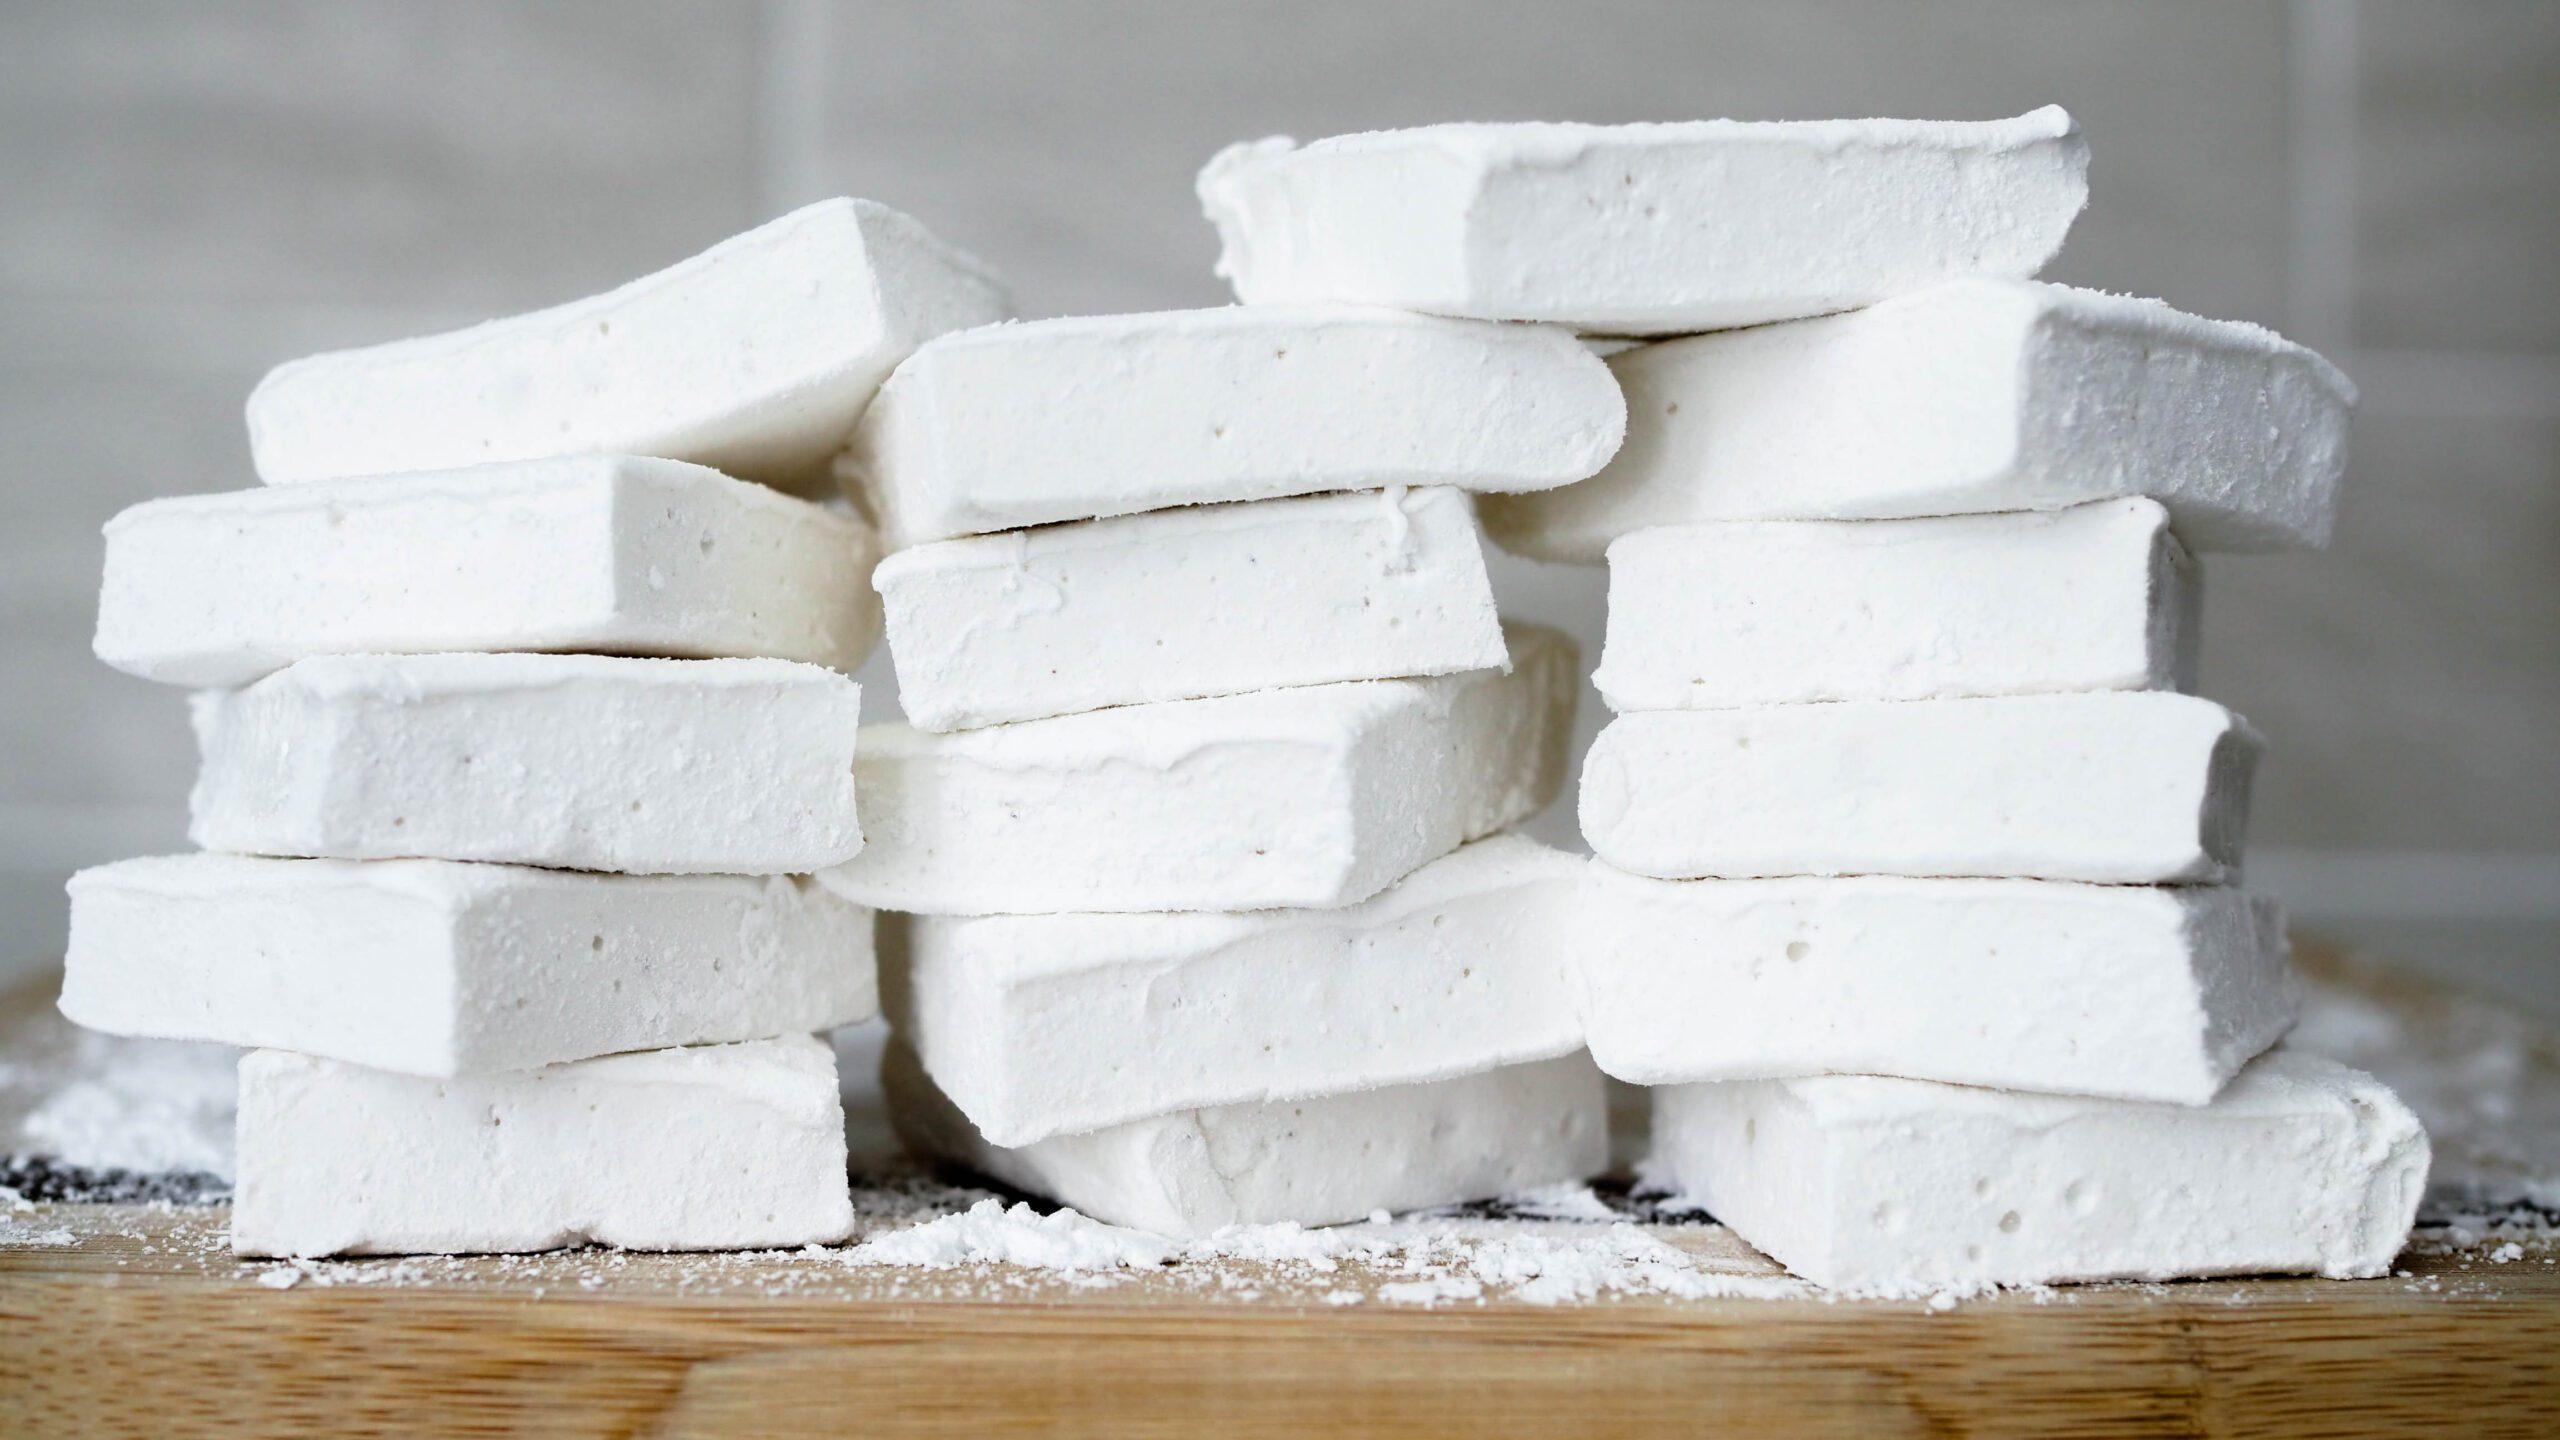
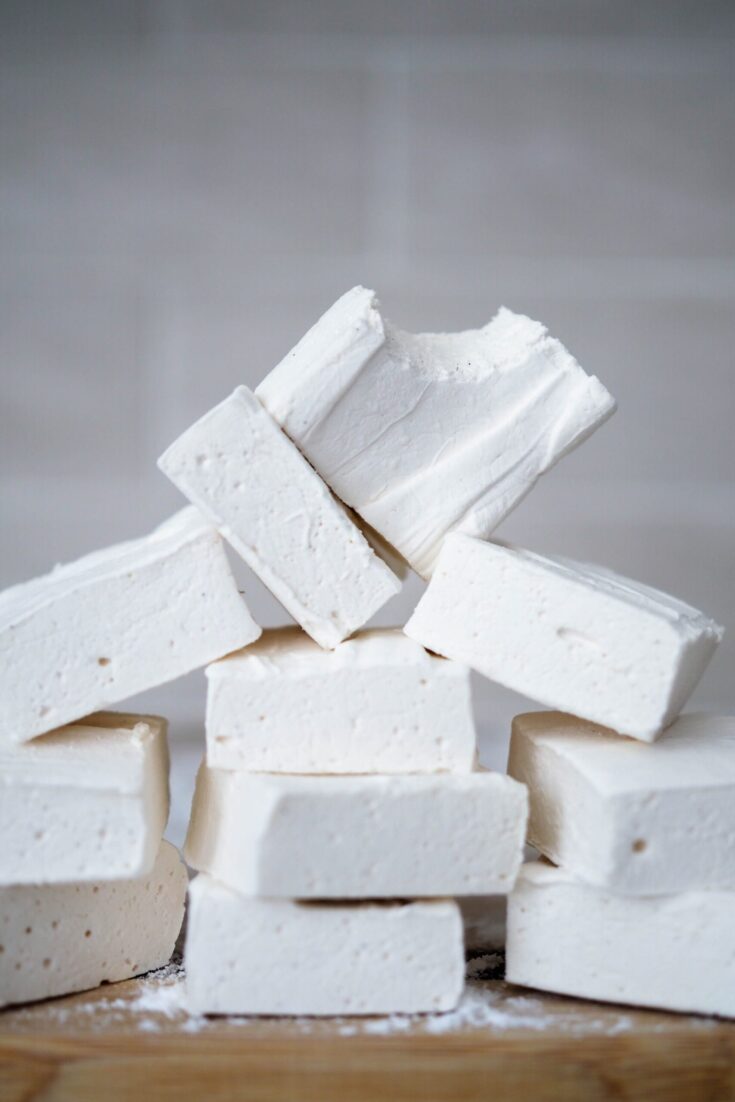
Store-bought marshmallows pale in comparison to the fluffy and pillowy homemade marshmallows you can make with just a few ingredients. I’m not normally a big fan of eating marshmallows plain, but my husband and I gladly eat these vanilla bean-speckled ones from the bag. They roast beautifully over the fire, and we also put them in hot chocolate, ice cream, and tea lattes.
Making marshmallows at home takes concentration and can make a bit of a mess, but the end result is well worth the effort. I always include a cleanup rating for my recipes, but in case you want a better judge of effort, you can also watch me make these homemade vanilla marshmallows on my YouTube channel.
This recipe makes about 16 marshmallows, so double the recipe if you want to make marshmallows for a crowd!
Ingredients for Homemade Marshmallows
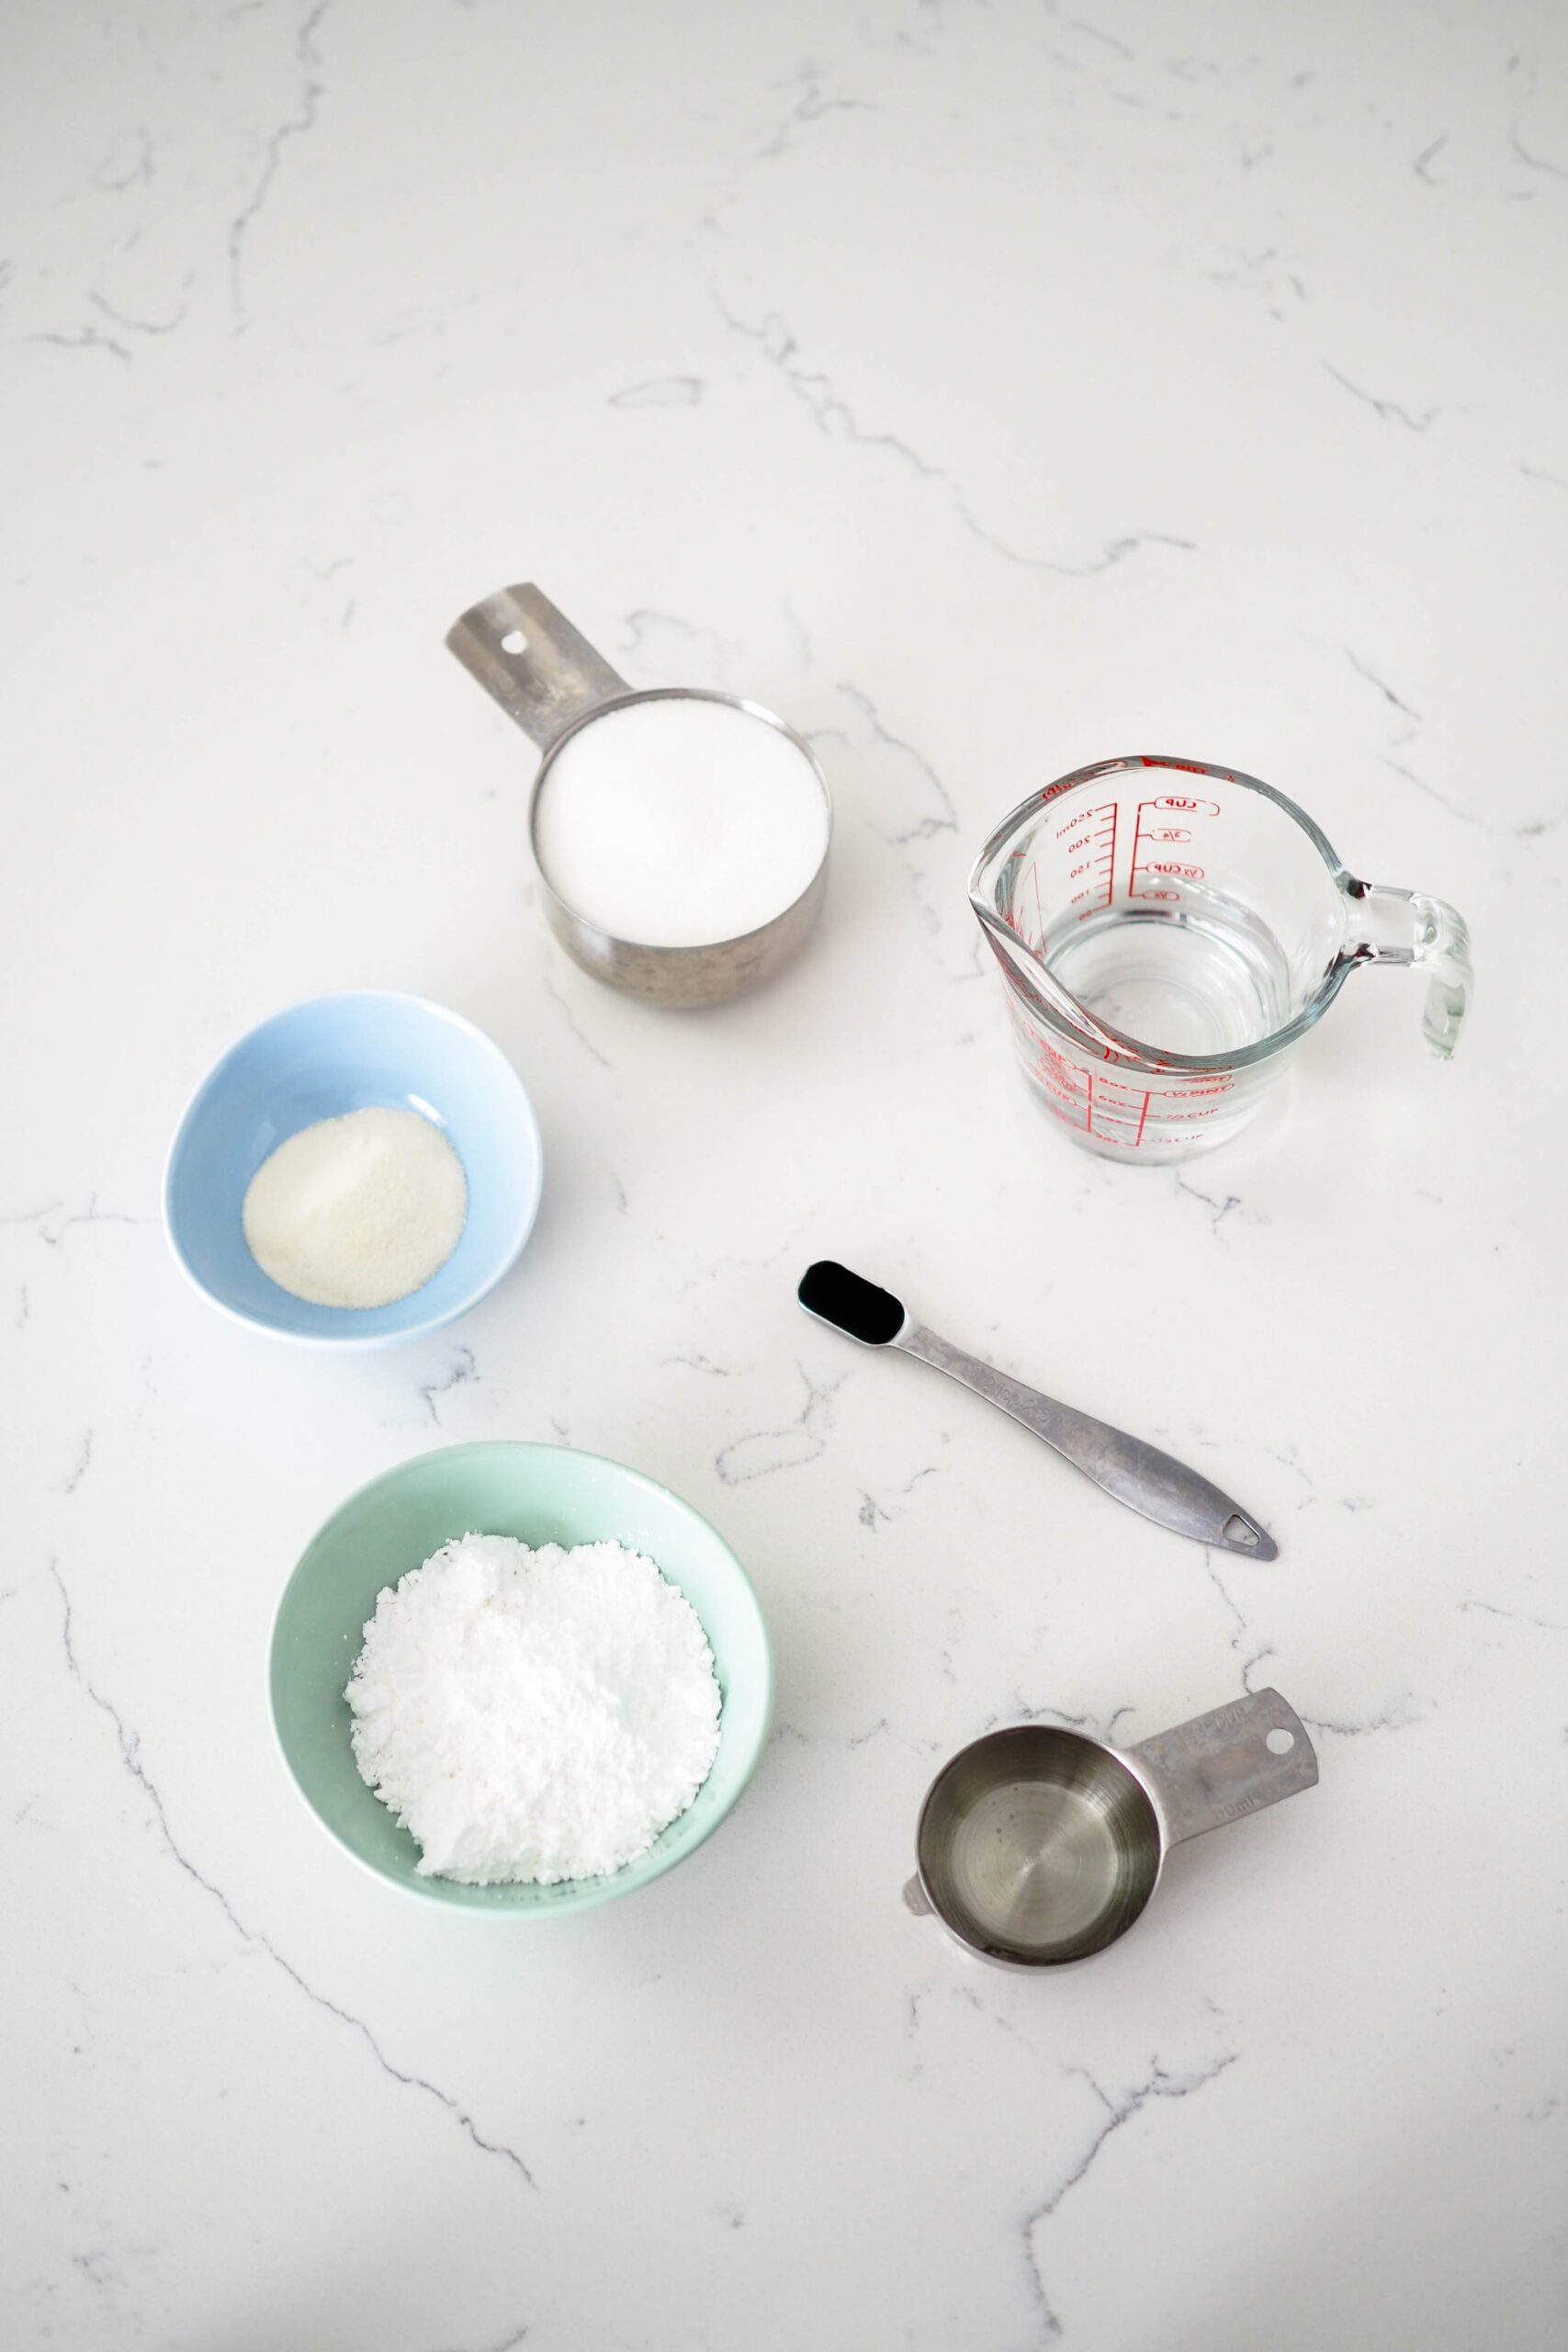
Homemade marshmallows require only a couple of ingredients and are inexpensive to make! The best part about these marshmallows is that they are easily customizable with different flavored extracts. Substitute peppermint extract for the vanilla bean paste for a wintry marshmallow.
- Water.
- Vanilla bean paste. If you only have vanilla extract, use that! The vanilla bean paste gives these marshmallows a stronger vanilla flavor, but vanilla extract will not change the recipe.
- Unflavored gelatin. Powdered gelatin works best. I trust Martha Collison, who was the baker who introduced me to homemade marshmallows, and she has not had success using leaf gelatin.
- Granulated sugar.
- Corn syrup. Golden syrup can easily be substituted, but it can be harder to find in the US.
- Powdered sugar. This will prevent the marshmallows from sticking to each other once cut.
Making Homemade Marshmallows without Corn Syrup
If you’re looking for a homemade marshmallow without corn syrup, substitute golden syrup for corn syrup. I began making marshmallows with British recipes that used golden syrup, which is just water and sugar boiled down to a thick syrup on the stove. I prefer to use that over corn syrup, but it’s harder to find in the United States. It’s easy to make golden syrup at home, but it does take an hour or two.
Quick Tips for Prepping Homemade Marshmallows
If you’ve never made marshmallows before, there are a few key things you need to know:
- Marshmallow is made by whipping a hot sugar syrup directly into a mixture of gelatin and water. If you’ve never poured hot sugar syrup into a mixing bowl with the mixer on, don’t worry. It’s not as terrifying as you’d expect, and you’ll be fine. But it does require concentration.
- Marshmallow begins setting almost immediately after whipping.
- Marshmallows take a few hours to set before you can cut them.
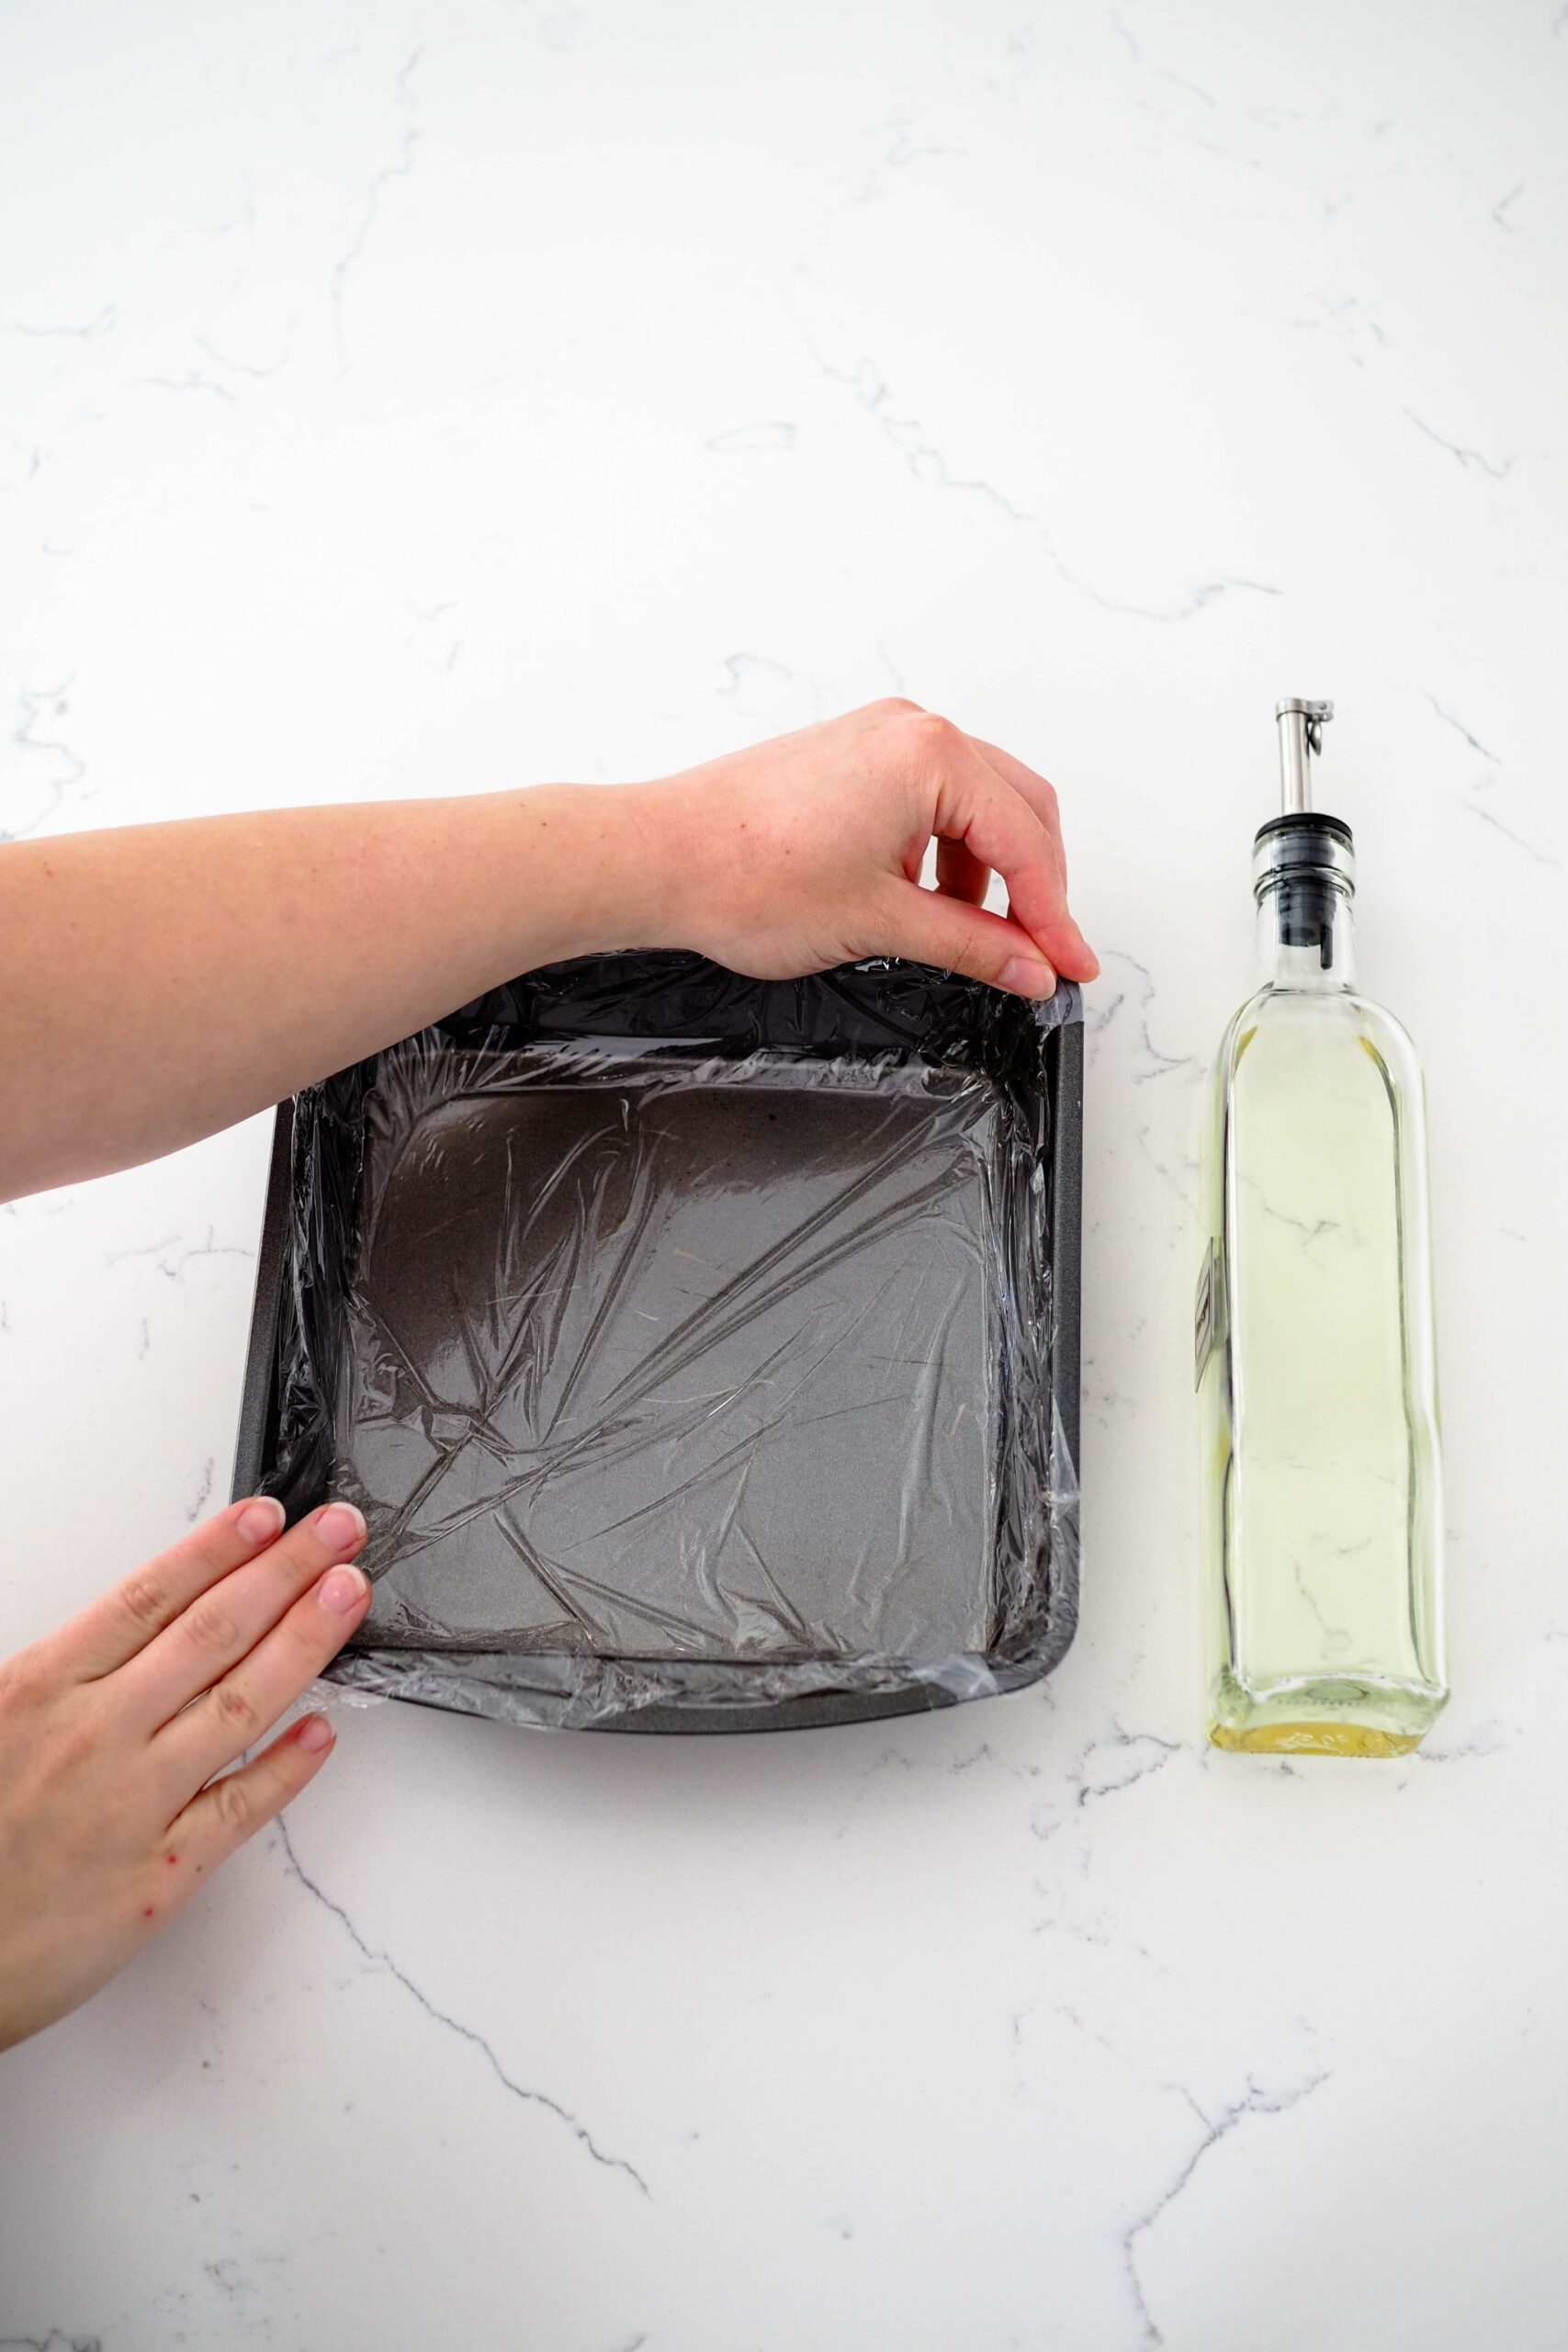
Grease Your Pan and Any Spatulas You Plan to Use
Marshmallow is incredibly sticky and begins to set almost immediately, so line and grease your pan before you do anything else. I cannot emphasize this enough.
To make removing the marshmallow easy and painless, line a square baking pan with plastic wrap. I tape the corners down to prevent the plastic wrap from moving too much.
Then spray with a nonstick spray or spread a few drops of canola oil with your fingers across the bottom and up the sides of the plastic wrap.
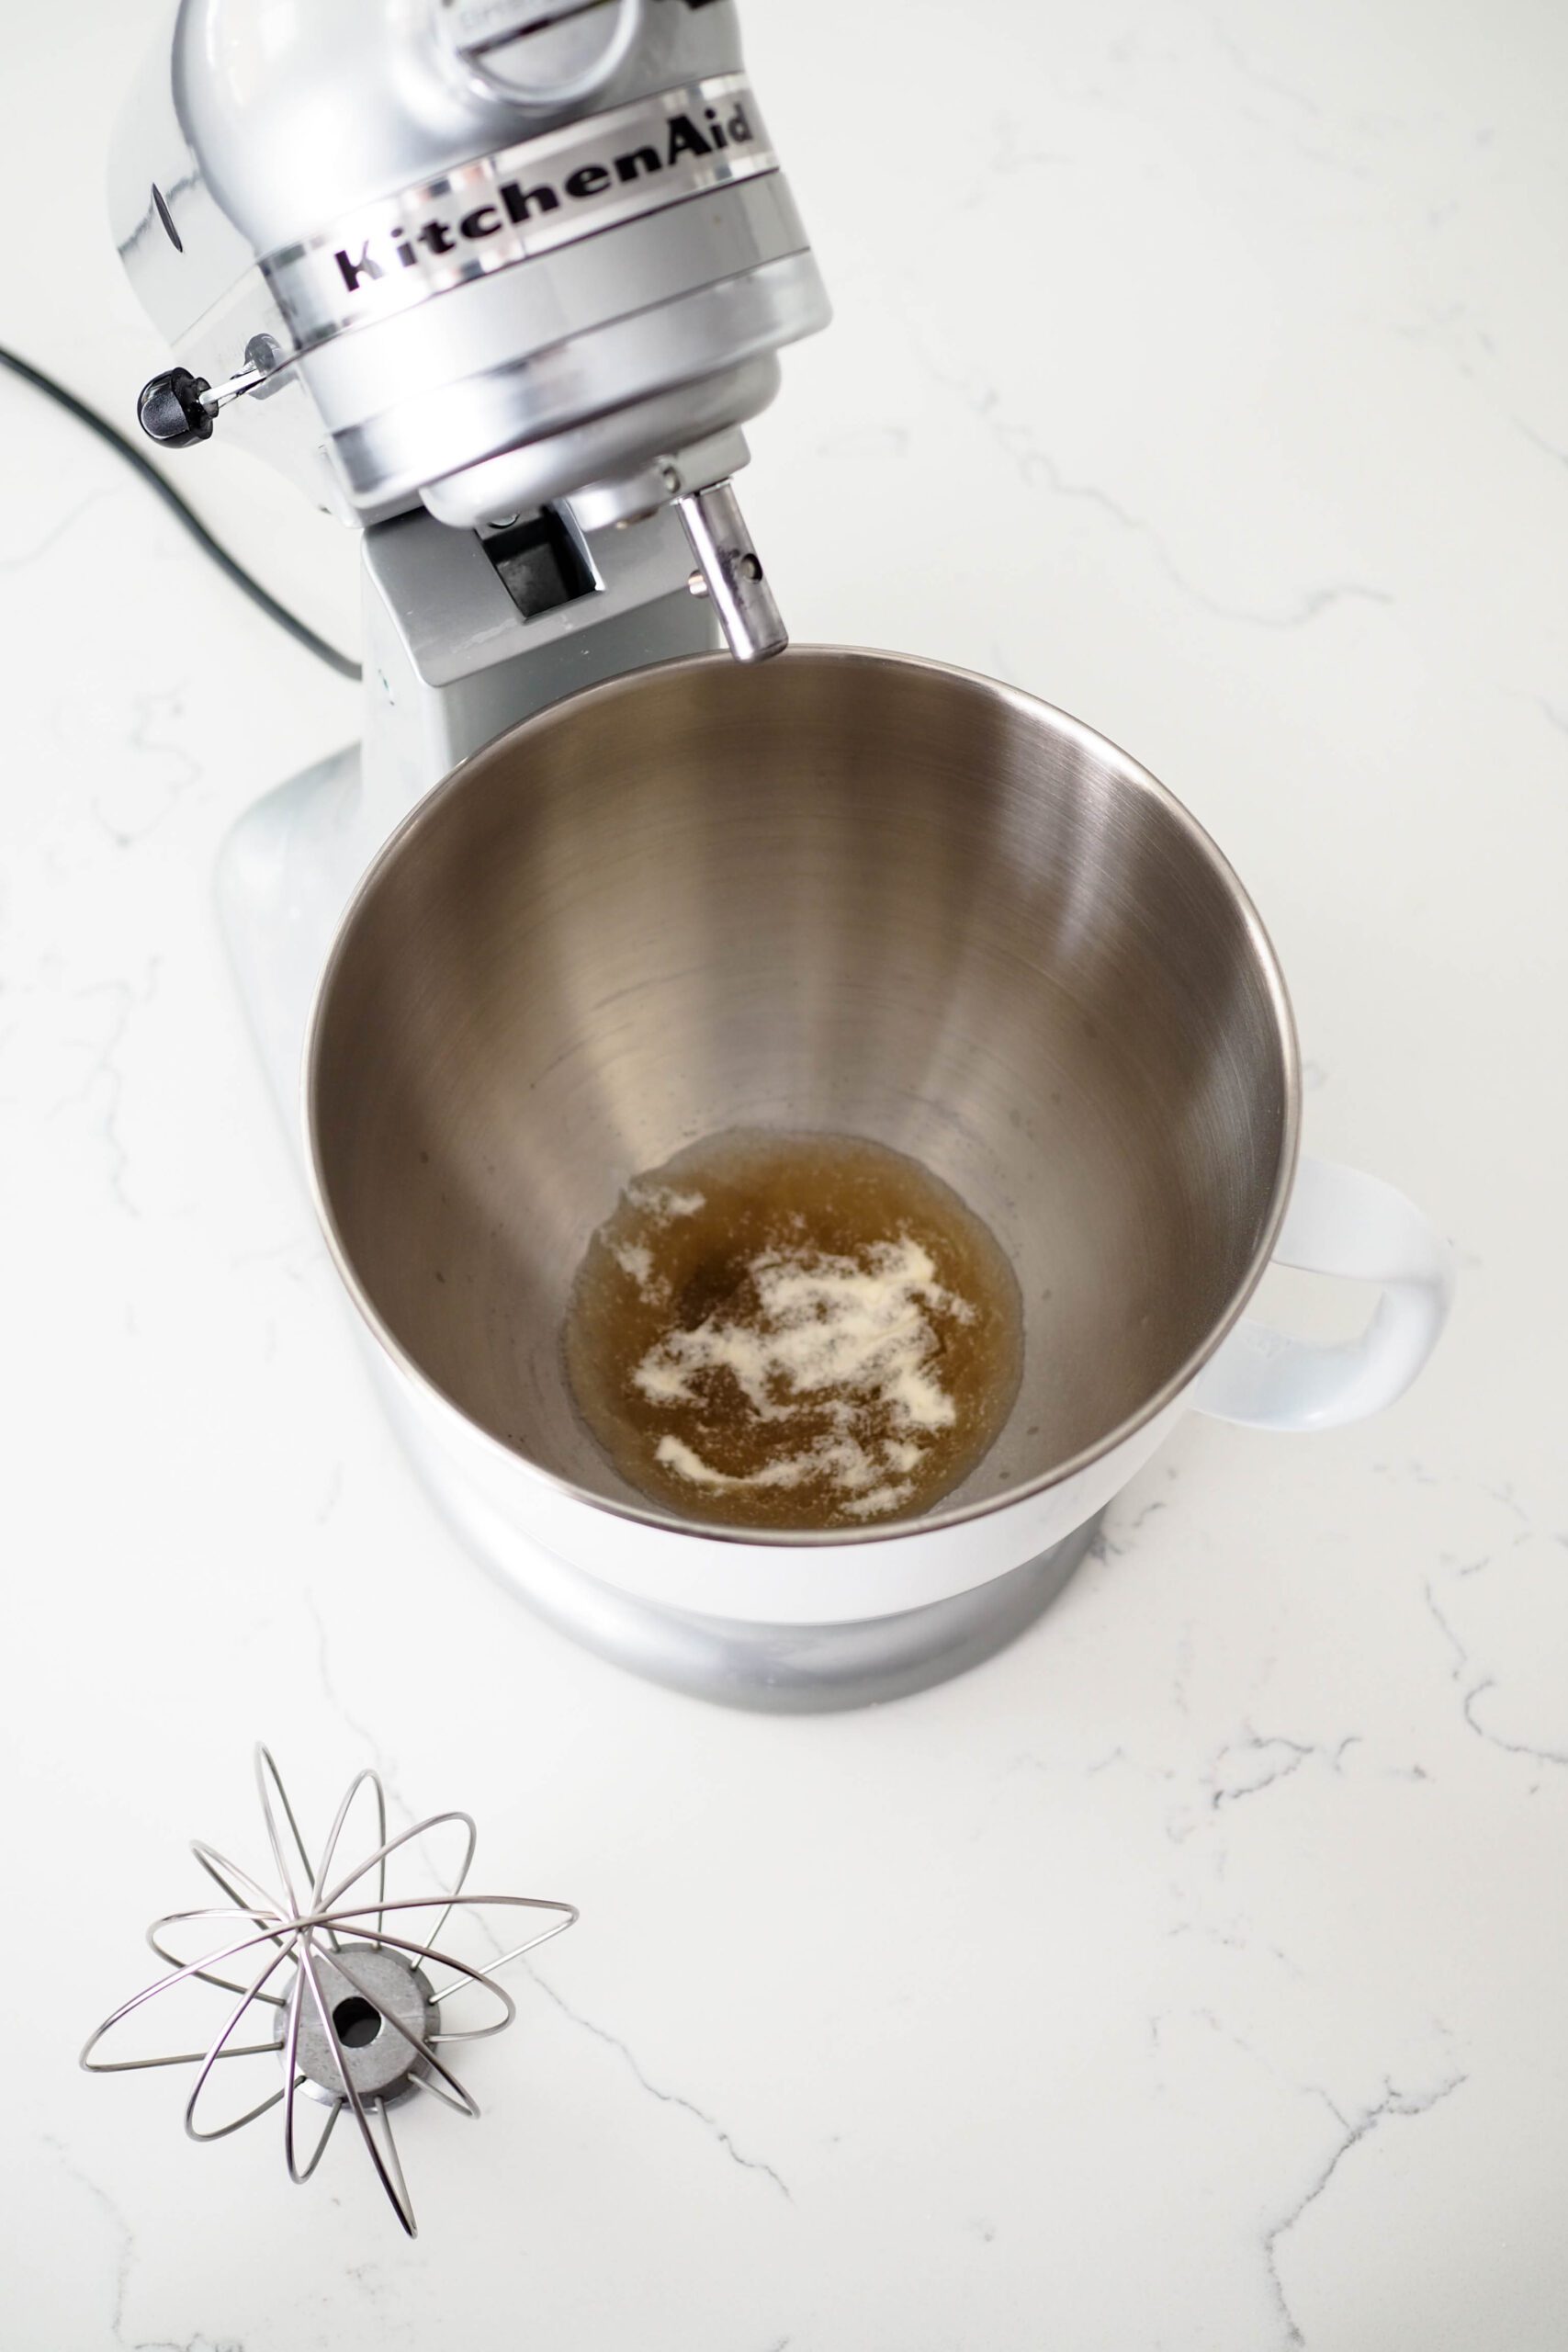
Preparing the Gelatin for Homemade Marshmallows
Gelatin needs to hydrate before we can use it to make marshmallows. To do this, simply sprinkle the gelatin over the water and vanilla bean paste/extract in your mixing bowl. There’s no need to stir. The gelatin will soften up over the course of making the sugar syrup. This process is called “blooming” the gelatin.
How to Make the Sugar Syrup for Homemade Marshmallows
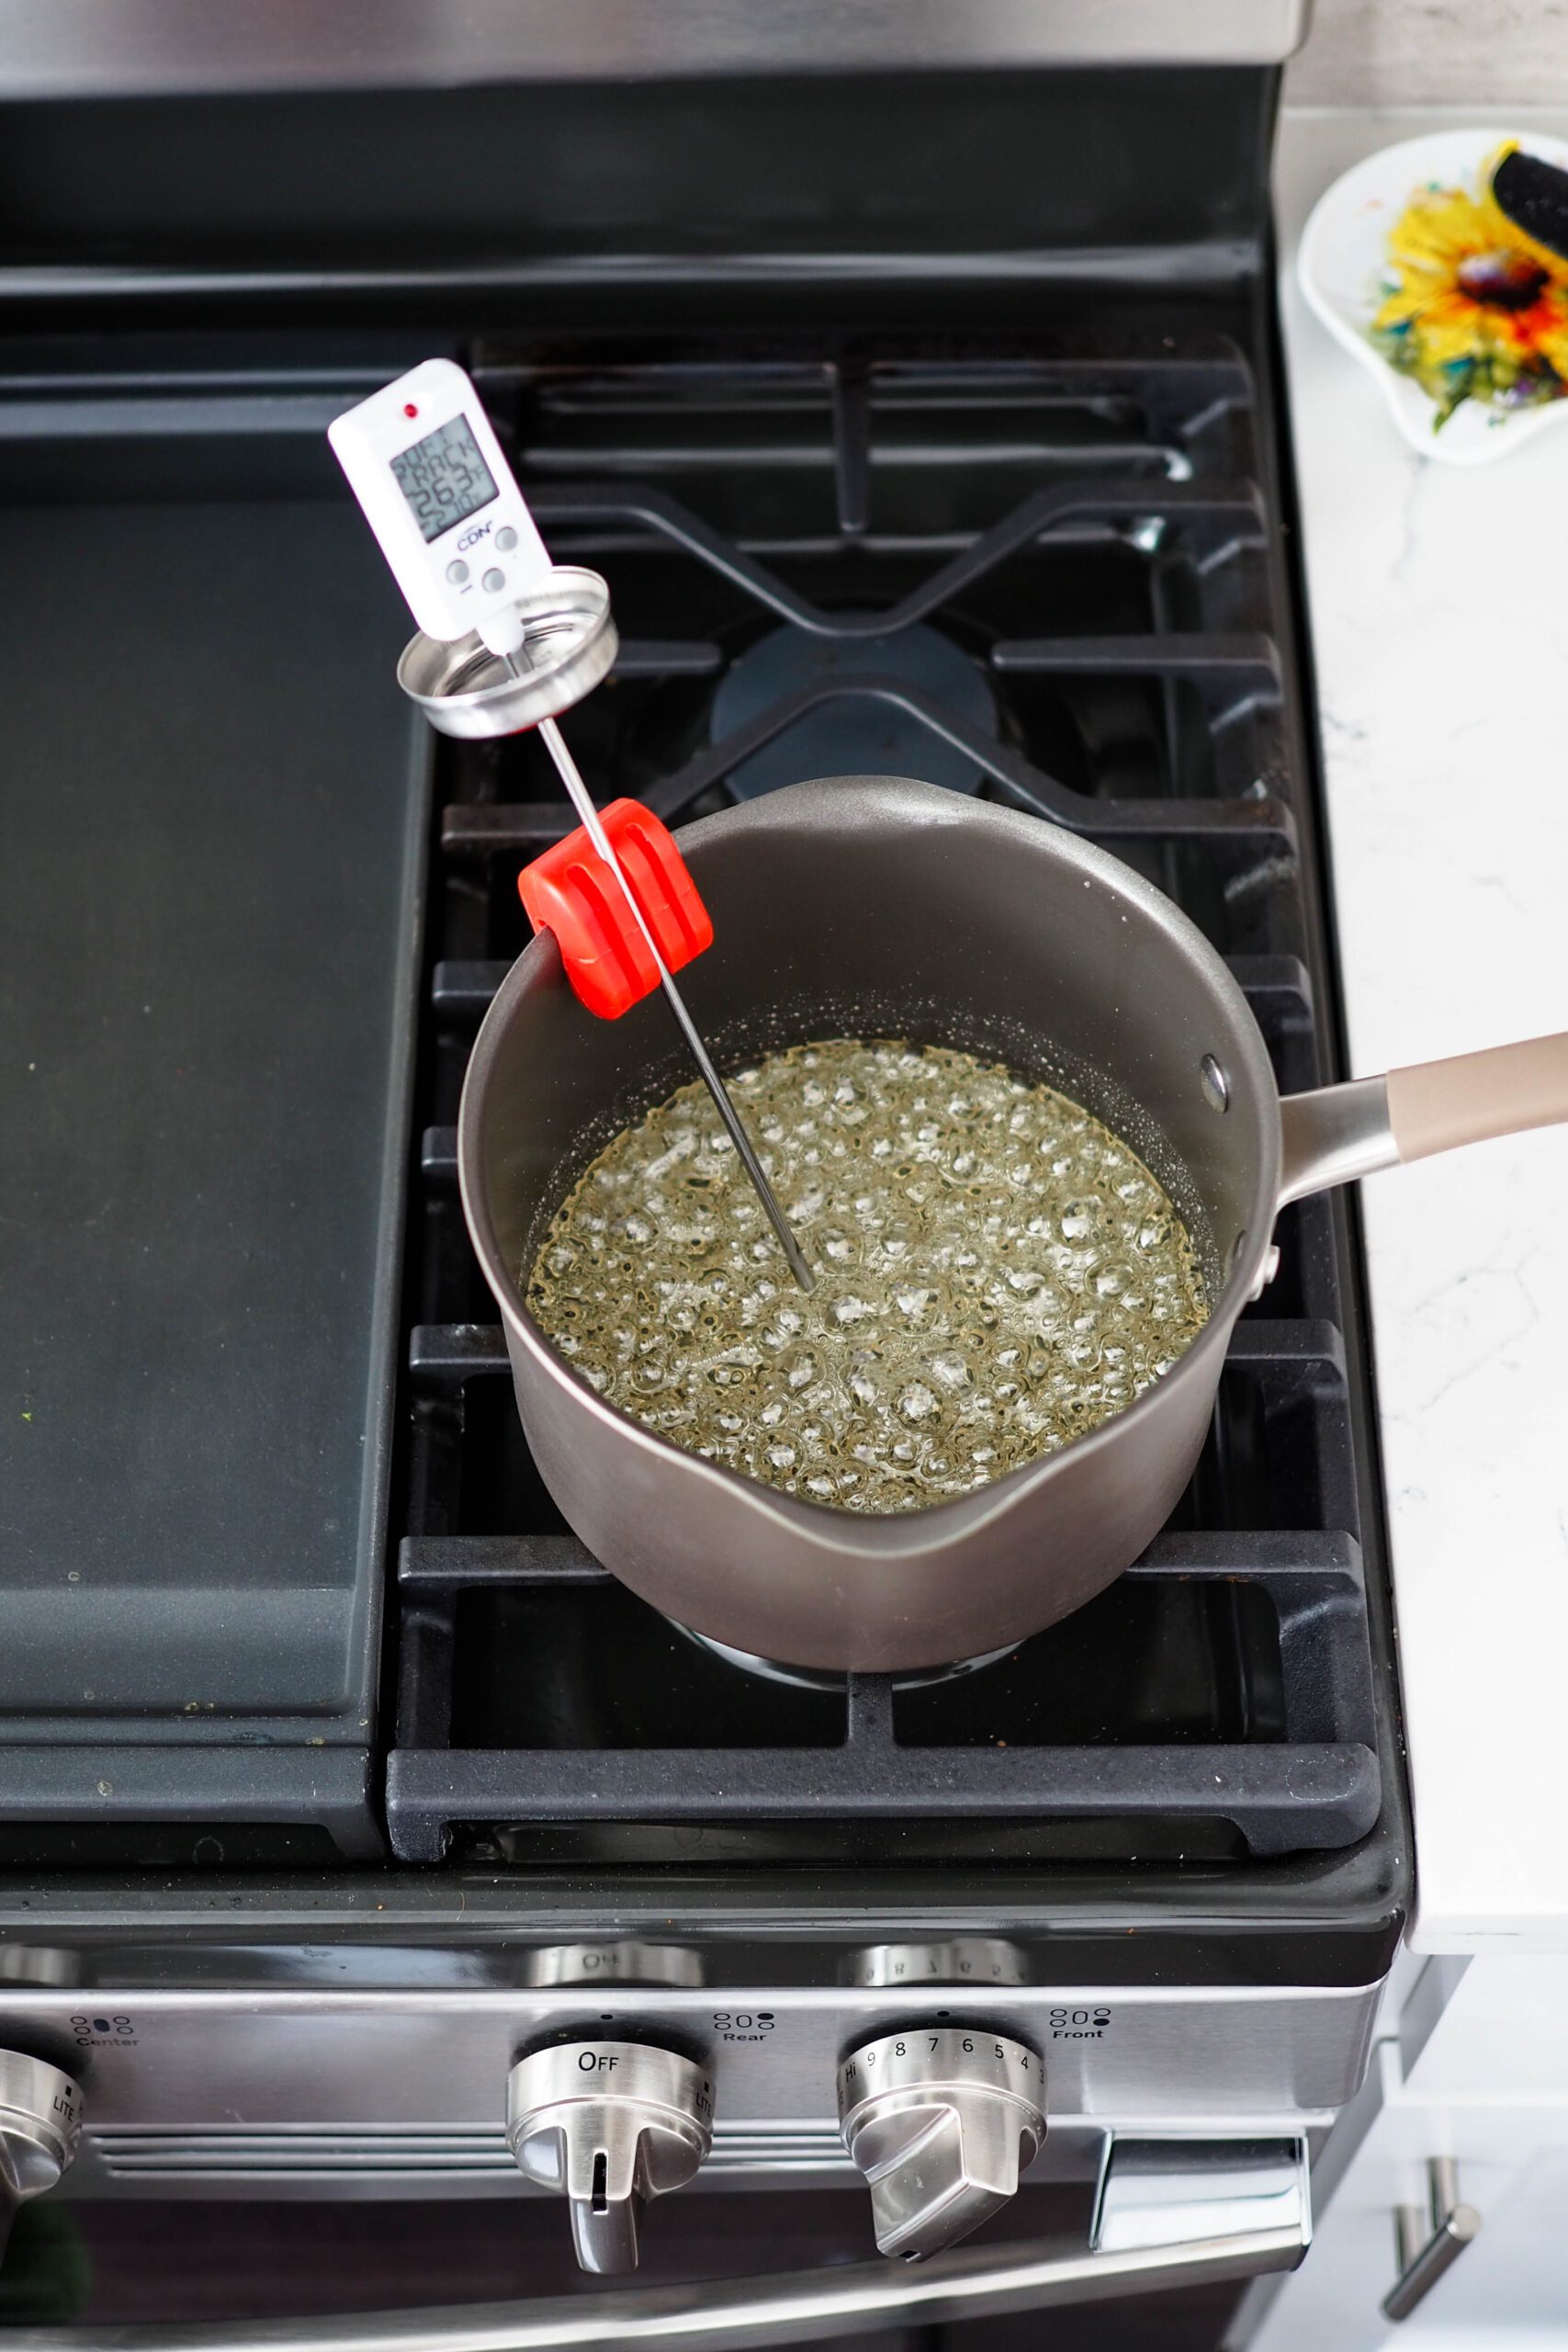
The sugar syrup is pretty straightforward. Mix together sugar, corn syrup (or golden syrup), and water before setting it over medium heat and cooking it to 270°F/132°C. A candy thermometer is highly recommended to make this easy on you. If you don’t have a candy thermometer, you can use a glass of cold water to test if your syrup is at the soft crack stage.
You will want to swirl the pan or stir it every so often to ensure your candy thermometer is giving you the correct temperature. Because there’s not much syrup in the pan, the thermometer may be registering the heat of the bubbles on top of the syrup and not the temperature of the actual syrup below. I swirl the pan every couple of minutes in the beginning and then once every 30 seconds or so when the temperature starts getting close (around 250°F or so).
A note: You can stir the syrup with a spatula, as it has enough corn syrup in it to prevent any worries about crystallization (see section on stirring if you’re curious).
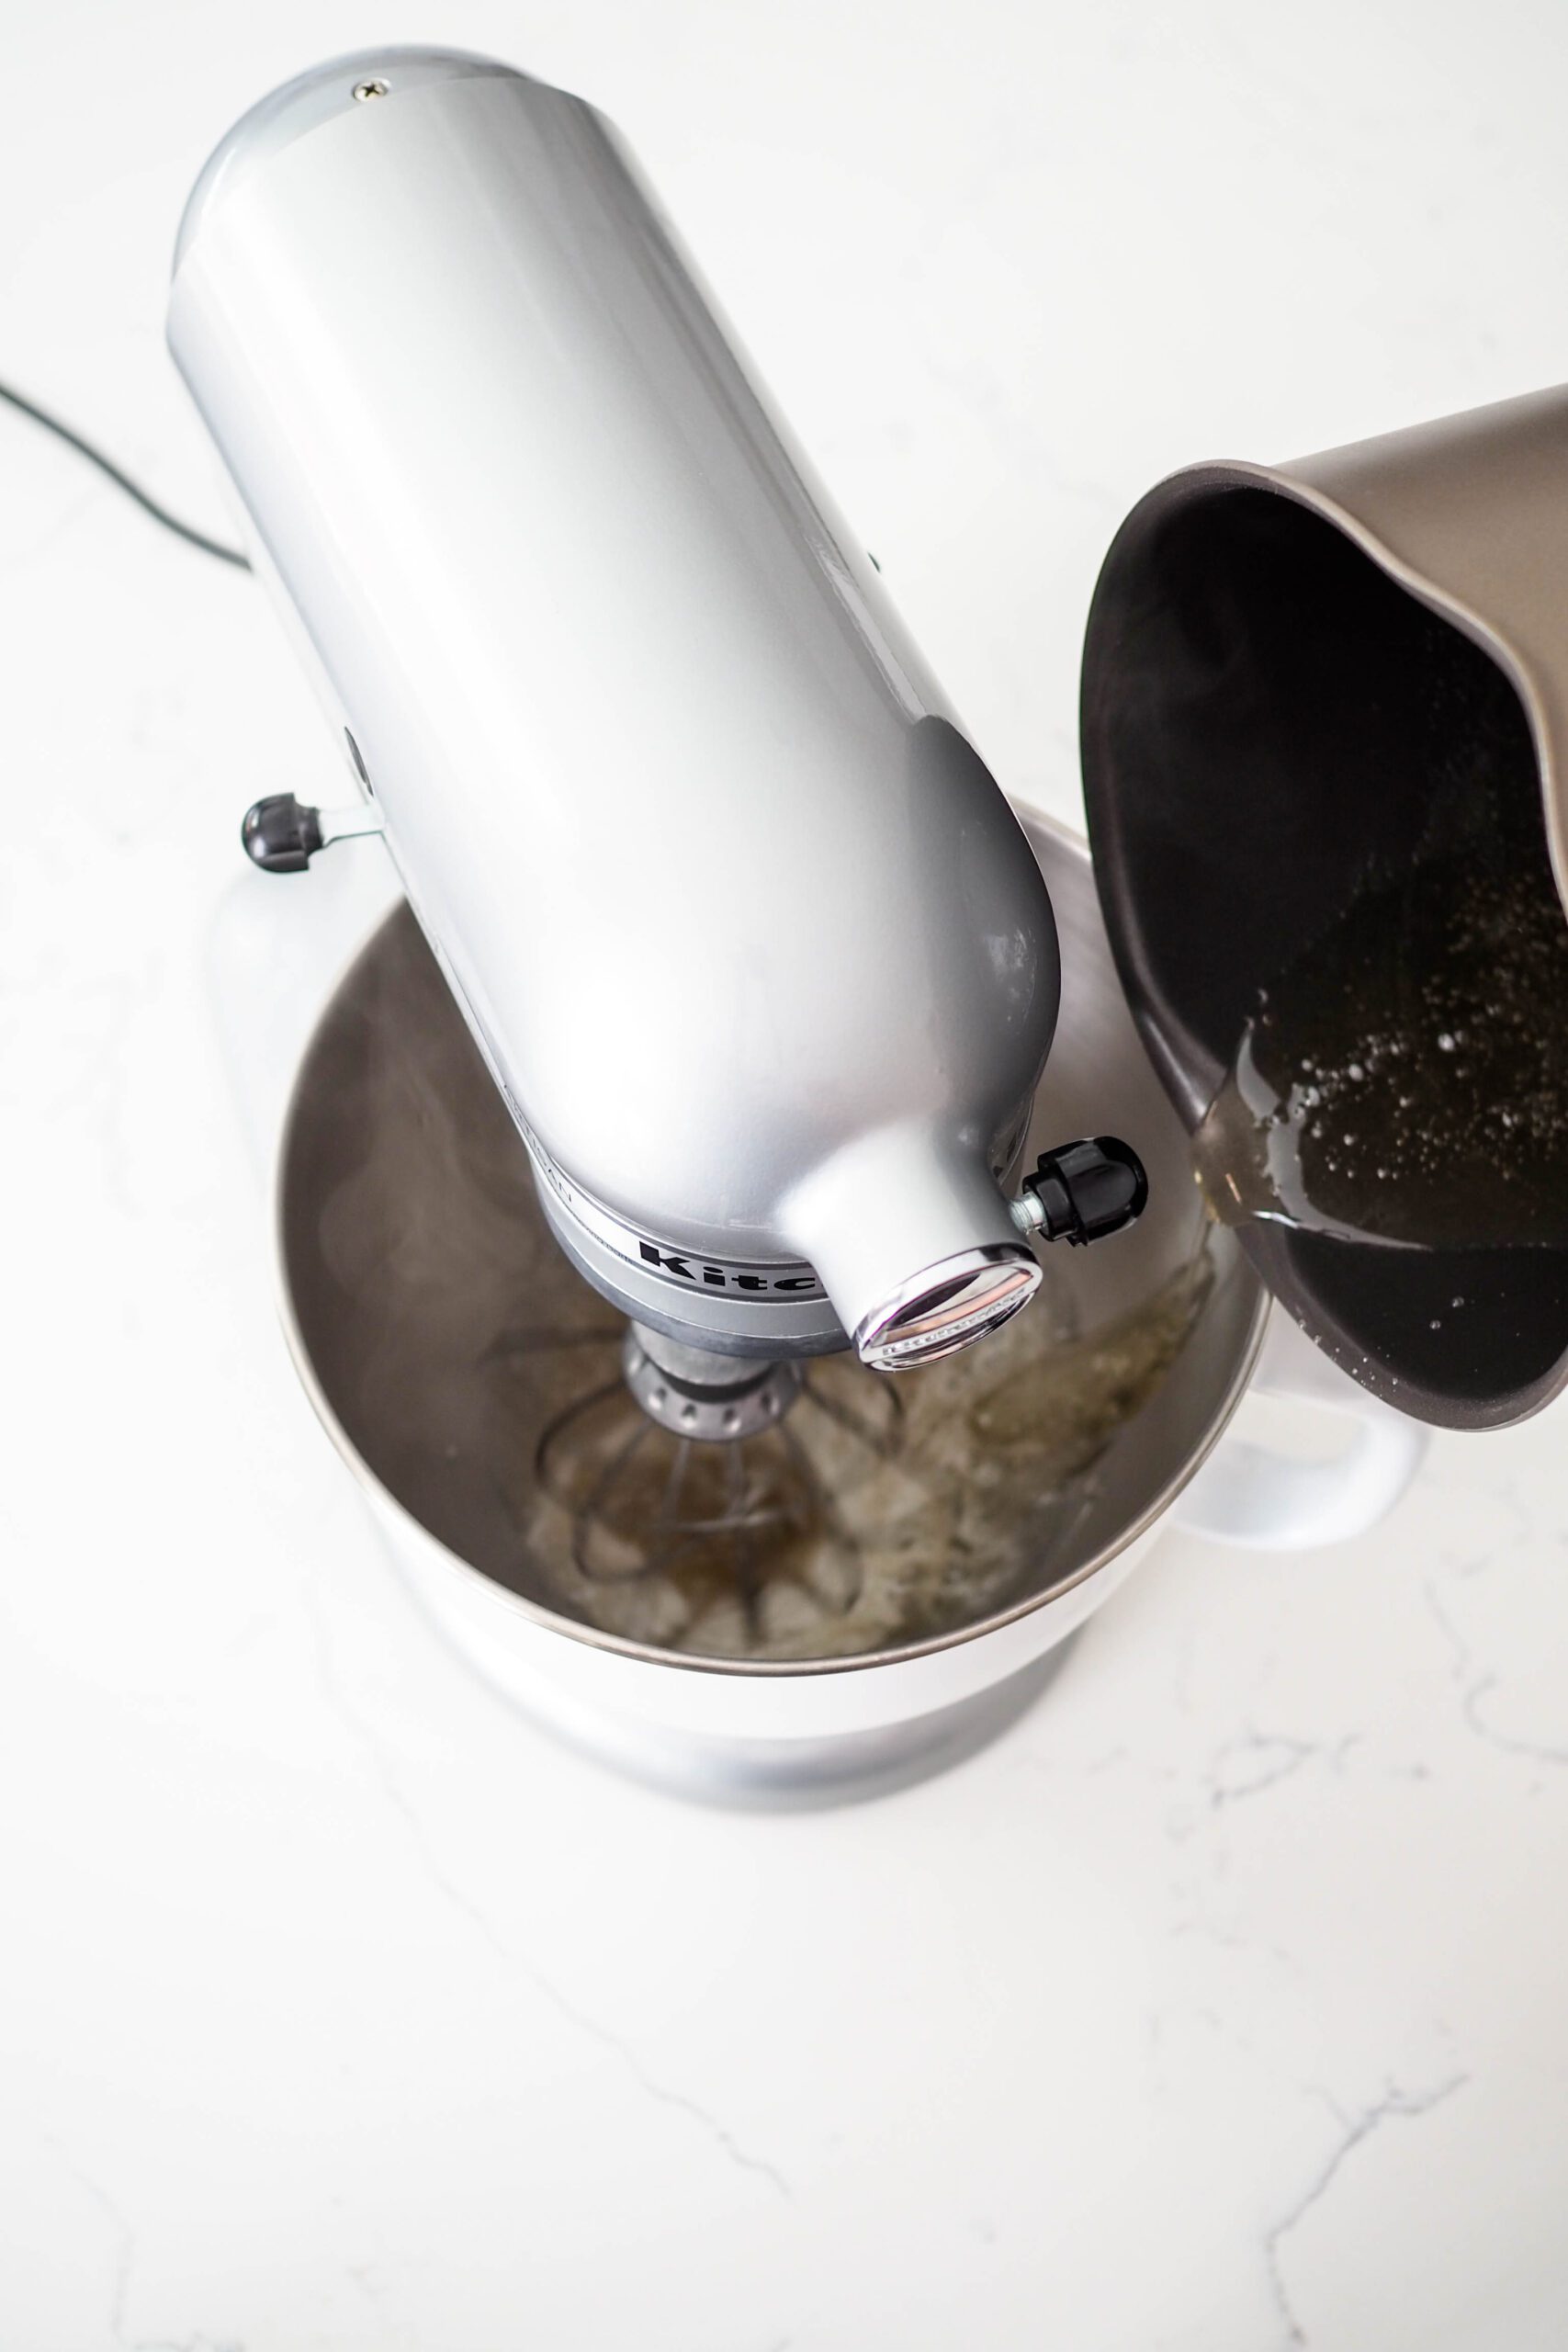
Pouring the Hot Sugar Syrup into the Mixing Bowl
This is easily the most challenging part of the entire recipe, but it’s not difficult. Take it slow and concentrate on where the stream is landing inside the bowl, and you’ll be fine.
To make this step even easier, you can look into getting nonstick pots with pouring spouts like the one I use in these images.
The first bit of syrup that comes into contact with the metal of the bowl cools down significantly and won’t stream down into the final mixture. However, any syrup poured on top of that syrup will make it into the marshmallow mixture.
That initial bit acts as an insulator between the syrup straight from the pan and the bowl. Do your best to limit the amount of syrup you pour directly onto the bowl after that first stream of syrup. Layer it all in the same spot, if possible.
I like to turn my mixer on low right before I begin pouring the sugar syrup into the bowl. Start slow, and begin pouring in a steady line down the side of the bowl. I aim for somewhere within the top half of the bowl to prevent pouring any of the syrup on the tines of the whisk as it goes past.
Continue to slowly tilt the pot to get almost all of the syrup in. It’s fine if you have a little syrup leftover (say, just enough to cover the bottom of the pan).
Whipping the Homemade Marshmallow Together
Marshmallows can easily be underwhipped, so follow these guidelines to make sure you end up with pillowy homemade marshmallows.
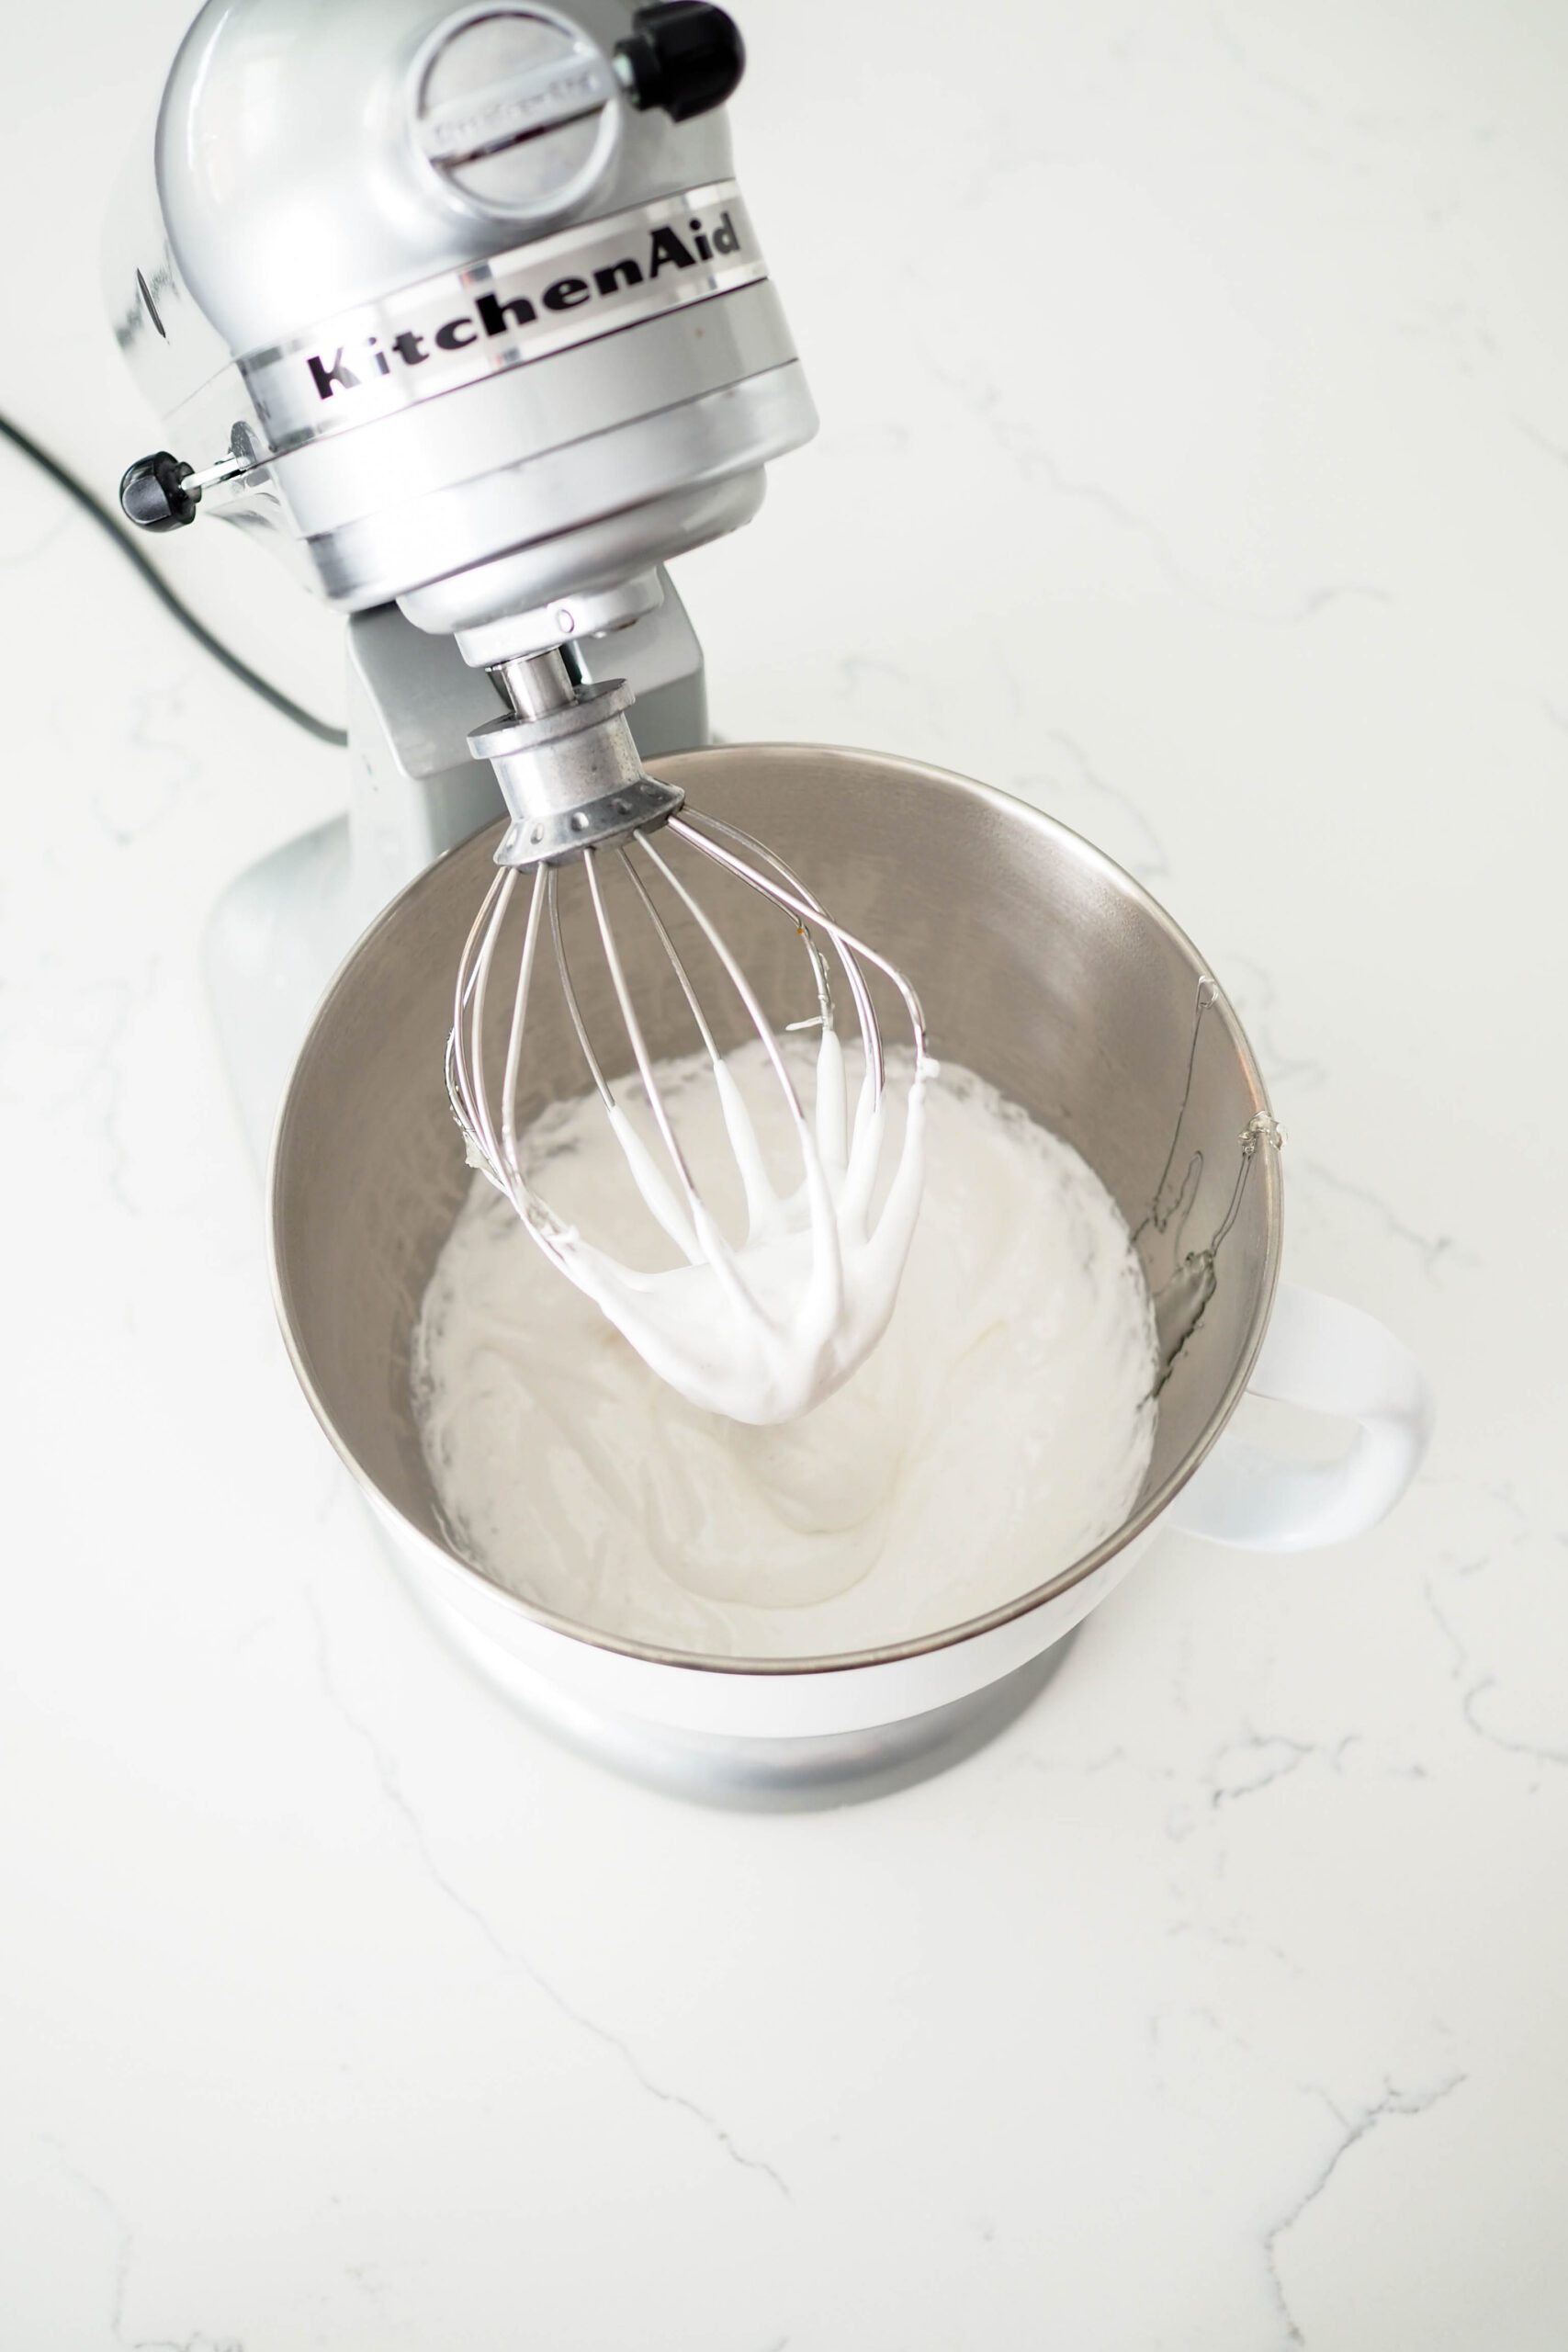
After all the sugar syrup is added, the bowl will be very warm, if not hot, to the touch. As you incorporate air into the marshmallow, two things happen: The marshmallow begins to aerate, and the bowl cools down.
The time it takes to whip the marshmallow can vary depending on the speed of your mixer, but it generally takes 5-10 minutes. For me, it takes closer to 10 minutes than five.
You’ll hear your mixer start to struggle or slow down a bit once the marshmallow starts thickening up.
You’ll see small strands of marshmallow on the top of the mixture when the mixture is almost ready. The bowl will also be only slightly warm to the touch. Once it’s aerated enough, the marshmallow will clump up in the base of the whisk, much like a meringue (even more so than the photo below).

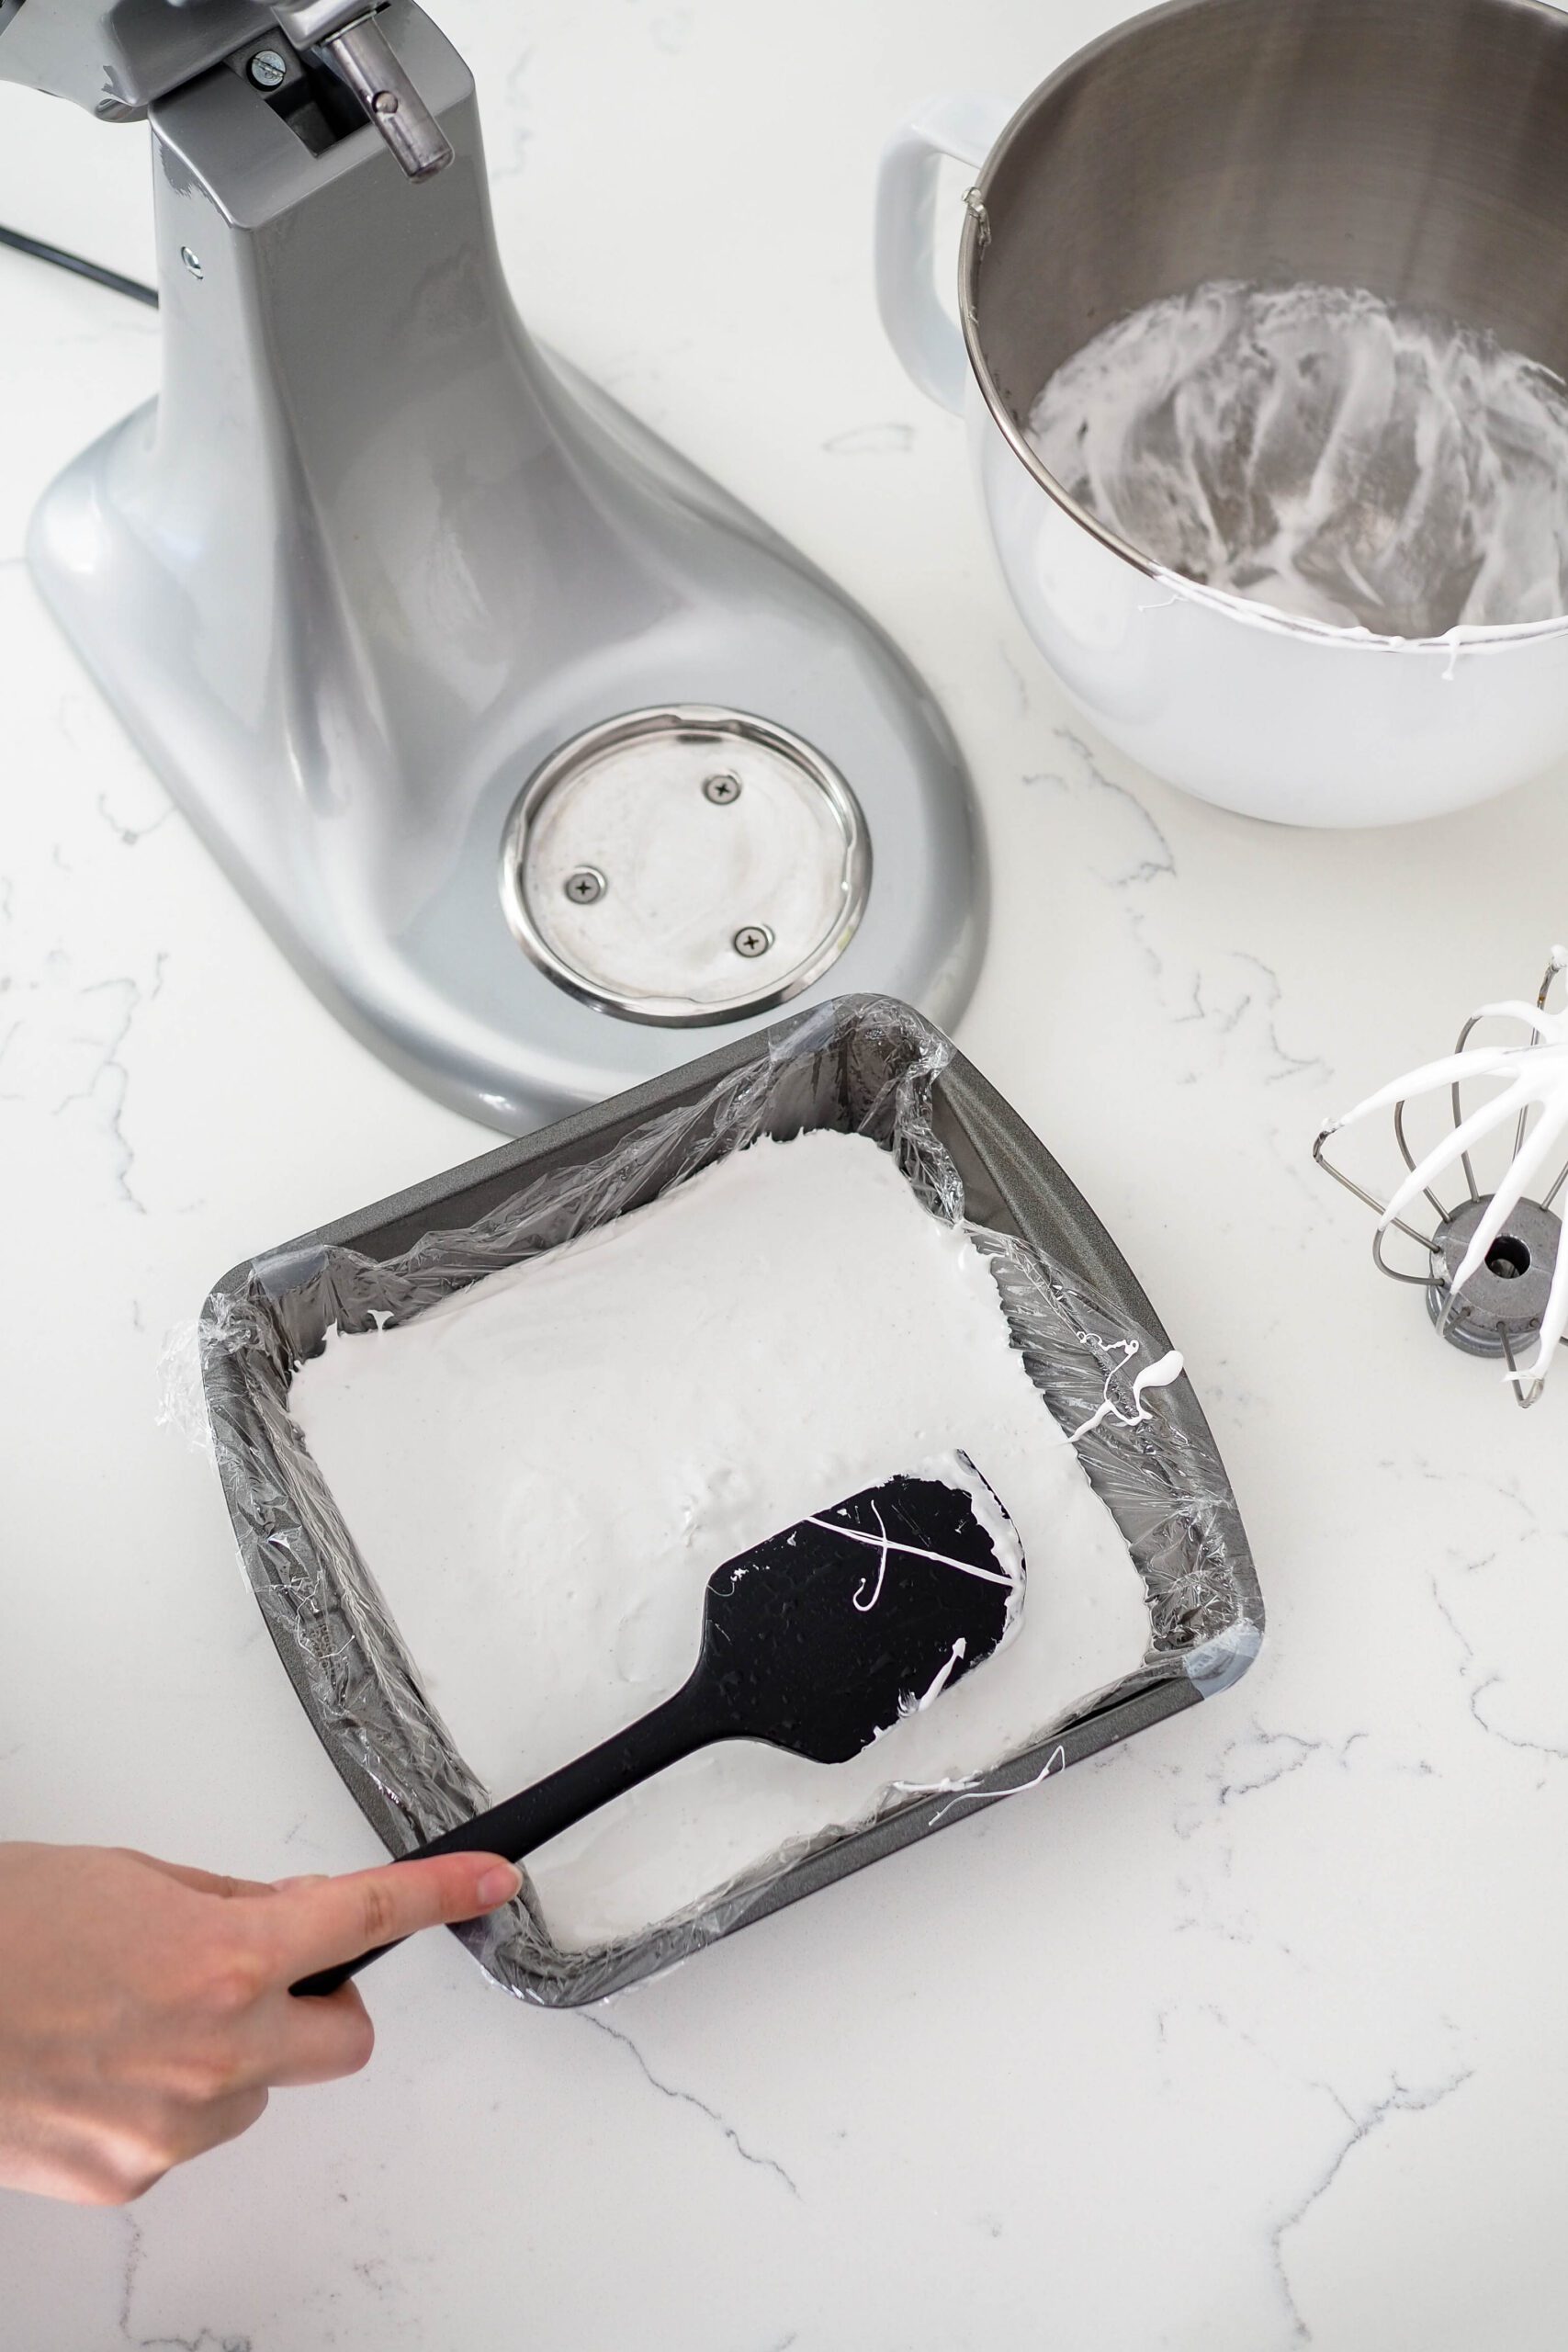
Pouring the Homemade Marshmallow in the Pan
Use an oiled spatula to immediately transfer the homemade marshmallow into your lined and greased pan. It should spread out some, but I always like to help it along into the corners.
Then, flatten down any large tufts or peaks with your oiled spatula. You may need to respray or reoil the spatula depending on how uneven the surface is.
Then, set the pan aside for 1-2 hours until the marshmallows have set.
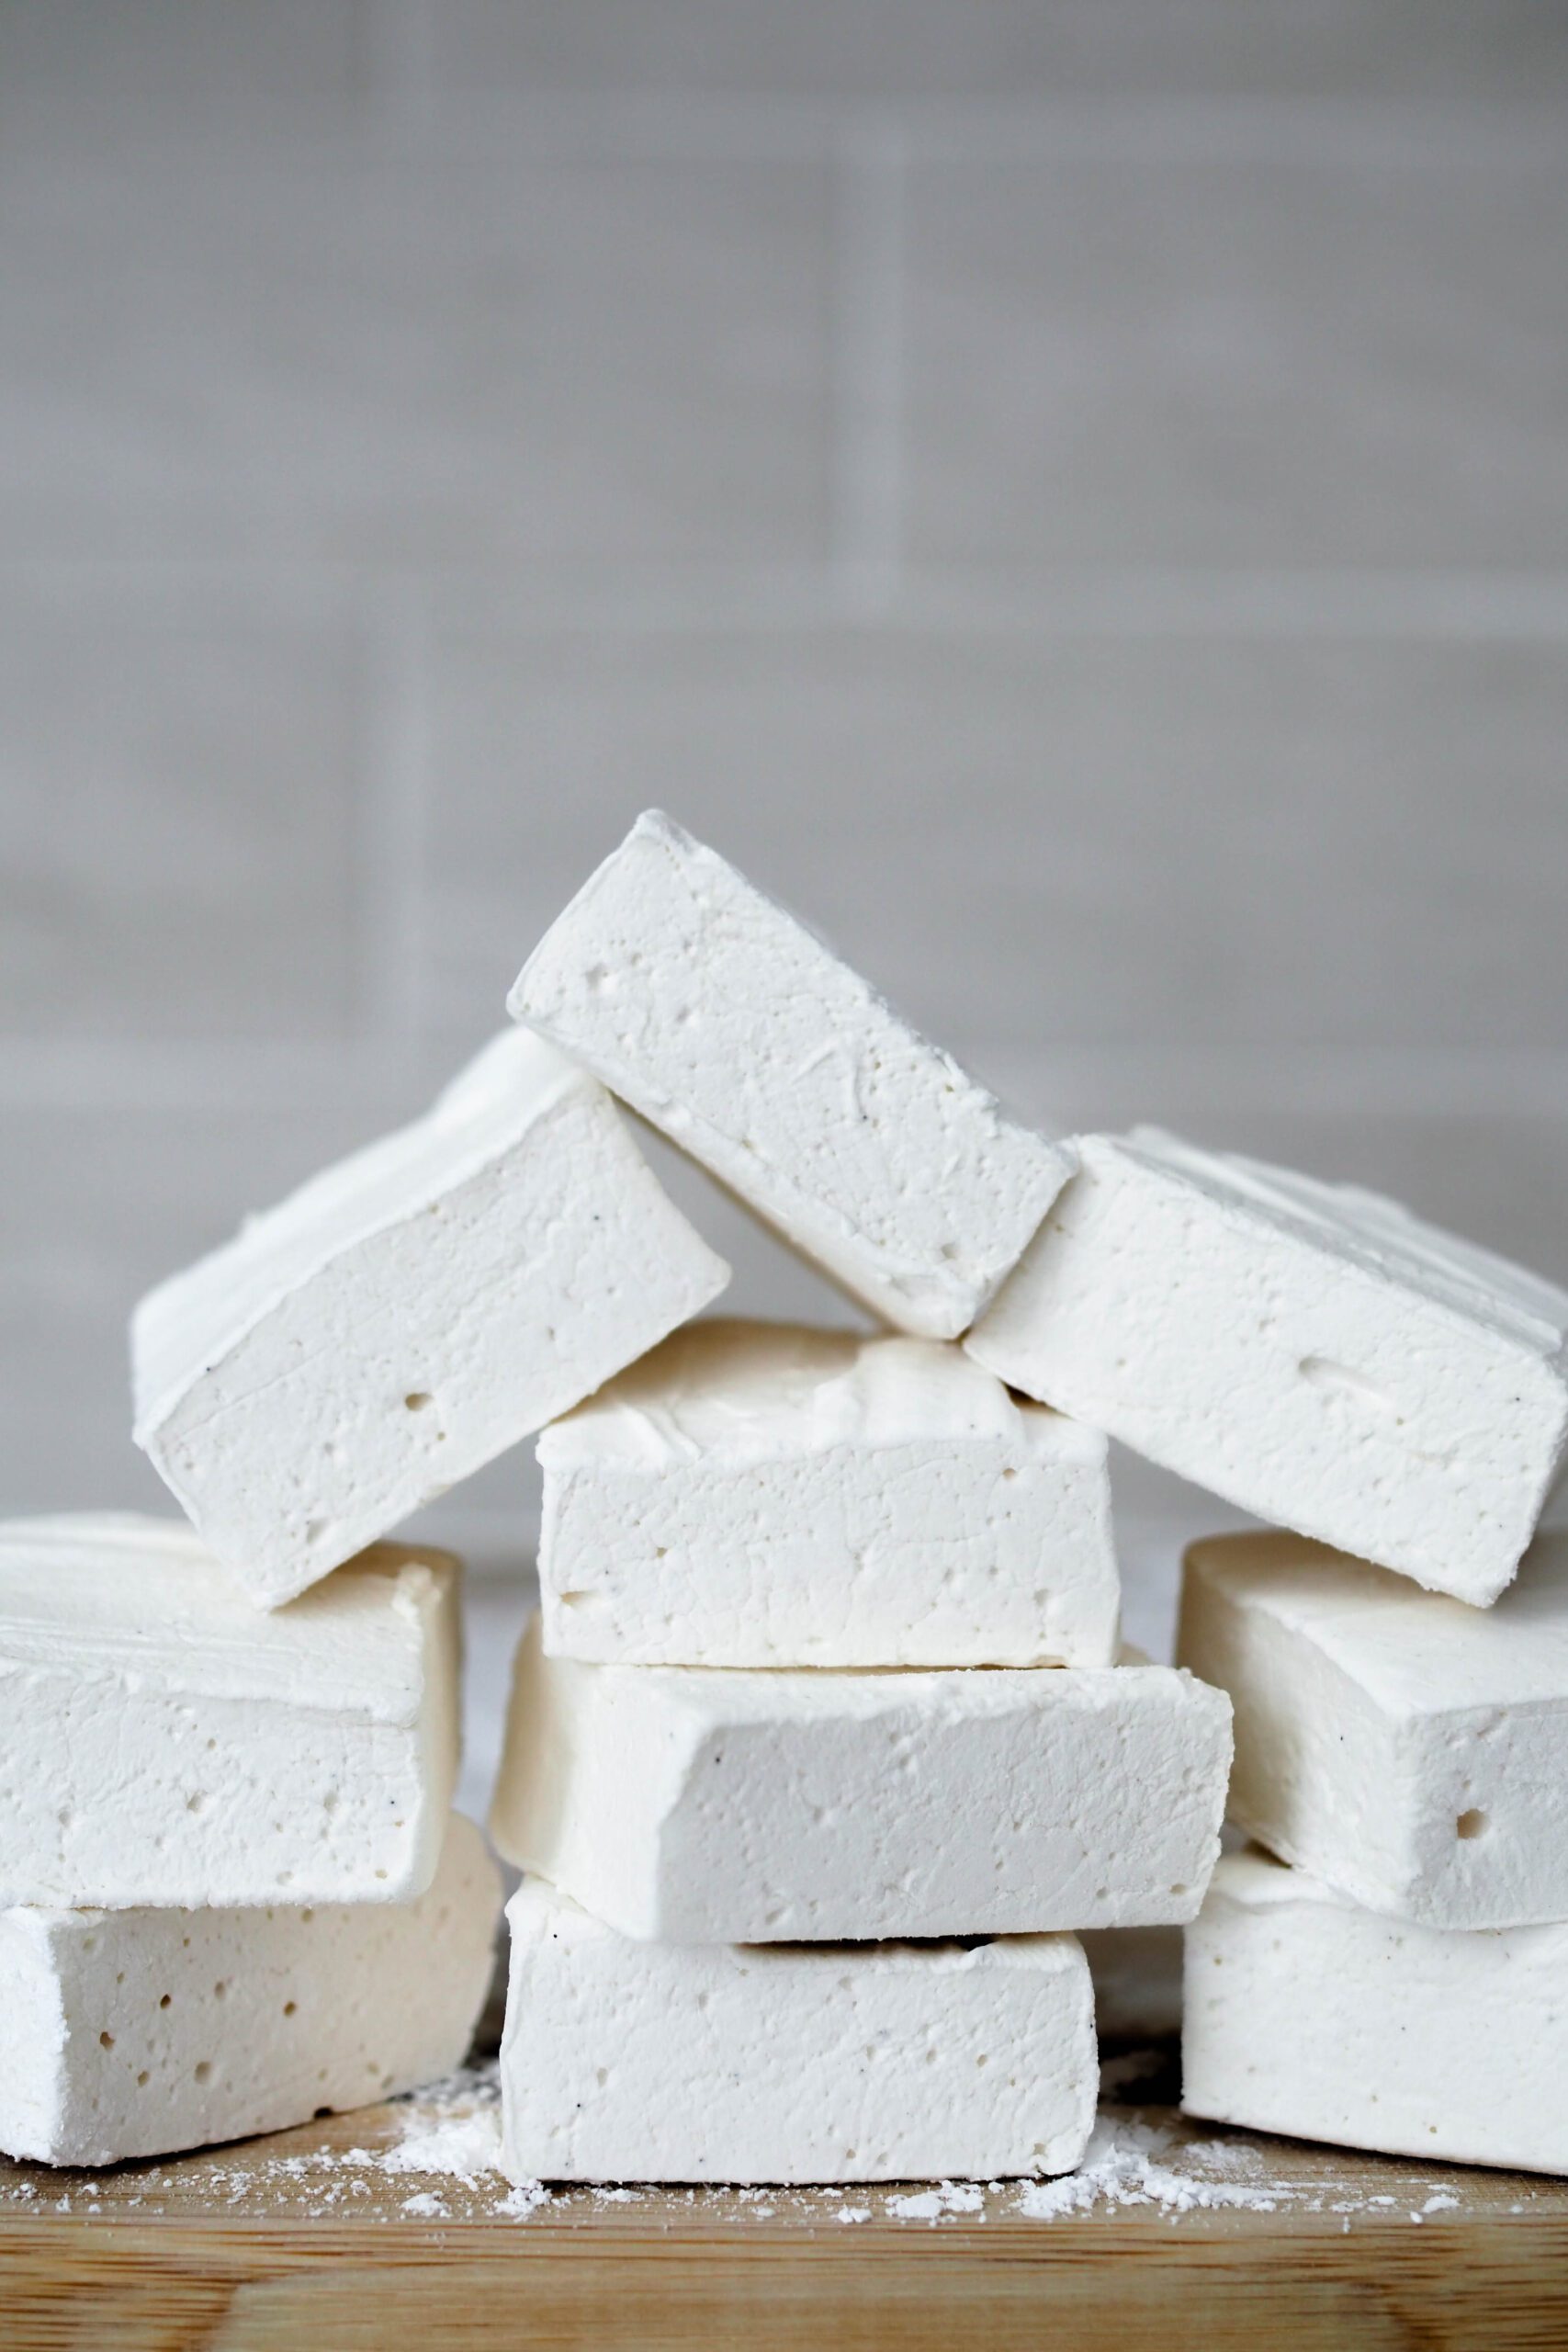
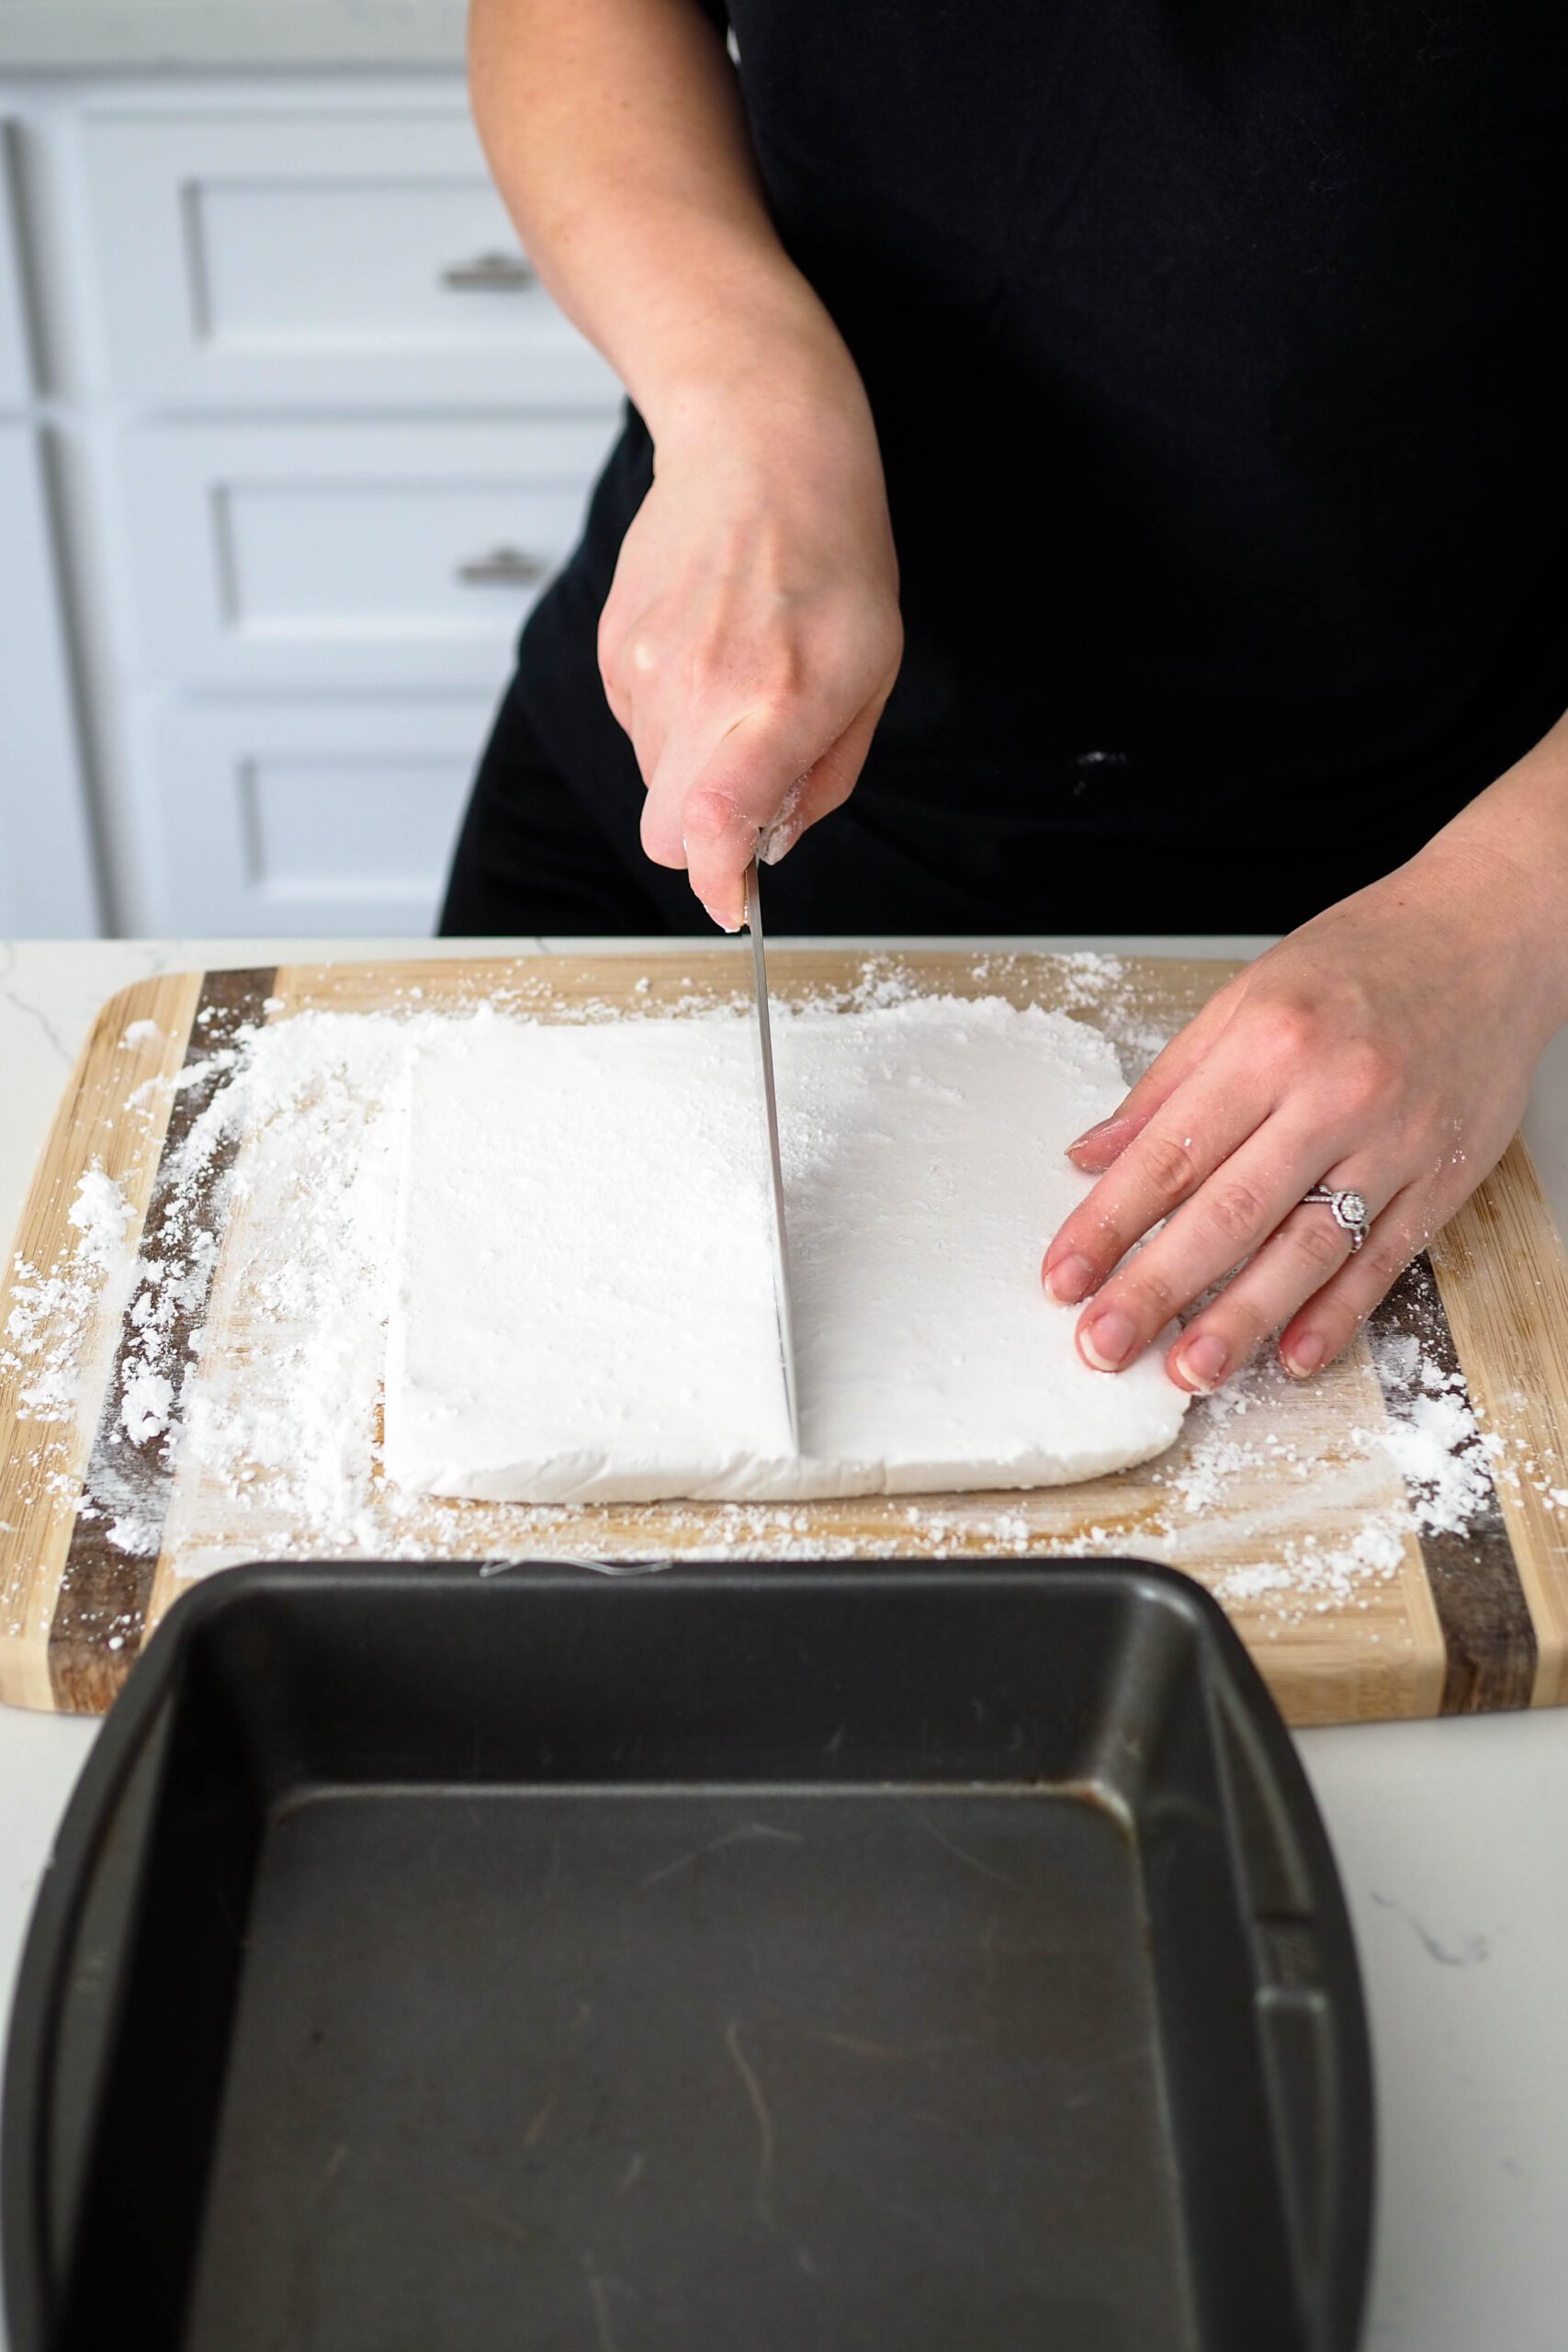
Cutting the Marshmallows
Test to check that the marshmallows have set before cutting into them. Poke at the top of the marshmallow loaf with finger. If the marshmallow has set, it won’t leave an impression or stick to your finger.
Once the marshmallows have set, dust a cutting board with powdered sugar. Remove the plastic wrap from the pan and gently peel it off the back of the marshmallows.
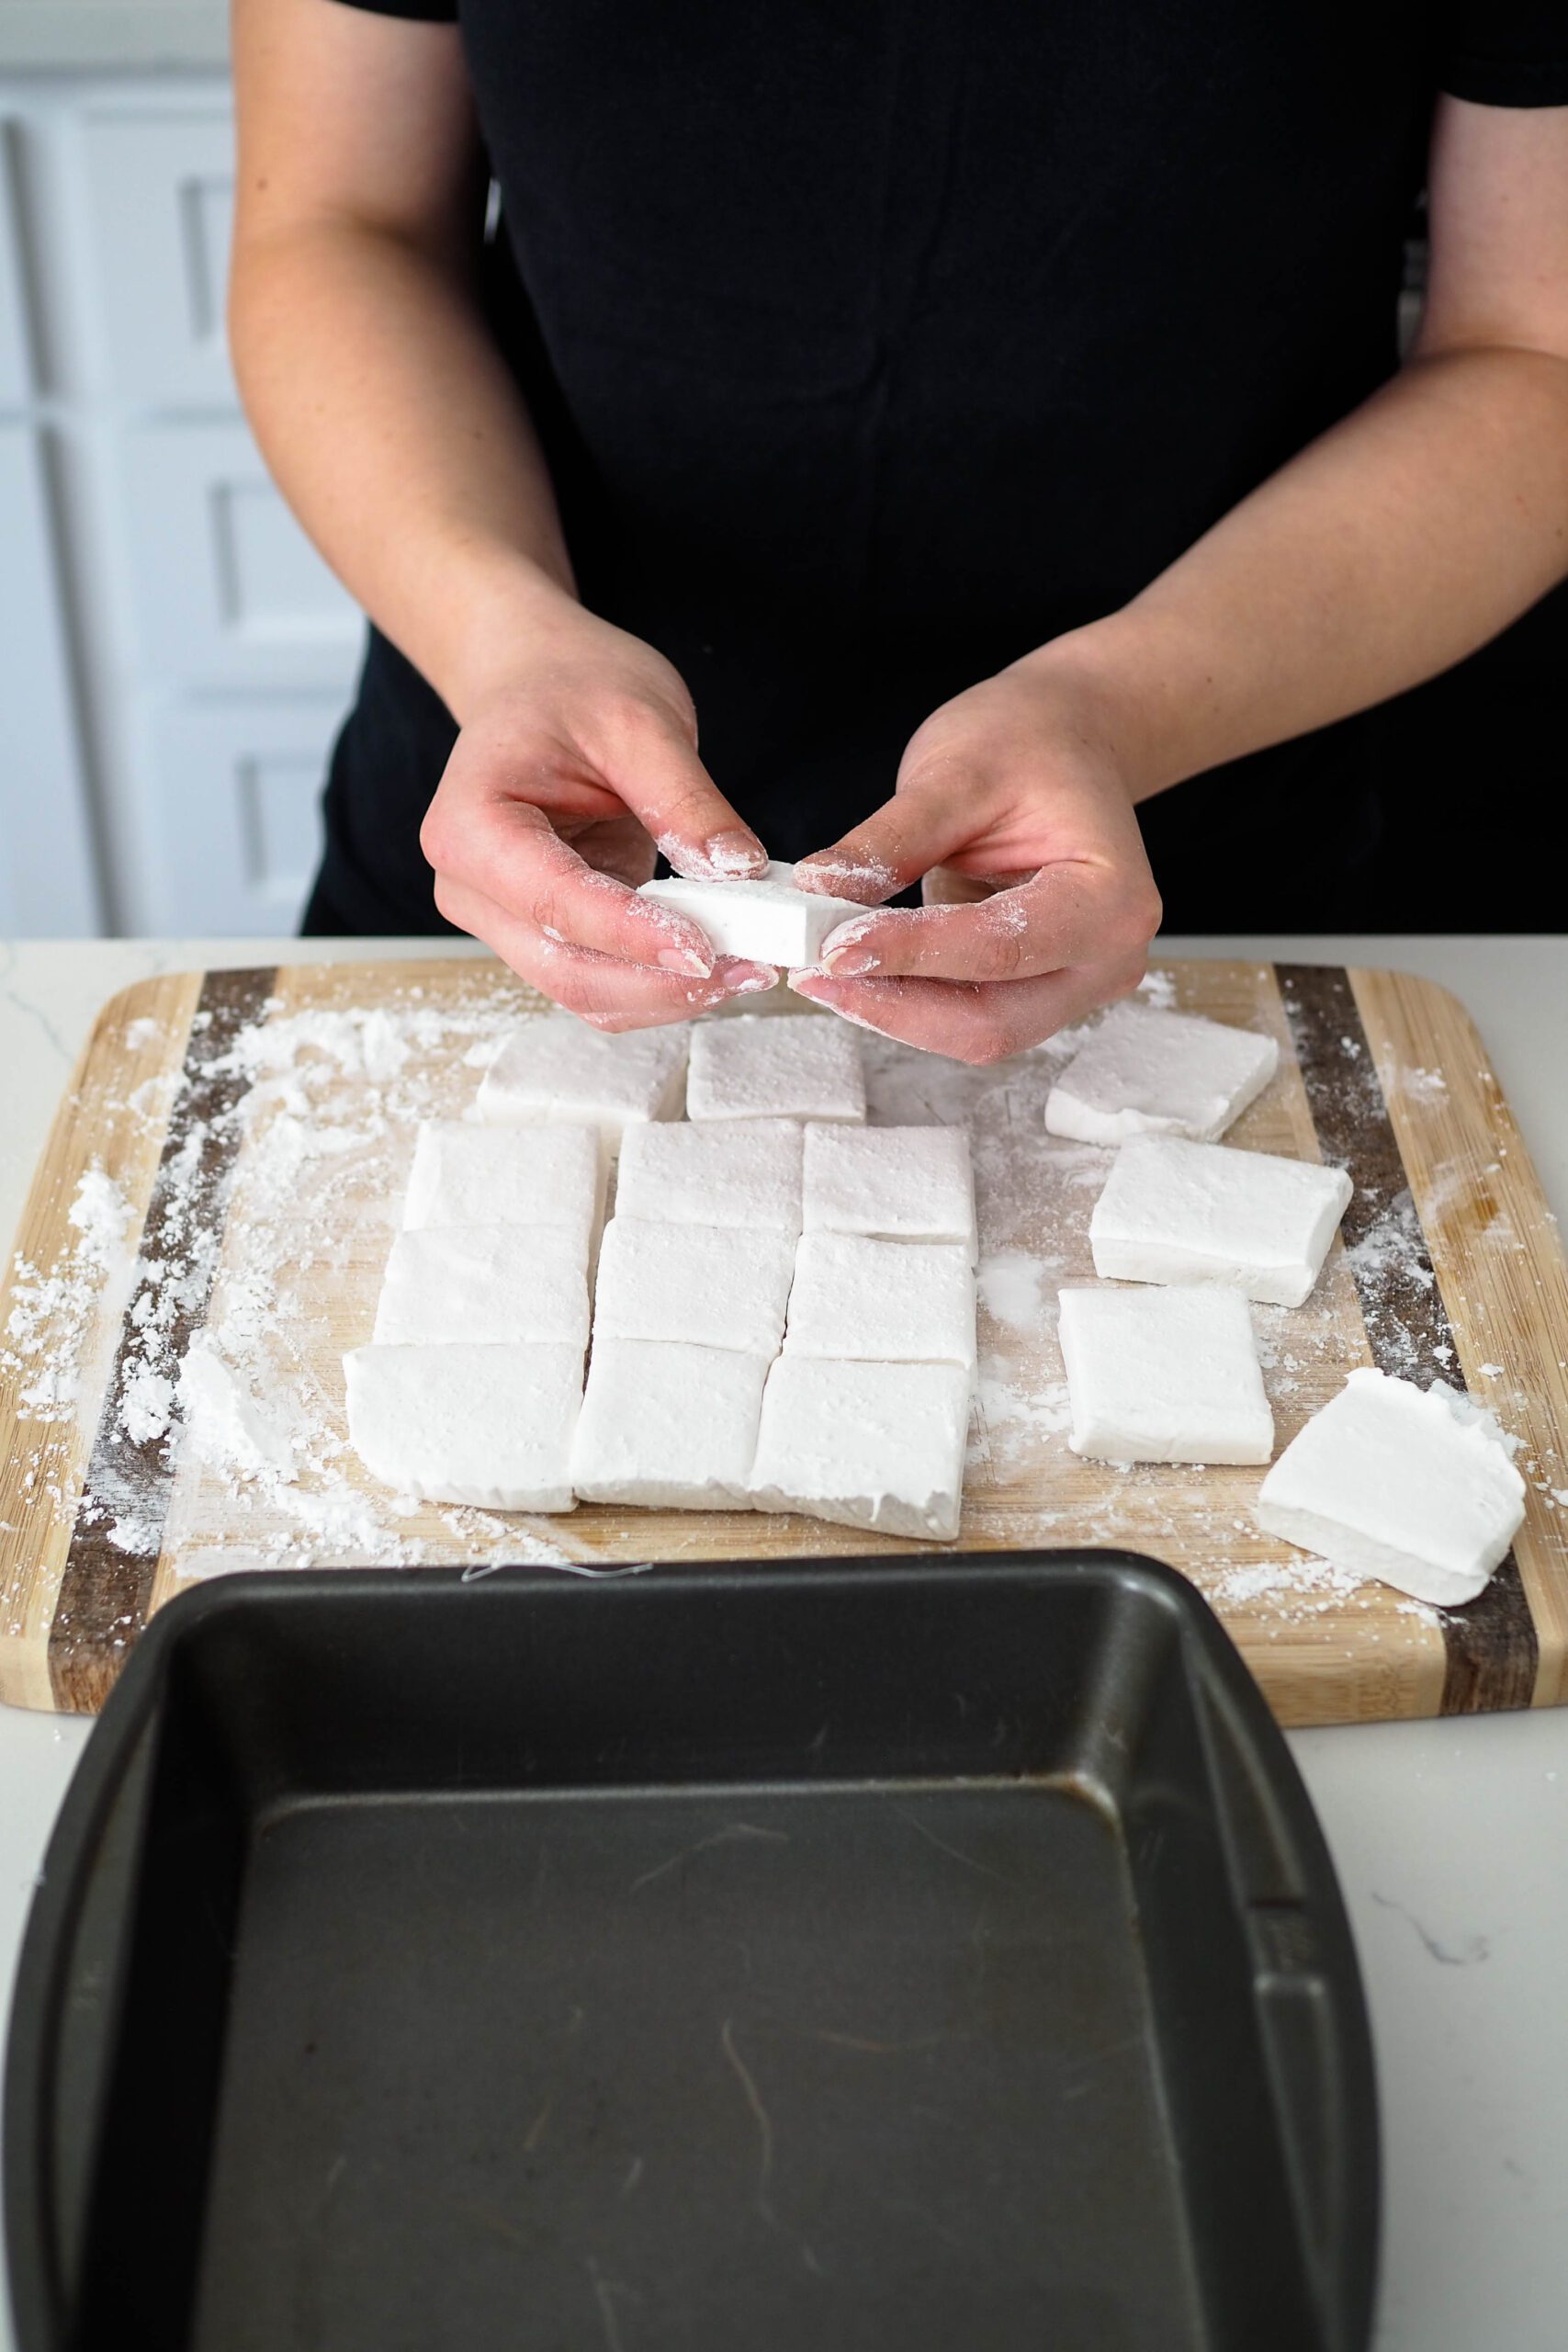
Use a sharp knife (or cookie cutter for fun shapes!) to cut the marshmallows as desired. Tap each cut side with powdered sugar, then dust off the excess to prevent them from sticking to each other.
Store in an air-tight container. For best results, use a zipper-lock bag that you can squeeze excess air out of. That will help the marshmallows stay soft for longer!
Homemade Marshmallow Troubleshooting
Marshmallows aren’t technically difficult to make, but they do require a particular temperature in order to properly set up. They are nowhere near as difficult to make as macarons, though!
I’ve gathered these troubleshooting tips over the last couple of years of making marshmallows. Hopefully they can help you troubleshoot if you’re having issues getting your marshmallows to turn out.
Why Does My Homemade Marshmallow Have Hard Clumps of Sugar In It?
Clumpy marshmallows are no fun! This can happen for a few different reasons:
- The sugar syrup was not hot enough when it was introduced to the gelatin.
- Some of the sugar syrup was poured onto the tines of the whisk rather than all down the side of the mixing bowl.
- The sugar syrup was not incorporated into the gelatin fast enough, resulting in some of the syrup being too cold to mix properly.
To prevent hard lumps of sugar in your homemade marshmallows, make sure that your sugar syrup is very close, if not at, 270°F/132°C.
Then, do your best to pour the syrup down the side of the mixing bowl and not directly onto the tines of the whisk. If you’ve never poured a hot syrup into a bowl with a mixer going, it can be stressful. It is hard to prevent any syrup from ending up on the tines of the whisk, but minimize the amount to prevent unpleasant sugar lumps in your marshmallows.
I Couldn’t Scrape Much Marshmallow out of the Bowl and into the Pan
If you have a hard time getting much marshmallow out of the bowl, it may be underwhipped or didn’t have enough of the sugar syrup incorporated into it. Try whipping the marshmallow for longer to increase the volume. The bowl should be only slightly warm to the touch by the time it is ready to be poured into a greased pan.
Marshmallow also begins to set very quickly, almost immediately after you turn off your mixer. If you did not begin to transfer the marshmallow into the pan right after you stopped whipping it, that will limit the amount of marshmallow you’ll be able to scrape out of the bowl.
I once forgot to line and grease my pan in advance, so I did that in a couple of minutes after turning off my mixer. I was only able to scrape out half of the marshmallow because the rest of it had started to set. That was a very sad and small batch of marshmallows.
There’s a Lot of Marshmallow Left Behind in the Bowl
There will be a good bit of marshmallow residue left behind in the bowl because it’s just a really sticky confection. When you’re cleaning up, don’t waste time scrubbing it out. Simply let it soak in water for 10 minutes and then rinse out the bowl.
Other Recipes You May Enjoy
As mentioned above, these marshmallows go wonderfully in hot drinks. Try them in my salted caramel hot chocolate when it’s cold for a cozy drink to warm you up.
Marshmallows and meringue are really similar! If you liked making these homemade marshmallows, you would also probably enjoy making these lifelike robin’s egg macarons, made with two kinds of meringues.
If marshmallows on ice cream are your thing, these would go great on top of my cherry pie ice cream for an extra pop of vanilla.
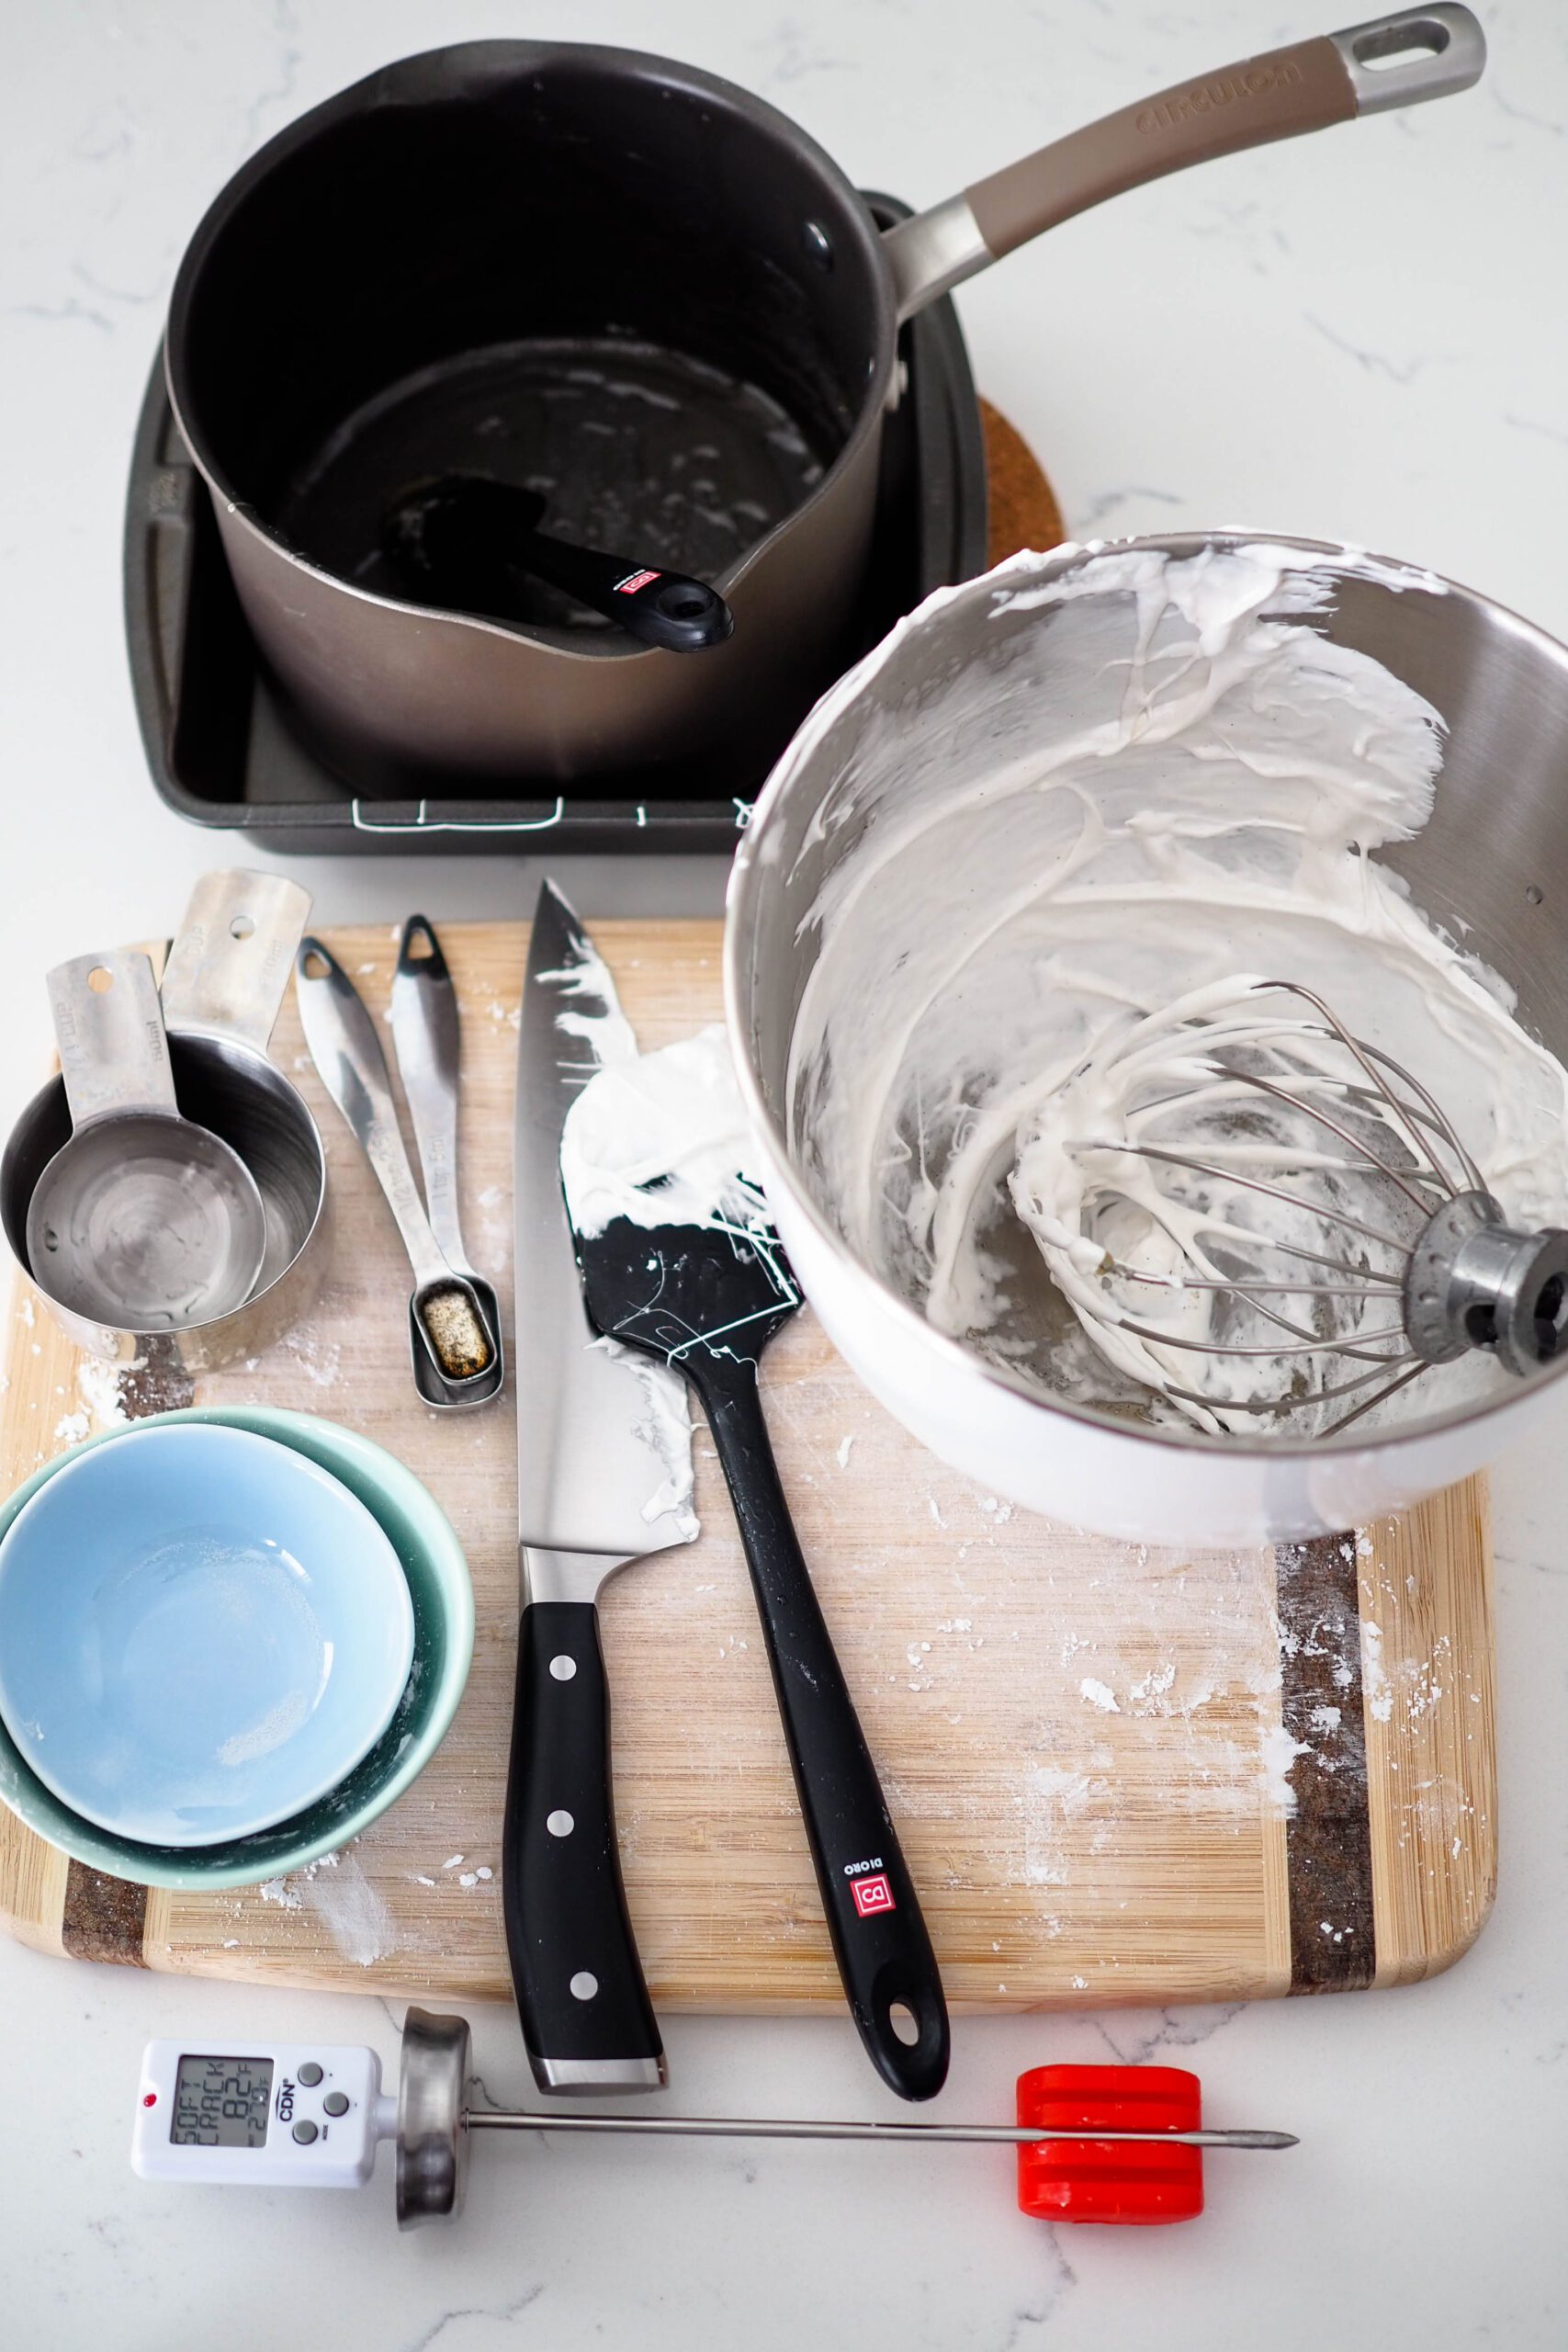
Dish Cleanup: Gonna Take a While
I rate my recipe cleanups on a scale of 1 to 5. 1 is only a handful of dishes, and 5 is everything including the kitchen sink.
This homemade marshmallow recipe has a cleanup rating of 4 out of 5. There are quite a few dishes that look really difficult to clean, but marshmallow dissolves in water easily. If you soak your mixing bowl, pot, spatula, and whisk for at least 10 minutes, there’s no heavy scrubbing.
(If you weigh all your ingredients, like I did in my YouTube video showing how to make homemade marshmallows, the cleanup is closer to a 3.)
Homemade Marshmallows Recipe
Small Batch Homemade Marshmallows
Small batch homemade marshmallows are so much better than store bought! These vanilla marshmallows are soft, fluffy, and perfect for toasting in s'mores, dipping in chocolate, or just eating plain.
Ingredients
- ½ cup water, divided (120 ml)
- 1 teaspoon vanilla bean paste or vanilla extract
- 2 packets unflavored gelatin (0.5 oz or 14g total)
- 1 cup granulated sugar (200g)
- ¼ cup light corn syrup or golden syrup (125 ml)
- ½ cup powdered sugar (100g)
Instructions
Preparation
- Prepare an 8" (20cm) square baking dish: Line it with plastic wrap and spray it with a nonstick spray or spread a drizzle of oil around the bottom and sides. If your plastic wrap isn't snug, tape the corners to prevent it from moving too much. It is key to do this step early, as the marshmallow will set quickly! Oil a spatula, as well.
- In a large bowl or the bowl of a stand mixer fitted with the whisk attachment, add half of the water (¼ cup, 60 ml) and vanilla bean paste or extract. Stir together, then sprinkle the gelatin on top. Let the gelatin absorb the liquid while you cook the syrup in the next step.
- In a medium saucepan over medium heat, add the sugar, corn syrup or golden syrup, and remaining ¼ cup or 60 ml of water. Stir the mixture until it's mostly combined, then cook the syrup until it reaches 270°F/132°C, swirling occasionally to even the temperature. Remove from heat. (A candy thermometer is helpful here to determine when your syrup reaches the soft crack stage.)
Whisking the Marshmallow Together
- Whisk the gelatin mixture together on low, then, still whisking, carefully pour the syrup down the side of the mixer bowl. Do your best to slowly pour the syrup in the same path on the side of the bowl and not onto the tines of the whisk. (The syrup will cool quickly on the metal tines and form hard lumps of syrup that won't incorporate into the marshmallow.)
- Increase the speed to medium high and continue whisking the mixture for 5-10 minutes, until the mixture is an opaque white, thick, and starts to clump in the center of the whisk. You'll hear the mixer start to work a bit harder once the mixture becomes stringy; that's your sign to turn off the mixer and begin spreading it into the lined pan.
- Use an oiled spatula to scrape the marshmallow out of the bowl and into the greased pan. Guide the marshmallow into the corners with your oiled spatula. Flatten out any peaks with the spatula, re-oiling as necessary to prevent sticking.
- Let the marshmallow set for 1-2 hours until firm before cutting.
Cutting the Marshmallows
- Spread a thin layer of powdered sugar on top of a cutting board. Peel away the plastic wrap from the marshmallow, and place the marshmallow loaf on the cutting board, with the flattest side facing downward.
- To cut the loaf into even, 2" (5 cm) marshmallows, use a sharp chef's knife to cut the marshmallow into four 2" strips. Rotate the cutting board 90°, then cut the marshmallow into four more 2" strips. This will give you 16 evenly-sized marshmallow squares.
- To prevent the marshmallows from sticking to each other, dust all the sides with powdered sugar and brush off any excess.
Notes
Store in an air-tight container for up two weeks. (A zipper-sealed bag works best to limit extra air from drying the marshmallows out.)
Recommended Products
As an Amazon Associate and member of other affiliate programs, I earn from qualifying purchases.


Nutrition Information:
Yield:
16Serving Size:
1 marshmallowAmount Per Serving: Calories: 95Total Fat: 0gSaturated Fat: 0gTrans Fat: 0gUnsaturated Fat: 0gCholesterol: 0mgSodium: 9mgCarbohydrates: 24gFiber: 0gSugar: 22gProtein: 1g
The nutrition facts are estimated and may vary based on specific ingredients used.
Thanks for trying out my homemade marshmallow recipe! Please consider rating this recipe so others find it, too.
I’d love to see how your recipe turns out: Take a photo and tag me on Instagram @floralapronblog to share with me, or use the hashtag #floralapronbakes.
This post contains affiliate links. If you click through and make a purchase, I may receive a small commission at no cost to you. Thank you for helping to support The Floral Apron!
is it supposed to set at room temperature for 1-2 hours or in the fridge??
Hi Kelsey,
The marshmallows set at room temperature—there’s no need to refrigerate 🙂