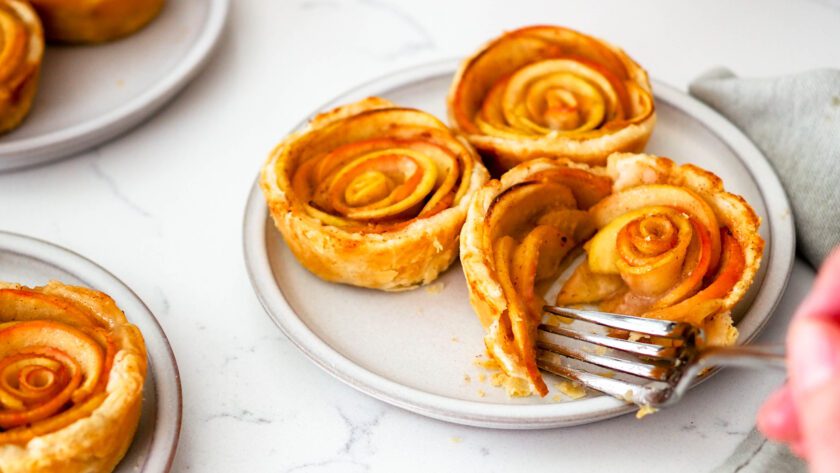
Lightly spiced and delicately arranged into rosettes, these mini caramel apple pies are the quintessential bite-sized fall dessert recipe. Cinnamon, nutmeg, and allspice complement the tartness of the apples and the sweetness of the salted caramel perfectly. Best of all, each mini apple pie is a single serving, meaning no one has to share!
Ingredients for Mini Caramel Apple Pies
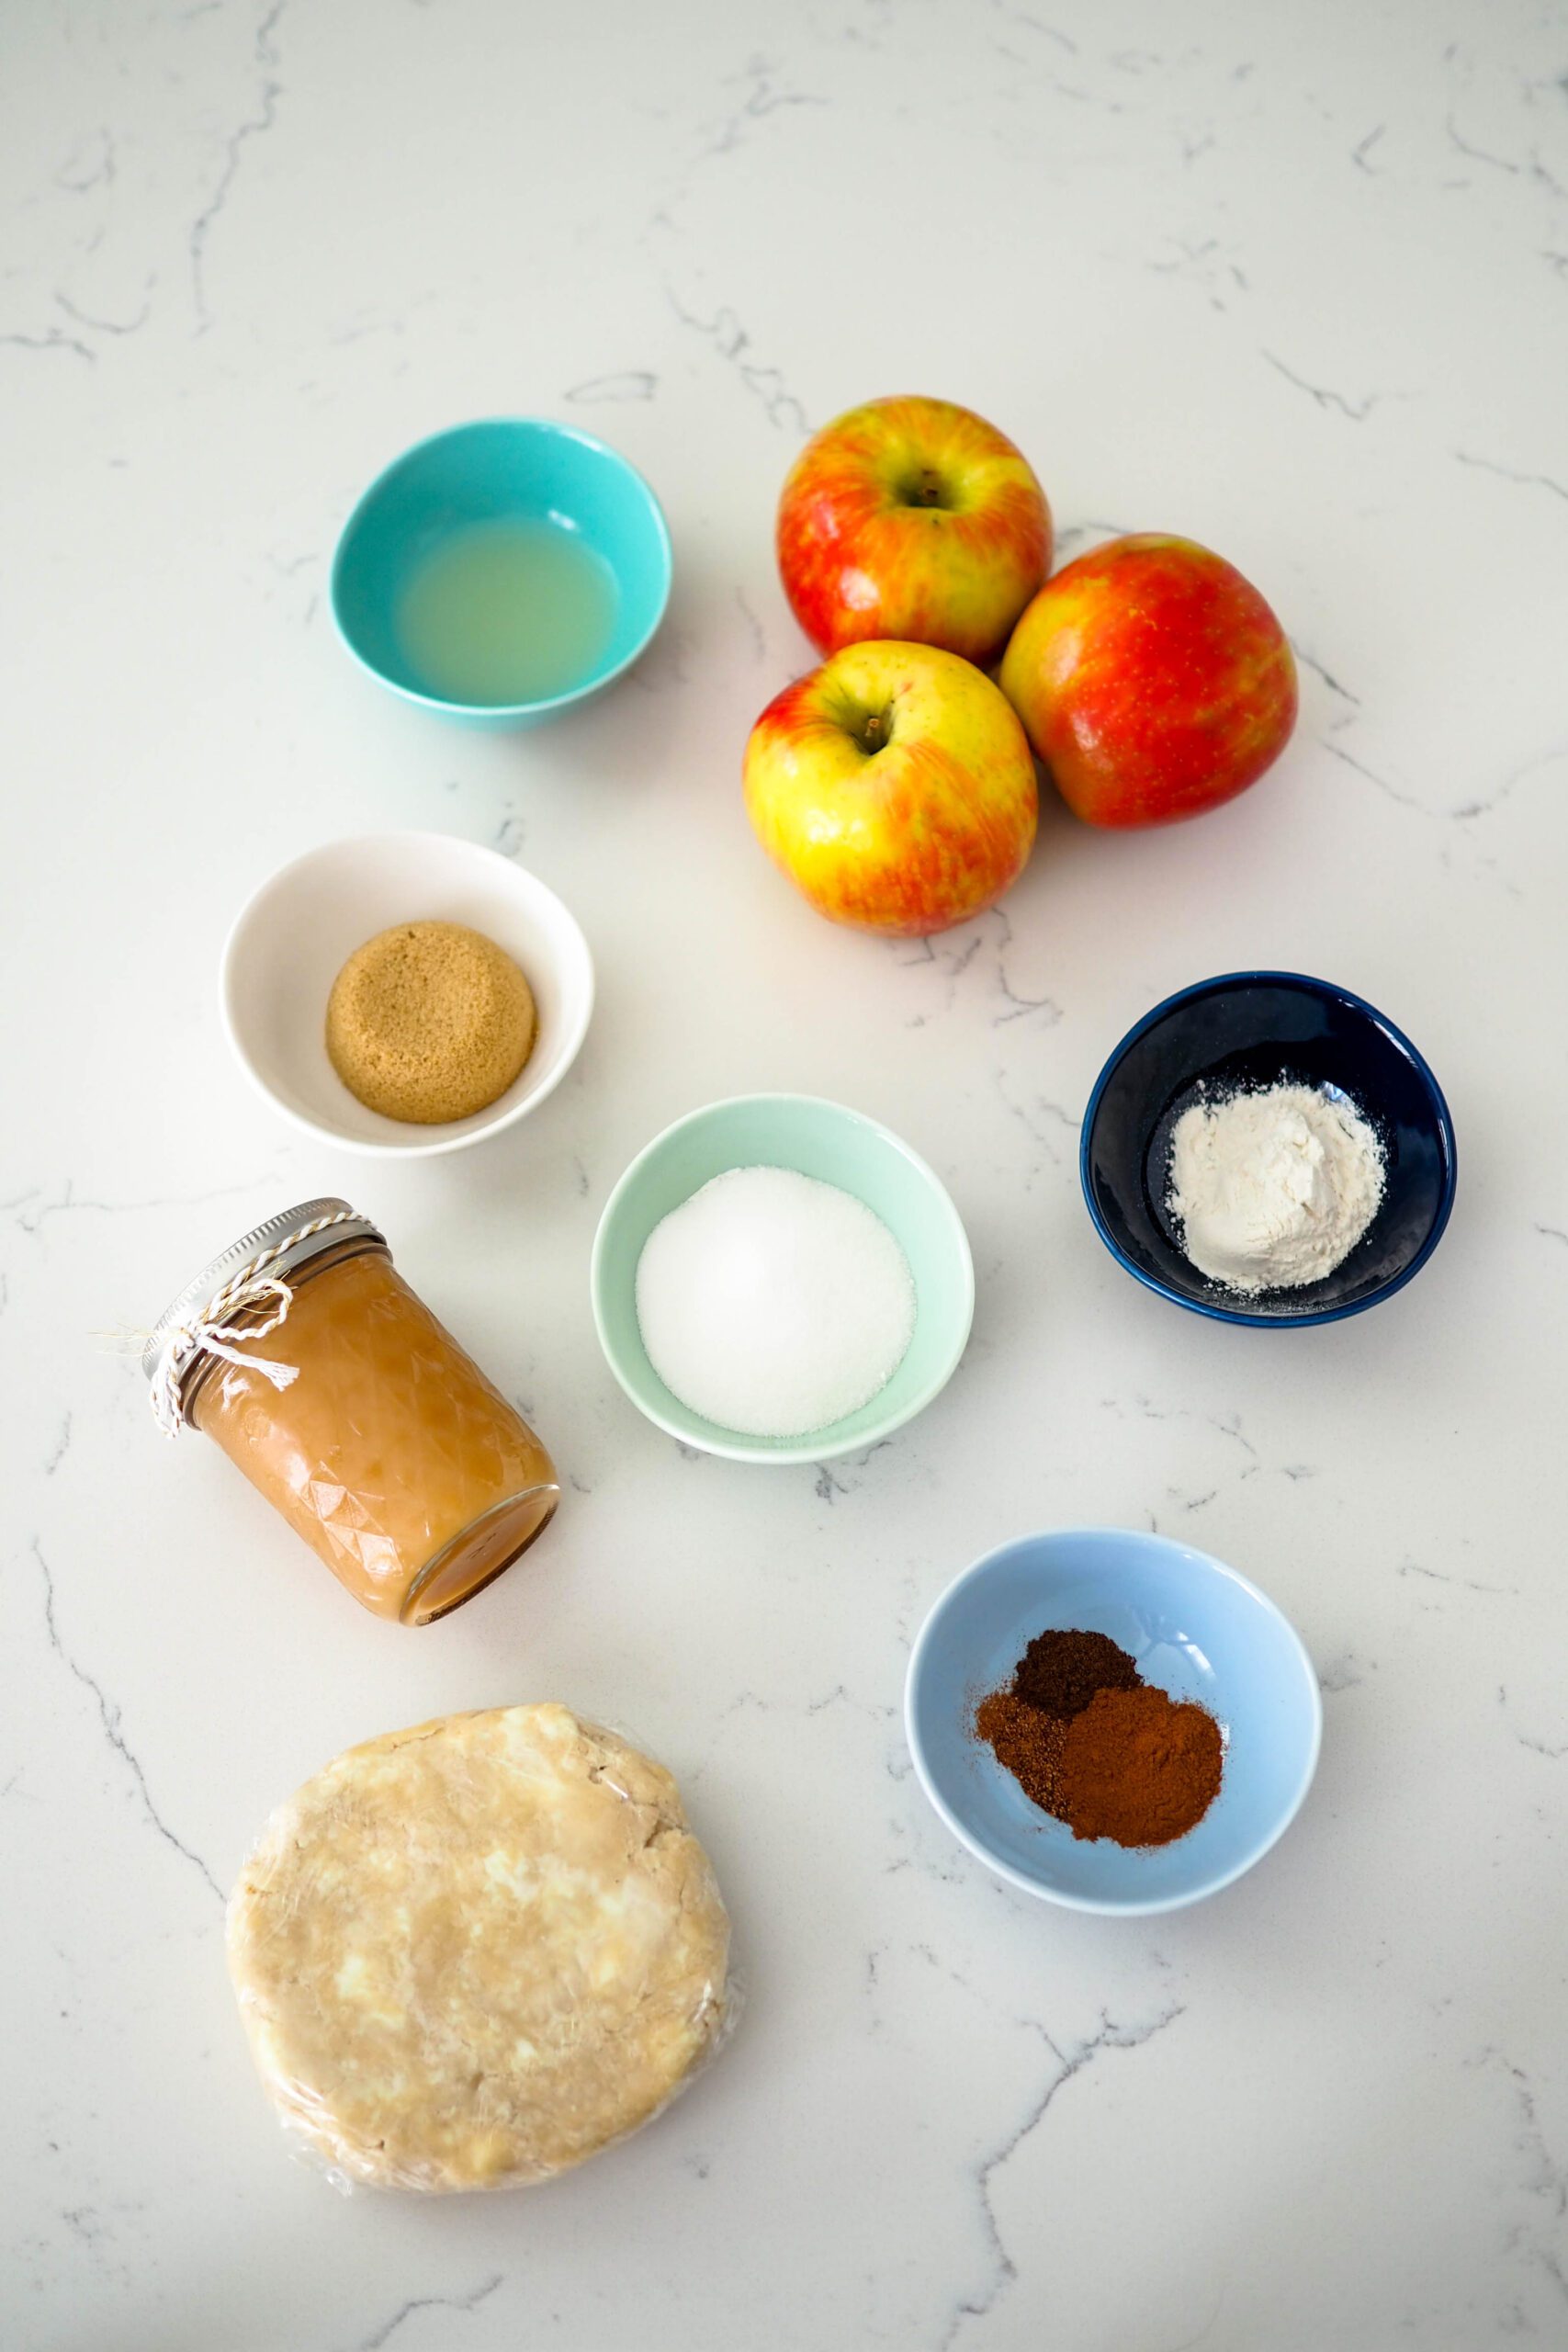
These individual apple pies with salted caramel are made with just a handful of ingredients. A few warm spices complement the tartness of the apples and the sweetness of the salted caramel inside perfectly, making these the ideal personal fall pies.
This recipe will work with whatever pie crust and salted caramel sauces you have—use whatever is easiest. I’ve linked the all-butter vanilla pie crust and my salted caramel sauce recipes I used in these small apple pies with salted caramel, but if you already have ingredients on hand, use those!
Here’s a list of what you’ll need for these mini salted caramel apple pies:
- Apples with firm flesh, like Honeycrisp or Granny Smith
- Brown sugar
- Granulated sugar
- Lemon juice
- Cinnamon
- Nutmeg
- Allspice
- Flour
- Single-crust pie crust—both storebought and homemade pie crust will work for these mini apple pies
- Salted caramel sauce—use your favorite salted caramel sauce for these, whether that’s mine, your own, or storebought
What Apples Work Best in Apple Pies?
Any firmer fleshed apple, like Honeycrisp or Granny Smith, will work great inside of apple pies. Fuji, Pink Lady, Gala, and Braeburn all are great apples to use in pies, as well.
Avoid softer, mealy apples like Red Delicious, as they won’t hold their shape well in the oven.
I’ve made apple pies with a mix of tart apples like Granny Smith and sweeter apples like Honeycrisp or Fuji and have had great results. Don’t feel chained to only one variety; the more varieties you include, the better the overall flavor will be.
What’s the Best Way to Cut Apples for Mini Rosettes?
My preferred way of cutting apples for individual apple pies is slicing the apple into four pieces. That will give you the most consistent slices for balanced rosettes.
To start, cut off the whole right side of an apple about a quarter of an inch to the right of the stem. Rotate the apple 180° and repeat. Then rotate the apple 90° and cut off that side. Rotate the apple another 90° and cut off the last remaining piece.
You should have two pairs (four pieces total) of apple that you can then thinly cut into ⅛” (3 mm) slices.
See the gif below for a visual.
Should I Peel the Apples for my Individual Apple Pies with Salted Caramel?
I don’t. The skin helps keep the apples in tact as you’re rolling and shaping them. It also adds beautiful color to the pies!
How to Make Mini Pies in a Muffin Pan with Pie Crust
Mini pies are made from the same crust as a single-crust pie crust, just cut into smaller pieces. I can usually get about a dozen 4″ rounds from one batch of pie crust.
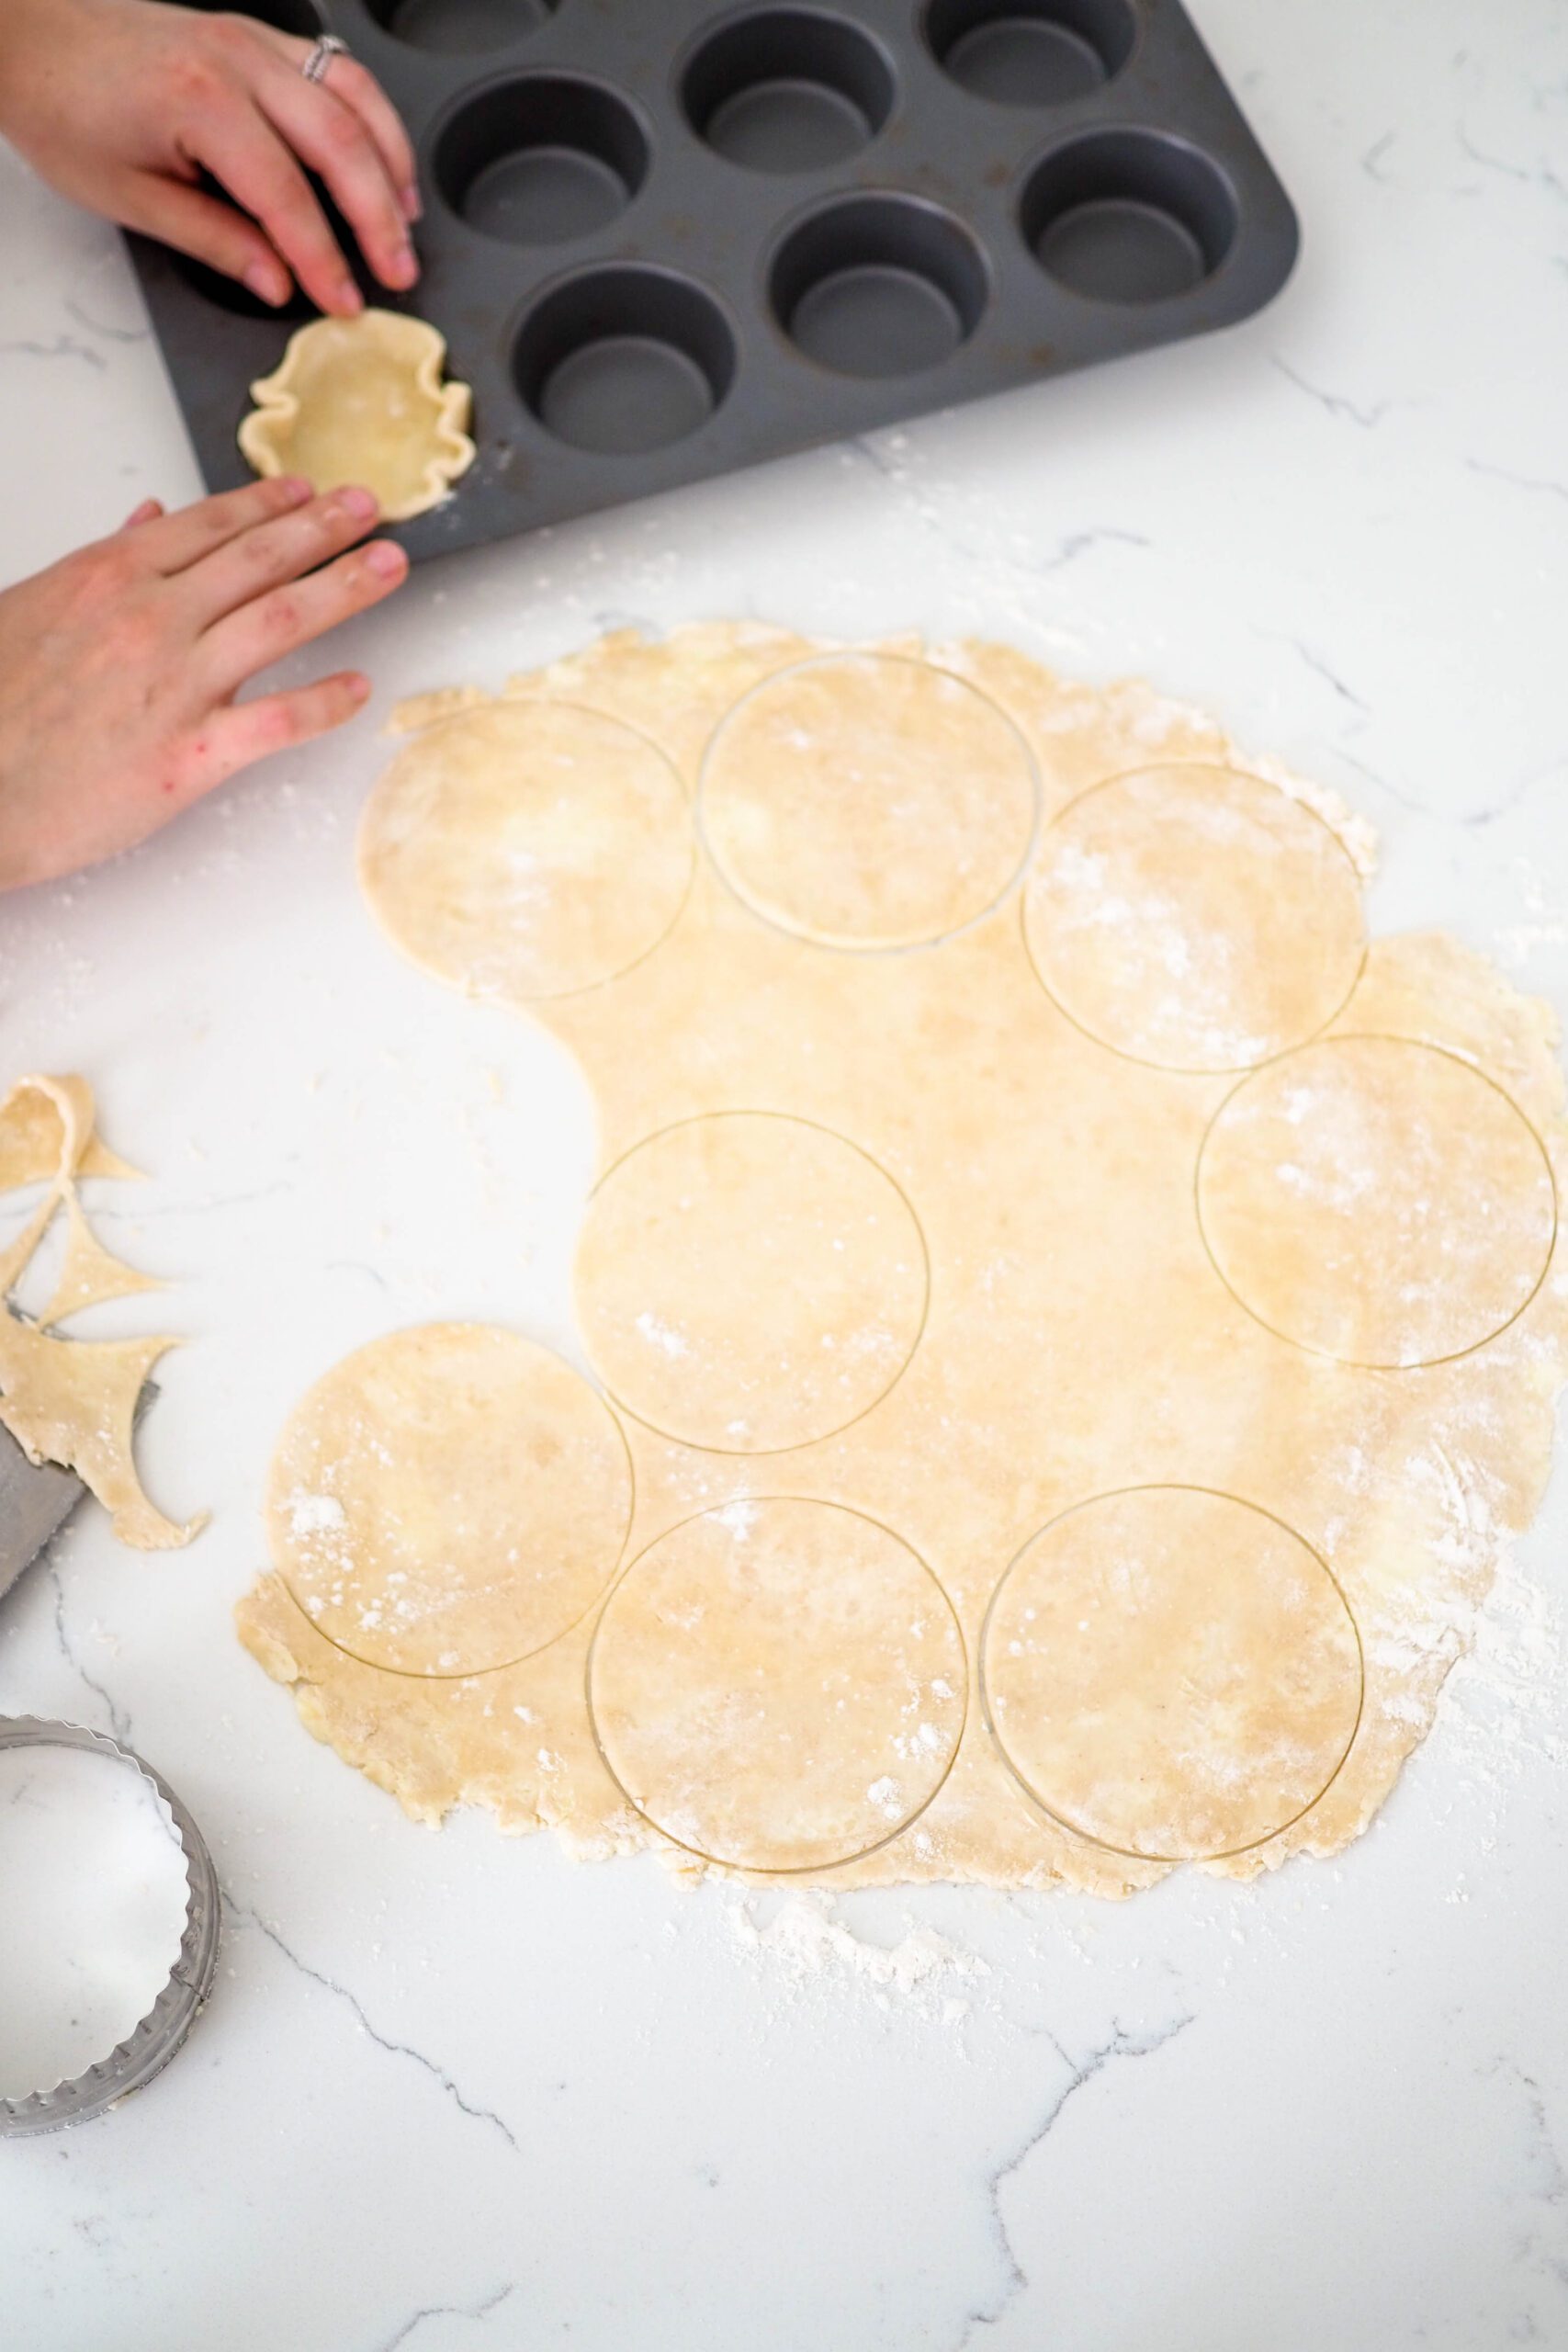
To make mini pies from one pie crust, roll out your chilled pie dough on a lightly floured surface. Rotate the dough one quarter turn after every roll to ensure it doesn’t stick to your work surface. Roll only in one direction, from the center of the dough out. Rolling in just one direction helps the dough keep its shape, prevents it from sticking, and maintains better layers.
Once you’ve rolled out to pie crust to 11″ or 12″ (28 to 30 cm) in diameter, use a 4″ (10 cm) cutter to cut circles out of the dough. I usually have to reroll my scraps, because I like a thicker crust. After piling all the scraps together and dusting them with flour on both sides, I reroll the dough until it’s large enough for me to cut out the remaining circles I need.
To fit the dough circles into the holes in the muffin pan, gently place each circle on top of a hole. Lightly press down evenly in the center of the dough round with the fingertips of one hand while guiding the edges of the dough circle down the side of the hole with your other. The edges will ruffle a little bit, so lightly press them into the sides of the hole for a flat border until you’re happy with them.
It might take a few tries until you get it; if a circle rips, just patch it up with excess dough!
How to Make Mini Rosettes in Individual Apple Pies
This recipe details how to make these individual apple pies with salted caramel as rosettes. In addition to the delightfully spiced apples, the rosette pattern really puts these pies over the top.
Making a rosette pie is no harder than making a regular apple pie; it just takes a little bit more time. I’ve found it easier to work on the whole pan at once rather than one at a time.
The thicker, less pliable apple slices will make up the outer petals of your rosettes; the thin, bendable apple slices will make up the inner petals. When you come across really thin slices of apple, stick them to the side of the bowl so they’re out of the way but easy to find when you need them later.
The Outer Rings
Place one of your thickest apple slices around the outer edge, curving it slightly so it follows the shape of the pan. Place another thick apple slice on top of it, offsetting it so that it covers only about 2/3rds of the first apple slice. Continue doing this the whole way around the inside of the round.
As you reach the midway point, start to phase in thinner slices that can handle some bending without breaking. If you break some thicker slices, don’t worry about it! There will be plenty of apples left over, even if you break a few.
The Inner Rings
Once your pies are nearly filled, take one of the thin slices you reserved earlier and tightly roll it up from end to end. I’ve found that beginning the roll at a bit of an angle works best. Place them in the centers of the rosettes.
See the gif below for a visual of the process.
Can I Let the Apple Mixture Macerate Overnight?
No, I wouldn’t recommend letting the spiced apple mixture sit for more than 4 hours.
I let my apples marinate overnight for this recipe once to see if the flavors would be more intense. Instead of the flavors developing and the apples softening like I imagined, the whole mixture turned a little mushy.
It ended up being harder to shape the rosettes the next day, so now I just let the apples sit for a few minutes before.

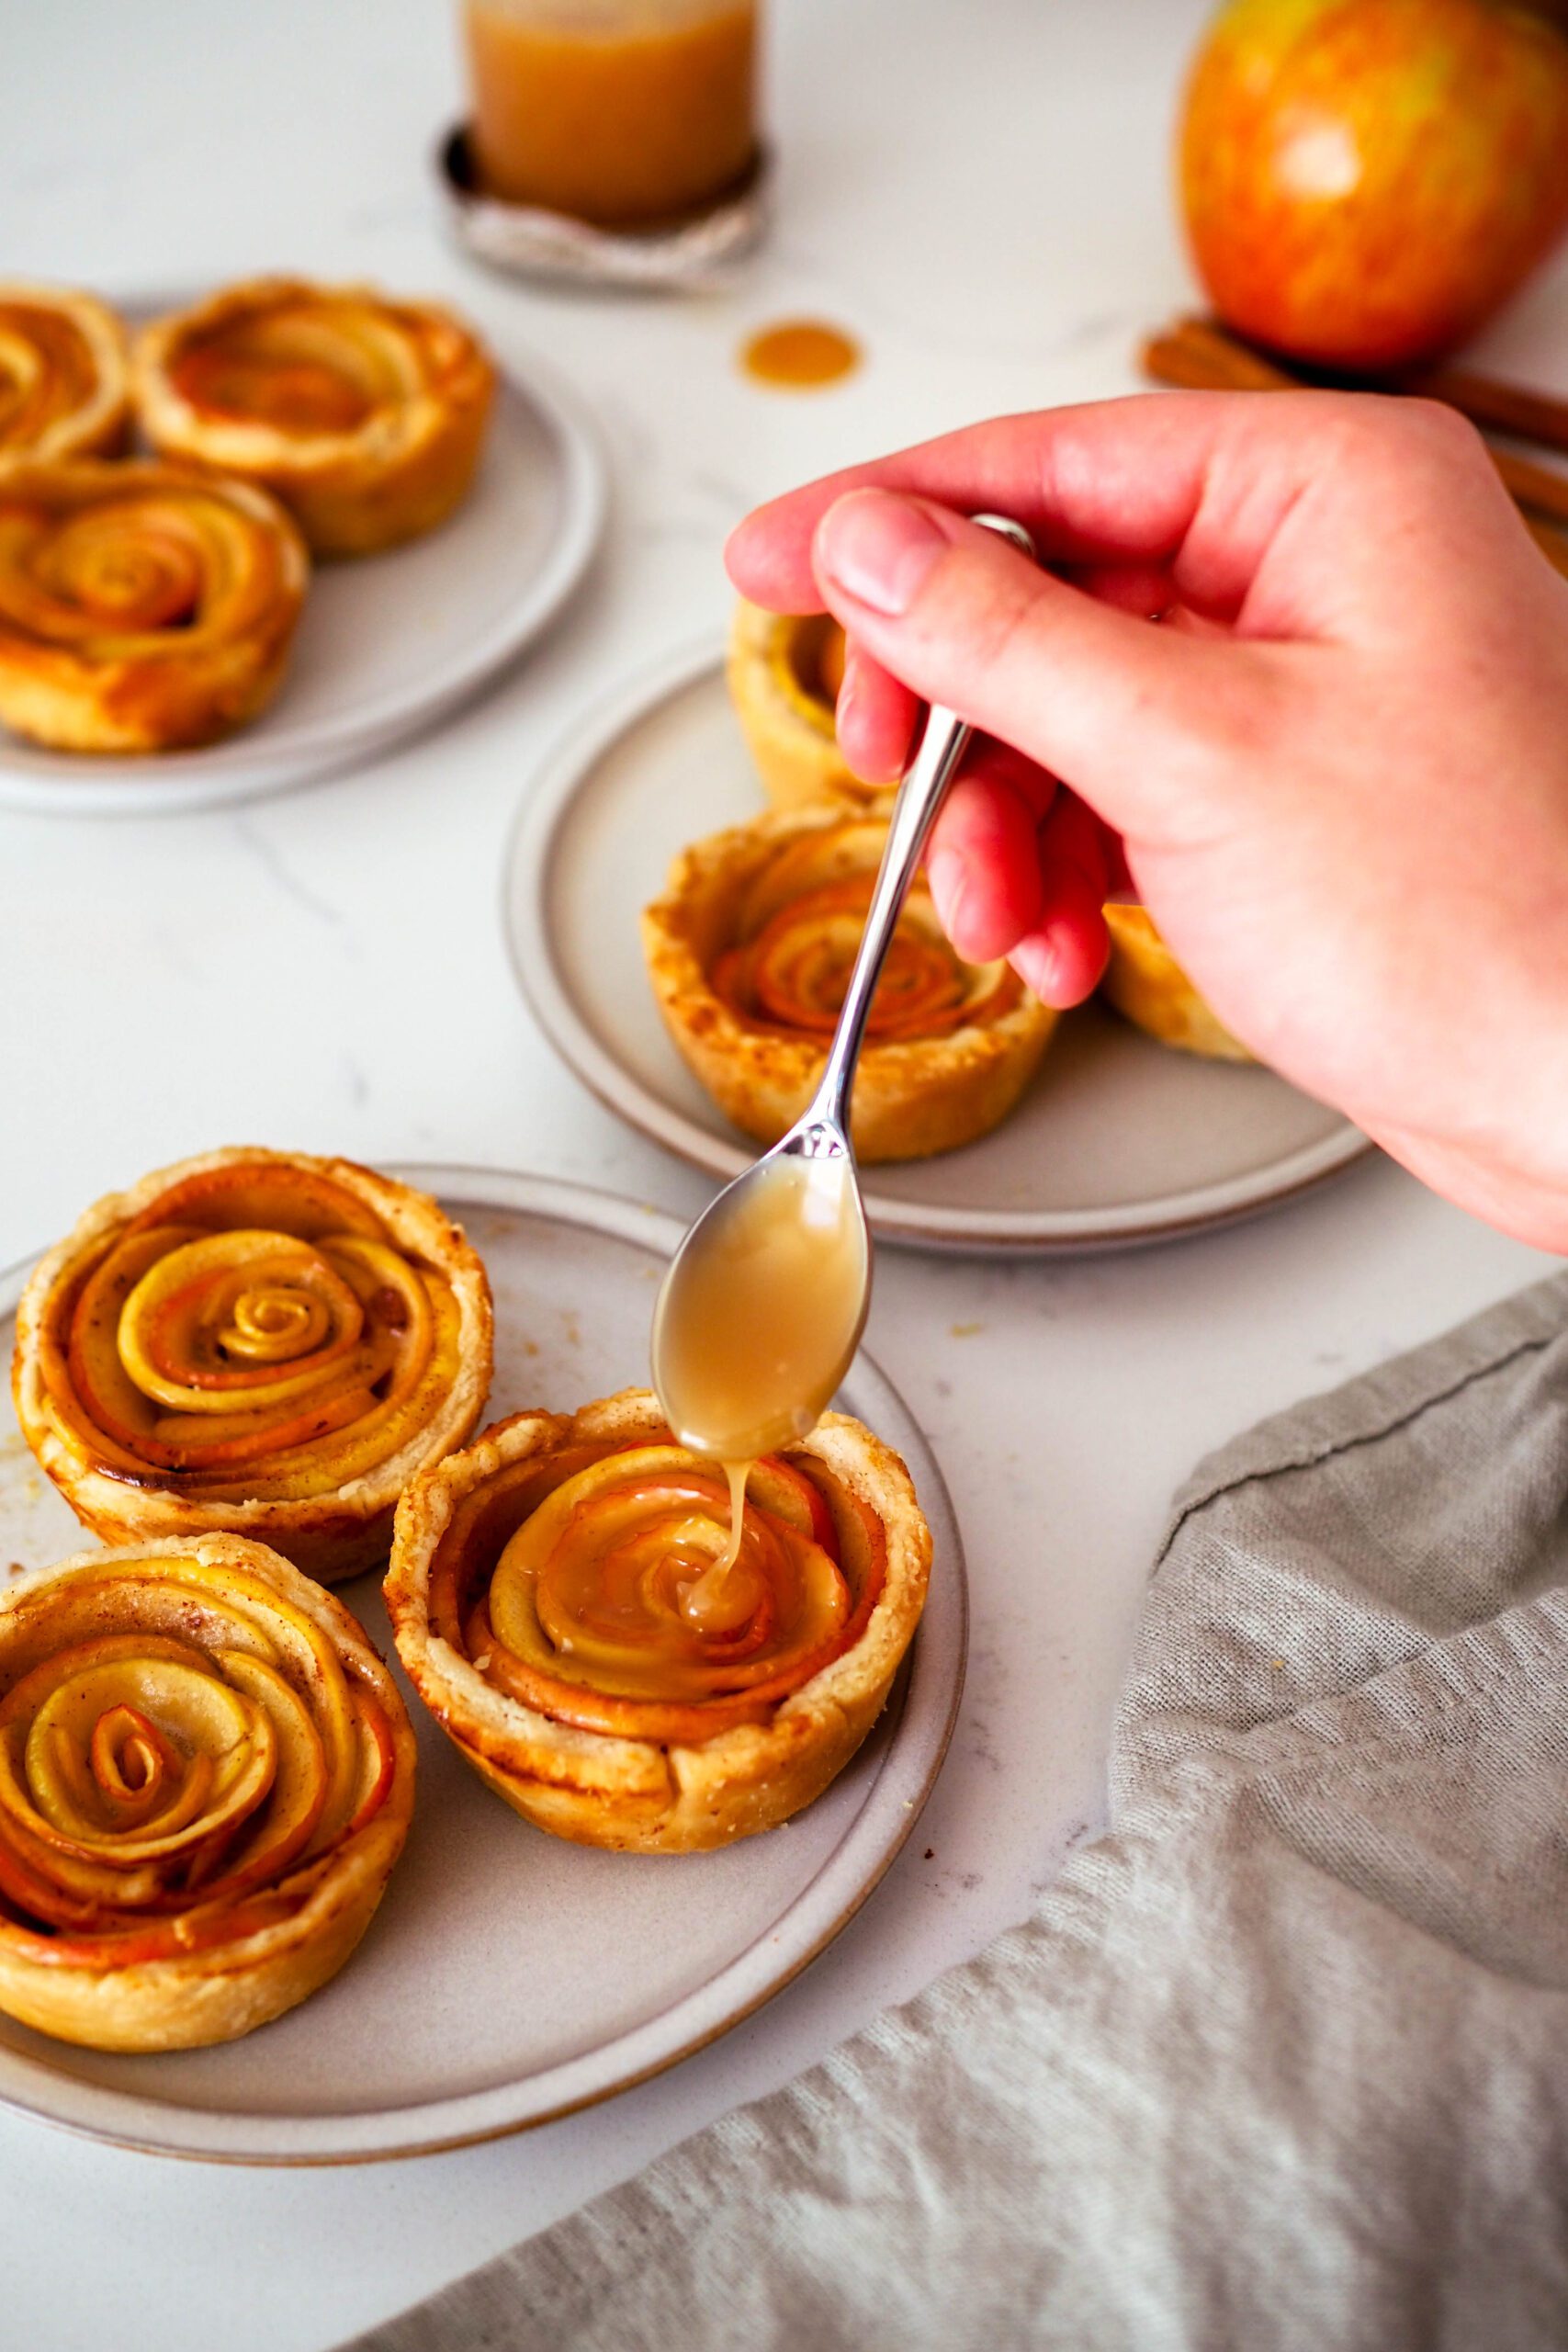
Adding the Salted Caramel to Mini Apple Pies
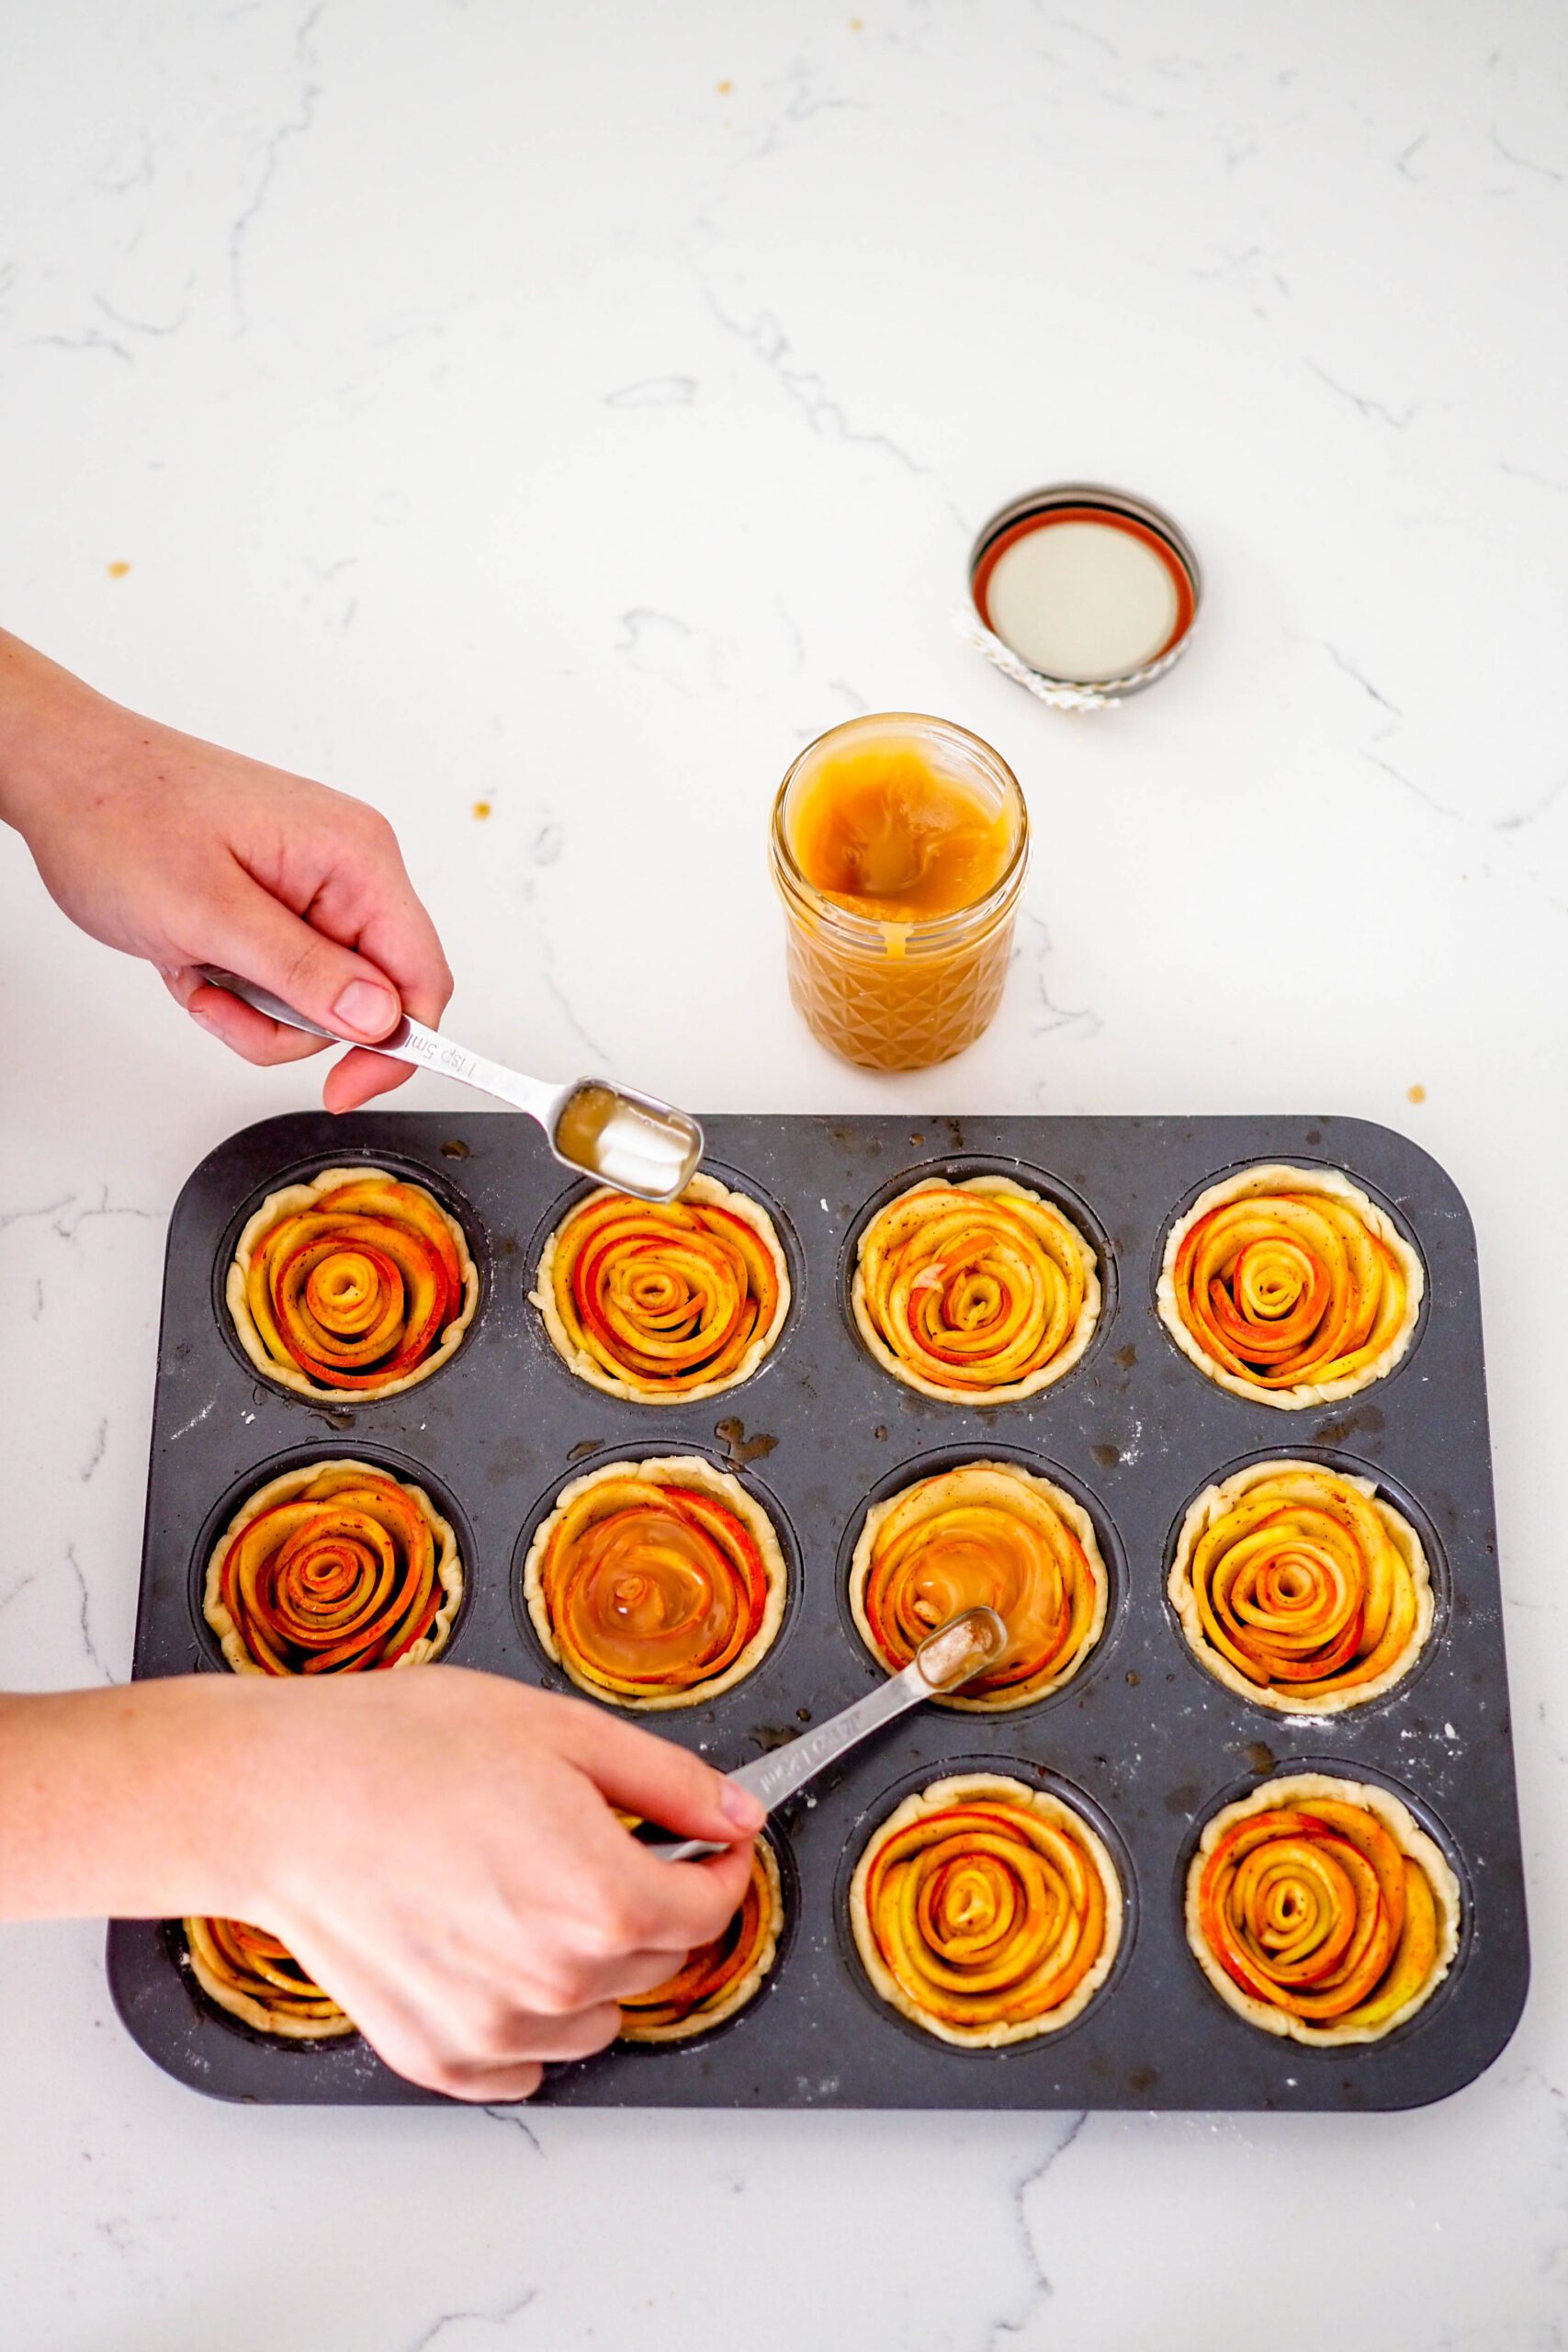
The salted caramel is the easiest part of this recipe, but there is a trick to it. Since the salted caramel is thick, it can stick to the apple slices and pull them in directions you don’t want them to go.
To prevent this from happening, use the back of a spoon to spread the caramel on top of the rosette in concentric circles. This will prevent the slices from unrolling as you go (especially the thin, inner slices).
Dish Cleanup: Not Too Bad
I rate my recipe cleanups on a scale of 1 to 5. 1 is only a handful of dishes, and 5 is everything including the kitchen sink.
This mini caramel apple pie recipe has a cleanup rating of a 3. It’s close to a 4, but there are a lot of easy-to-wash dishes here that bring the rating down to a 3. Even the rolling pin, cutting board, and mixing bowl are larger but not necessarily difficult to clean.
Something to keep in mind: The muffin pan gets more difficult to wash if you let the caramel on it harden. Washing it while it’s still warm from the oven worked best for me (or you can always pop it in the dishwasher, if you have one).

Mini Caramel Apple Pie Recipe
Mini Caramel Apple Pies

Delightfully spiced and delicately arranged into rosettes, these mini caramel apple pies are baked to a deep golden brown. Best of all, you don't have to worry about sharing!
Ingredients
- 3 firm apples, like Honeycrisp or Granny Smith
- ¼ cup brown sugar, packed (50g)
- ¼ cup granulated sugar (50g)
- 1 Tablespoon lemon juice
- ¾ teaspoon cinnamon (2g)
- ¼ teaspoon nutmeg
- ⅛ teaspoon allspice
- 1 Tablespoon flour (10g), plus more for dusting
- 1 single-crust pie crust (storebought or homemade)
- ¼ cup salted caramel sauce
Instructions
Making the Spiced Apple Filling
- Preheat the oven to 425°F/220°C. Use a dark-colored muffin pan for the best, crispiest results. Aluminum pans work, but it takes longer for the pie crust to turn a deep golden brown.
- Cut the apples into thin slices about ⅛" (3 mm) thick. Don't worry if they're not all perfect; some thinner and some thicker is exactly what you want to make beautiful rosettes.
- Place the sliced apples in a large bowl, and add the brown sugar, granulated sugar, lemon juice, spices, and flour. Leave out the salted caramel sauce. Mix everything together, making sure each apple piece is well-coated in the sugar mixture. The sugar draws out water from the apples, softening them. Give the sugar time to work and set aside for at least 10 minutes and up to 12 hours. The apples will be easier to shape after this process, which is called maceration.
Preparing the Mini Caramel Apple Pie Crusts
- While the apples are macerating, roll out your chilled pie crust on a lightly floured surface. Rotate the dough one quarter turn after every roll to ensure it doesn't stick to your work surface. Roll only in one direction, from the center of the dough out. (Don't roll it from the outside in!)
- Once you've rolled out the pie crust to 11" or 12" (28 to 30 cm) in diameter, use a 4" (10 cm) cutter to cut circles out of the dough. I usually only get 8 or 9 circles before I have to reroll my scraps and cut out the rest.
- Gently place each circle into a hole in your cupcake pan and press to fit. To prevent holes, press down evenly in the center of the dough round with the fingertips of one hand while guiding the edges of the dough circle down the side of the cutout with your other. It might take a few tries until you get it; if a circle rips, just patch it up with excess dough!
Making the Rosette
- Mix together the apple mixture once more to evenly distribute the juices, then start designing your rosettes. I work on the whole pan at once rather than one pie at a time. The thicker, less pliable apple slices will make up the outer rings of your rosettes; the thin, bendable apple slices will make up the inner portions.
- Place your thickest apple slice around the outer edge, curving it slightly so it follows the shape of the pan. Place another thick apple slice on top of it, offsetting it so that it covers only about 2/3rds of the first apple slice. Continue doing this the whole way around, using progressively thinner slices that curve more and more.
- For the center most pieces, find the 12 thinnest apple slices you can and tightly roll them up, then place in the centers of the rosettes.*
- Top each rosette with a teaspoon of salted caramel sauce. Spread the sauce in a concentric circle in the direction of the rosette to avoid disturbing the beautiful pattern you just created!
Baking the Pies
- Bake the pies for 15-20 minutes in the center rack of your oven. If using a dark-colored pan, your mini caramel apple rosettes will be fully baked closer to 15 minutes. If using a light-colored pan like aluminum, they may take closer to 20 or 25 minutes to turn golden brown on the edges.
- If desired, add an extra teaspoon of salted caramel on top of each rosette before serving.
Notes
These pies are best served the day you make them, but can be saved and eaten for up to two days after baking. Store them at room temperature loosely wrapped in aluminum foil or plastic wrap to prevent them from getting soggy, or in the fridge in an airtight container.
*If you have leftover apple pie filling, don't throw it away! Cook it over medium heat on the stove for 10 minutes until the syrup boils. Store in the fridge and serve on top of ice cream, mixed into oatmeal, or plain as a sweet snack.
Nutrition Information:
Yield:
12Serving Size:
1Amount Per Serving: Calories: 159Total Fat: 6gSaturated Fat: 1gTrans Fat: 0gUnsaturated Fat: 4gCholesterol: 0mgSodium: 110mgCarbohydrates: 26gFiber: 1gSugar: 14gProtein: 1g
The nutrition facts are estimated and may vary based on specific ingredients used.
Thanks for trying out my mini caramel apple pie recipe! Please consider rating this recipe so others find it, too.
I’d love to see how your recipe turns out: Take a photo and tag me on Instagram @floralapronblog to share with me, or use the hashtag #floralapronbakes.
This post contains affiliate links. If you click through and make a purchase, I may receive a small commission at no cost to you. Thank you for helping to support The Floral Apron!
Other Recipes You May Enjoy
My cherry pie with almond extract recipe uses the same pie crust I used for these individual apple pies, and it’s always a hit. It’s one of my husband’s favorites.
If you’re looking for more ways to bring fall into your kitchen, my caramel chai muffins are loaded with chai spices and salted caramel for a cozy, fall feeling.