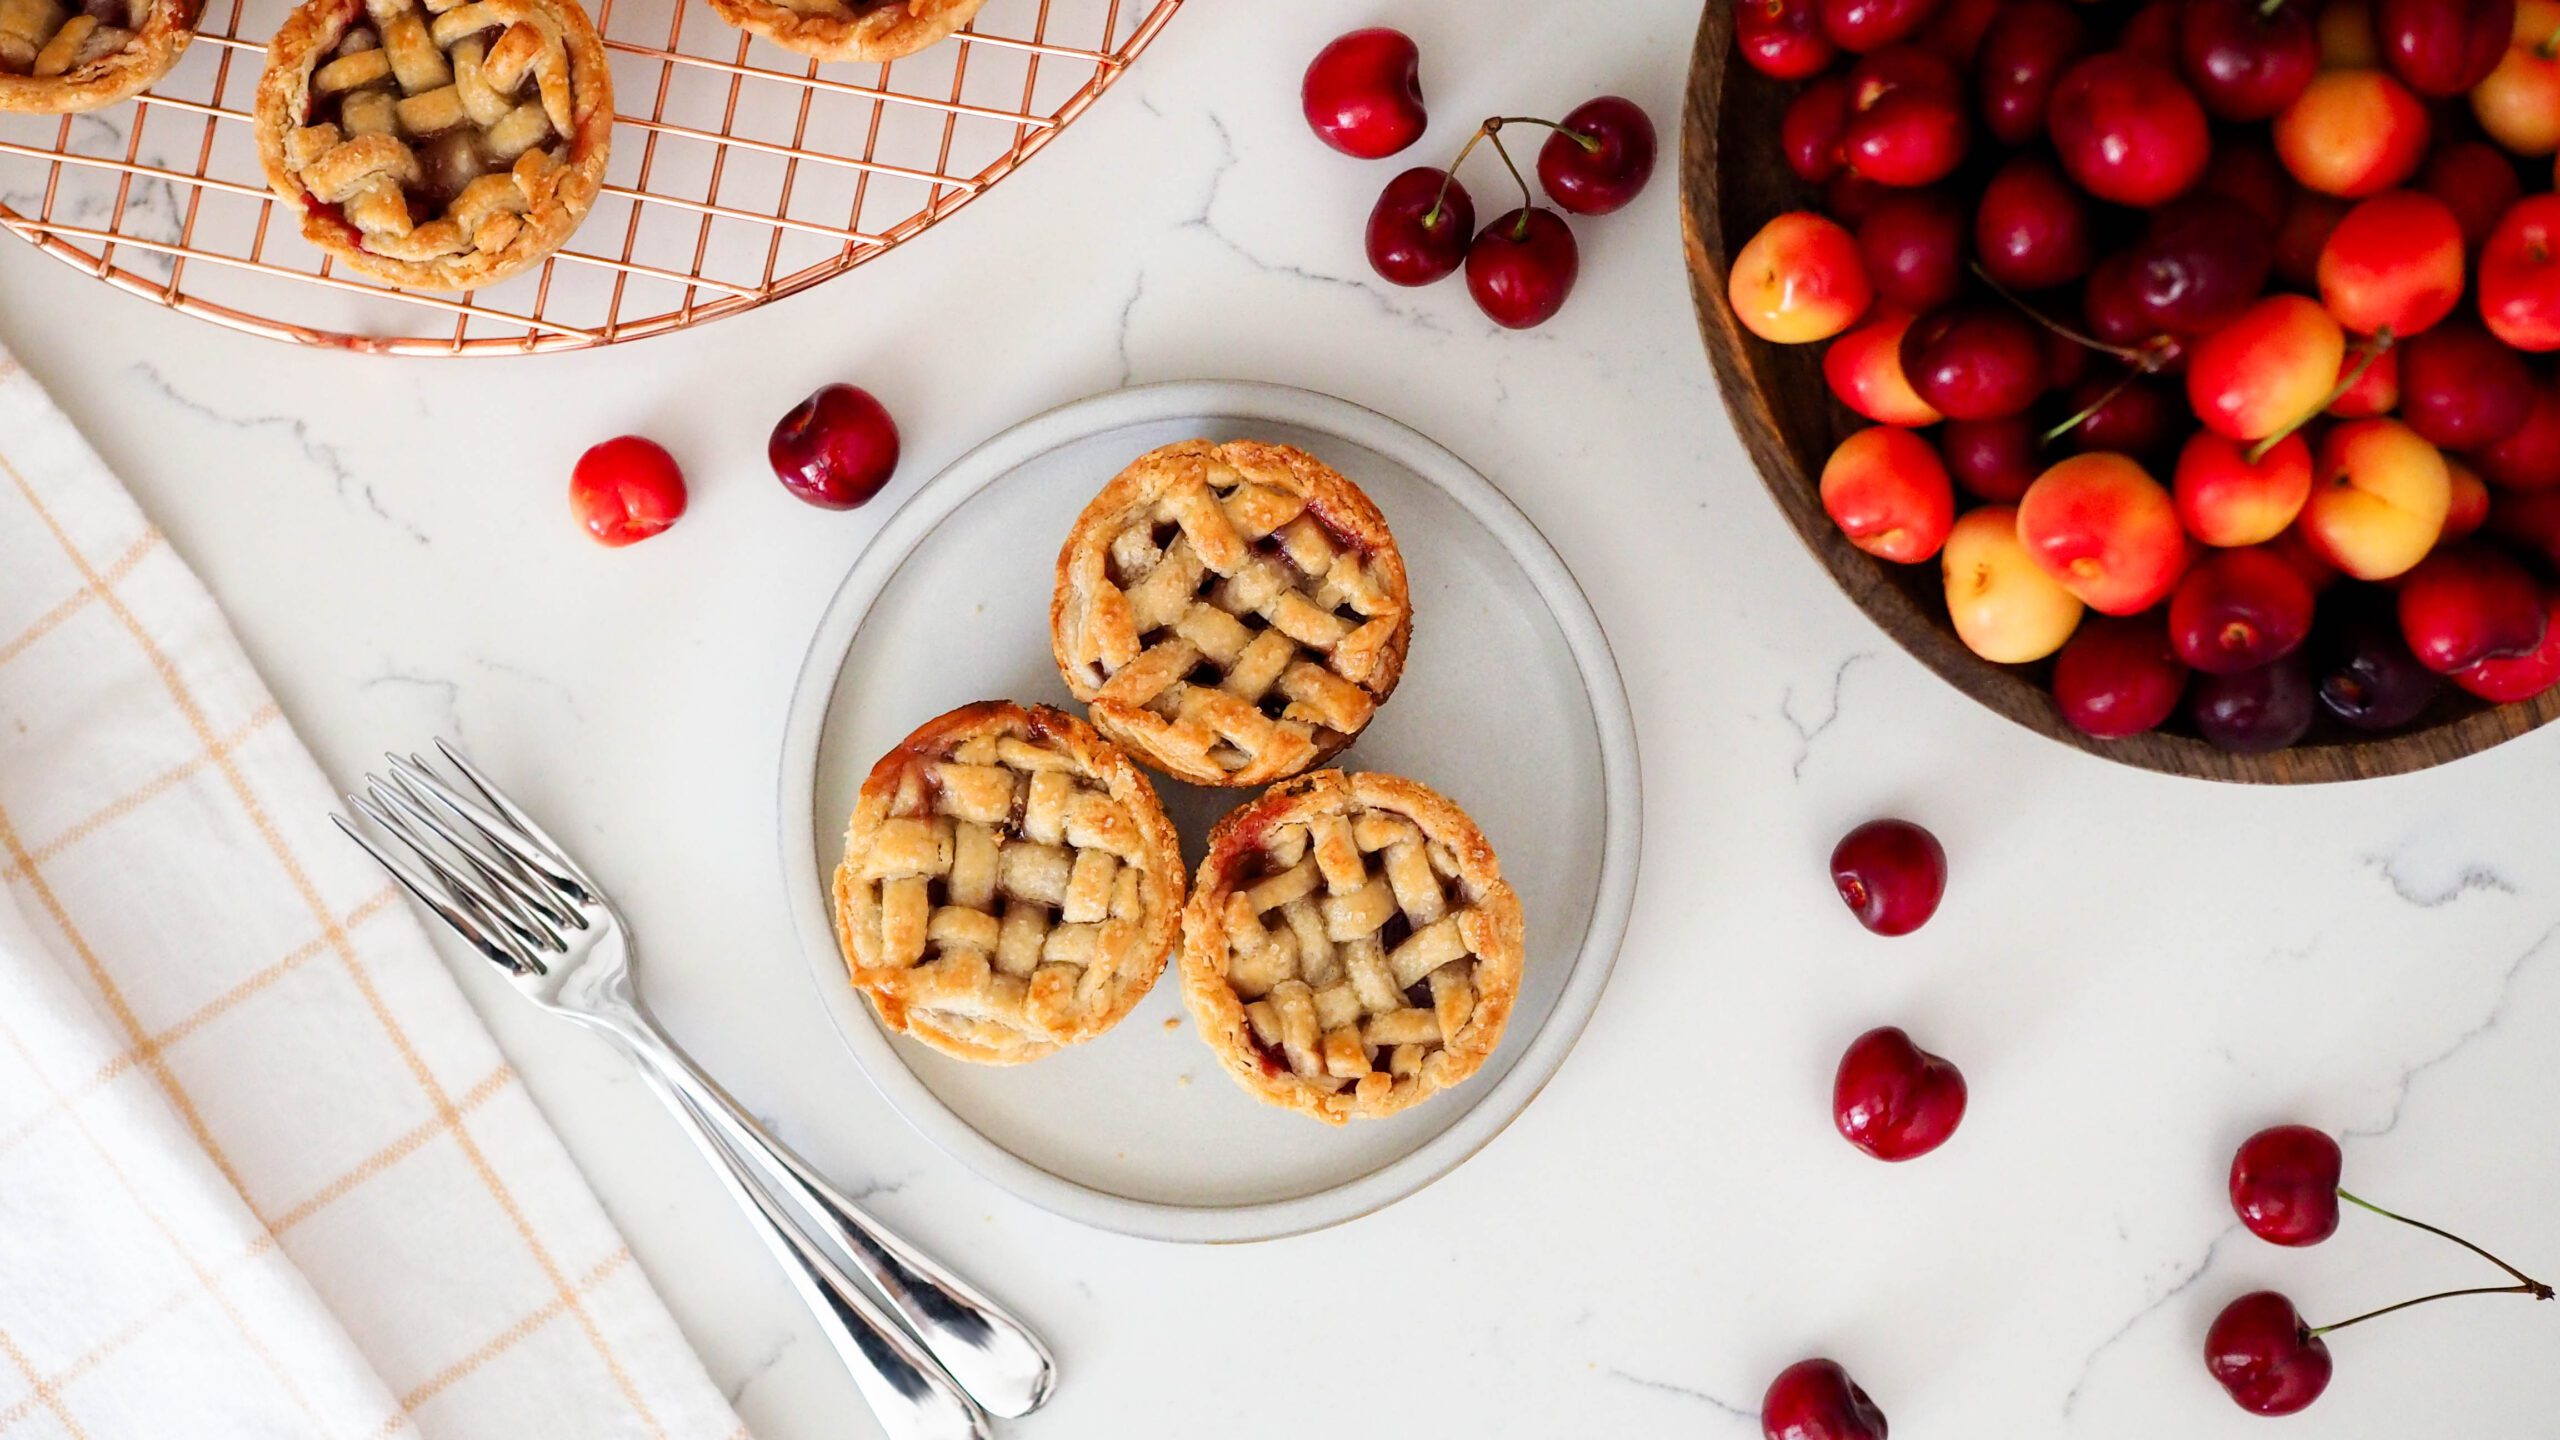
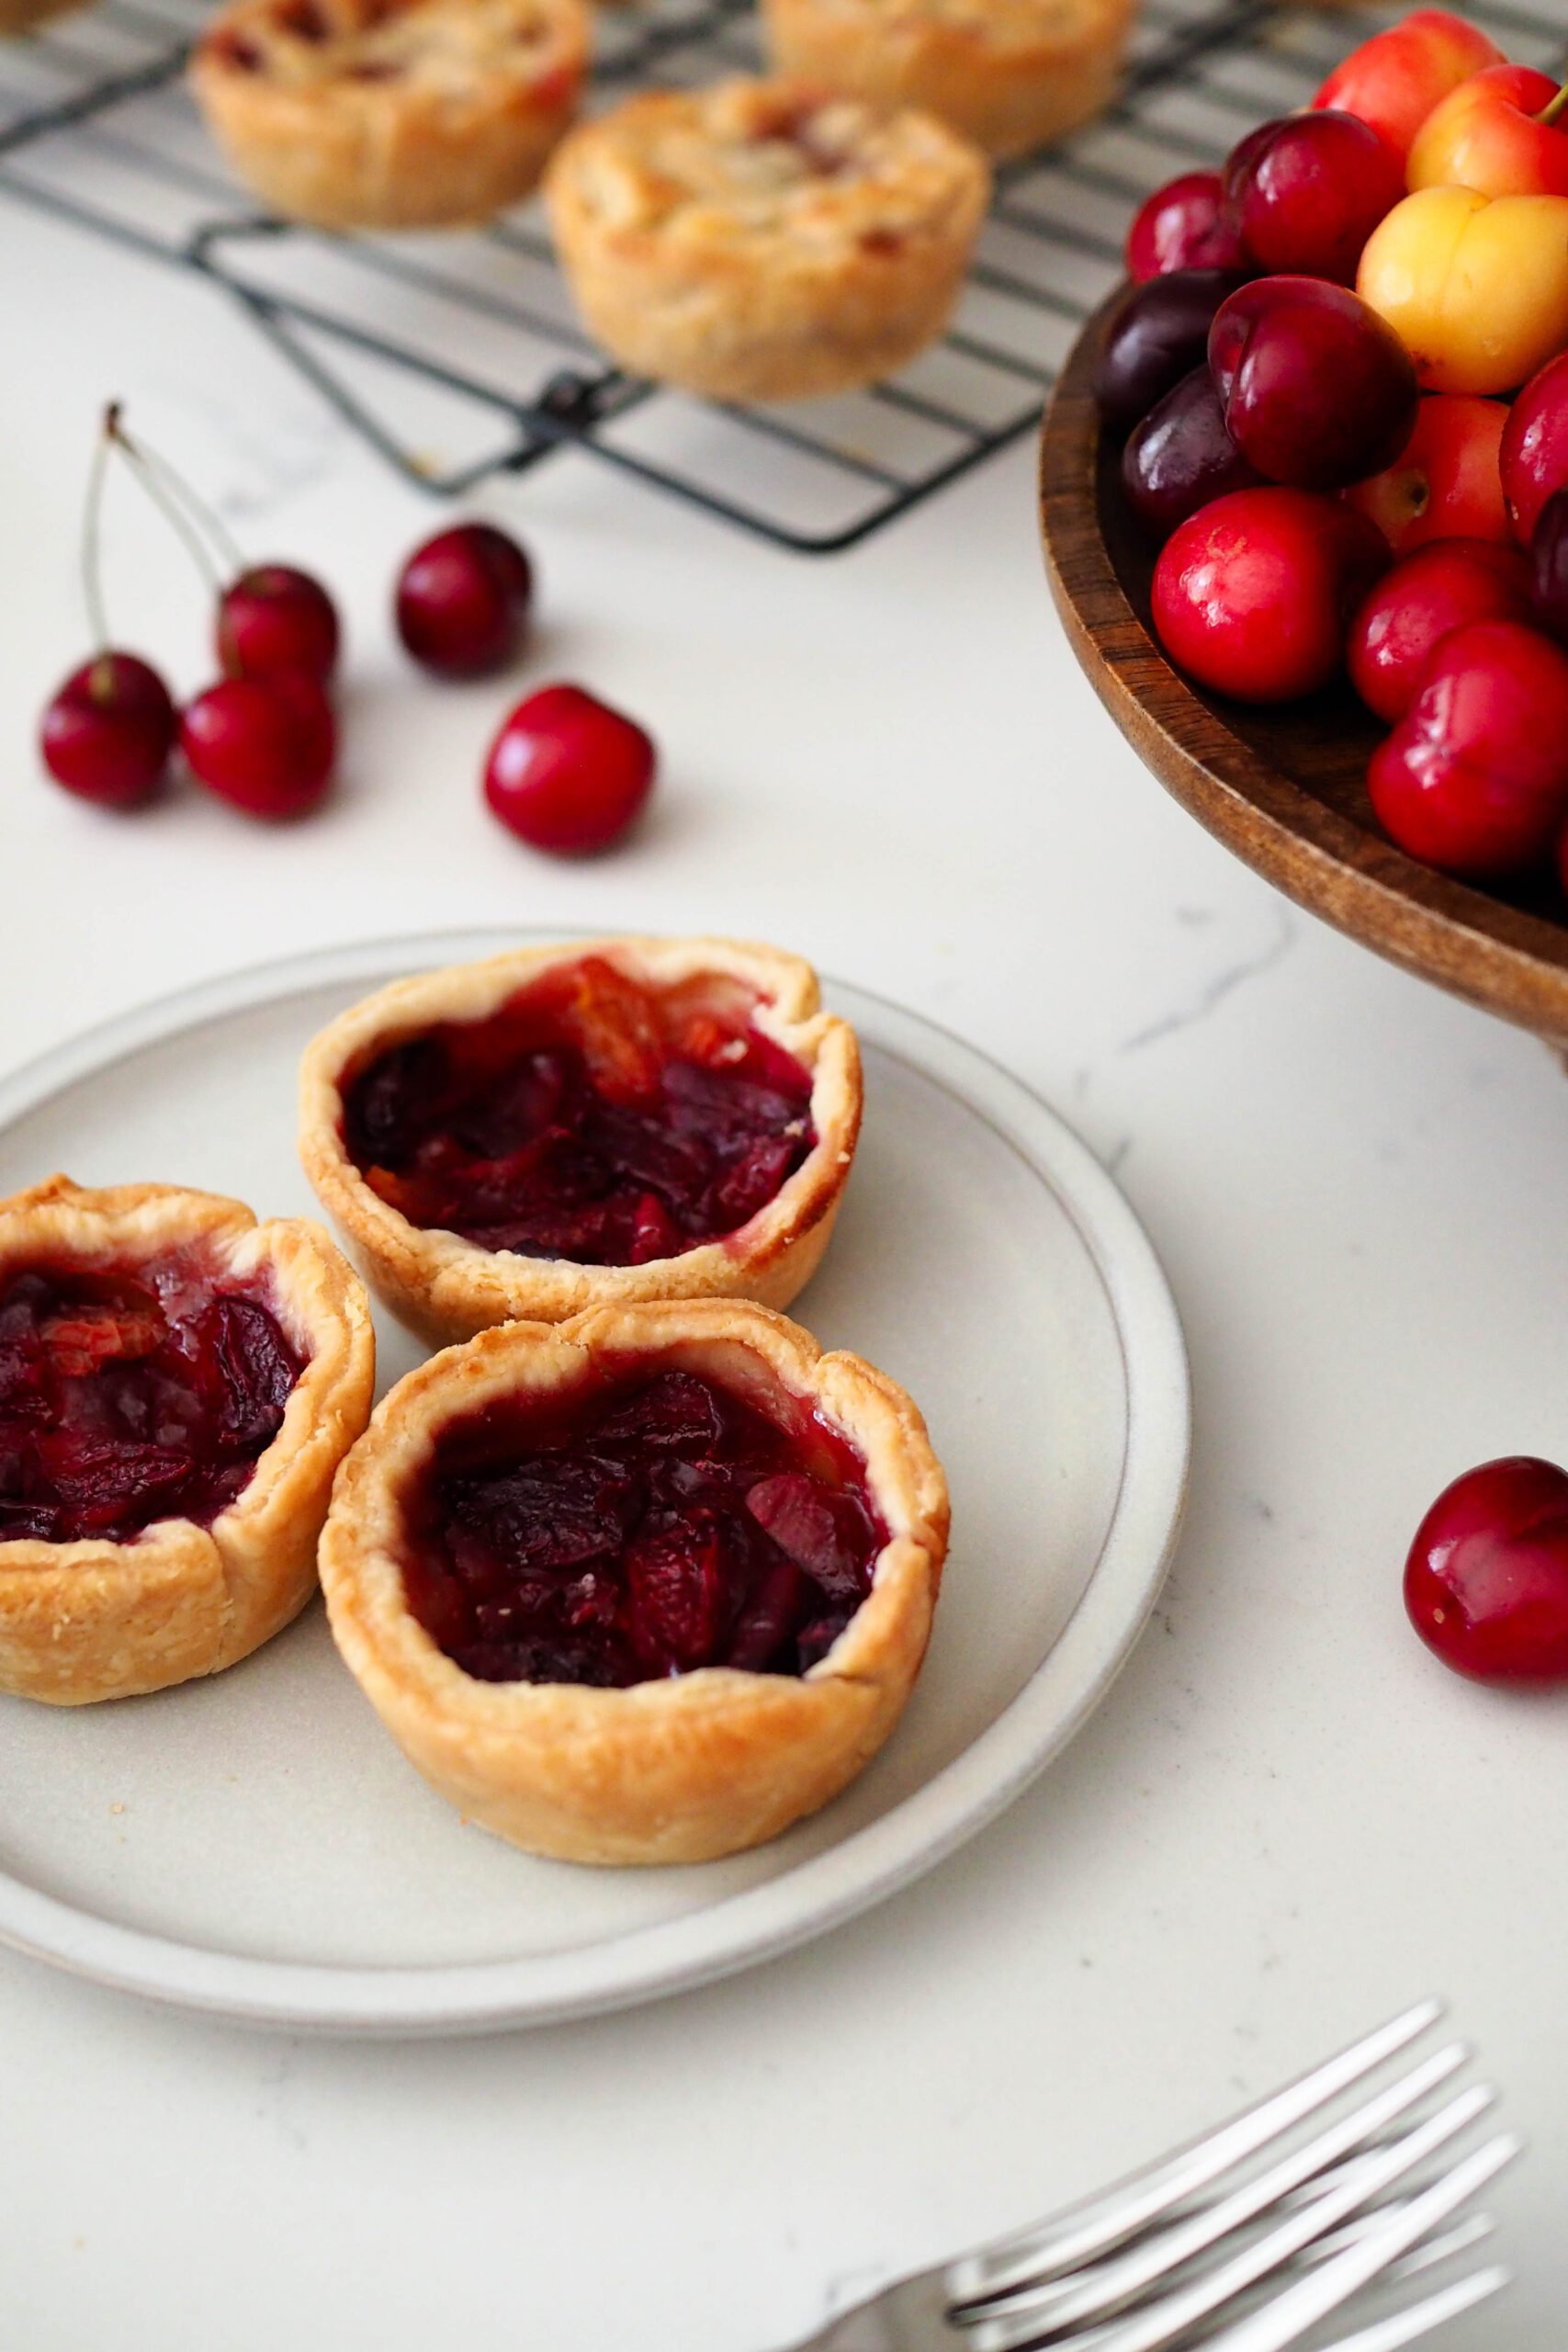
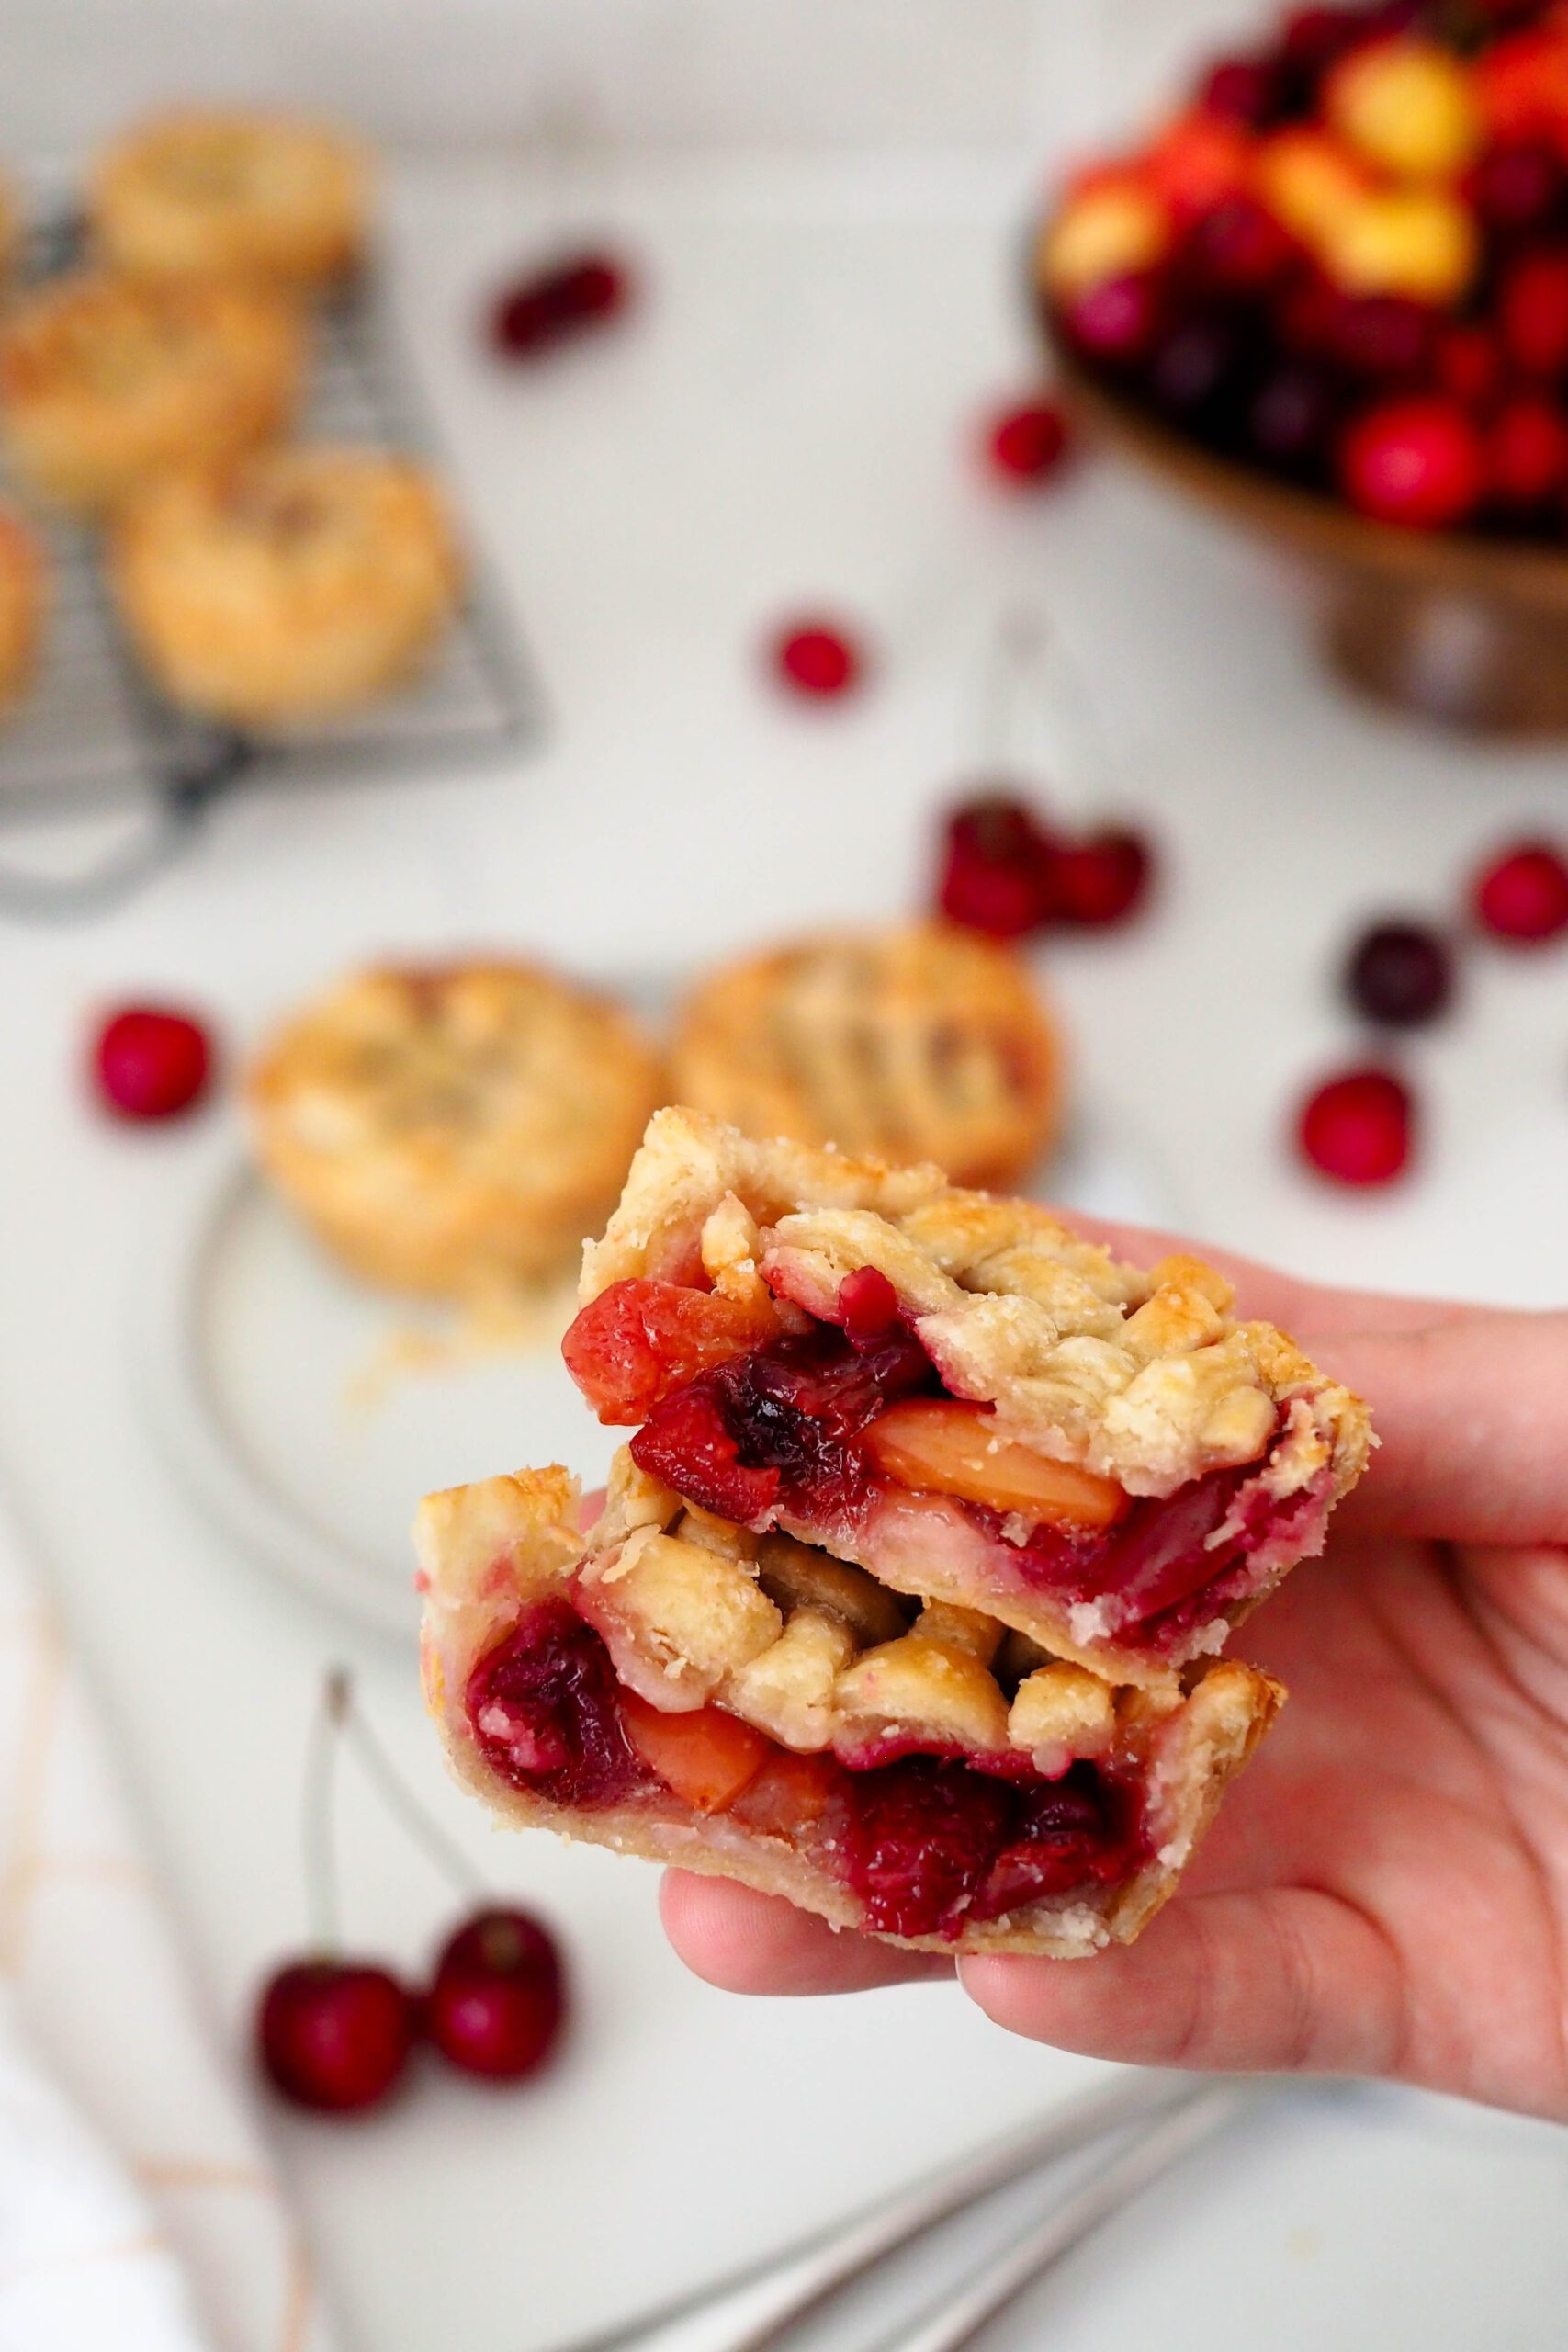
Topped with a cute lattice crust, these mini cherry pies will be the talk of the table! Use fresh or frozen cherries for the cherry pie filling, then bake this twist on the hand pie in a muffin pan for the perfect handheld summer dessert.
If you’ve never made a pie before, that’s totally fine! I have plenty of instructions for beginner pie bakers in this blog post and the recipe card to set you up for success. You can also try making my full-size cherry pie with almond extract if you want to ease into the pie-baking with a little less effort. I recommend using my all-butter vanilla pie crust or my all-butter flaky pie crust recipes for perfectly flaky crusts every time, though you are always welcome to use your favorite pie crust recipe or store bought!
I have a video showing how to make these mini cherry pies on my YouTube channel, too!
Ingredients for Mini Cherry Pies
This twist on cherry hand pies uses only 10 ingredients for a simple but beautiful summer dessert. Here’s what you’ll need to make them:
- Cherries. Fresh or frozen cherries will work for this recipe; just be sure to thaw your cherries if using frozen.
- Sugar. In addition to making the cherry pie filling sweet, sugar draws out some of the liquid in cherries to give us a nice, jammy filling.
- Cornstarch. The key ingredient to thickening up the cherry pie filling. A little goes a long way!
- Salt. Just a pinch helps to enhance all the flavors.
- Lemon juice. A little bit of acidity helps to balance out the sweetness.
- Vanilla and almond extracts. Both of these extracts help add some extra flavor to these mini cherry pies.
- Pie crusts. I always use my all-butter vanilla pie crust recipe for sweet pie crusts, as it’s flaky and delicious, but you can use your favorite pie crust recipe or store-bought, too.
- Egg. An egg wash gives the pies a beautiful color and shine during baking.
- Coarse sugar. Just a sprinkle on top of the egg wash gives the crust an extra crunch with a bit of sweetness.
This is not an ingredient but an important note on supplies: This recipe works best with dark-colored pans! Light-colored pans, like aluminum, will still work, but plan to increase the bake time by about five minutes for the same rich color and flaky crust.

Quick Tips for Making Cherry Pie Filling
Homemade cherry pie filling is easy to make, requires only a few ingredients, and doesn’t need to pre-bake!
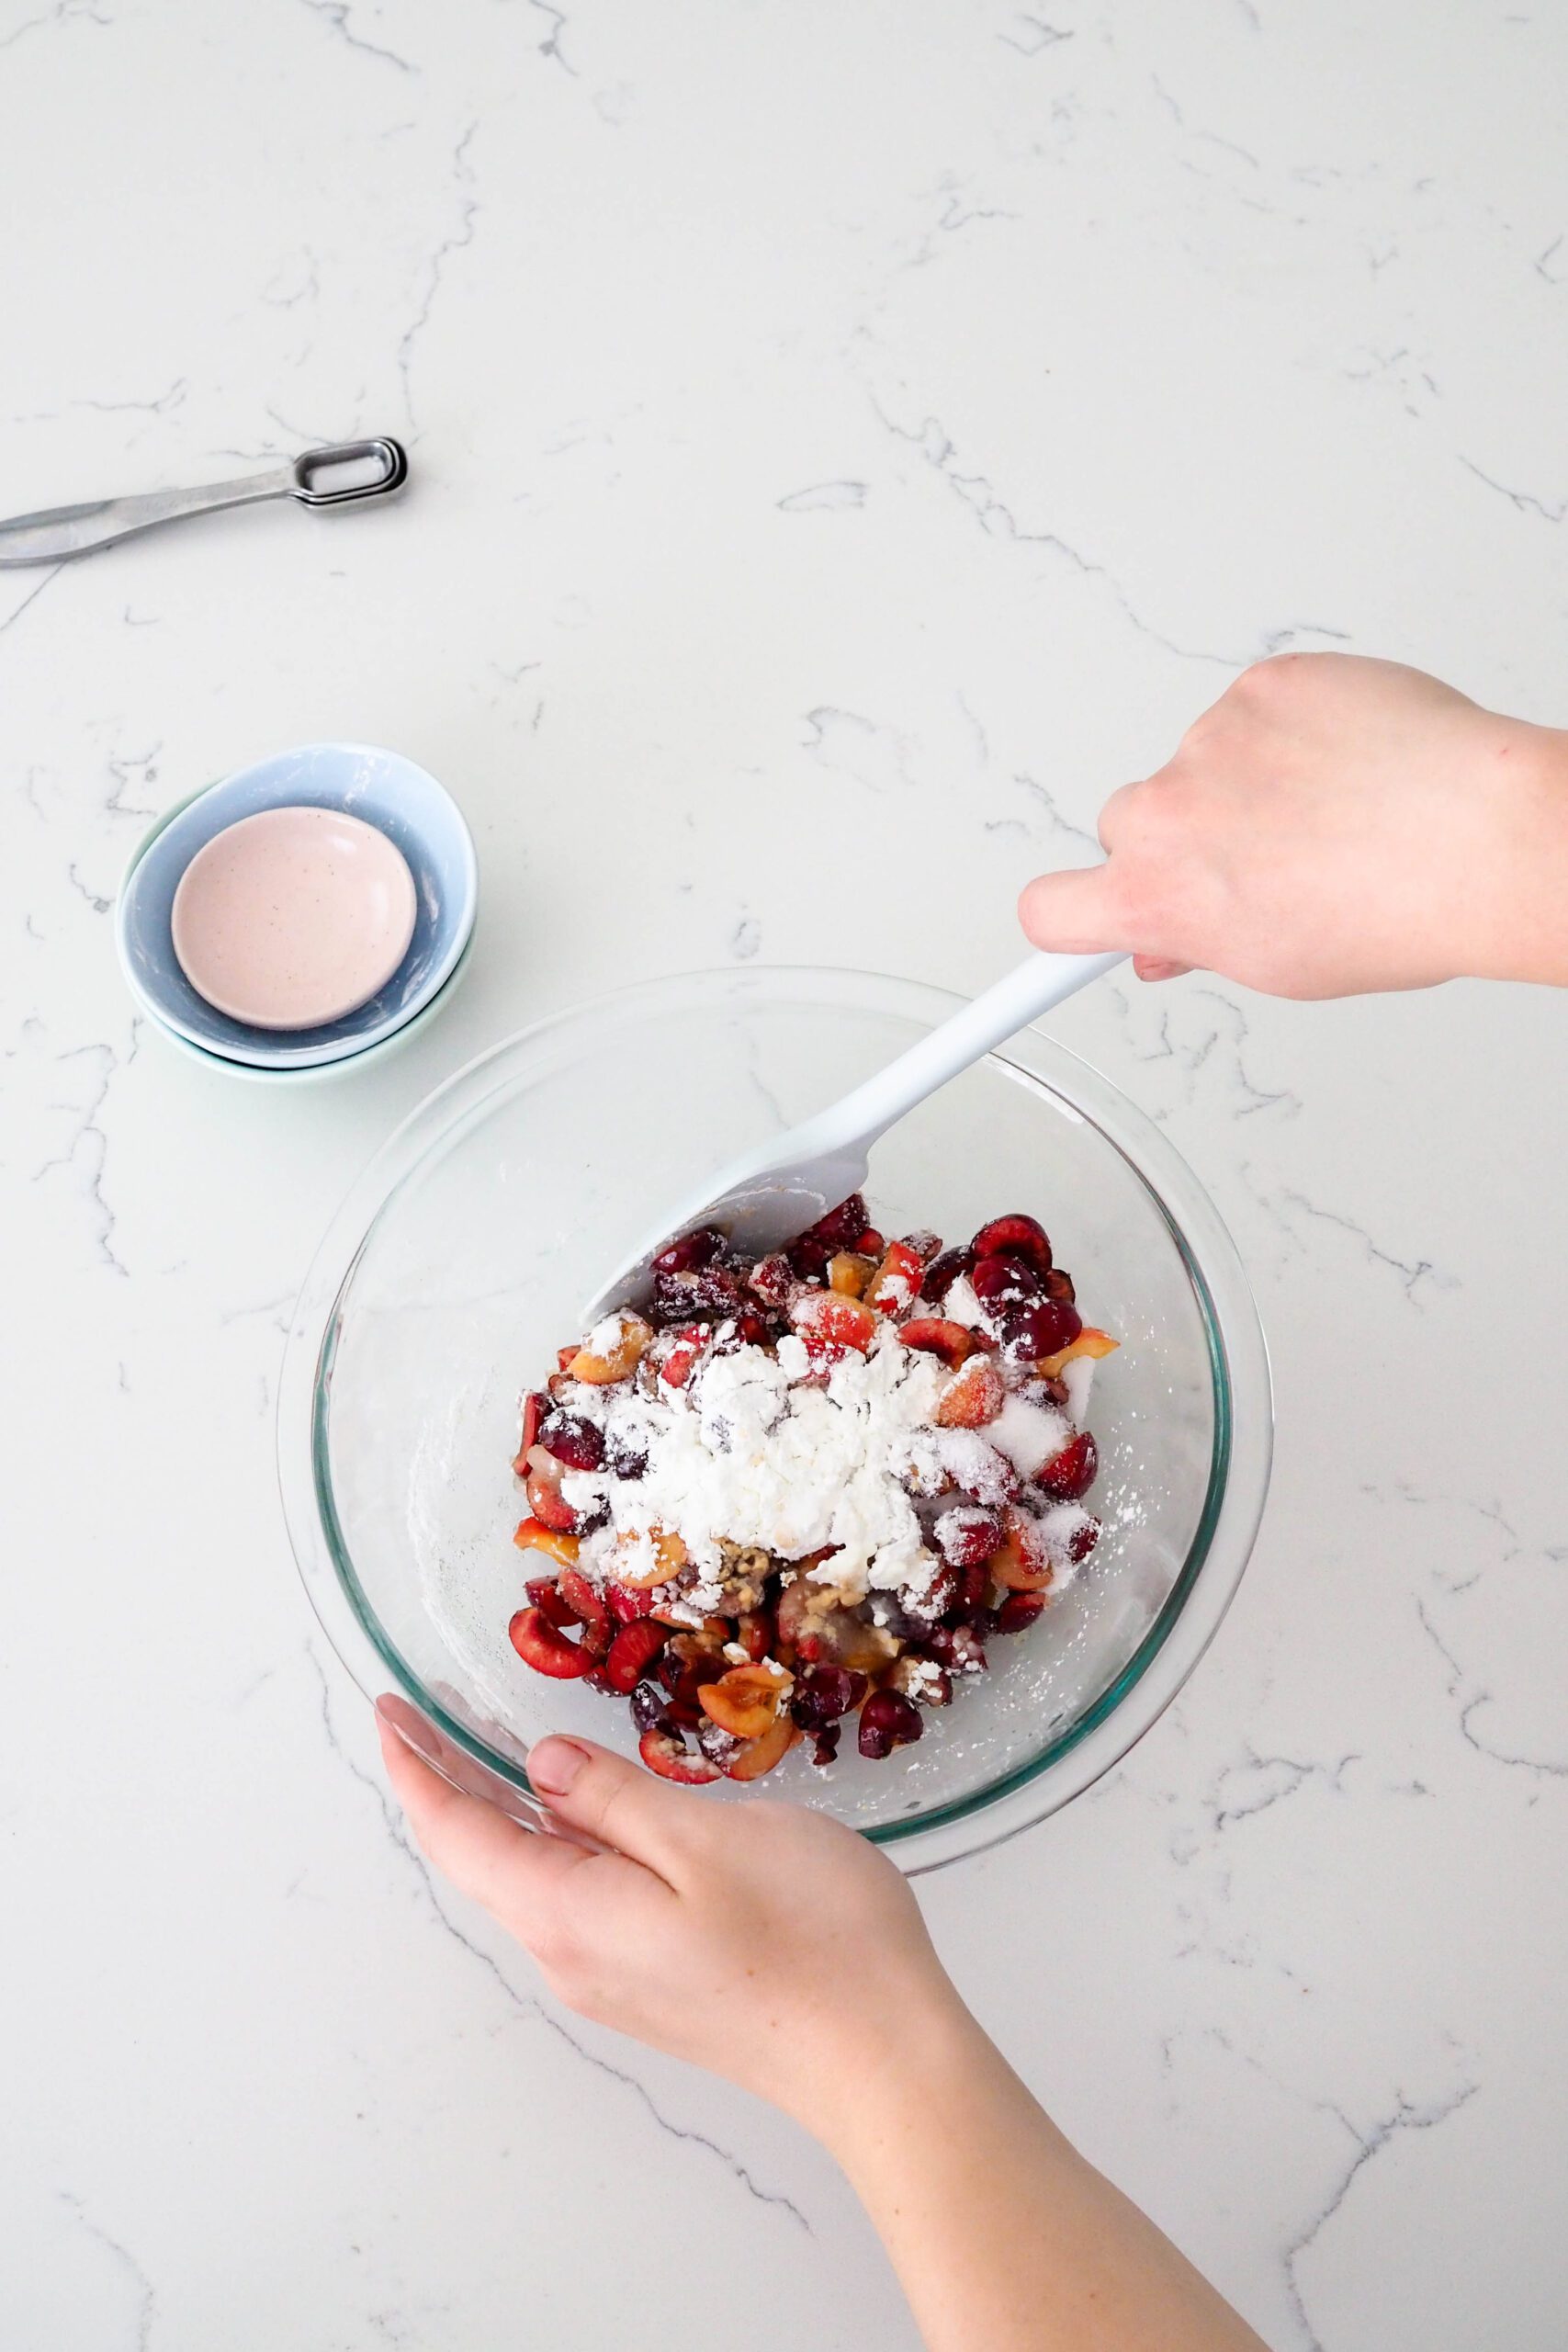
Mix together pitted and quartered cherries in a medium bowl with sugar, cornstarch, and salt, then stir in the lemon juice and vanilla and almond extracts.
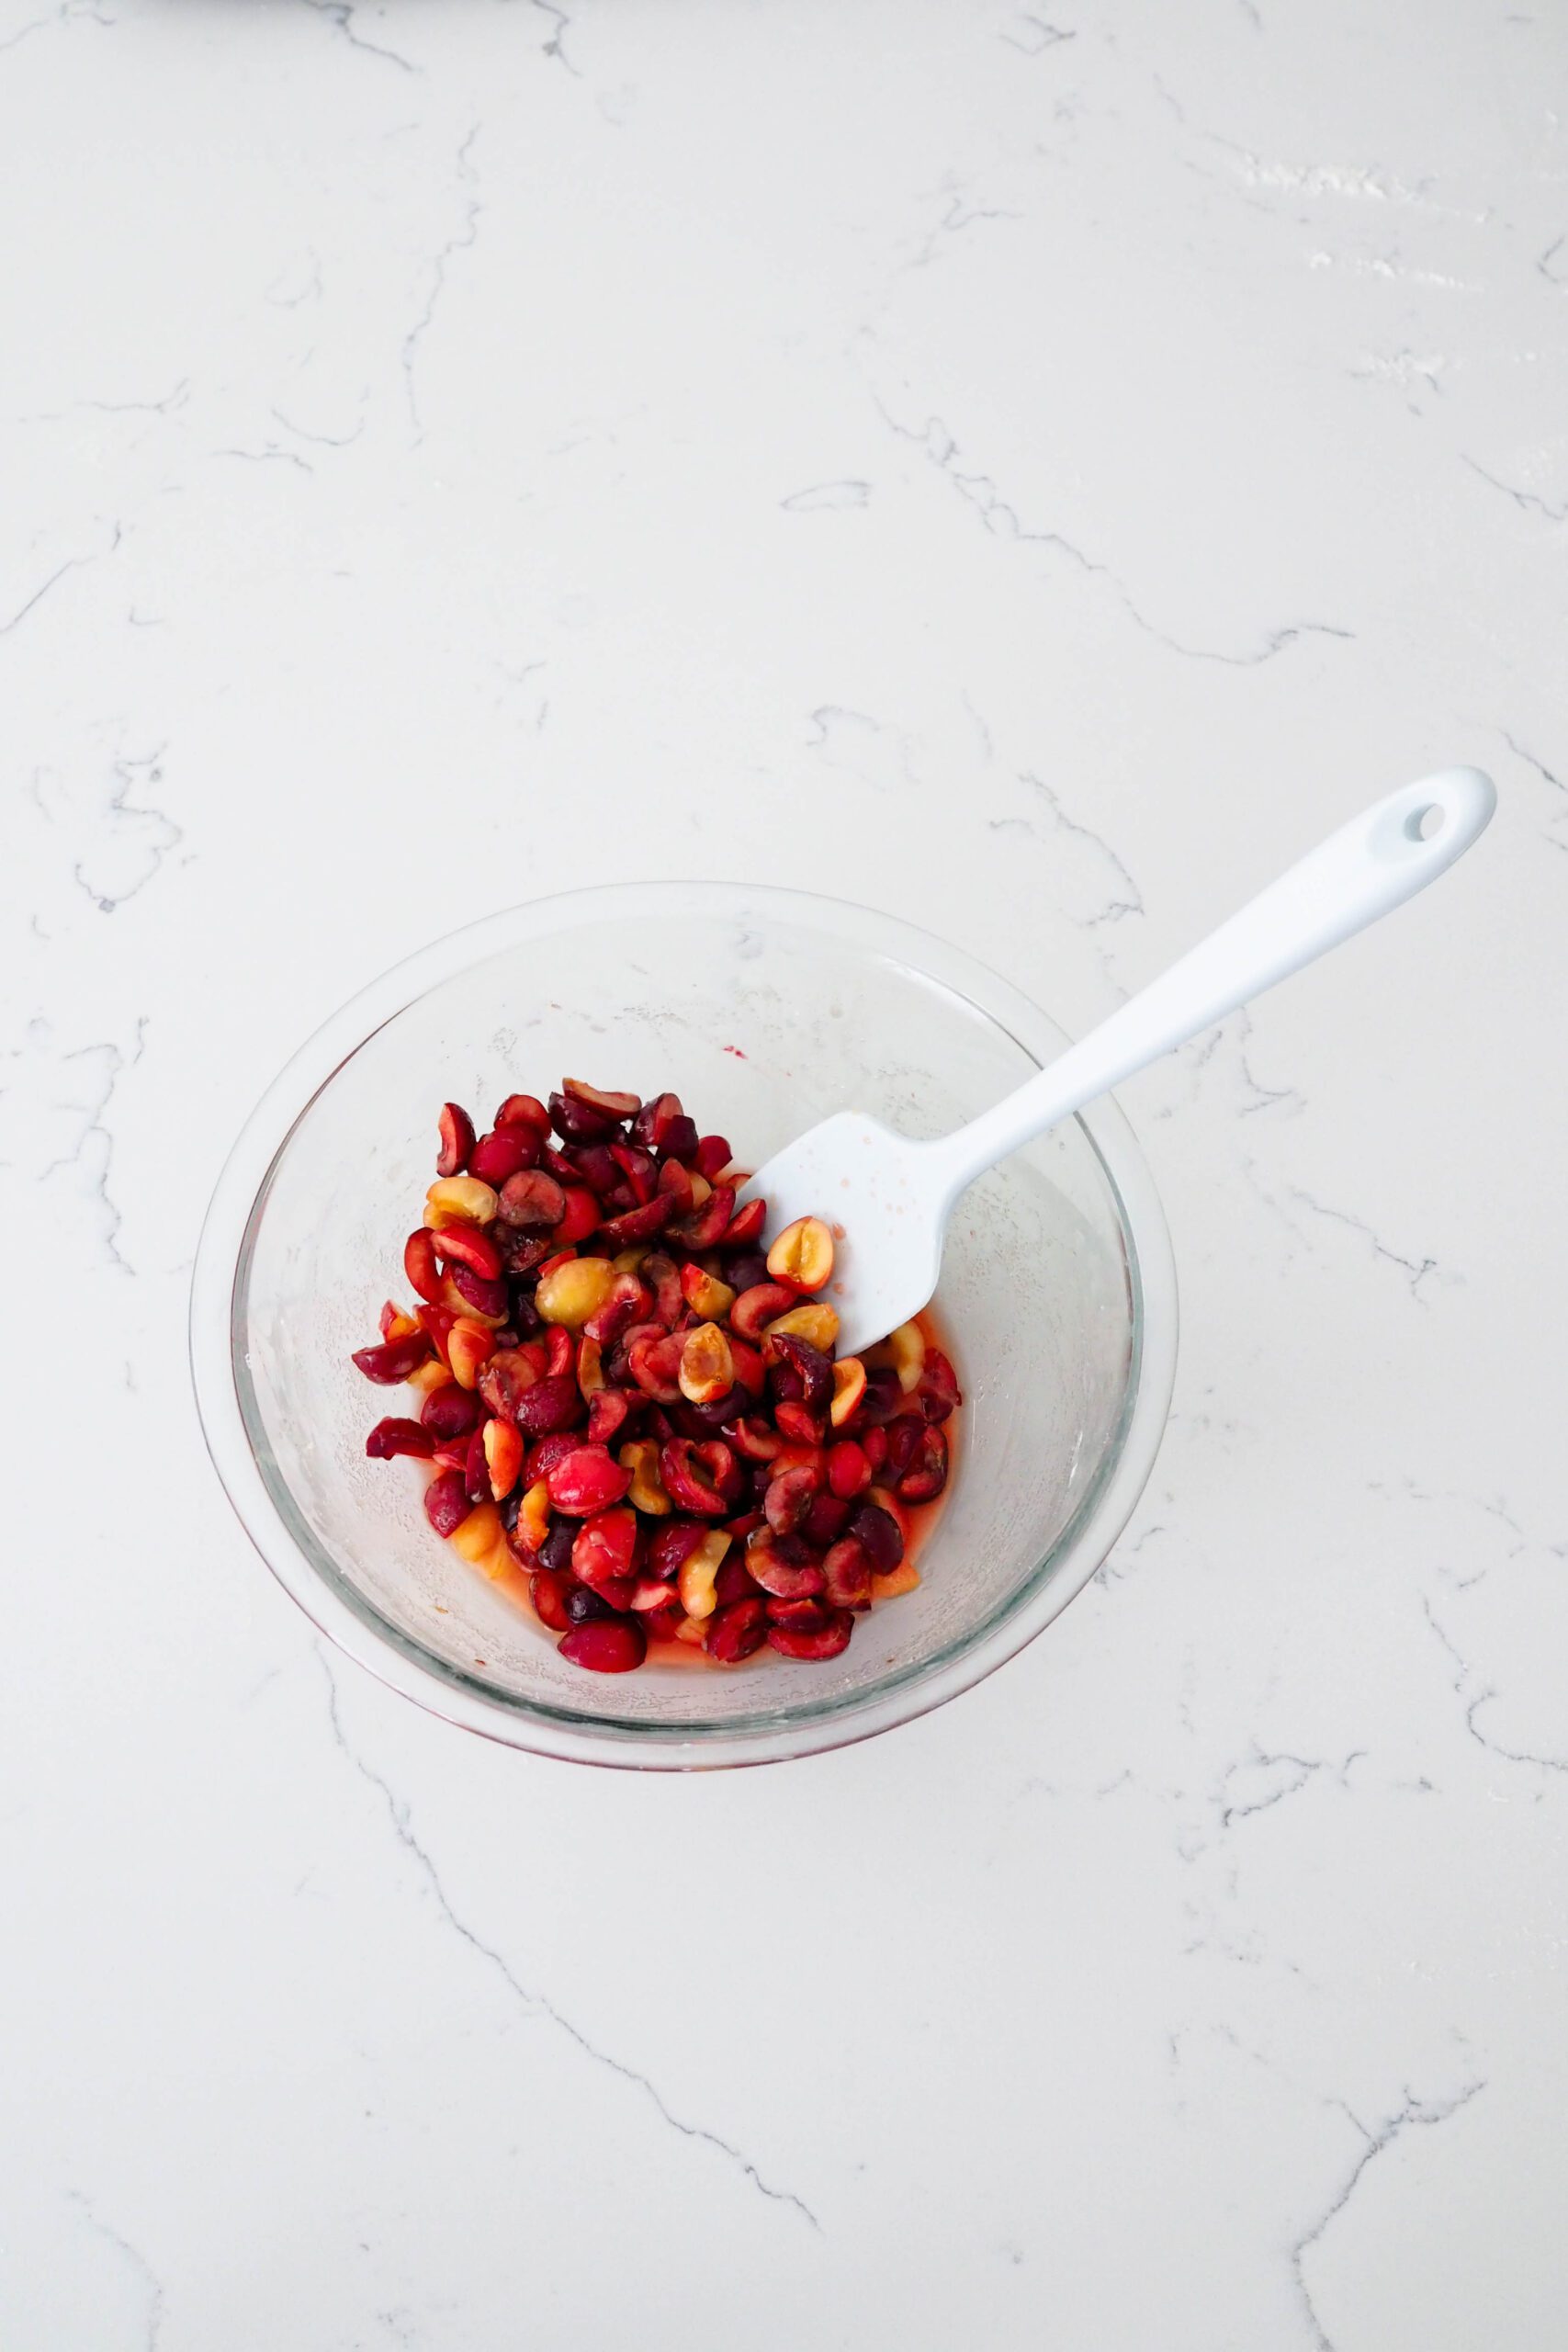
For the jammiest filling in your mini cherry pies, you’ll want to let the cherries rest for at least 10 minutes at room temperature. This gives the sugar in the mixture time to draw water out of the cherries. We can avoid the need to add liquid to the cherry pie filling just by waiting a few minutes for this maceration process to take place.
Quick Tips for Making Mini Pie Crusts
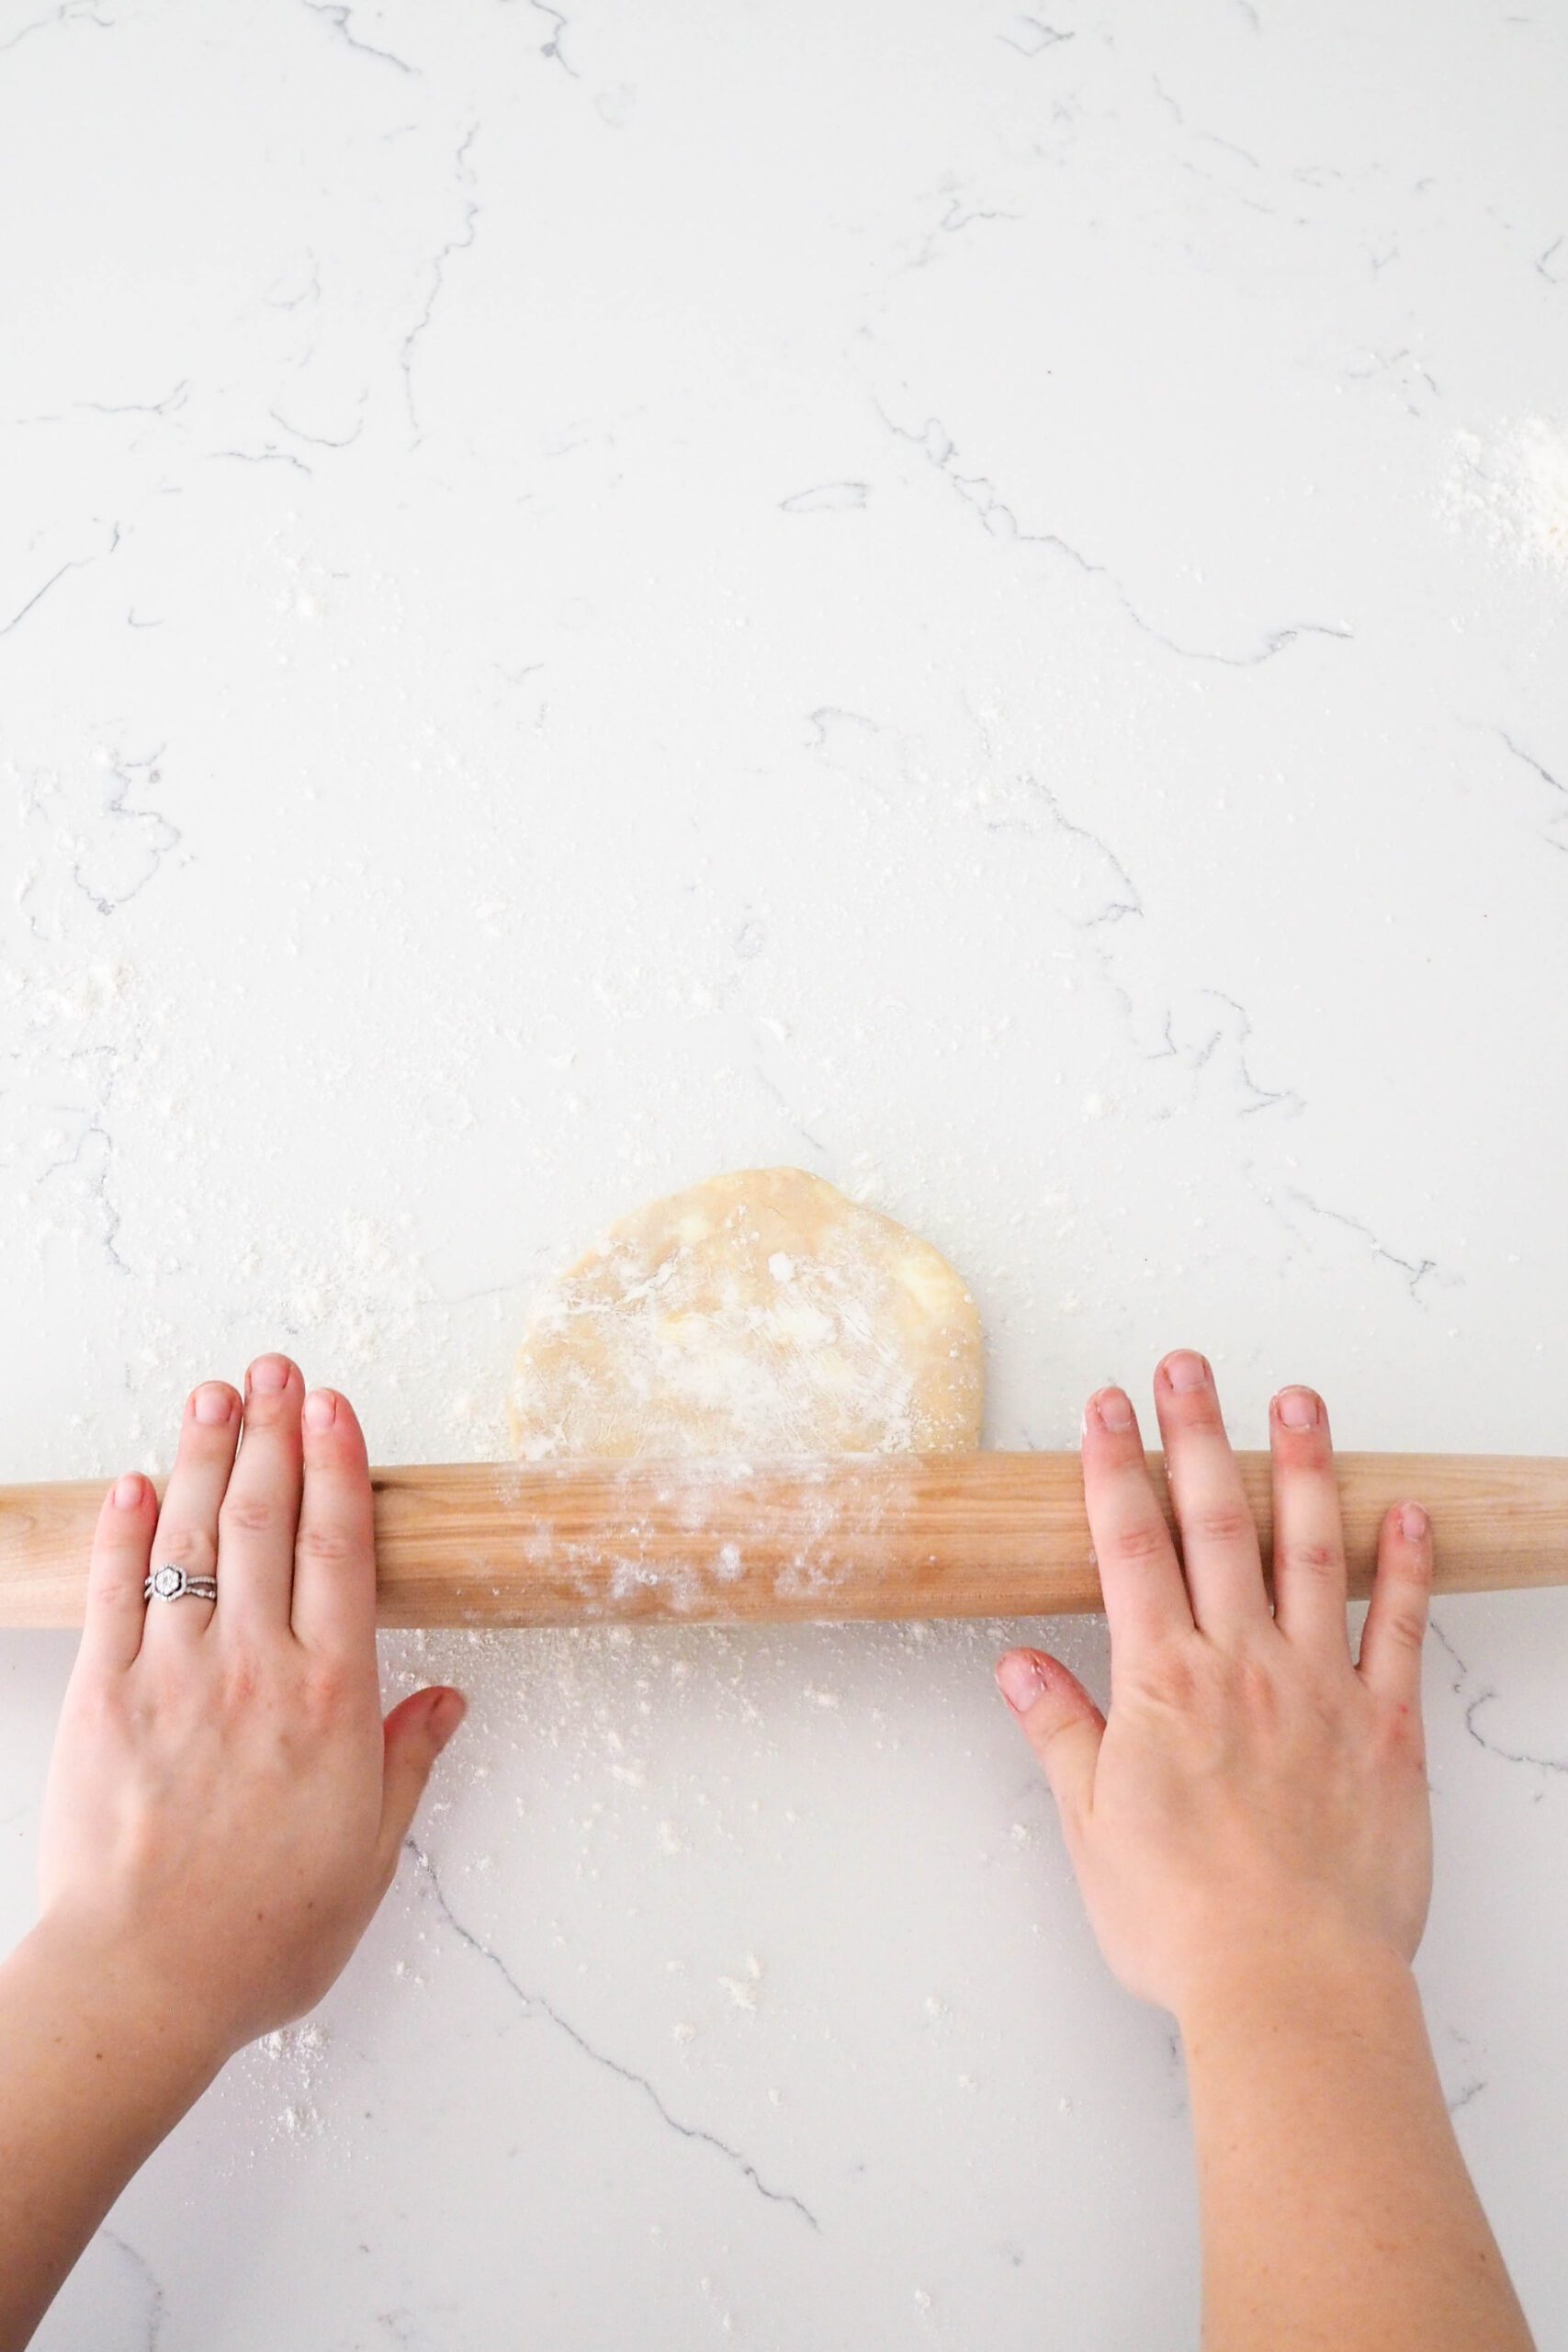
The key to having good mini pie crusts is rolling out the pie dough well, which I cover in the blog post for my all-butter flaky pie crust. The short version is to roll from the center of the dough out, in one direction, while making sure your workspace is lightly dusted with flour to prevent sticking.
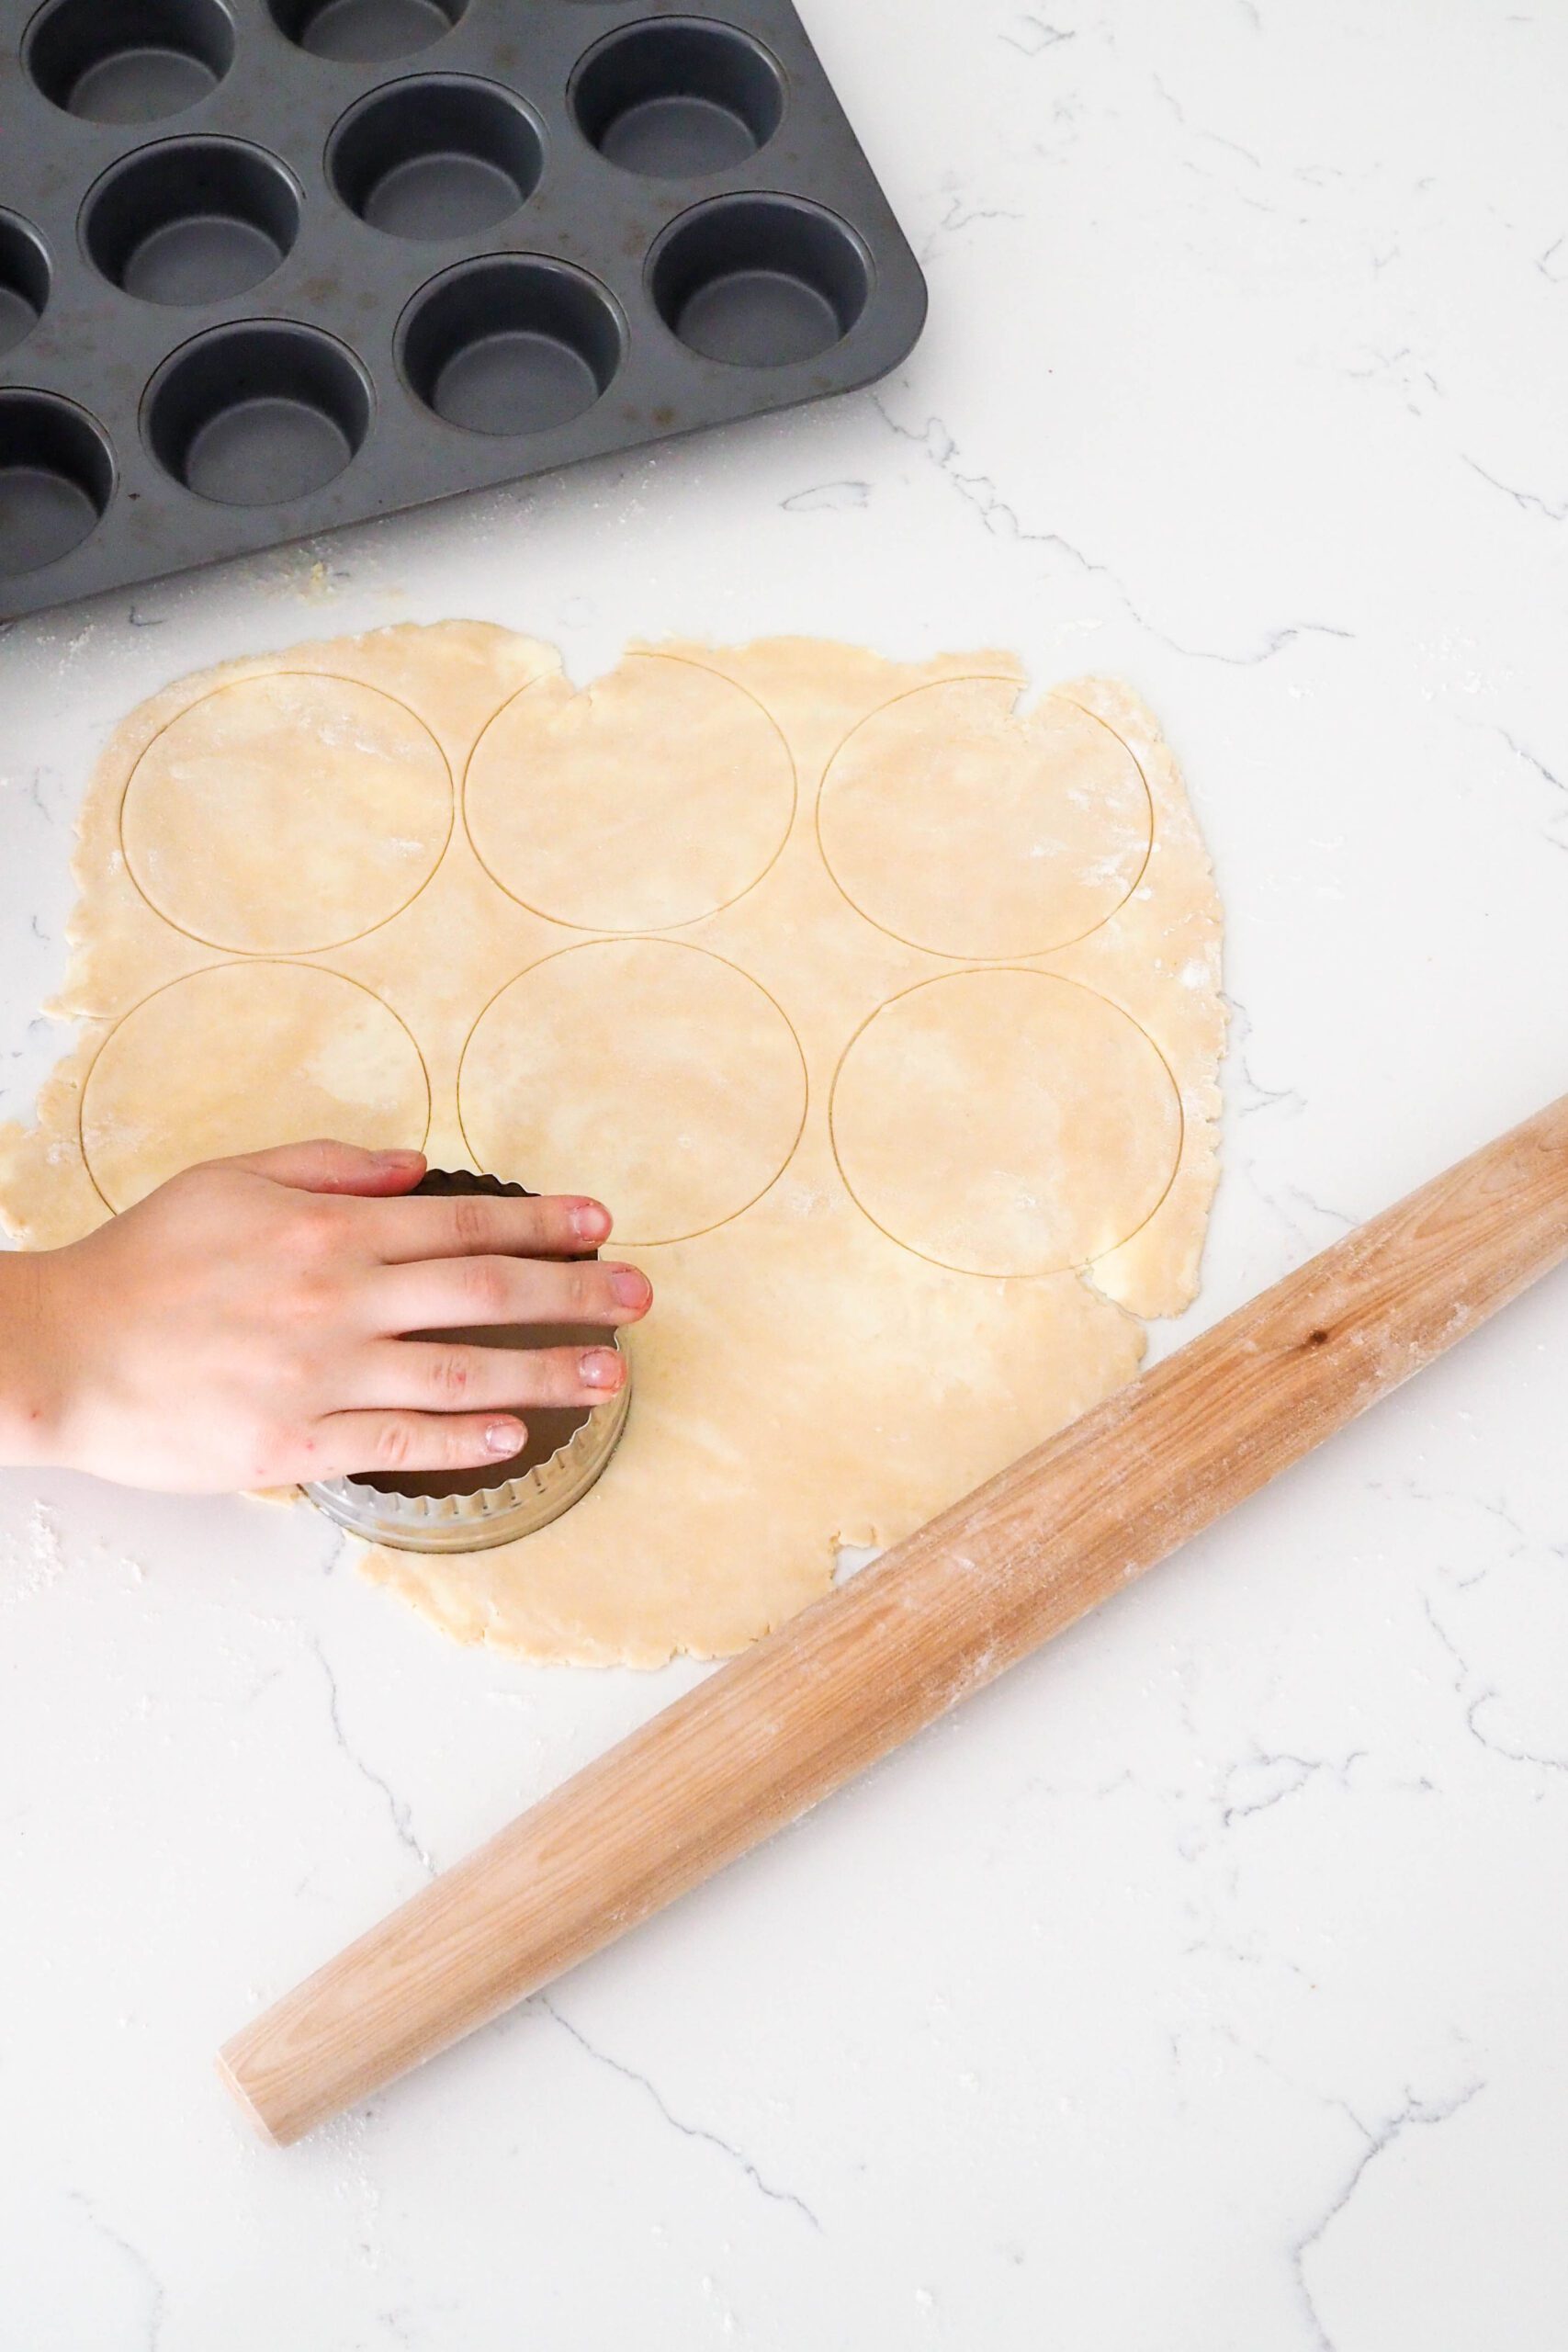
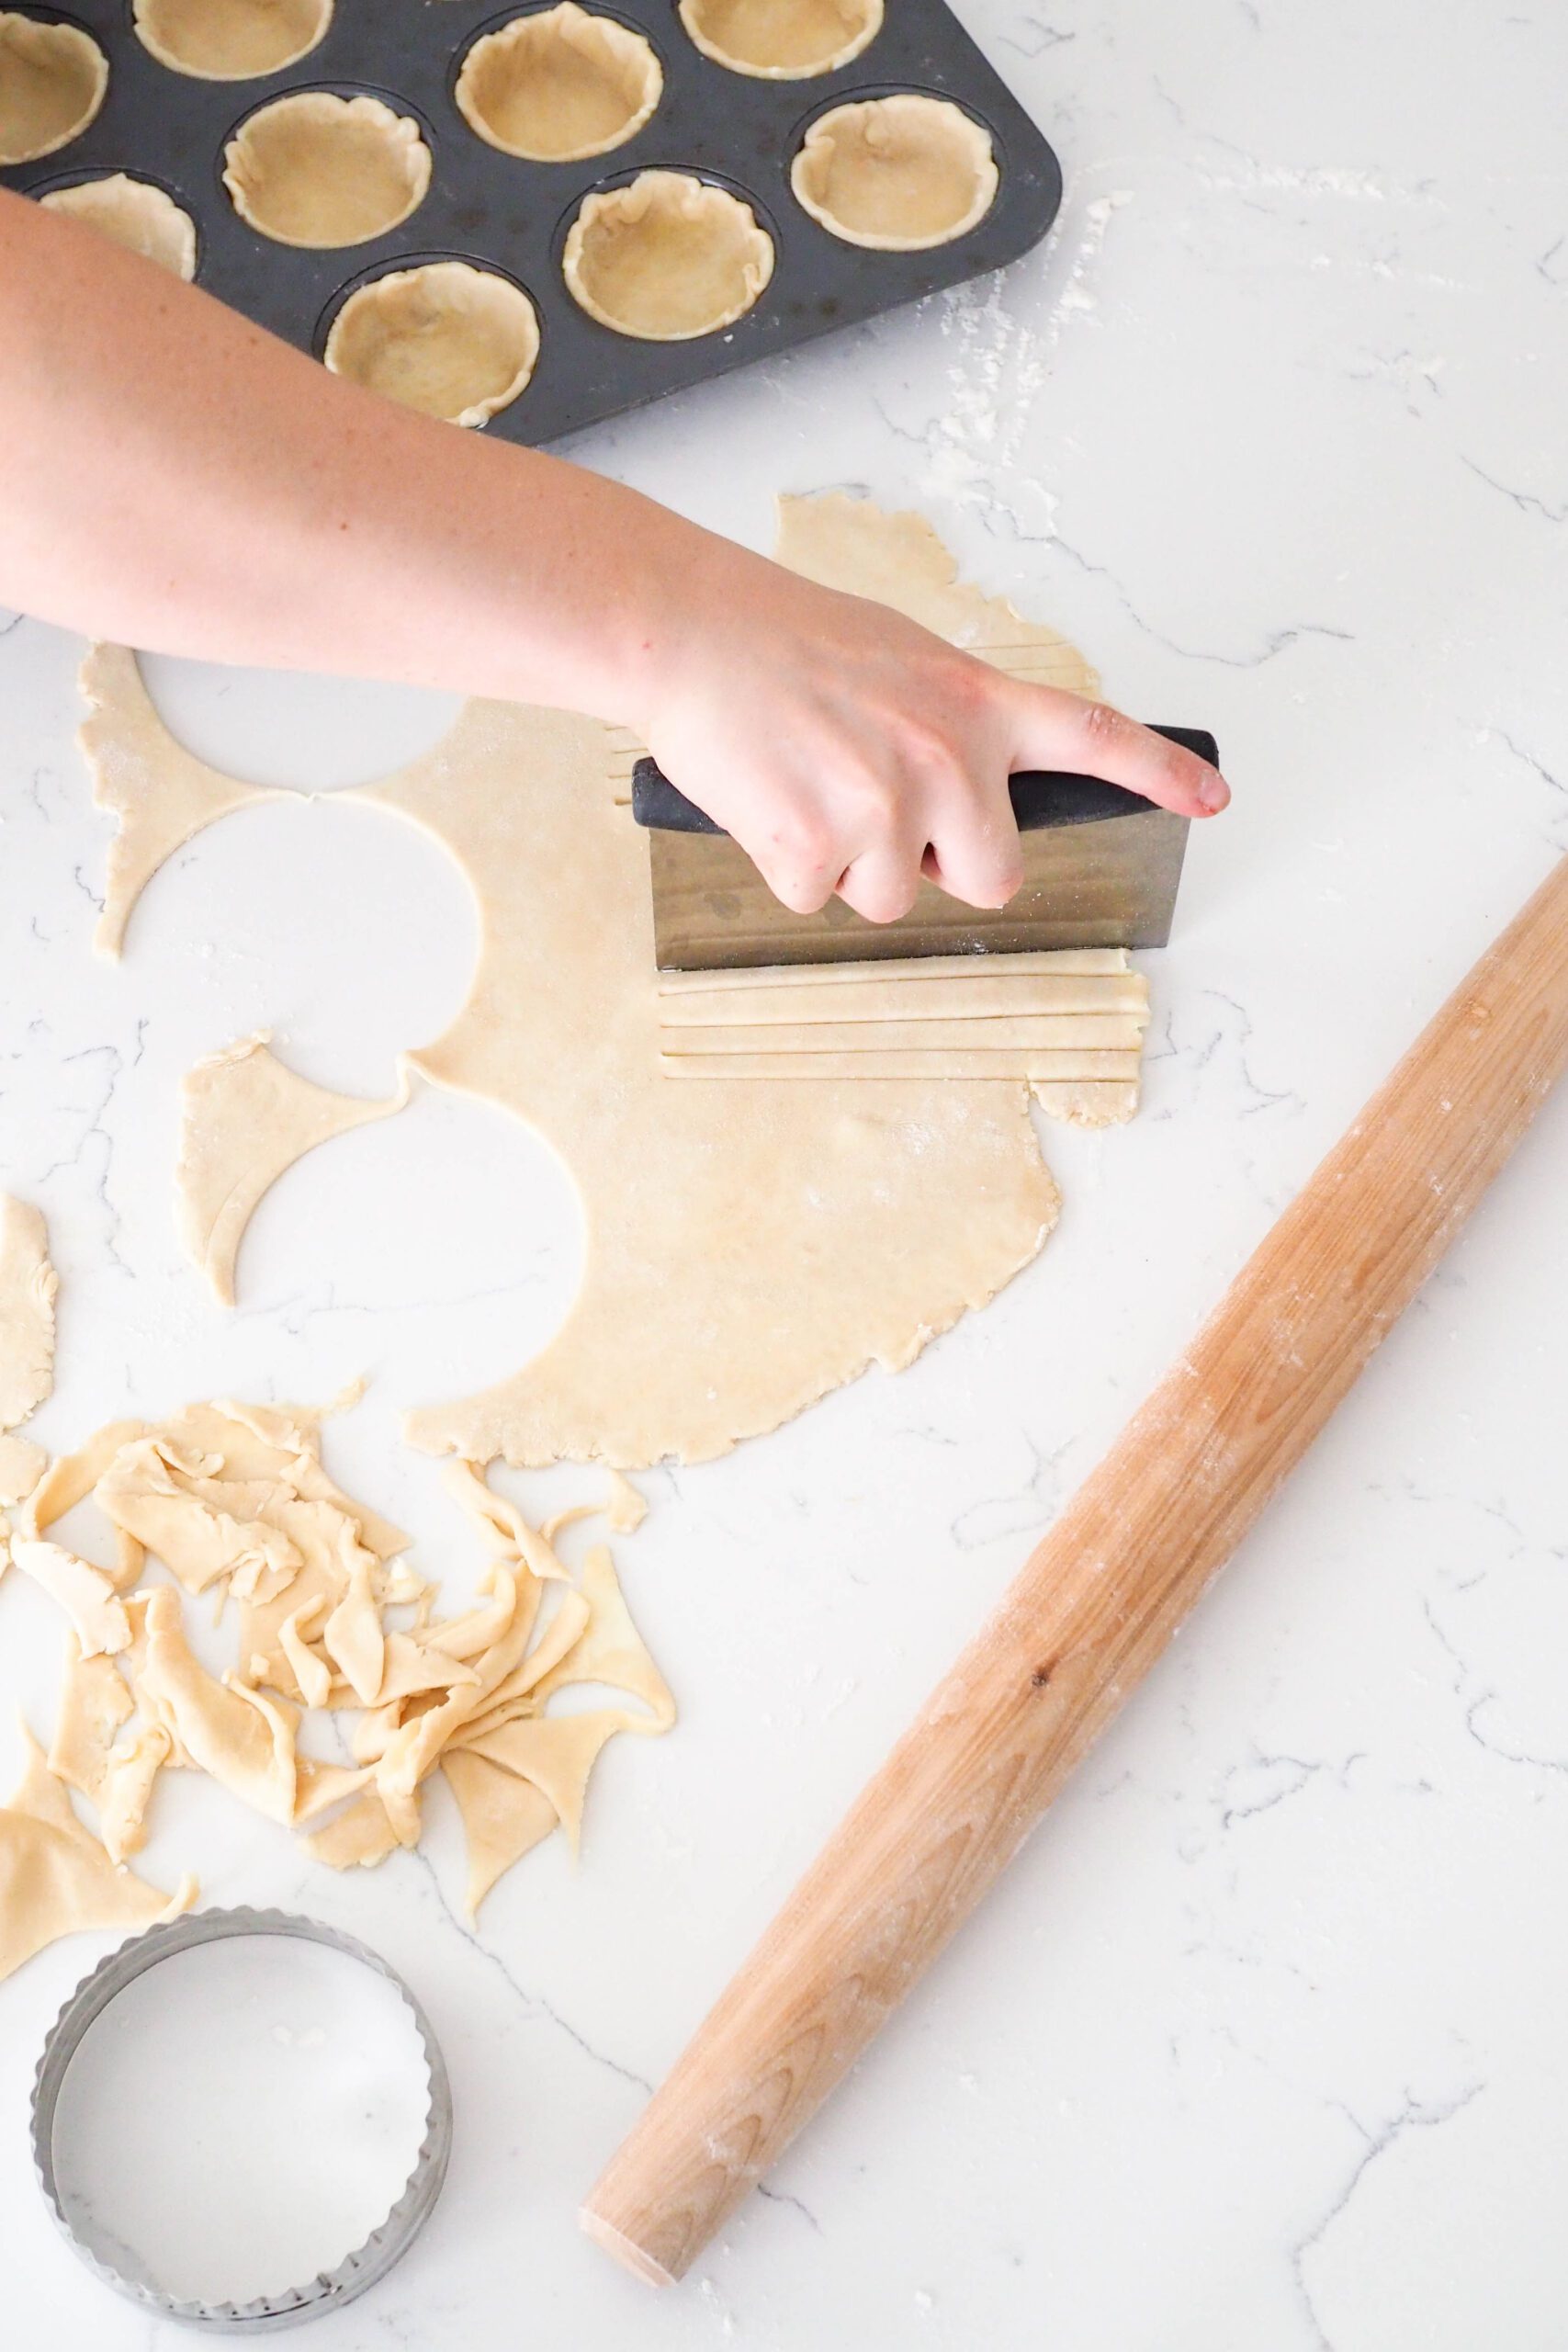
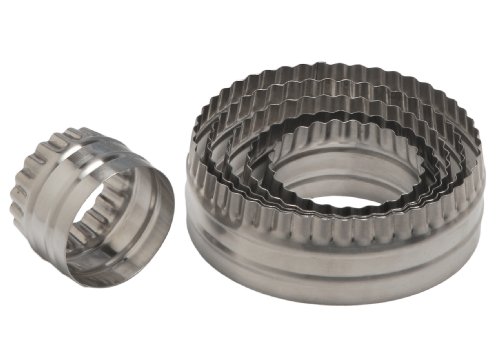
Once the dough is rolled out, use a 4″ (10 cm) round cutter to cut circles into the dough. I’ve tried using smaller cutters to fit more circles in the dough, but 4″ is the best size for this purpose. The dough fully covers the inside of the muffin pan opening and makes it easy to connect the lattice on top.
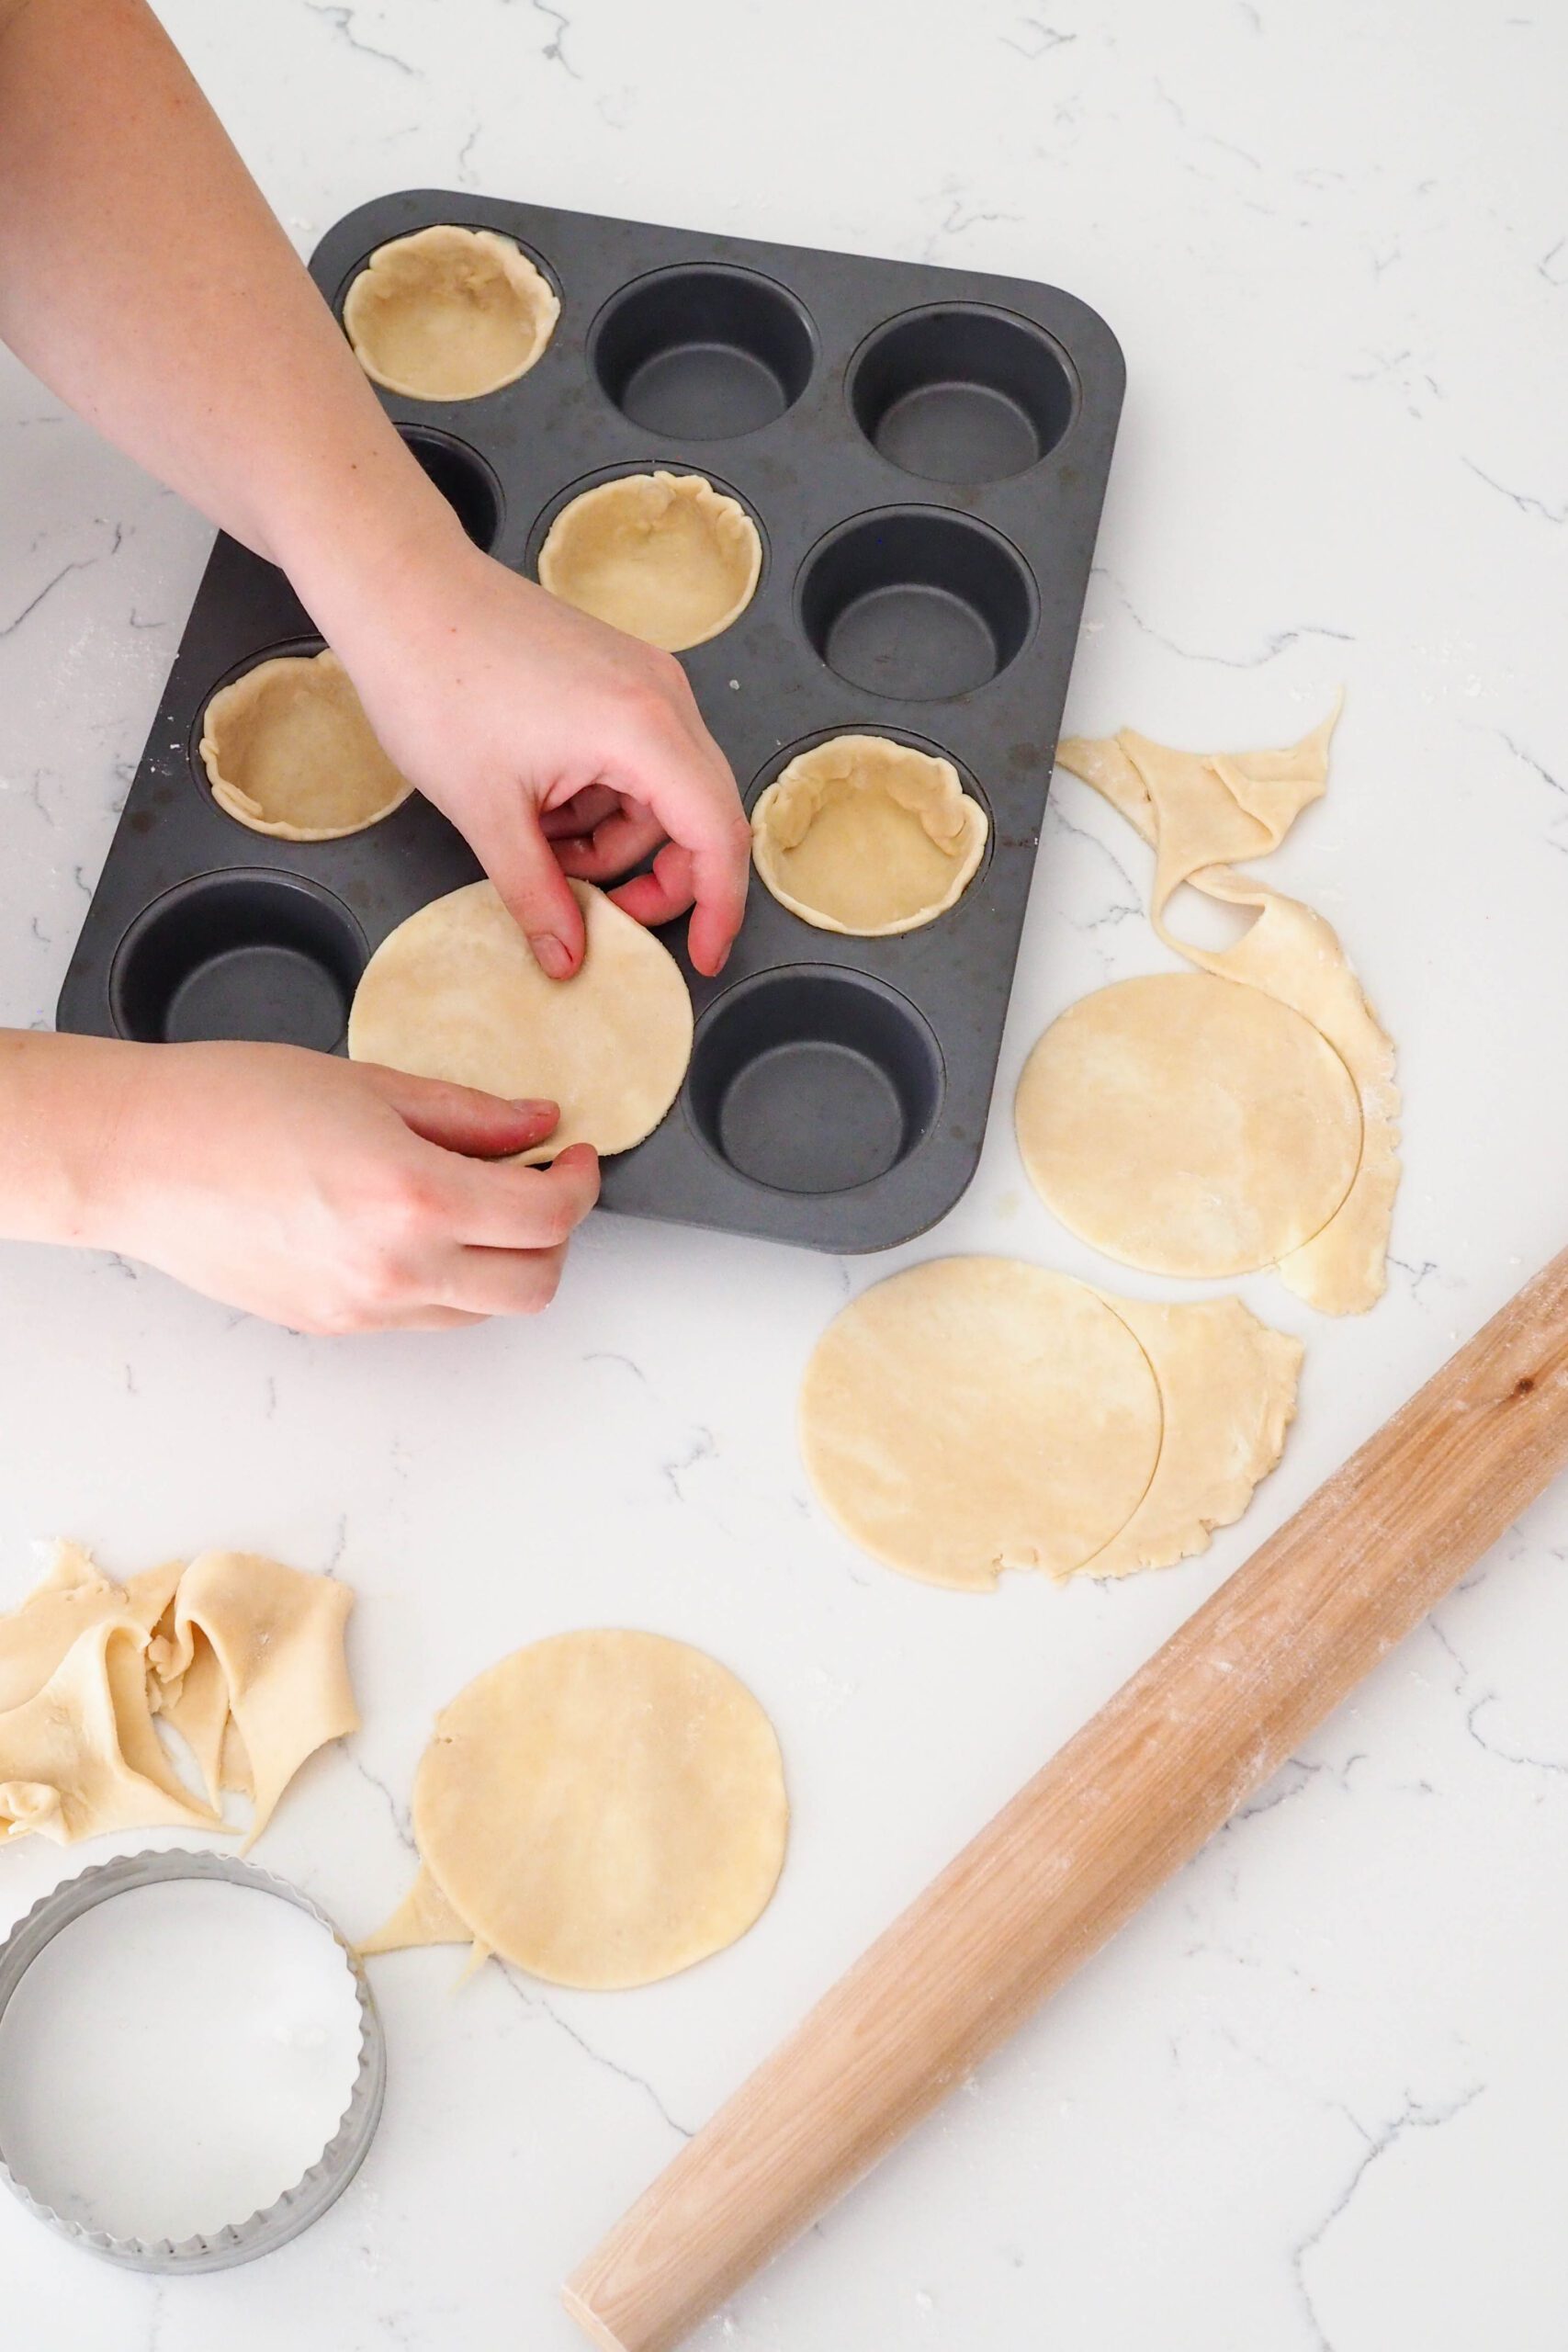
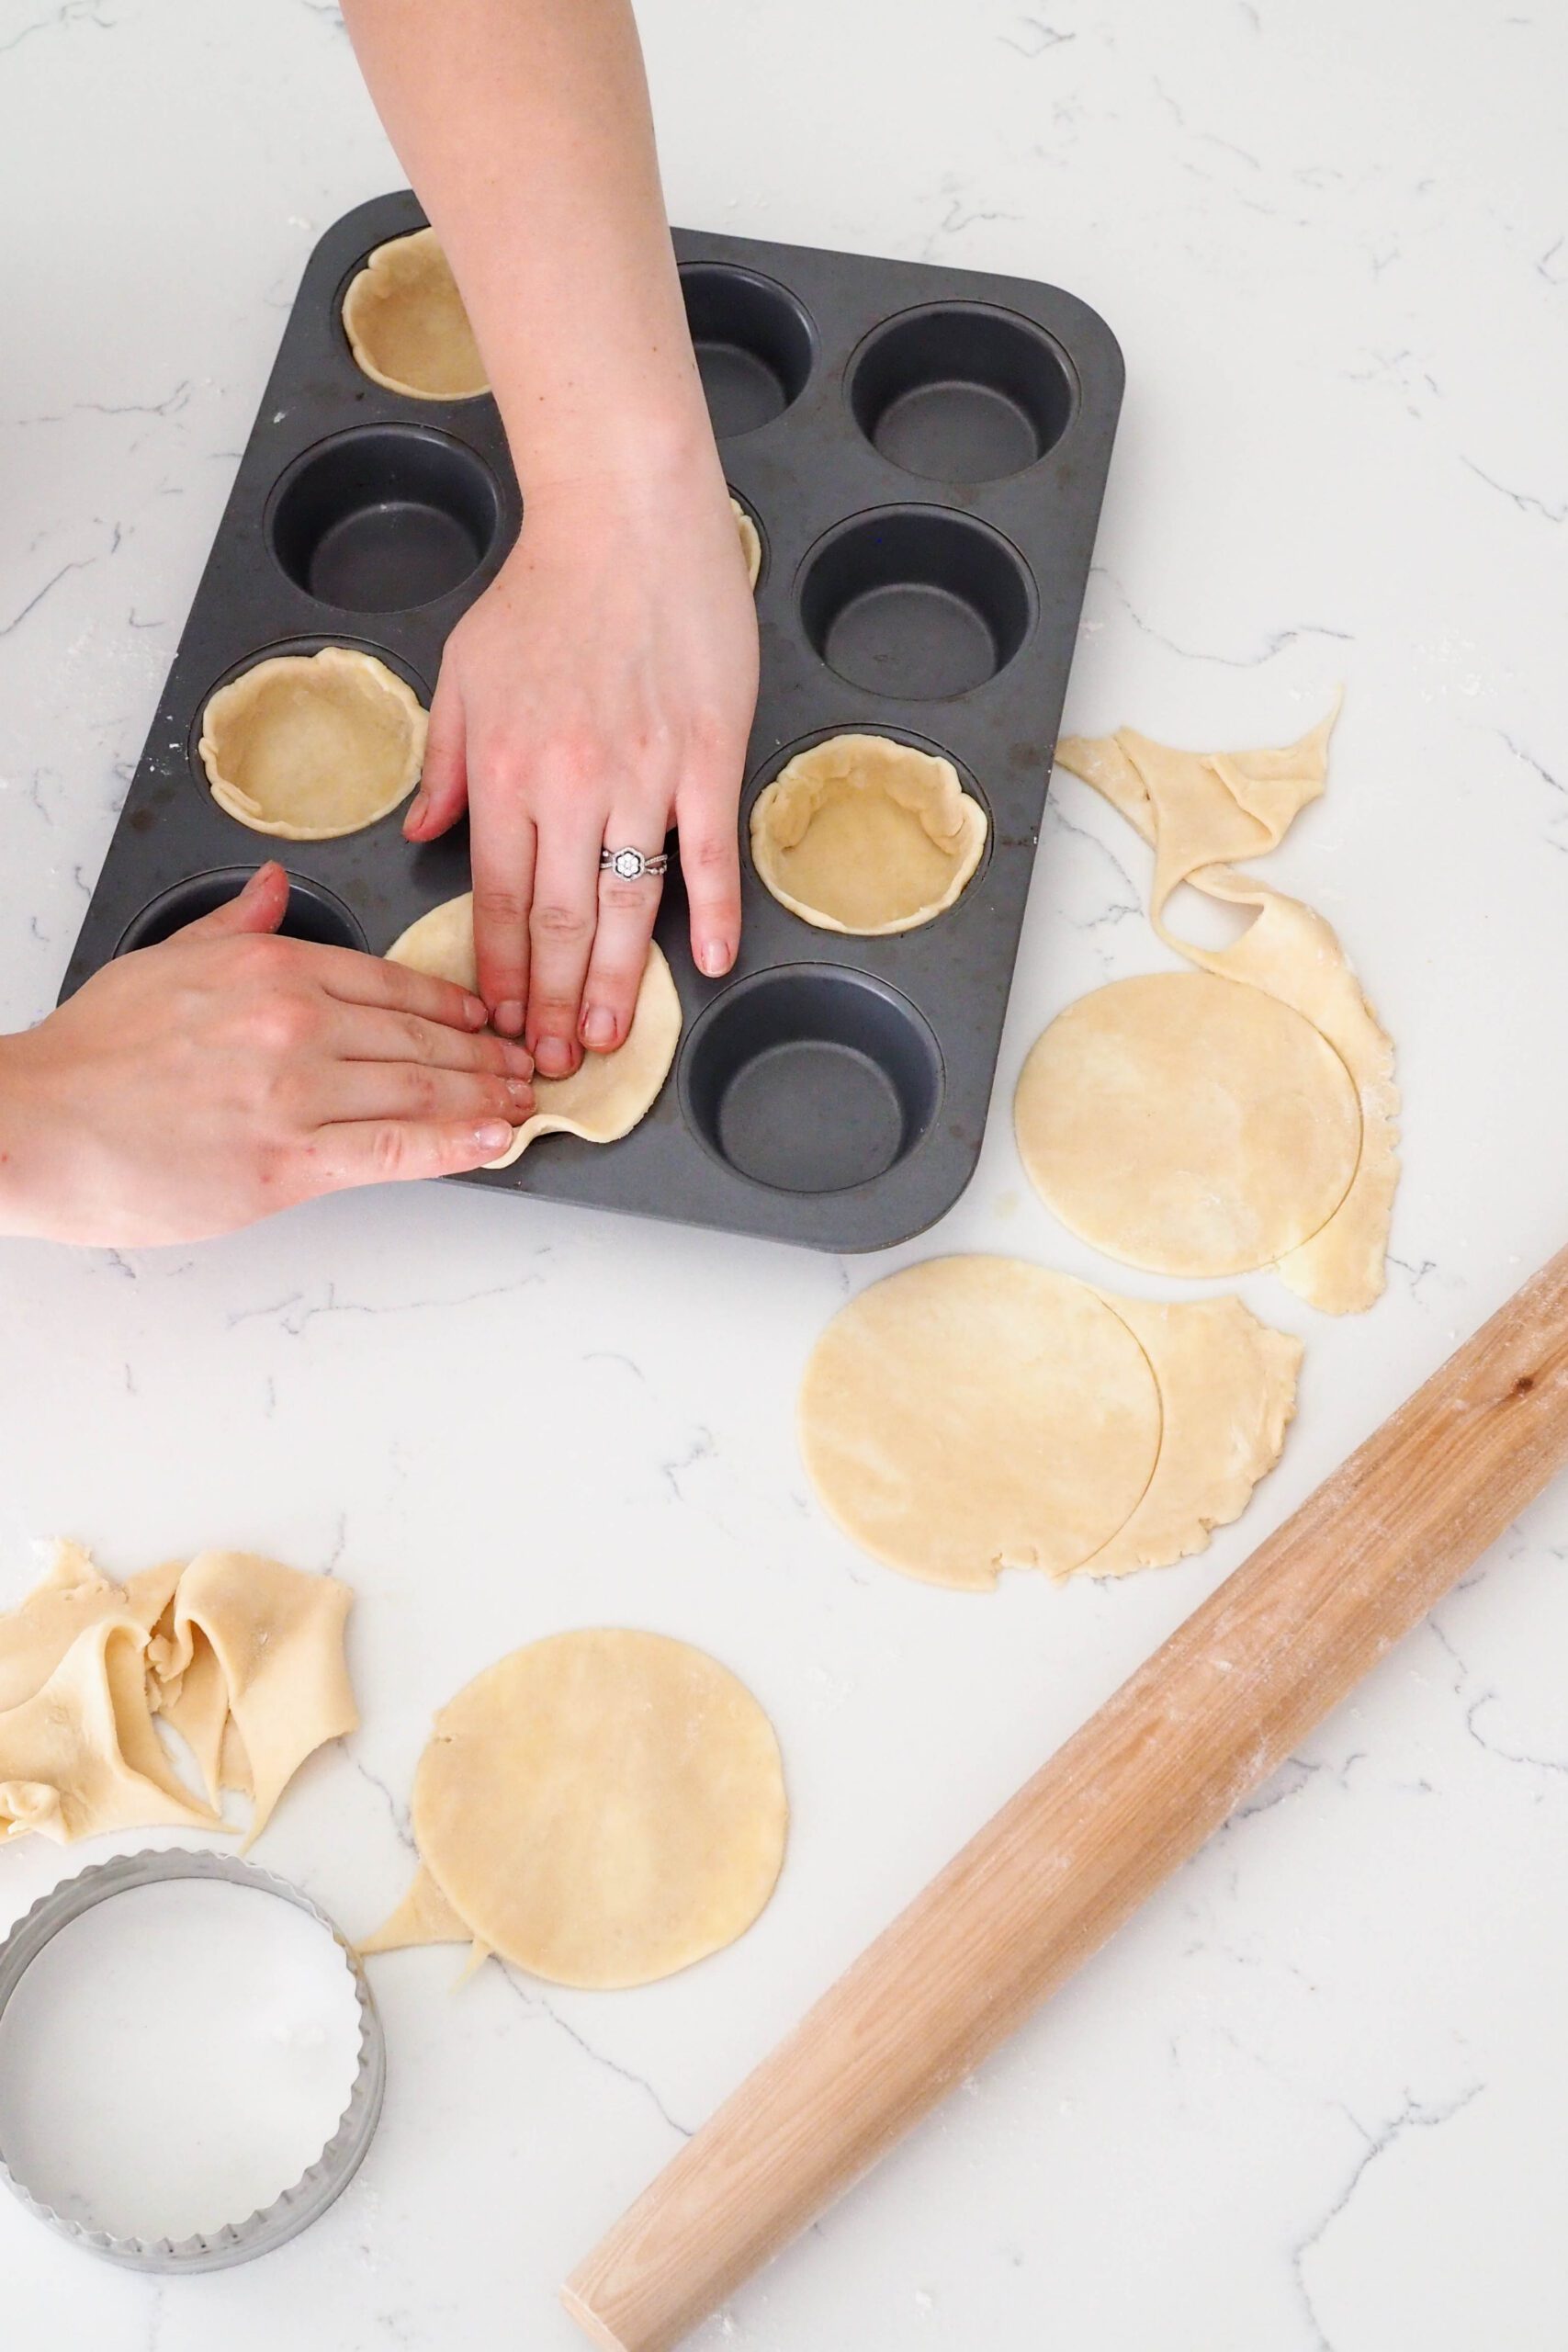
Once the circles have been cut, pick them up and gently place them over a hole in a muffin pan. Use the pads of your fingers to gently press the dough into the muffin pan. Please note: If you have longer fingernails, they may poke holes in the dough!
The dough will stretch a little bit, then fit perfectly inside of the hole in the muffin pan. Clean up the edges if they look uneven, then get ready to add cherry pie filling.
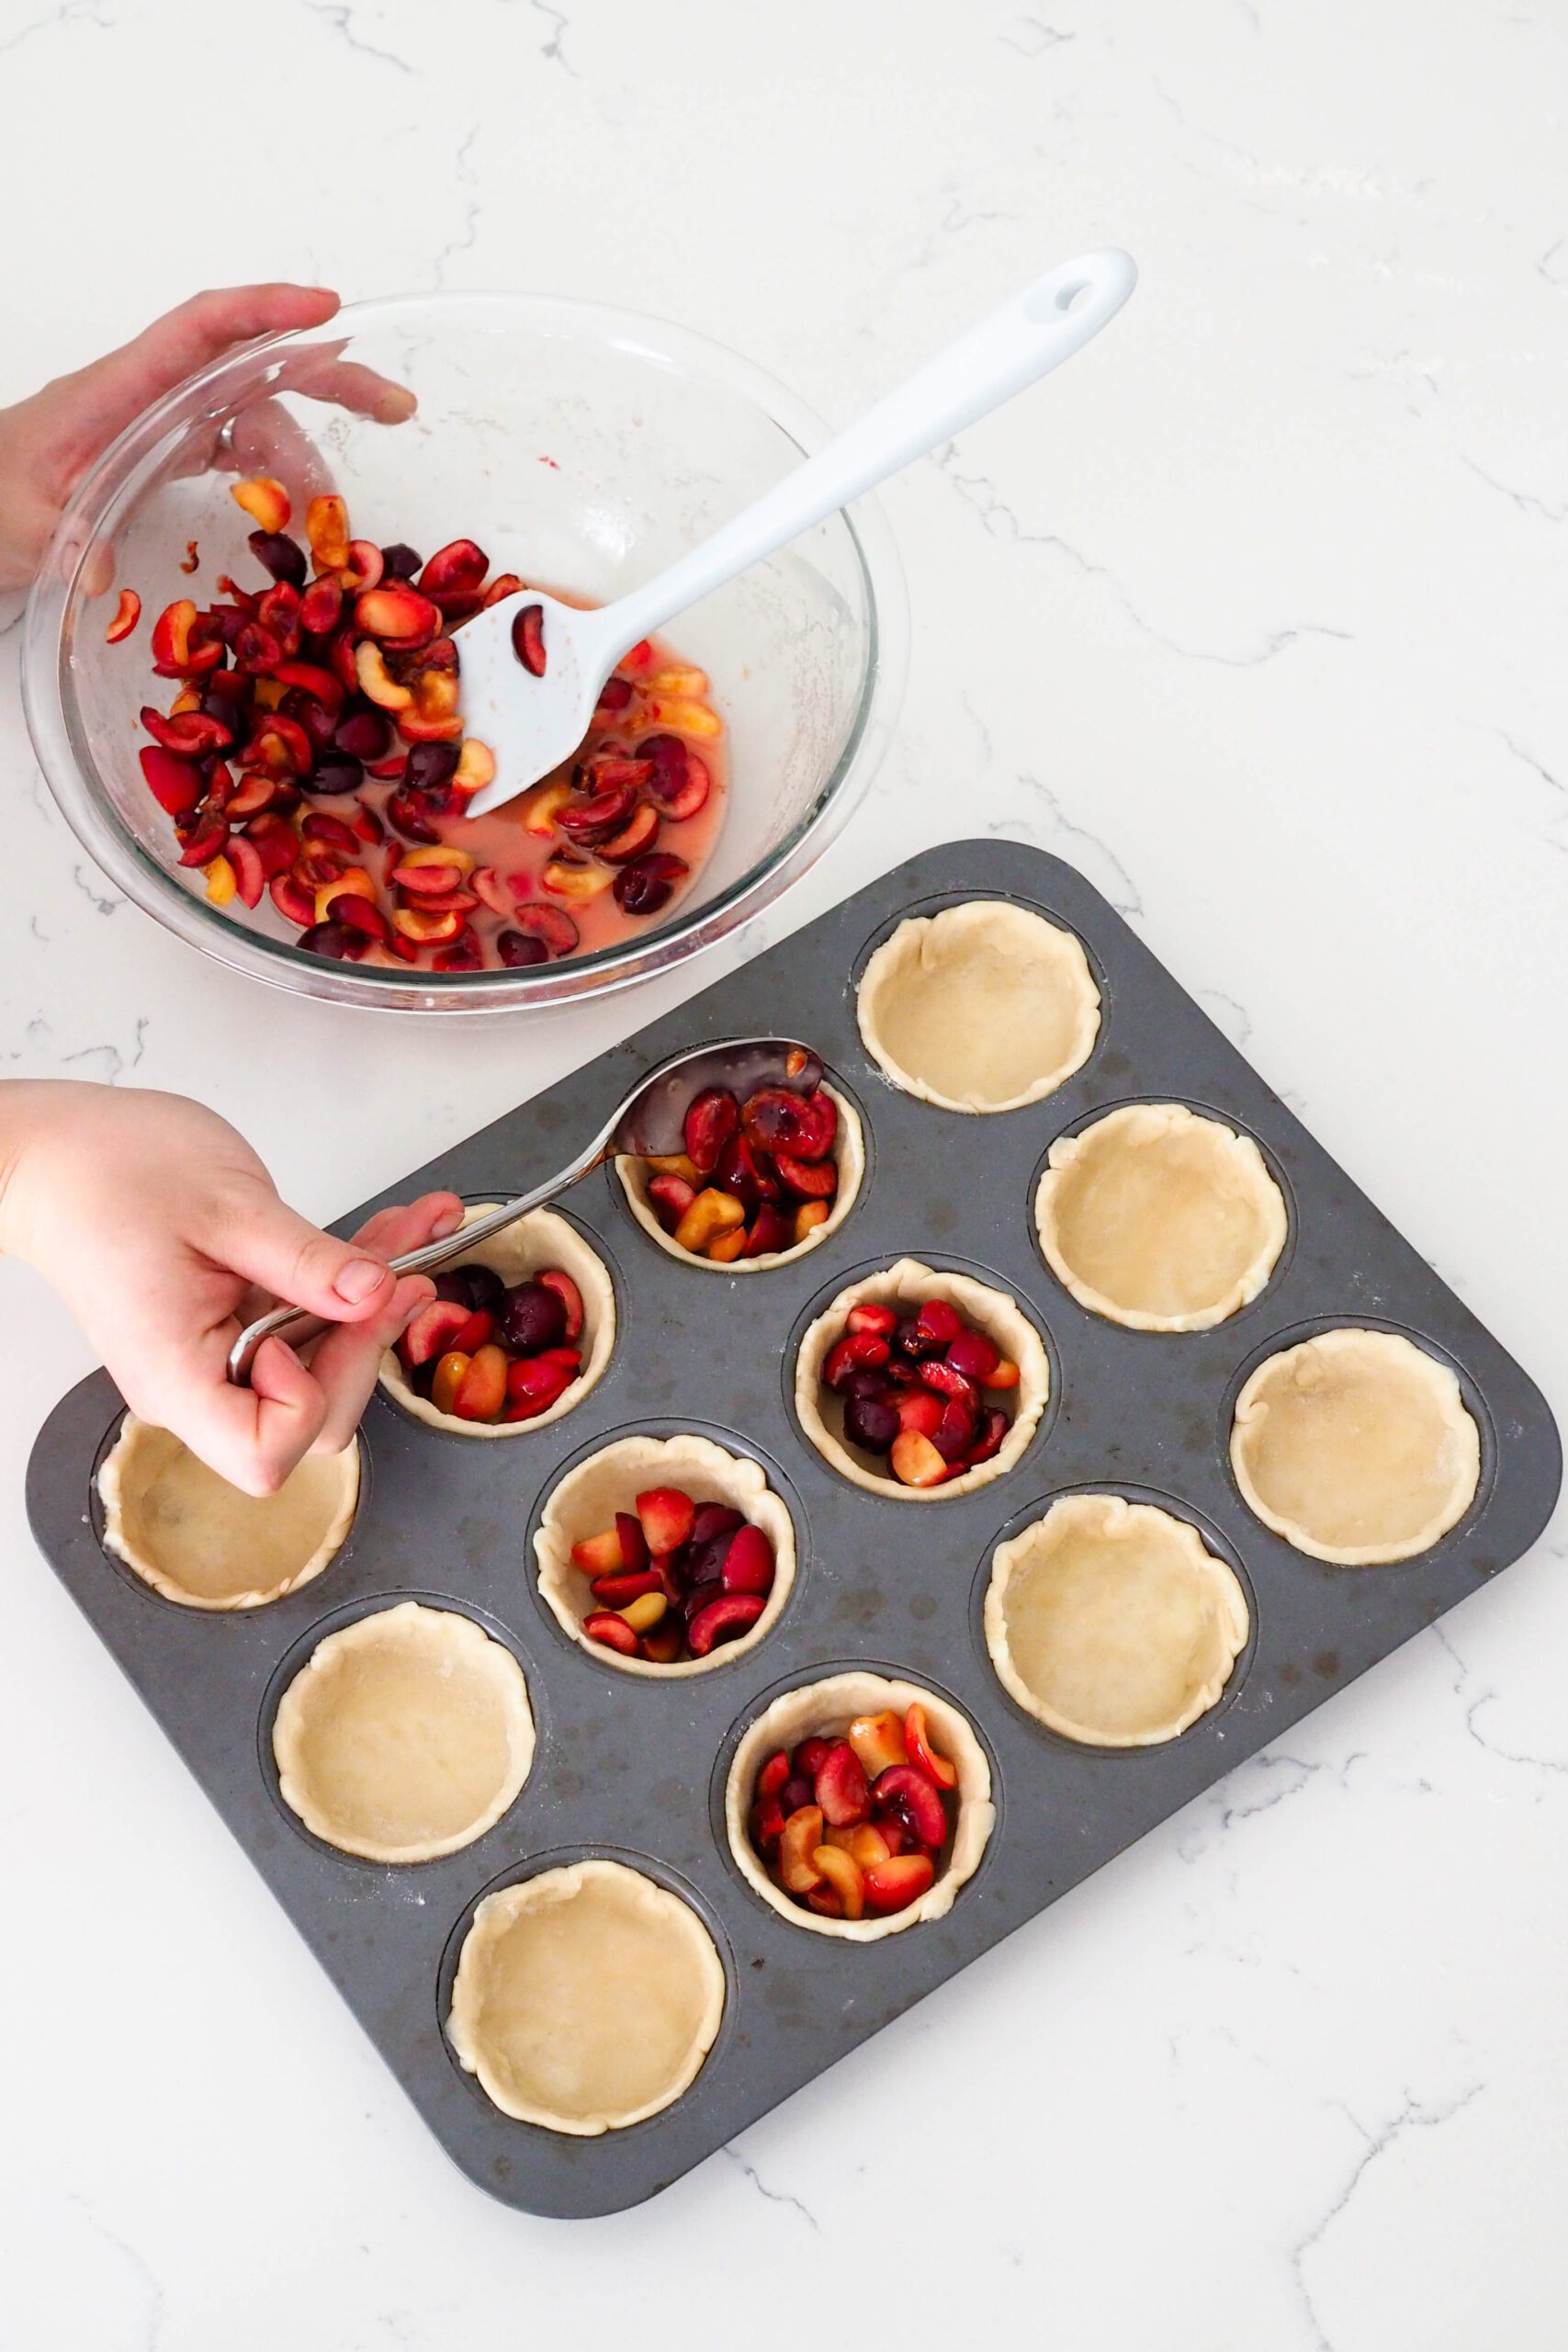
Quick Tips for Filling Mini Cherry Pies
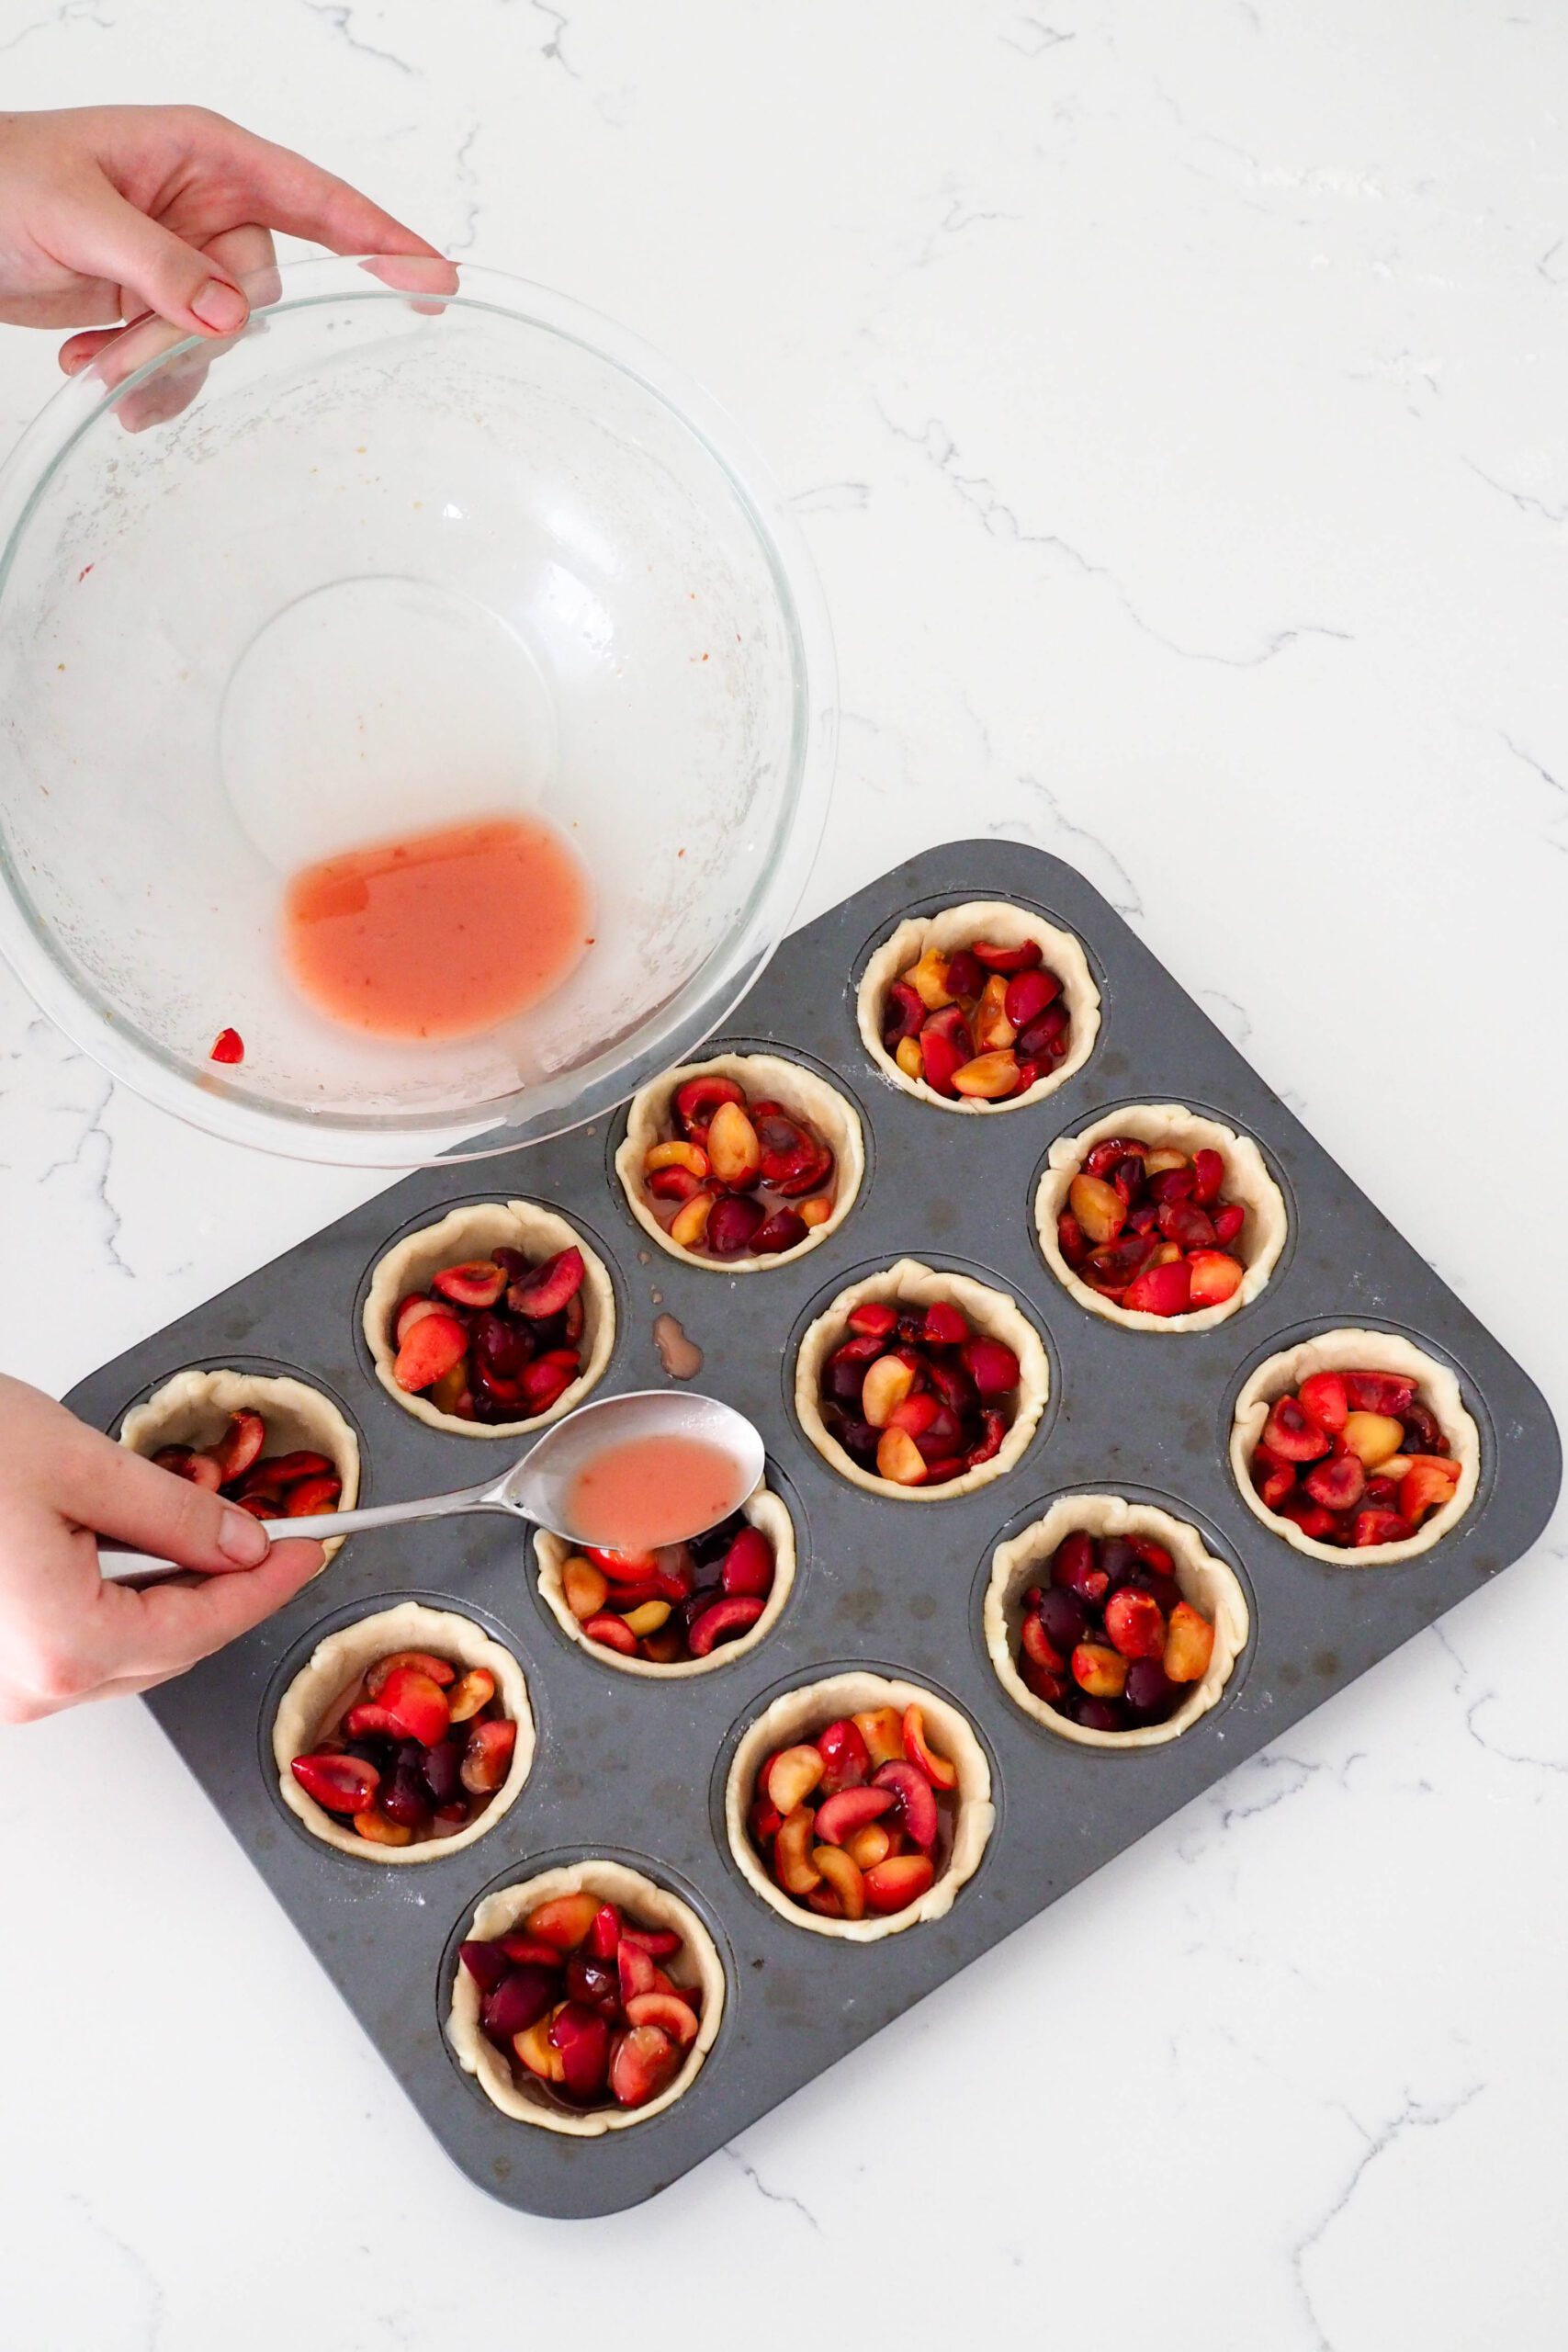
Use a tablespoon (one from your silverware drawer works just fine!) to add cherry pieces to each pie cup. There should be enough cherries for each mini pie to get one rounded tablespoon. Then, add about a tablespoon of the leftover liquid to each cherry pie cup.
Once the pies are filled, place the pan in the fridge, uncovered until you are ready to place the lattices on top.
How to Make Mini Lattices for Hand Pies
The hardest part of a lattice is starting it. After that, you can kinda tell where things need to go to look right!
And if you don’t think you’re up to making mini lattices, you can absolutely skip this part. Bake for the same amount of time and enjoy your cherry pies just the same. If, however, you choose to make the lattices, here’s how I do it:
Weaving Mini Pie Lattices
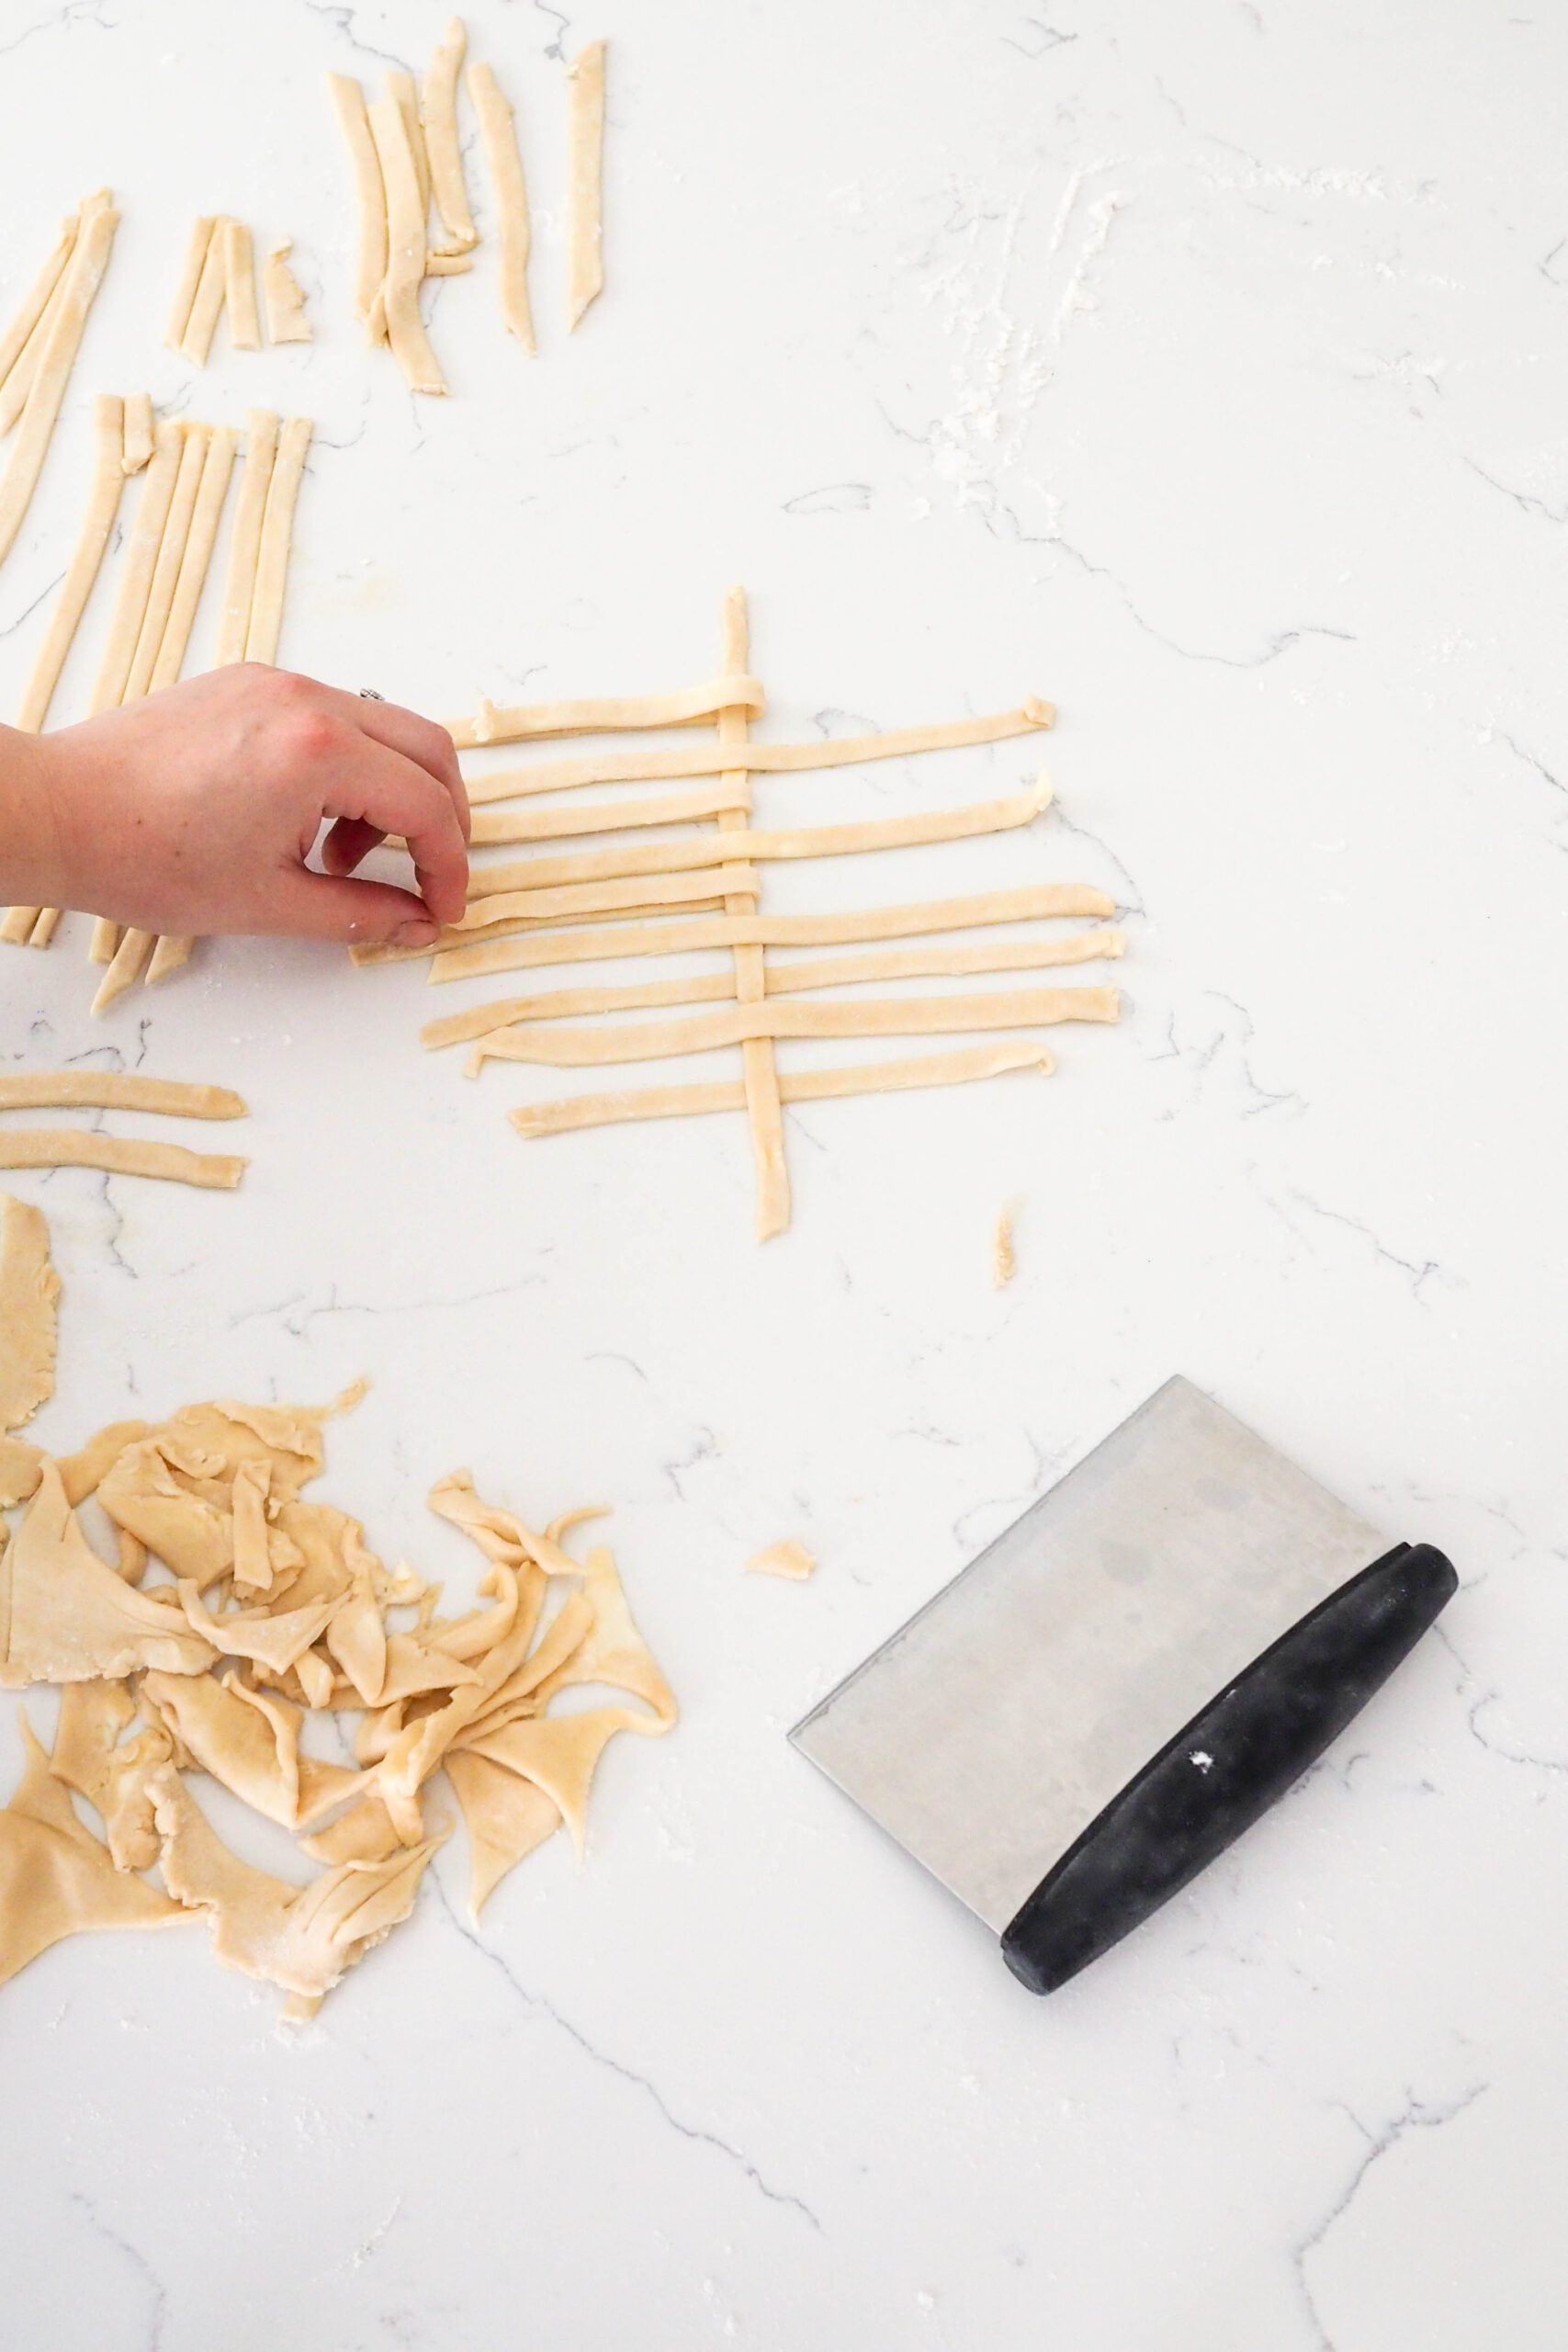
After cutting my leftover pie crust into strips about ¼” (6 mm) wide, I line up half of the strips up vertically in one row on a lightly floured surface. If it is warm in your kitchen or you anticipate needing to take a break, I’d recommend making the lattice on parchment paper so you can easily transfer it to the fridge if needed.
Fold over every other strip in the vertical row in half. Then, take one of the strips from the remaining pile and place it horizontally right above the fold point. Fold the vertical strips back over the horizontal strip. You have your first lattice!
Continue weaving the pie crust into each other until you have a really large lattice about 10″ by 8″ (25 cm by 20 cm) or your pie crust strips are too short to continue.
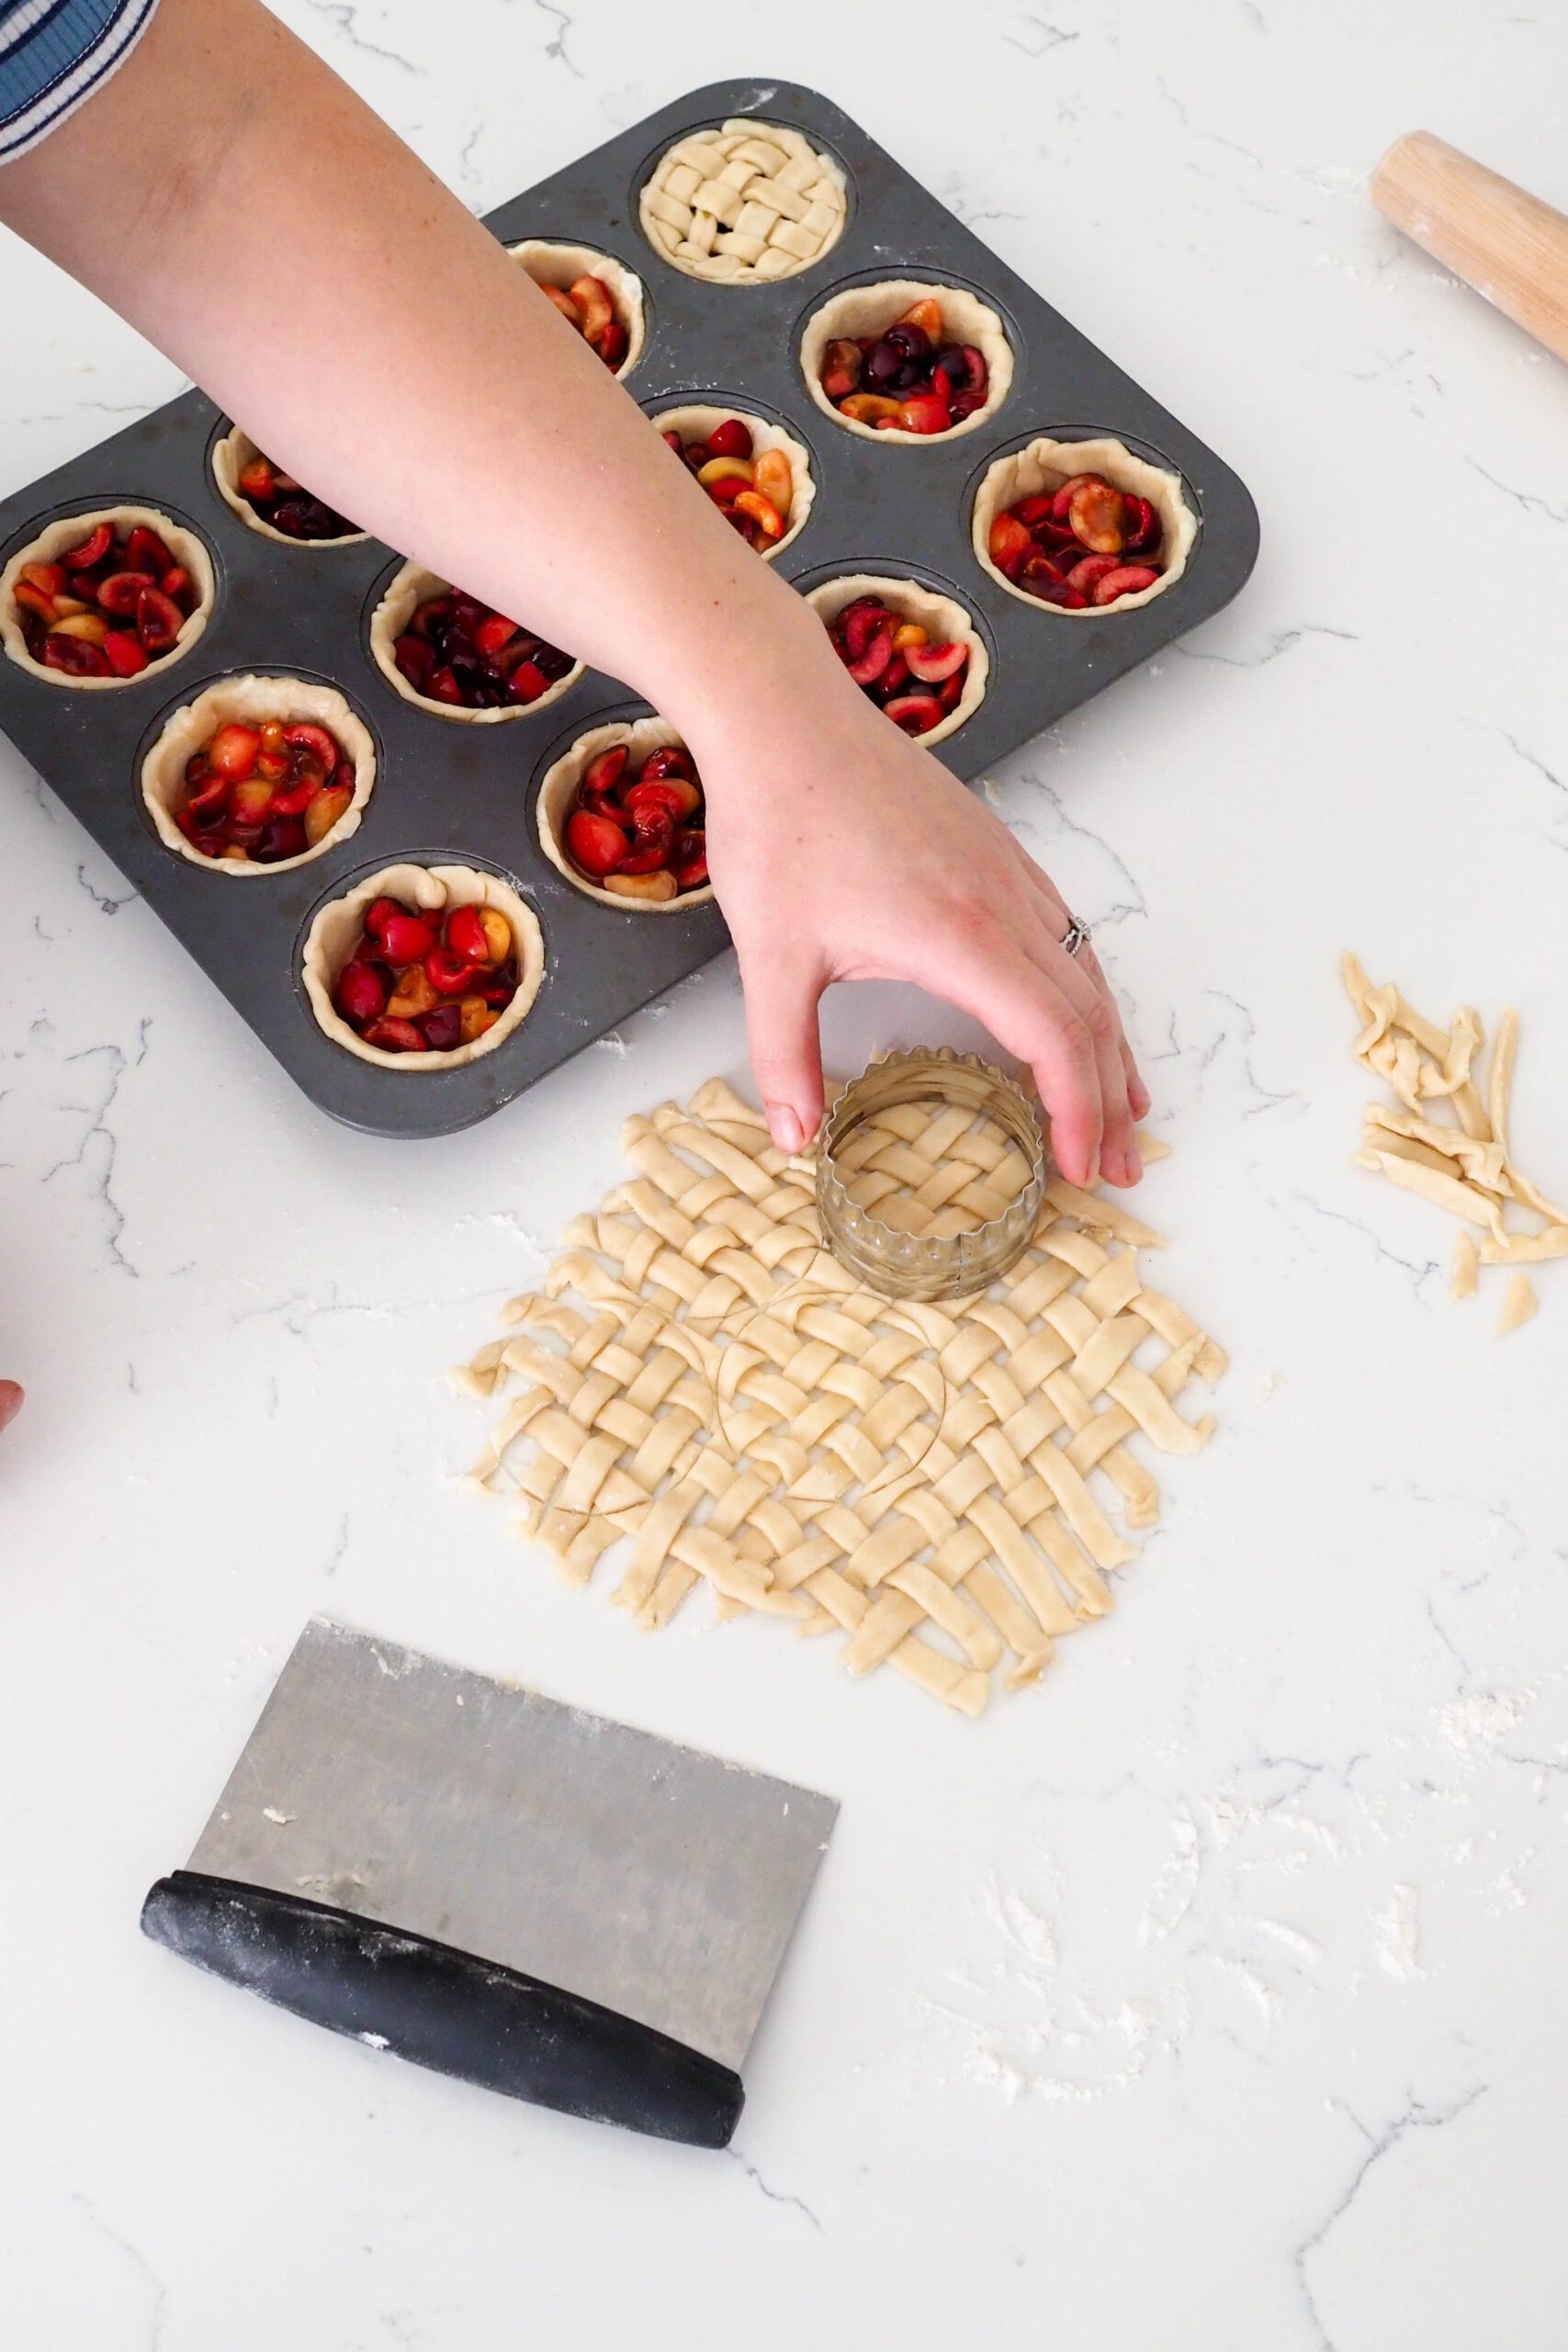
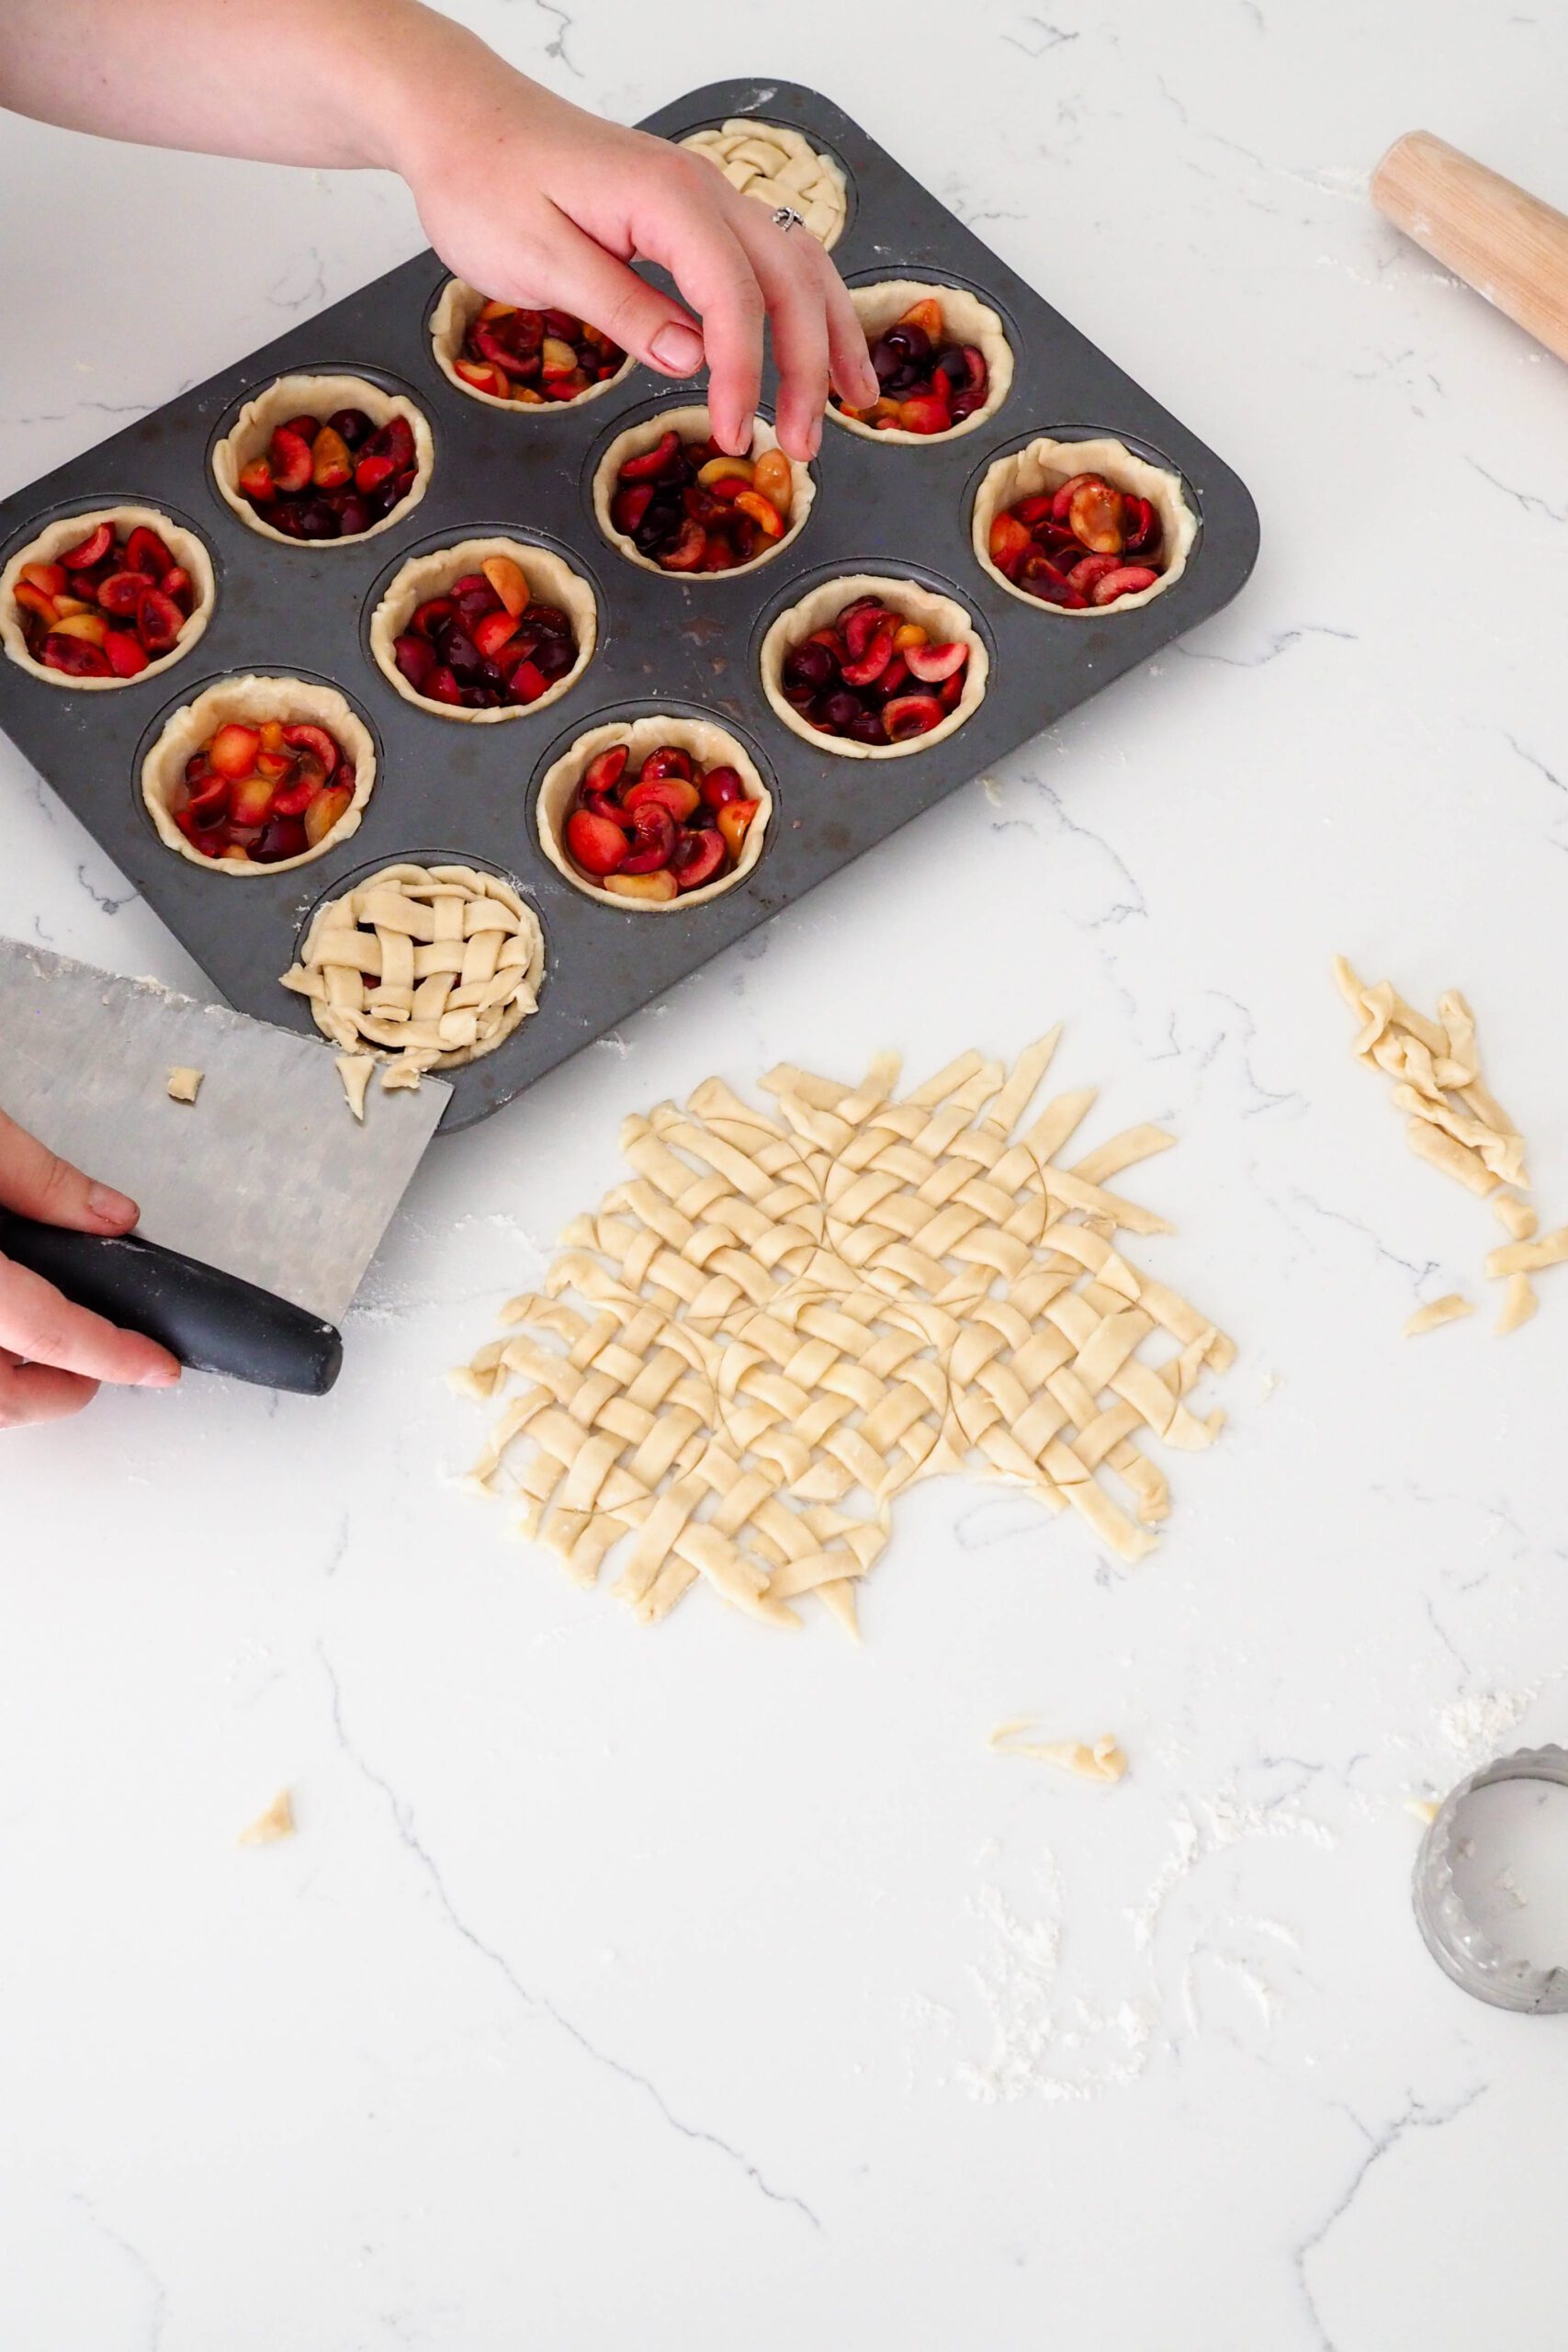
Once the lattice is large enough, cut circles out of it using a 2″ (5 cm) round cutter. I like to use a bench scraper to assist in this.
Quickly slide the bench scraper under the circle, then slowly raise the bench scraper. If the cutter went through the whole way, transfer the lattice to a mini pie. If some parts are stuck, either recut with the circle cutter or peel apart with your fingers; whichever you find easier.
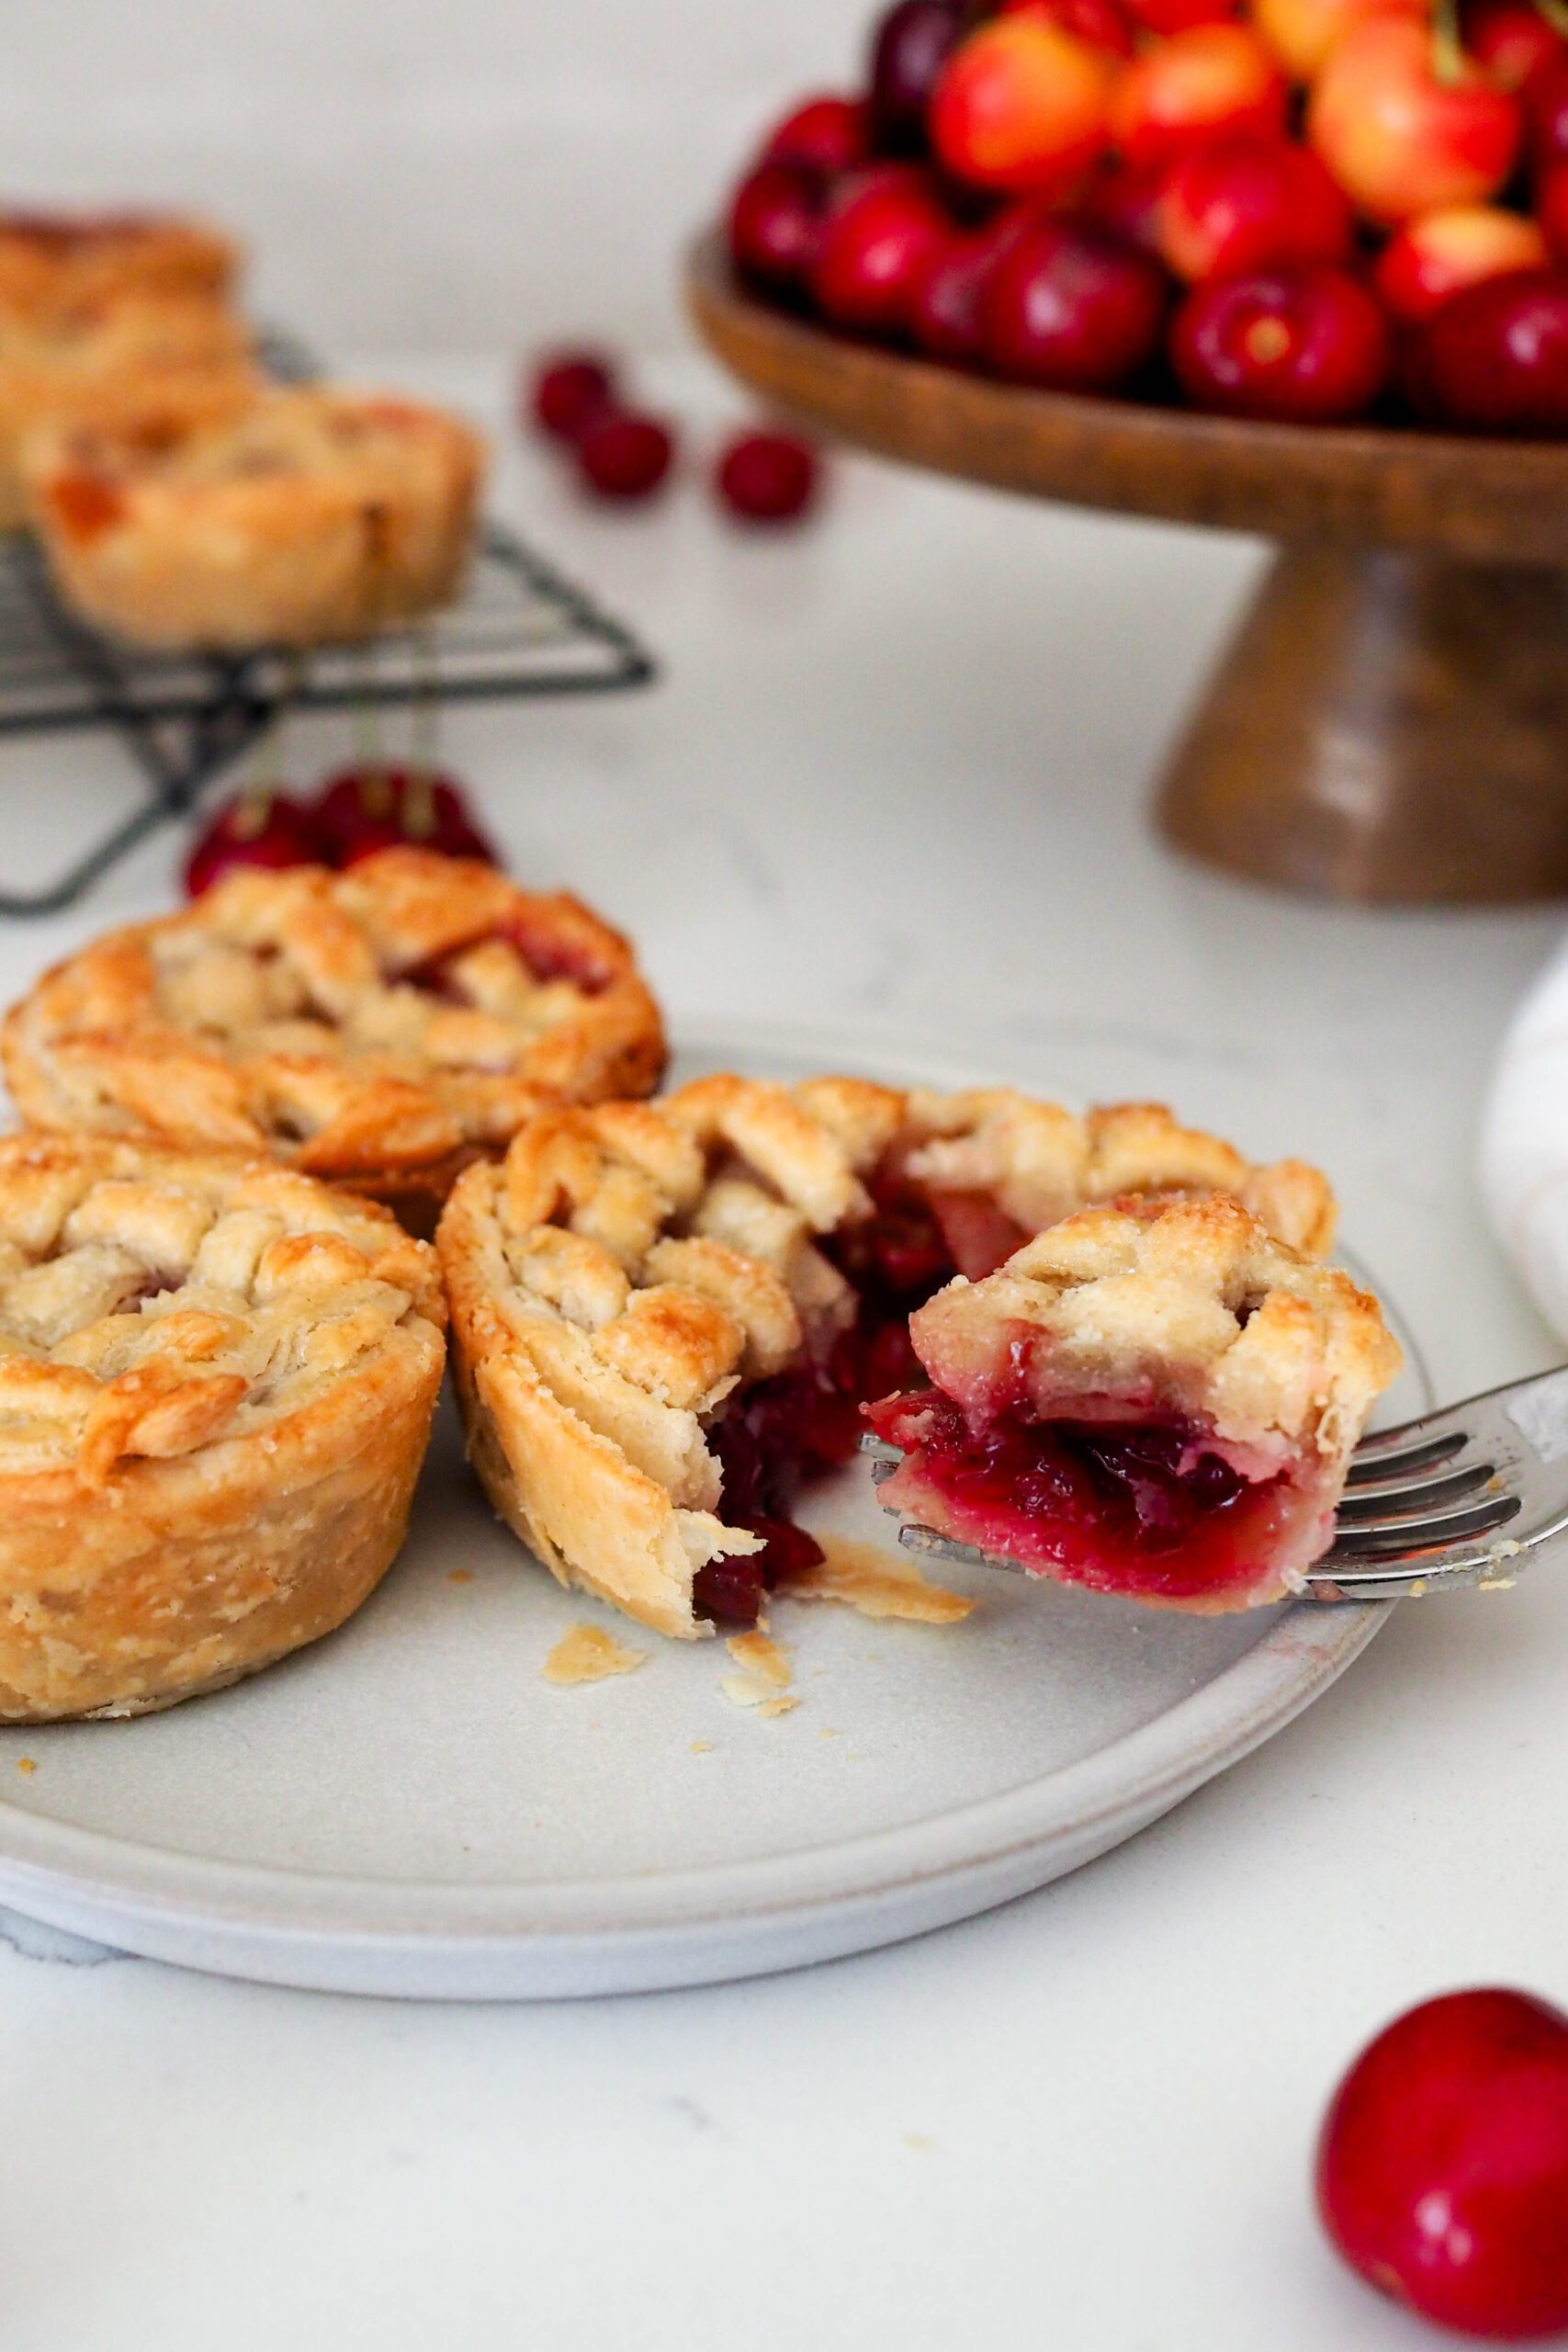
I press the lattices lightly on top of the cherries, but I don’t pinch the bottom crust and the top crust together. The dough will expand in the oven, and because the cherry pies aren’t overfilled, the crusts will bake into each other perfectly.
Quick Tips for Baking Mini Cherry Pies
As stated before, I recommend using a dark-colored pan because the pie crust will take on a beautiful golden color much faster. (If you’re curious, you can read more about dark vs light pans.) Funnily enough, I learned this while filming an audition for the Great American Baking Show.
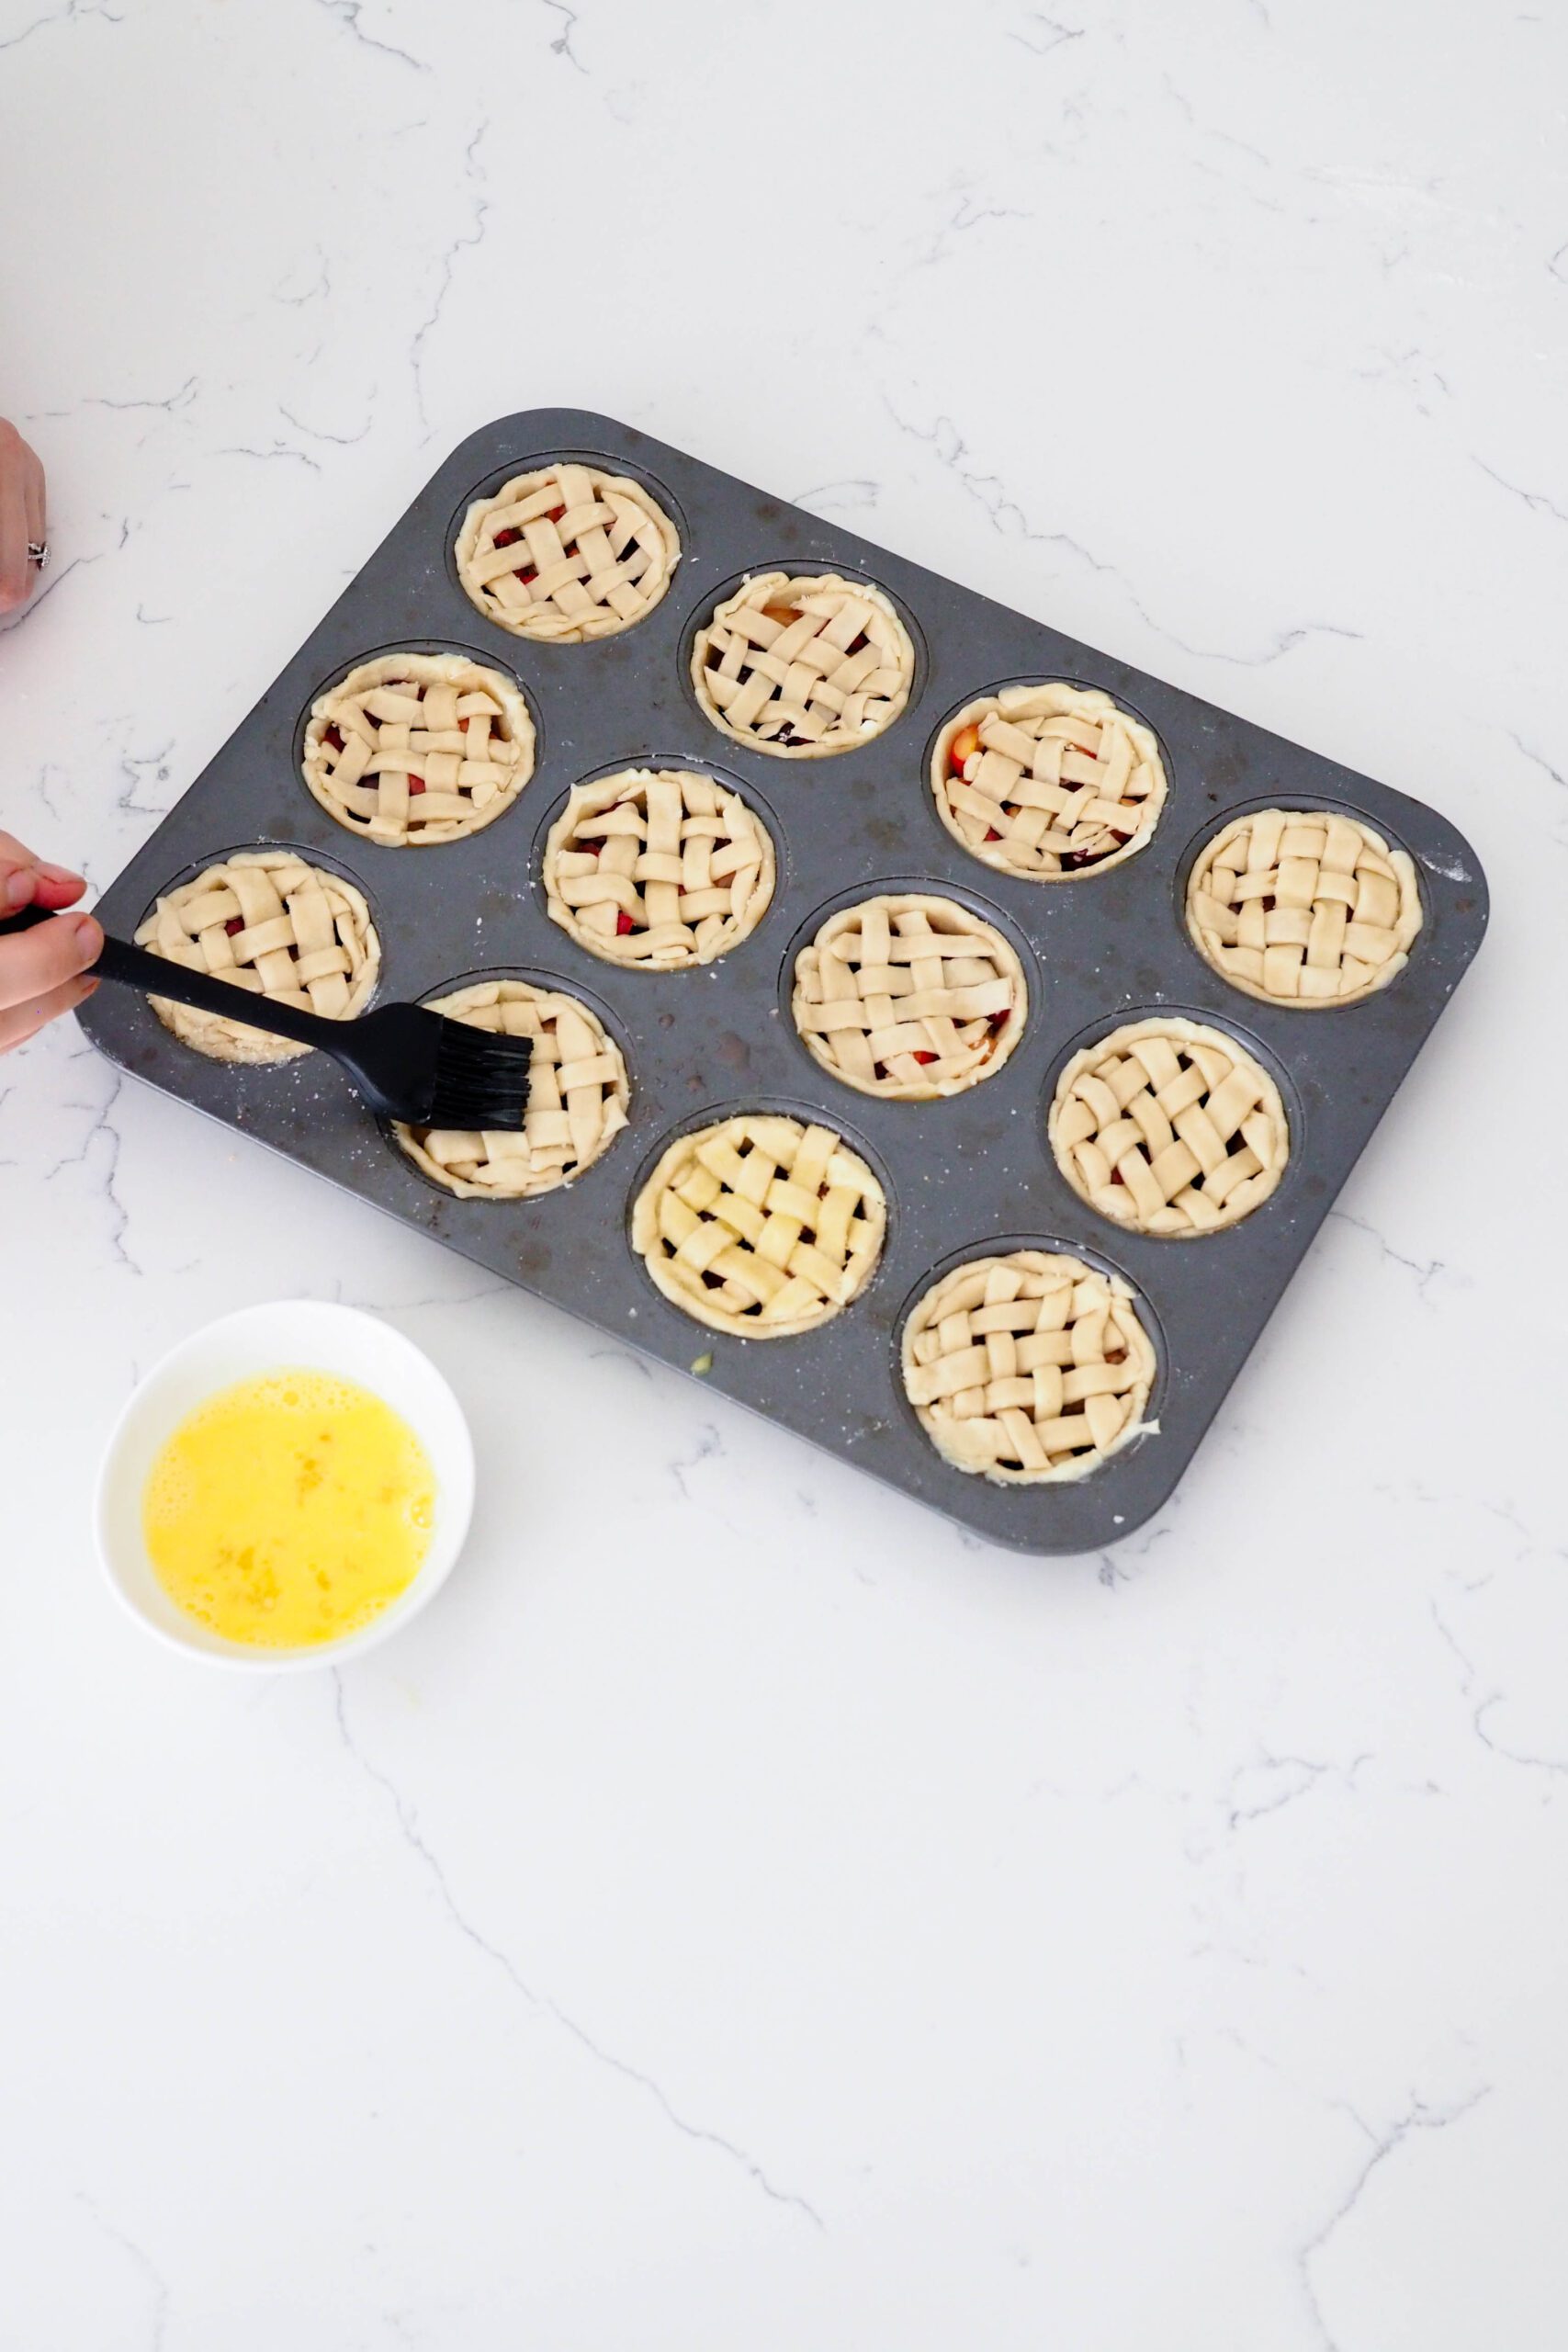
If you brush the tops of the lattices with an egg wash, the pies will take on an extra-golden color. And you can add some coarse sprinkles on top for added texture!
FAQ’s about Mini Cherry Pies
No, you don’t! These pies taste delicious and bake beautifully even without the lattice. You’ll only need one pie crust to make this recipe, but you will need to reroll the scraps. Then skip the directions from the “Making the Mini Lattice Tops” section, including the egg wash, because it’s not necessary.
You sure can! If you are running short on time or just don’t want to make homemade pie crust, you’re more than welcome to use a store bought dough. If you think you can’t make good pie crust, however, I promise you can! Just follow this recipe!
Yes, canned cherries will work, though they are softer than fresh or frozen cherries! Drain the cherries well, then cut into quarters and proceed with the recipe.
I haven’t tried it, but I suppose you could if you couldn’t find fresh, frozen, or canned cherries anywhere. Do not add any extra ingredients to it.
I do! You can find my video for these mini cherry pies on my YouTube channel.
Other Recipes You May Enjoy
If you’re like my husband and me and ended up picking 27 pounds of cherries this summer, you’ll probably need all my cherry recipes and then some! Here’s a list of all the recipes on my website that use cherries.
My mini caramel apple pies are also made in a muffin pan for a twist on the hand pie.
Other than classic cherry pie with almond extract, my husband’s favorite dessert is my cherry almond cupcakes, with two buttercreams swirled together for a perfect cherry almond flavor!
Craving cherry pie but need to beat the heat with some ice cream instead? Try my cherry pie ice cream recipe, a vanilla ice cream base filled with cherries and bits of flaky pie crust (which is a great way to use up any leftover pie dough scraps).
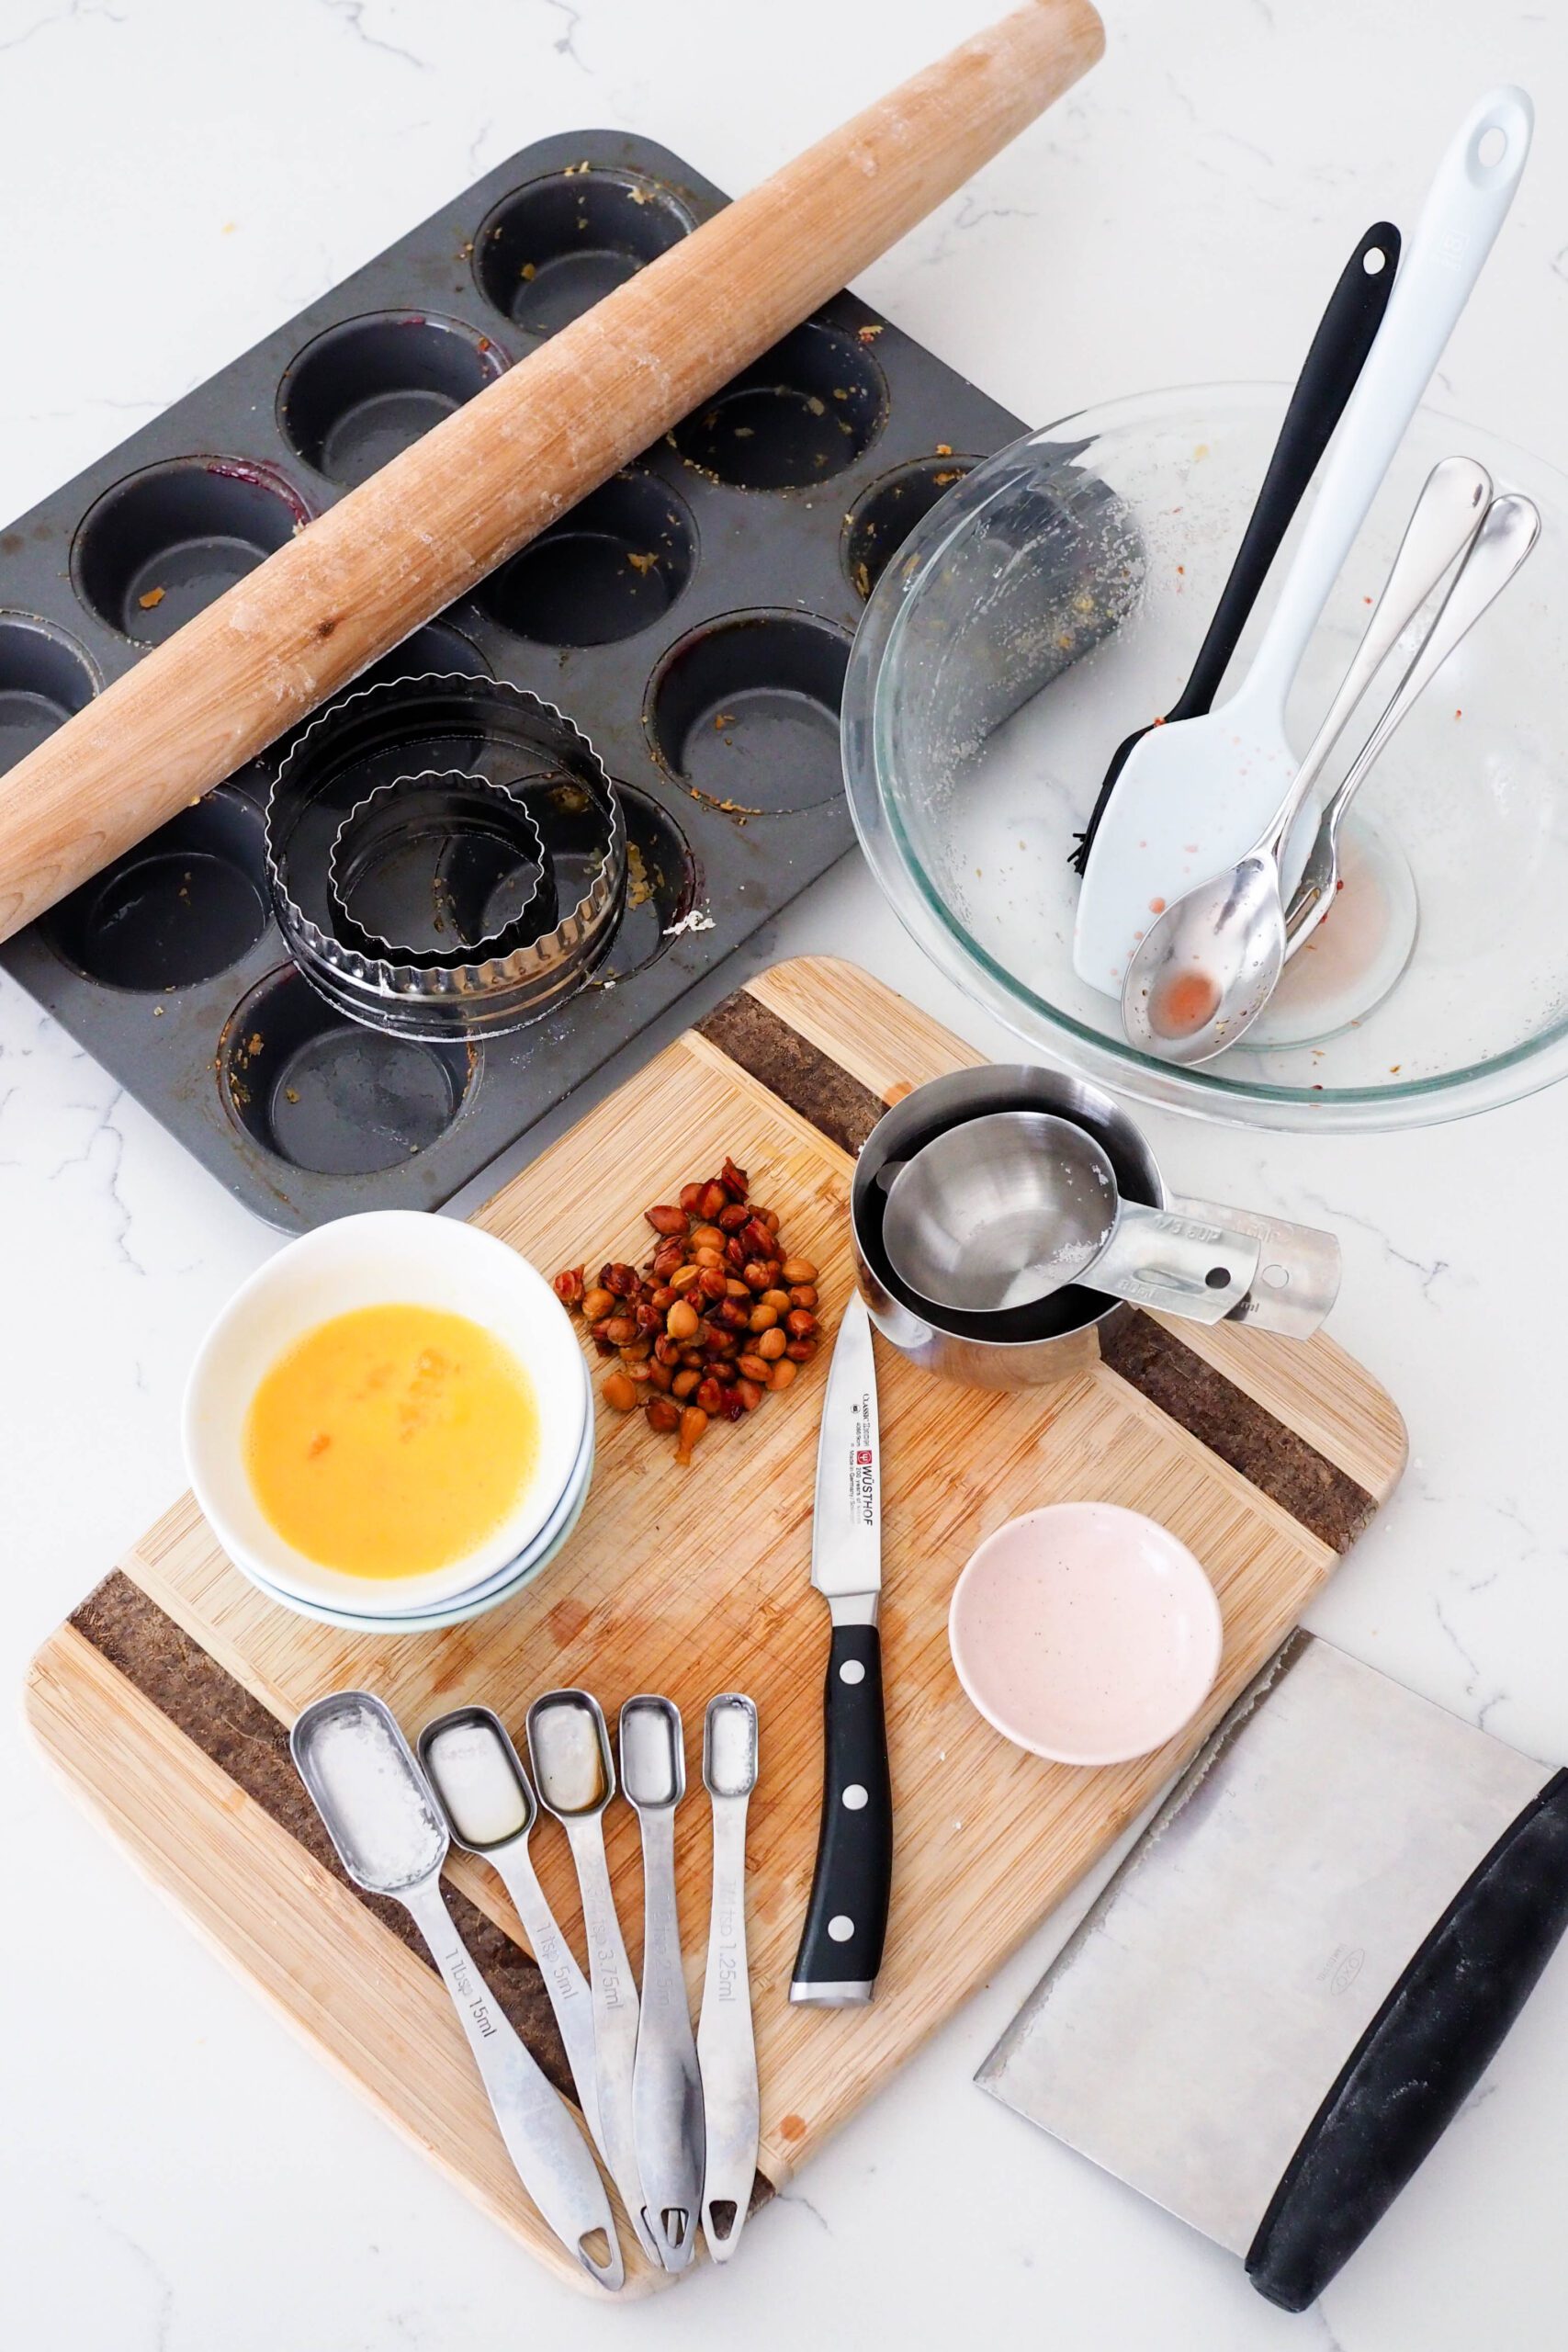
Dish Cleanup: Gonna Take a While
I rate my recipe cleanups on a scale of 1 to 5. 1 is only a handful of dishes, and 5 is everything including the kitchen sink.
These mini cherry pies have a cleanup rating of a 4. You may not need the cutting board and knife if your cherries are already pitted and quartered, but the muffin pan will require a bit of scrubbing. All that in addition to the other bowls and spoons (and workspace!) starts to add up, but these little pies are worth the effort!
Mini Cherry Pies Recipe
Mini Cherry Pies
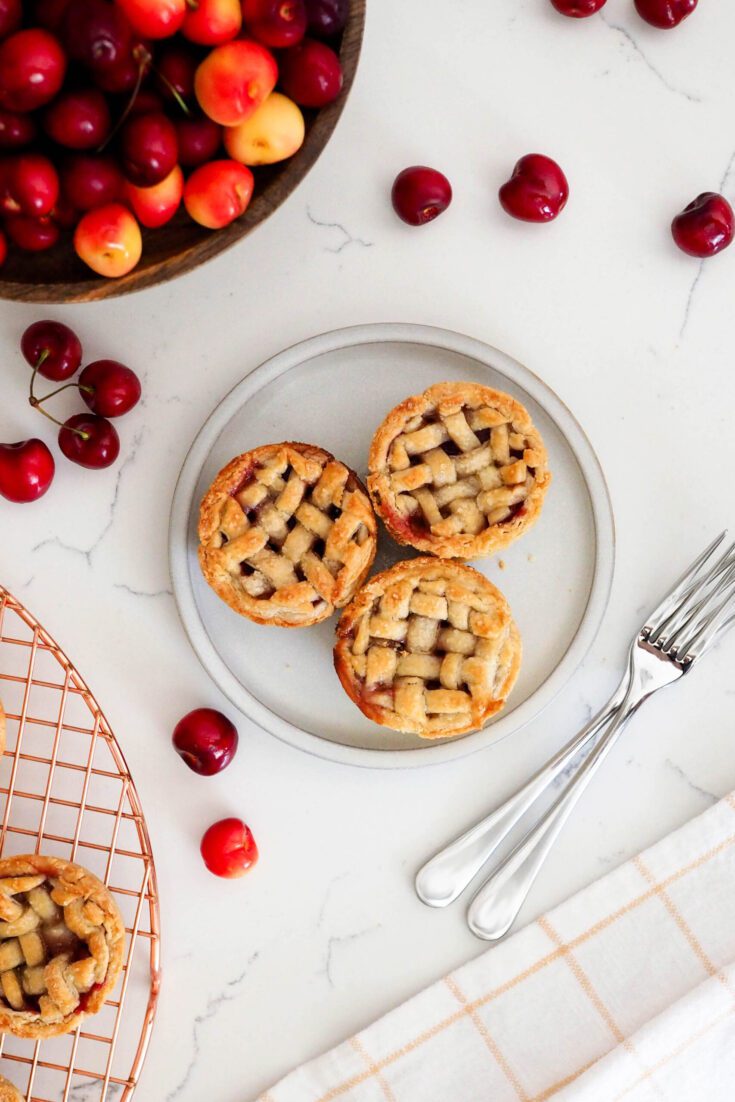
Bite-sized cherry pies are baked in a muffin pan for the perfect handheld dessert. Filled with juicy cherries and topped with a flaky lattice crust, this take on the hand pie will be the talk of the table!
Ingredients
- 2 ½ cups cherries, pitted and quartered (about 60 cherries, 380g)
- ⅓ cup sugar (70g)
- 2 Tablespoons cornstarch (20g)
- ¼ teaspoon salt (2g)
- 1 teaspoon lemon juice (5 ml)
- ¾ teaspoon vanilla extract (4 ml)
- ½ teaspoon almond extract (3 ml), optional
- Two pie crusts (store bought or homemade)*
- One large egg
- 1 Tablespoon coarse sugar, optional
Instructions
Making the Cherry Pie Filling
- Preheat the oven to 375°F/190°C. Use a dark-colored muffin pan for the best, crispiest results. Light-colored or aluminum pans work, but note that there may be a longer bake time for the pie crust to turn a deep golden brown.
- Place the quartered cherries in a medium bowl with the granulated sugar, cornstarch, salt, lemon juice, and extracts. Stir everything together, then set aside for at least 10 minutes. During this time, the sugar will pull water out of the cherries, giving us the liquid filling. This process is called maceration.
Preparing the Mini Cherry Pie Crusts
- While the cherries are macerating, roll out one chilled pie crust on a lightly floured surface, leaving the other in the fridge. Rotate the dough one quarter turn after every roll to ensure it doesn't stick to your work surface. Roll only in one direction, from the center of the dough out to help prevent sticking.
- Once you've rolled out the pie crust about 11" to 12" (28 to 30 cm) in diameter, use a 4" (10 cm) circle cutter to cut 8 or 9 circles out of the dough, then immediately place each one into a hole in your muffin pan. To prevent holes, press down evenly in the center of the dough round with the fingertips of one hand while guiding the edges of the dough circle down the side of the cutout with your other. It might take a few tries to get the hang of it, but if a circle rips, just patch it up with excess dough—no one will ever know!
- Set aside the leftover dough from the first pie crust, then roll out the second pie crust in the same manner as the first. Cut out the remaining 3 or 4 circles to fill the rest of the muffin pan holes. You'll use the remaining dough to make the lattice, so set it aside for now.
Filling the Mini Cherry Pies
- Fill the mini pie crusts with about one Tablespoon of just the cherries (not yet the liquid!) from the cherry pie filling.
- Then divide the leftover liquid from the filling into the mini pies, usually a little less than a Tablespoon per pie.
Making the Mini Lattice Tops*
- Place the muffin pan with the filled pies in the fridge to chill while you make the lattices.
- Using a bench scraper or knife, cut strips of dough about ¼" (6 mm) wide.
- Line half of the strips up vertically on your lightly floured workspace in one row, with the other half of the strips close by. Fold over every other strip in the vertical row in half. Then, take one of the strips from the remaining pile and place it horizontally right above the fold point. Fold the vertical strips back over the horizontal strip. You have your first lattice!
- For the next lattice, fold back the opposite vertical strips, up to the horizontal strip you just laid. Take a strip from the pile close by and place it horizontally, right above the fold point. Fold the vertical strips back over the horizontal strip, and you'll have your second lattice.
- Repeat Steps 2 and 3 until you run out of dough strips. You can make one large lattice about 10" by 8" (25 by 20 cm), or a few smaller lattices, whichever is easier for you. (I usually end up making two.)
- Using a 2 ½" (6 cm) round cutter, cut out circles of the lattice. Use a bench scraper or spatula to slide under the lattice circle, then place it directly on top of a mini cherry pie, pressing it lightly into the edges of the pie crust.
- Beat the egg in a small bowl, then lightly brush the egg wash over the pie crust. Sprinkle coarse sugar on top, if desired.
Baking the Pies
- Bake the pies for 22-25 minutes in the center rack of your oven. If using a dark-colored pan, your mini cherry pies will be fully baked around 22 minutes. If using a light-colored pan, like aluminum, they may take closer to 25 minutes to turn golden brown on the edges.
- Allow the pies to cool in the pan for 5 minutes, then carefully remove from the pan with a fork. Place on a wire cooling rack to finish cooling and prevent soggy bottoms. Enjoy!
Notes
*This recipe can be made with just one pie crust if you don't want to go through the effort of making the lattice tops! You'll need to reroll the scraps from your first pie crust dough to get the last 3 or 4 pie crusts out of it. Then skip the directions from the "Making the Mini Lattice Tops" section, including the egg wash, because it's not necessary.
Store these pies in a loosely sealed container at room temperature for up to three days or in the fridge for up to five days.
These mini cherry pies can be frozen (yes, even with the cornstarch!) for up to three months. Thaw overnight at room temperature in a loosely covered container to allow moisture to escape, or thaw directly from the freezer on a sheet pan in the oven at 375°F/190°C for about 10 minutes until warm.
Recommended Products
As an Amazon Associate and member of other affiliate programs, I earn from qualifying purchases.
Nutrition Information:
Yield:
12Serving Size:
1Amount Per Serving: Calories: 187Total Fat: 8gSaturated Fat: 3gTrans Fat: 0gUnsaturated Fat: 5gCholesterol: 16mgSodium: 170mgCarbohydrates: 27gFiber: 2gSugar: 12gProtein: 3g
The nutrition facts are estimated and may vary based on specific ingredients used.
Thanks for trying out my mini cherry pie recipe! Please consider rating this recipe so others find it, too.
I’d love to see how your recipe turns out: Take a photo and tag me on Instagram @floralapronblog to share with me, or use the hashtag #floralapronbakes.
This post contains affiliate links. If you click through and make a purchase, I may receive a small commission at no cost to you. Thank you for helping to support The Floral Apron!
I’m going to try this one. Can you use apples or peaches?
Yay! I have another mini pie recipe that uses apples and salted caramel here.
Because the water content is different from cherries to apples to peaches, I wouldn’t suggest just substituting apples or peaches in this recipe; however, you are more than welcome to substitute your favorite apple or peach pie filling instead. They’ll likely bake for about the same amount of time, but keep an eye on them towards the end, just to be safe! 🙂
I have fresh cherries soaked in Moscato can I use them?
That would be delicious! I’d recommend straining out any excess Moscato from the cherries, then continuing with the recipe as written 🙂