
In practically no time at all and three ingredients, you can make a beautiful, flaky pie crust that’s flakier than store-bought! This is an easy and simple recipe with just butter, flour, and water, and it makes the flakiest pie crust you’ve ever had to use in your favorite sweet or savory recipes, like chicken pot pie with mushrooms, mini blueberry pies, or cherry pie with almond extract.
My step-by-step instructions ensure a consistent and beautiful pie crust every time, even if you’re a beginner pie maker. If you’re a visual learner like me, you can watch how to make this pie dough on my YouTube channel, or look through the process images in the blog post below. To add a little extra something special to your sweet pies, try this all butter vanilla pie crust recipe!
One reader, Nicole, says, “Absolutely perfect pie crust! I’ve been using the Crisco standard recipe for decades. I tried this one as I never feel mine is quite flaky enough. I’m never going back…thank you for this simple recipe and easy to follow instructions!!”
This post contains affiliate links. If you click through and make a purchase, I may receive a small commission at no cost to you. Thank you for helping to support The Floral Apron!
Ingredients for Homemade All Butter Pie Crust
Pie crust is one of the simplest recipes—it only has three ingredients. Each of these ingredients is equally important, along with the methodology used to make the pie crust. For the absolute best results, use high quality ingredients.
- Cold, salted butter. The fat in butter will give us the signature flakiness you expect when it comes to pies. I use Kirkland Signature’s Grade AA butter, which has a butterfat percentage around 80%. Make sure the butter is cold, as it needs to hold its shape inside the dough order to leave behind flaky pockets of goodness when baked in the oven.
- All purpose flour. Regular, all-purpose flour works best for pies. We want a little bit of gluten to hold the dough together but not too much. All-purpose flour has just the right amount.
- Ice cold water. Water will keep your pie crust together and prevent it from crumbling. The water needs to be very cold to prevent melting the butter.
How to Get a Perfectly Flaky All Butter Pie Crust
I grew up thinking that good, flaky pie crusts were difficult to make. I thought that there was some special ingredient that made them flaky, or that the butter had to be a certain kind, or that you had to use an exact amount of water each time.
I’m happy to report that really couldn’t be further from the truth. If you’re capable of following directions, you can make a flaky pie crust on your very first try. There are all kinds of crusts and preferences out there. Aunt Deb’s famous pie crust might be everyone’s favorite… but your pie crust can come in at a close second!
There are two things to keep in mind when making pie crust: Butter and gluten.
Butter’s Role in Making a Flaky Pie Crust
Pie crusts are flaky, for the most part, because of the water content in the butter. Compared to other kinds of fat, butter has a high water content. Most butter made in the United States is about 18% water, whereas something like shortening is 0% water.
When you put the crust in the oven, the water from the butter starts to evaporate and turn into steam. Steam naturally takes up more volume than dry air, so the pocket of dough expands under the pressure. The steam then escapes and leaves behind an air pocket. The fat remains, leaving you with an empty space and forming a delicious layer.
Butter Size Matters
The size of the pieces of butter you use in your pie crust will directly correlate to the flakiness.
If you want large flakes, you will need to have large pieces of butter incorporated into the dough. I like to use chunks of butter that are about the size of grape. If you want smaller flakes, small pieces of butter will need to be incorporated into the dough.
I start by breaking up all the large pieces of butter before moving on to slightly smaller ones. When my largest piece of butter is the size of a grape, I give the dough a flip to verify I’ve gotten all the chunks to the size I want. Variety in the size of butter chunks also helps create a flaky crust.
You can also use a pastry cutter/dough blender to break the butter into smaller pieces, if you would prefer.
Gluten’s (Lack of a) Role in Making a Flaky Pie Crust
The second thing to keep in mind when making pie crust is gluten. Gluten forms when wheat proteins come into contact with water. Additional mixing continues to hydrate the dough, resulting in gluten development and a chewy crust rather than a flaky one.
To keep pie crusts flaky and not chewy, it is imperative to keep the gluten development down. You can do this by making sure not to overmix the dough and by adding in some alcohol, like vanilla extract, if you’re making a sweet pie.
When mixing your dough together, do your best to gently guide the flour where you want it to go rather than forcing it. Less movement will result in less gluten development, which will result in a perfectly flaky crust.
Why Do I Need to Chill Pie Dough?
Pie crusts need to chill in the fridge for two reasons:
- The flour needs to hydrate. Even after you’ve added water to the pie dough and spread it throughout the dough, the flour hasn’t fully absorbed it. Think of the different reactions you have when dipping your fingers in water for a second versus soaking them in the pool for 10 minutes. Hydration takes time. The dough will be softer and less crumbly (and much easier to work with) once the flour has fully hydrated.
- The butter in the pie crust softens quickly, especially in warmer temperatures. Chilling the dough solidifies the butter so that it doesn’t spread in the dough. Hard, distinguishable pieces of butter in your dough will result in flaky layers.
Quick Tips for Rolling Out Pie Crusts
The temperature of the butter is quite important in this recipe, so pay close attention to your butter. If the butter starts to go soft at any point in the process, place the entire disc in the fridge, covered, for 15 to 20 minutes to firm up the butter. Warm butter won’t hold its shape as easily and can become muddled within the dough.
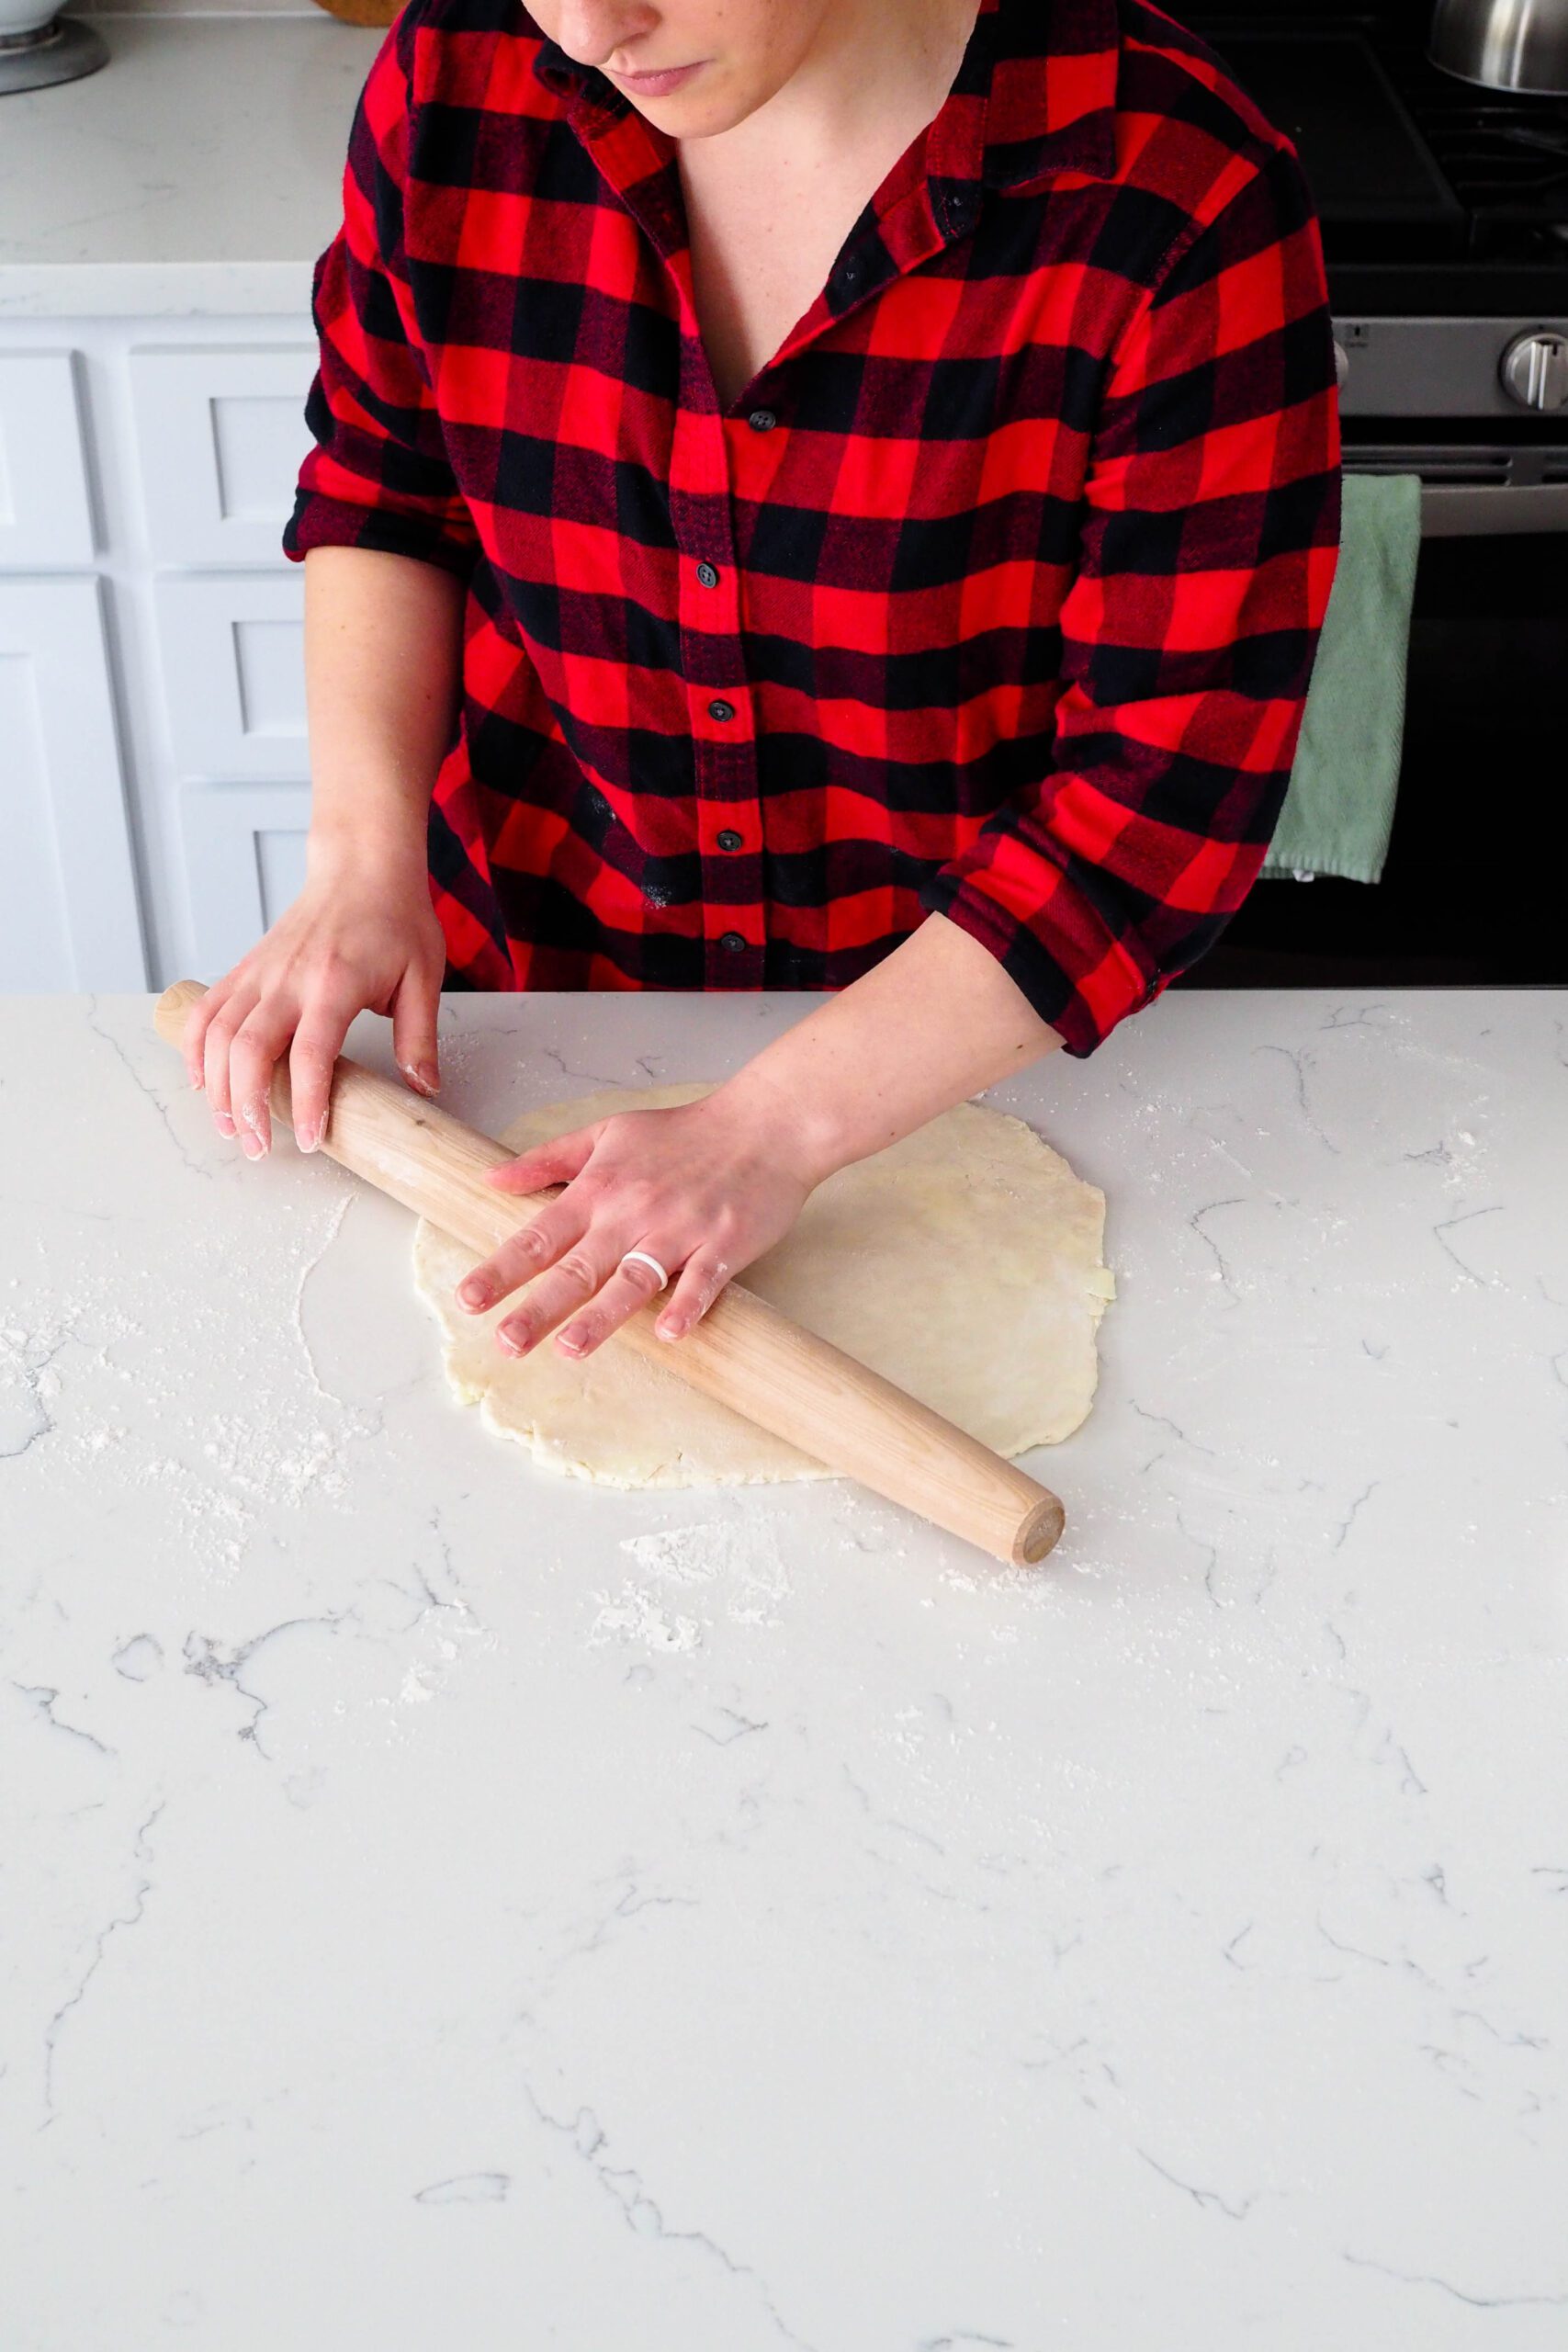
When rolling out the dough, use a lightly floured surface and rotate the dough a quarter turn after each roll. This will prevent the dough from getting stuck to the counter. Add flour sparingly, but do so as needed to prevent sticking.

Pie dough warms up (read: goes sticky) within a few minutes in the heat of summer. Plan ahead and roll out your pie crusts in the morning or evening when it’s cooler, if possible. You can also pre-cool your workspace by placing ice packs on your counter or putting your entire cutting board in the fridge or freezer for 30 minutes.
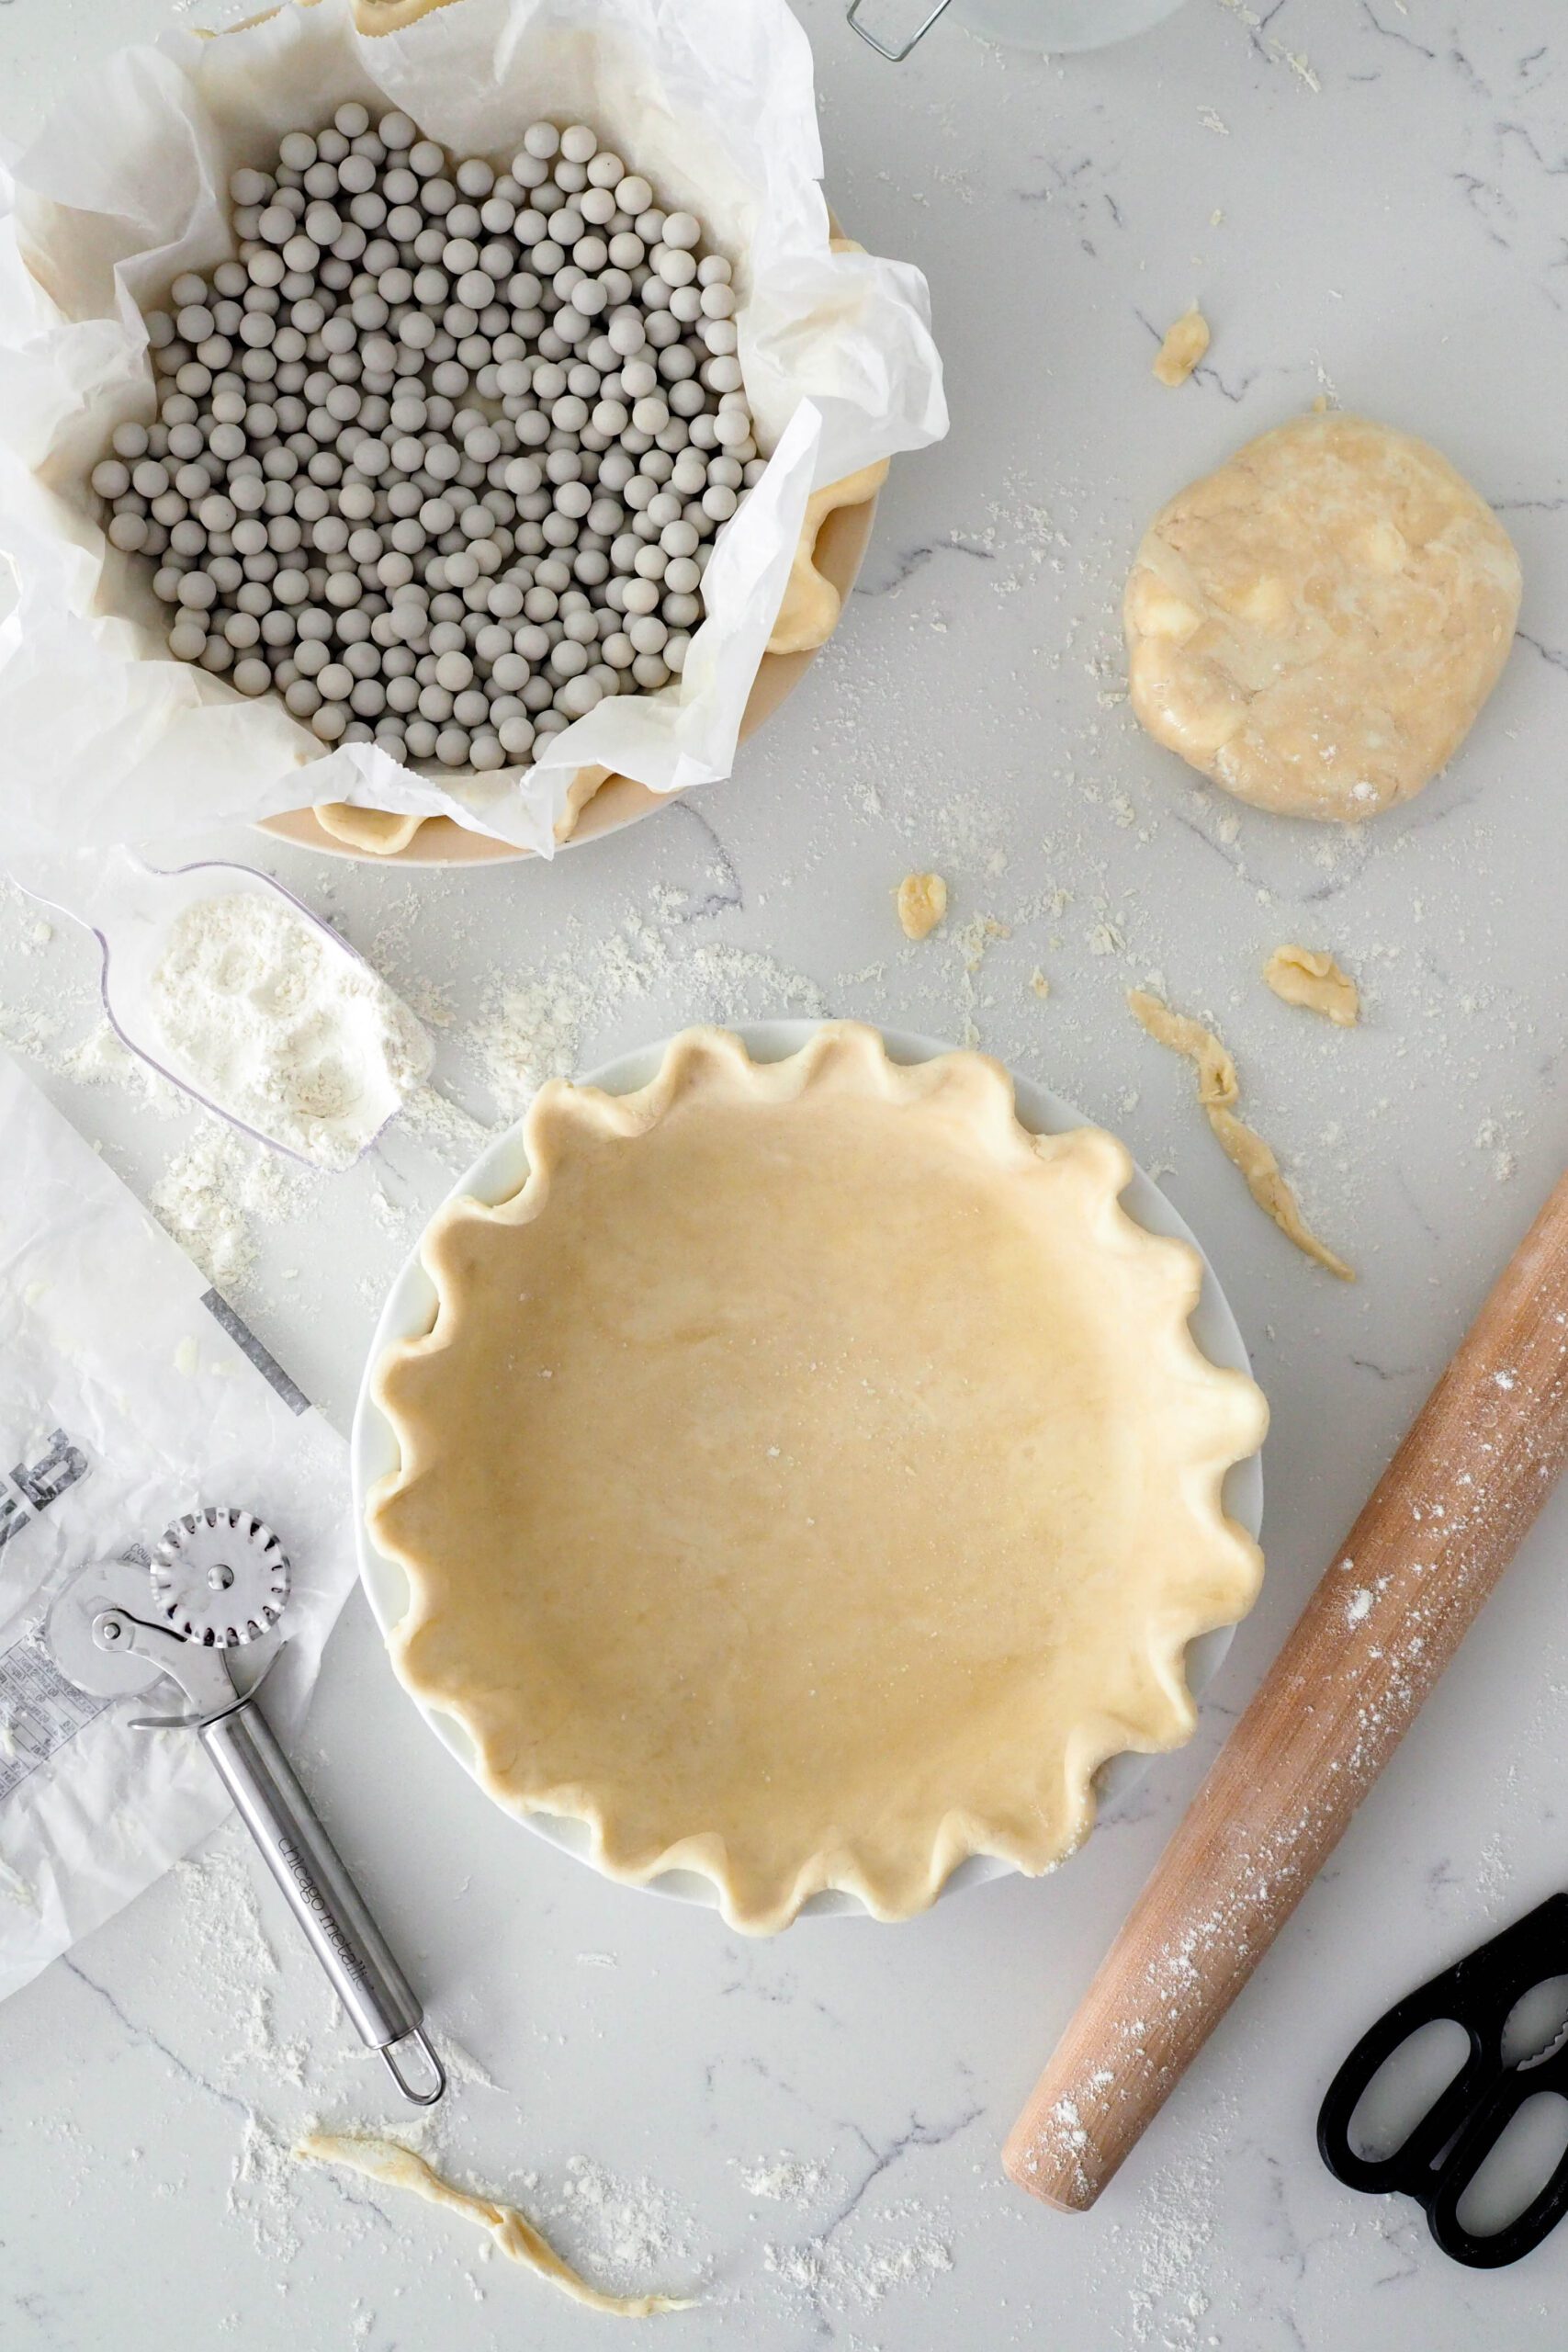
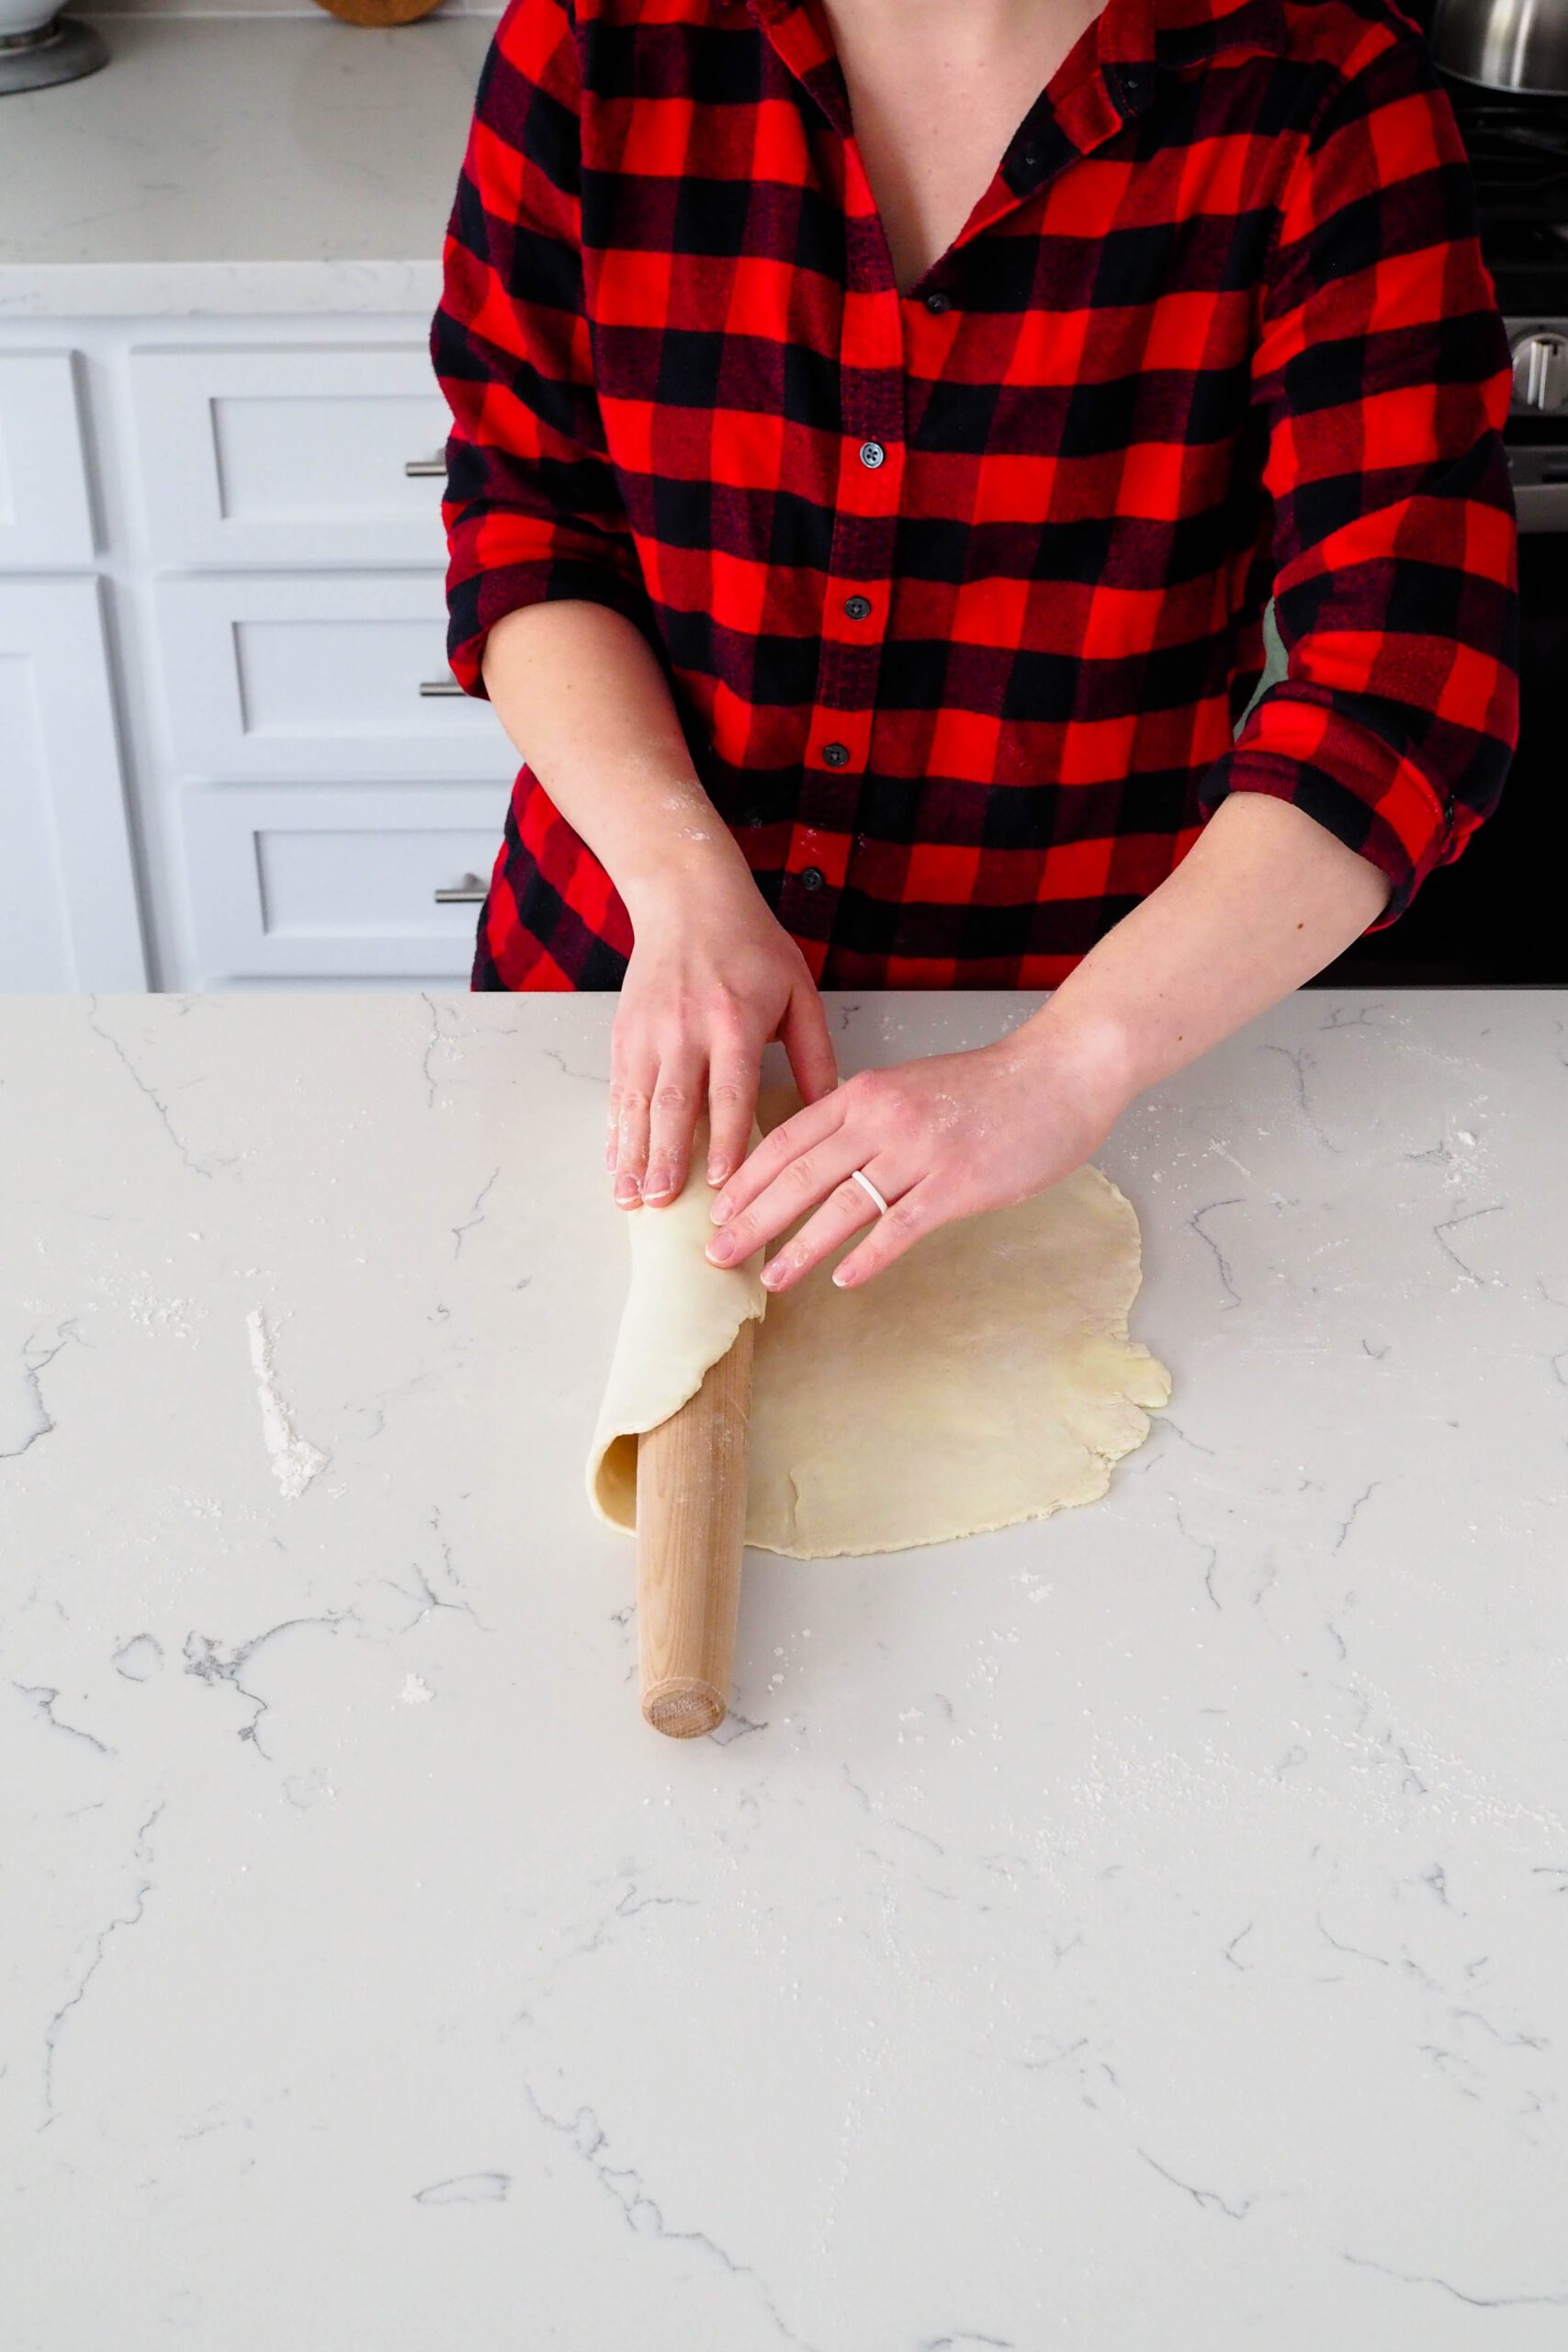
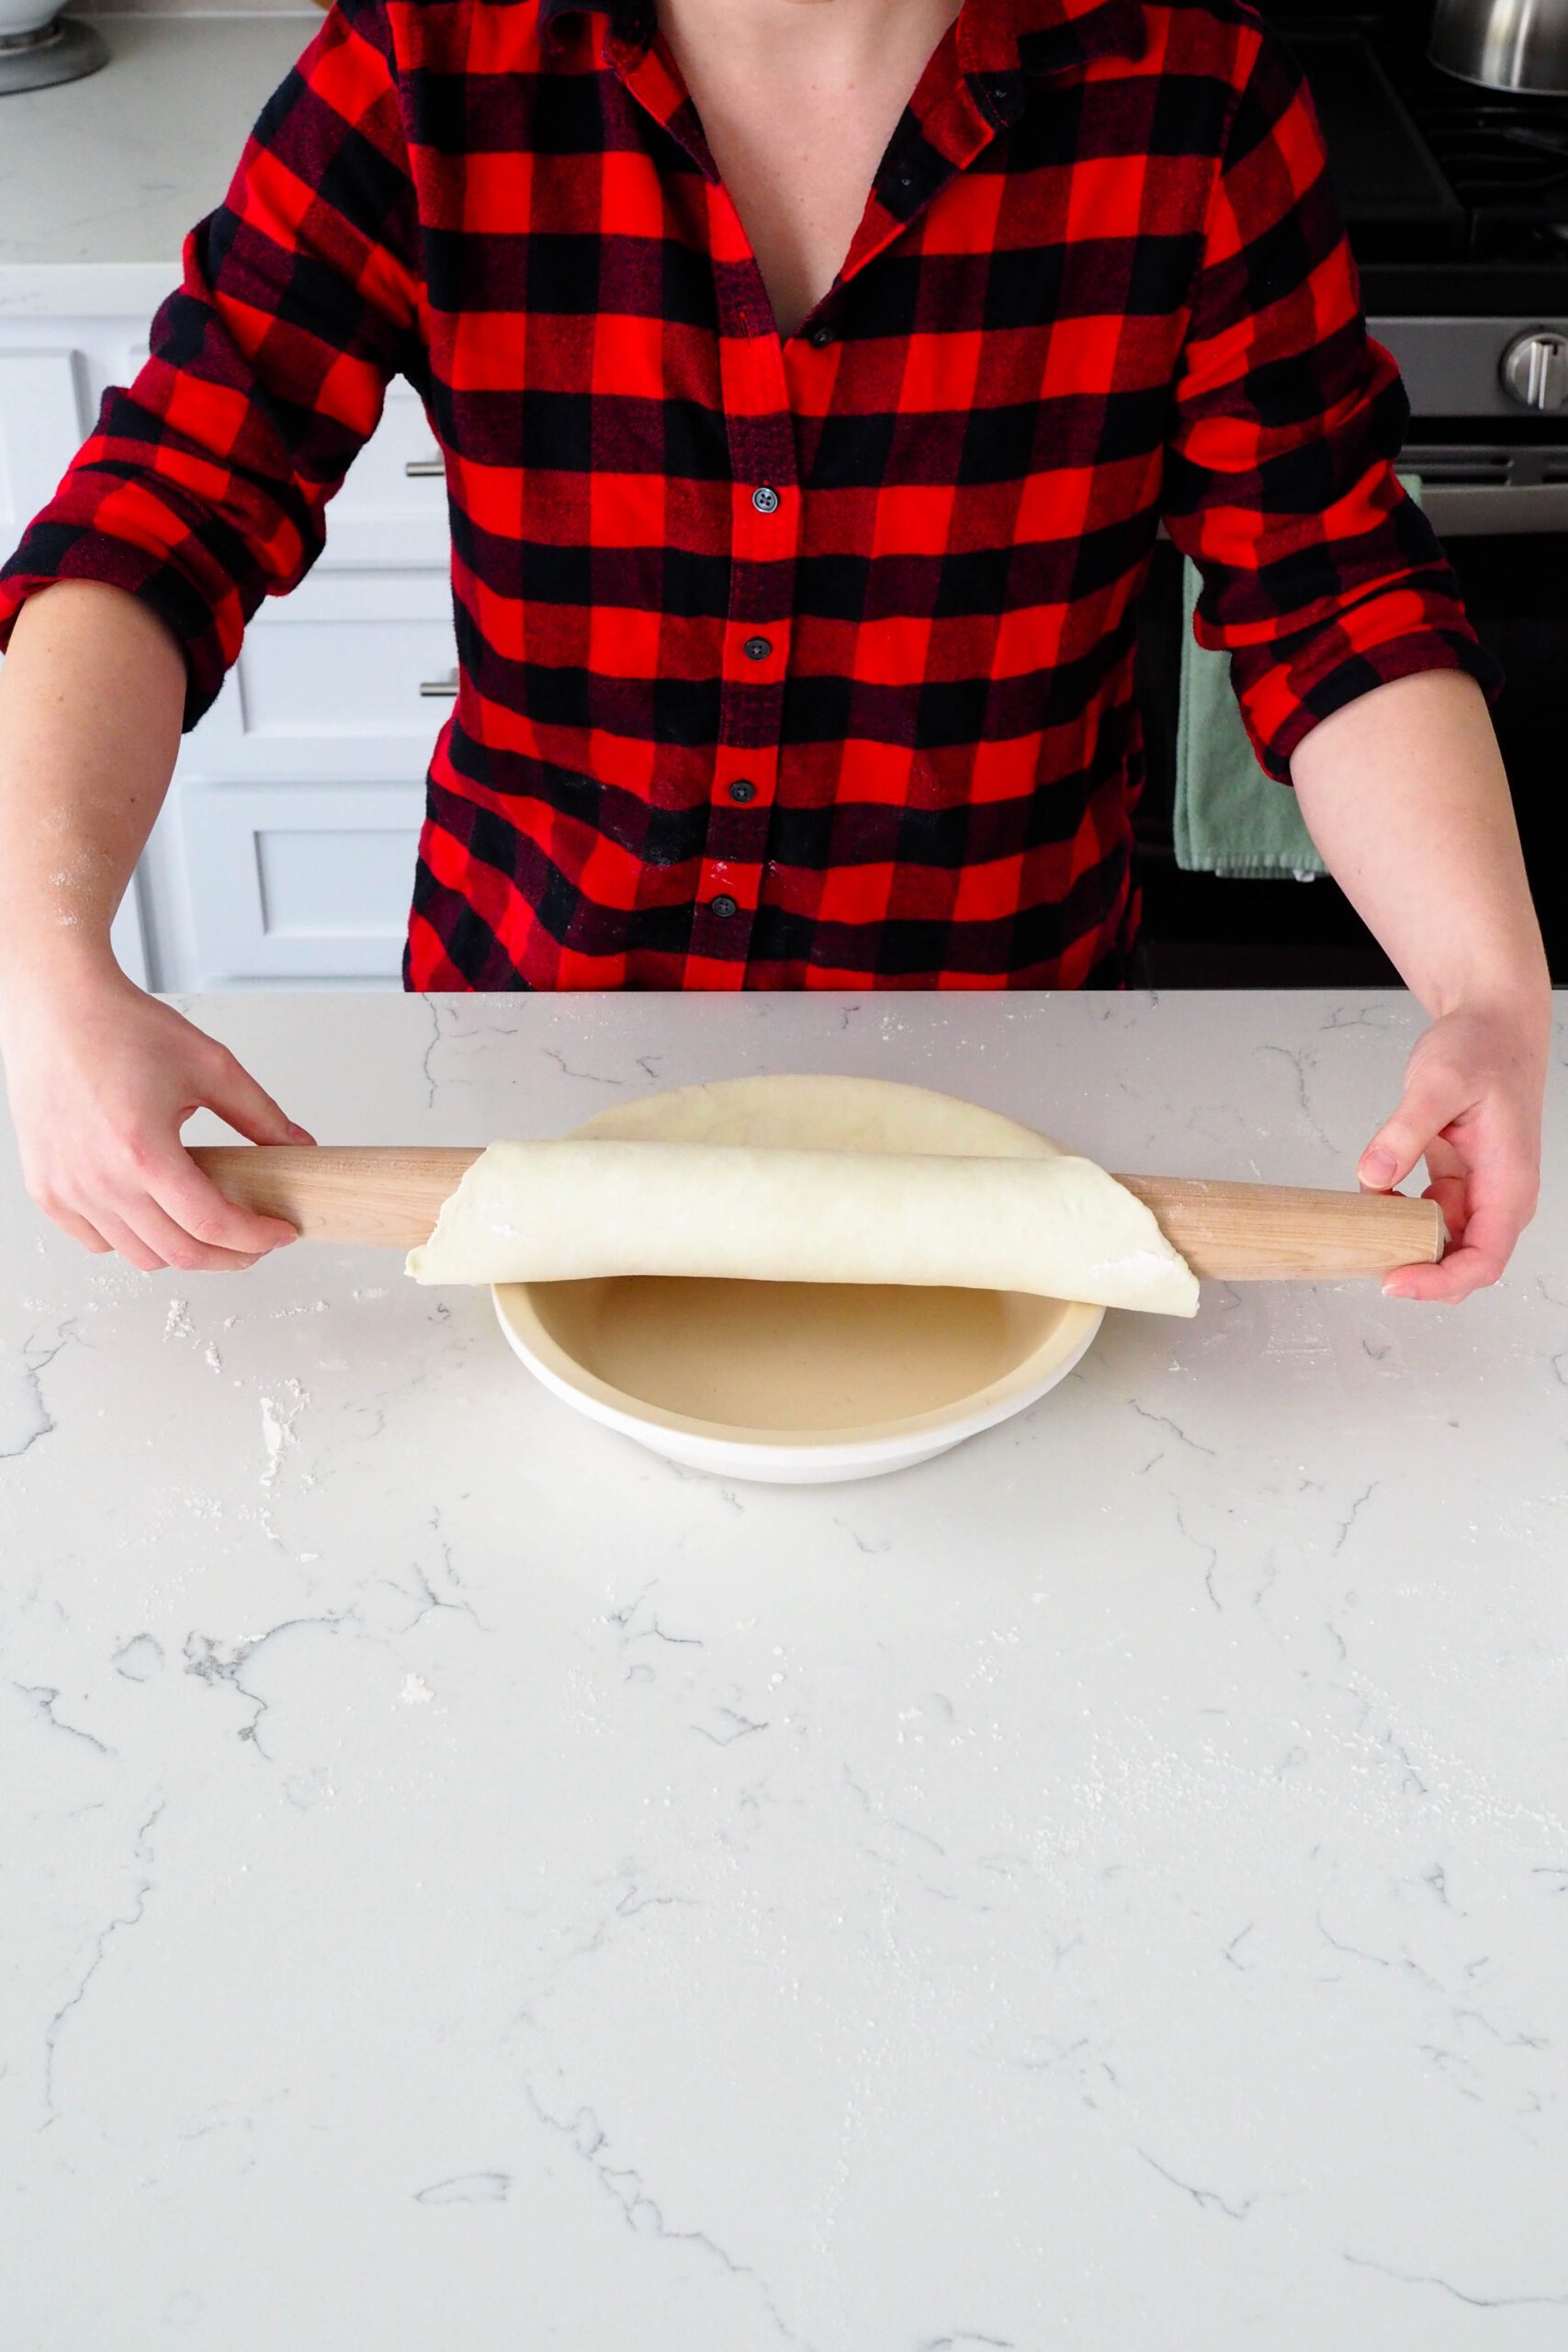
To transfer your rolled out pie crust to the pie pan, loosely roll the pie crust up on the rolling pin. Place the edge of the crust on the edge of a pie dish and unroll the pie crust over it. This works best with solid rolling pins, as ones with a handle may roll on you!
Dish Cleanup: Not Too Bad
I rate my recipe cleanups on a scale of 1 to 5. 1 is only a handful of dishes, and 5 is everything including the kitchen sink.
My all butter flaky pie crust recipe has a cleanup rating of a 2. Pie crust can take a little time to master, but the dishes are no sweat. I like to wipe everything out with a paper towel to reduce the amount of fat that I have to wash off in the sink.
If you’re like me, you may also have butter and flour all over the fridge handles, too. Those are easy enough to wipe off!
Other Recipes You May Enjoy
Make my favorite homemade chicken pot pie with this pie crust for best results. My recipe uses mushrooms and celery rather than peas and corn for better flavor and texture.
Upgrade a classic with my cherry pie with almond extract recipe. The vanilla in the crust really shines!
Did you know that leftover baked pie crust pieces are amazing in ice cream? My cherry pie ice cream recipe is one-of-a-kind and totally delicious.
All Butter Flaky Pie Crust Recipe
All Butter Flaky Pie Crust
Made with just butter, flour, and water, this is a perfectly flaky and buttery homemade pie dough. Step-by-step instructions ensure a consistent and beautiful pie crust every time.
Ingredients
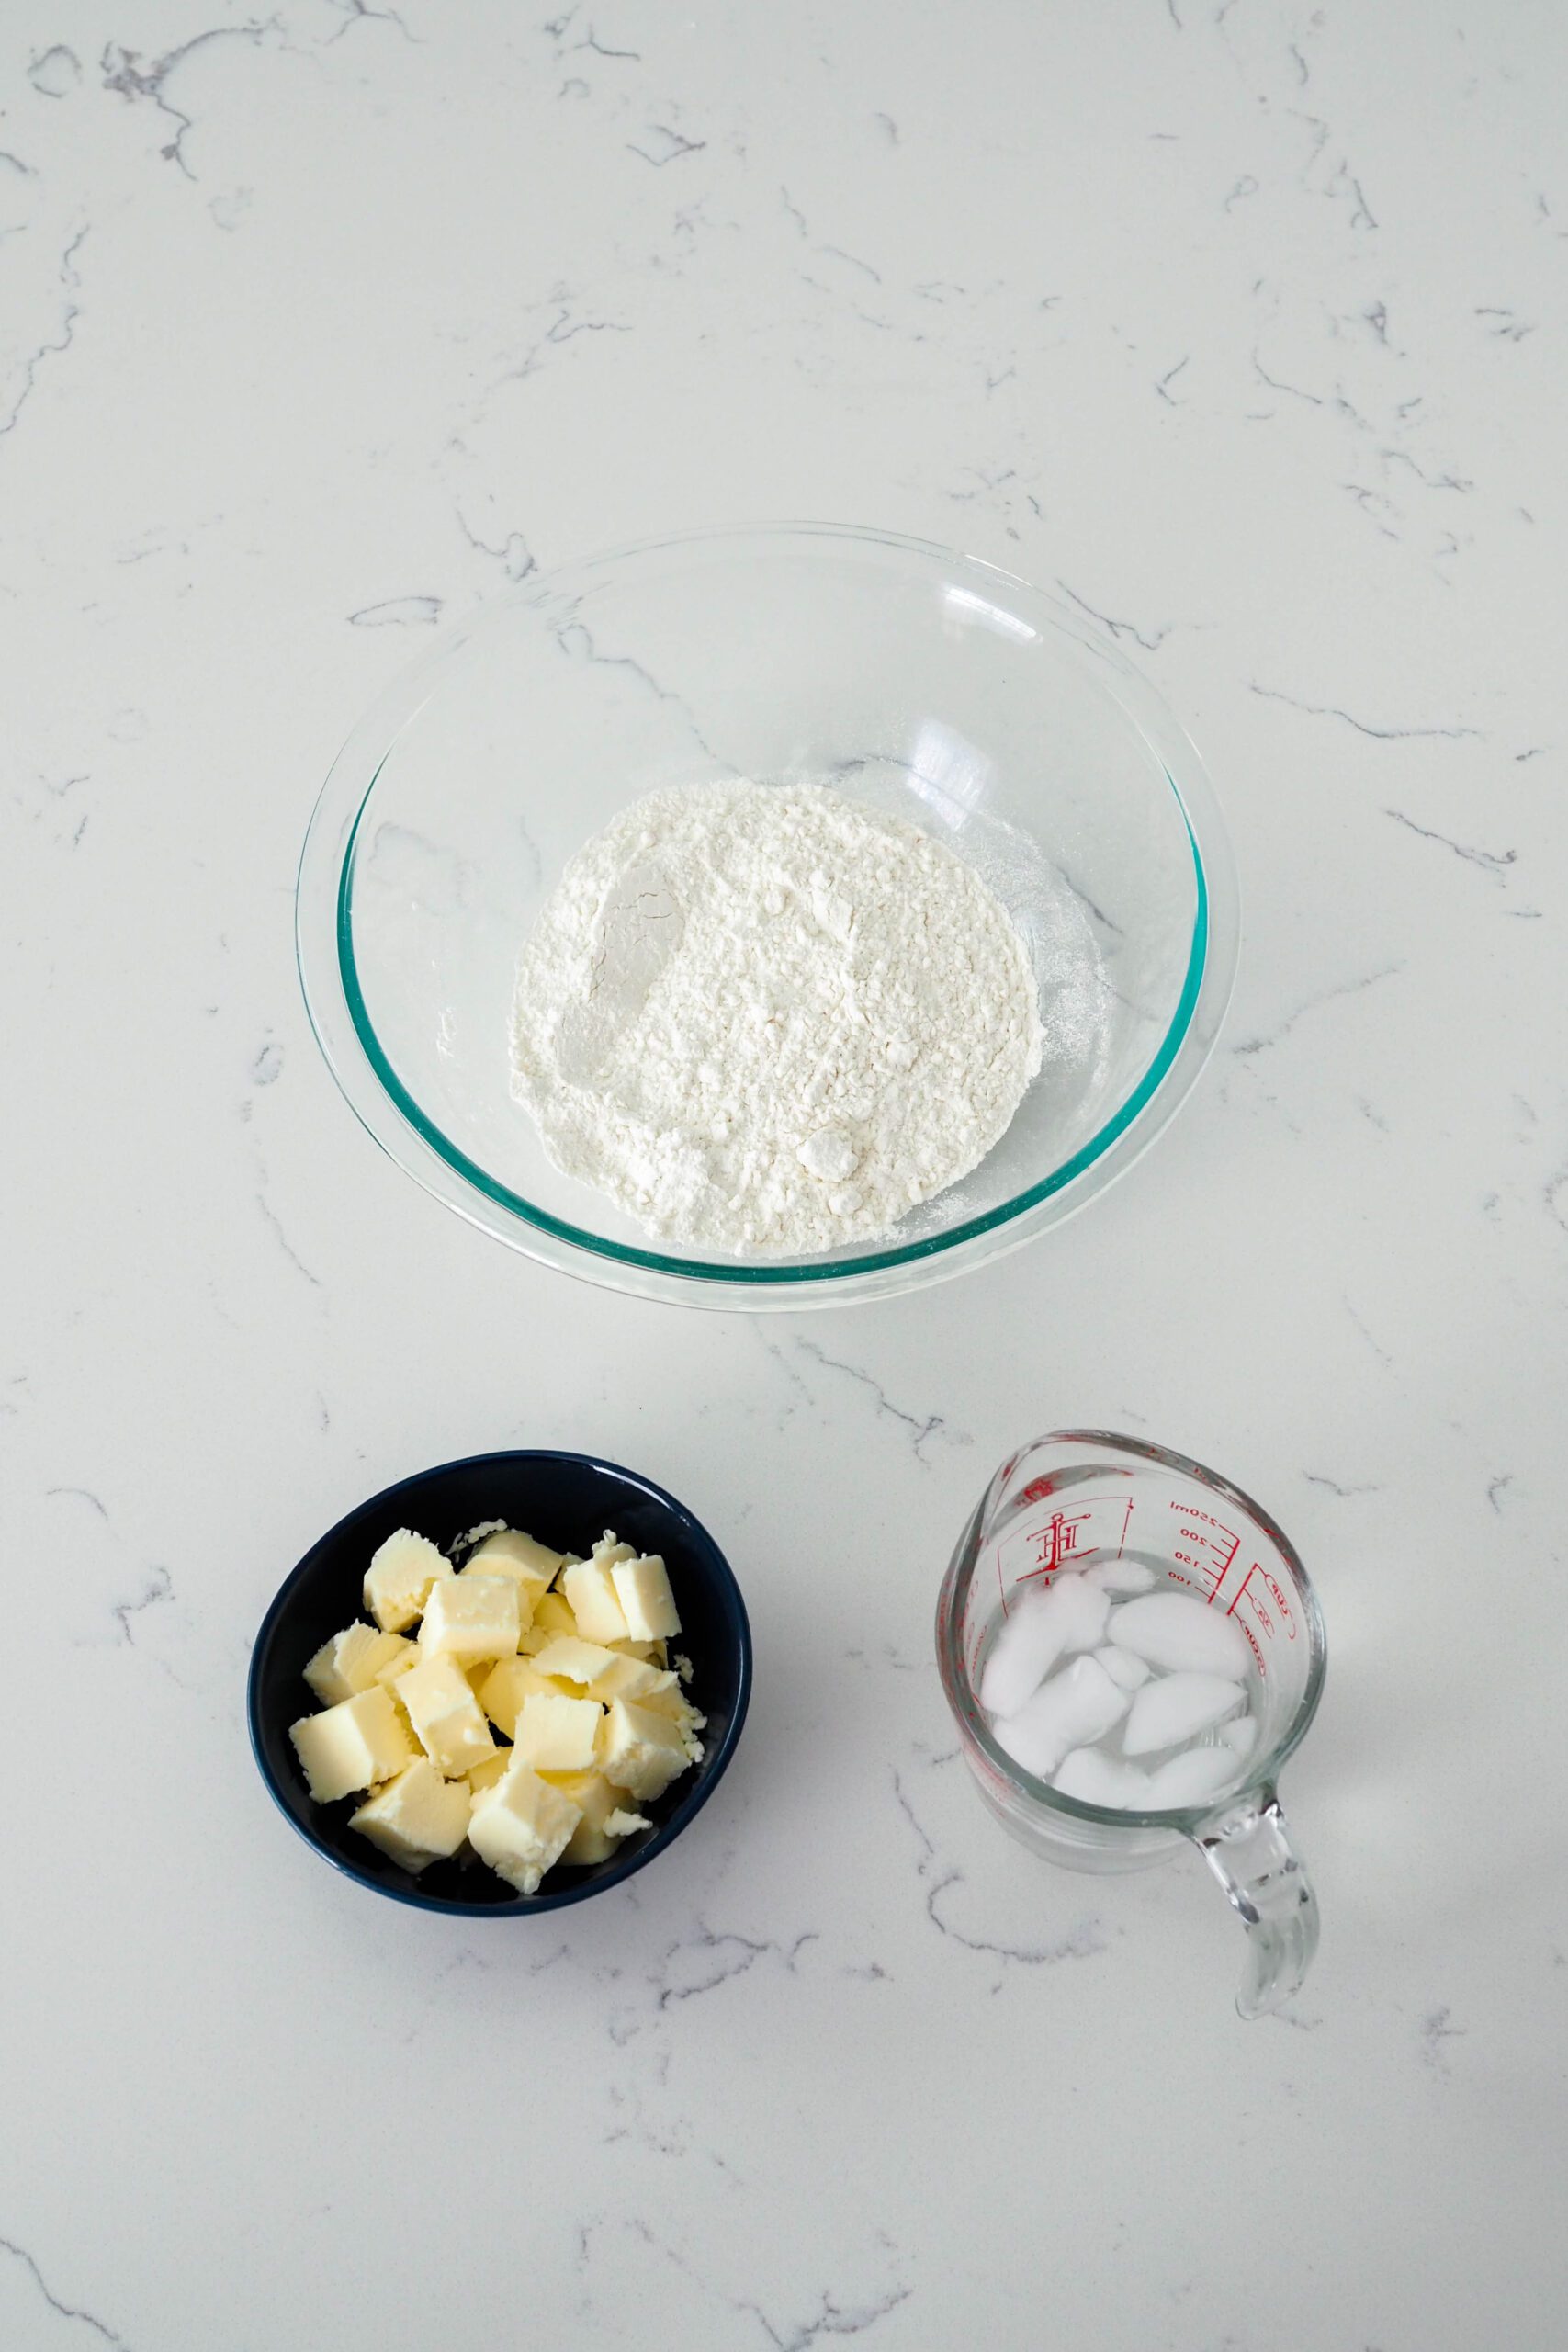
- 1 cup all purpose flour (135 g)
- 8 Tablespoons salted butter, cold (113 g)
- 3-4 Tablespoons ice cold water (45-60 ml)
Instructions
- Remove the butter directly from the fridge and cut it into small cubes about ¼" to ½" (6 to 12 mm).
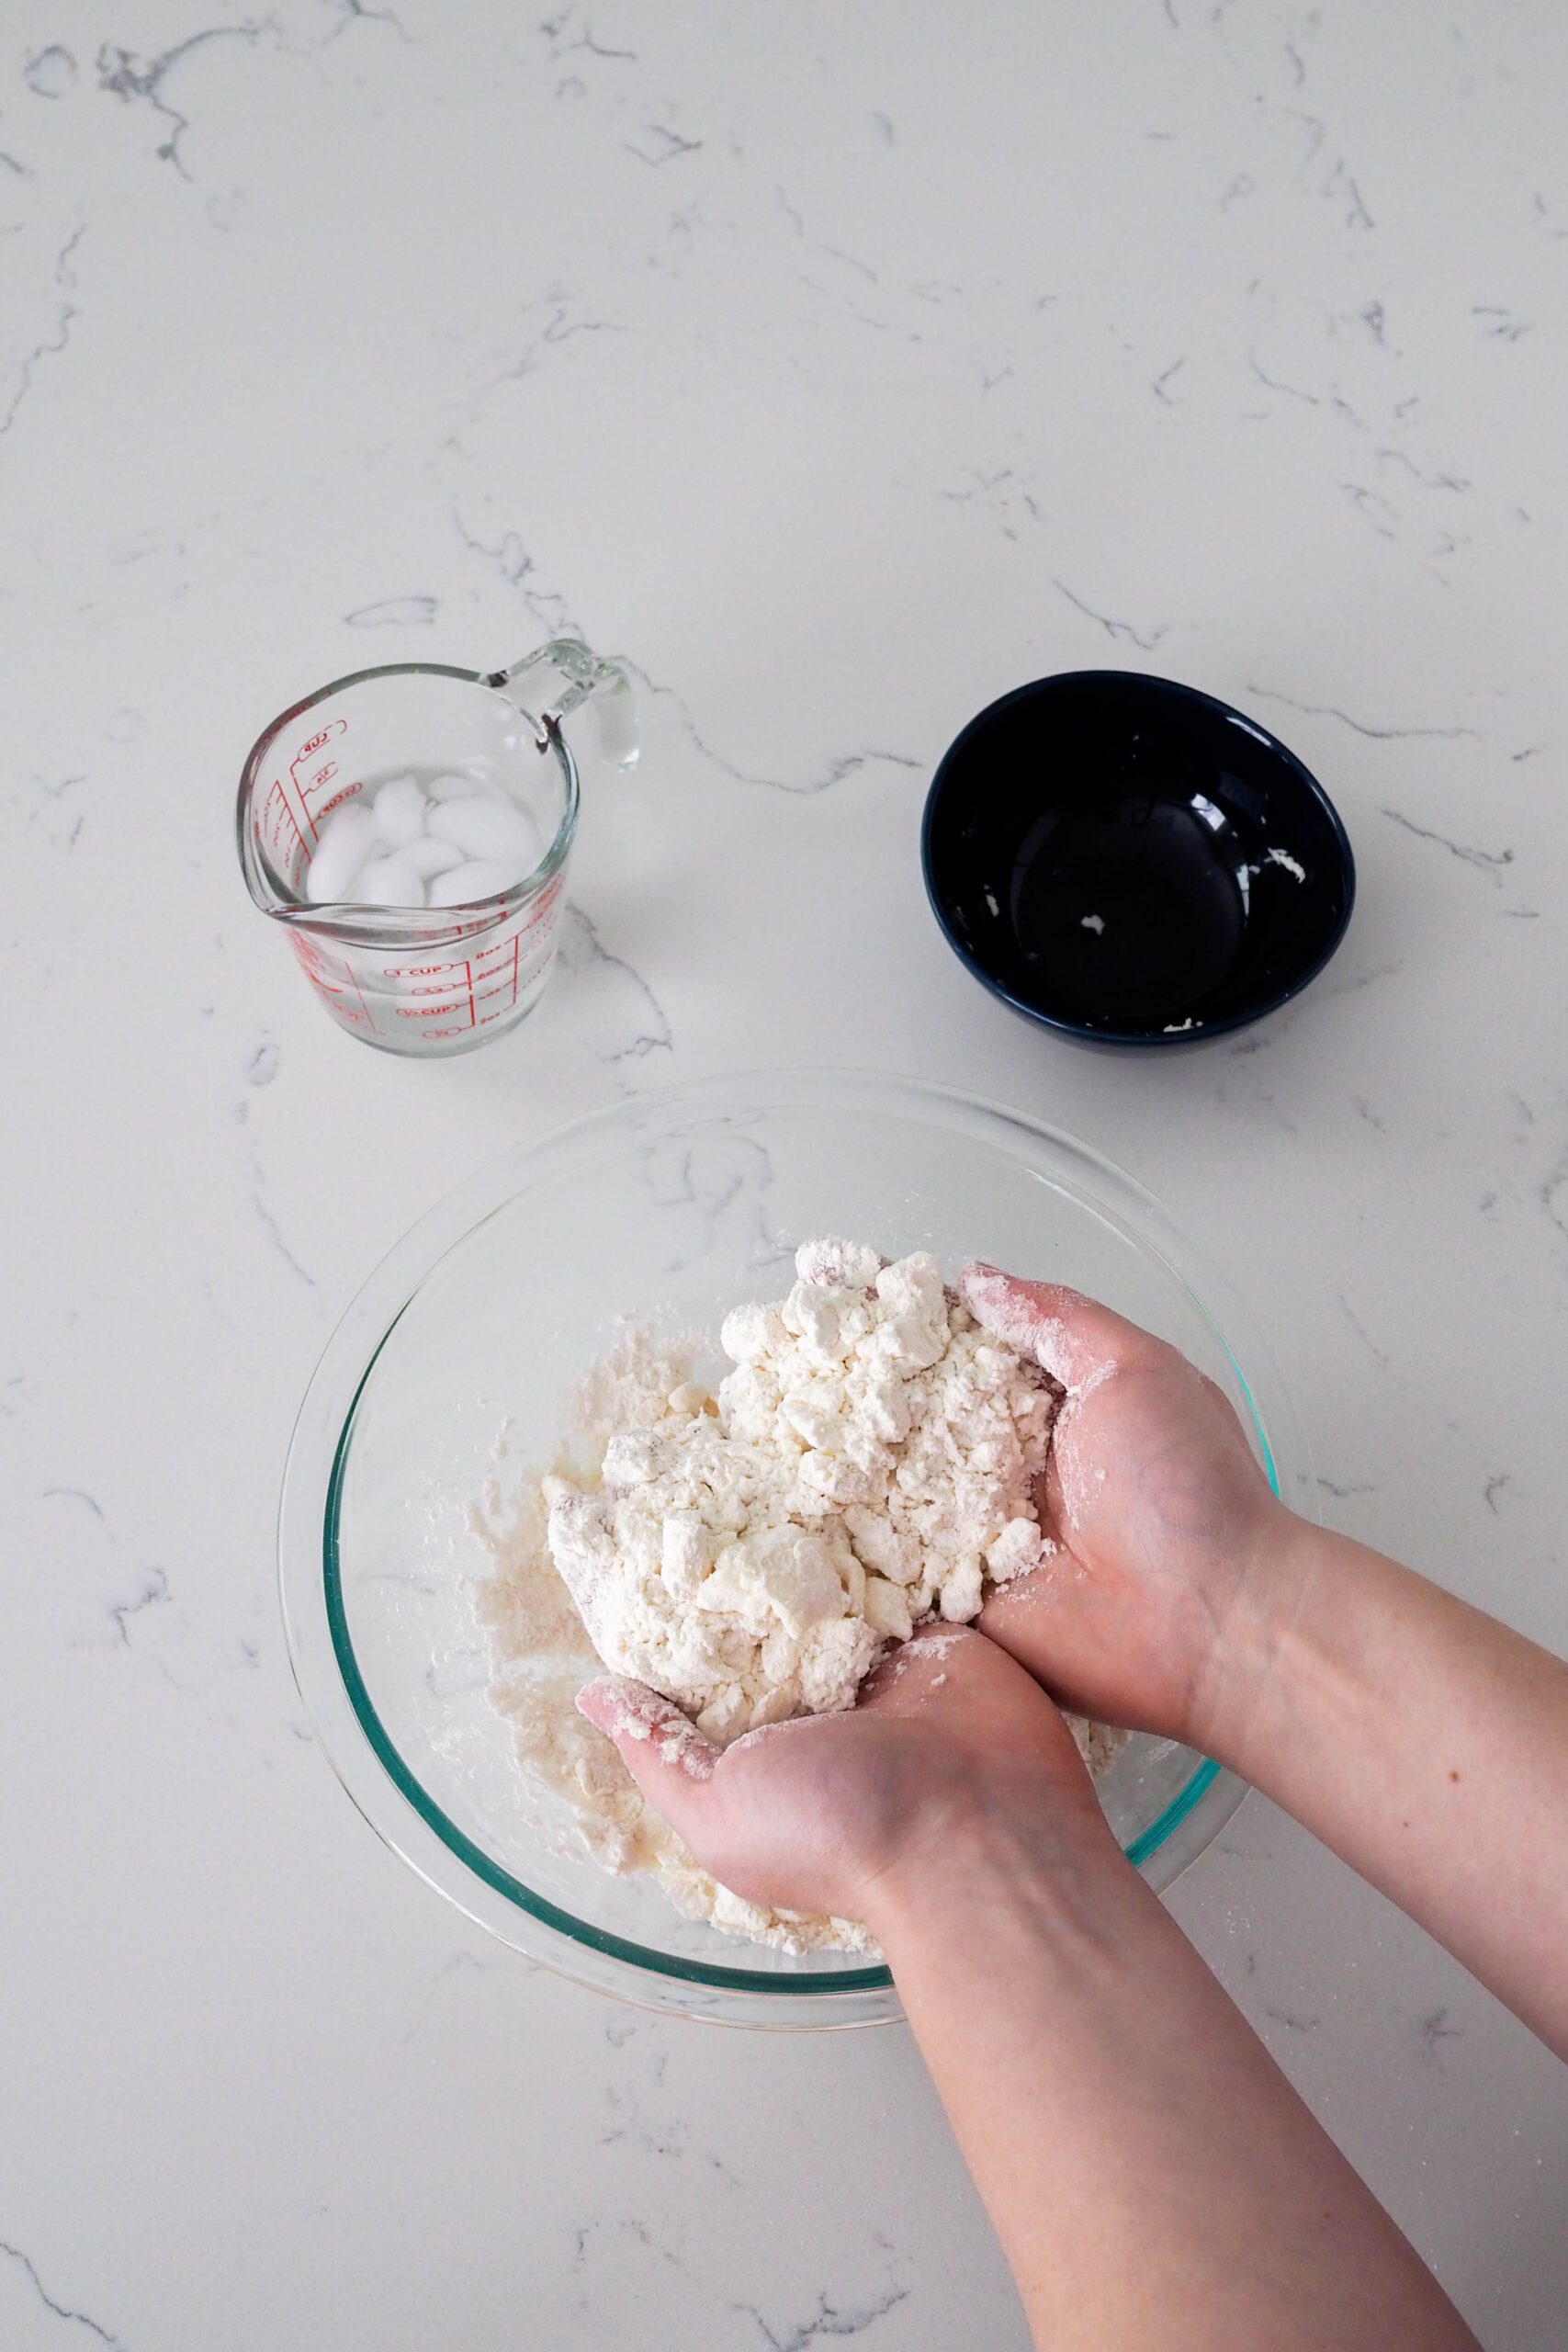
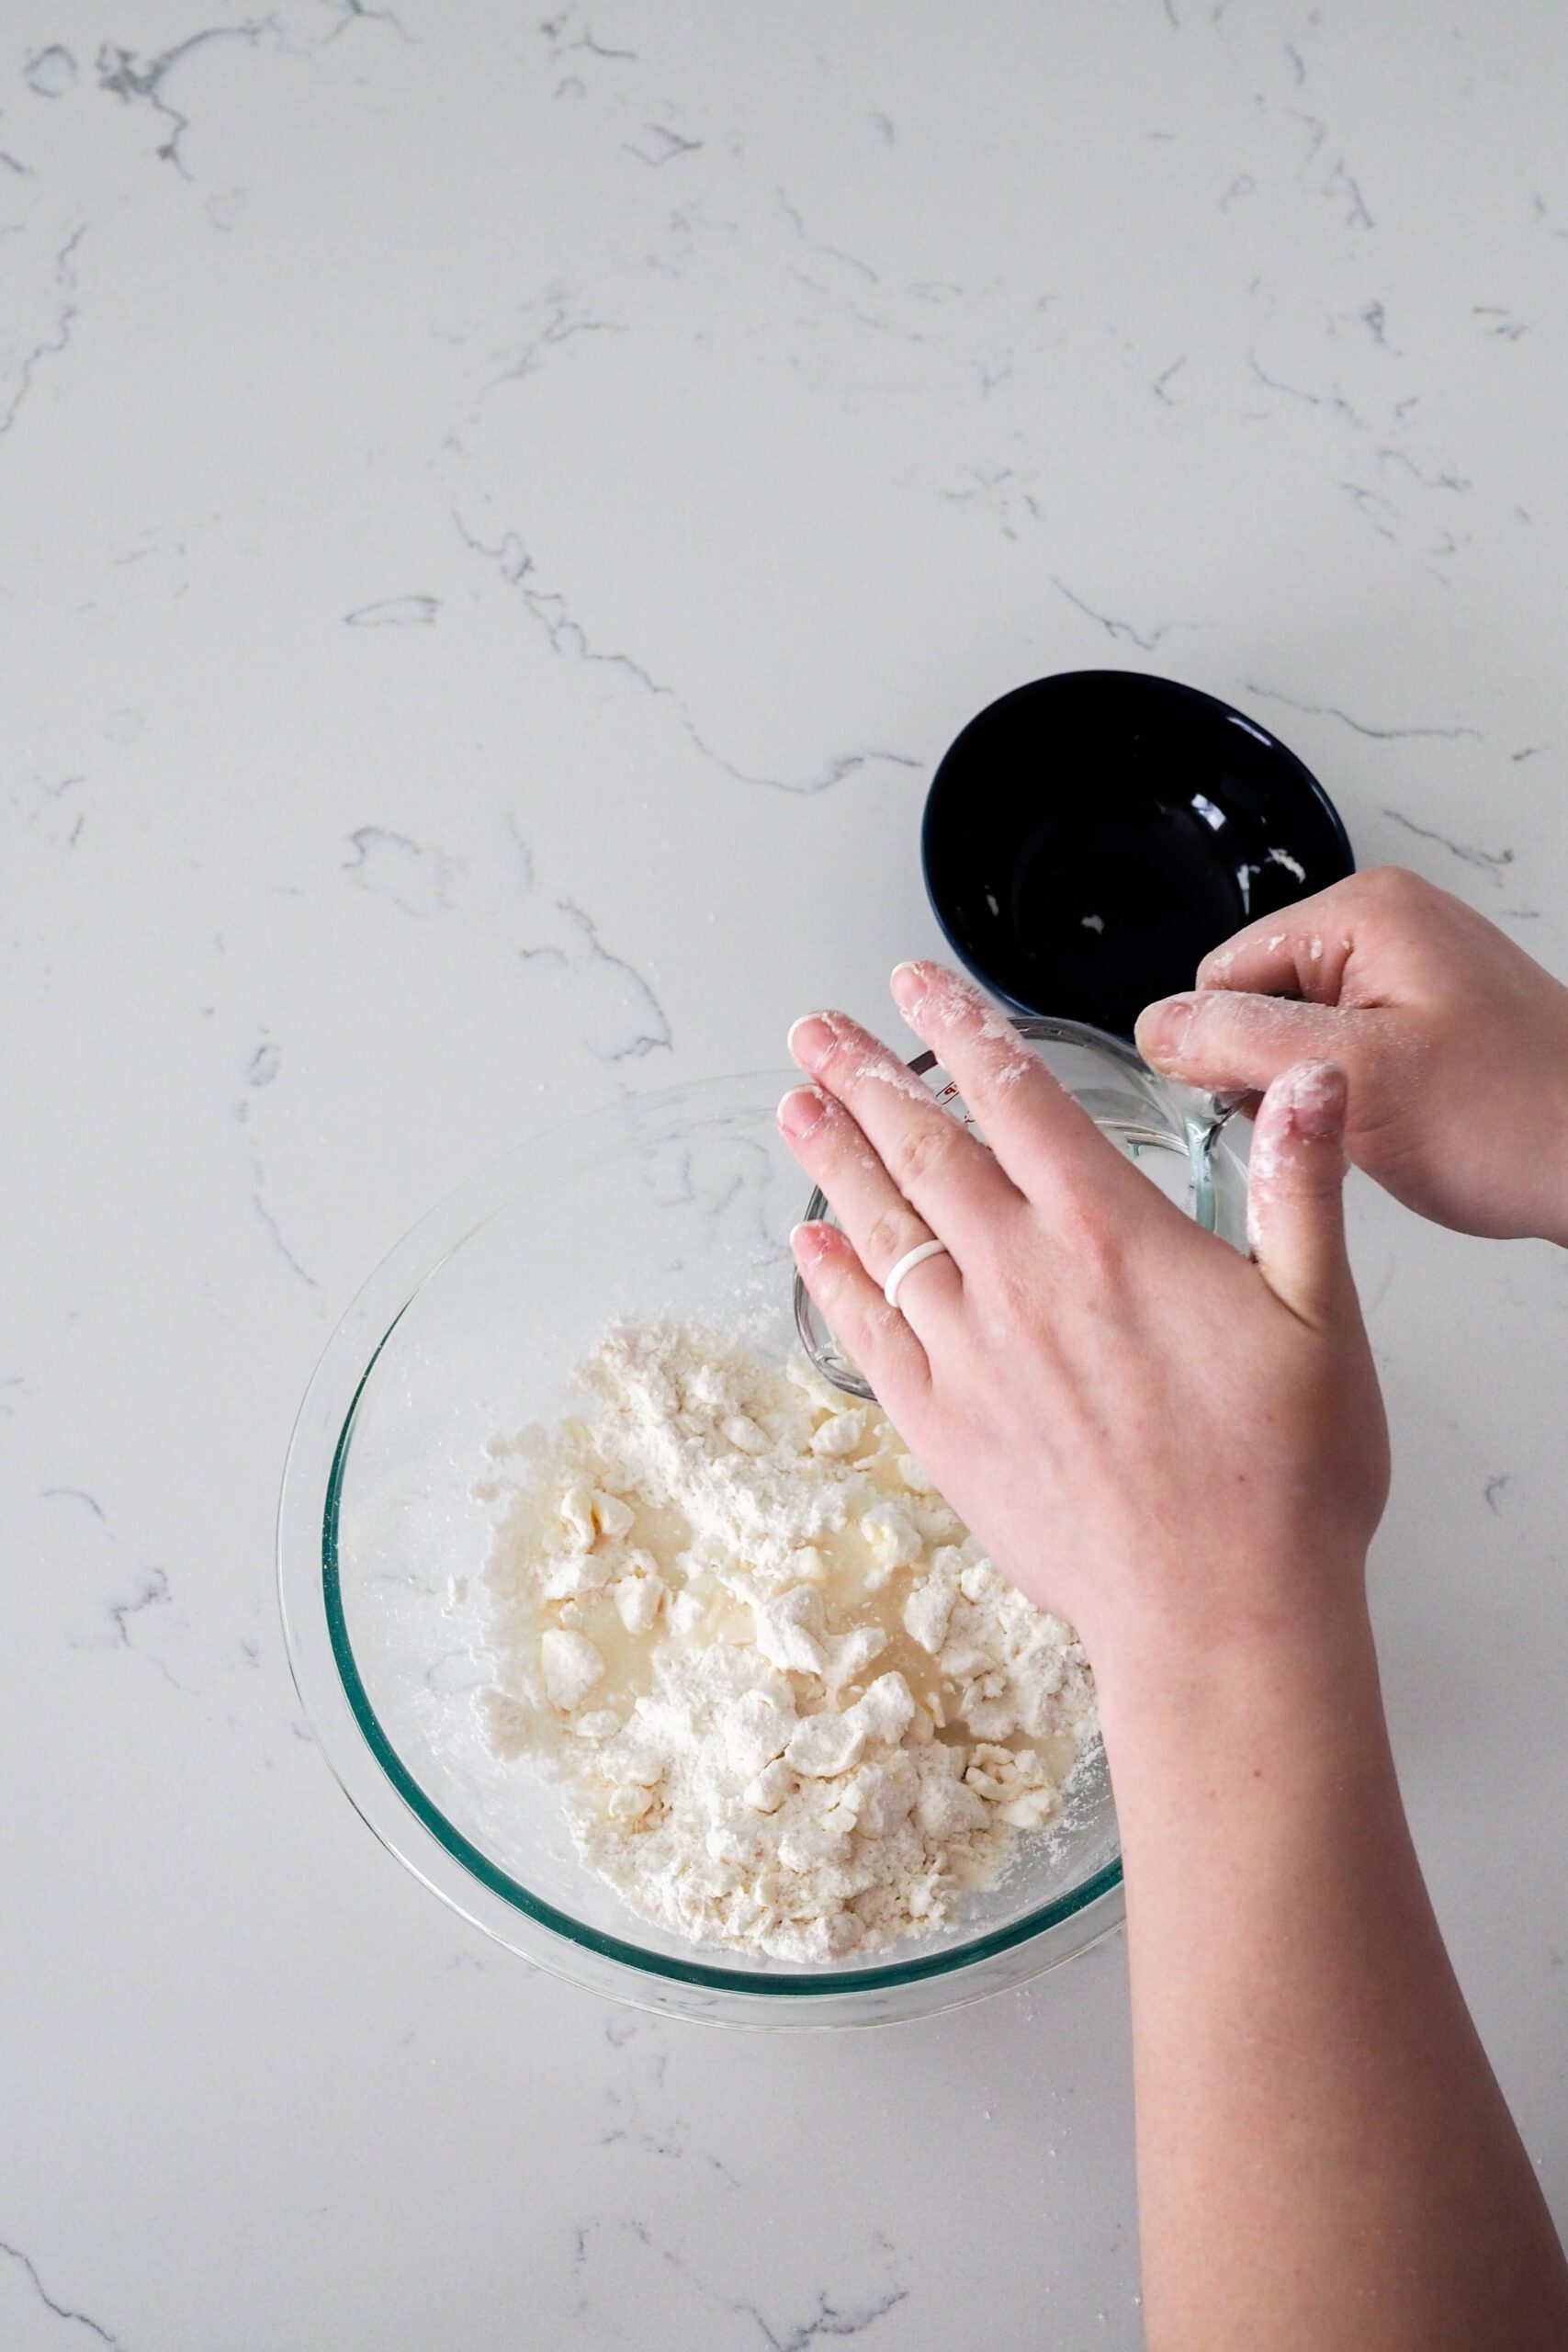
- Place flour and cubed butter in a medium bowl. Then, take a cube of butter coated in flour in your fingers. Rub the cube between your thumb and first two fingers. It will break up and flatten into smaller pieces, each becoming coated with flour. Drop the pieces back into the bowl, give it a stir, and then grab another flour-coated cube. Repeat this with all the cubes until the largest chunk of butter is about the size of a grape. You may need to rub some of the larger pieces multiple times.
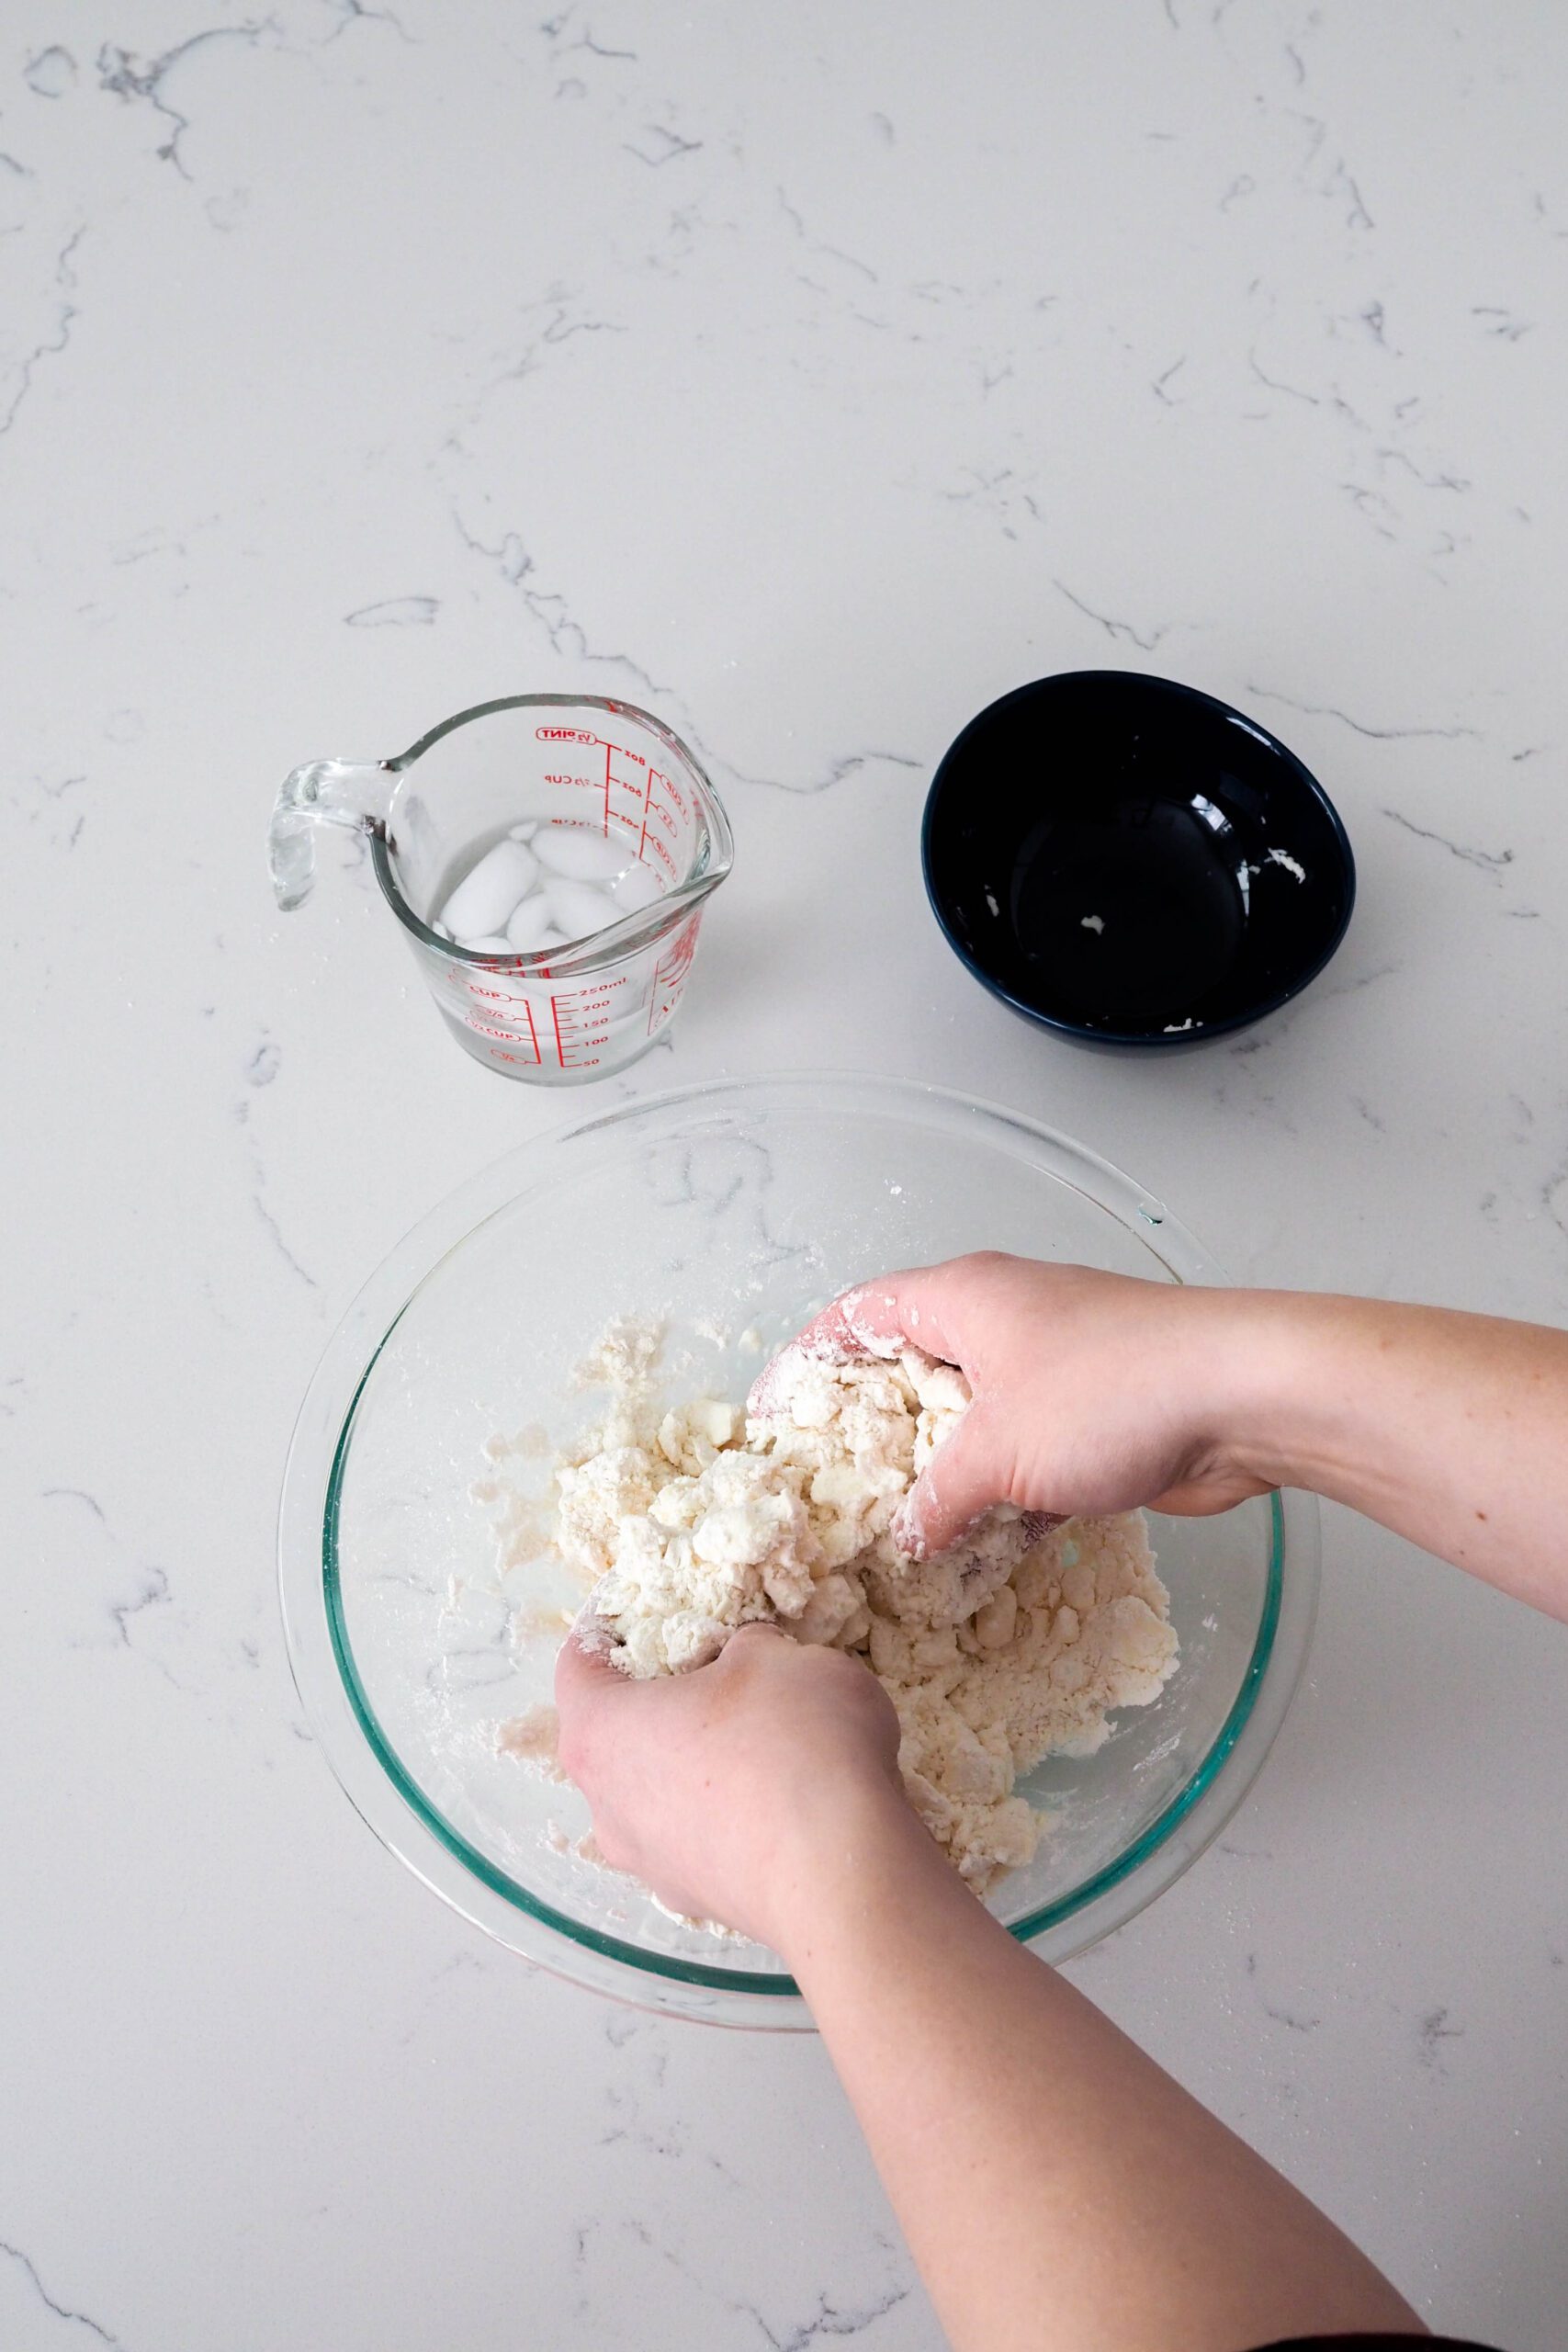
- Pour half of the water over the flour mixture, then begin folding the dough together. Slide your hand down the edge of the bowl until you get to the bottom, and then flip the mixture on top of itself. Then divide the dough in half down the middle and squeeze the sides together. Continue doing this until all the water has been absorbed and no pockets of water remain. Do your best to gently guide the flour where you want it to go rather than forcing it in the direction. Less movement will result in less gluten development, which will result in a perfectly flaky crust.
- If the dough is still crumbly and flour remains at the bottom of the bowl, add in another Tablespoon or two of ice water and gently fold together until all the flour mixes into the dough. I use around 3 Tablespoons of water in winter and, sometimes, up to 4 Tablespoons in summer.
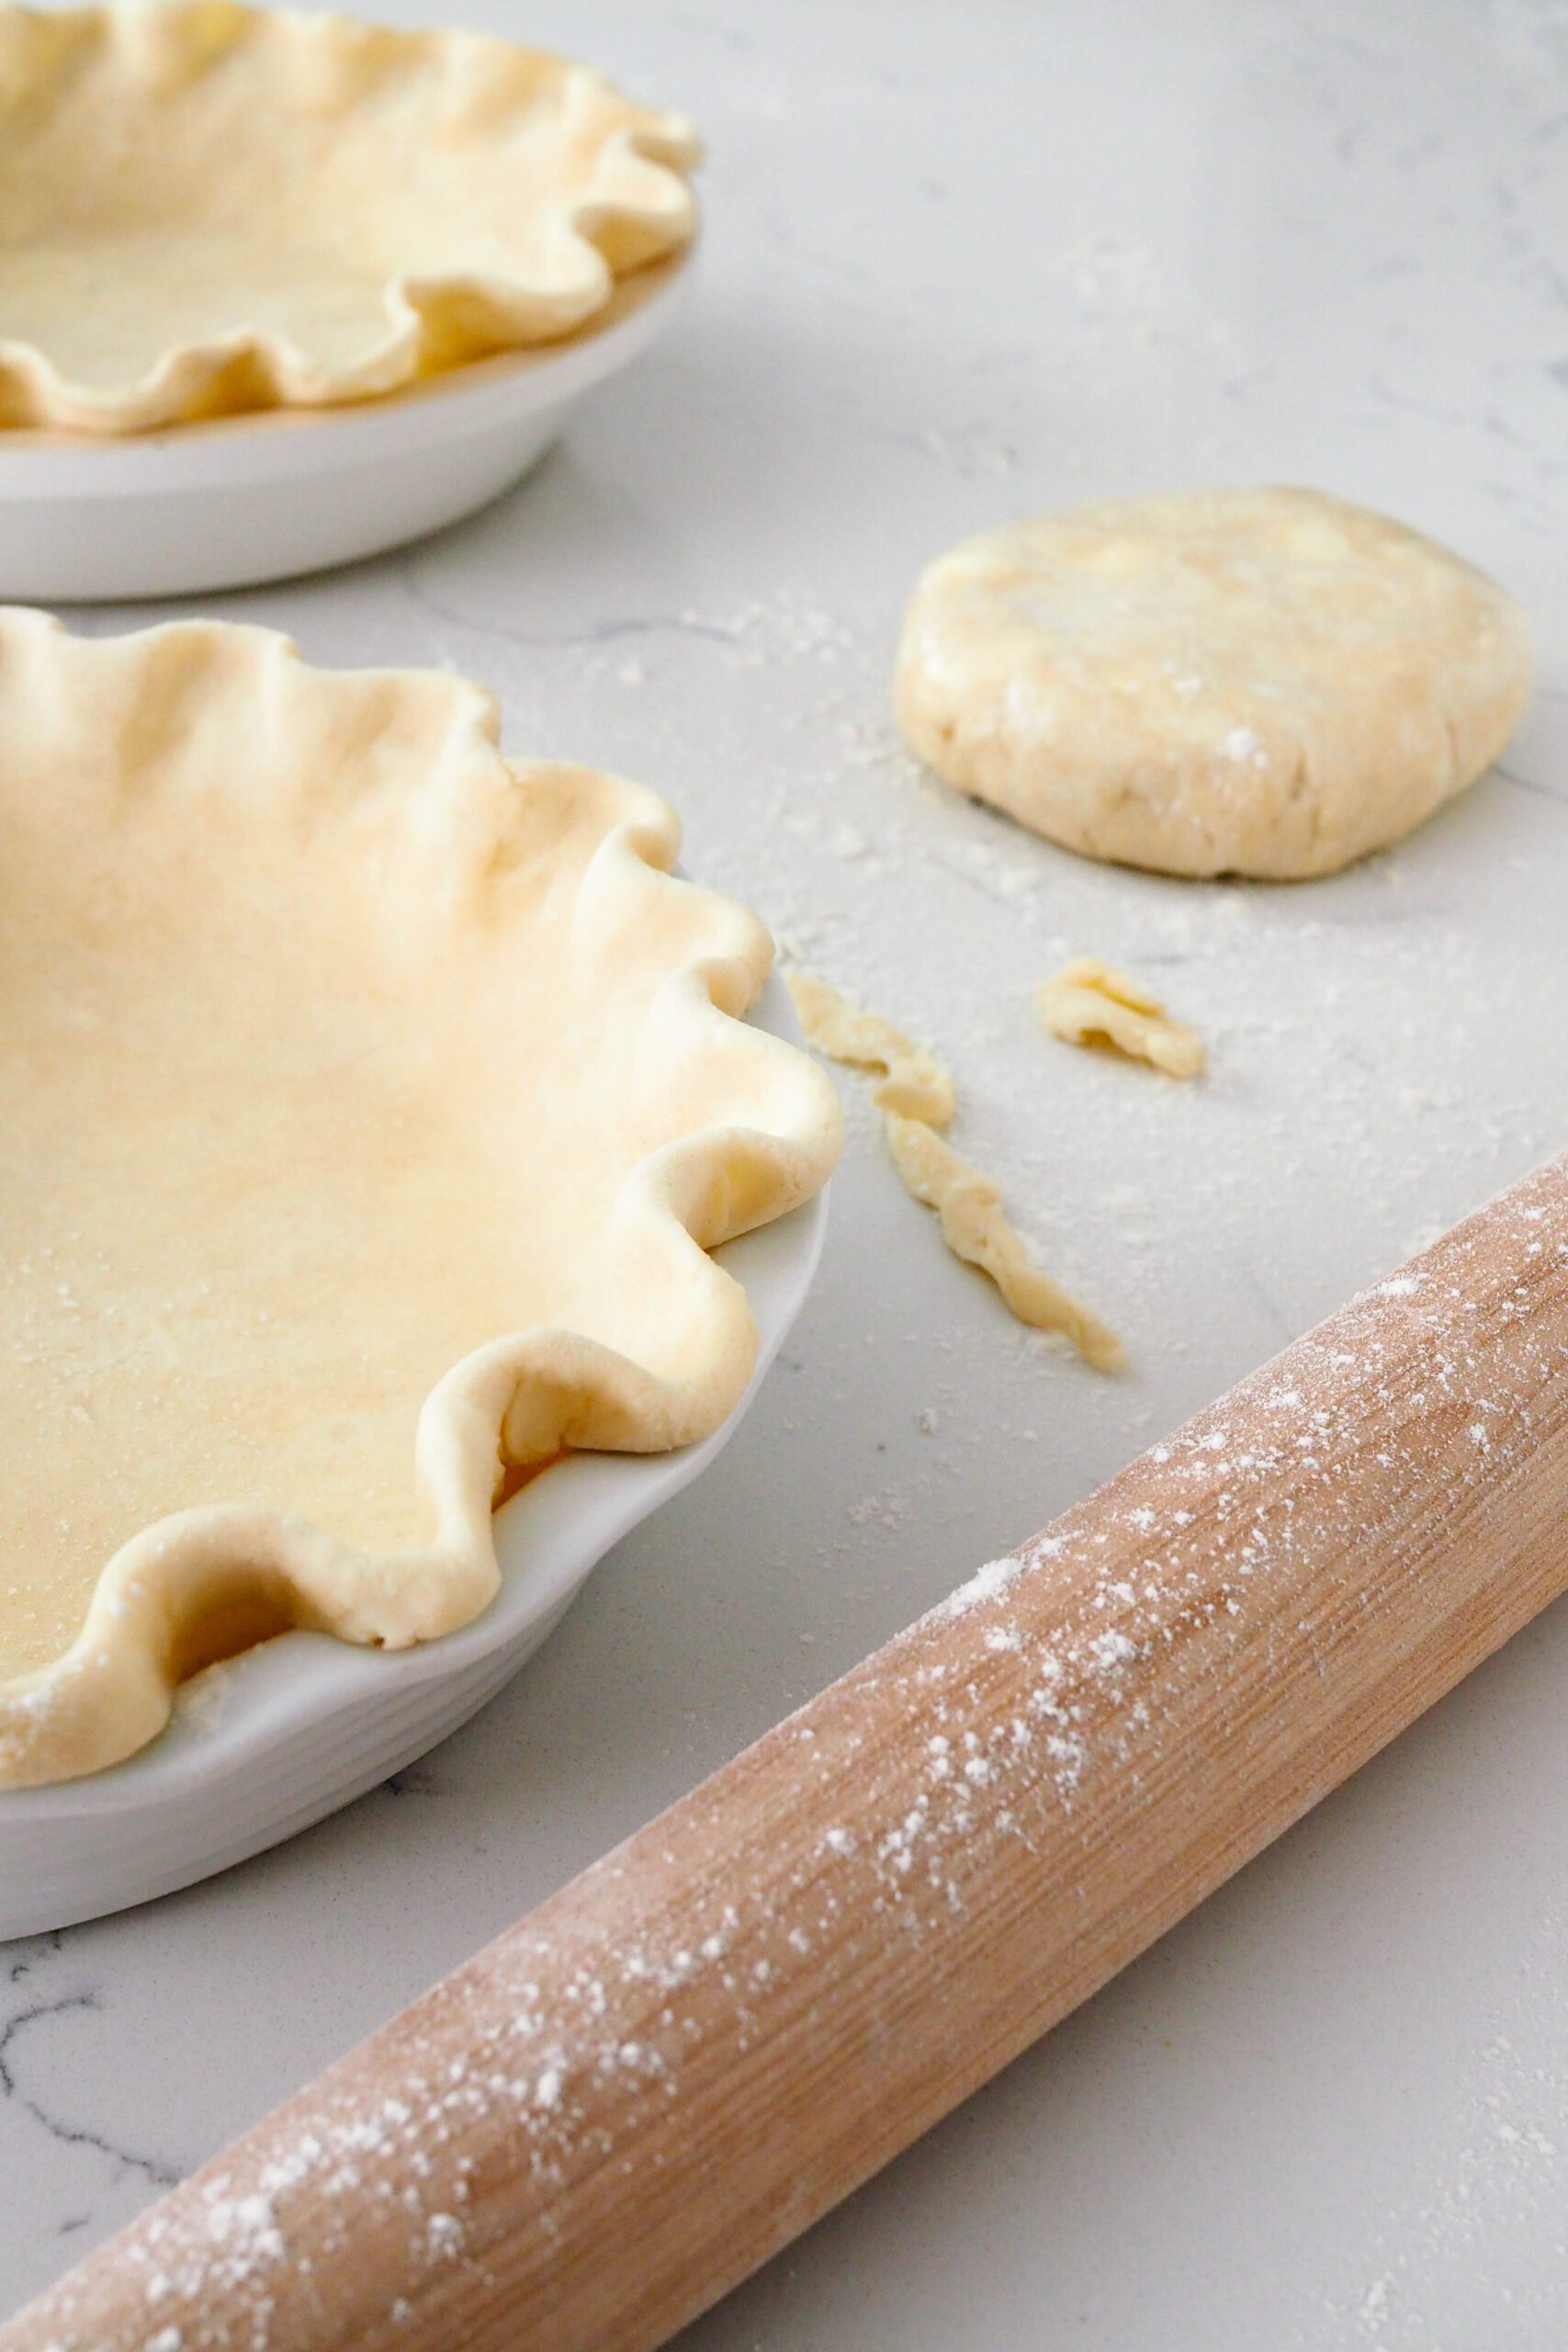
- Remove the dough from the bowl and place on top of a piece of plastic wrap. Lightly shape the dough into a disc, then cover completely with the plastic wrap. Refrigerate for at least 2 hours or up to 3 days. You may also freeze the dough for up to three months for best results.
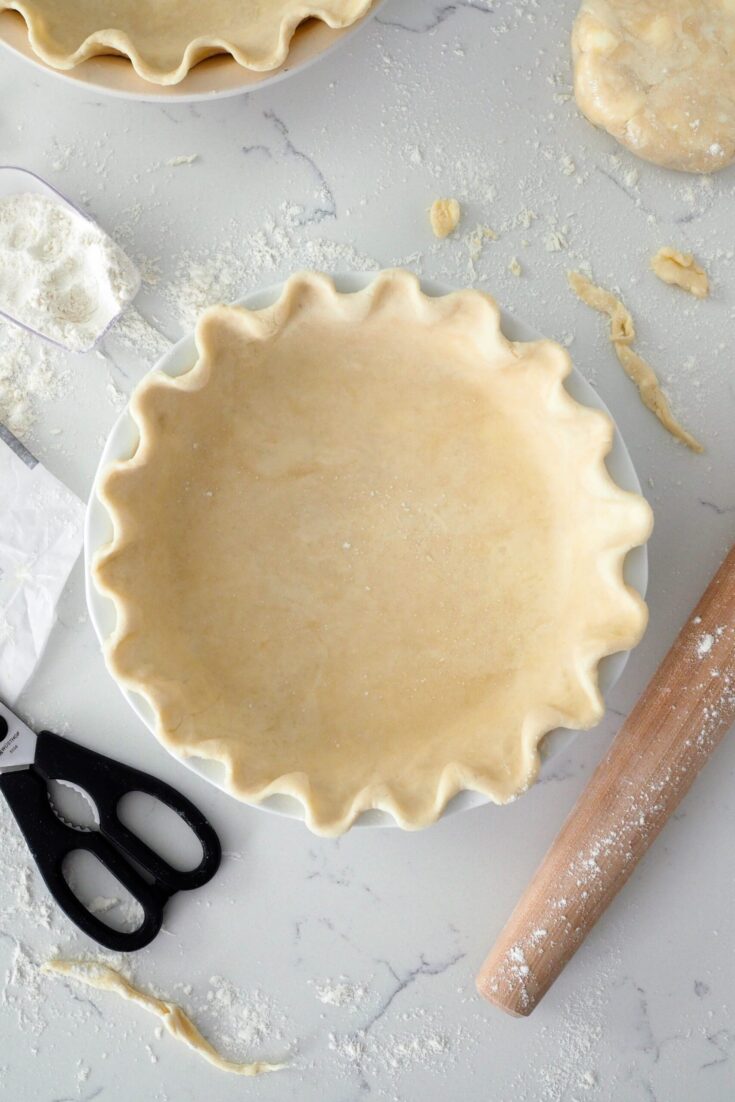
- When ready to use in a recipe, roll out the dough on a lightly floured surface. Rotate the dough a quarter turn between each roll to ensure it doesn't stick to the work surface. Dust with flour as needed.
Notes
This dough freezes well! Simply place your wrapped disc of pie dough in a freezer bag and place in the freezer for up to 3 months. Thaw overnight in the fridge before using.
If you have any leftover offcuts after placing this crust in a pan, cut them into strips and bake them at 375°F/190°C for 5-10 minutes. Put them in a freezer bag in the freezer and then use them as a topping for ice cream.
I like to scrape my workspace clean with a bench scraper to remove any dough bits stuck to the counter after I place the pie dough in the fridge to chill.
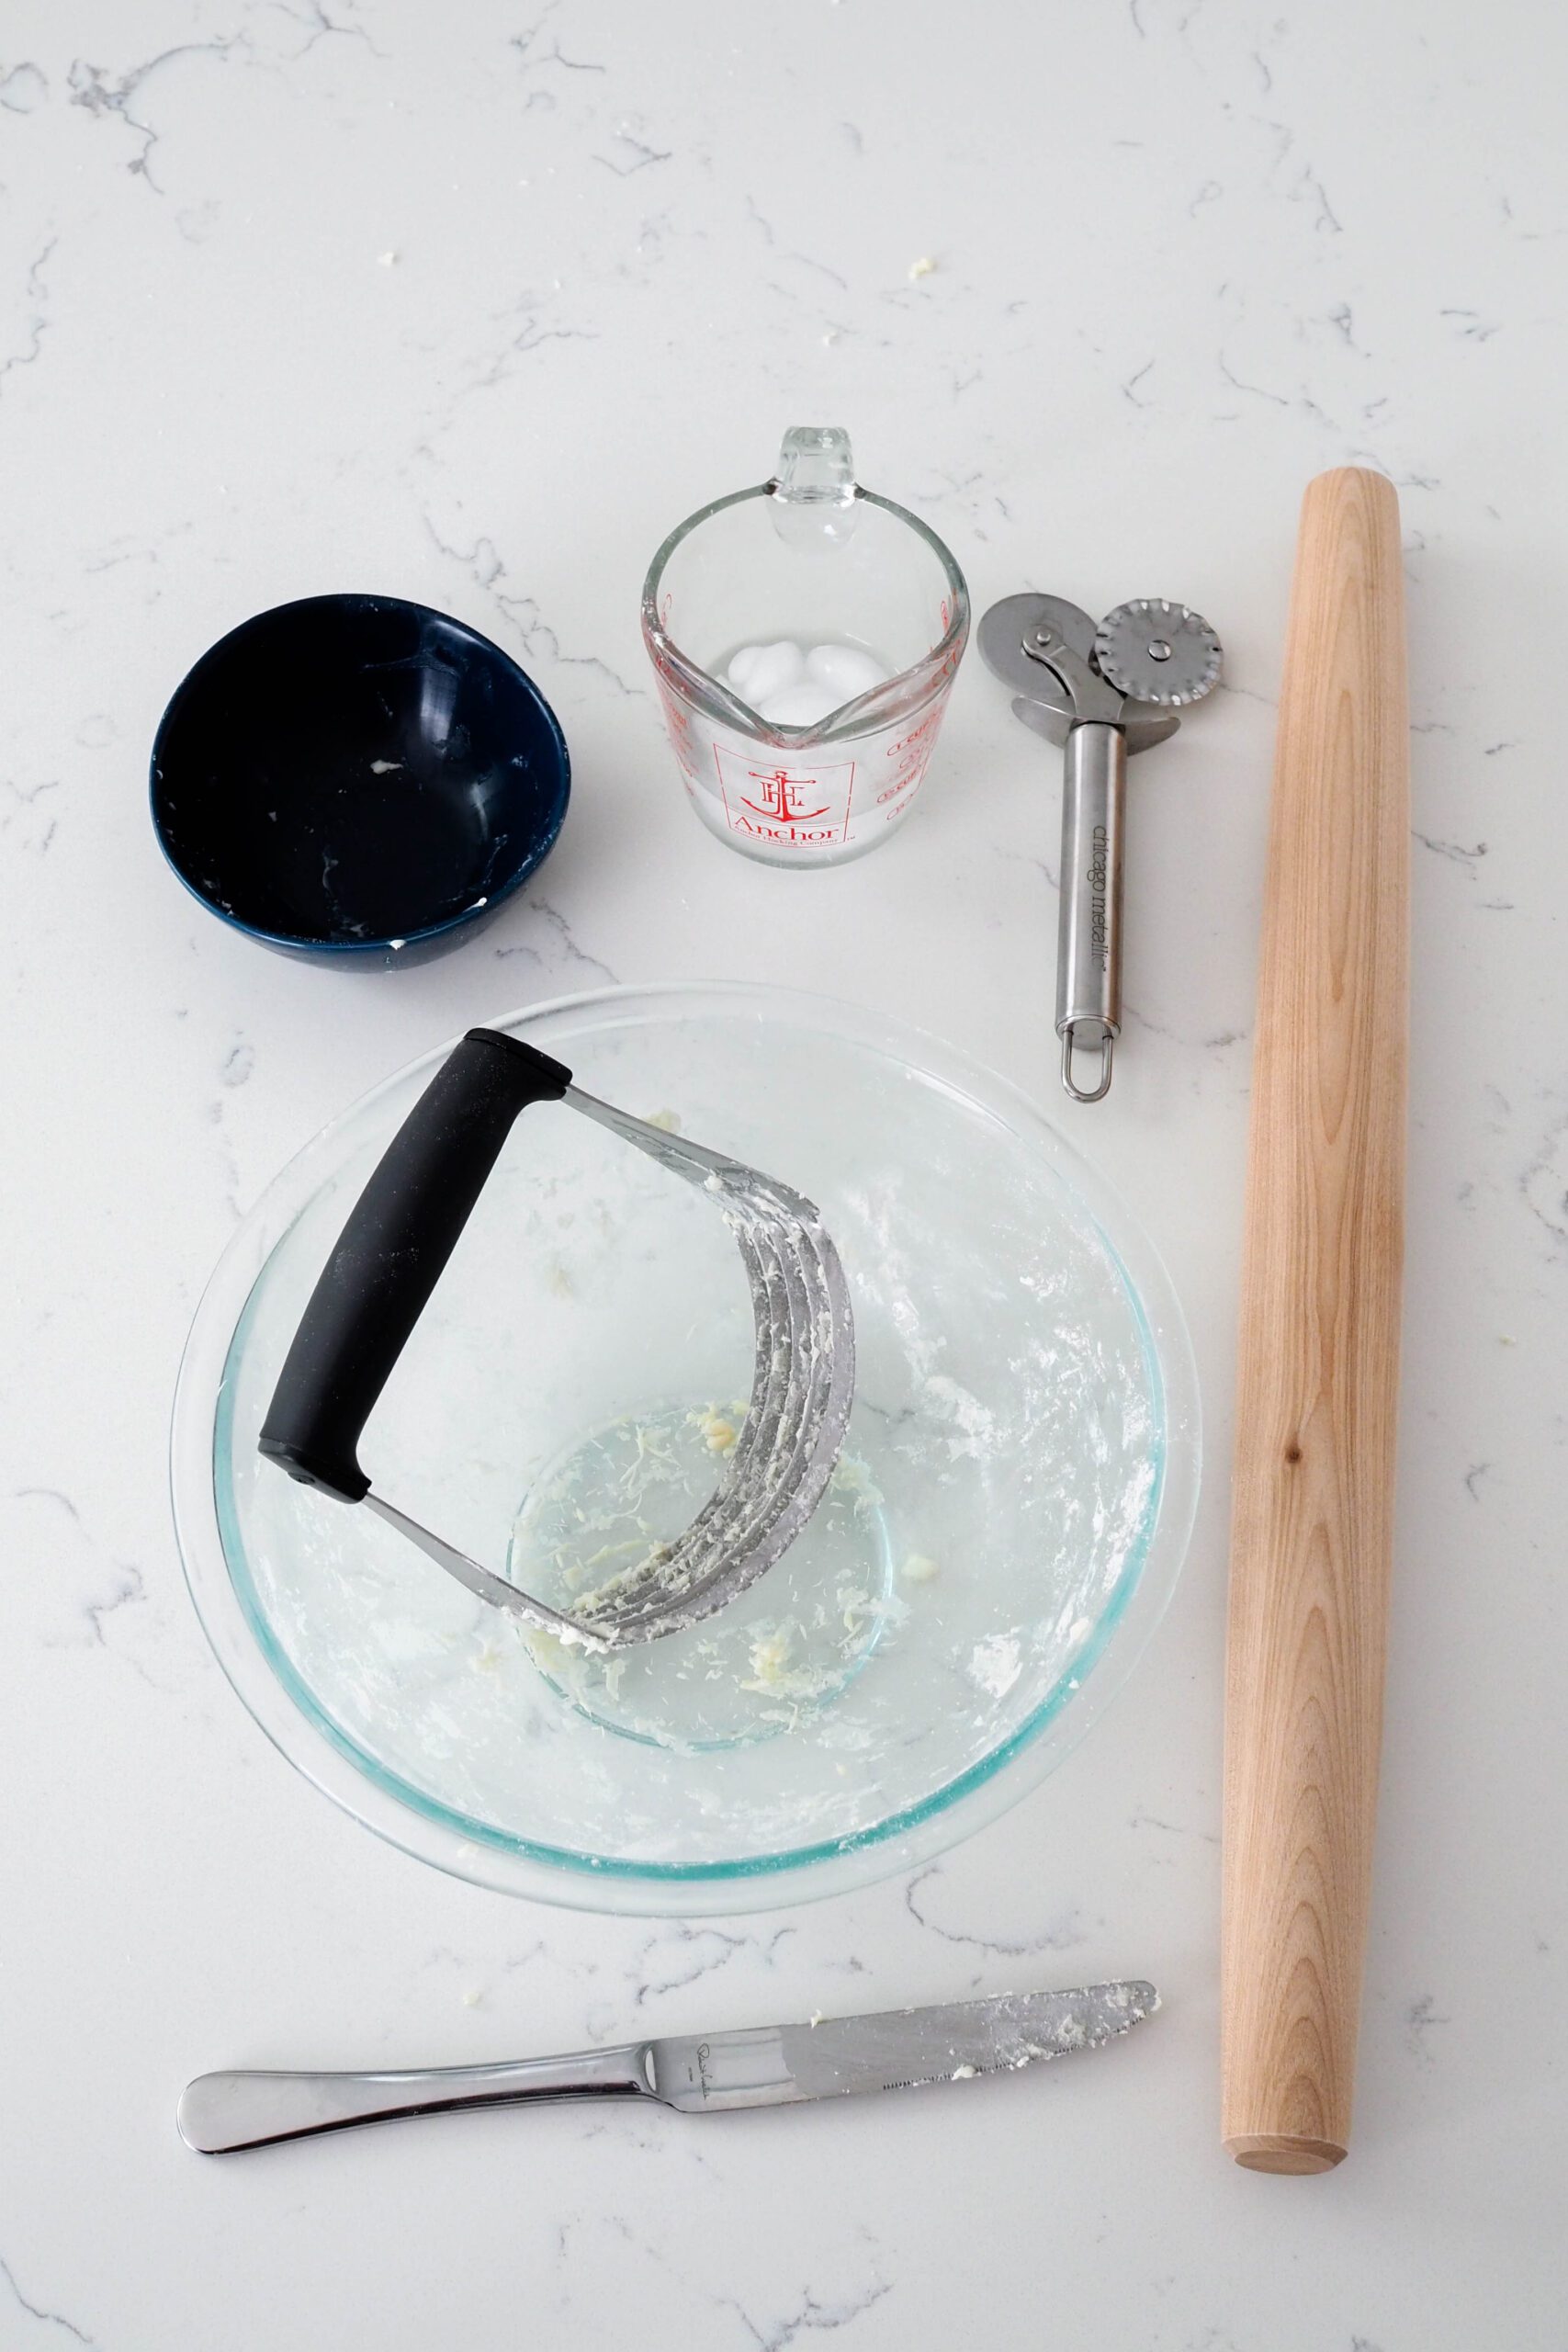
Recommended Products
As an Amazon Associate and member of other affiliate programs, I earn from qualifying purchases.


Nutrition Information:
Yield:
8Serving Size:
1Amount Per Serving: Calories: 159Total Fat: 12gSaturated Fat: 7gTrans Fat: 0gUnsaturated Fat: 3gCholesterol: 31mgSodium: 93mgCarbohydrates: 12gFiber: 0gSugar: 0gProtein: 2g
The nutrition facts are estimated and may vary based on specific ingredients used.
Thanks for trying out my all butter flaky pie crust recipe!
If you liked it, please consider rating this recipe five stars so others find it, too.
I’d love to see how your recipe turns out: Take a photo and tag me on Instagram @floralapronblog to share with me, or use the hashtag #floralapronbakes.
Absolutely perfect pie crust! I’ve been using the crisco standard recipe for decades. I tried this one as I never feel mine is quite flaky enough. I’m never going back…thank you for this simple recipe and easy to follow instructions!!
Yay, SO glad to hear that, Nicole! Hope you and your family have a happy Thanksgiving! 🙂