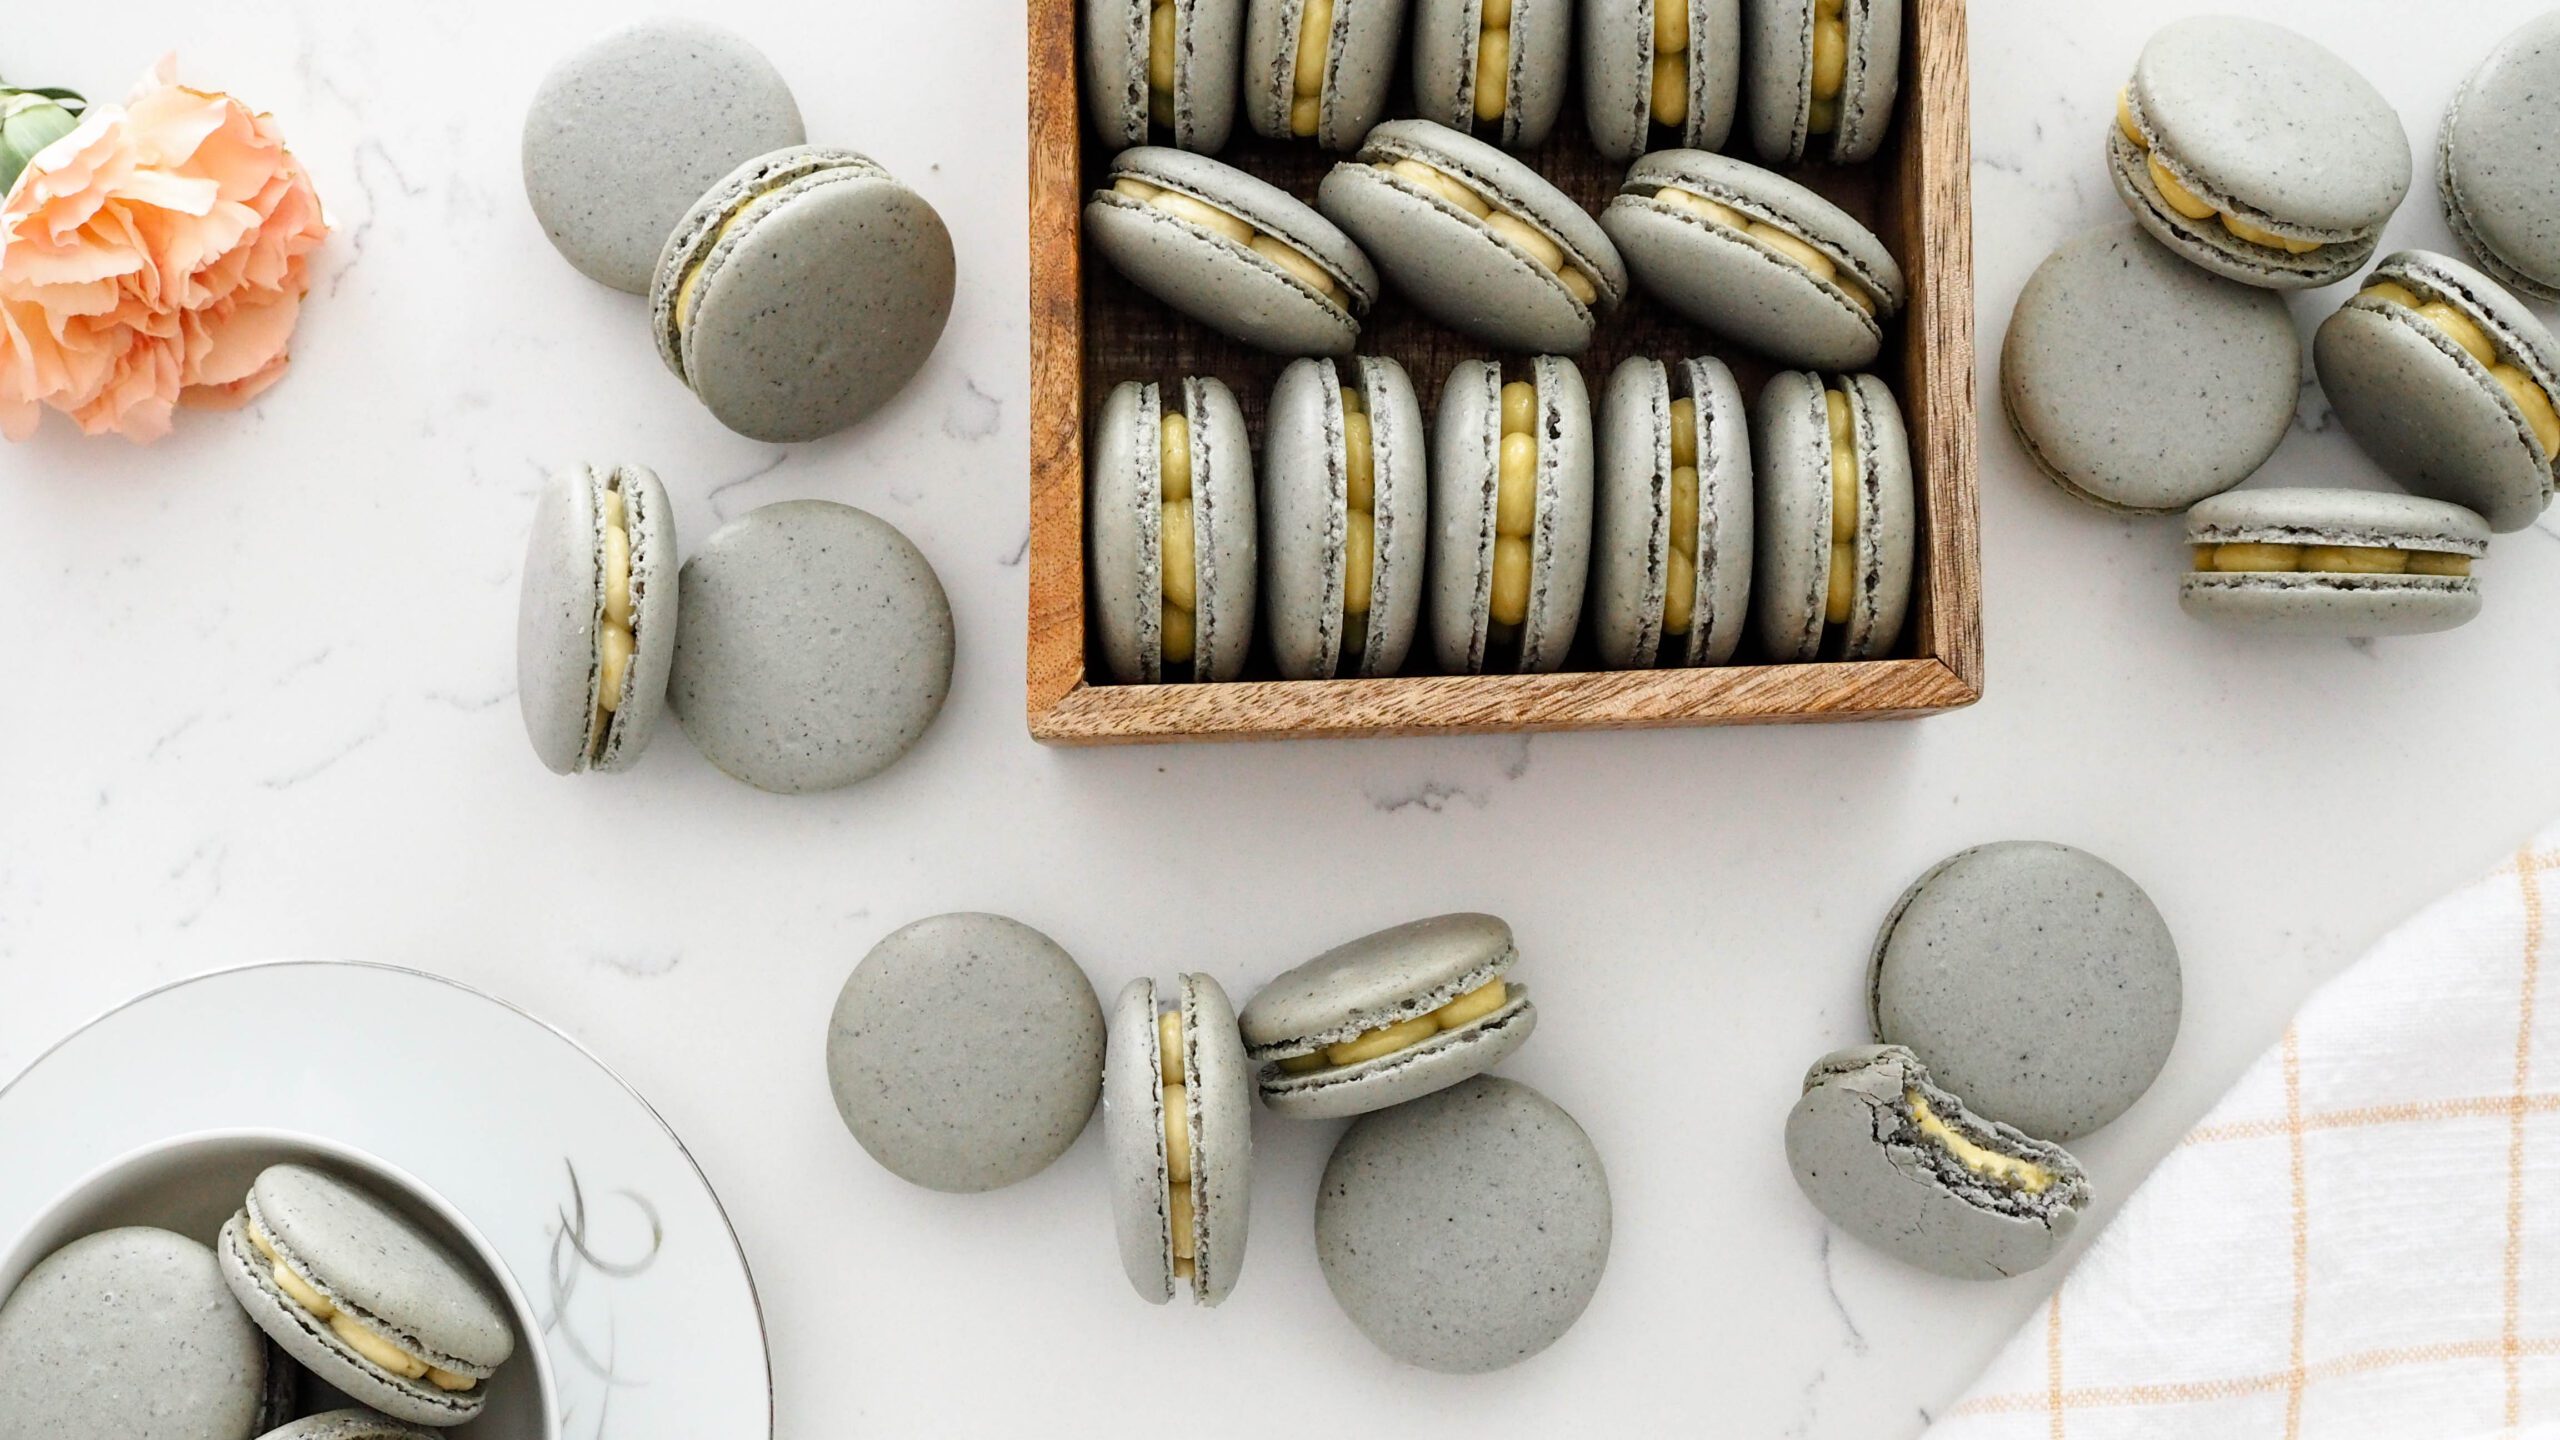
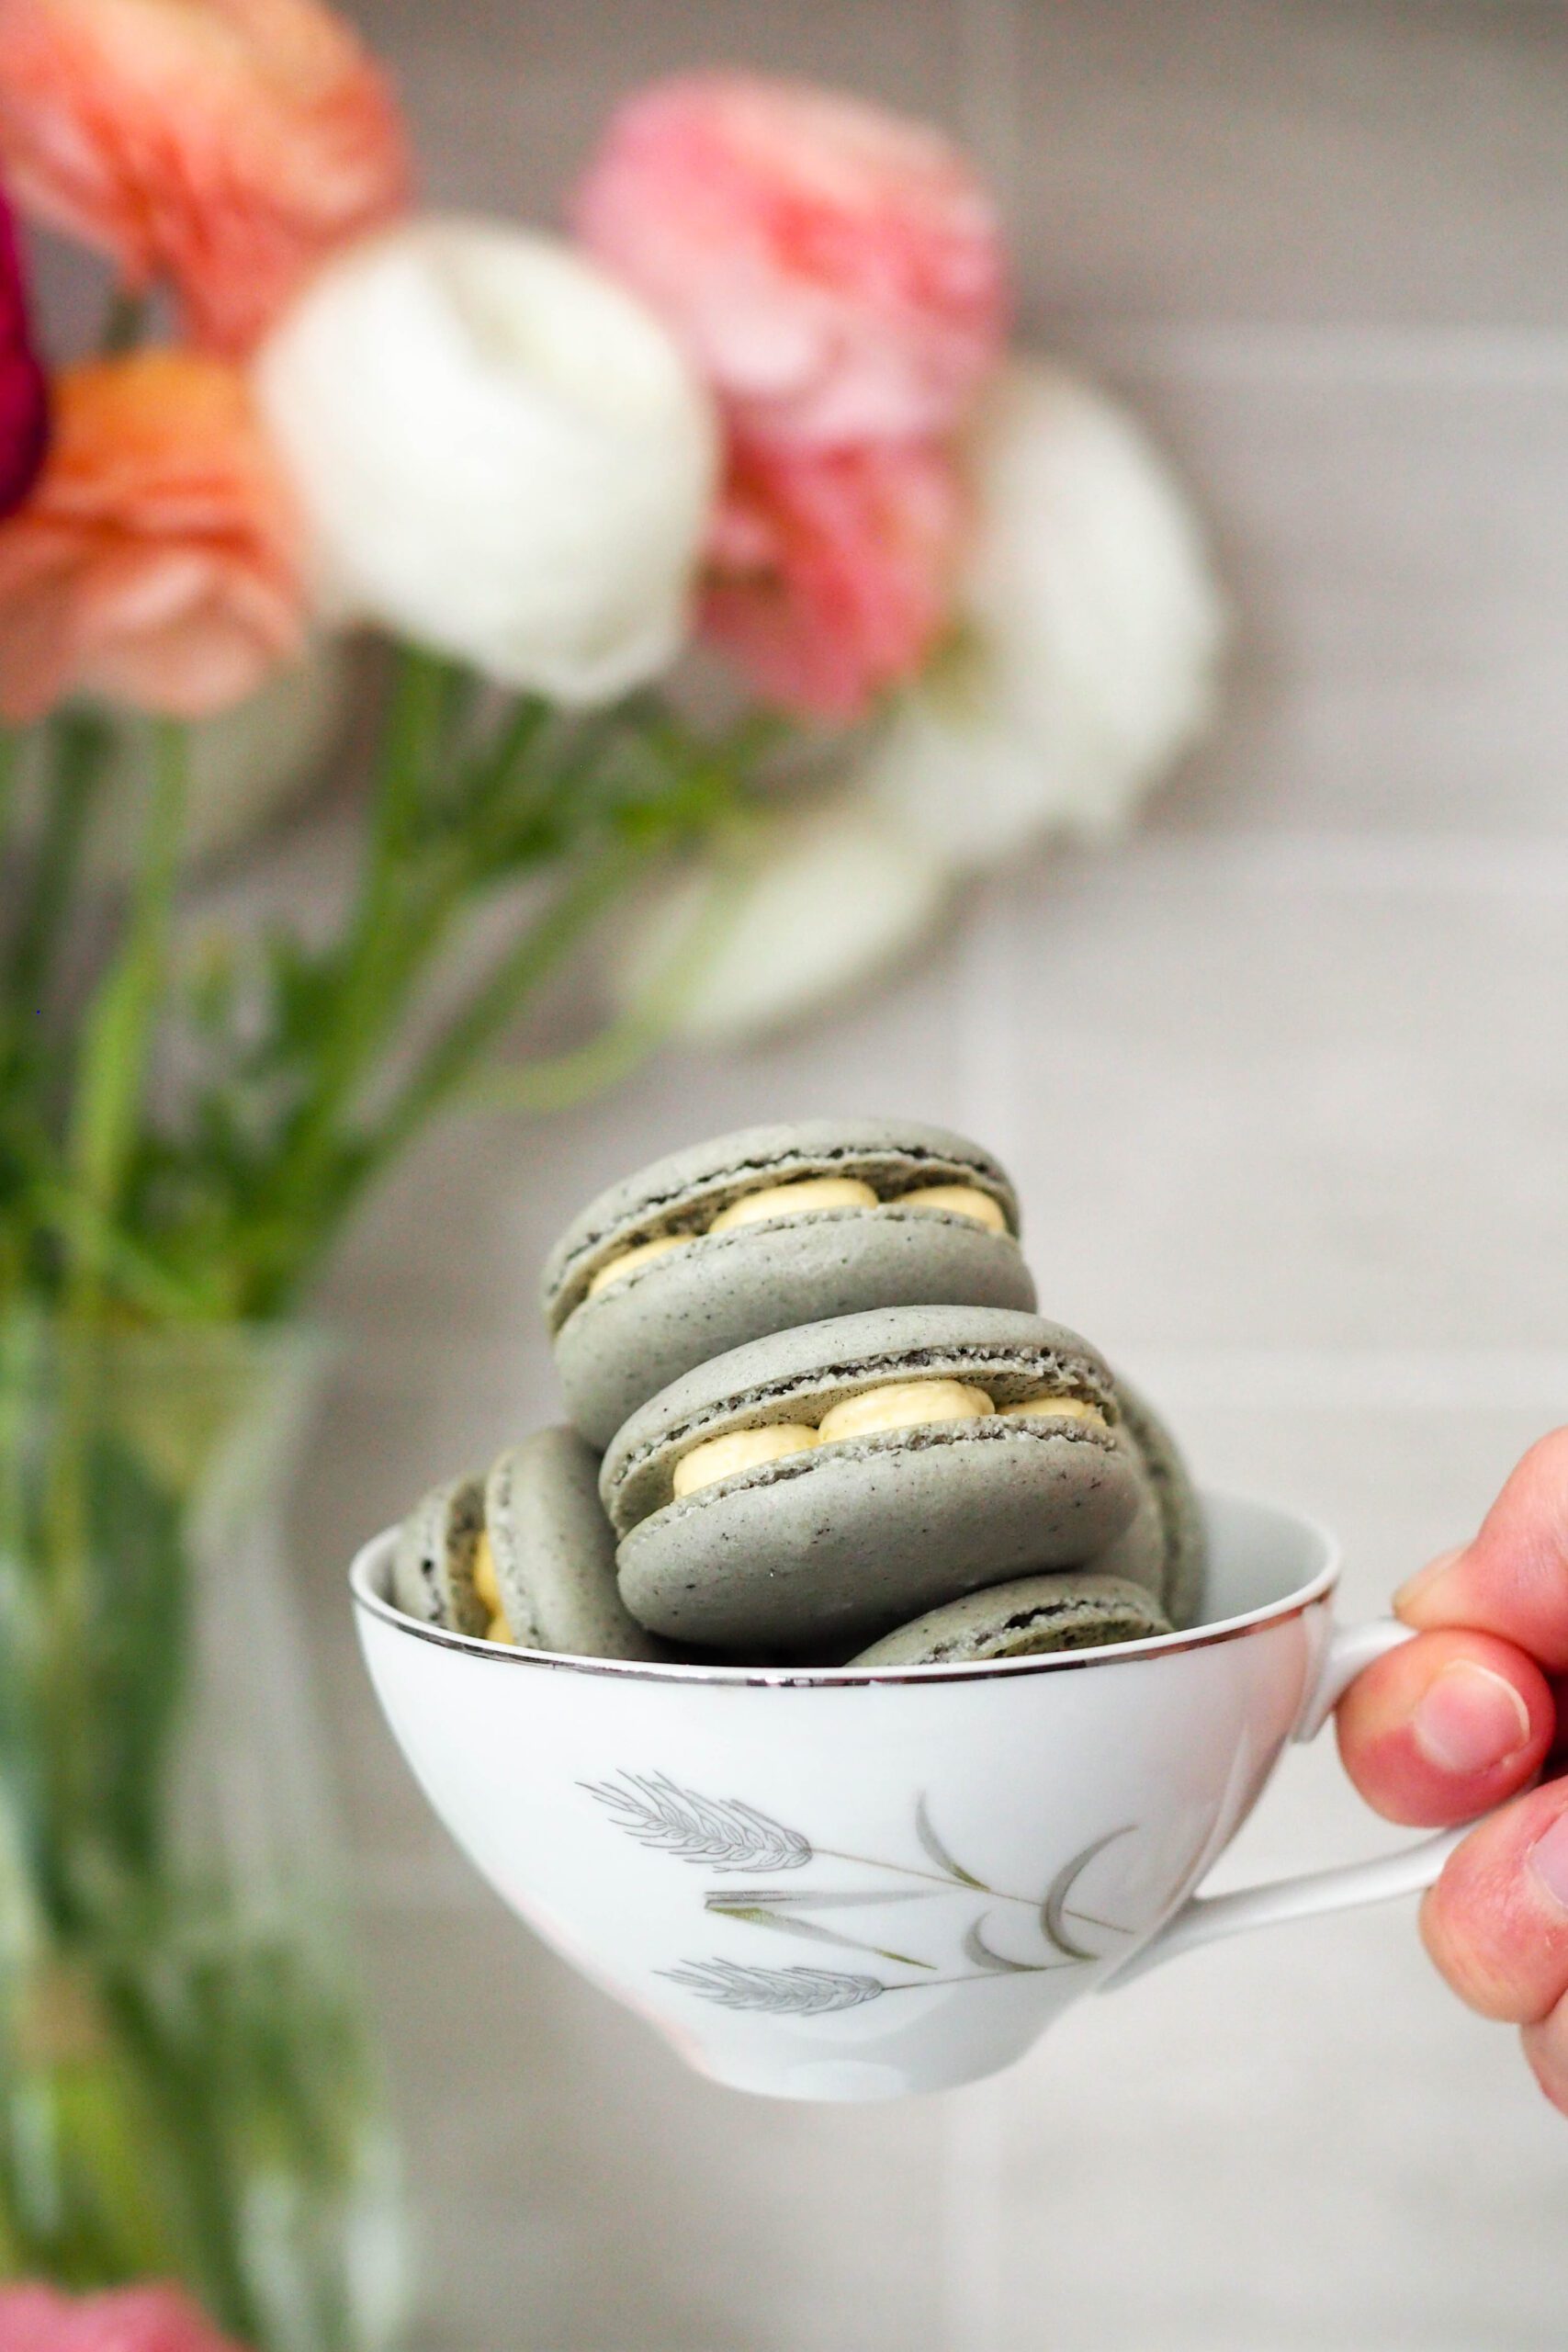
Perfect with tea, these Earl Grey macarons have a strong bergamot flavor from the finely ground tea in the shell. It’s the ideal dessert for tea lovers, as there’s a second hint of bergamot in the French buttercream filling from an Earl Grey syrup. Bonus: This recipe won’t leave you with any leftover egg yolks!
If you’ve never made macarons before; don’t worry! I share all of my tips and tricks in this blog post and in the recipe card to help you get macarons right the first time. I recommend reading (or at least skimming) all of it so you feel confident in what you’re looking for.
Once you’ve successfully baked your first batch of macarons, you can celebrate with more tea-infused desserts, like chai spice macarons, homemade Earl Grey marshmallows and Earl Grey-infused truffles.
Ingredients for Earl Grey Macarons
French macarons require only four ingredients to get right; it’s the fillings that add to the list here! Macarons are made with a simple mix of almond flour, powdered sugar, and meringue, made from egg whites and granulated sugar. The Earl Grey tea in these macarons adds the wow factor.
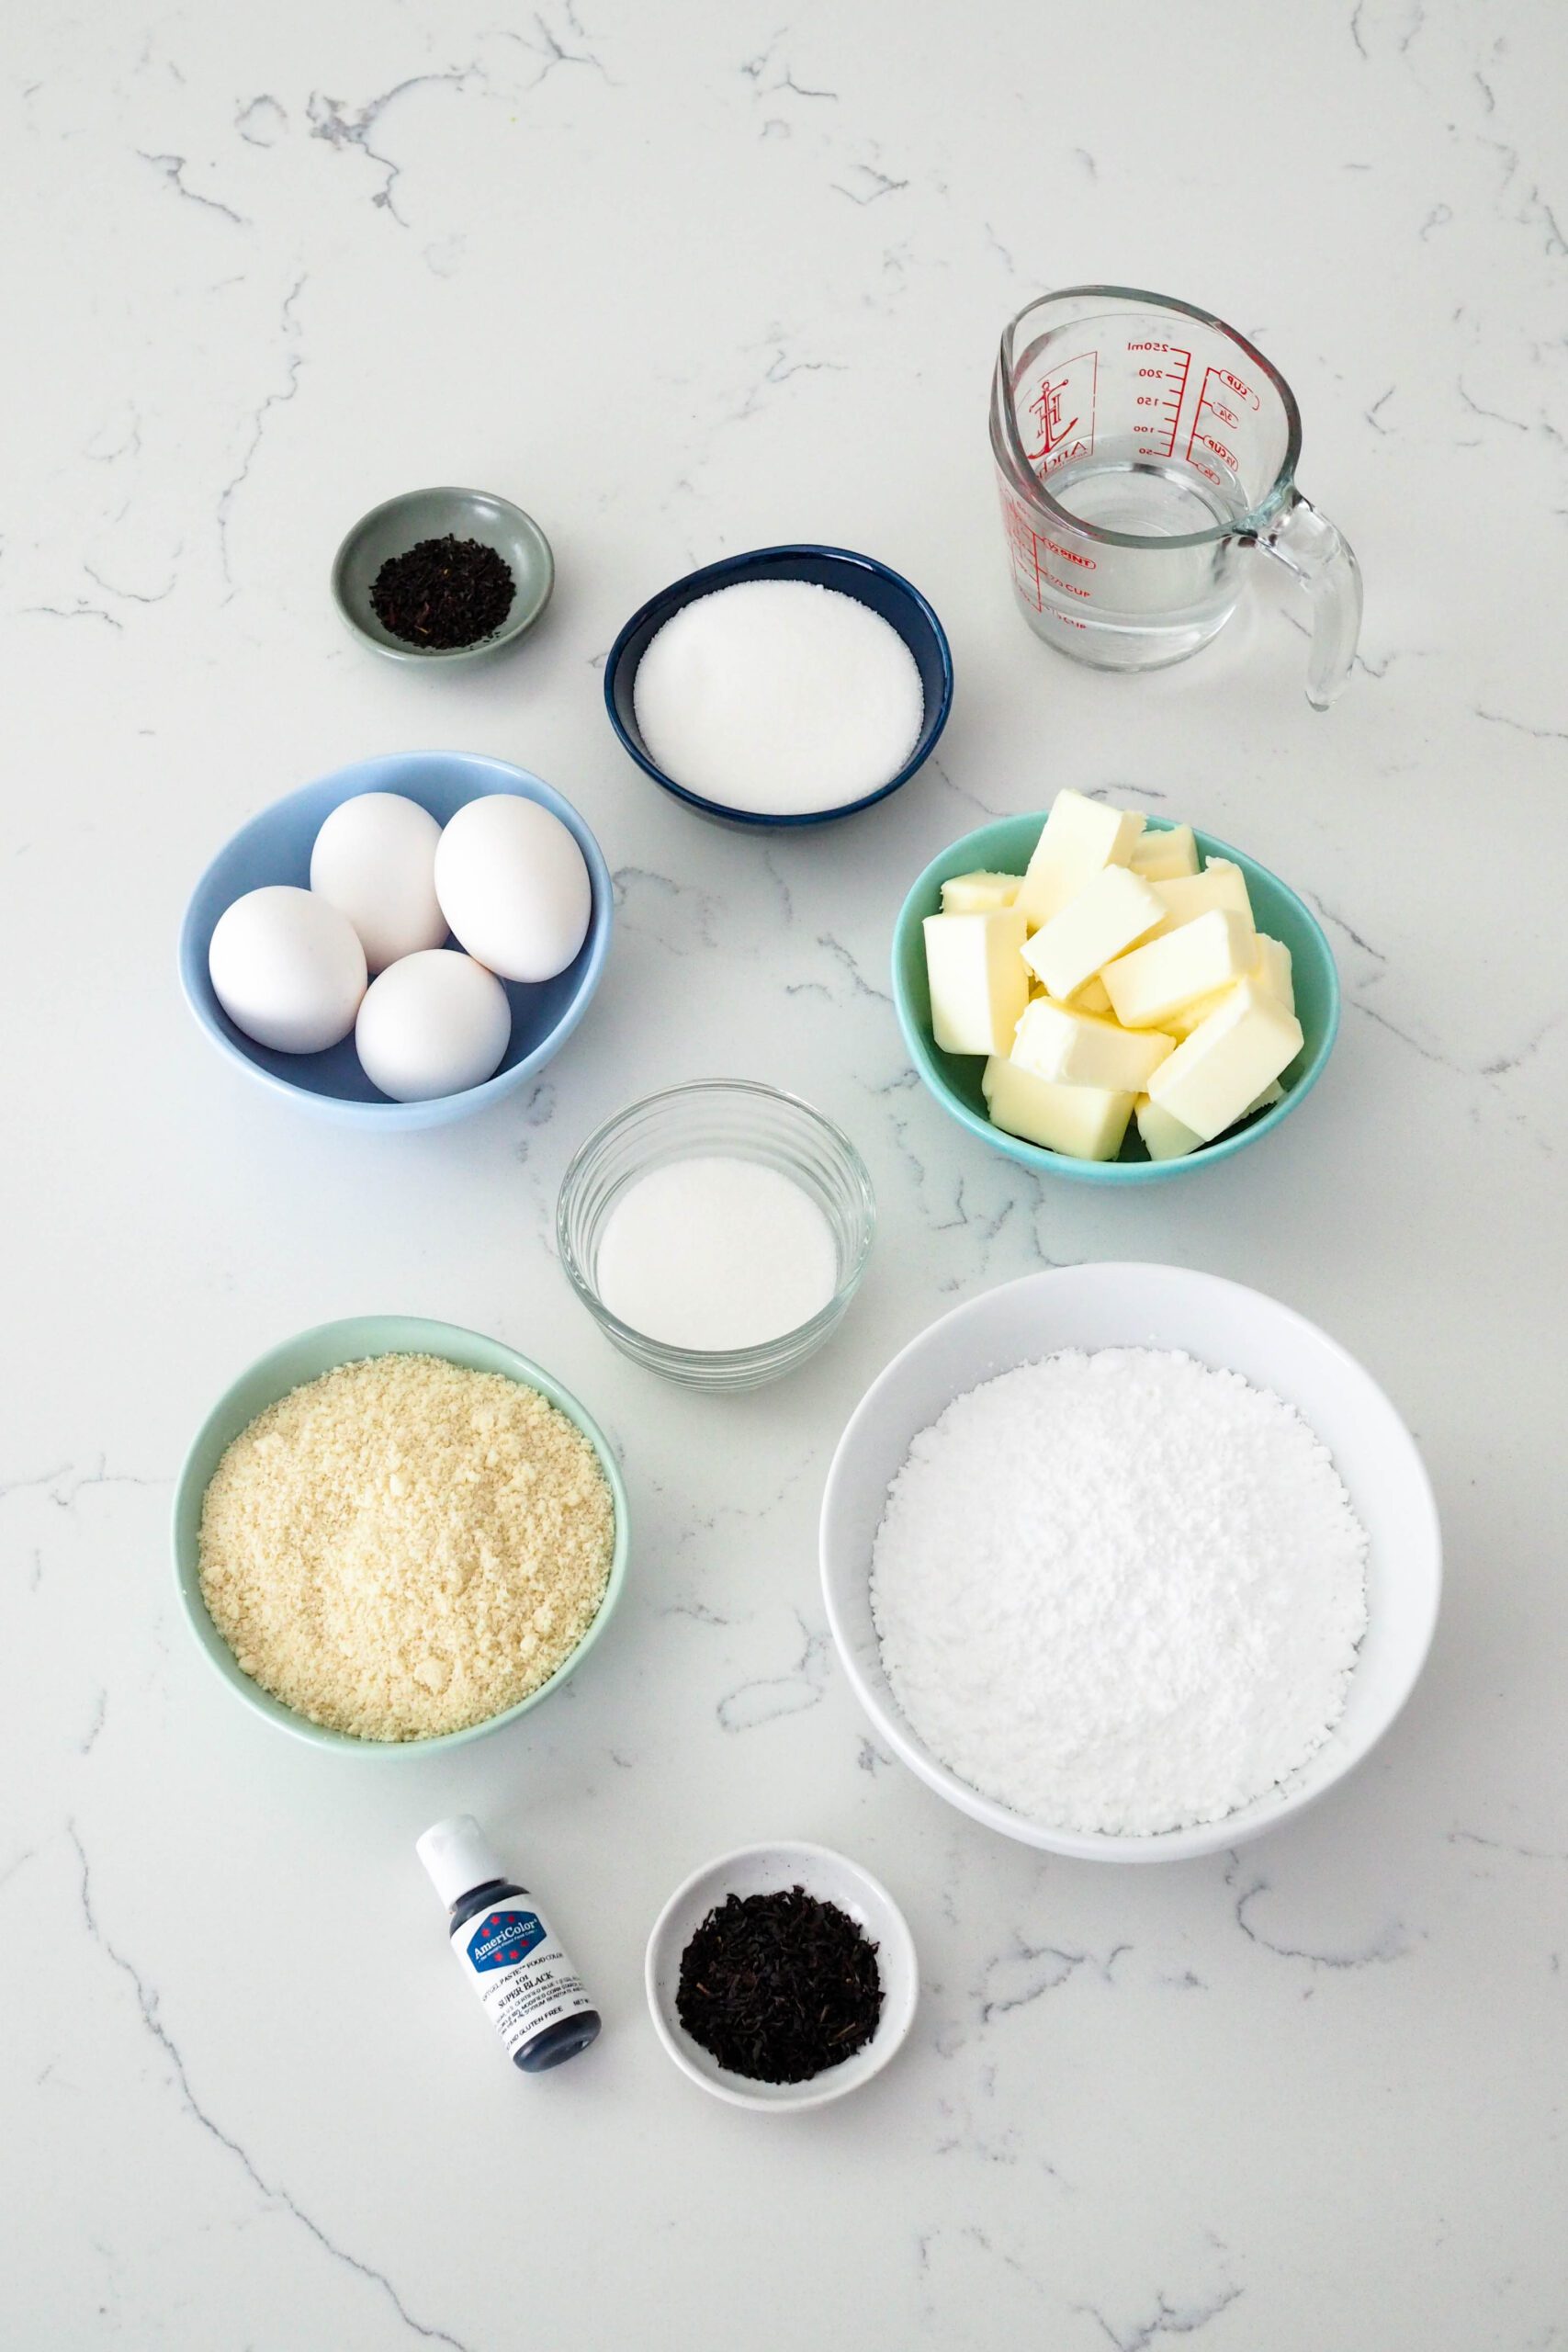
- Earl Grey tea. I used an Earl Grey with vanilla for this recipe. Those are my favorite kinds of Earl Grey, even though they aren’t technically traditional. Use your favorite Earl Grey blend here—with or without vanilla.
- Granulated sugar. Sugar helps to stabilize the meringue, allowing you to fold in the almond flour mixture and rest the macarons without worrying about the meringue collapsing.
- Egg whites. For best results, use fresh eggs rather than egg whites in a carton. Those egg whites are pasteurized and may not whip into a meringue.
- Almond flour. Almond flour provides structure for the macaron shell and a nutty flavor.
- Powdered sugar. Powdered sugar helps to thicken the macaron batter and provide structure.
- Black gel food coloring (optional). Please do not use liquid food coloring—it will not work! If you don’t have any gel food coloring, I recommend this kit from Americolor. It has all the colors you’ll need!
- Hot water. Used to brew the tea for the French buttercream.
- Egg yolks. The reserved yolks make up the custard in the buttercream.
- Unsalted butter. Unsalted butter makes up the body of the Earl Grey buttercream and gives the filling richness.
- Vanilla extract. A touch of vanilla adds extra flavor.
How to Make Earl Grey Macarons
The most important thing to remember is that macarons are finicky. Even if they don’t look perfect, they’ll still taste great!
The number one tip I have for making French macaron shells is to be patient. It can take a number of tries to get a perfect batch. My first batch of macarons came out well enough, though there were a few cracked shells. It took me quite a few months, though, to feel confident that each batch I put in the oven would turn out.
Recommended Supplies for Making Macarons
Each oven and home variables vary. I can’t guarantee that these supplies will turn out perfect macs for you. I have used dark baking sheets and aluminum baking sheets and had success in different ovens. With my current oven, a light-colored aluminum baking sheet is essential for turning out macarons.
In my old house and old electric oven, I could use a dark nonstick pan and parchment paper on top of silicon macaron mats with no issues. In my new house and new gas oven, I have to use aluminum pans with silicon macaron mats. I use those same pans and mats with my Smart Oven Air Fryer Pro from Breville. It’s a great option if you’re looking into baking macarons with a countertop oven.
If you are following all the steps, have watched some macaron troubleshooting videos, and your macarons still aren’t consistent after three batches, I would look into your supplies. Try changing one variable at a time to determine what the problem is.
Making the Earl Grey Sugar
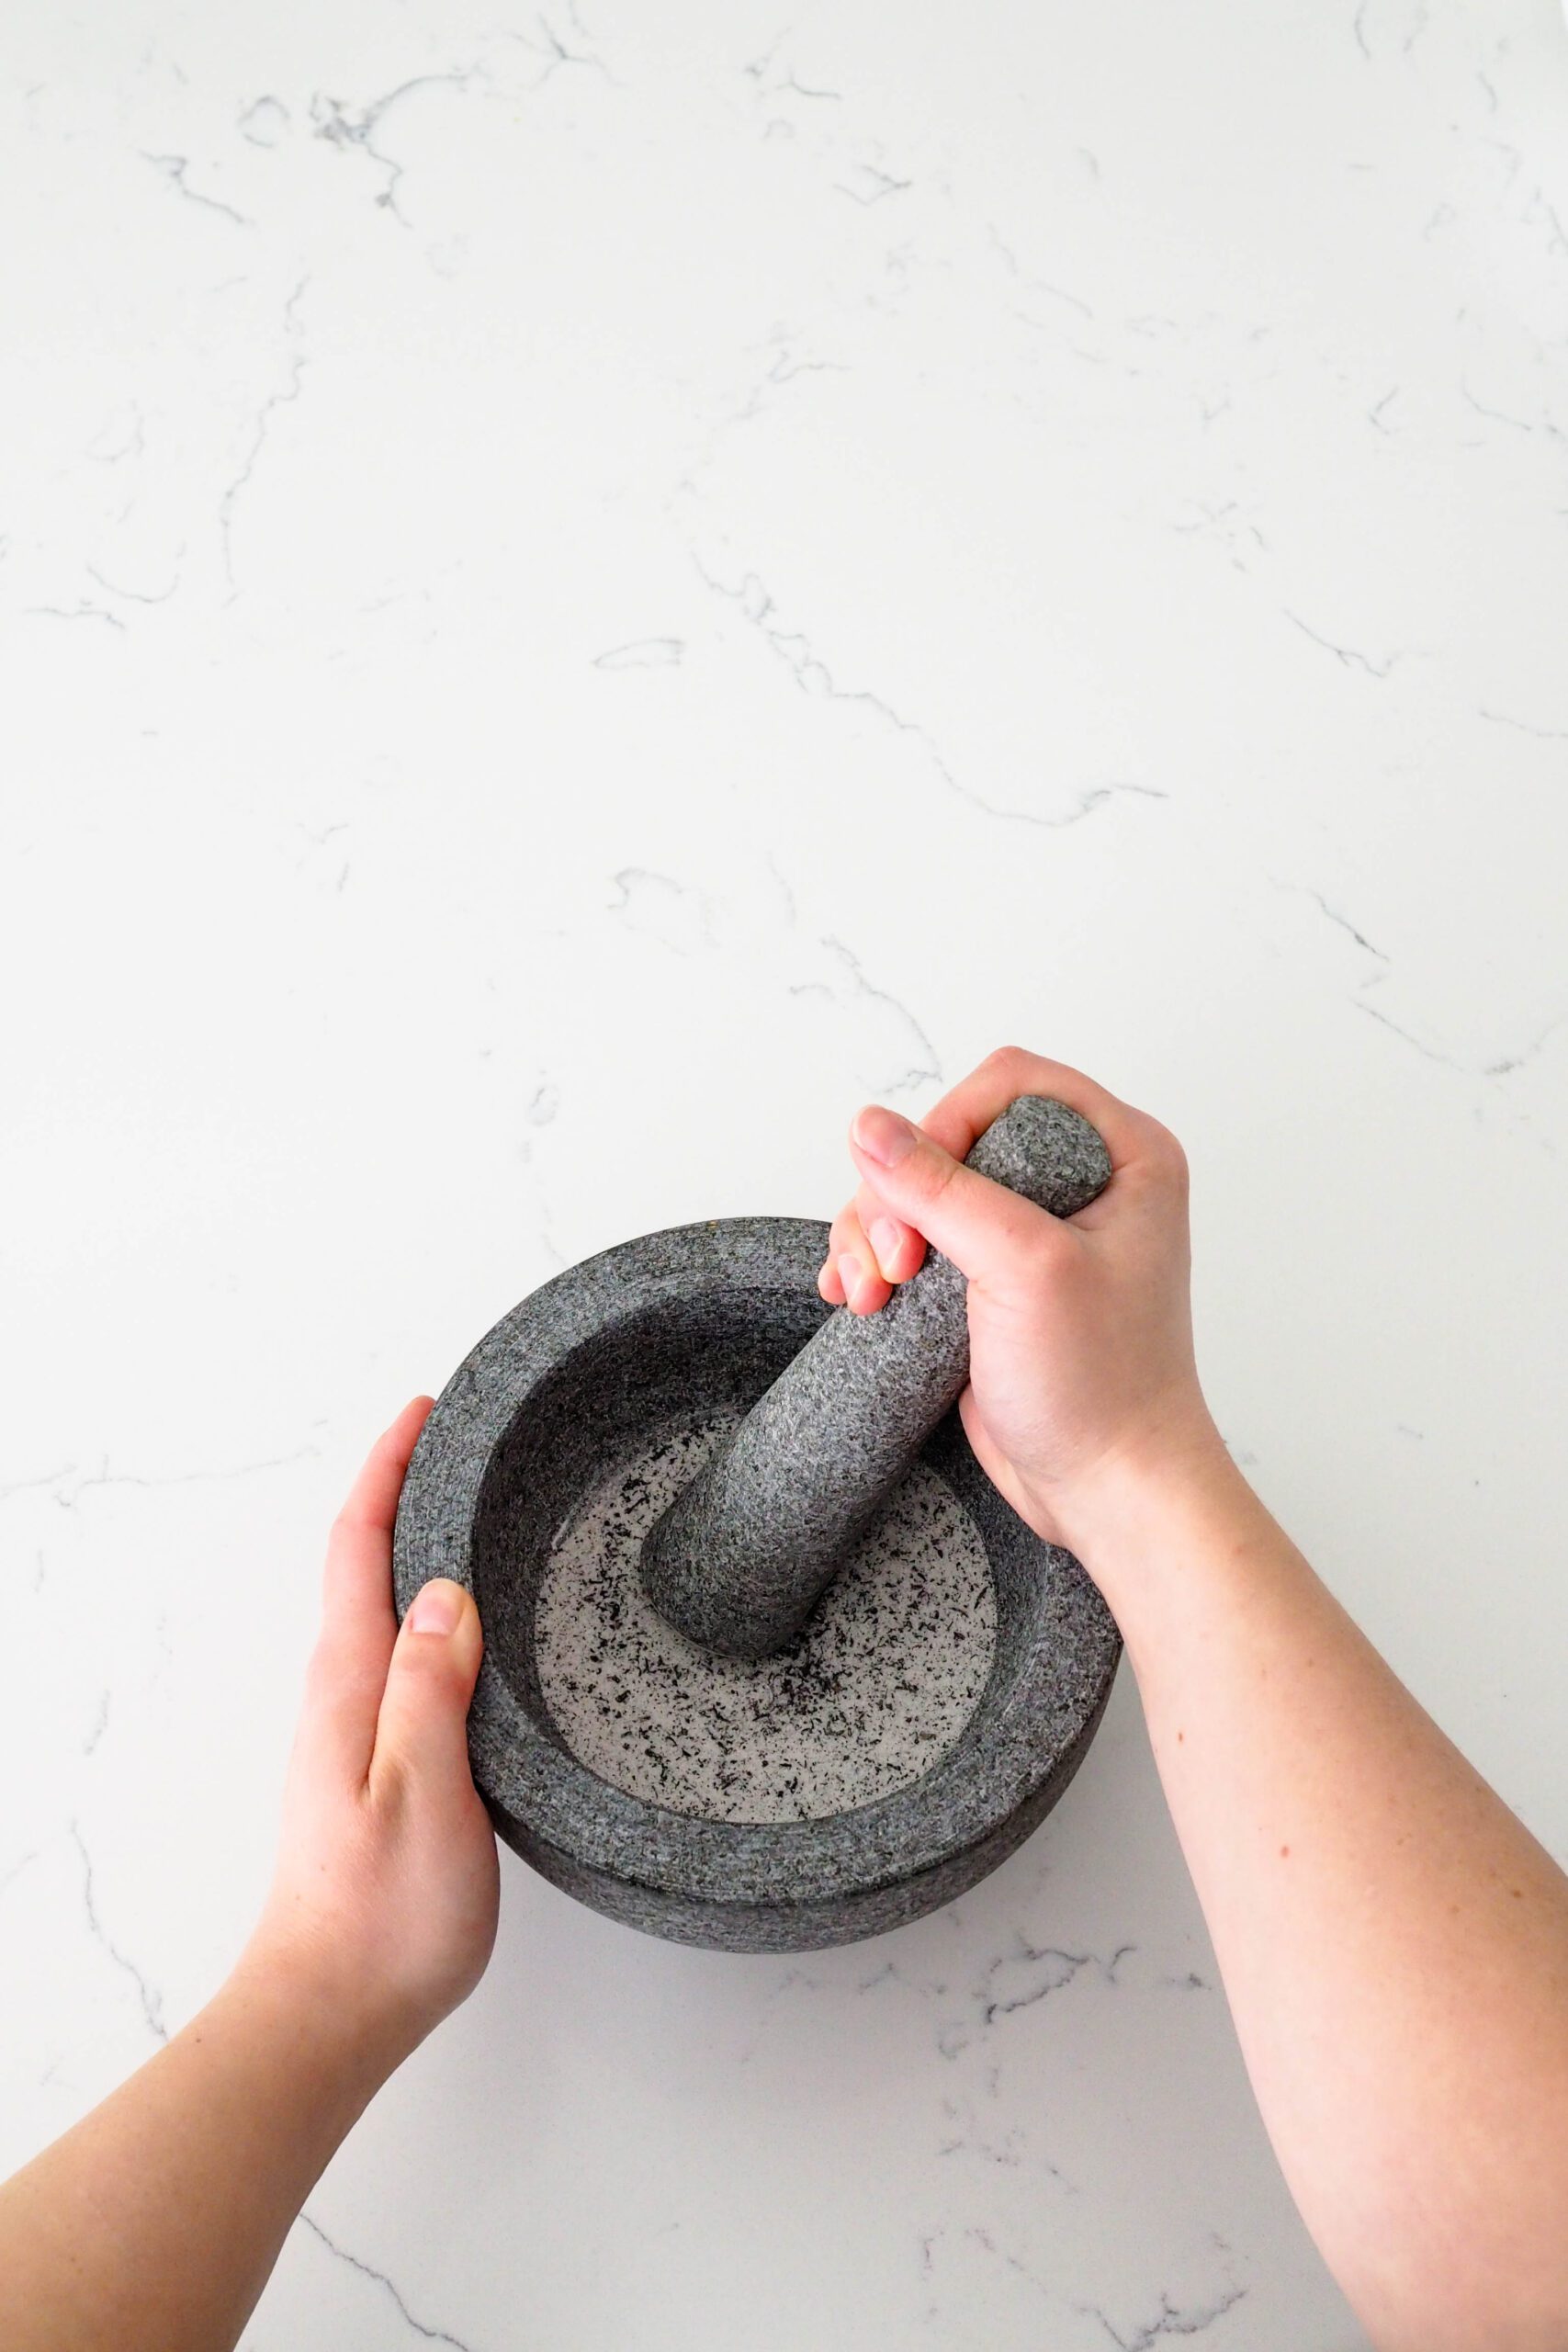
The most important part of the Earl Grey macaron shells is the Earl Grey tea! I tested this recipe a few different ways and much prefer the texture and flavor of the Earl Grey when it has been ground together with the granulated sugar that’s added to the meringue.
The French meringue still forms perfectly with the ground Earl Grey sugar, and the flavor is much more pronounced. And, my personal favorite: You won’t find full tea leaves hiding somewhere in your mouth an hour after eating these macarons!
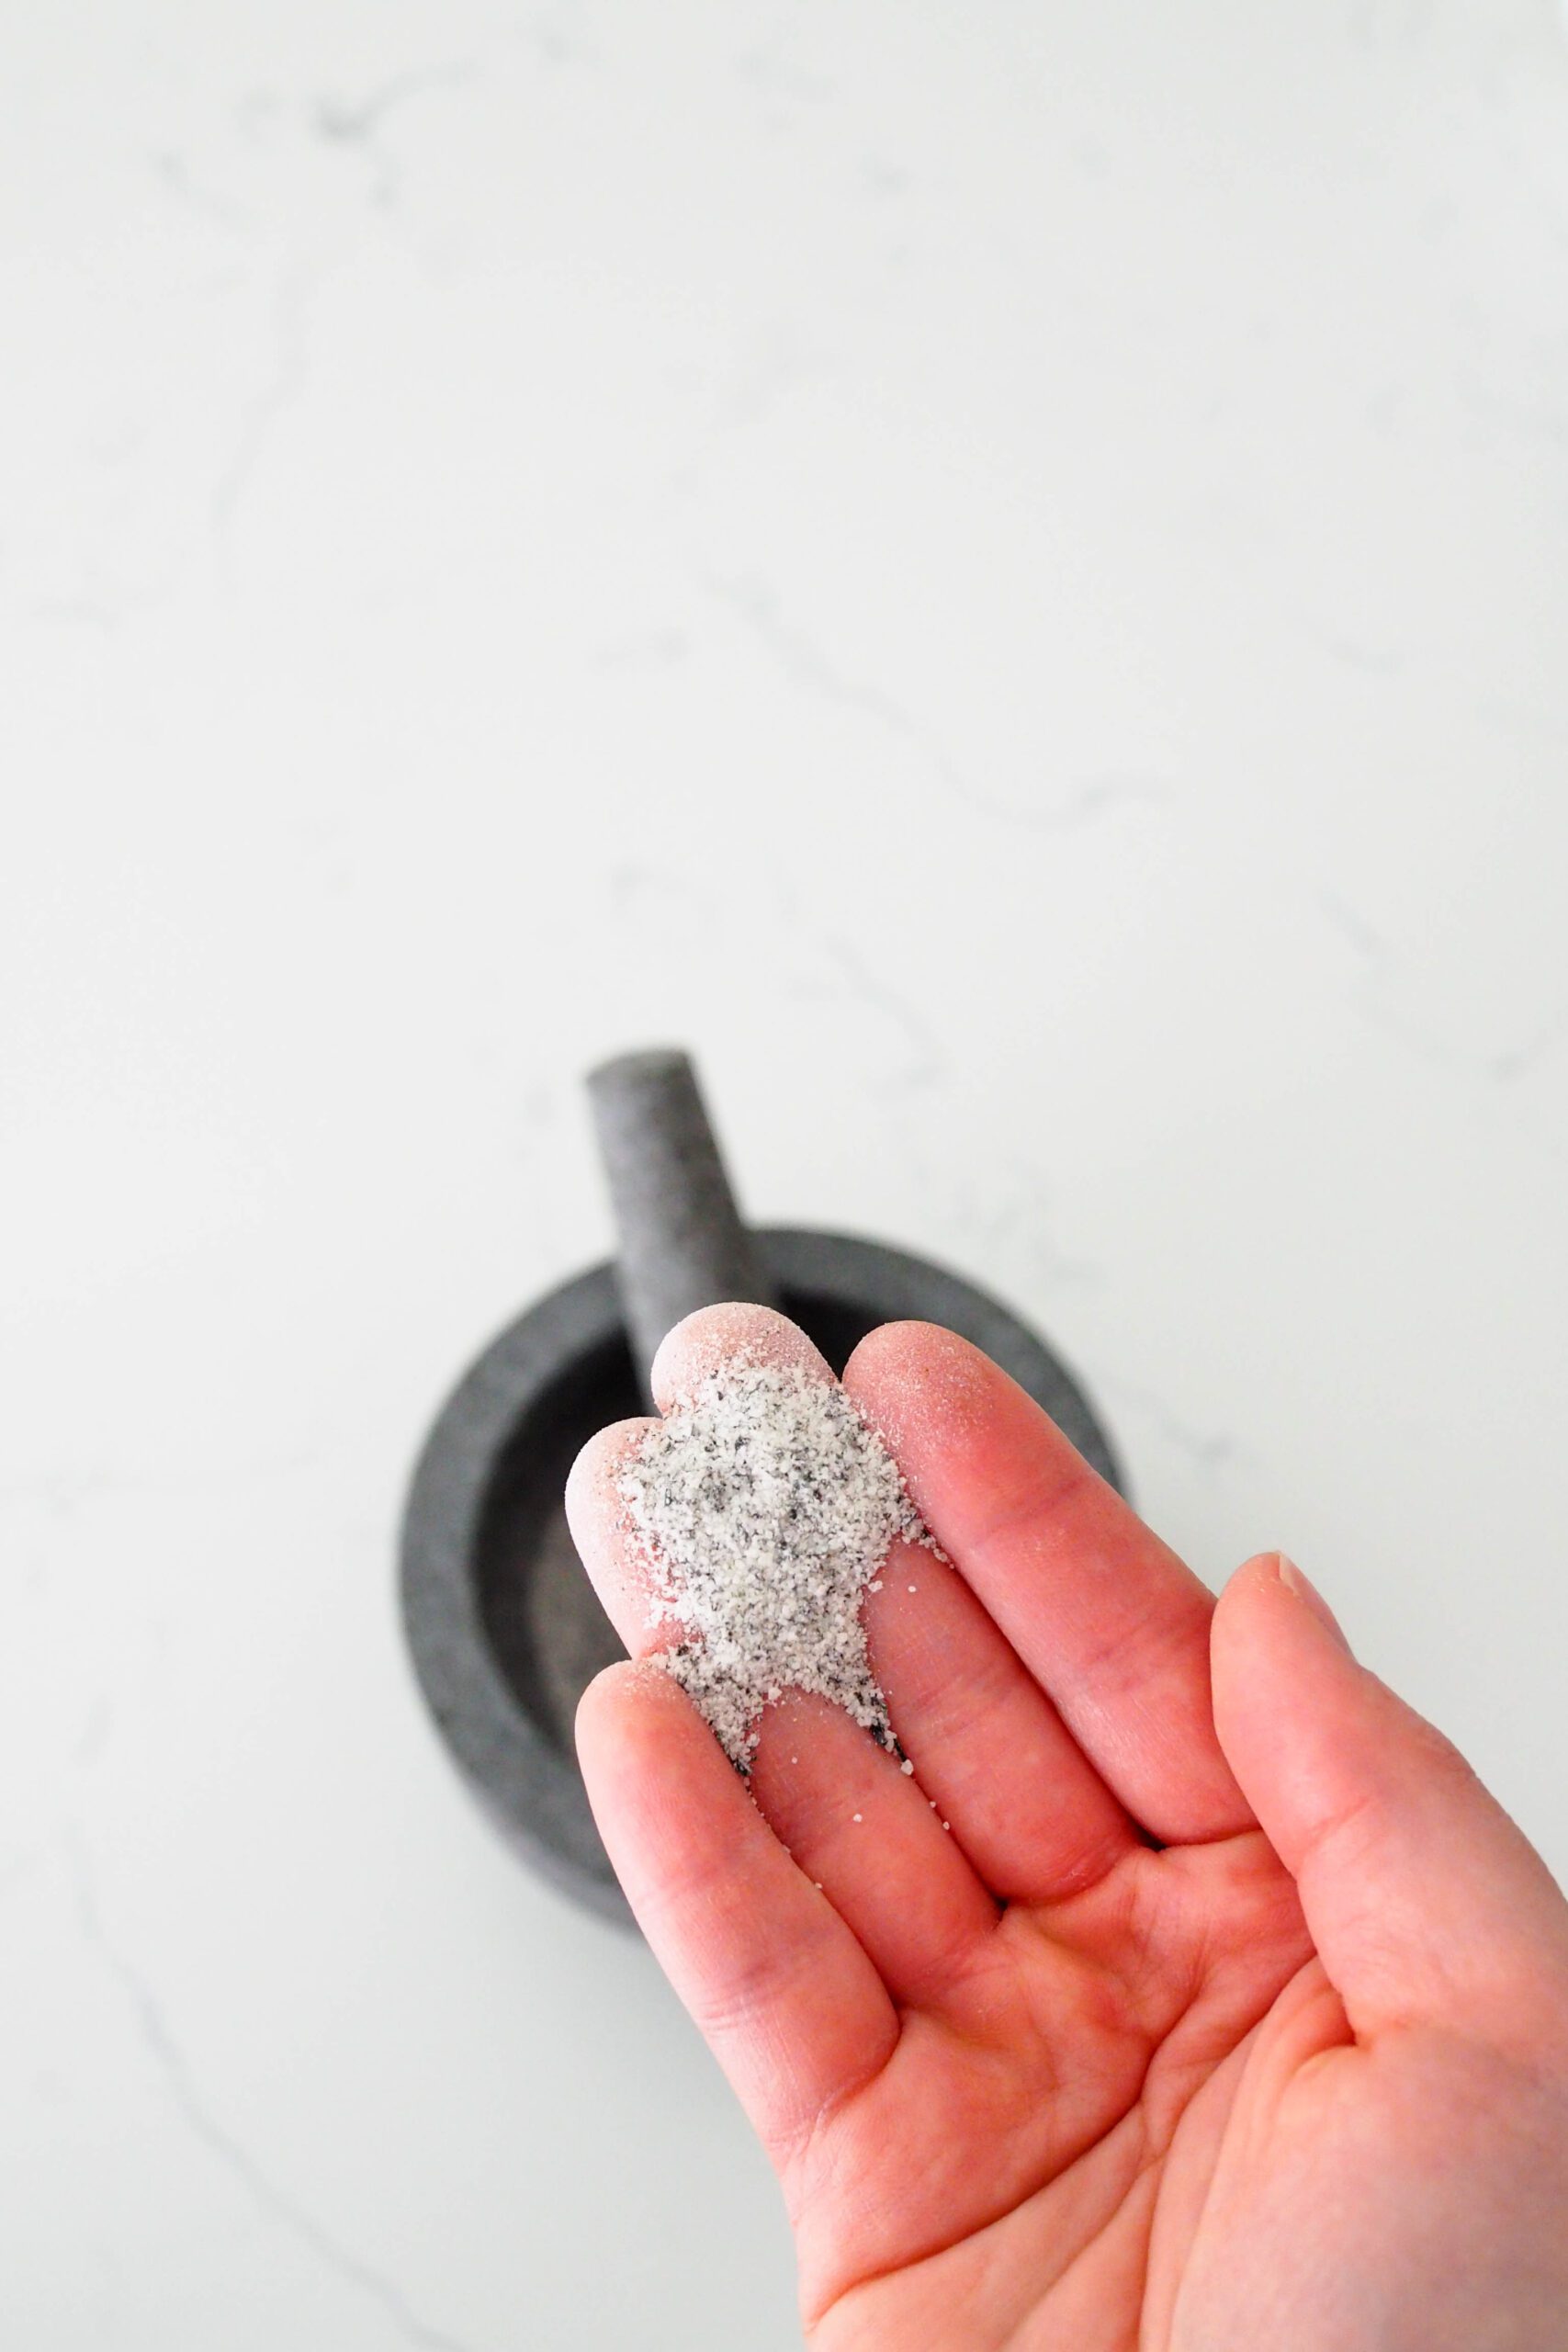
To make the Earl Grey sugar, grind the tea and granulated sugar together in a mortar and pestle until the tea is well-ground and the sugar resembles a coarse powdered sugar.
If you don’t have a mortar and pestle, you can also use a food processor or a high-powered blender. The tea may not be processed quite as finely with blades in such a small quantity, which is why I recommend the mortar and pestle for best results.
The Perfect French Meringue Base for Macarons
A good meringue is key for a good macaron. French macarons generally call for aged or at least room temperature egg whites, but because of the way I mix up my meringue, I can use eggs directly from the fridge without a stabilizer.
I adapted this technique from Cenk Sönmezsoy’s The Artful Baker (though he recommends room temperature egg whites). If you’re newer to meringue, I would recommend using room temperature egg whites, as they are a bit more elastic (read: forgiving).
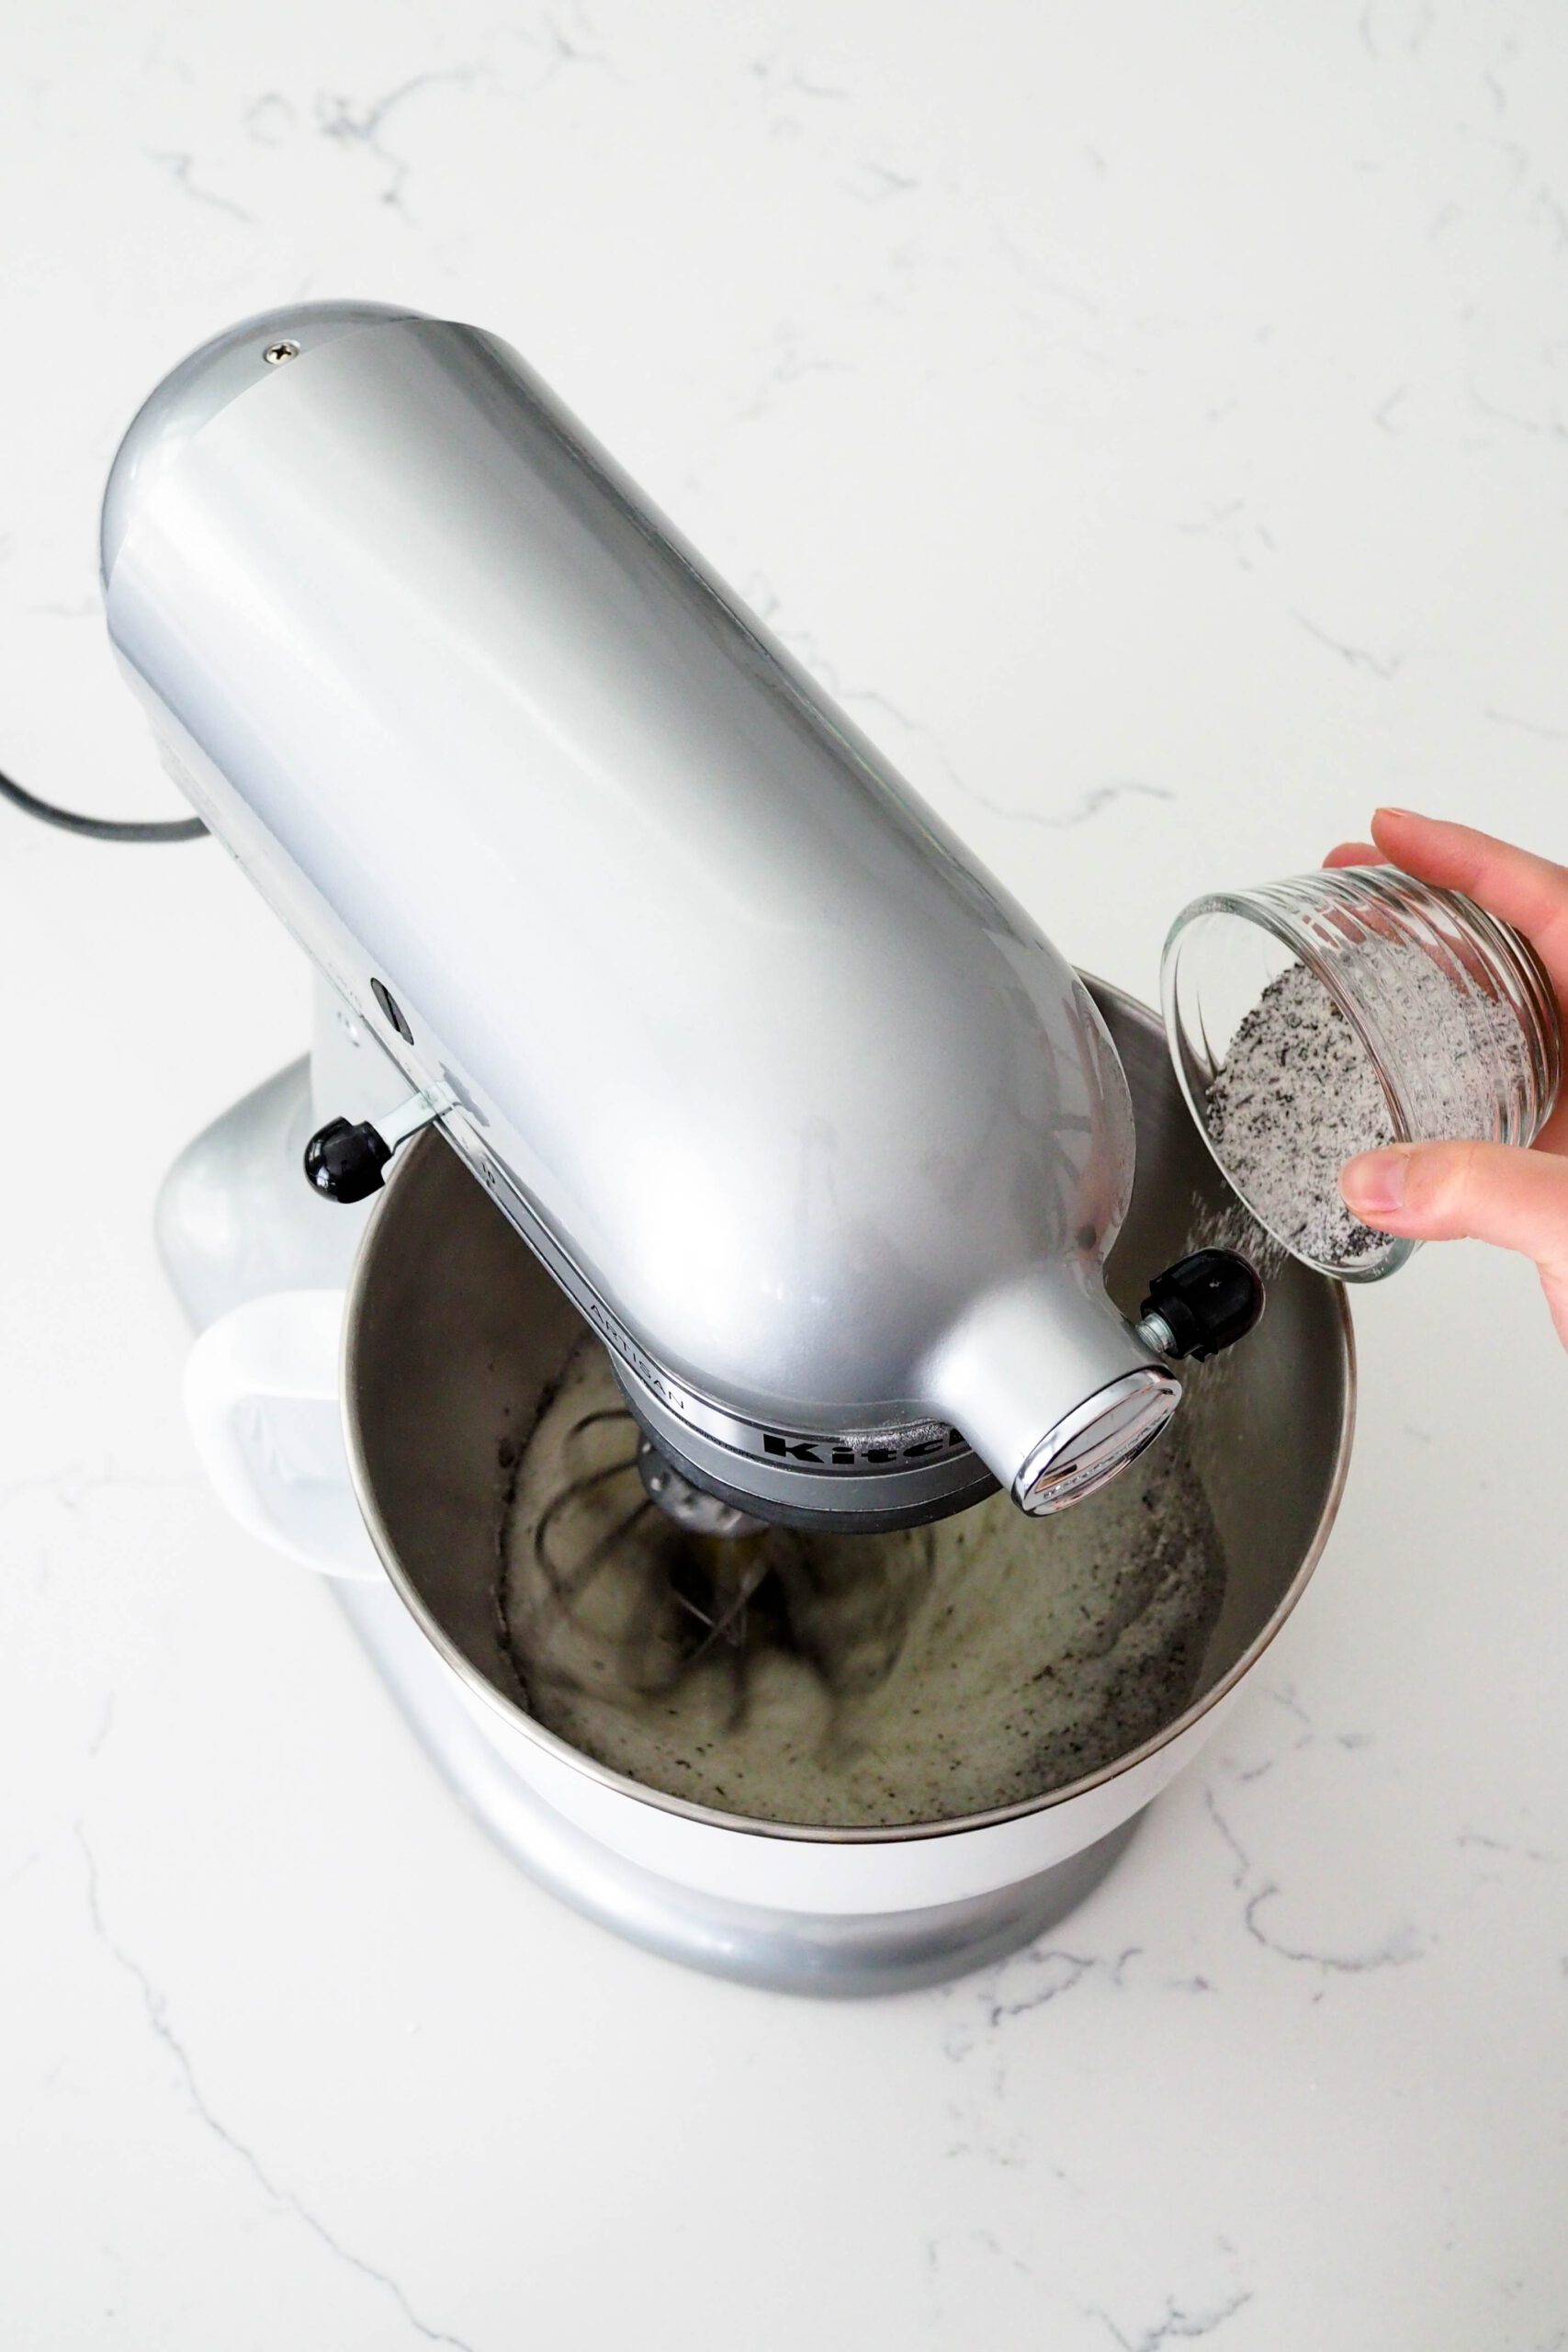
For a perfect French meringue every time, start by whipping the egg whites on low in a stand mixer, just to incorporate. Once the whites begin to foam, increase the speed to medium. The whisk will begin to leave trails in the foam; at that point, sprinkle in the sugar about a teaspoon at a time.
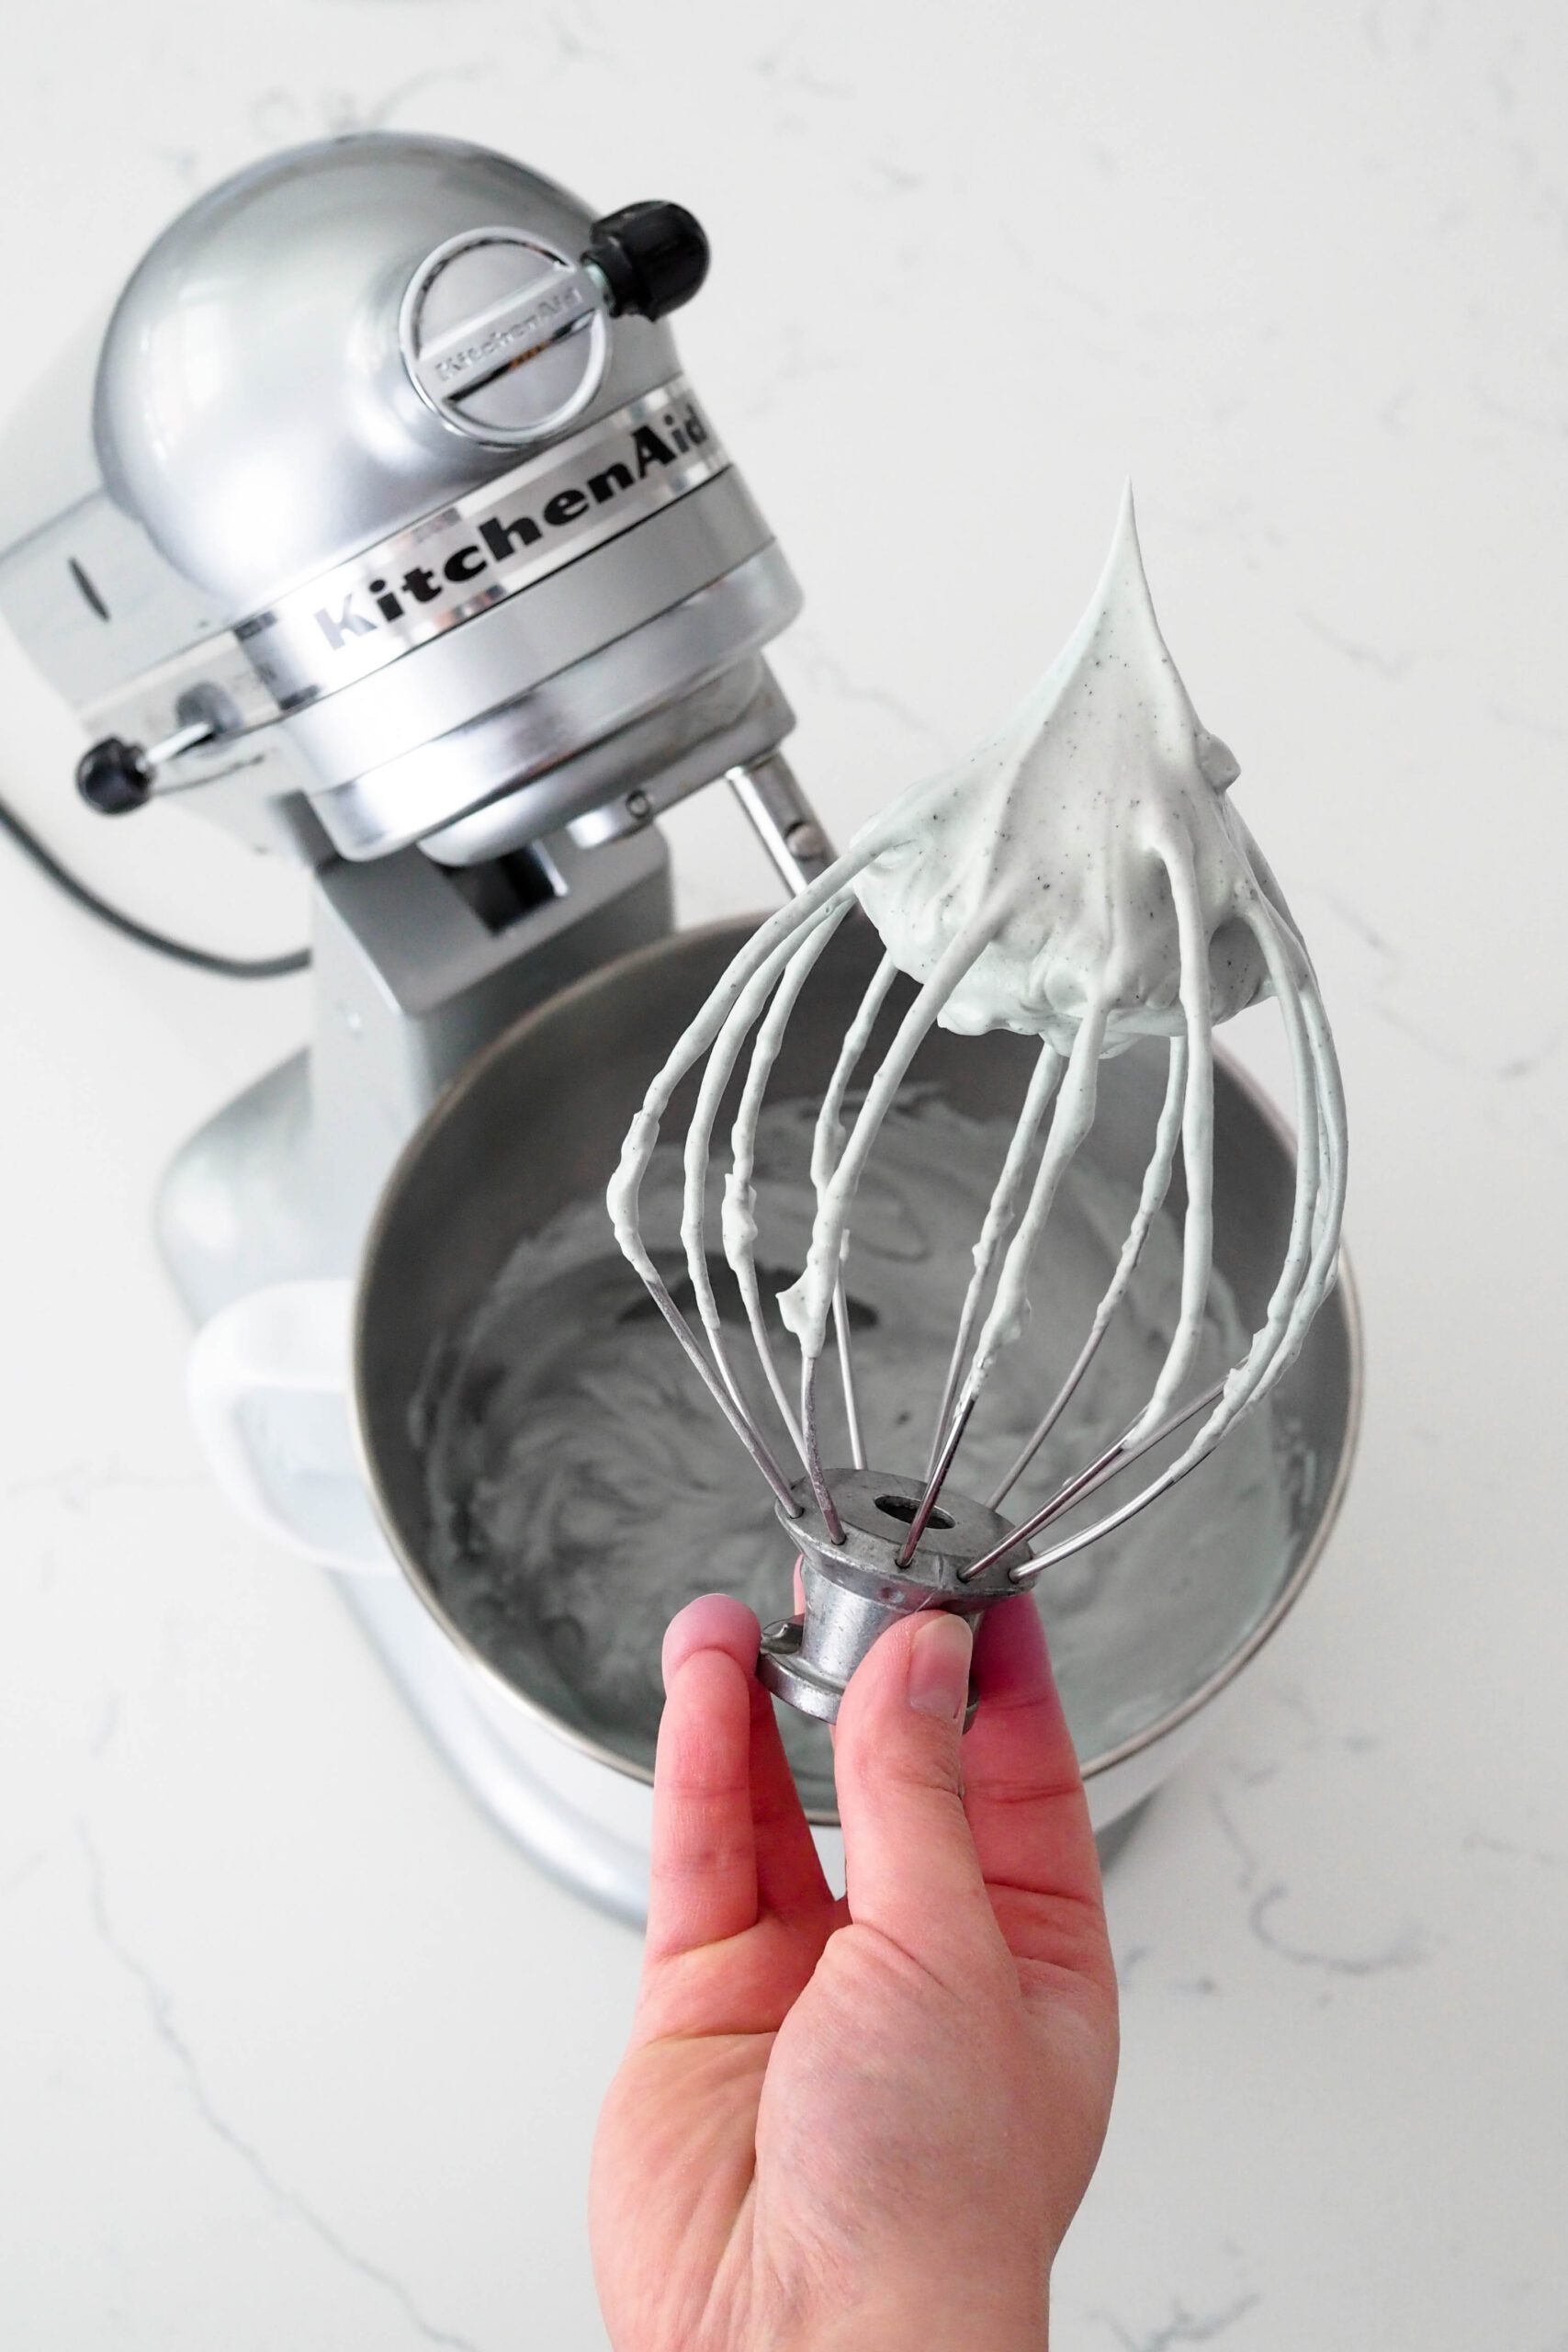
When all the sugar is incorporated, increase the speed to medium and whisk until you begin to see the whisk leave deep indents in the meringue (anywhere from three to five minutes).
Test to see if the meringue has stiff peaks by removing the whisk and flipping it upside down. If the meringue stands straight up or curls into itself lightly with a sharp point, stop whisking. (See photo below.) If the point is soft and looks like it has a lot of tiny bubbles in it, whisk for another 10 seconds, then test again.
The Perfect Macaron Batter Consistency
Macaron batter needs to be a certain consistency in order to develop feet. The process is so important that it has its own name: “macaronage.”
If you’re a beginner, this section will help you understand what’s happening and what you’re looking for during the macaronage.
Macaronage Is a Process
The egg whites start out as liquid with no air in them. Then you whip in lots of very tiny air bubbles to transform the egg whites into a meringue. You have added so much air into the egg whites that now they essentially function as a solid instead of a liquid.
Then, you fold in almond flour and powdered sugar. As you fold the batter with a spatula, you are knocking the air out of the meringue. That helps to transform our previously solid meringue back into a liquid batter. The more folds you give the batter, the more liquid the batter becomes. (My husband says this is called viscosity, but that’s a bit technical.)
The perfect consistency of macaron batter will look grainy as it flows off the spatula in one long, stacking ribbon. Then, it begin to look shiny and absorb back into the rest of the batter within 10-15 seconds.
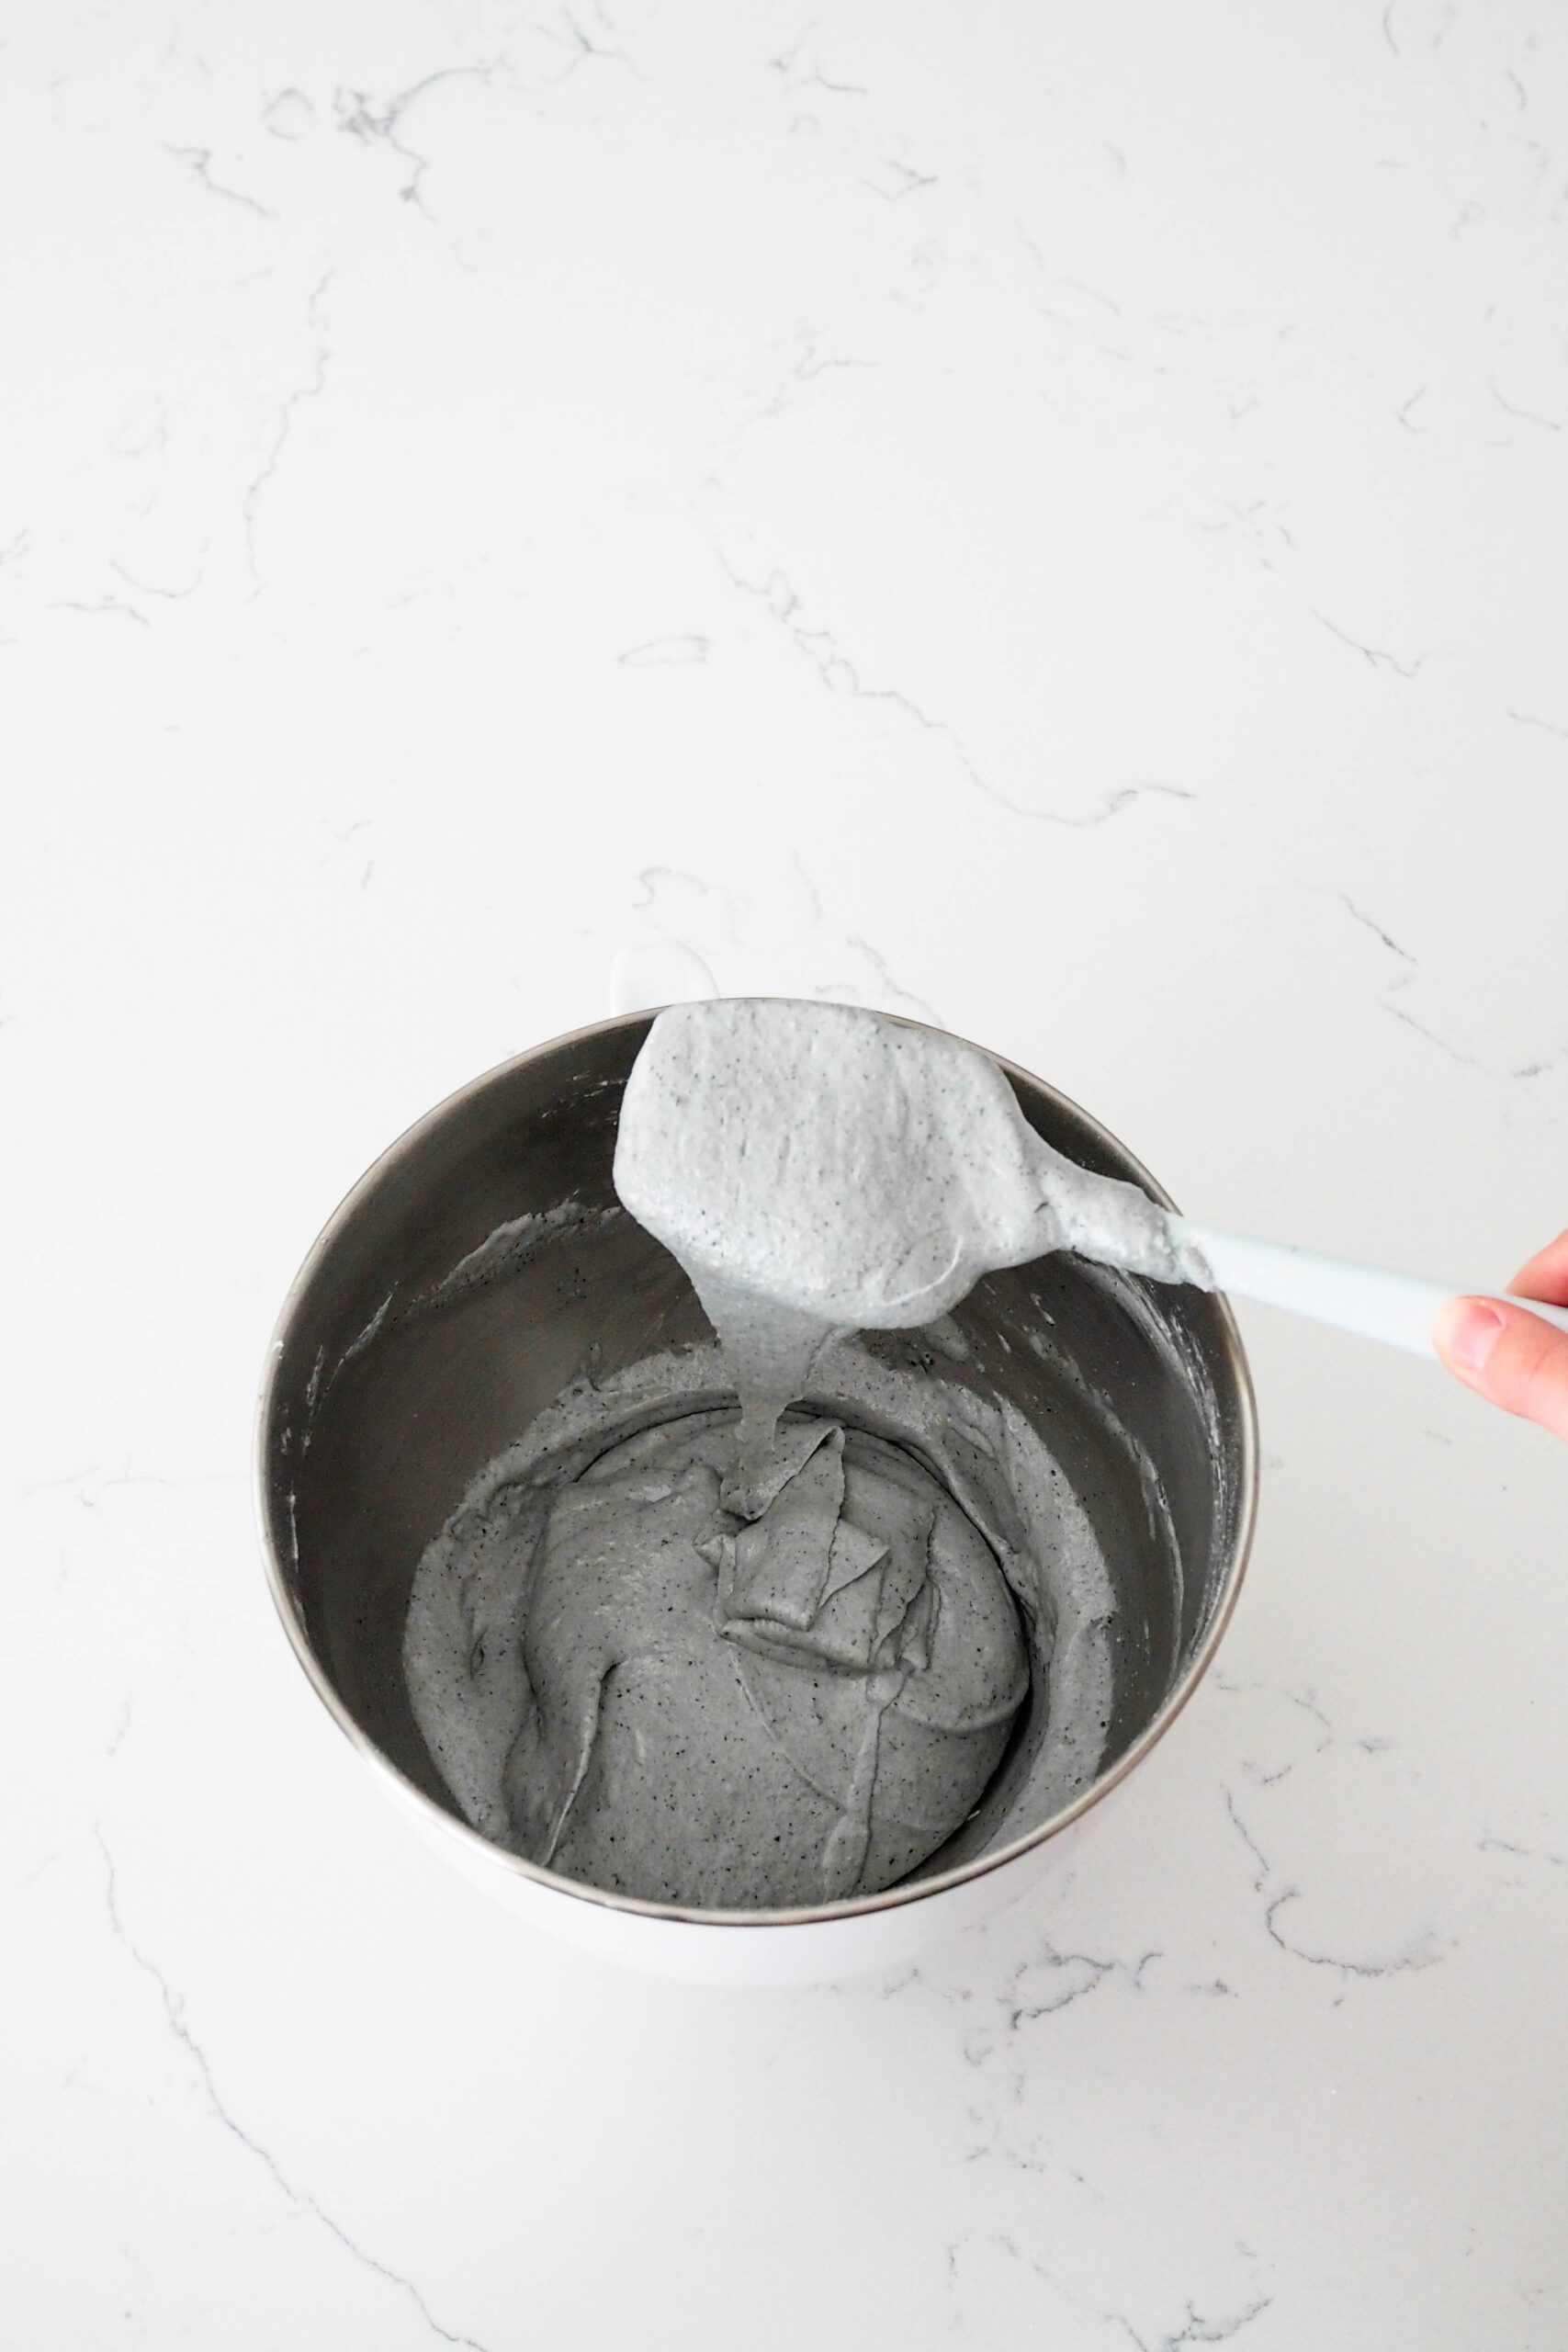
If your batter takes more than 15 seconds to absorb, you need to knock more air out of the meringue. Too much air in the macarons will make them crack in the oven.
If your batter takes closer to 5 seconds to absorb, it’s likely overmixed; however, it will probably still turn out decent macarons. Unfortunately, if your batter absorbs immediately, there is not enough air left in the meringue to form proper macarons. I recommend starting over.
Do I Really Need to Weigh the Ingredients for Macarons?
YES. If there was ever a case for all-caps, this is it. I typically include both volumetric (cups) and mass (weight) measurements on my recipes, but because macarons are so finicky, I have only included mass measurements. Yes, this requires a kitchen scale, but it is worth it to get perfect macarons every time.
Kitchen scales are relatively inexpensive as far as minor appliances go, and they will last you forever. I have this kitchen scale from OXO and love it.
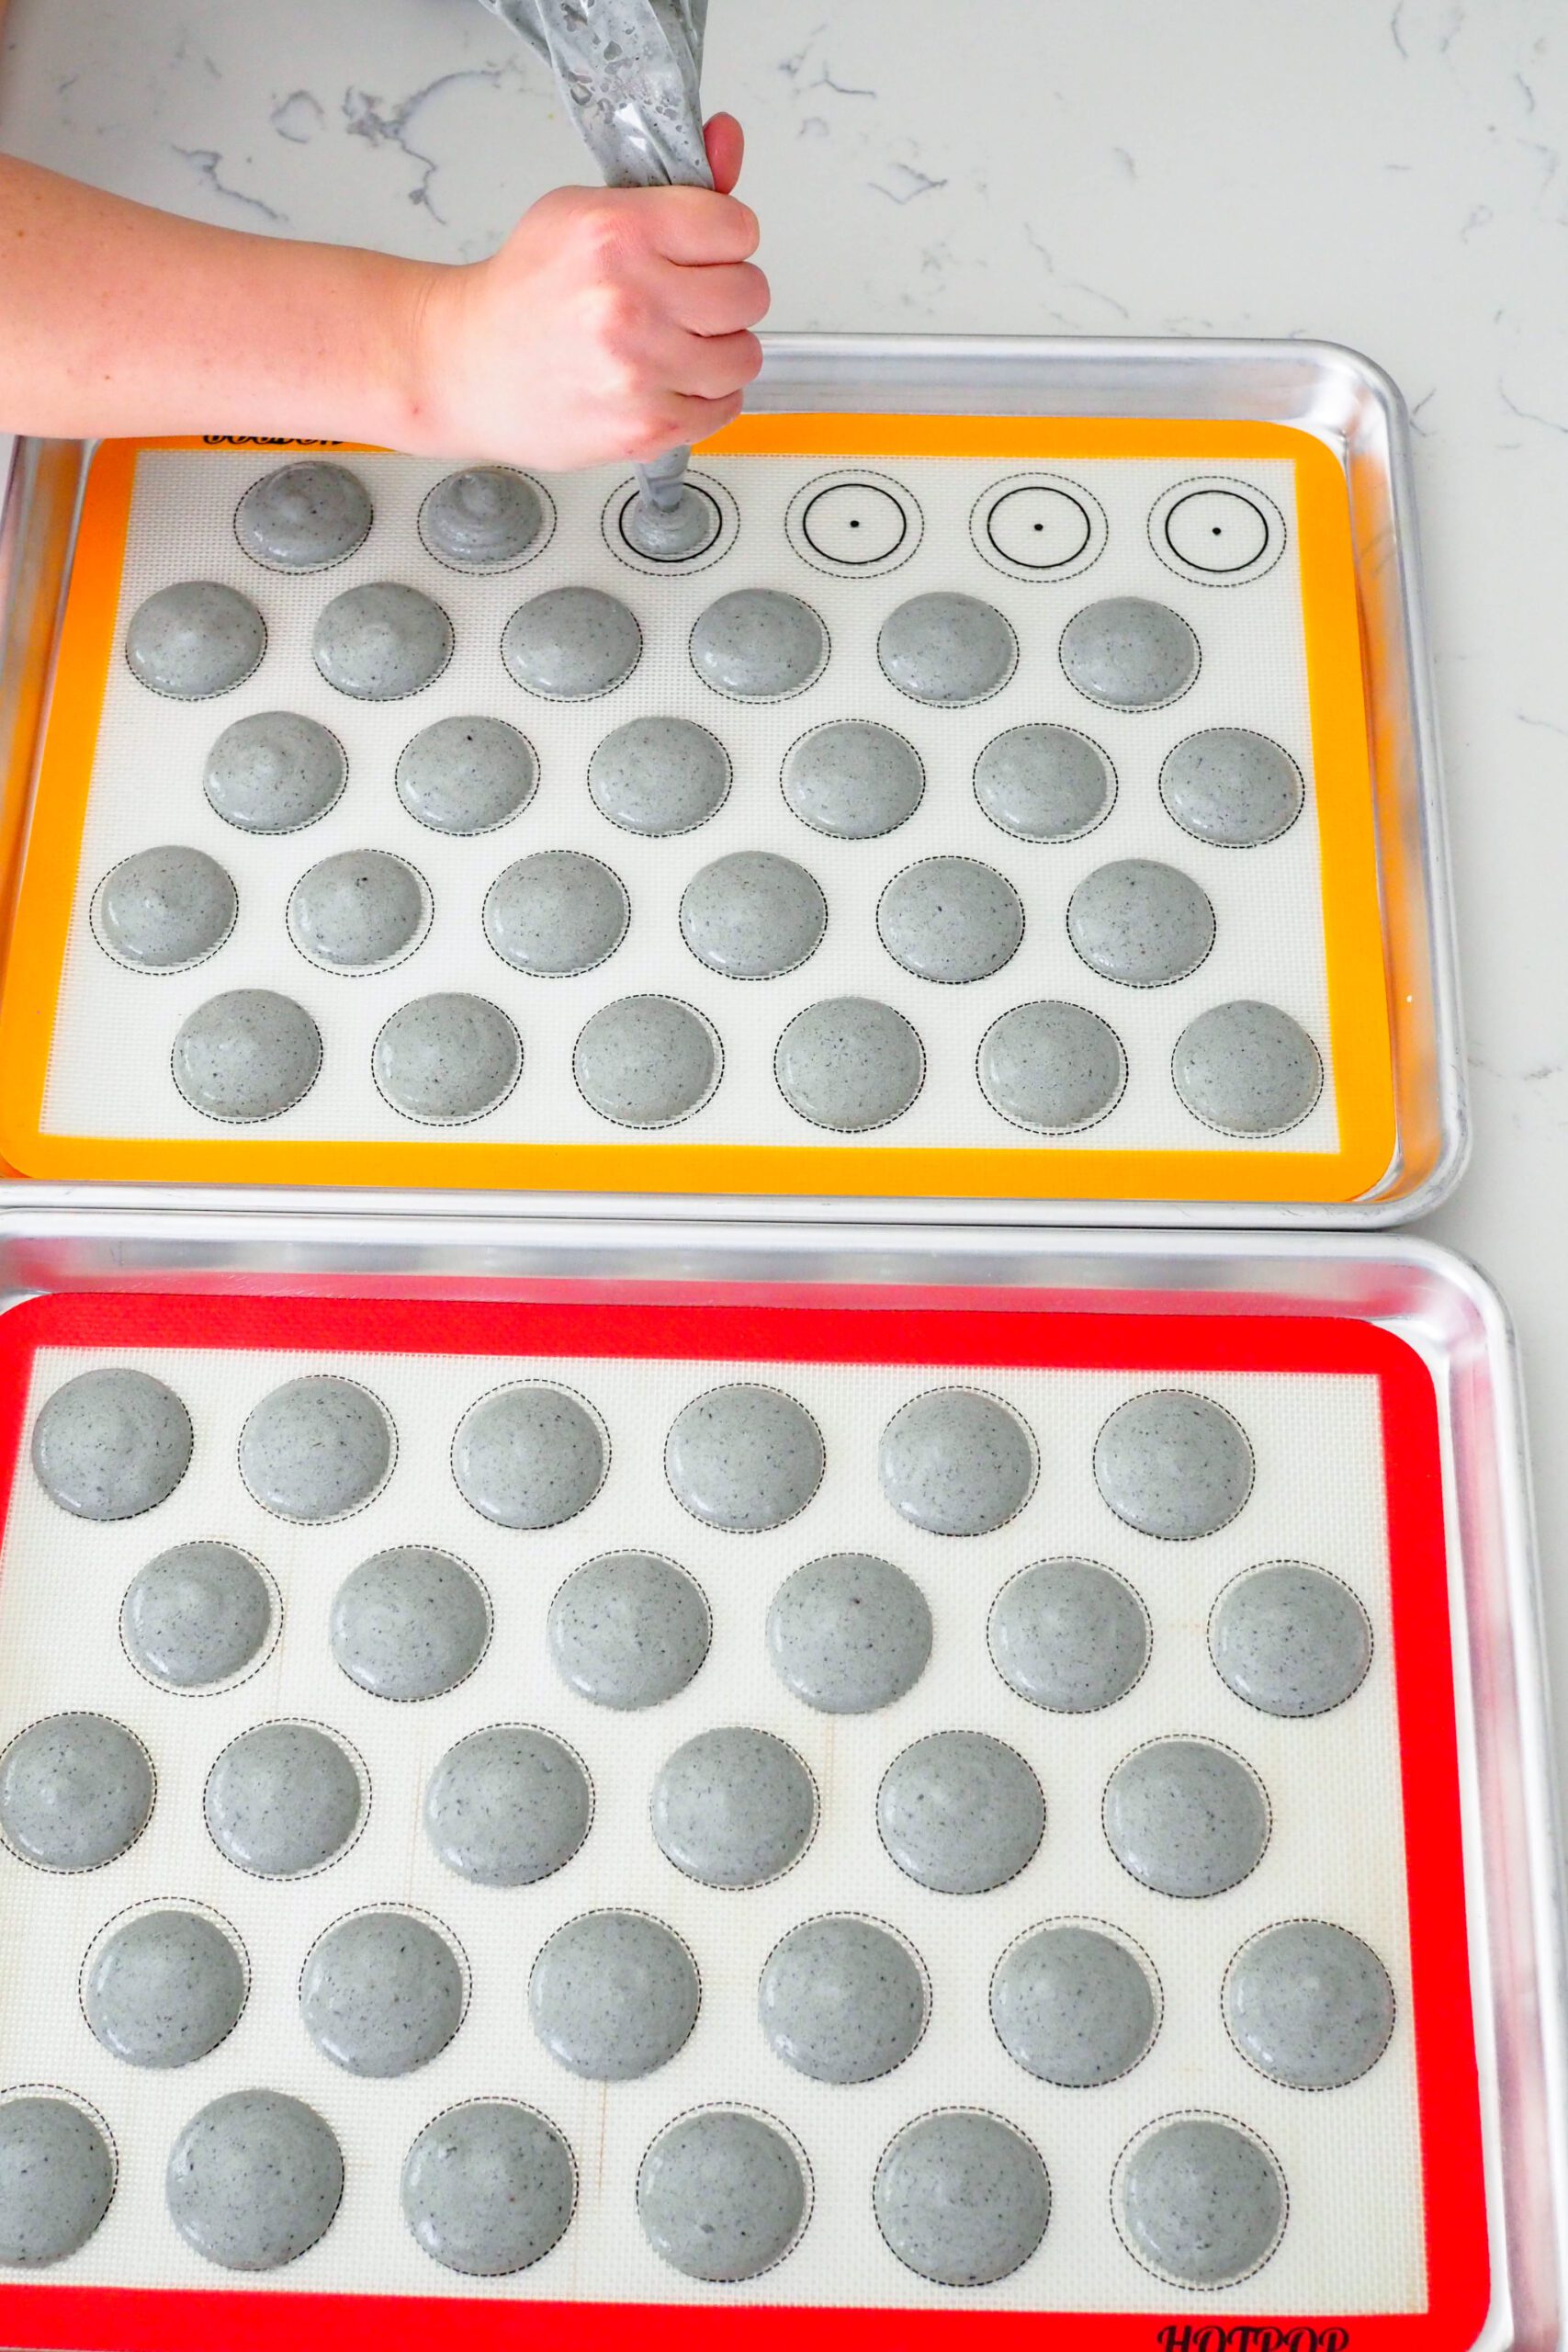
How to Pipe the Macarons
I recommend using a silicone mat or template under parchment paper. The batter can be a little tricky to pipe neatly until you know how it flows.
Using a small round piping tip (#10), gently squeeze out the macaron batter about one inch (3 mm) in diameter at a 90° angle from the pan. The lumps will spread as they settle.
Once the whole tray has been piped, pick up the pan with one hand and bang the heel of your other hand against it in various locations under the macarons until you see air bubbles rise from the bottoms of the shells. Alternatively, bang the pan against the counter a few times.
Let the macarons rest until they are dull and don’t leave a residue when you lightly run your finger across the top.
How to Make Earl Grey Custard Buttercream
This French buttercream is more involved than American or Russian buttercream, but the richness and creaminess is second to none! To make it, place your reserved egg yolks into the bowl of a stand mixer, then mix on low until the yolks are homogeneous.
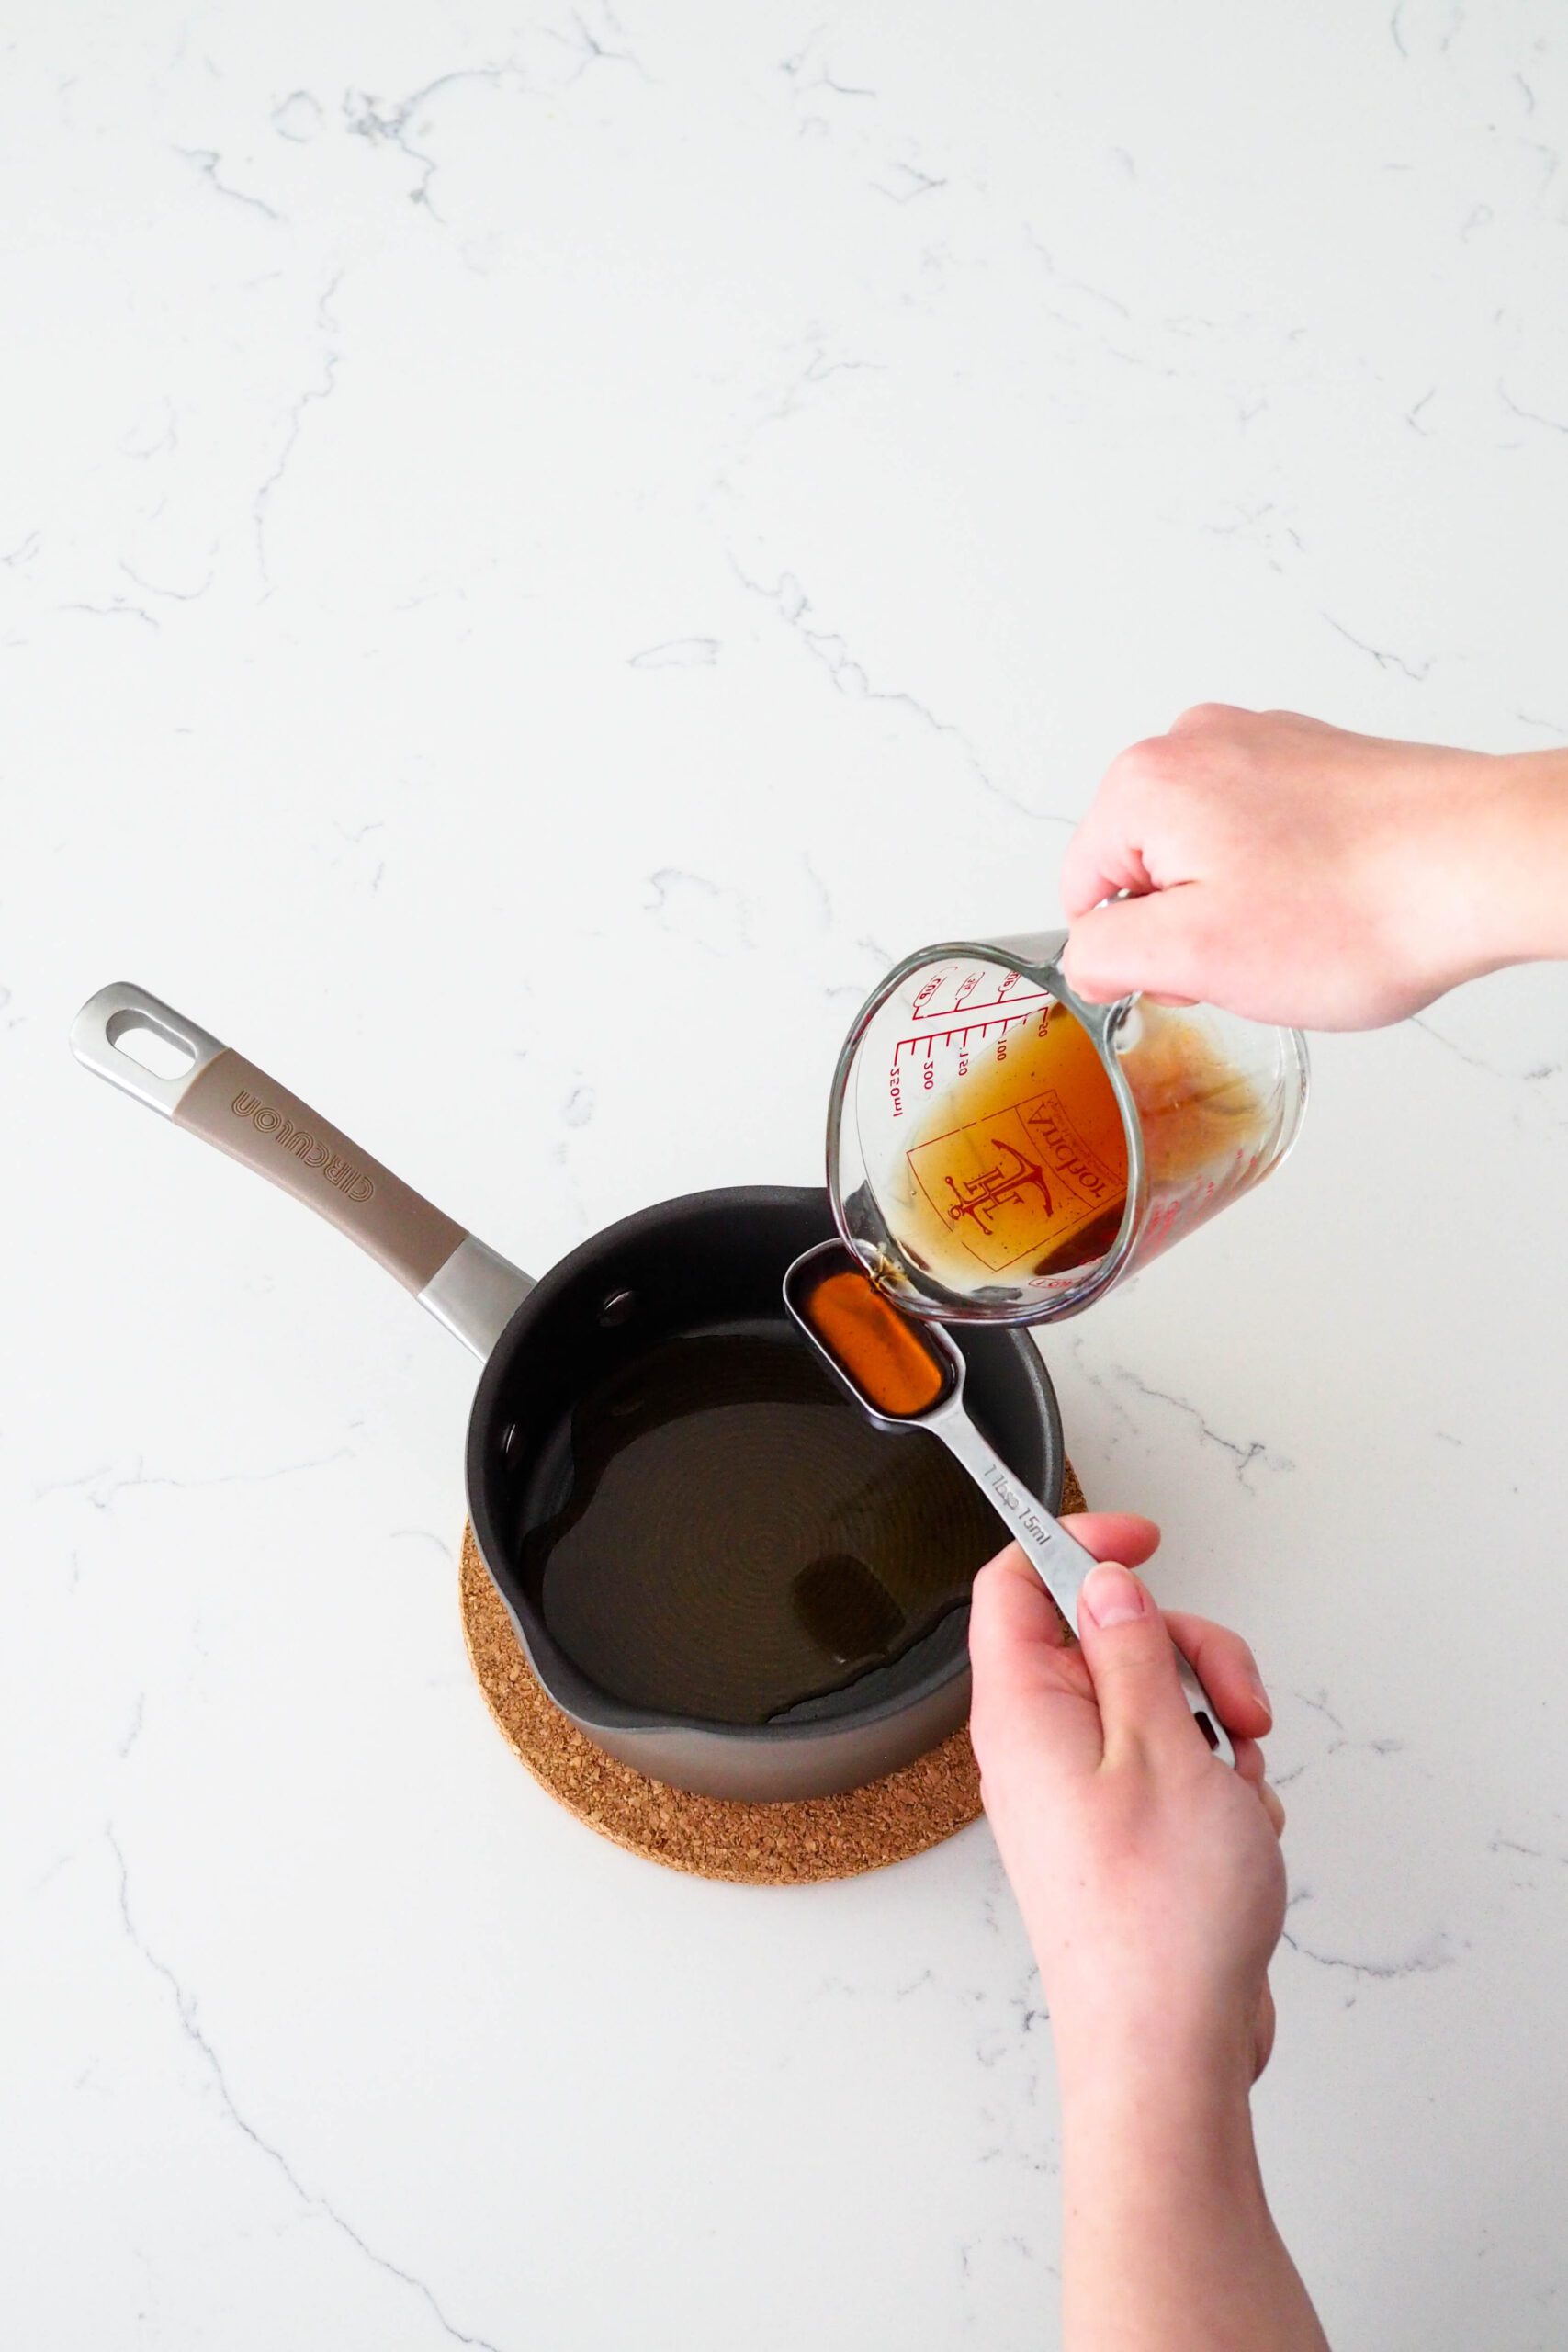
Then, add brewed Earl Grey tea to sugar in a small saucepan and heat on medium until the syrup reaches 245°F or 118°C, the firm ball stage. A candy thermometer is very helpful here.
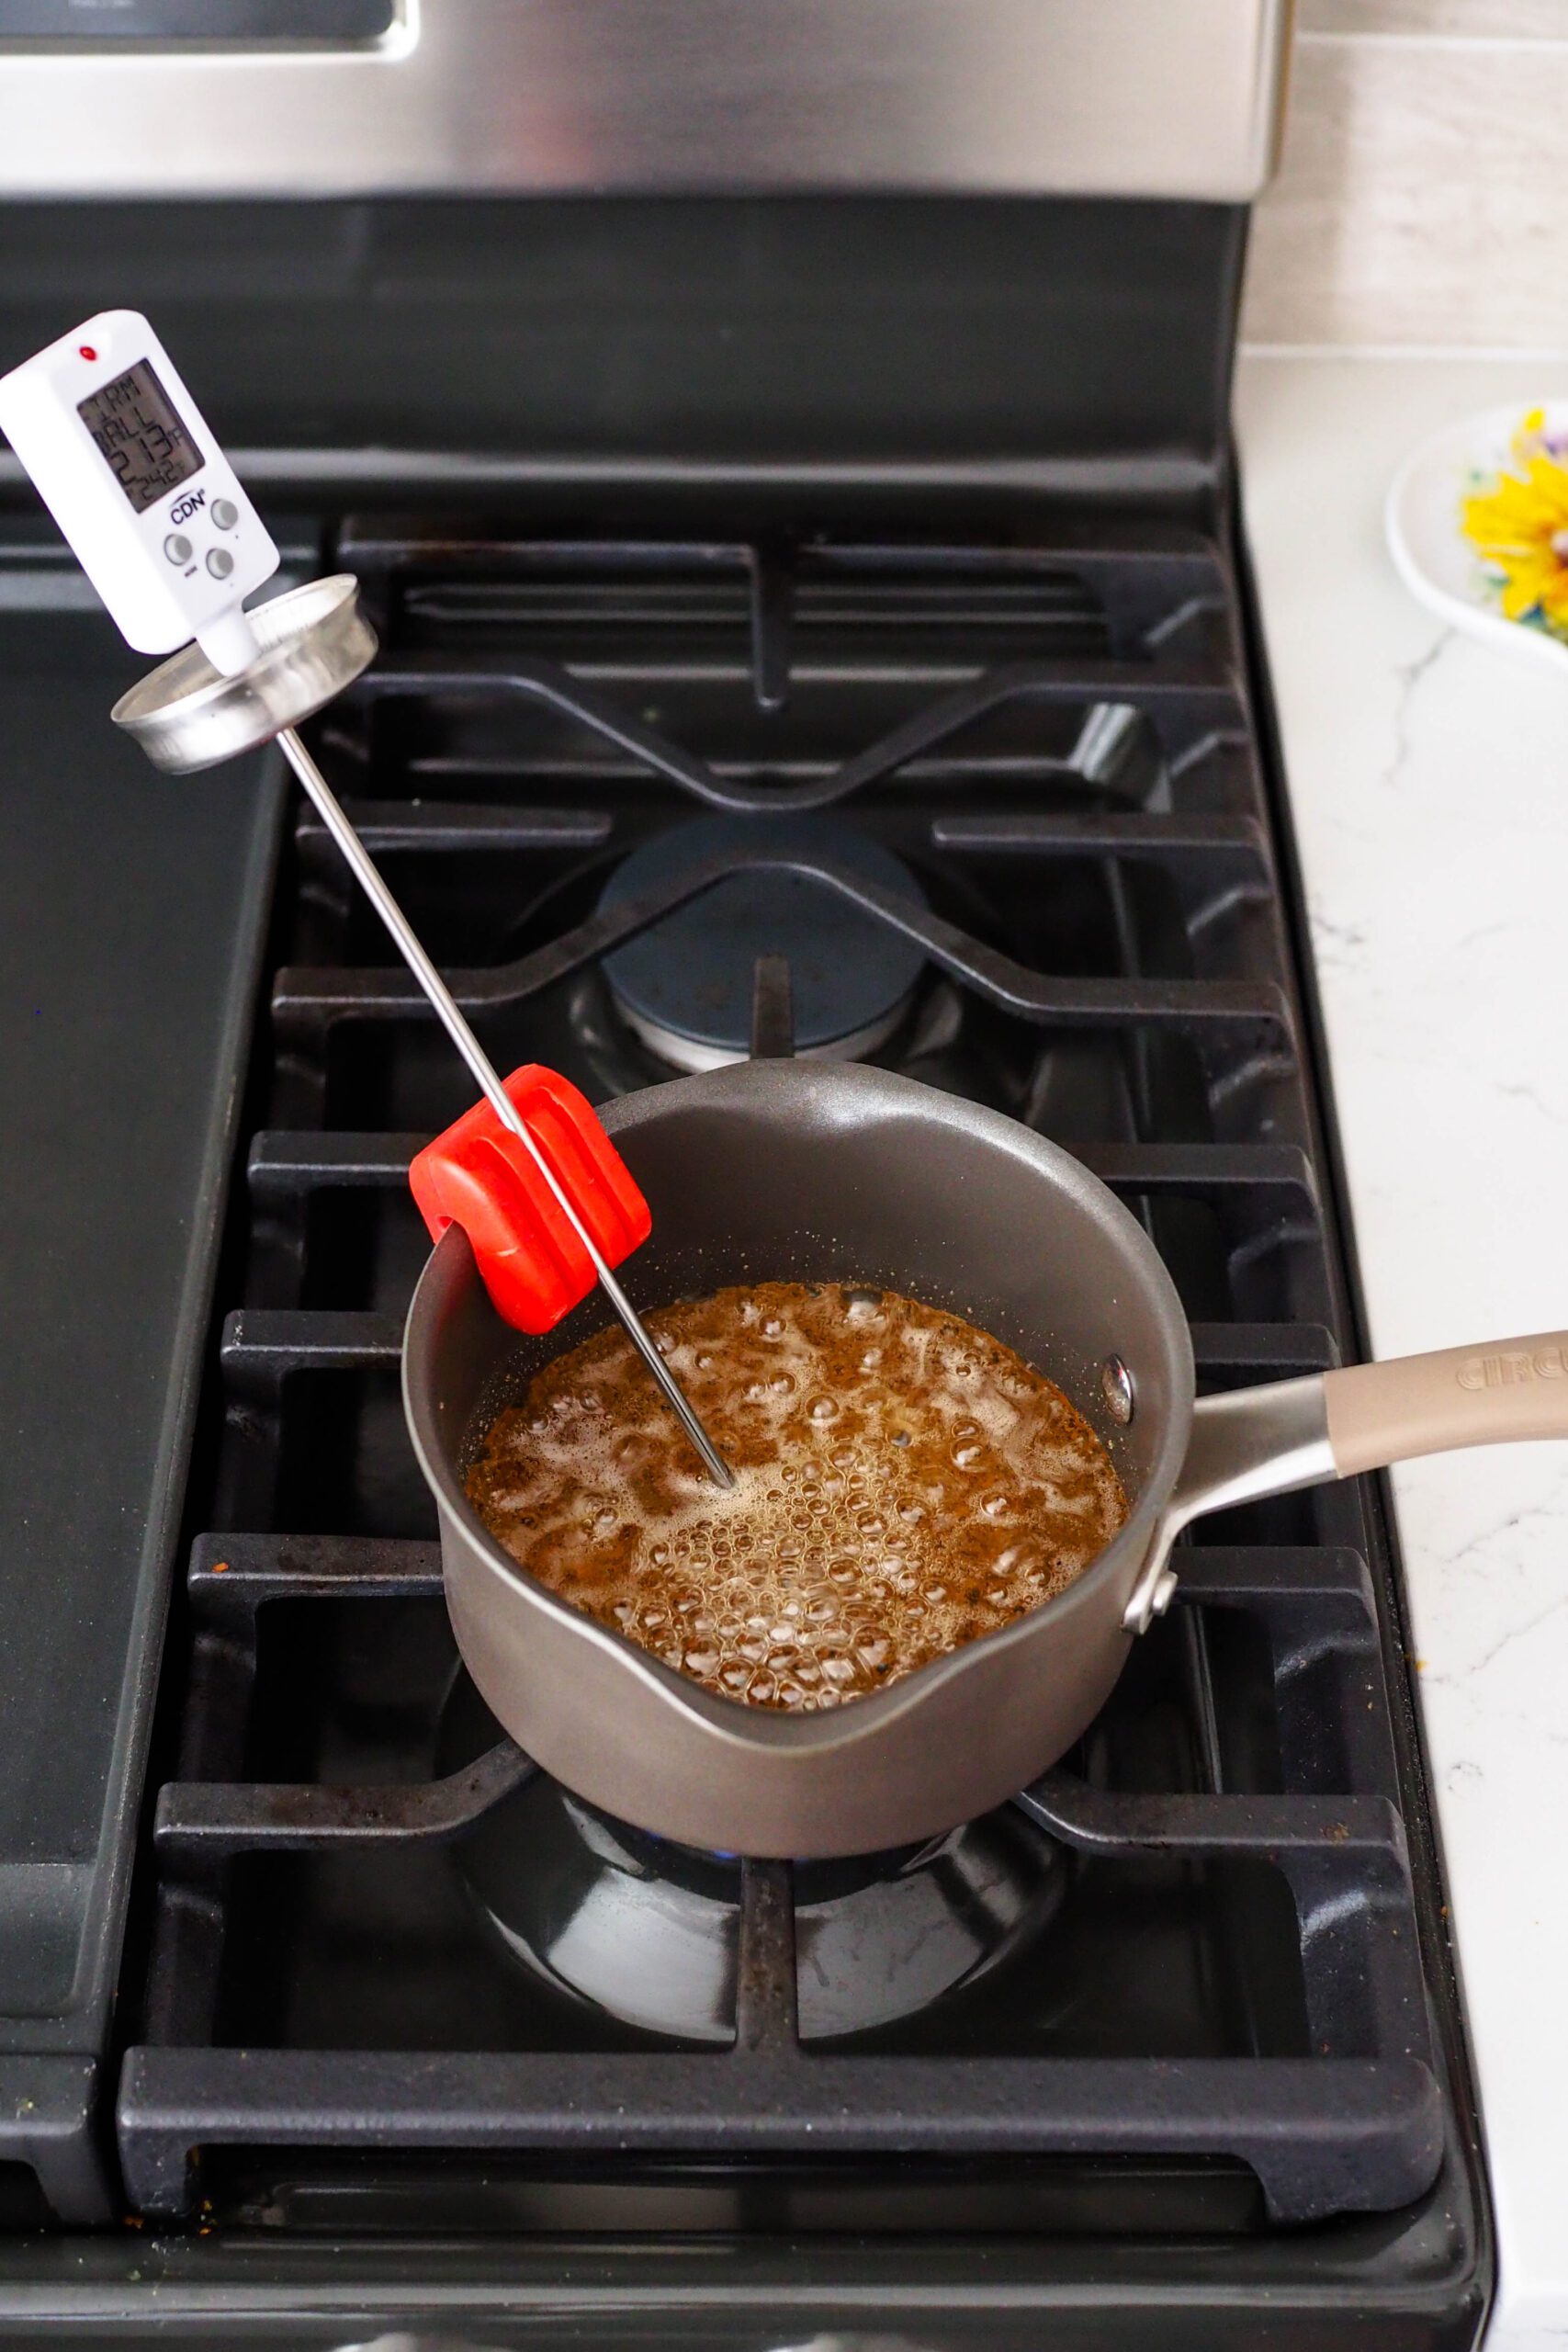
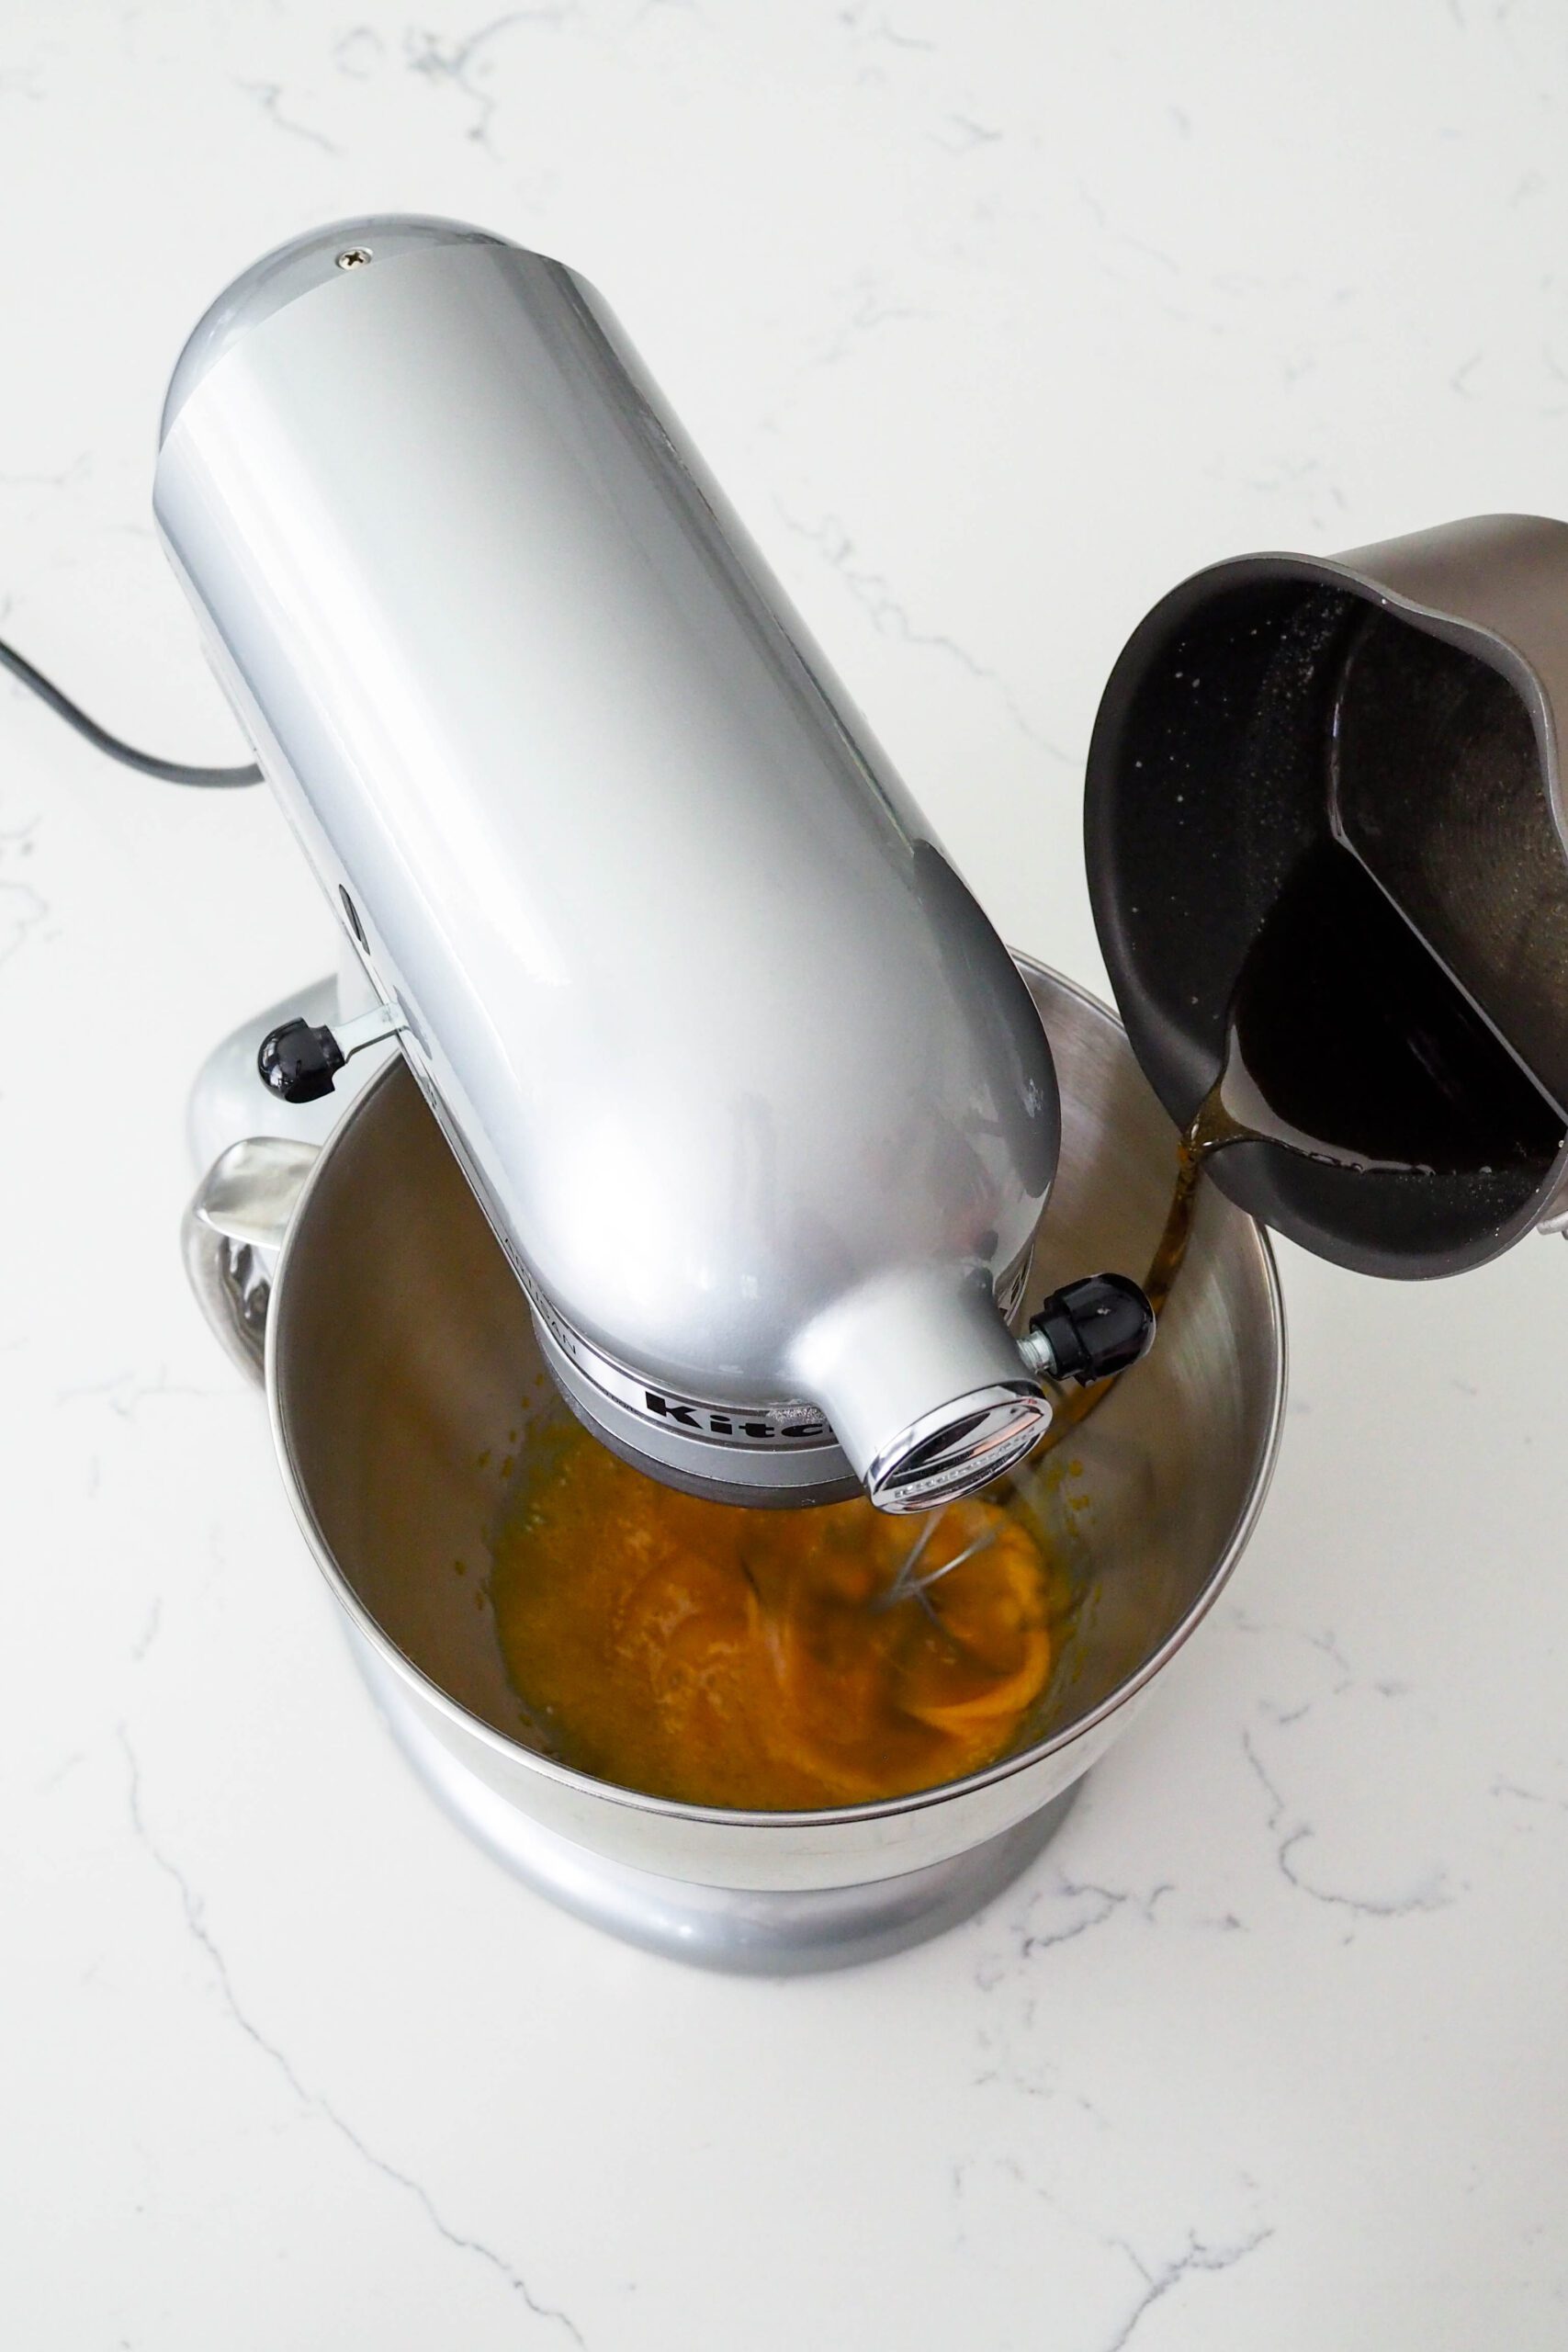
Once the syrup stops bubbling, pour it into the stand mixer bowl, in one spot if you can.
When all the syrup has been added, scrape down the sides and bottom of the bowl to incorporate any stray bits of yolk. Whisk the custard until it is pale and fluffy.
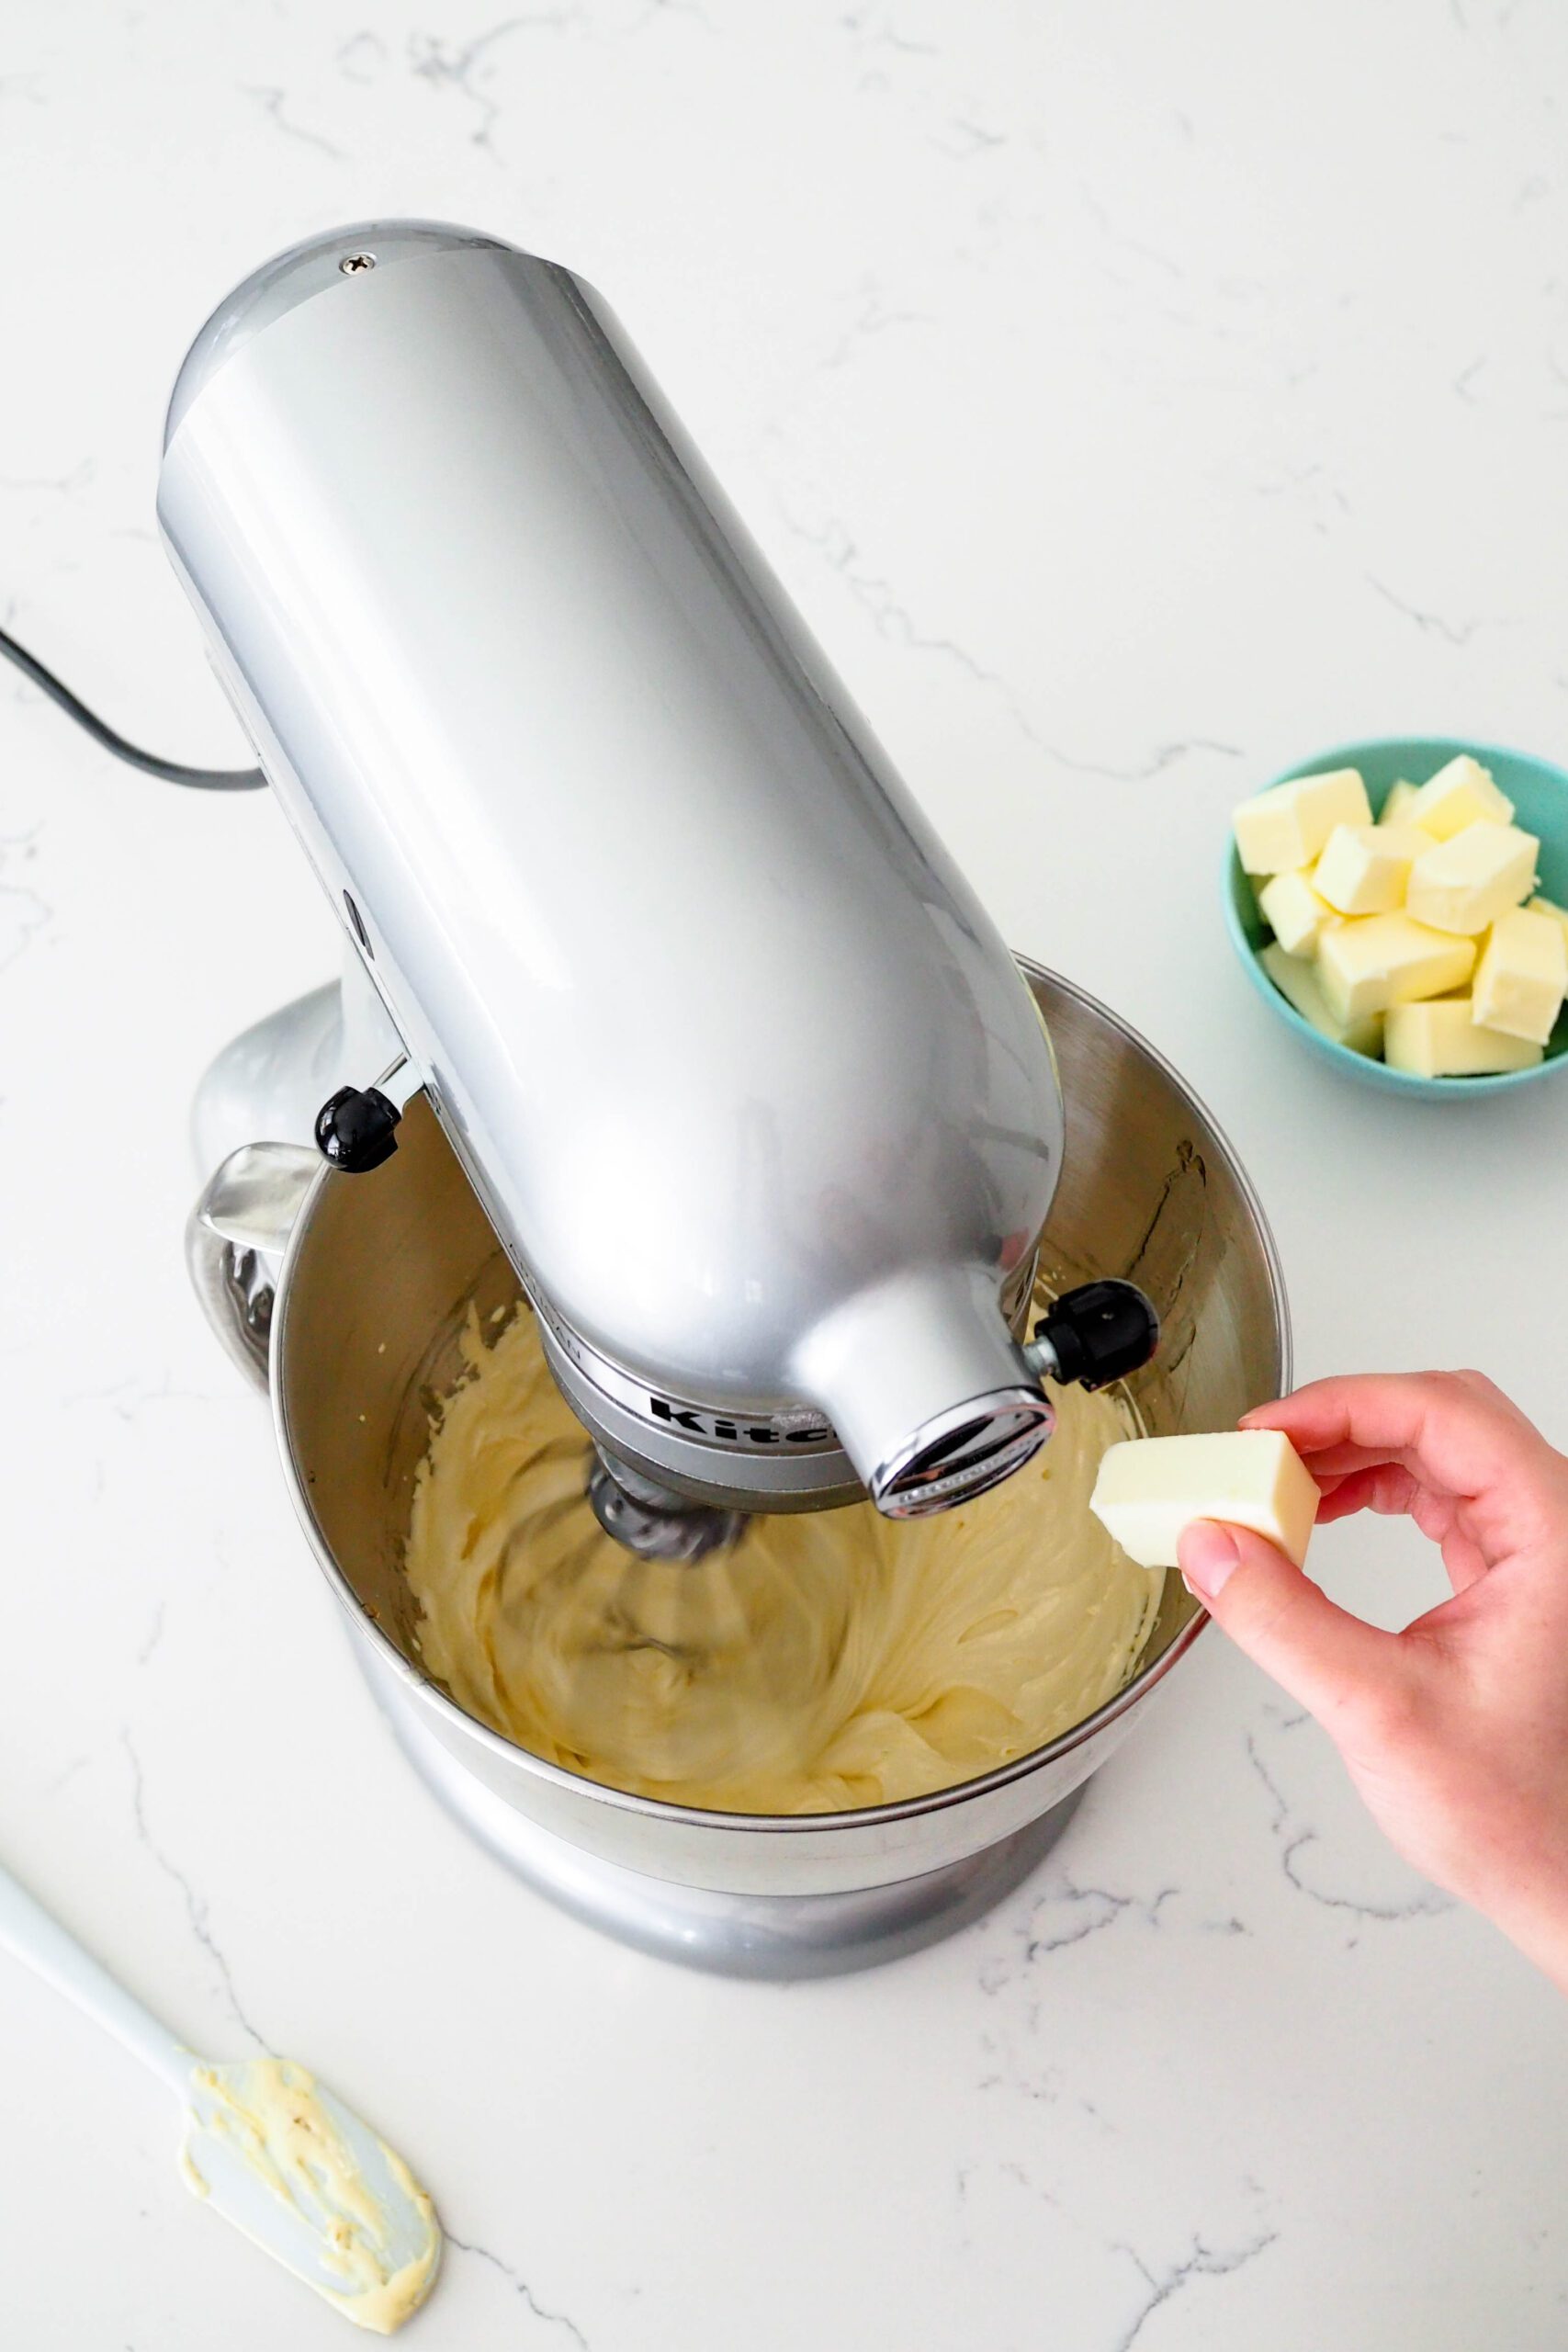
Then, add your butter one piece at a time, and beat until the buttercream is light and fluffy. Add vanilla, then transfer to a piping bag. Now you’re ready to fill your macarons!
Please note: This Earl Grey custard buttercream recipe makes enough for two batches of macarons. It’s difficult to make a smaller batch with just two yolks in a stand mixer, so I opt to use all four.
Store any leftover buttercream in the fridge for up to three days or freeze for up to three months. To thaw, place overnight in the fridge, then set out at room temperature for an hour. Beat for five minutes to aerate, then use as desired.
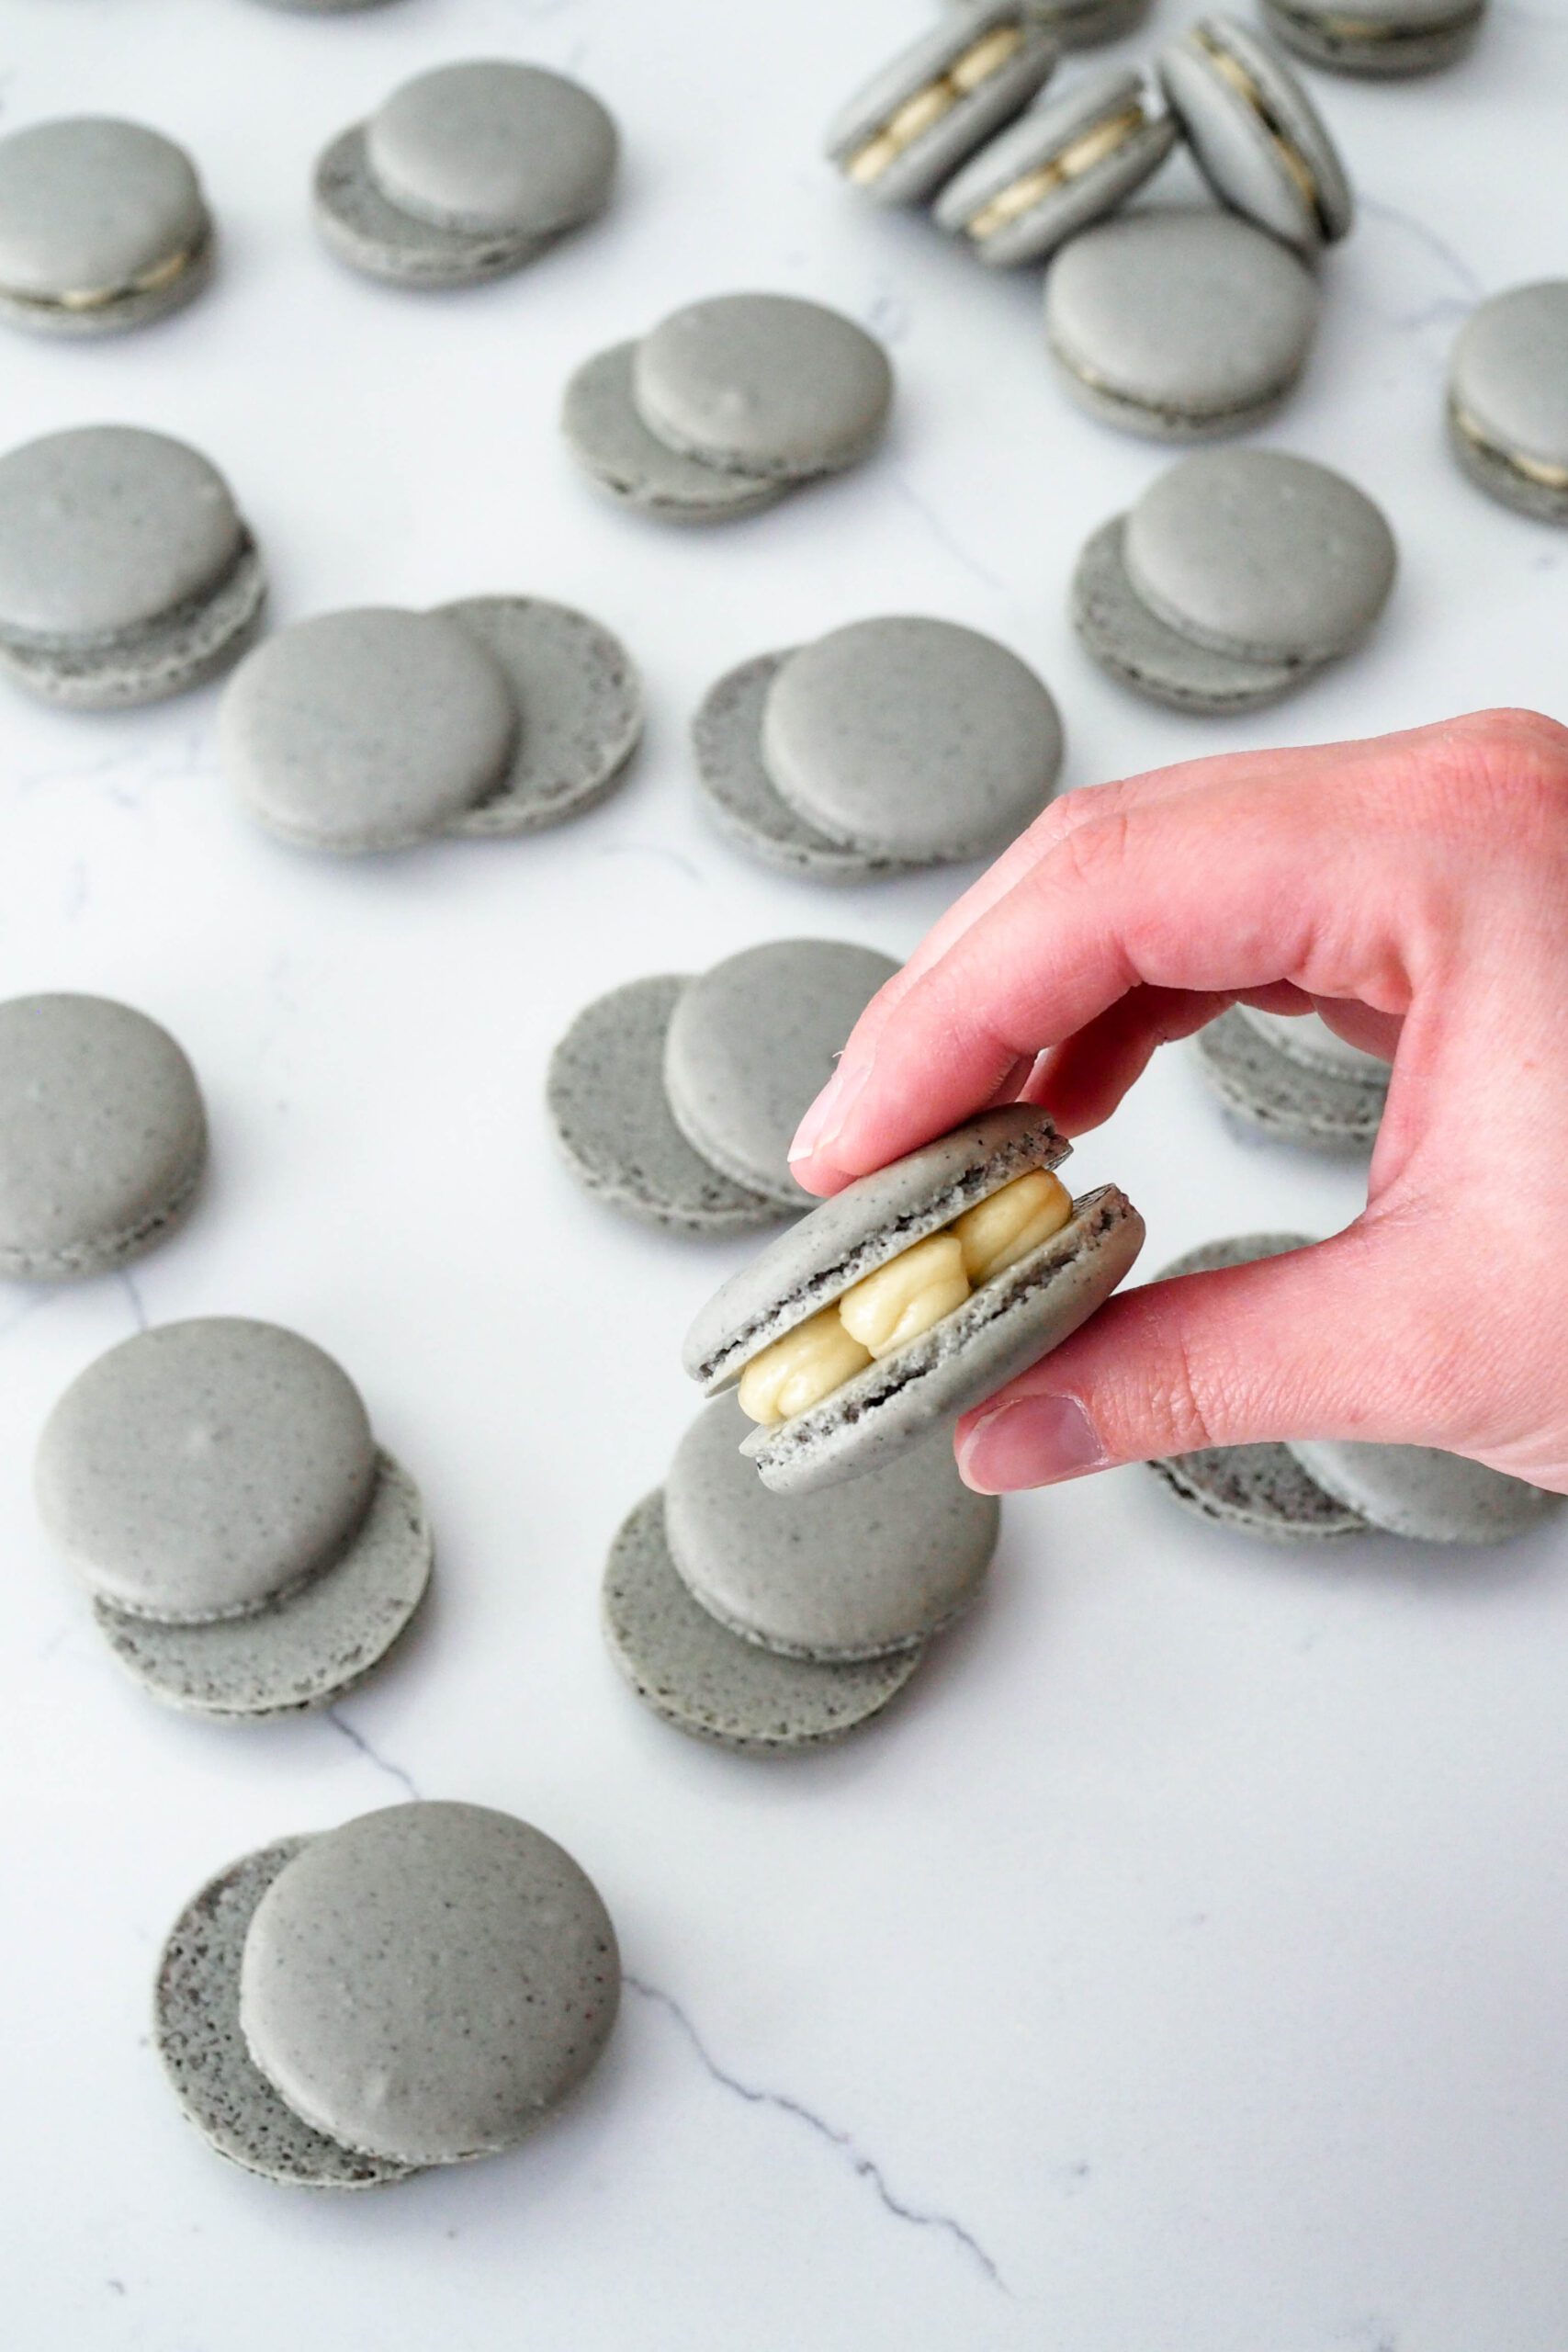
How to Fill Earl Grey Macarons
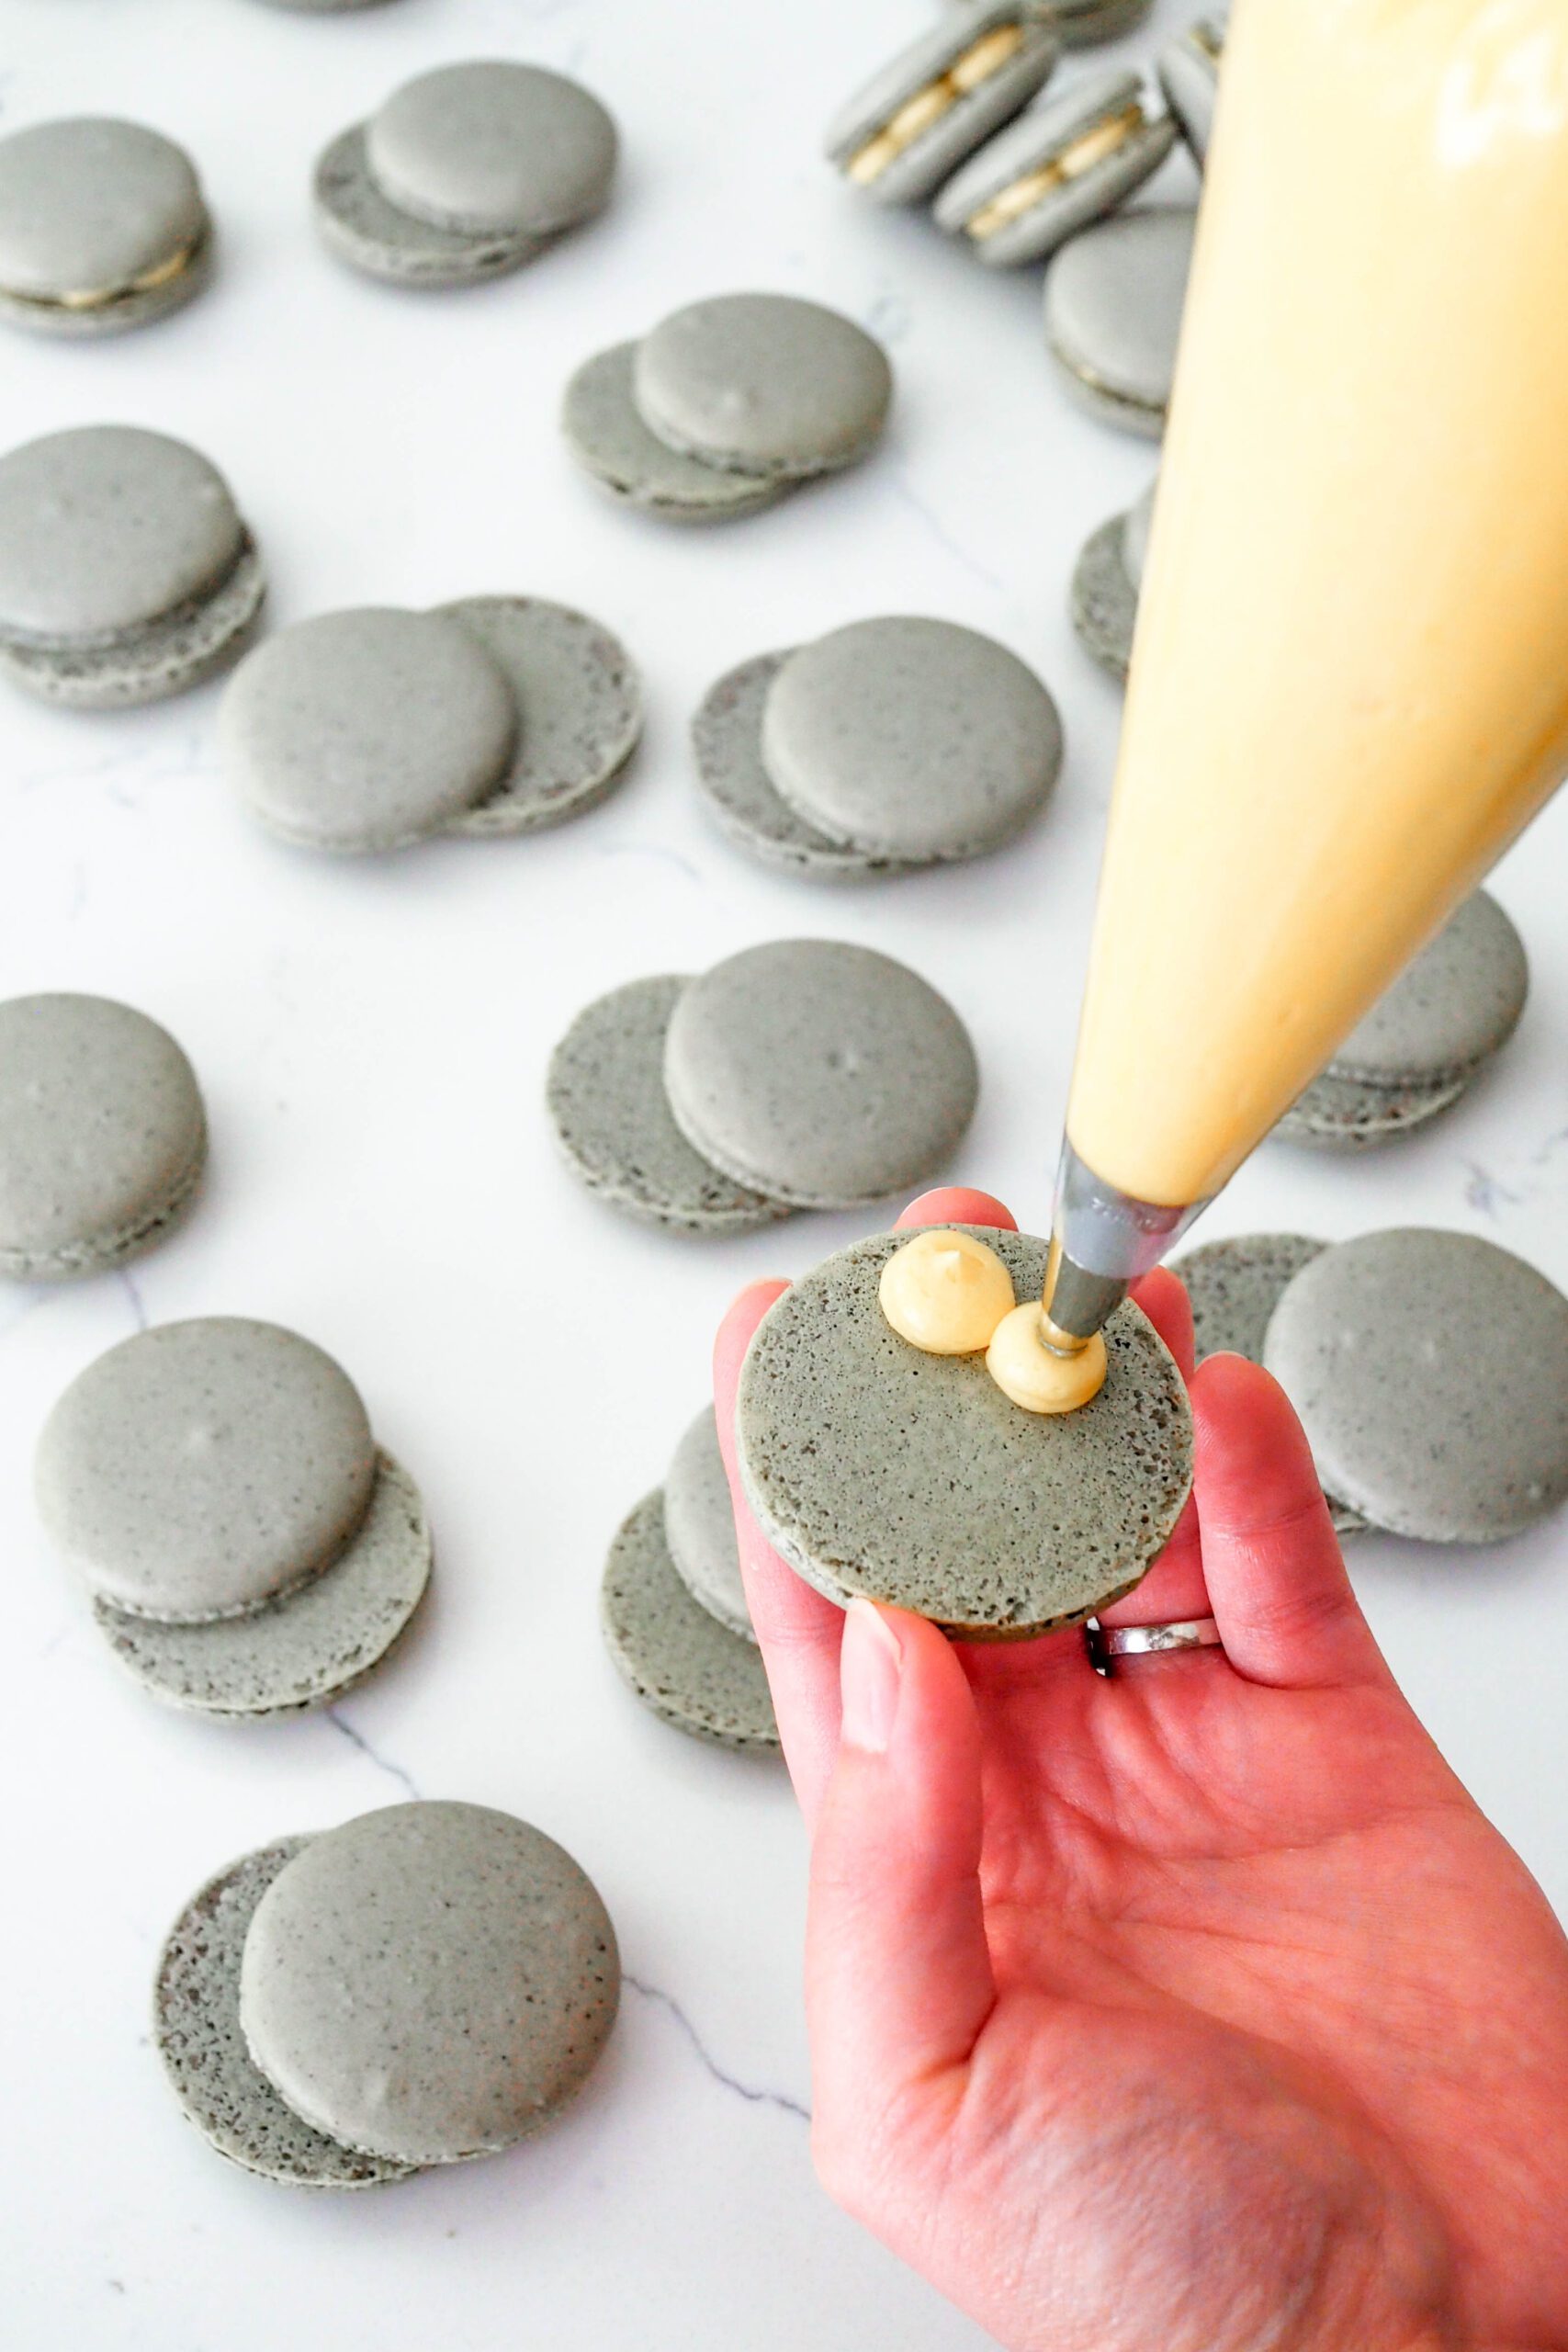
Filling macarons is my favorite part! You can use a larger piping tip and pipe one dollop in the center of a macaron shell or a smaller one like I used here.
For a professional look, pair similarly sized macarons together and line them up with one side face up and one side face down.
On a macaron shell with the flat bottom facing up, pipe six small circles of the Earl Grey custard buttercream around the edge of the shell, then finish with another small circle in the center. Repeat with the rest of the macarons, then place the matching macaron shell on top.
Other Recipes You May Enjoy
Earl Grey tea has a big place here on The Floral Apron. Here are some of my favorite recipes using this bergamot-y black tea:
Dish Cleanup: Gonna Take a While
I rate my recipe cleanups on a scale of 1 to 5. 1 is only a handful of dishes, and 5 is everything including the kitchen sink.
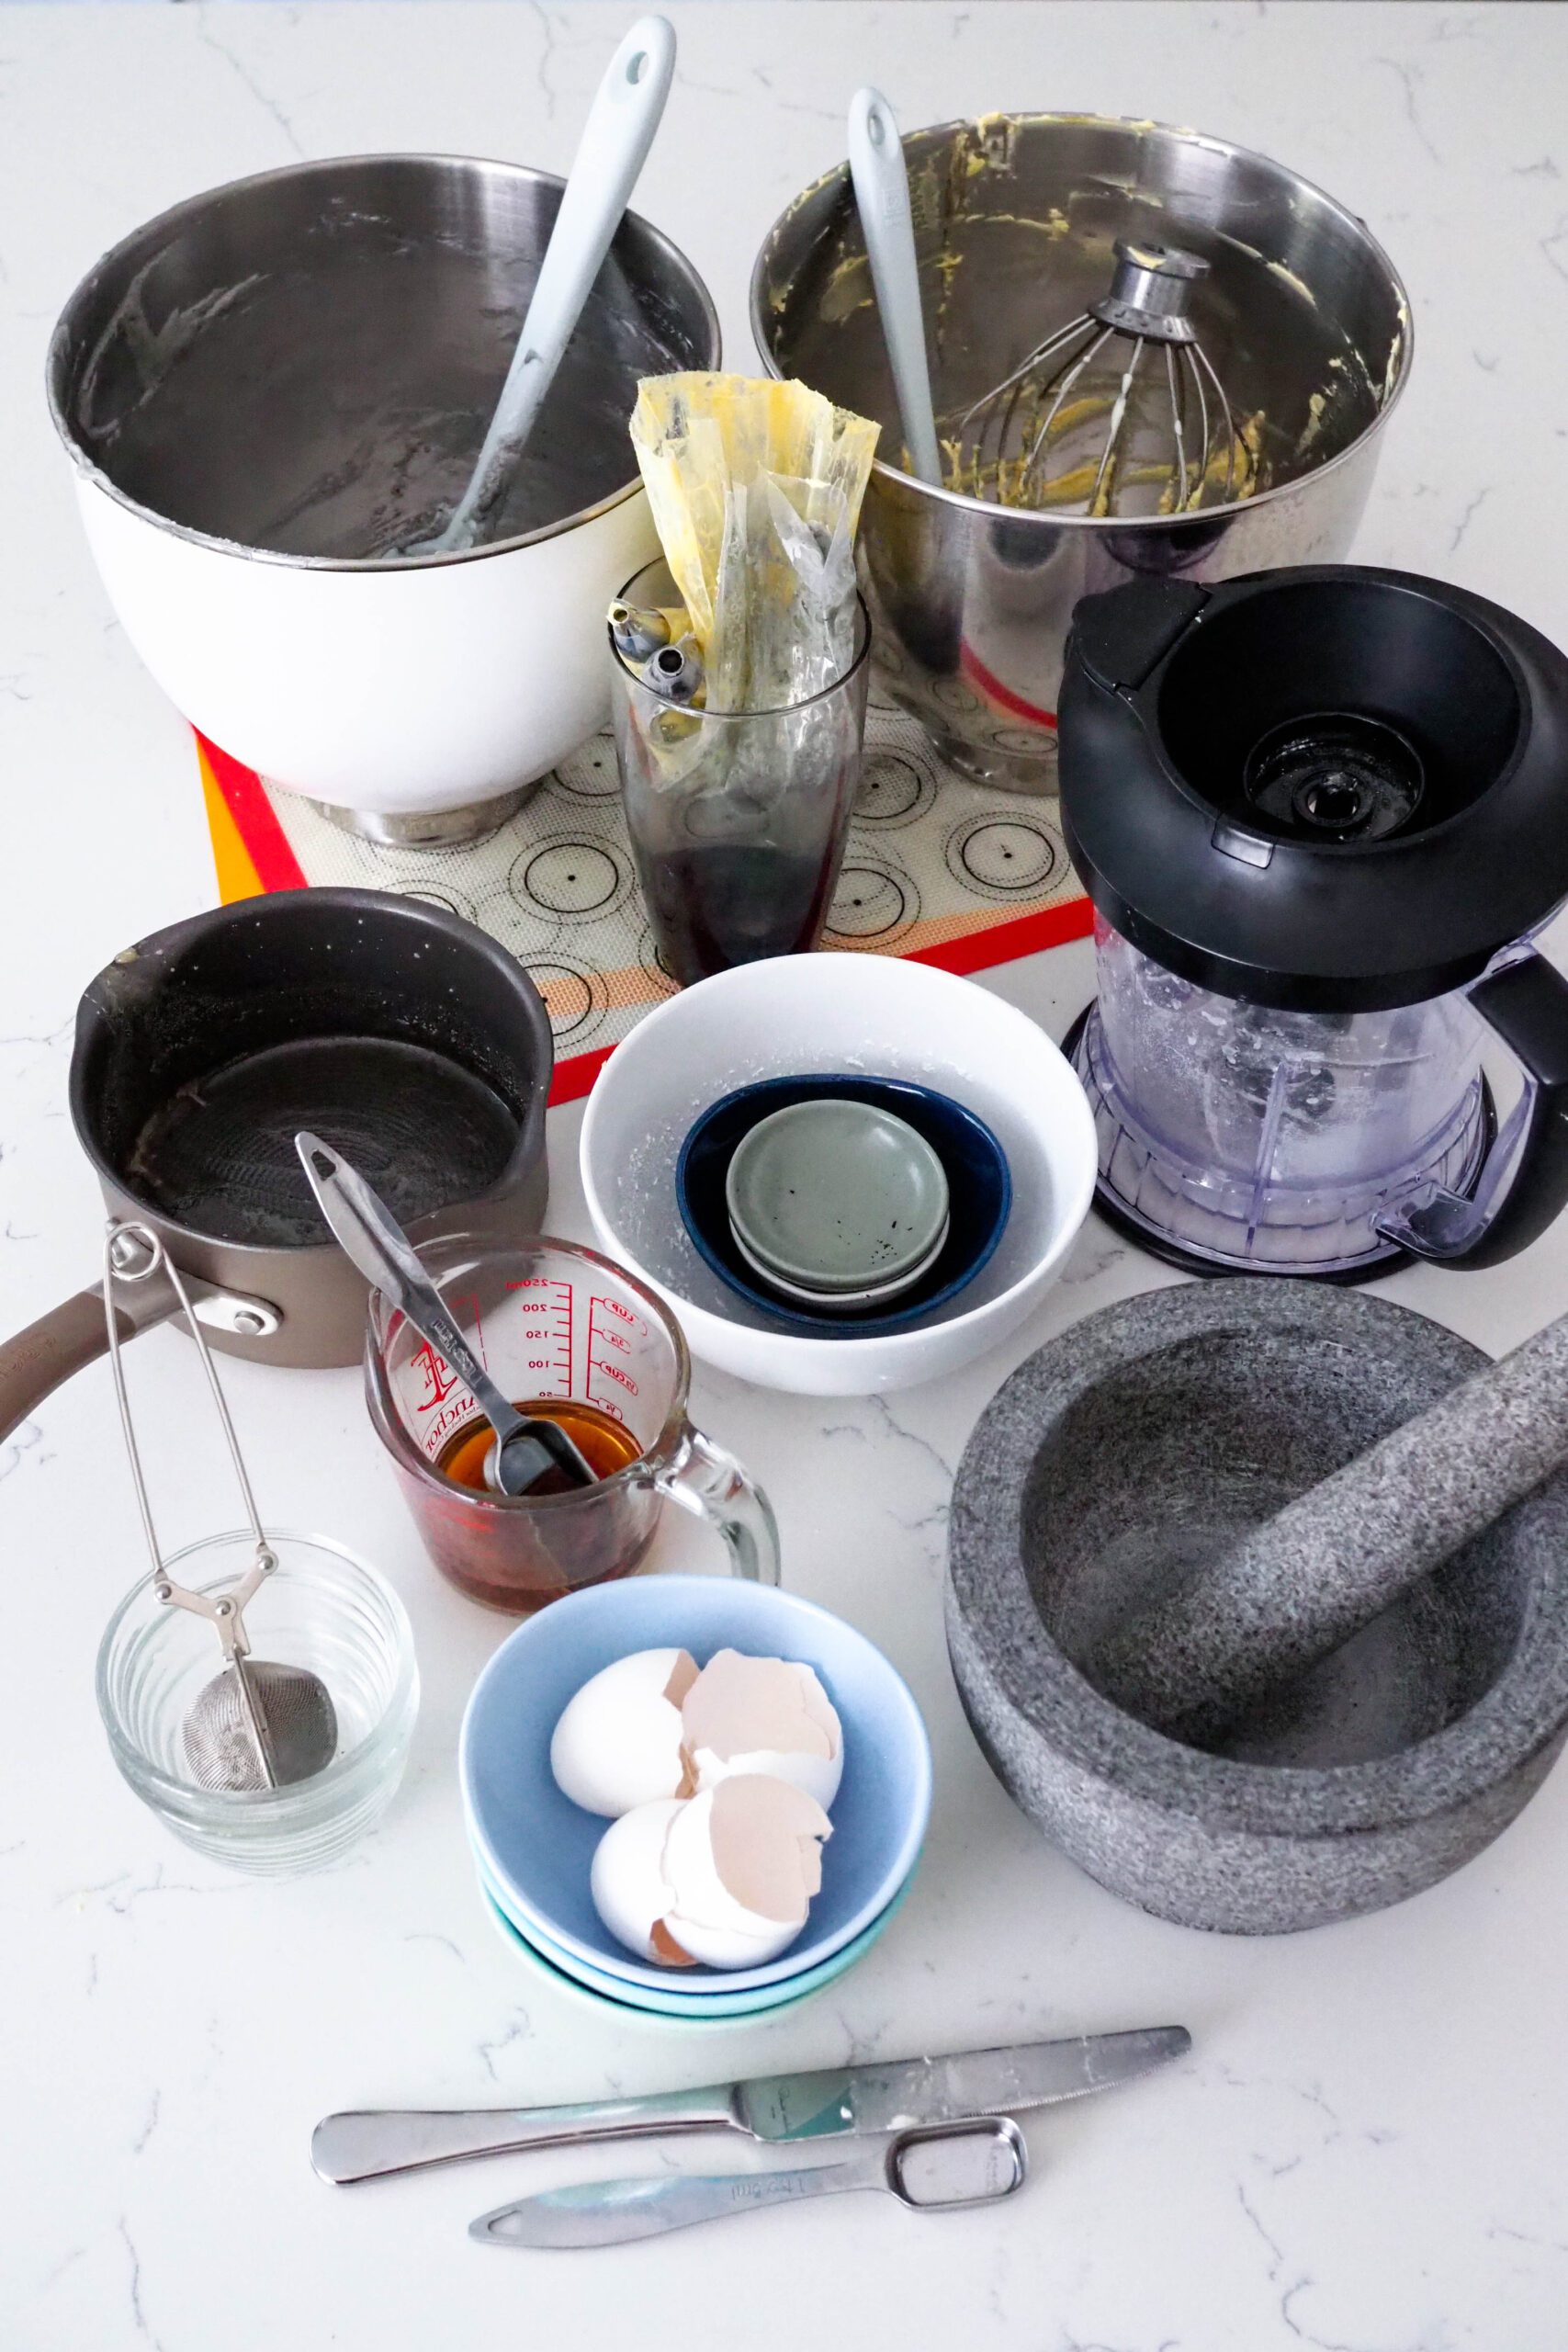
My Earl Grey macarons recipe has a cleanup rating of a 4. There are two mixing bowls (one for the batter and one for the buttercream), a saucepan, a food processor, and macaron mats in addition to various other smaller items. This recipe has a few more dishes than a macaron recipe with a less complicated filling, but I promise the flavor is worth the time spent at the sink!
Earl Grey Macarons Recipe
Earl Grey Macarons
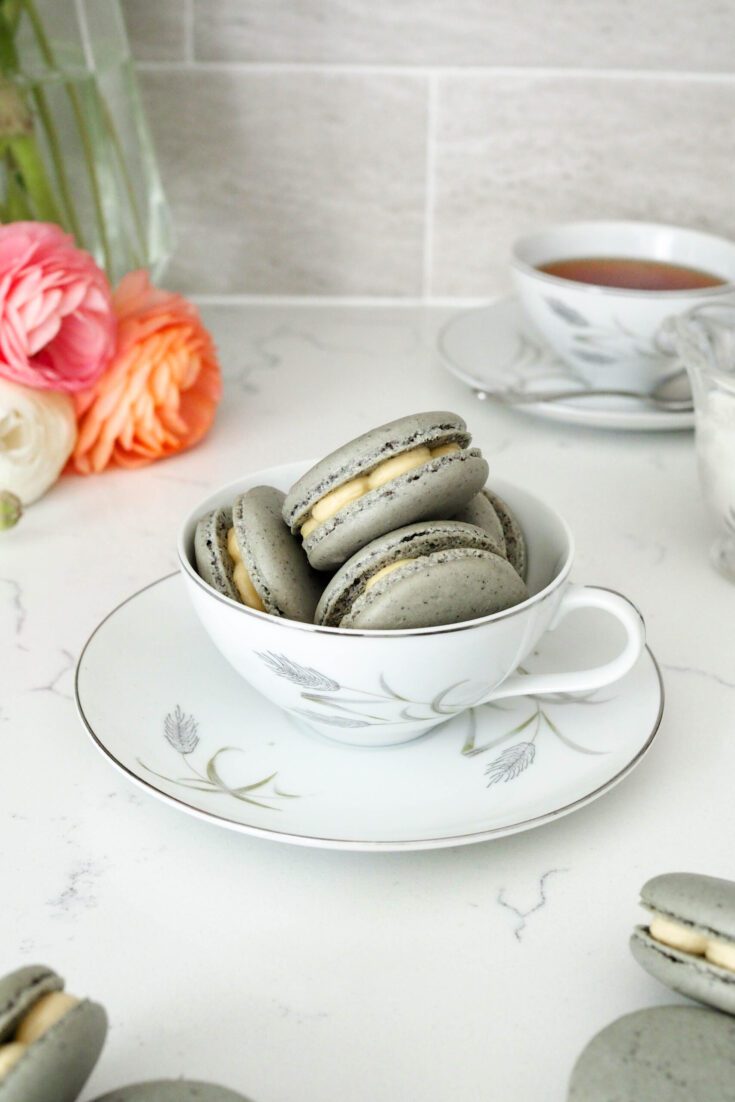
Made with finely ground Earl Grey tea in the shells and a custardy Earl Grey buttercream filling, these Earl Grey macarons are perfect for tea time.
Ingredients
For the Earl Grey Macaron Shells
- 1 Tablespoon Earl Grey tea
- 50g granulated sugar
- 120g egg whites, from four large eggs
- 120g almond flour
- 200g powdered sugar
- 1-2 drops black gel food coloring (optional)
For the Earl Grey Custard Buttercream
- 1 teaspoon Earl Grey tea
- ¼ cup hot water (60 ml)
- 4 egg yolks
- ½ cup granulated sugar (100g)
- 1 cup unsalted butter, two sticks (226g)
- 1 teaspoon vanilla extract (5 ml)
Instructions
Making the Macarons
- Prepare two baking sheets with macaron silpats or parchment paper. Prepare a piping bag fitted with a round tip (I use Wilton #12 or Ateco 808) and set aside.
- In a mortar and pestle, grind the Earl Grey tea with the granulated sugar. A mortar and pestle works best to really break down the tea leaves, but a food processor will work, too, if you don't have one. Transfer into a small bowl and set aside.
- For perfectly smooth shells, process the powdered sugar and almond flour together in a food processor for a superfine consistency. Set aside.
- Separate the eggs, reserving both the egg whites for the macaron shells and the egg yolks for the buttercream.
- Weigh the egg whites in the bowl of a stand mixer fitted with the whisk attachment, then mix on 2 (or low) until frothy. Increase speed to 4 (medium-low). Once the whisk begins leaving a trail in the egg whites, sprinkle in the Earl Grey sugar about a teaspoon at a time. Once all the sugar is incorporated, increase speed to 6 (medium) and whisk until stiff peaks form. The meringue will look gray from the tea.
- Add in 1-2 drops of black gel food coloring, if desired. Whisk on medium for just a couple of seconds to fully incorporate.
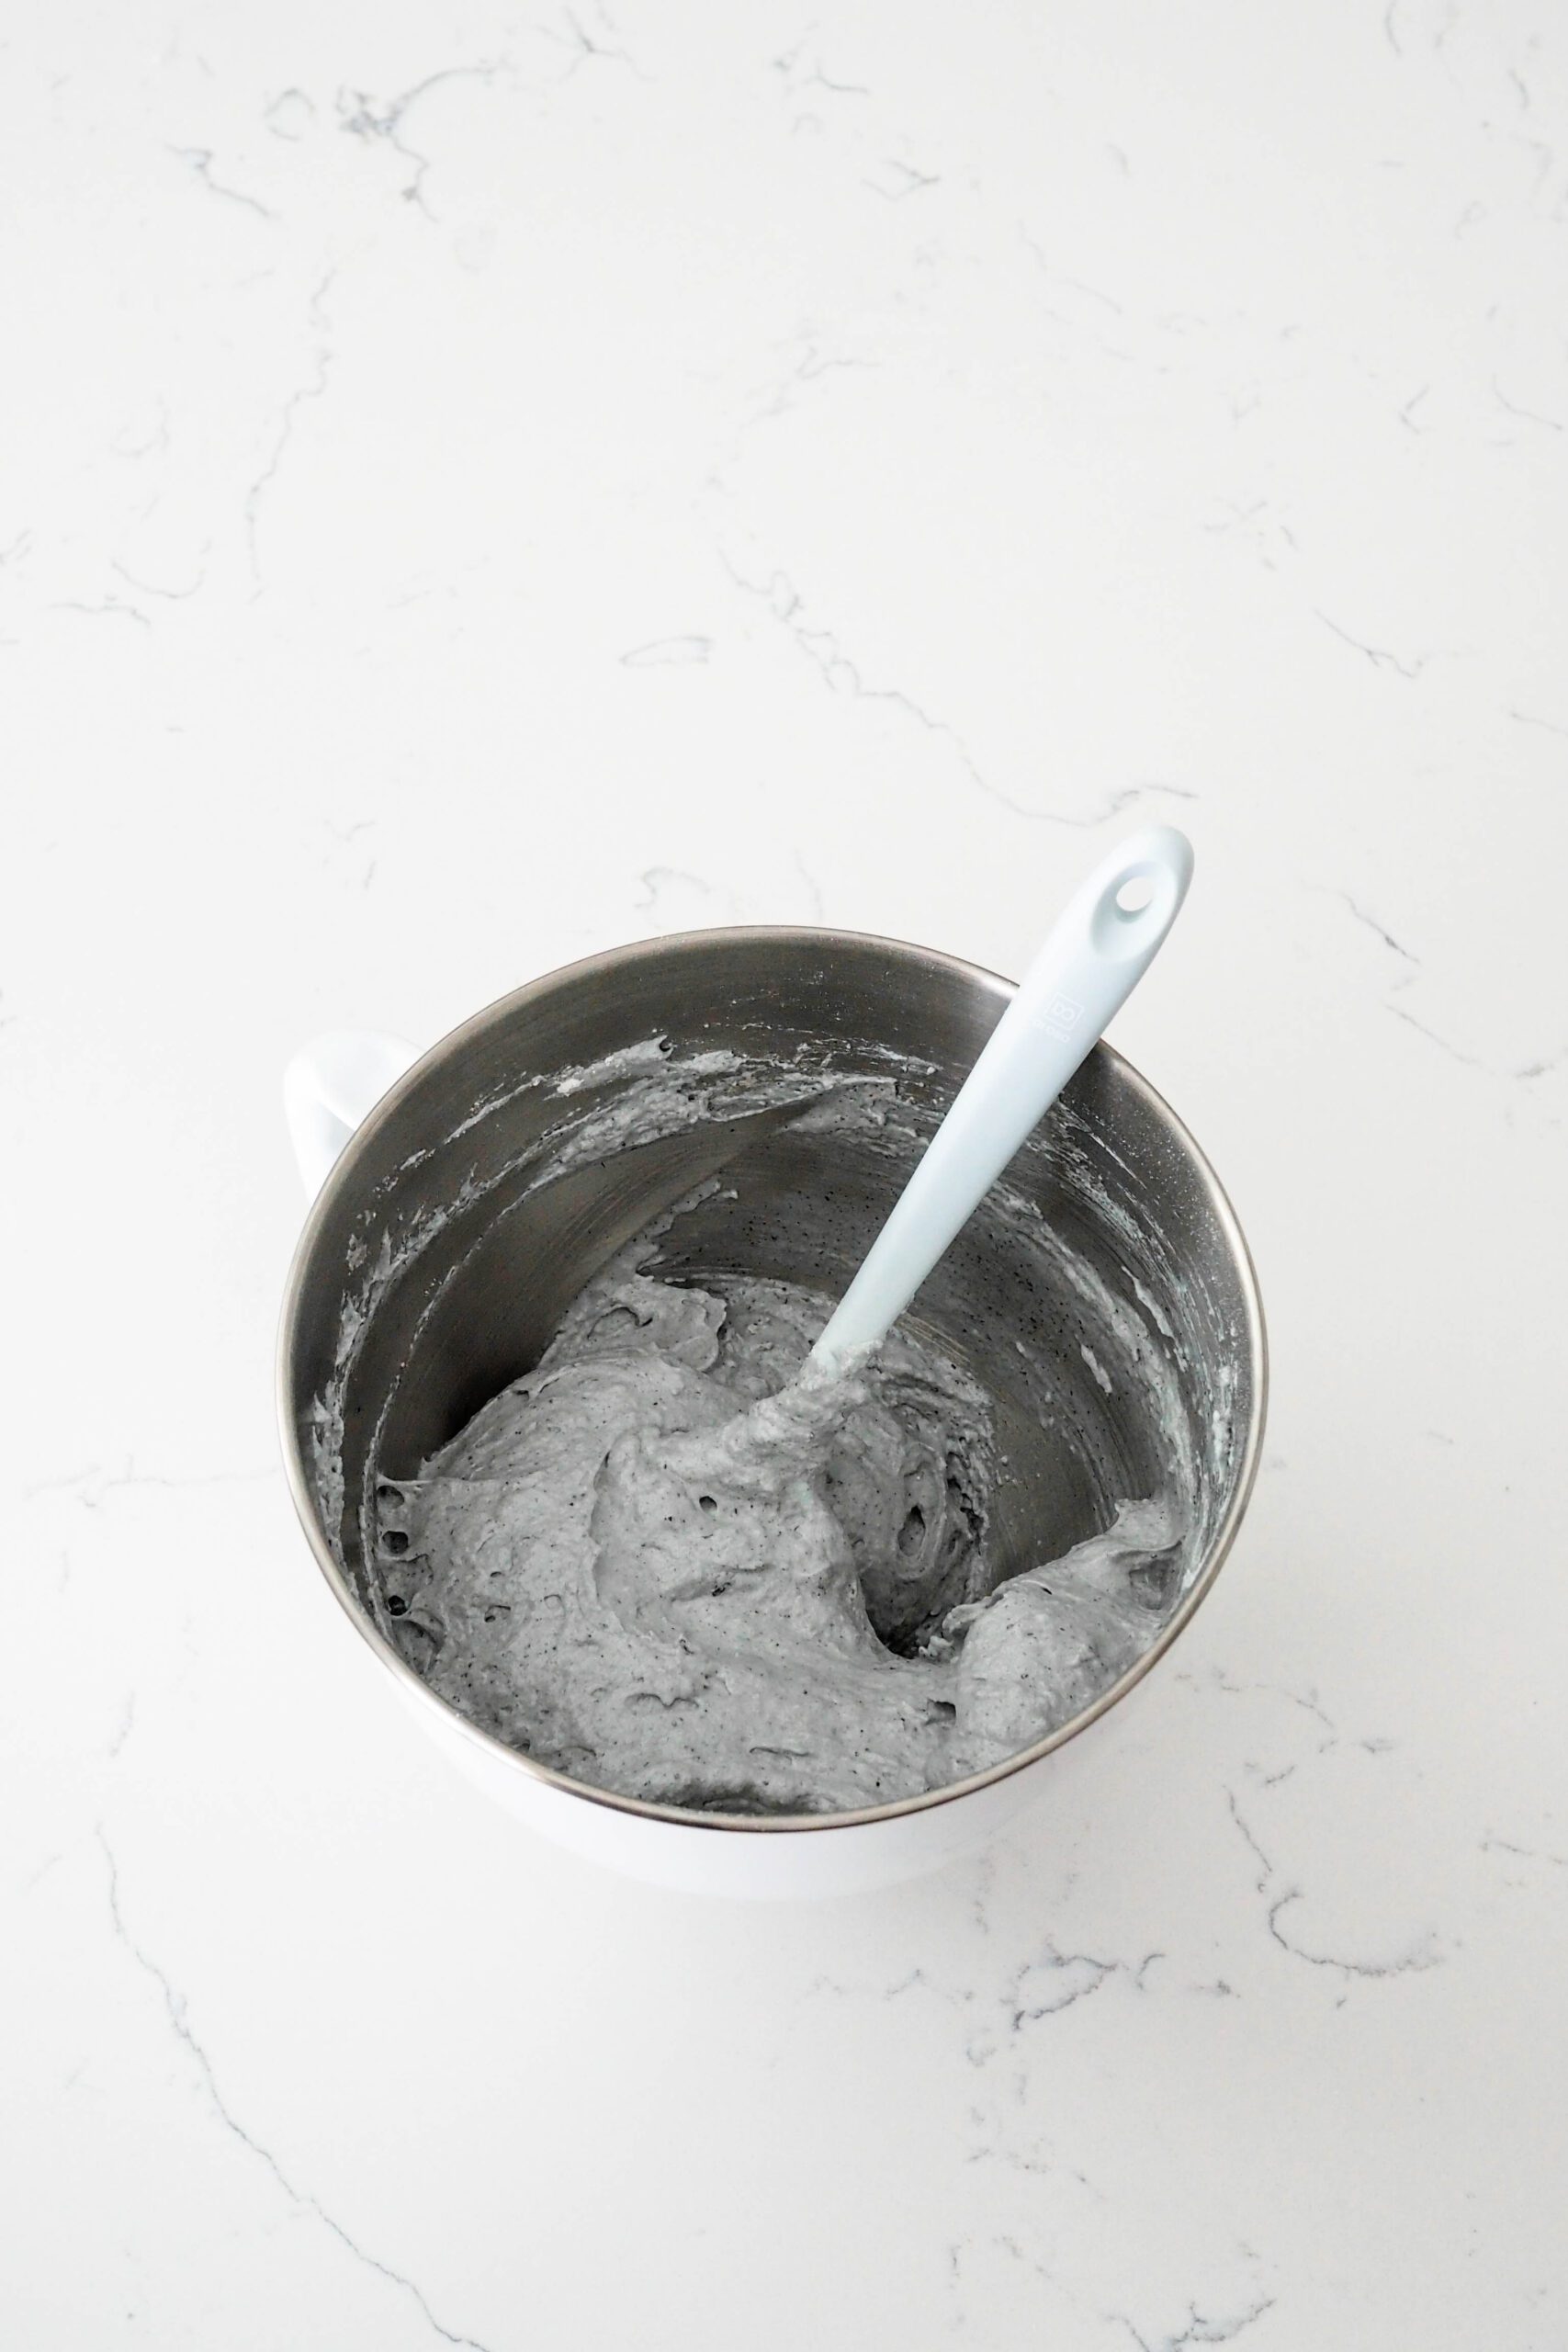
- Remove the bowl from the stand mixer and pour half of the almond flour mixture into the meringue. Fold together until fully incorporated, scraping the sides and bottom of the bowl. Add in the remaining almond flour mixture and fold together. The mixture will be thick, but as you continue folding, it will lose some air and thin out. Continue folding and pressing the batter into the sides of the bowl until the batter is the correct consistency (covered in the next step).
- To test the consistency, scoop the batter up, and let it flow back into the bowl. Continue folding until the mixture flows in one solid ribbon off the spatula. It should look a bit grainy as it flows off the spatula, then dissolve back into the batter in 10-15 seconds and look glossy instead of grainy.
- Pour the batter into the prepared piping bag. Holding the bag at a 90° angle to the pan, gently squeeze out the macaron batter into lumps about 1-1.5" (3 mm) in diameter. They will spread as they settle.
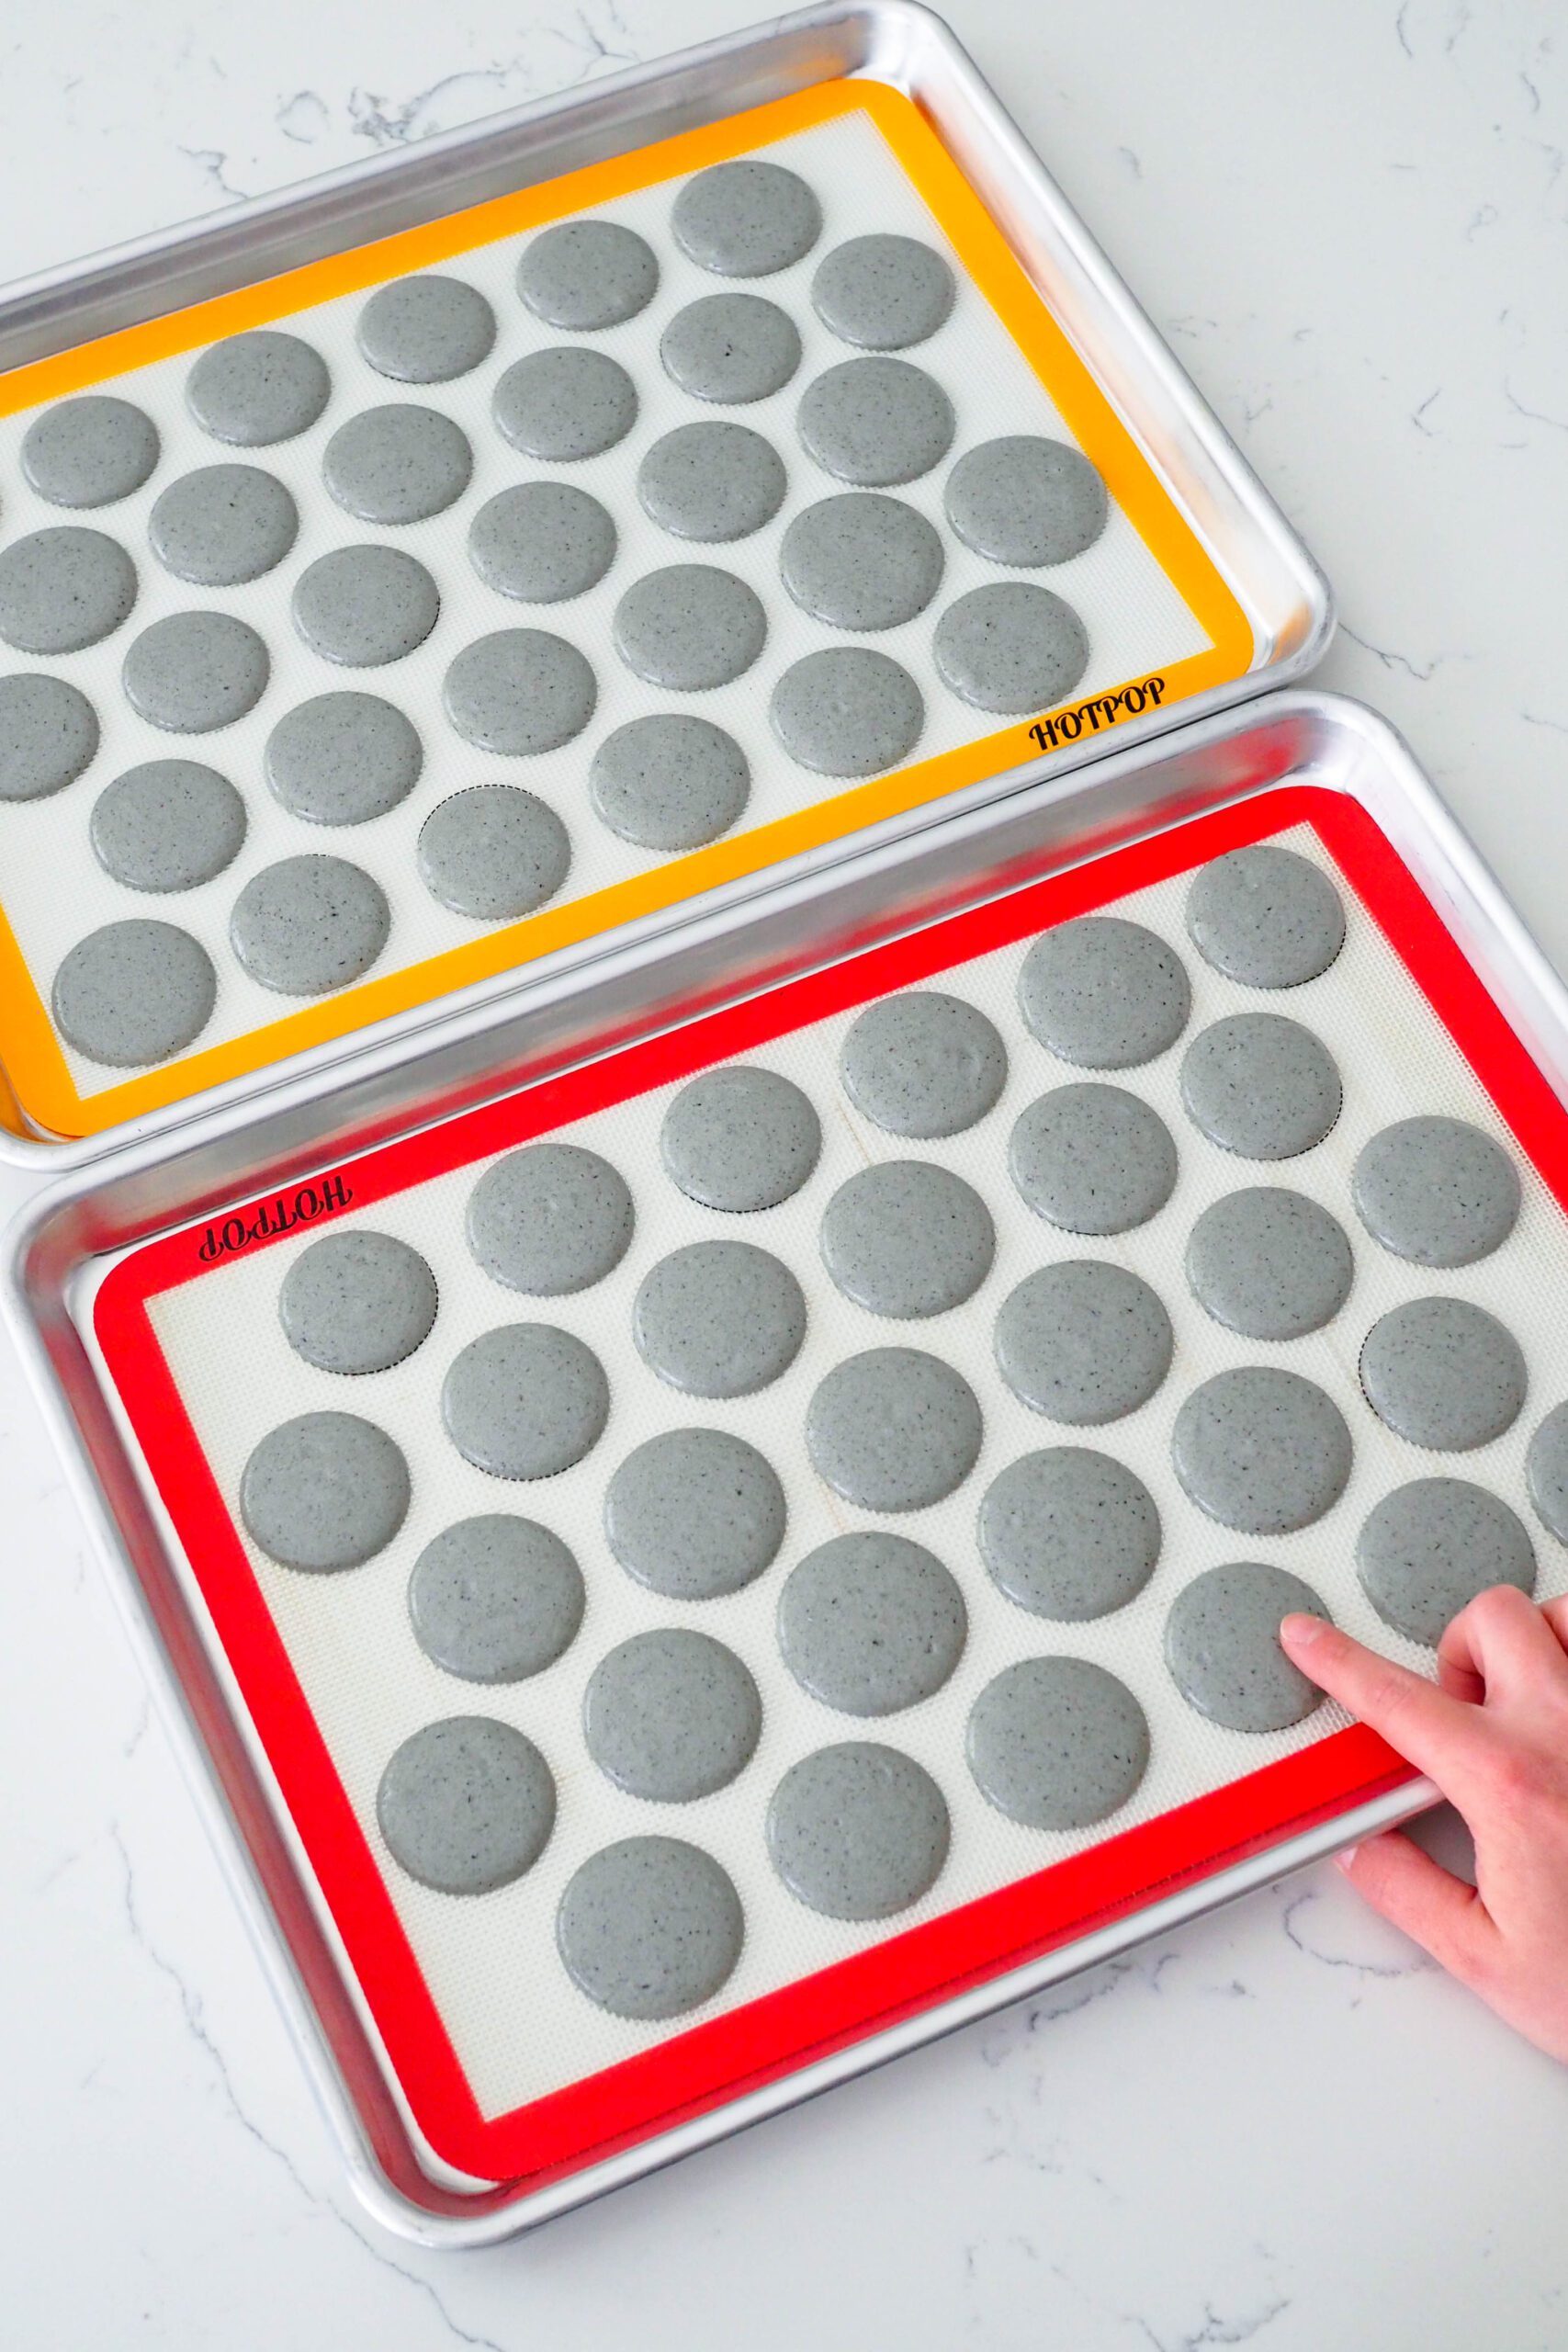
- Once piped, pick up the pan with one hand and bang the heel of your other hand against it in various locations under the macarons until you see air bubbles rise from the bottoms of the shells. Alternatively, bang the pan against the counter a few times. Use a toothpick to pop any remaining bubbles for a perfectly smooth top. Notice how shiny the surface looks now; it will dull as the macarons rest.
- Set the macarons aside in a well-ventilated area to dry for about 20-30 minutes. On particularly humid days, this may take up to an hour.
- While the macarons are drying, preheat the oven to 320°F/160°C. The macarons are ready to go in the oven when the tops are no longer reflective, don't leave a residue on your finger when touched, and feel like skin when you lightly run your finger across it.
Baking the Macarons
- Once the macarons are dry, bake one tray at a time in the center rack for 15-17 minutes or until the macaron is set. Test to see if the macarons are set: Try to gently wiggle a macaron back and forth from the center of the pan with your thumb and forefinger. If the top moves at all, put the tray back in the oven for another minute or two until the center of the macaron is set and does not move when prompted.
- Let each tray cool completely before removing the macarons from the mats, about 10 minutes.
Making the Earl Grey Custard Buttercream
- Please note: It's hard to make a small batch of this buttercream in a stand mixer, so this makes enough buttercream to fill two batches of macarons.*
- While the macarons are baking, brew the Earl Grey in the hot water.
- Place four egg yolks in the bowl of a stand mixer and whisk together on low until incorporated.
- Add sugar and only 3 Tablespoons of the brewed tea to a small saucepan and heat over medium heat until the syrup reaches 245°F or 118°C (firm ball stage).**
- With the stand mixer whisking the yolks on medium low, carefully pour the syrup inside the bowl, staying in one spot just outside of reach of the whisk. Try not to get syrup on the tines of the whisk, as the syrup will splatter and cool down before incorporating into the yolks.
- Once all the syrup has been poured in, increase the speed on the stand mixer to medium high and whisk the yolk mixture until the bowl no longer feels warm to the touch and the yolk mixture is pale yellow and fluffy. I like to cut my butter into cubes while I'm waiting.
- When the mixture has cooled, begin incorporating the butter into the mix, one piece at a time. The buttercream may begin to look like it's curdling or separate during this process—if that happens, switch to a beater attachment. Once all the butter has been added, add the vanilla extract. Whisk/beat for two additional minutes to get the buttercream fluffy, then mix on low for one minute to remove excess air pockets.
- Transfer into a piping bag prepared with the piping tip of your choice. (I used Wilton #8 here.)**
Assembling the Macarons
- Pair similarly sized macarons together and line them up with one side face up and one side face down.
- On a macaron shell with the flat bottom facing up, pipe six small circles of the Earl Grey custard buttercream. Repeat with the rest of the macarons, then place the matching macaron shell on top.
- The macaron shells will soften and the flavors will develop after maturing in the fridge for one day, though you may eat them any time you'd prefer after assembly.
Notes
*Store leftover buttercream in the fridge for up to three days or freeze for up to three months. To thaw, place overnight in the fridge, then set out at room temperature for an hour. Beat for five minutes to aerate, then use as desired.
**If you accidentally add all of the tea, don't worry about it too much. It will just take longer to cook down!
Store in the fridge in an airtight container for up to a week for maximum freshness.
Recommended Products
As an Amazon Associate and member of other affiliate programs, I earn from qualifying purchases.


Nutrition Information:
Yield:
30Serving Size:
1 macaronAmount Per Serving: Calories: 142Total Fat: 9gSaturated Fat: 4gTrans Fat: 0gUnsaturated Fat: 4gCholesterol: 66mgSodium: 18mgCarbohydrates: 13gFiber: 1gSugar: 12gProtein: 3g
The nutrition facts are estimated and may vary based on specific ingredients used.
Thanks for trying out my Earl Grey macarons recipe! Please consider rating this recipe so others find it, too.
I’d love to see how your recipe turns out: Take a photo and tag me on Instagram @floralapronblog to share with me, or use the hashtag #floralapronbakes.
This post contains affiliate links. If you click through and make a purchase, I may receive a small commission at no cost to you. Thank you for helping to support The Floral Apron!