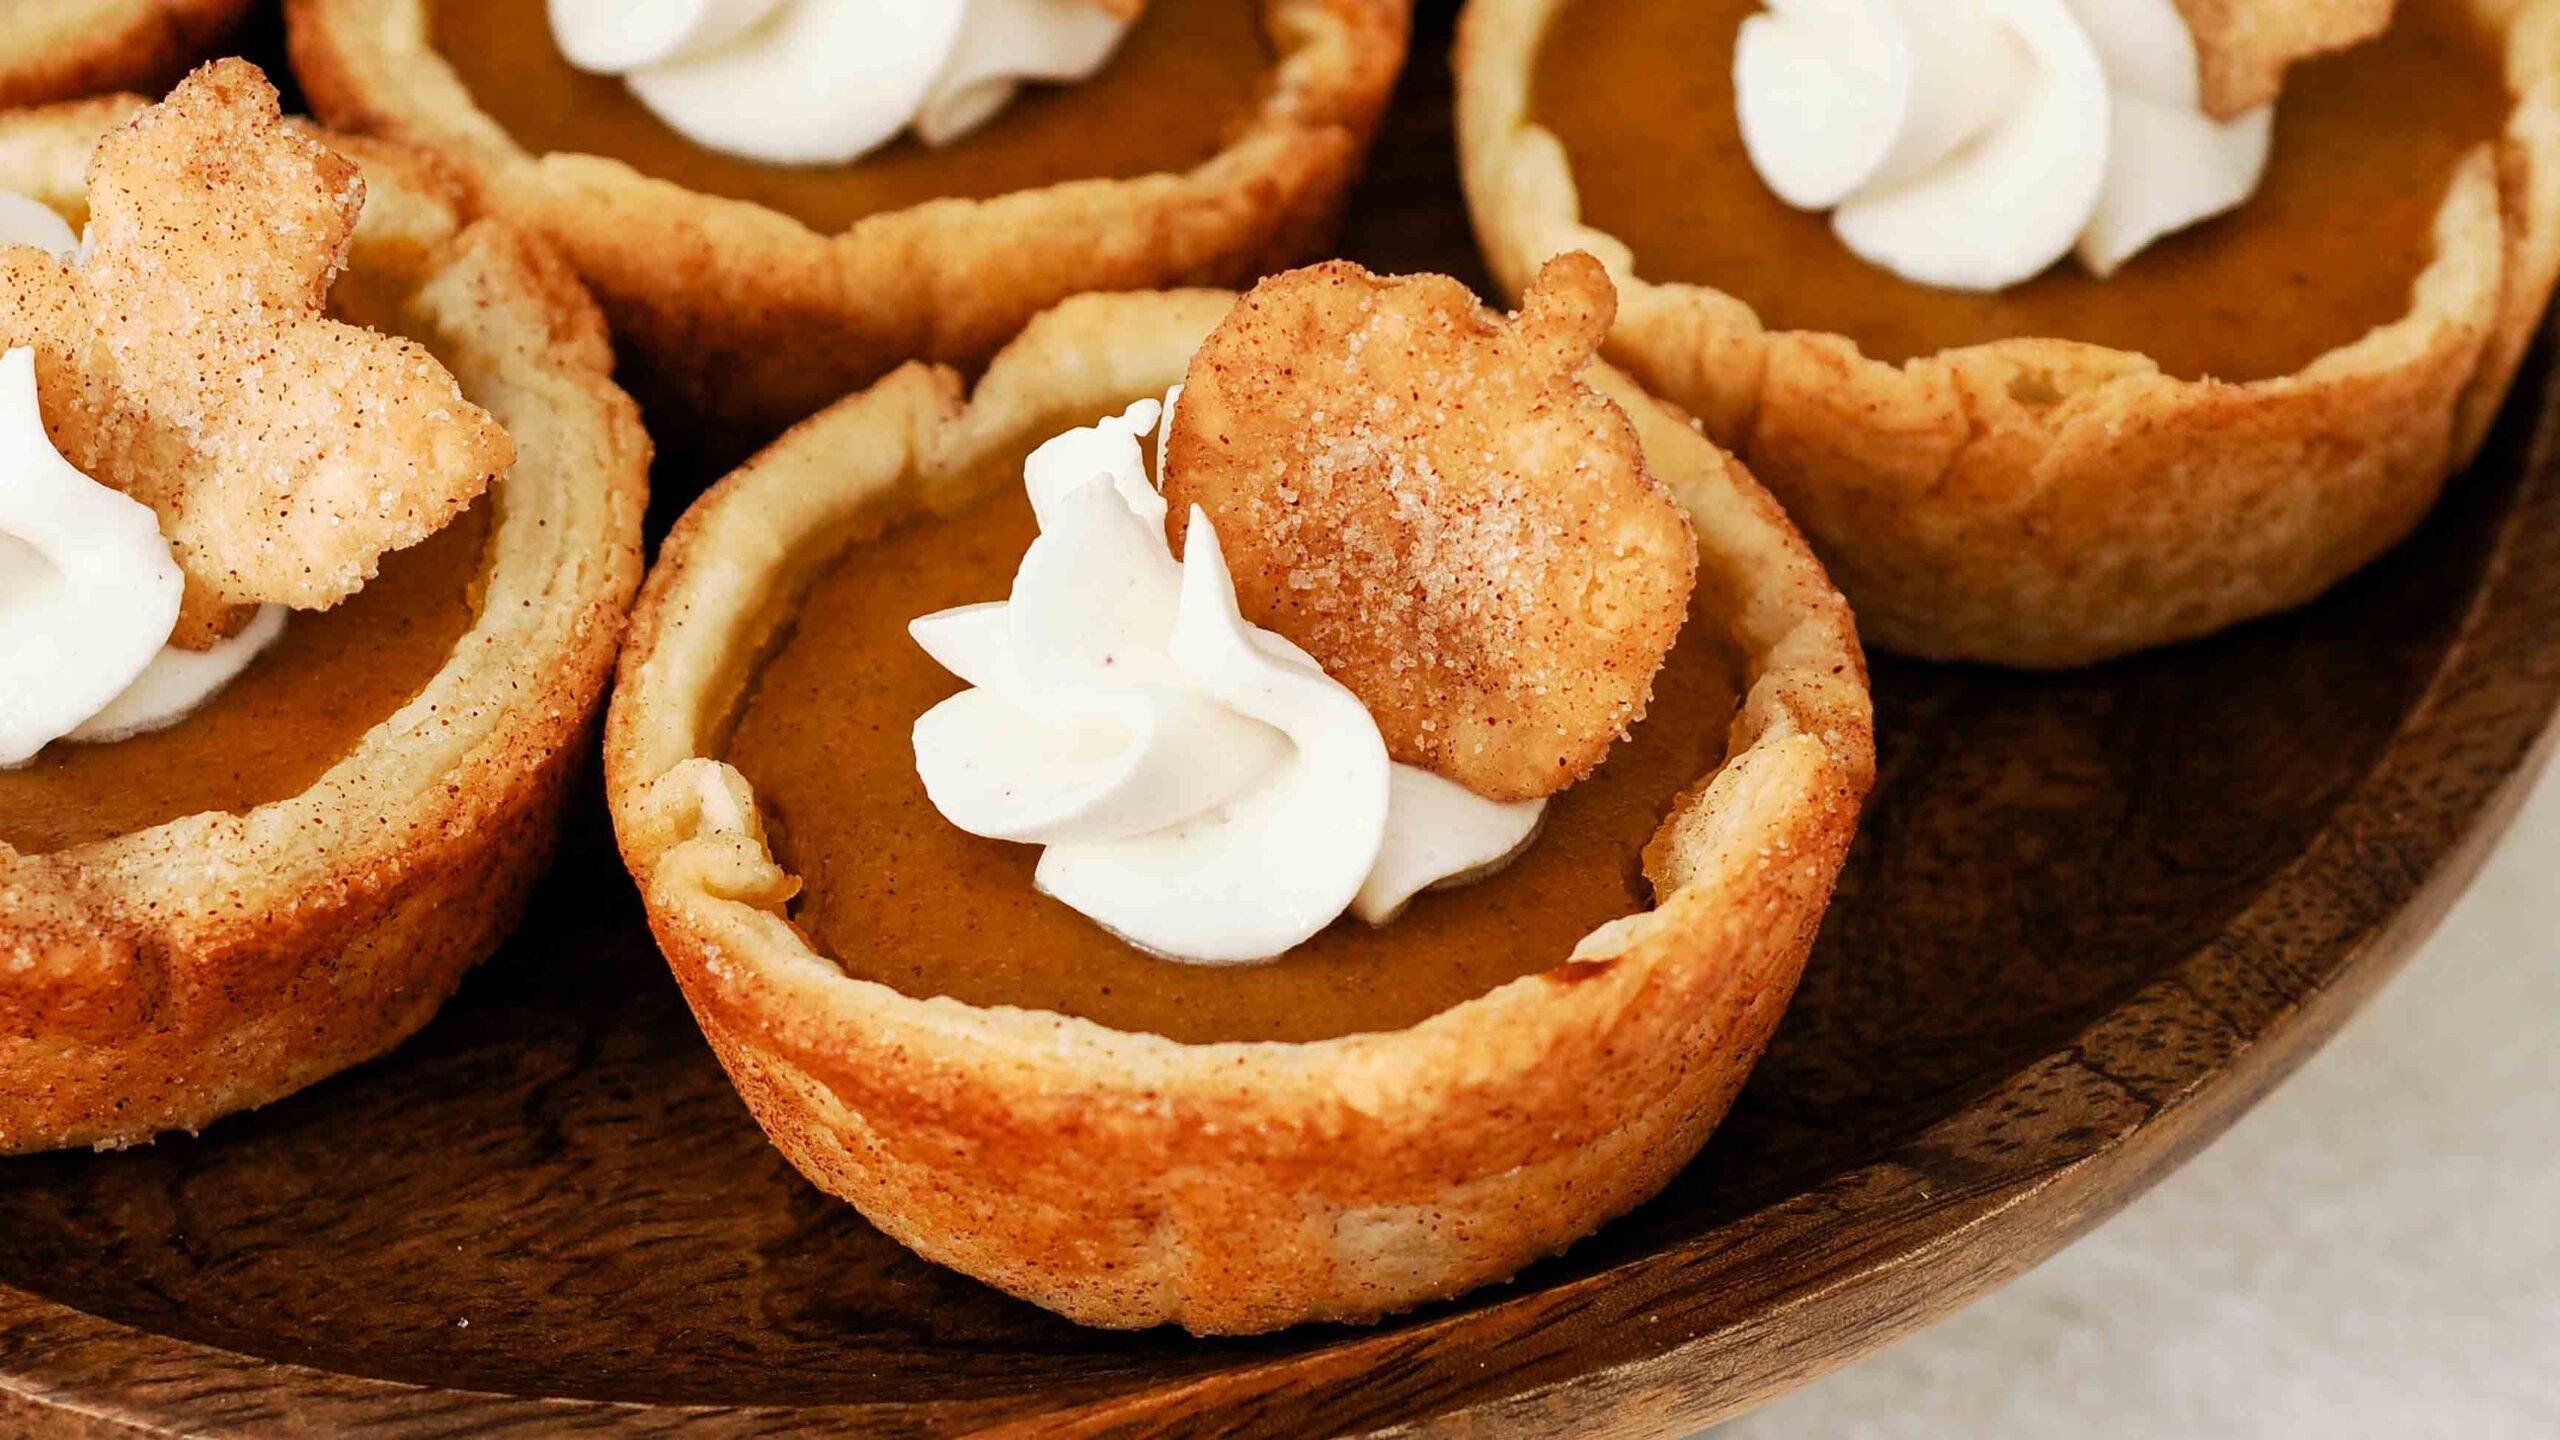
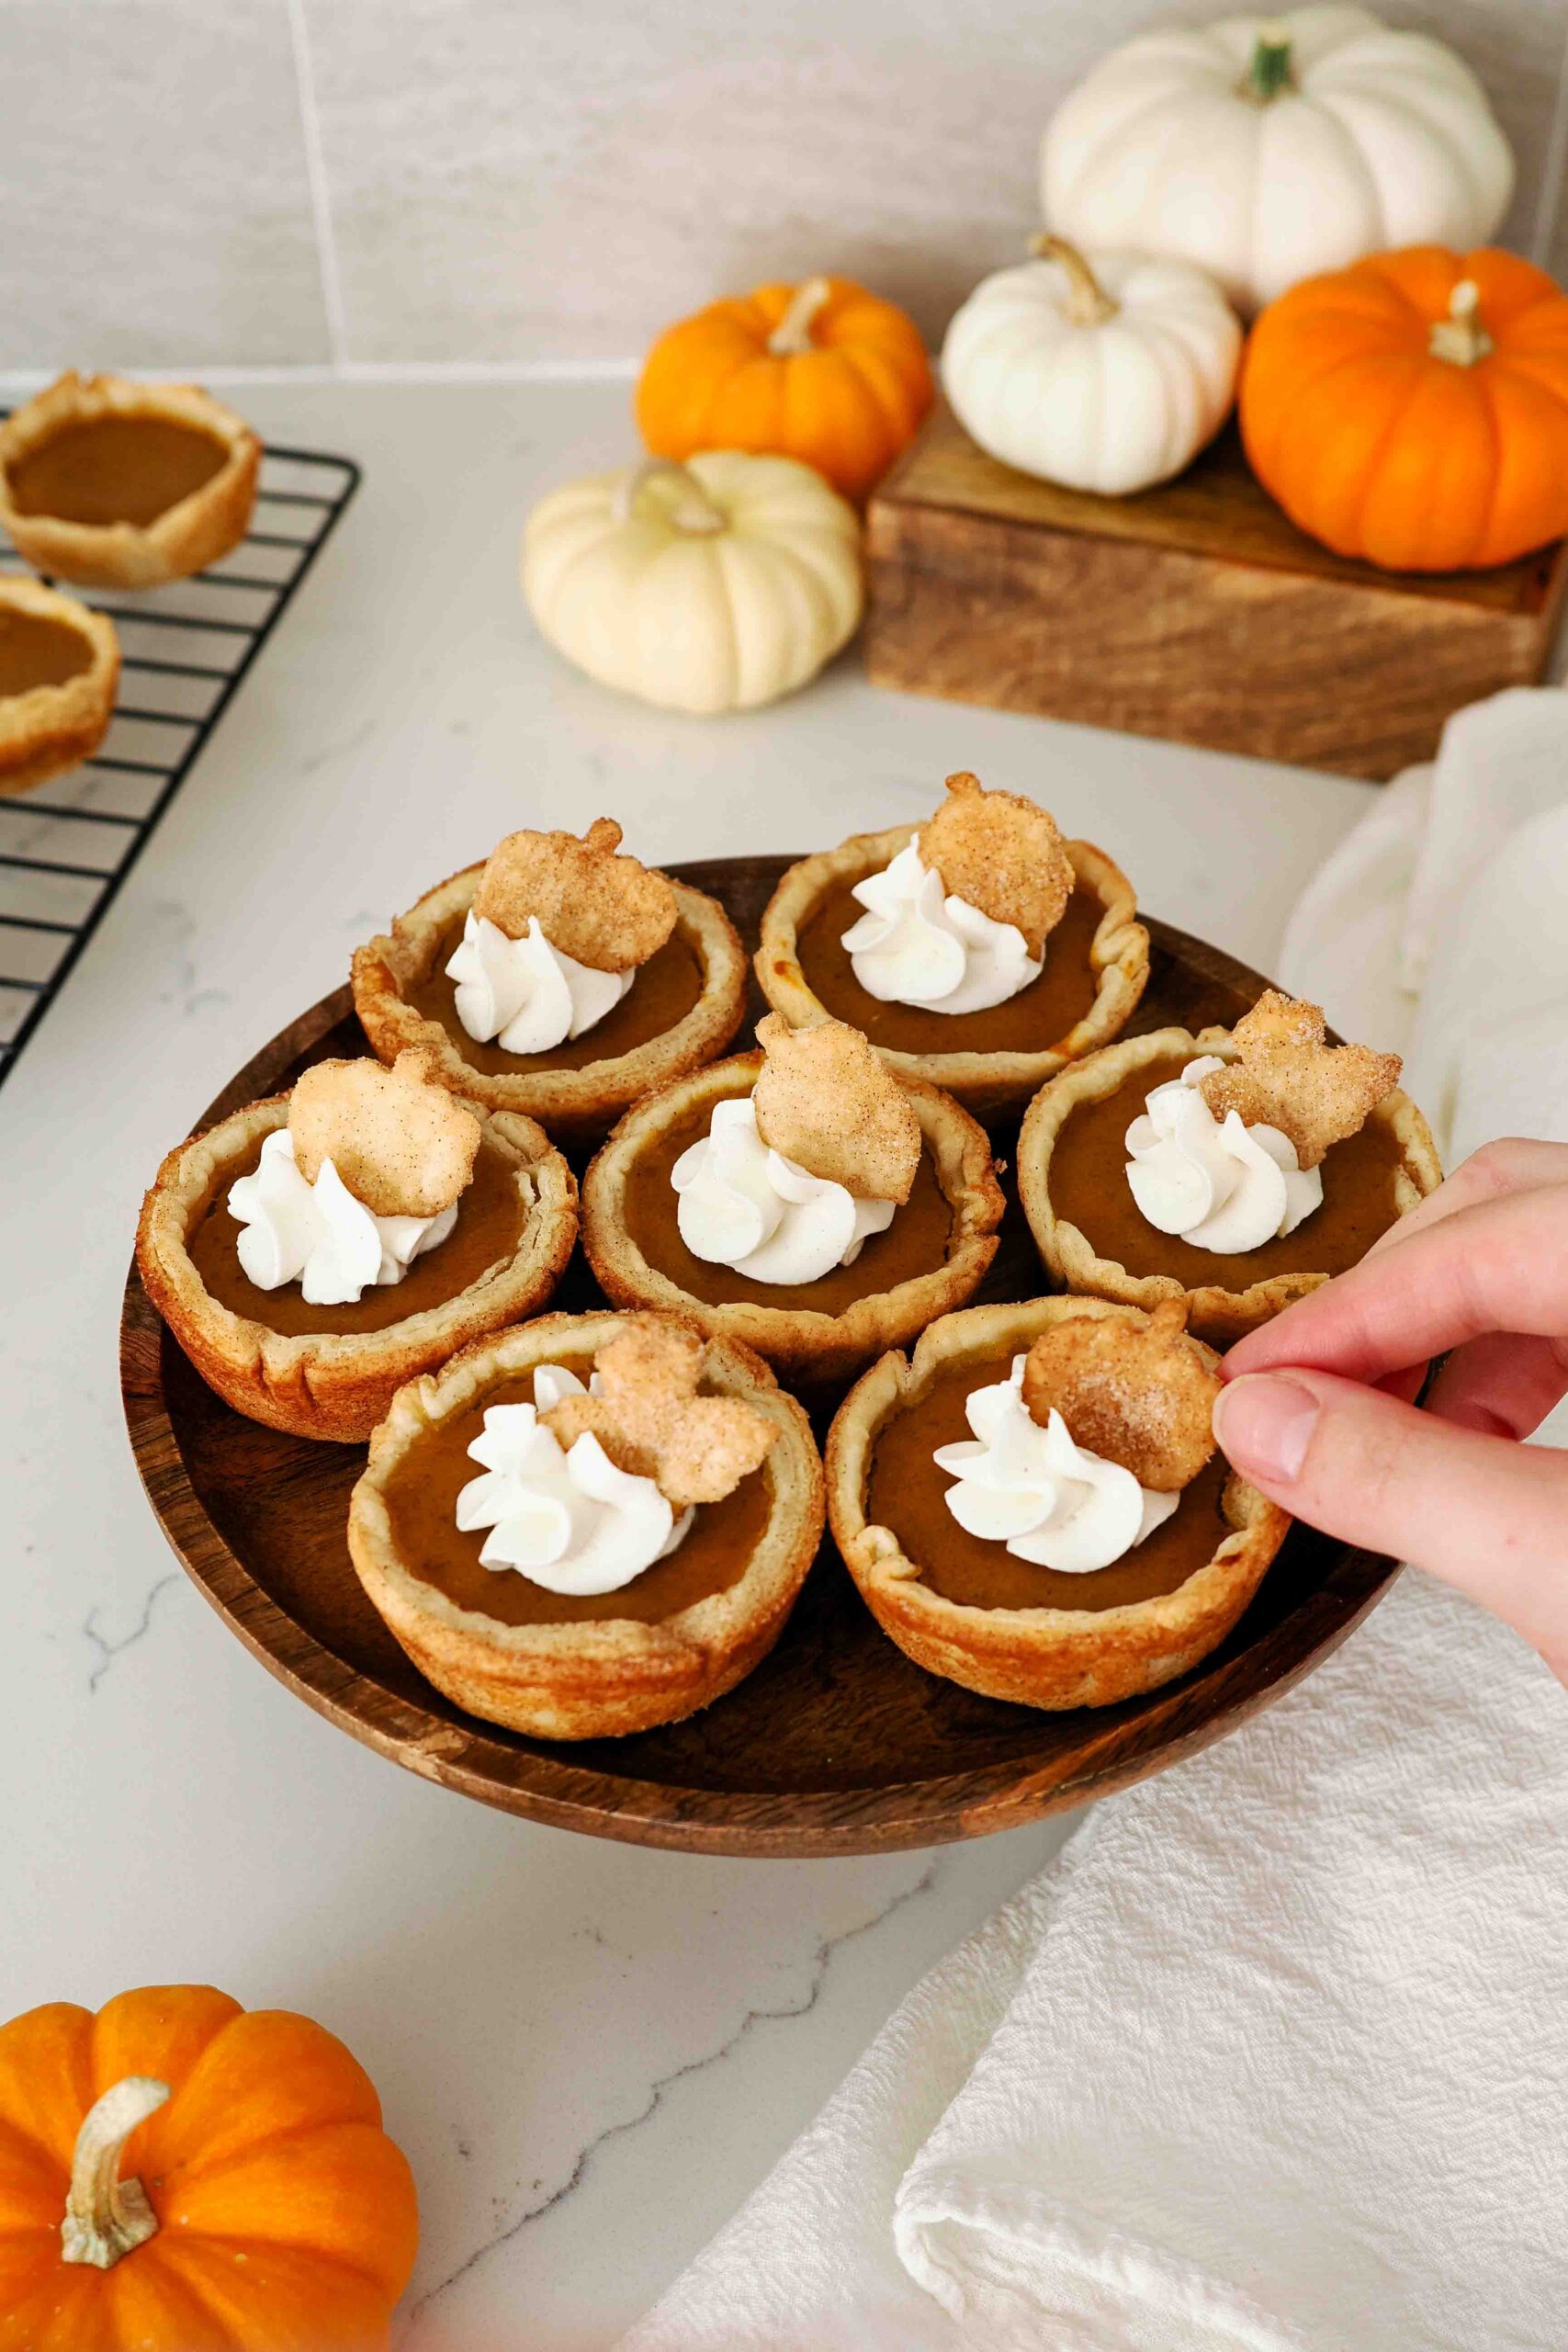
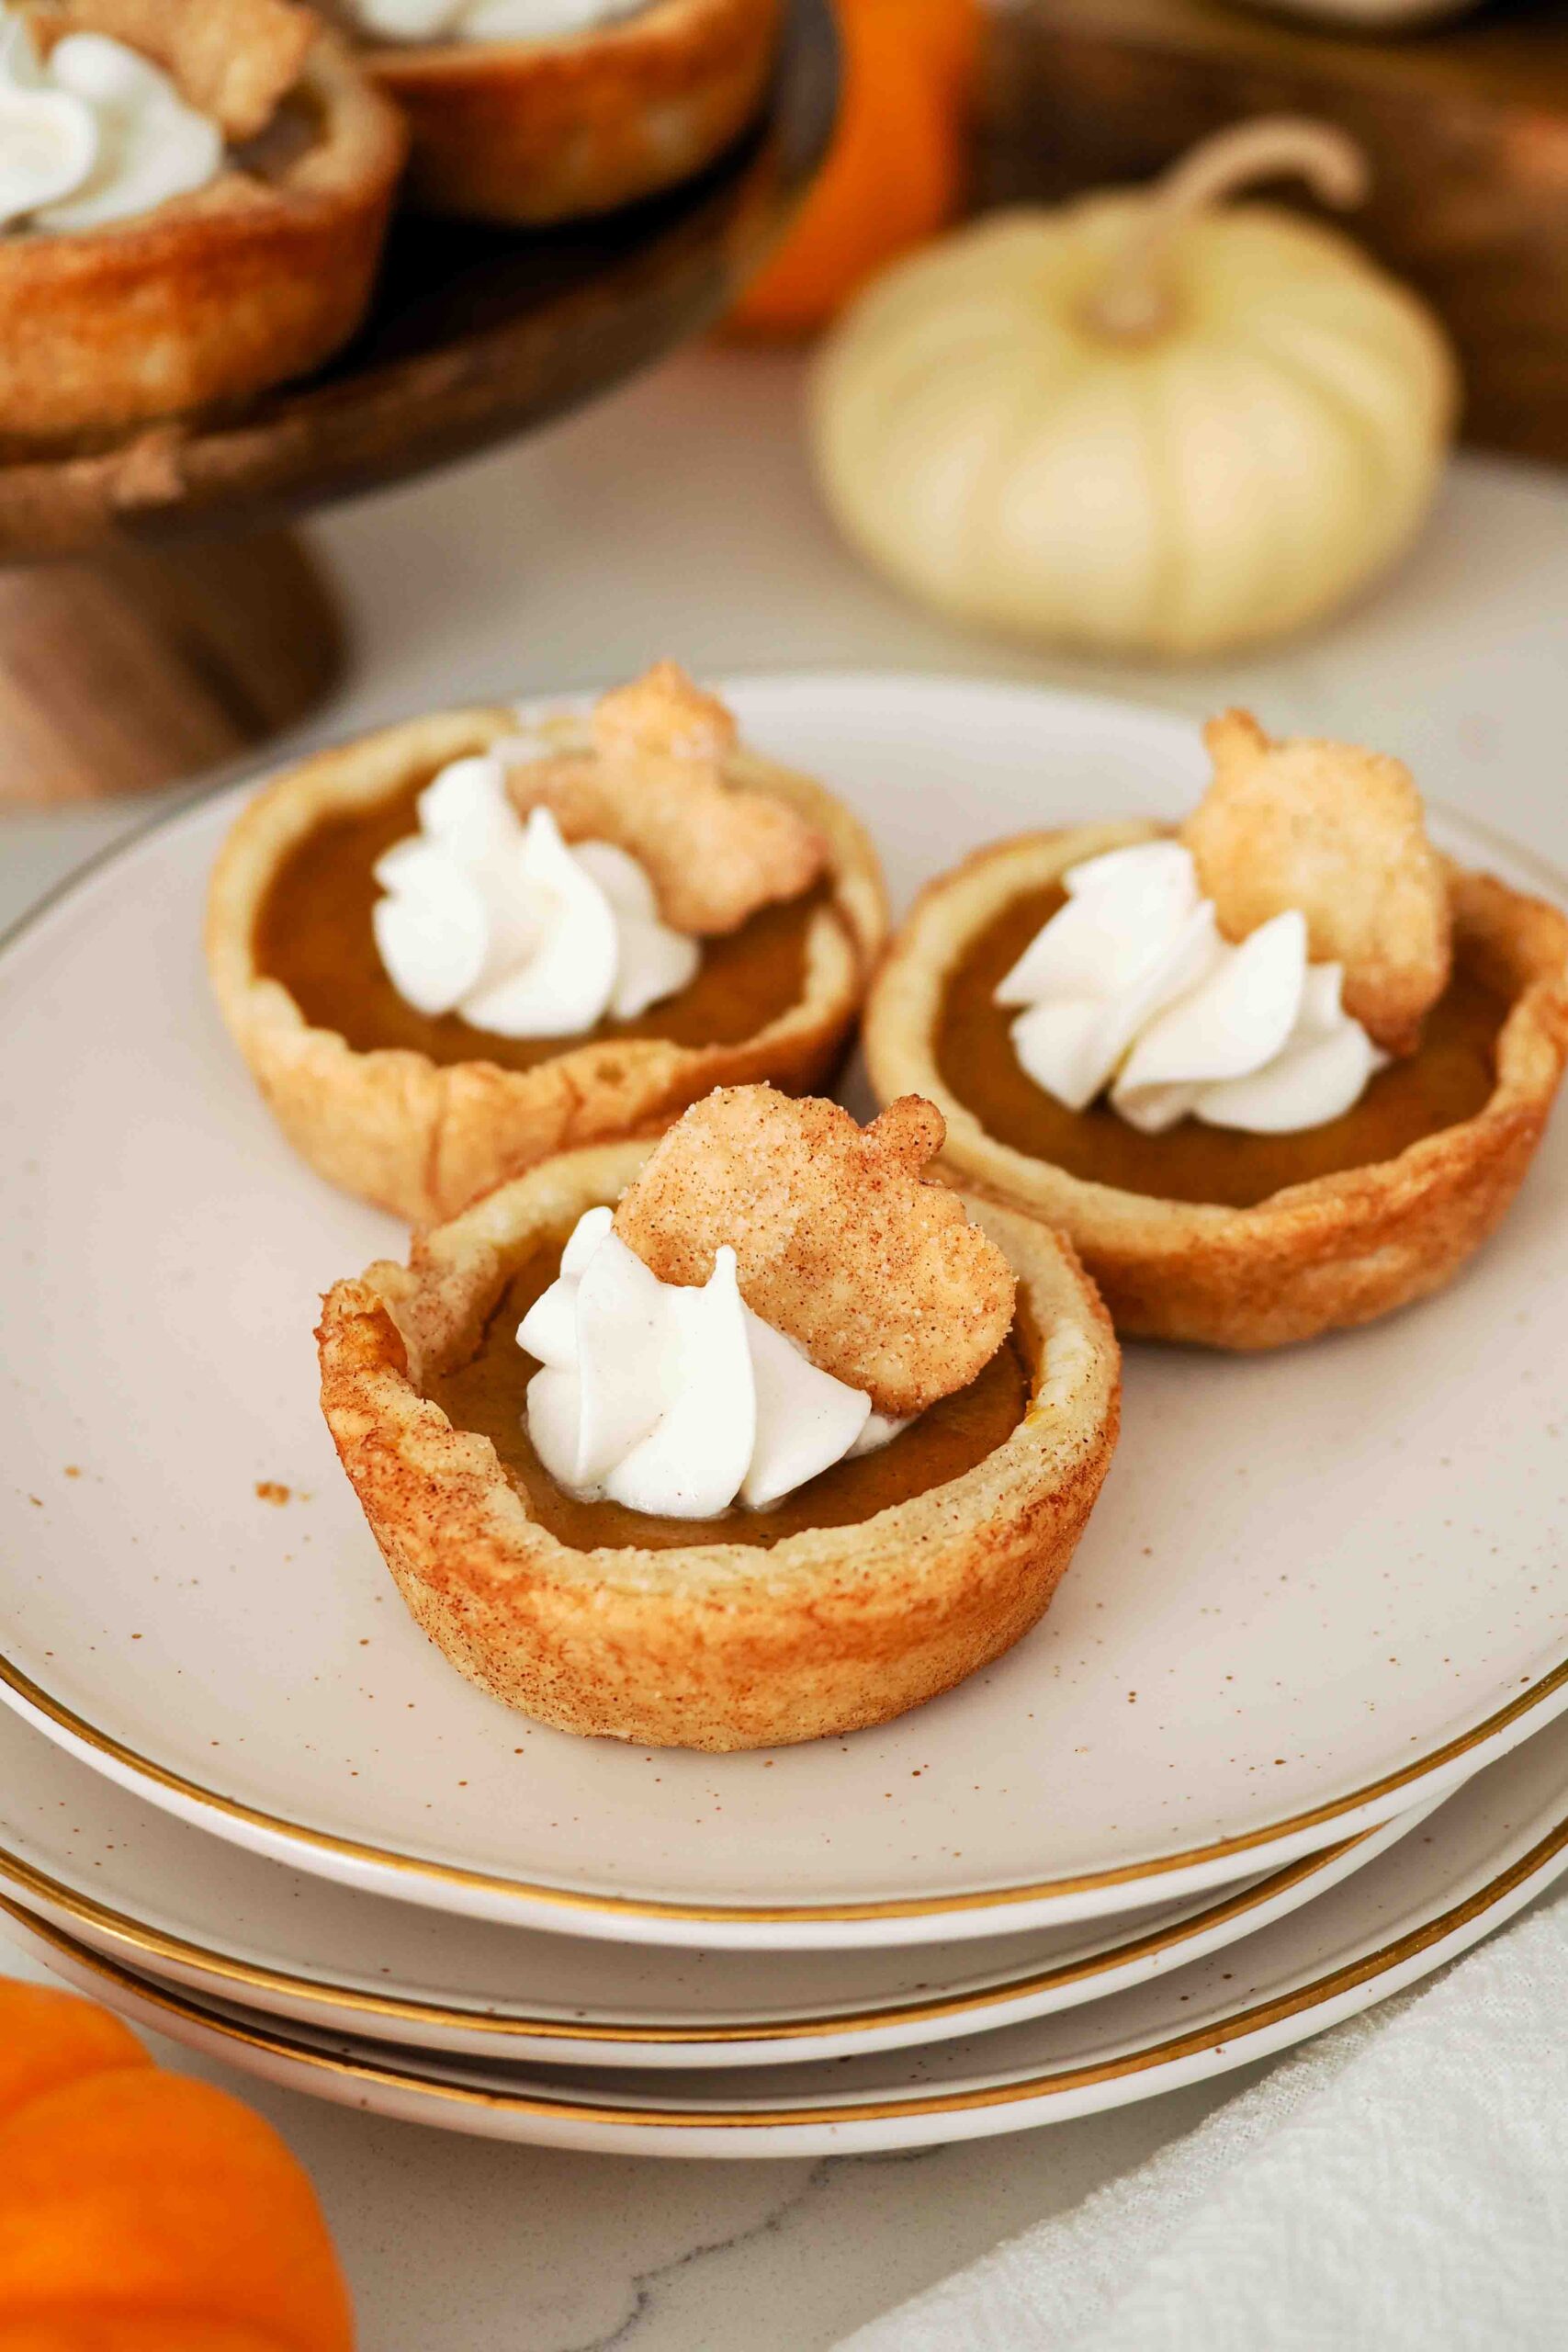
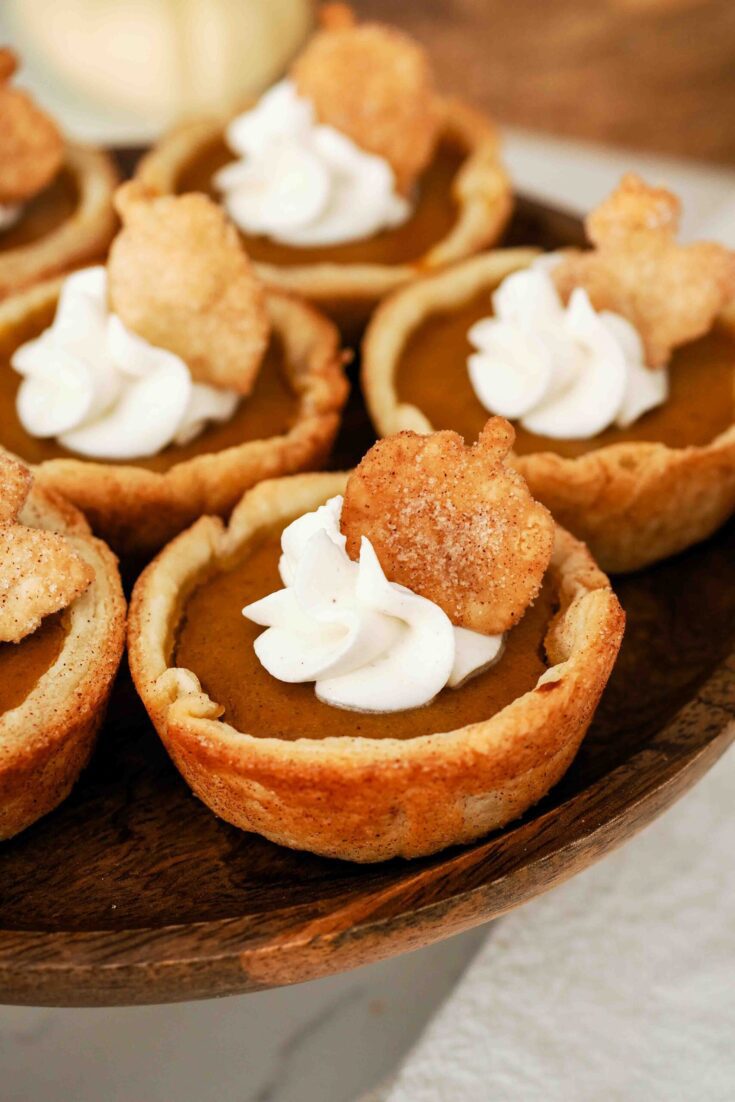
Made with a cinnamon sugar-coated crust and a creamy pumpkin pie filling, these mini pumpkin pies made in a muffin pan are sure to be the favorite dessert this Thanksgiving! Top with a dollop of fresh whipped cream and sugared pie crust pieces, and you have the cutest fall dessert you can bring anywhere. These mini pies make for cute, individually-sized pumpkin pies.
Hand pies, individual pies, and single-serving pies—whatever you call them, these small pies are becoming more and more popular, and for good reason: Mini pies are easy to eat, transport, and give as gifts, especially when you need a recipe to use up a leftover cup of pumpkin puree!
If you’ve never made a pie before, you’re in good company! I have plenty of instructions for beginner pie bakers in this blog post (and the recipe card, because that’s where the tips really matter) to set you up for success, along with a video on my YouTube channel. If you’re in need of a perfectly flaky pie crust recipe, I recommend using my all-butter vanilla pie crust or my all-butter flaky pie crust recipes. You are always welcome to use your favorite pie crust recipe (or even store-bought), though!
This post contains affiliate links. If you click through and make a purchase, I may receive a small commission at no cost to you. Thank you for helping to support The Floral Apron!
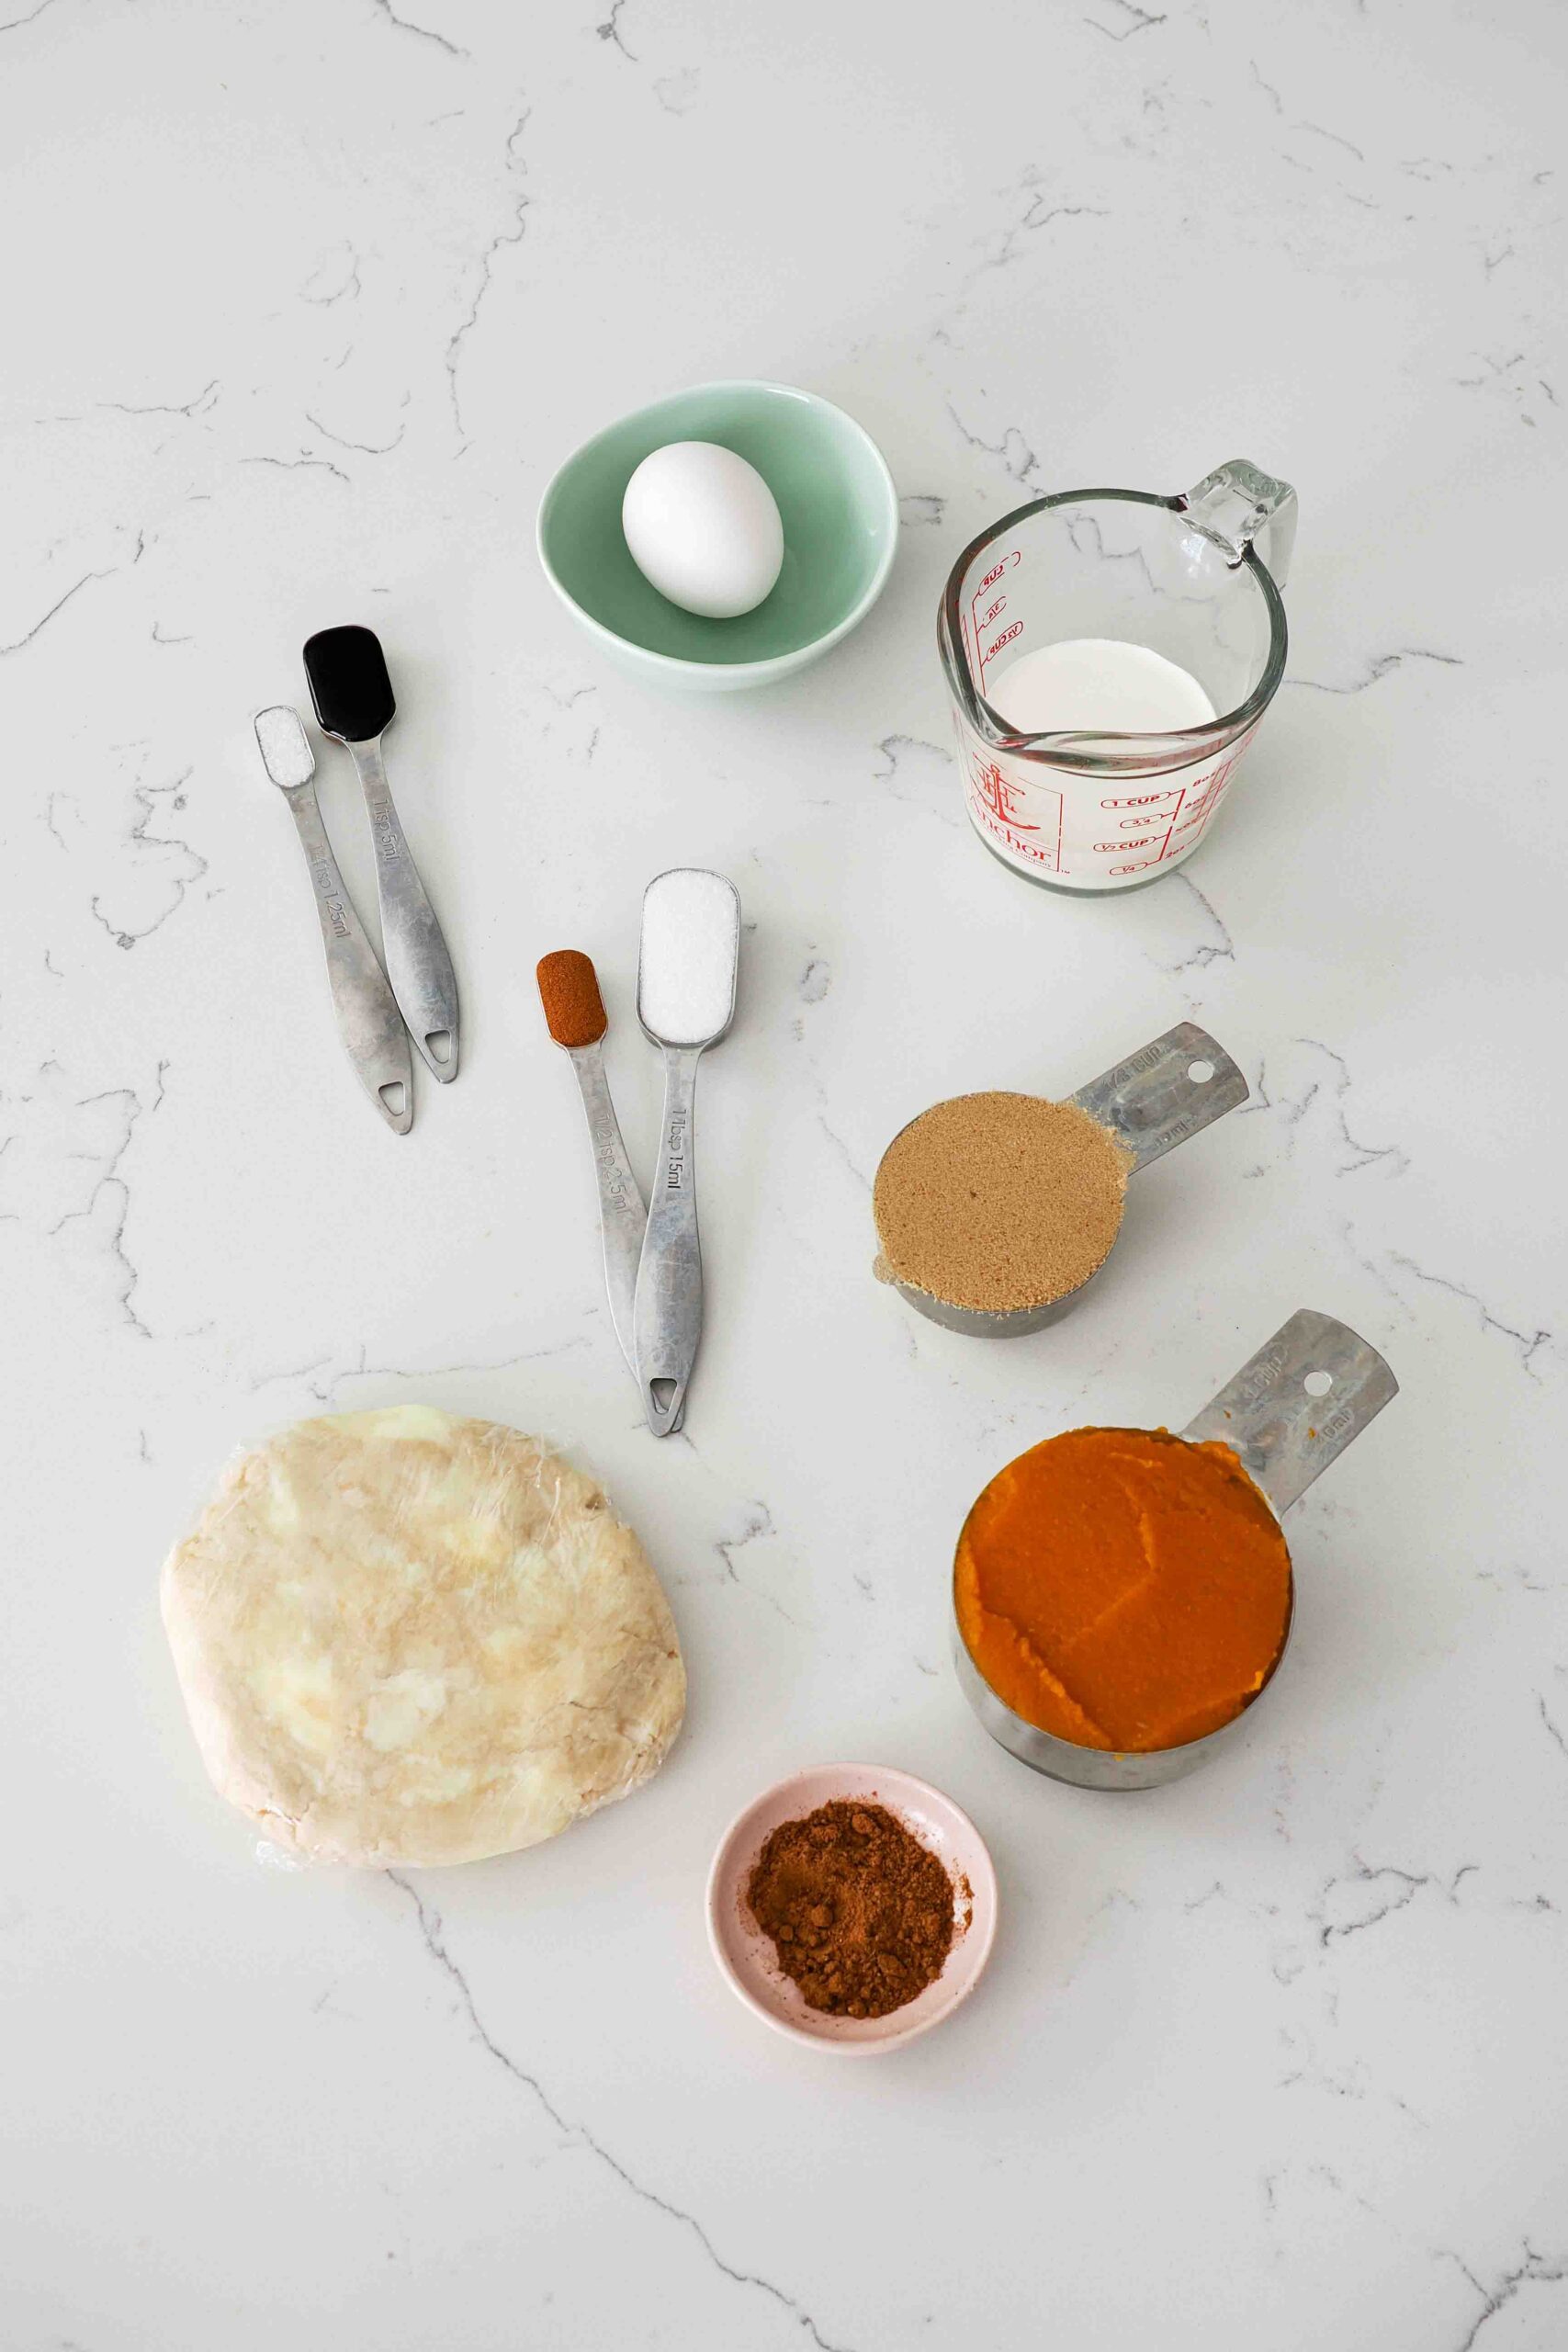
Ingredients for Mini Pumpkin Pies
This pumpkin pie recipe uses a bit more pumpkin than traditional pumpkin pie recipes, and it results in a thicker, creamier filling with fewer ingredients—a win all around!
- Pie crust. You’ll need a single pie crust for this mini pie recipe. I always use my vanilla pie crust for sweet pies, though a regular pie crust or a store-bought one will work, too.
- Granulated sugar. A light coating of sugar mixed with cinnamon on the outside of the pie crusts gives these mini pies an extra bit of sweetness.
- Ground cinnamon. This flavors the sugar on the pie crust and gives it a little color, too.
- Pumpkin puree. Use 100% pumpkin, not pumpkin pie filling, which has added sugar and flavoring.
- Brown sugar. Brown sugar gives these pies a richer, more molasses-y flavor than granulated sugar.
- Heavy cream. Just enough to make the filling indulgent but not too rich.
- Egg. This gives the filling just enough structure to set into a thick and creamy pumpkin pie filling.
- Pumpkin pie spice. This common spice mix is easy to make at home with cinnamon, nutmeg, ginger, and allspice. (Full quantities listed in the “Notes” section of the recipe.)
- Vanilla extract. Both vanilla extract and vanilla bean paste work well here.
- Salt. Just a pinch helps to enhance all the flavors.
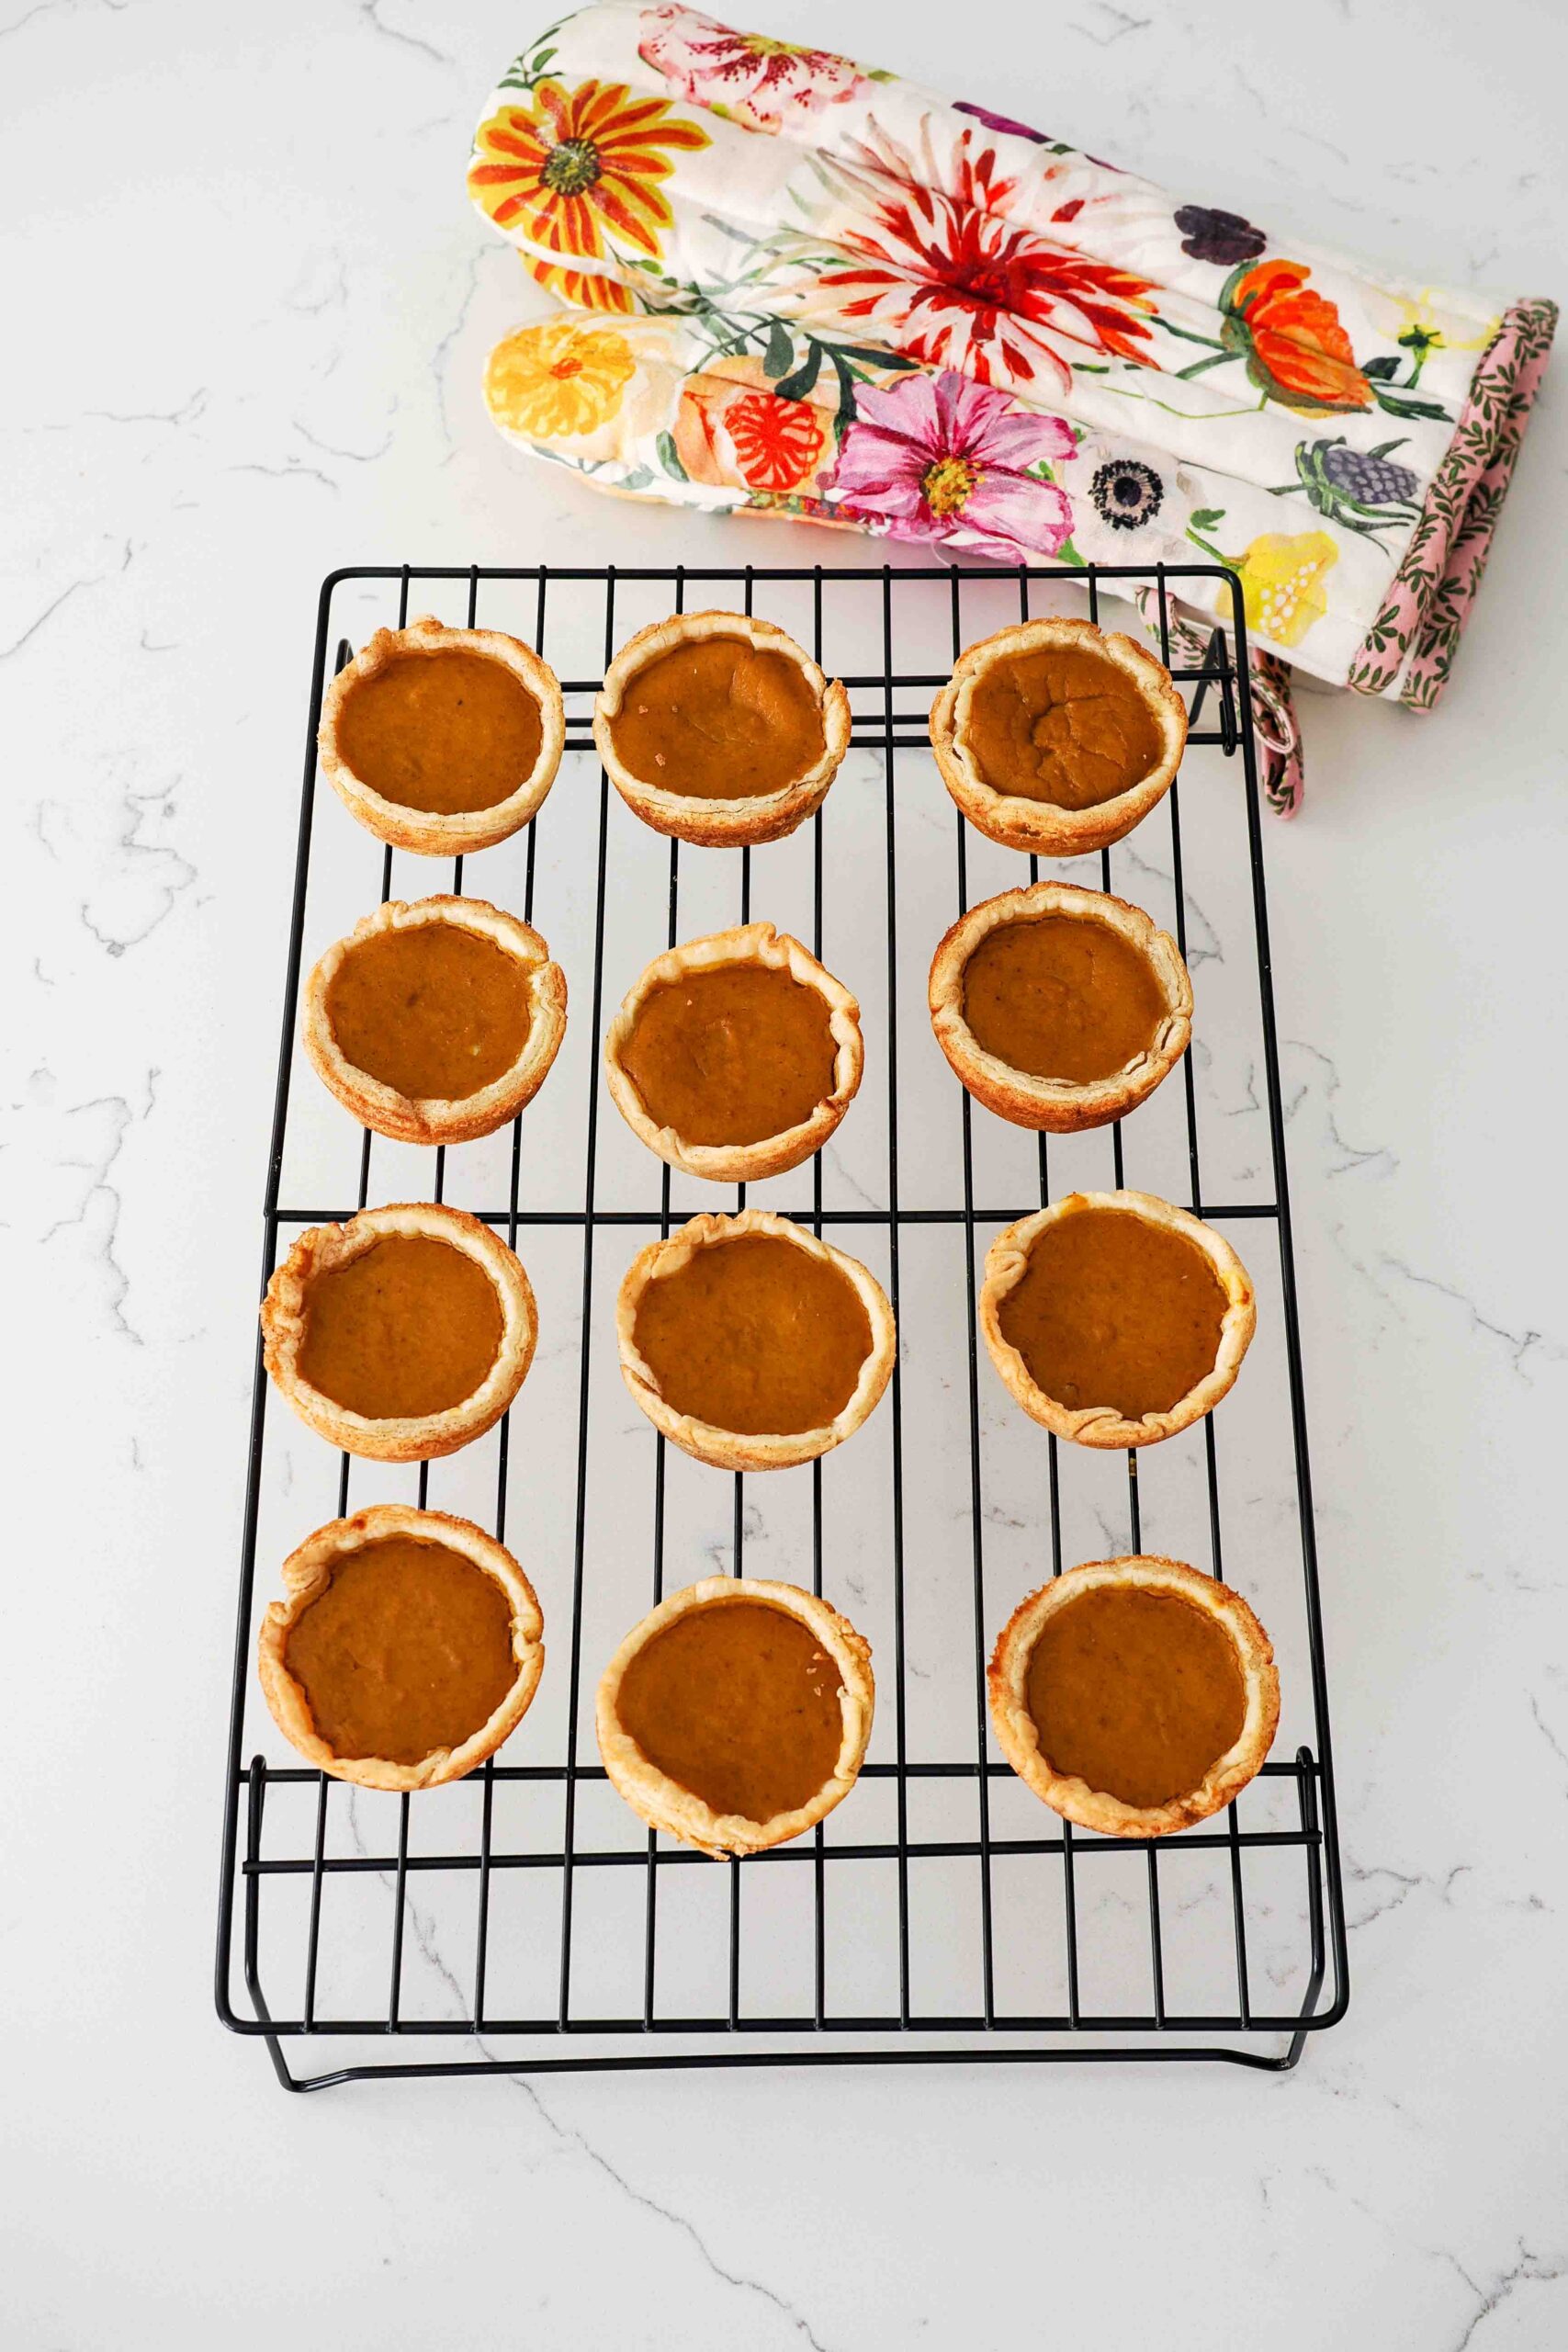
This is not an ingredient but an important note on supplies: This recipe works best with dark-colored pans! Light-colored pans, like aluminum, will still work, but plan to increase the bake time by about five minutes for the same rich color and flaky crust.
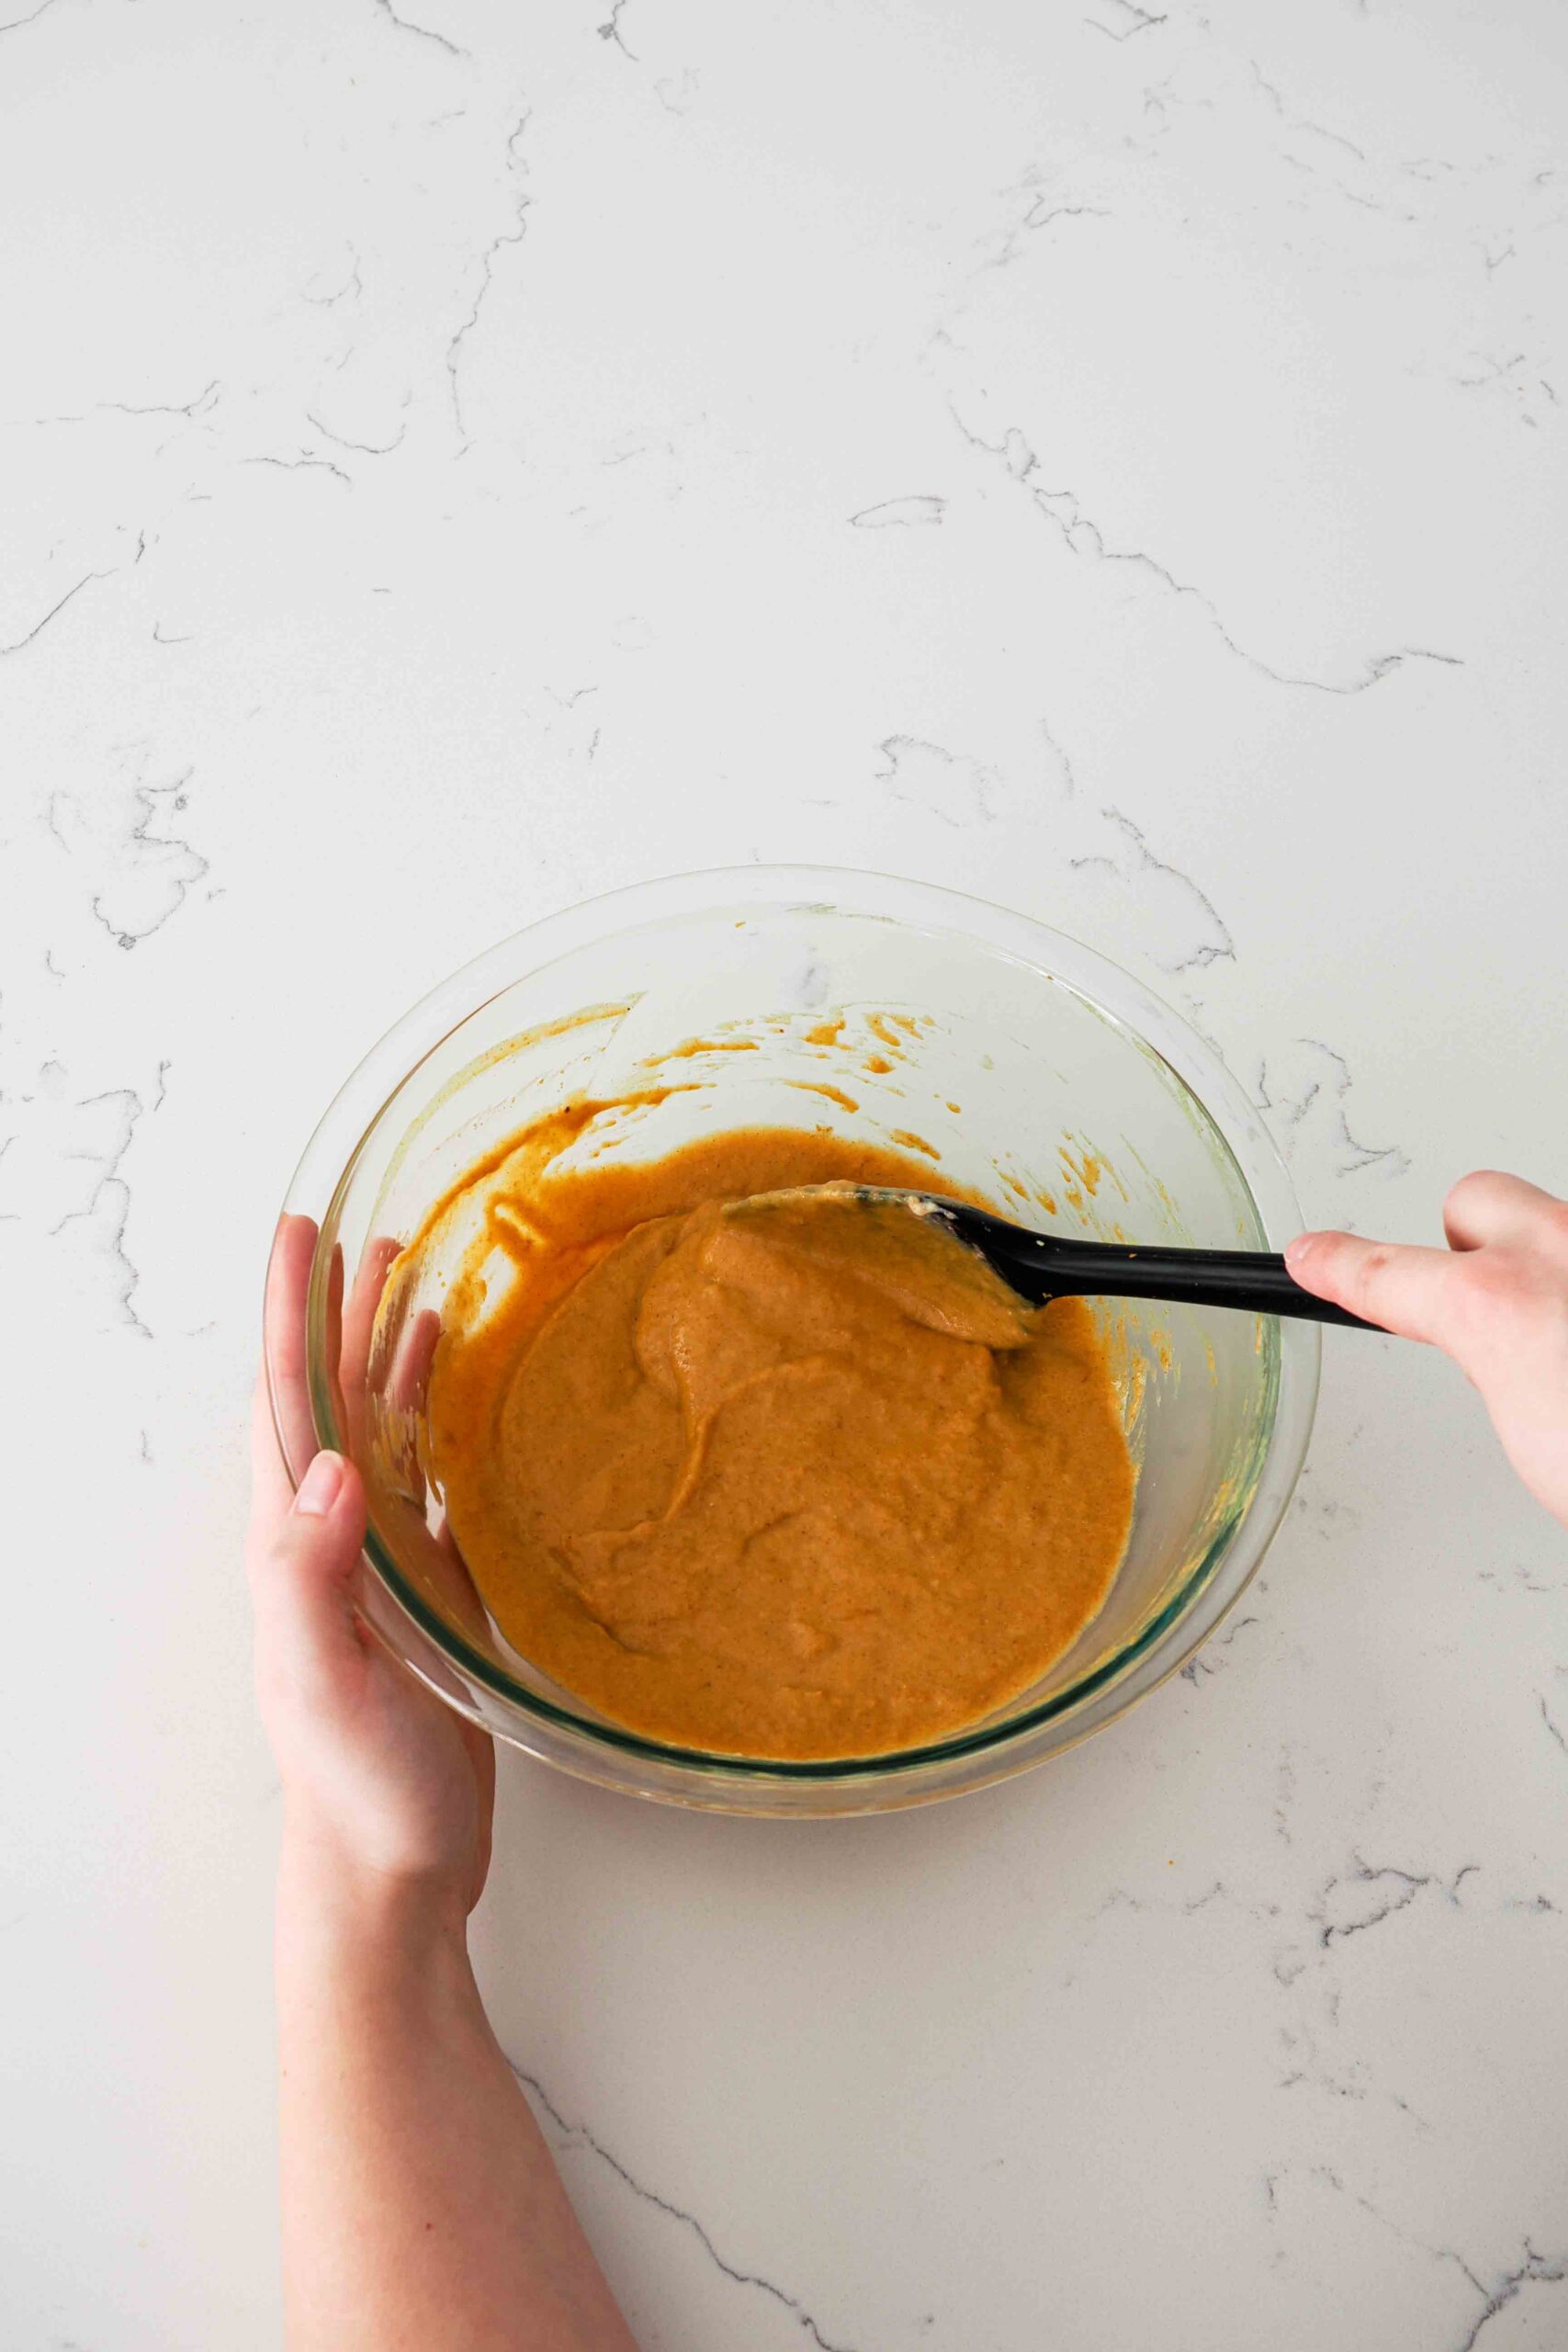
Quick Tips for Making Mini Pumpkin Pie Filling
Homemade pumpkin pie filling couldn’t be easier to make: Simply stir together pumpkin puree, brown sugar, heavy cream, egg, vanilla extract, spices, and salt in a medium bowl until well-combined. Once there are no streaks of egg in the mix, set aside. You can leave the filling at room temperature for up to an hour while you roll out the dough. Watch a video on how to make mini pumpkin pies here.
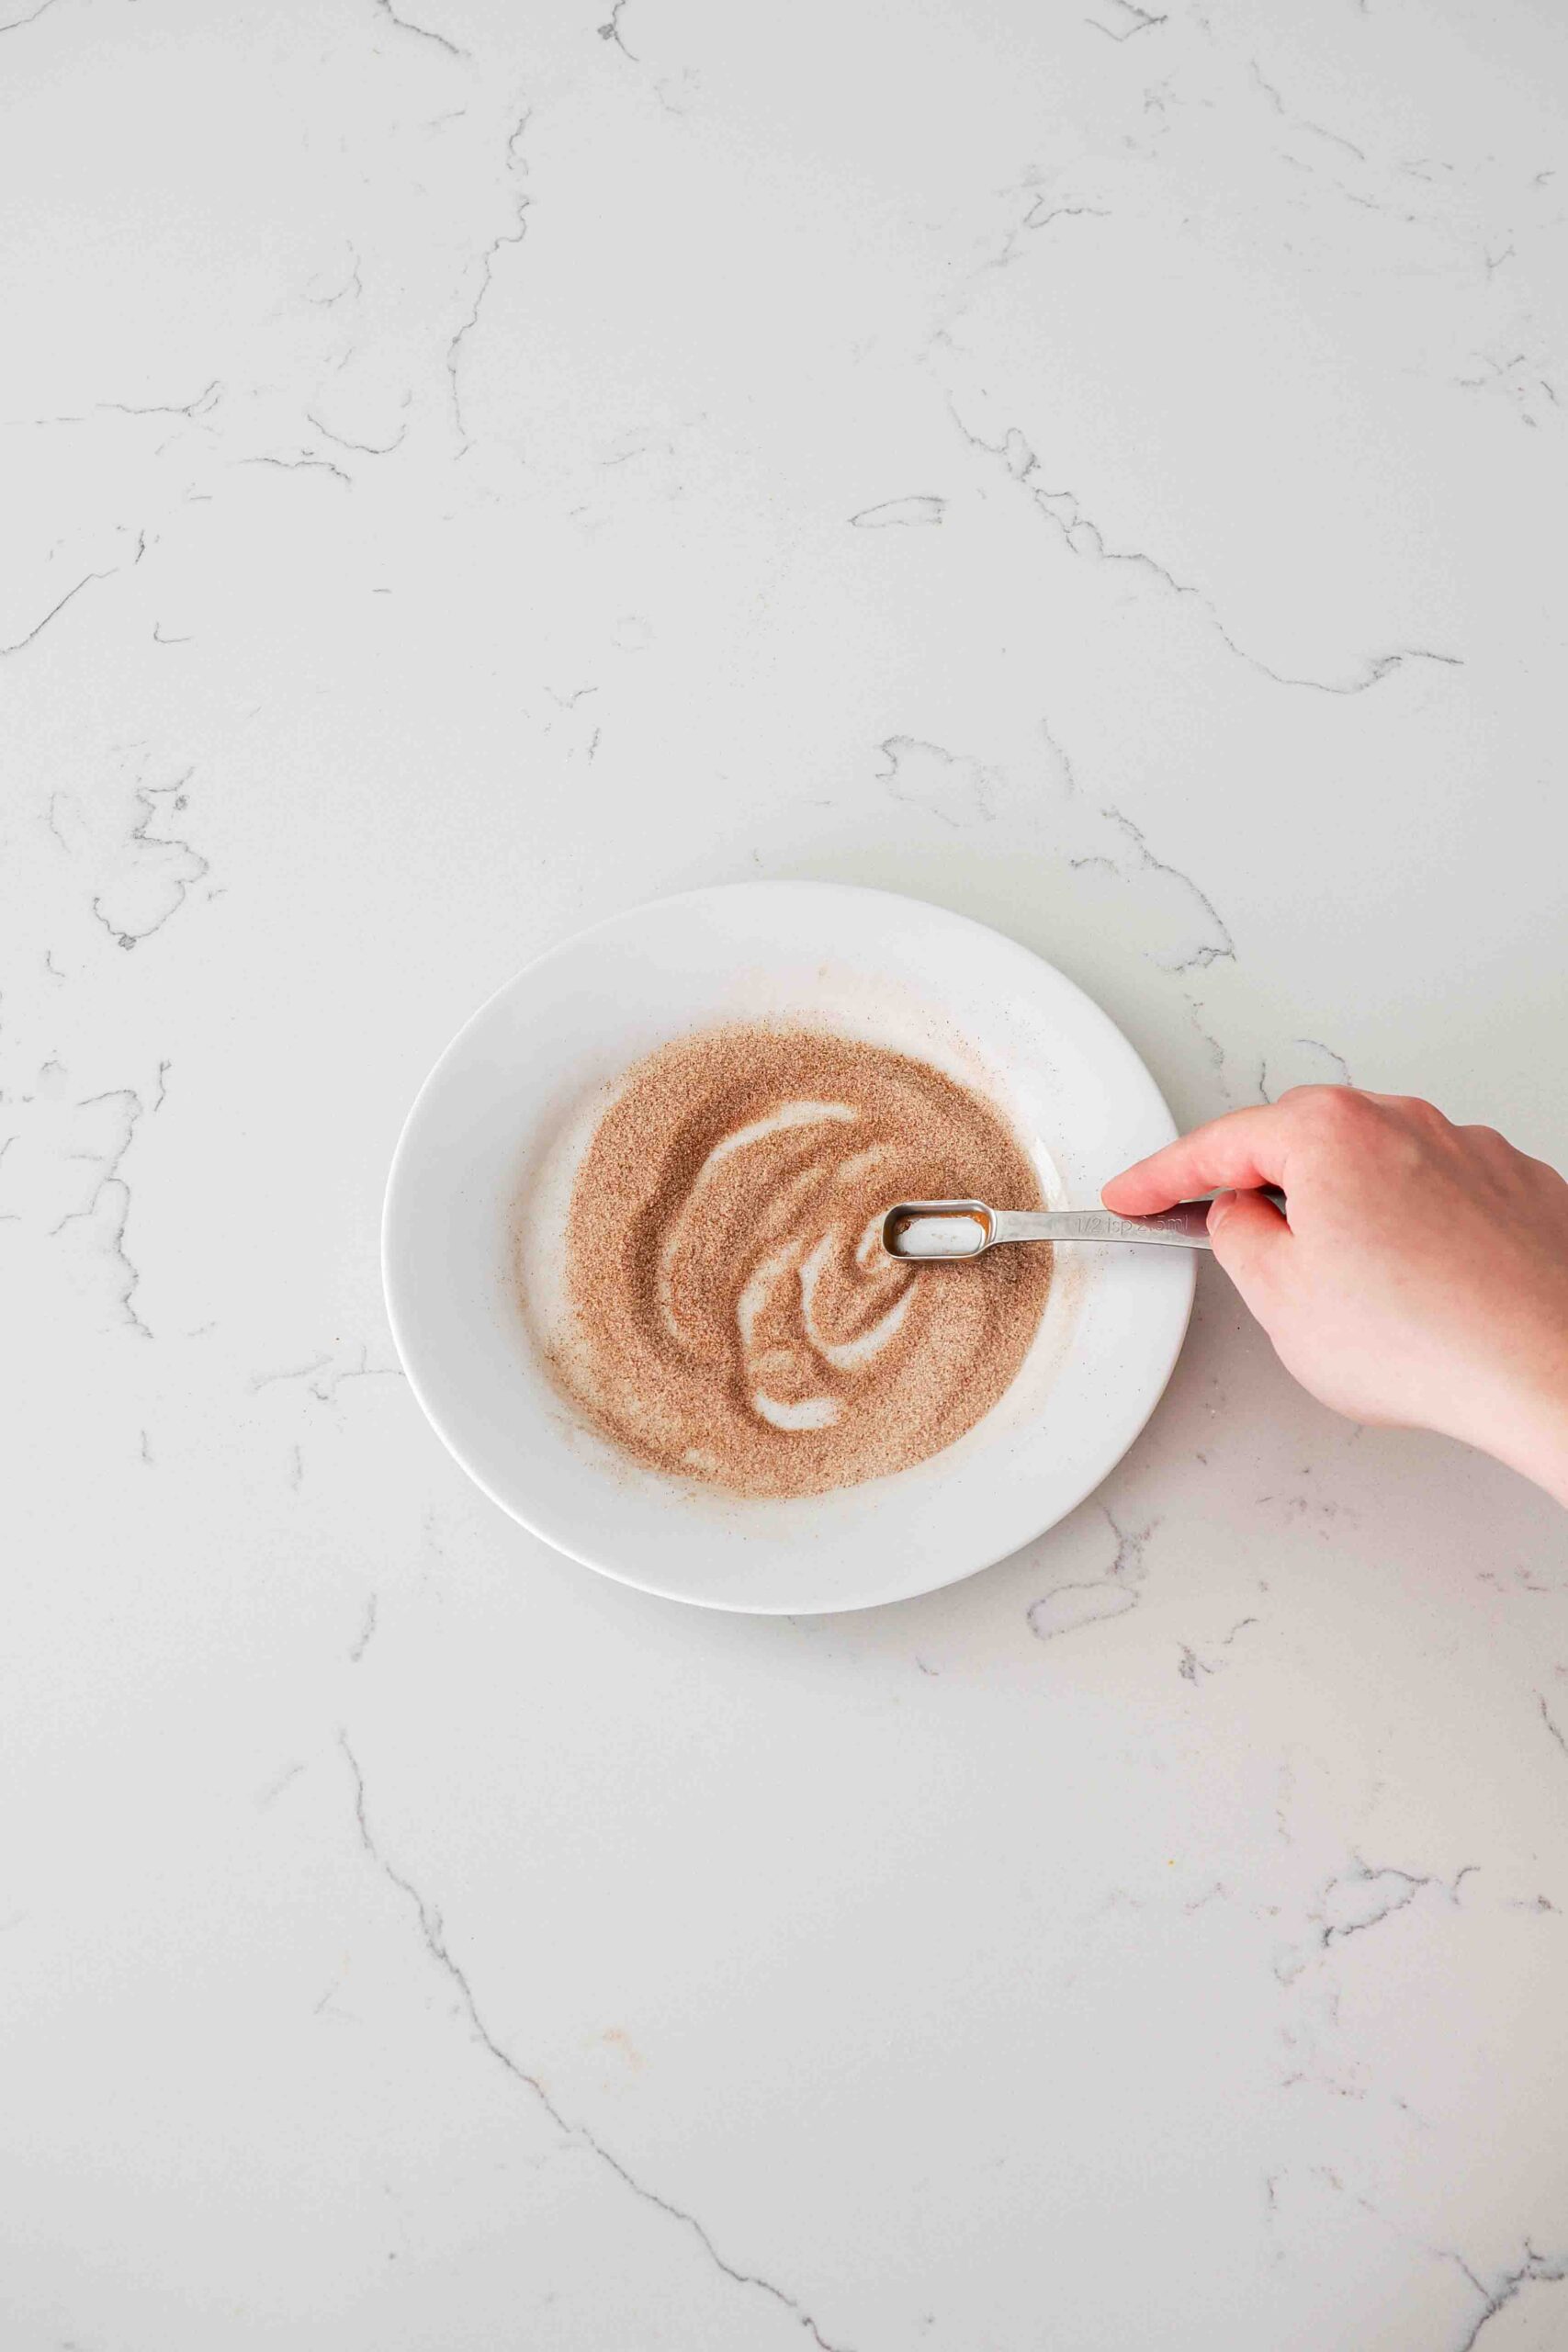
Then, mix together the cinnamon and sugar used to coat the pie crusts on a small, shallow plate.
Quick Tips for Prepping Mini Pie Crusts
The key to having good mini pie crusts is rolling out the pie dough well. (I cover how to do that in the blog post for my all-butter flaky pie crust.) The short version is to roll from the center of the dough out, in one direction, while making sure your workspace is lightly dusted with flour to prevent sticking.
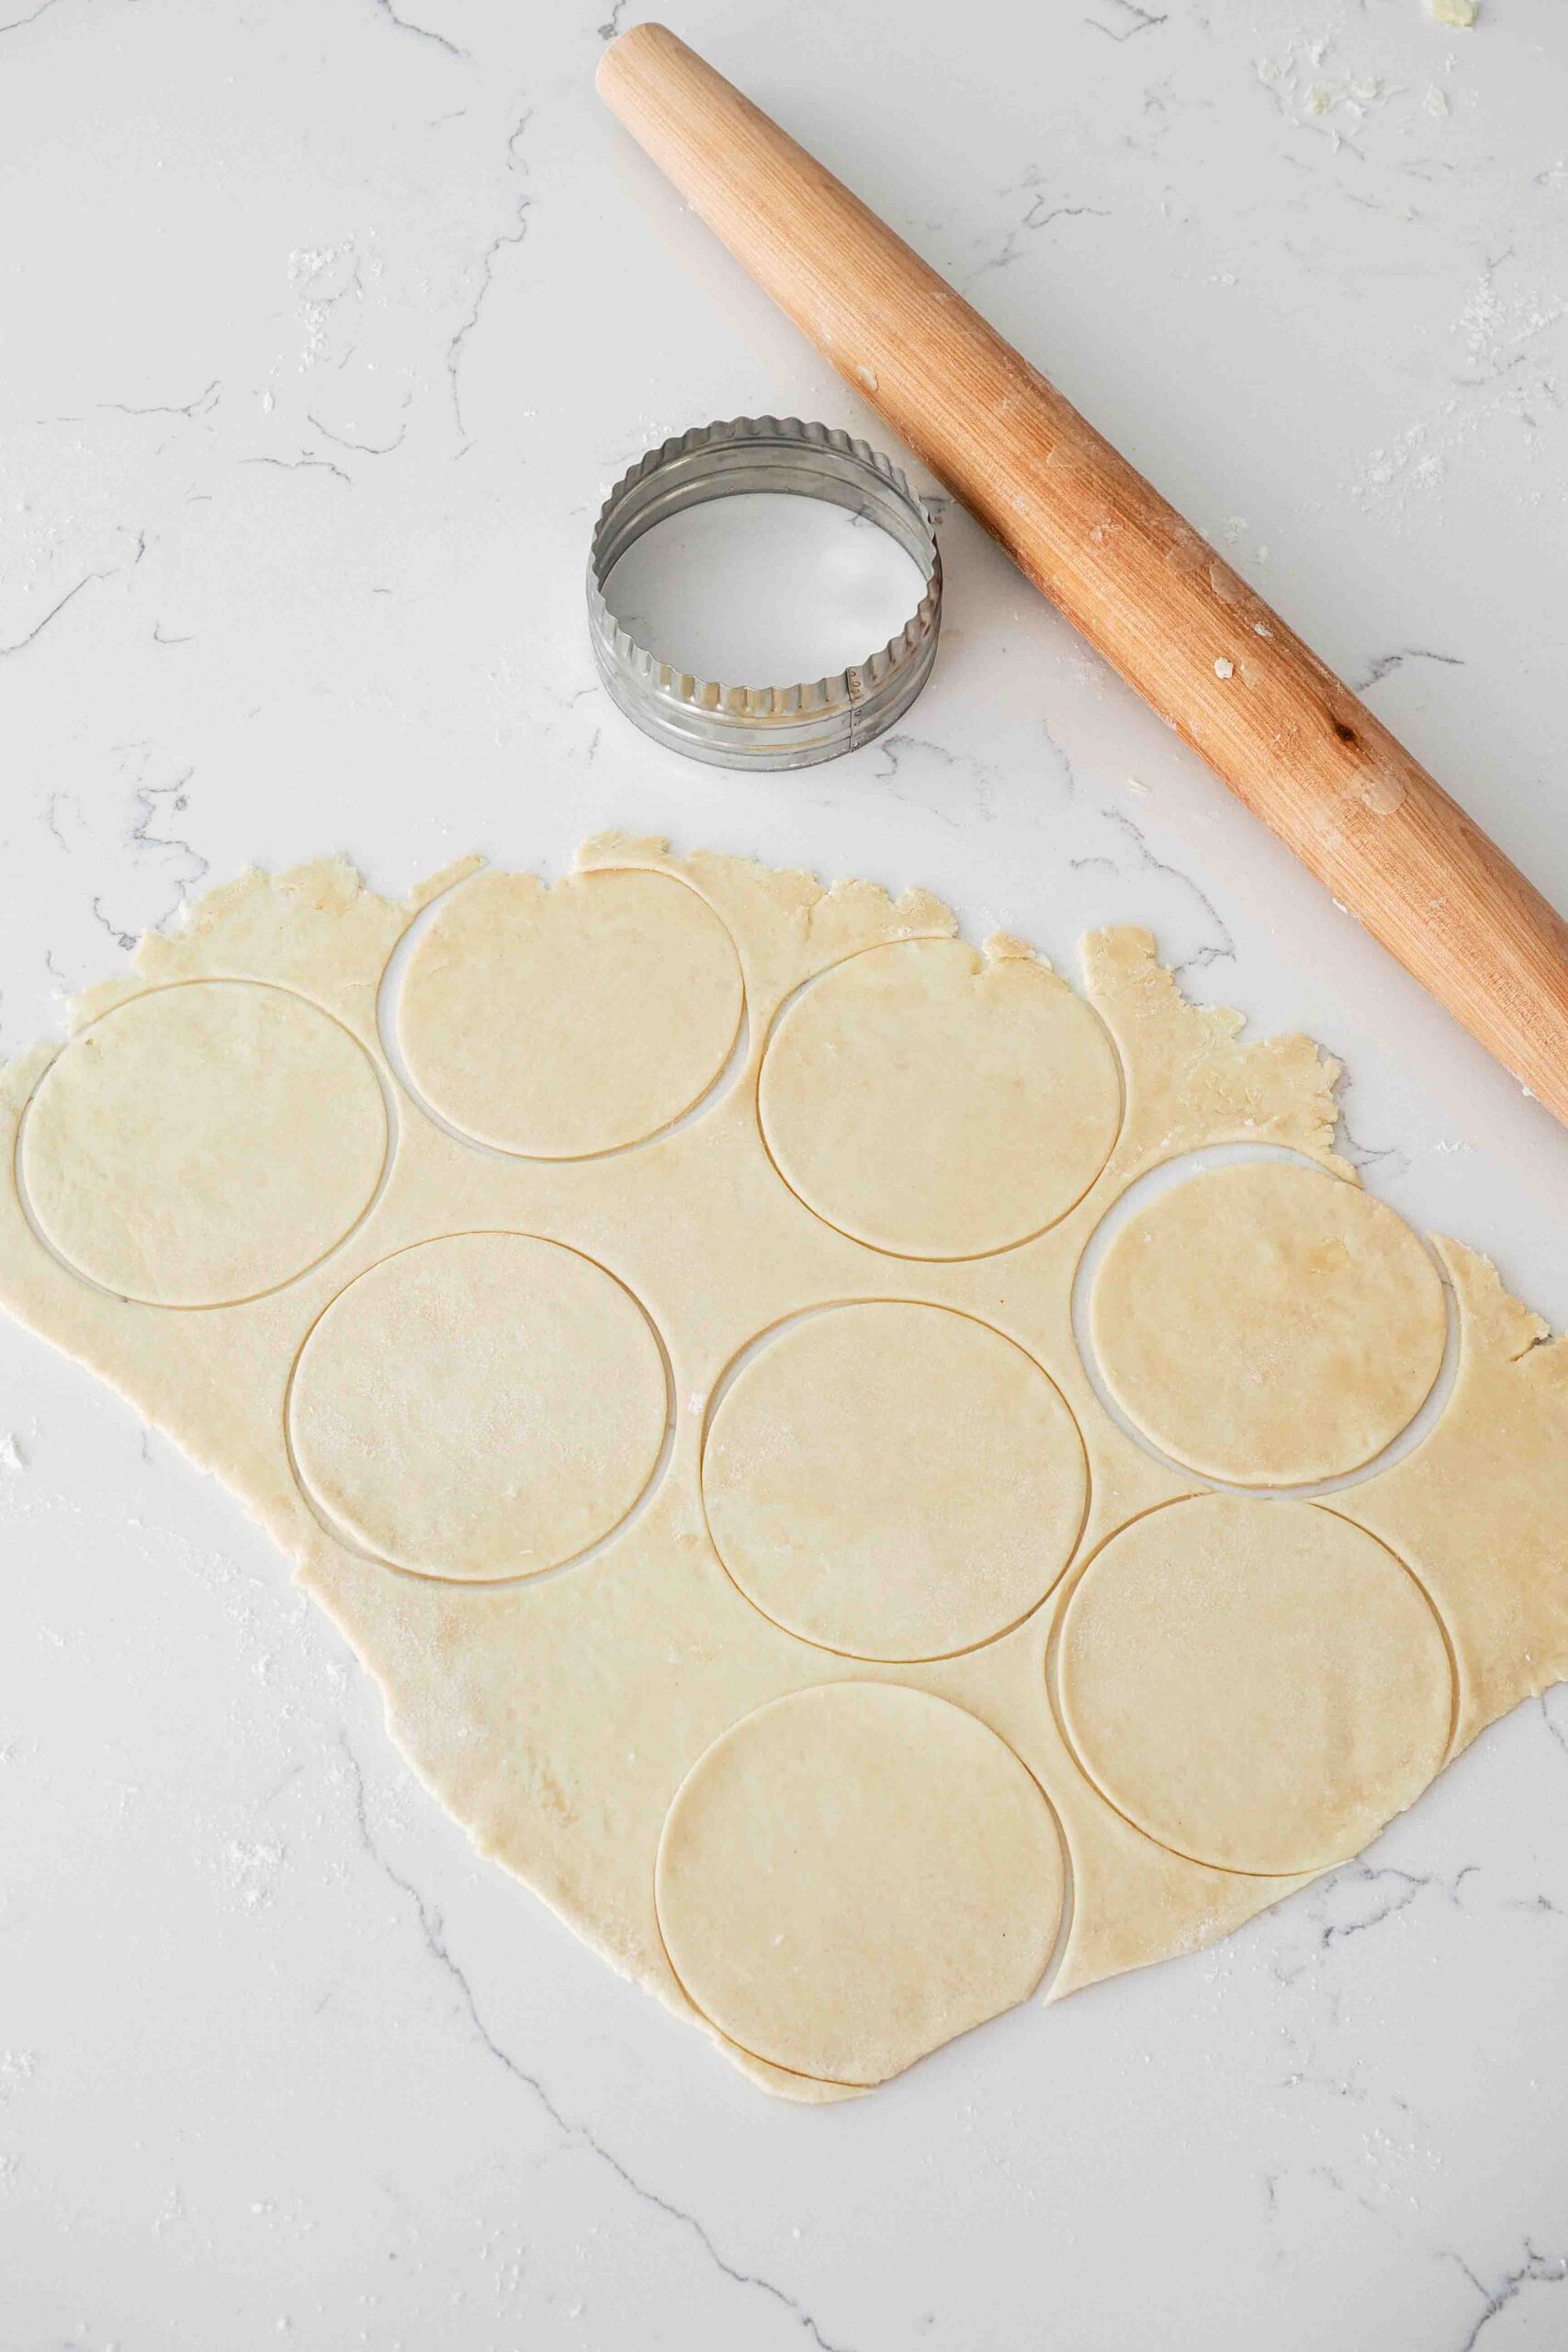
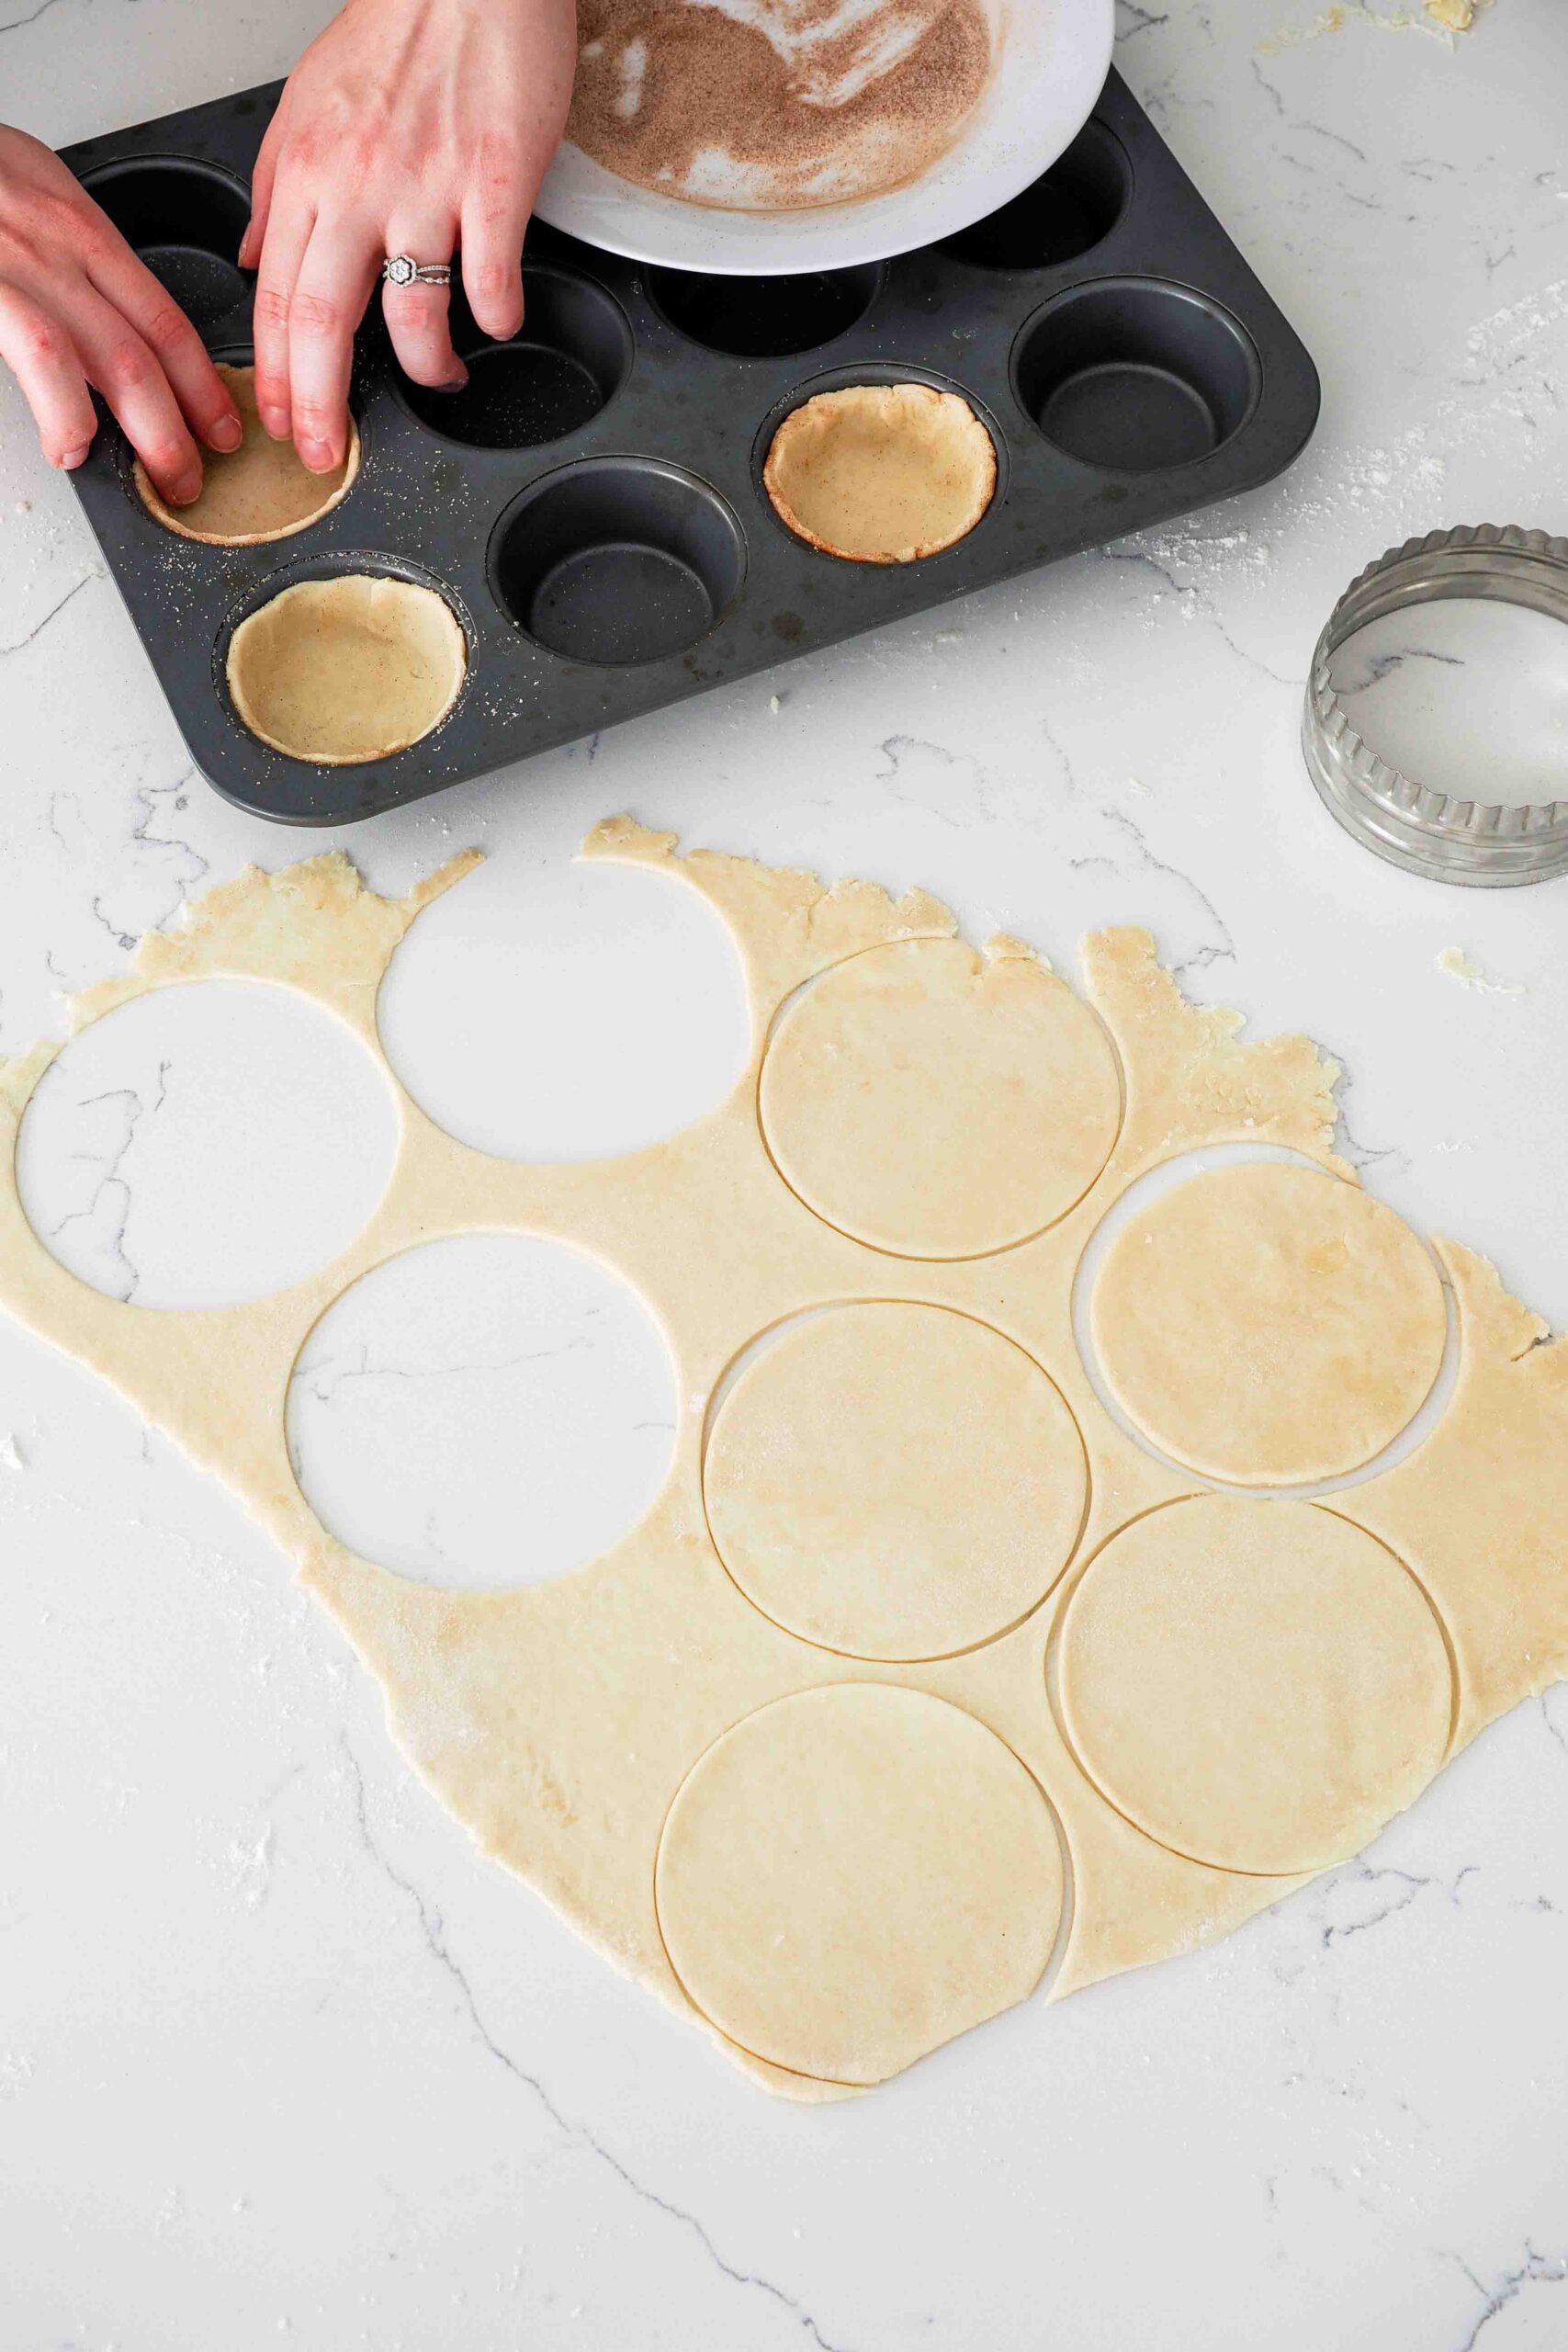
Roll out the dough to about ⅒” (3 mm) thick—the pumpkin custard filling is very wet, and anything thicker has a hard time crisping up and browning properly. Then, use a 4″ (10 cm) round cutter to cut circles into the dough.
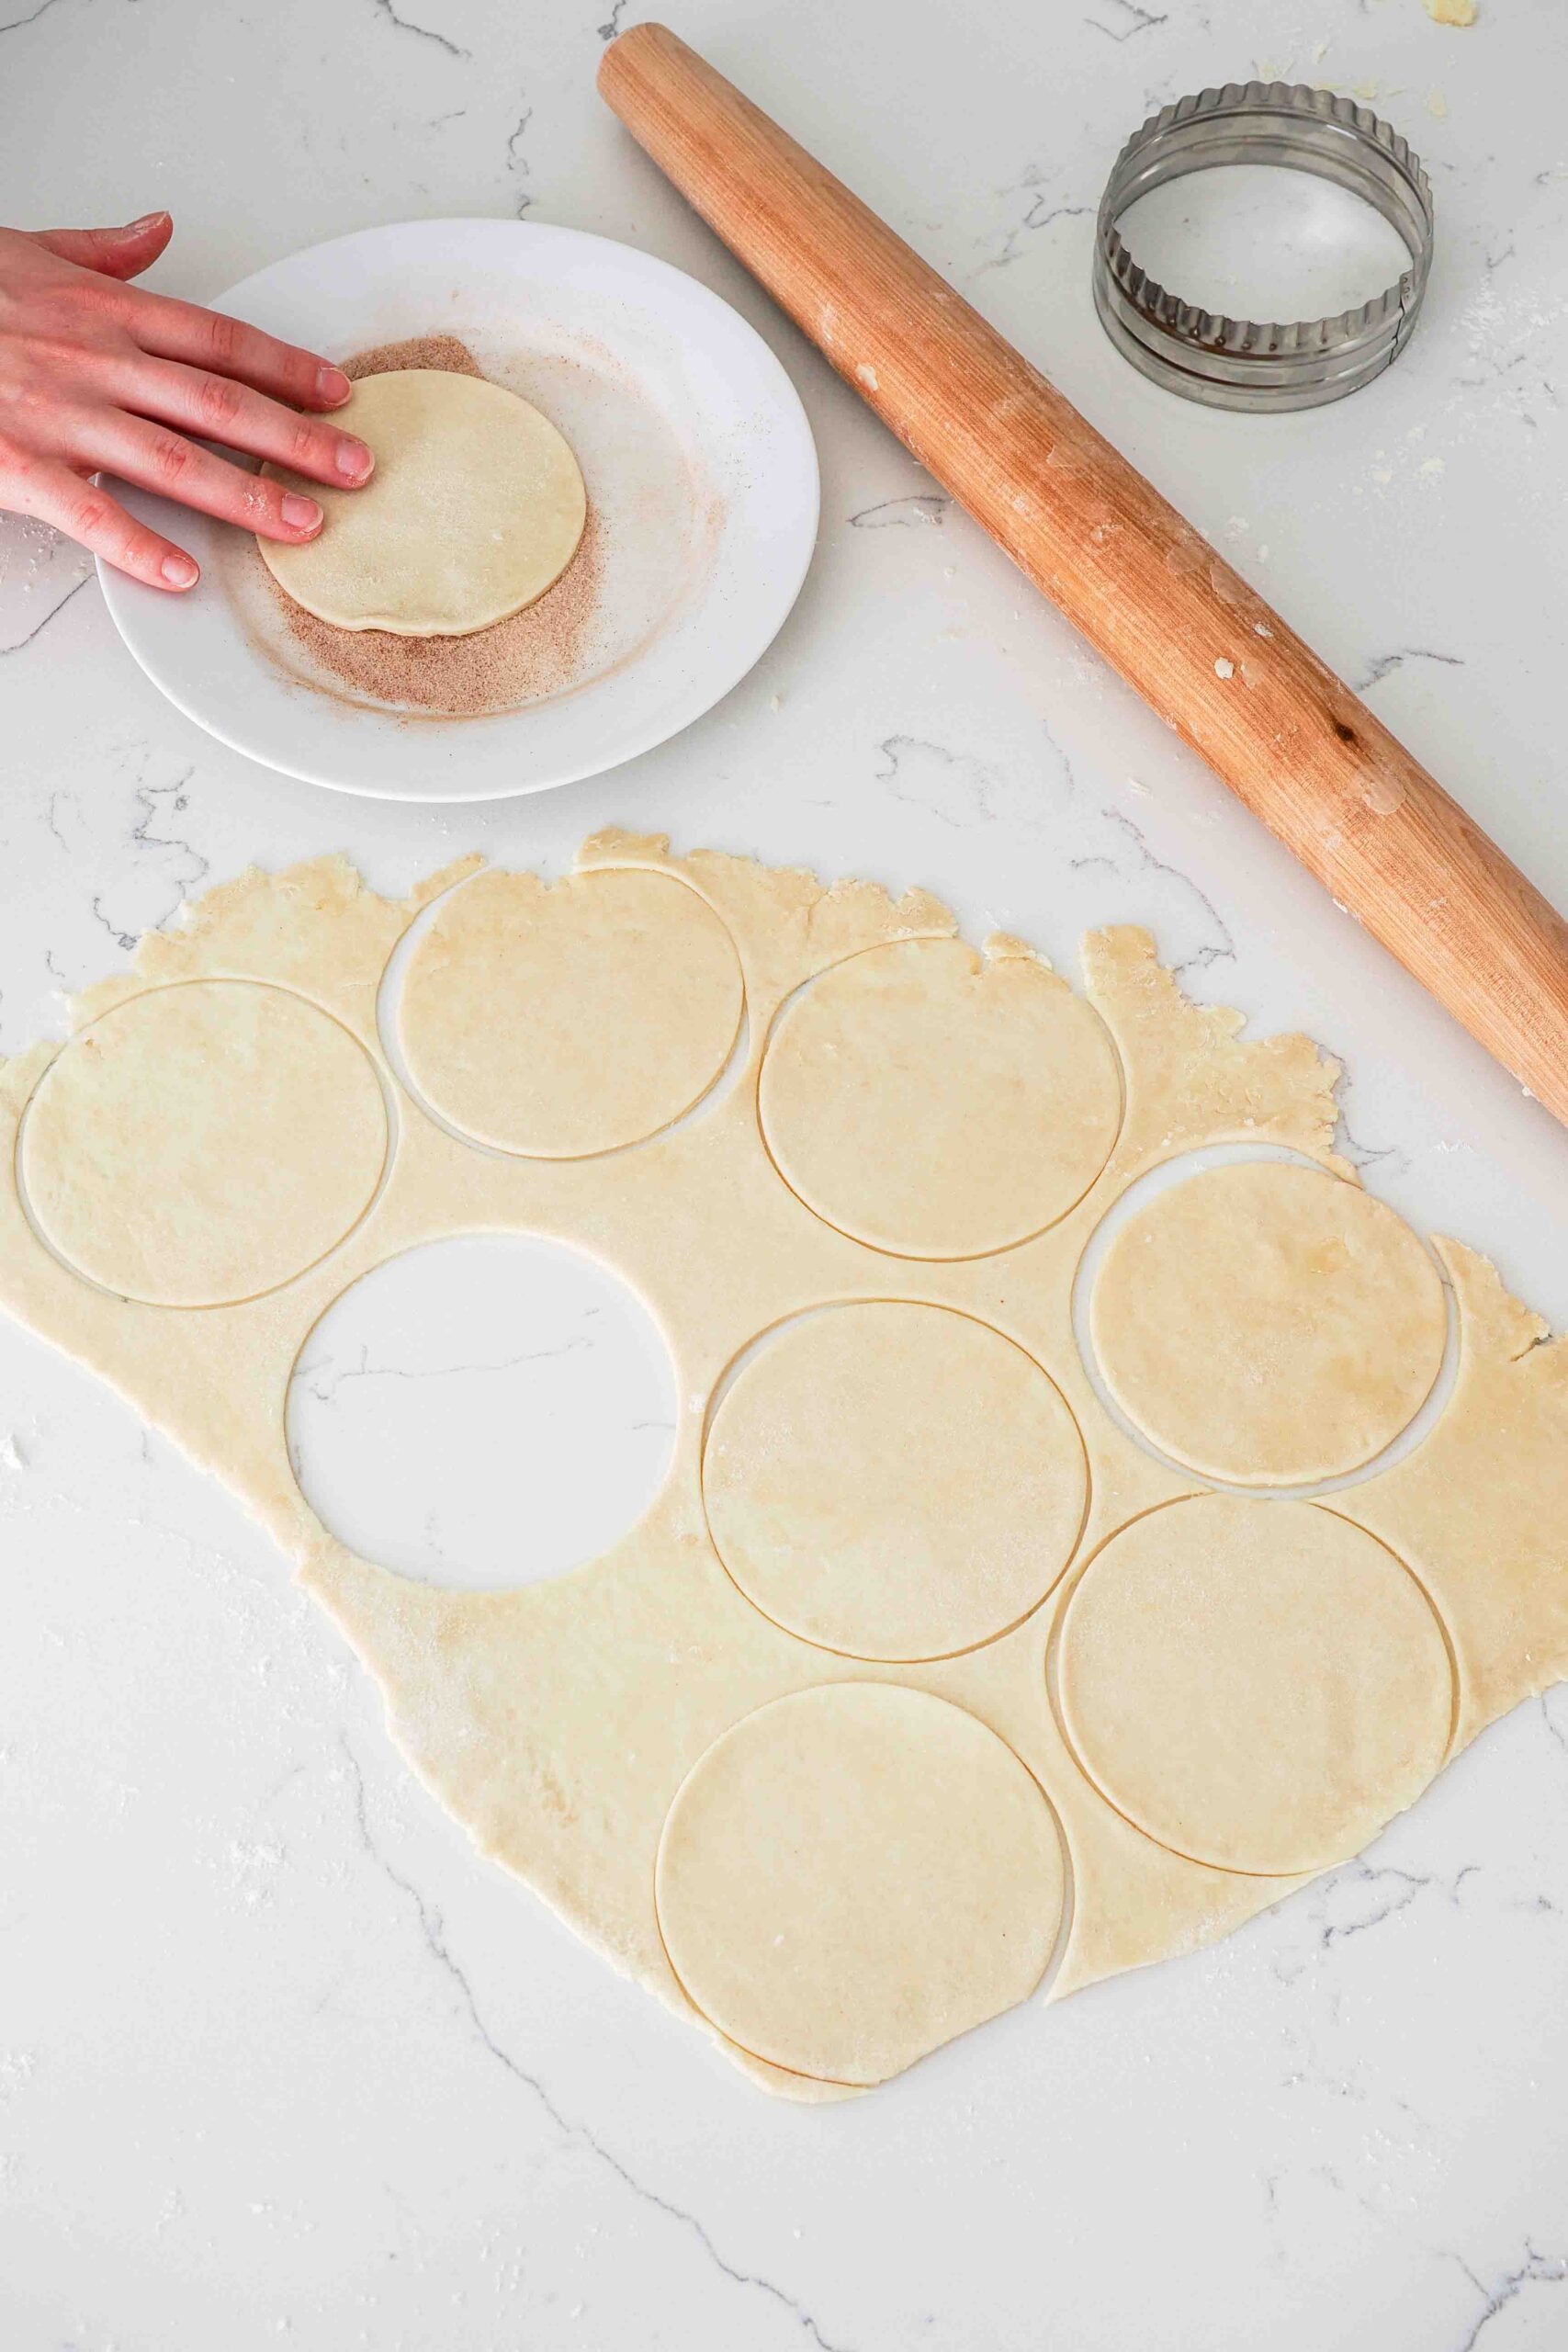
Pick up one dough round at a time and dip it into a shallow plate with cinnamon sugar. Swirl the dough round in the the cinnamon sugar until the bottom is fully covered.
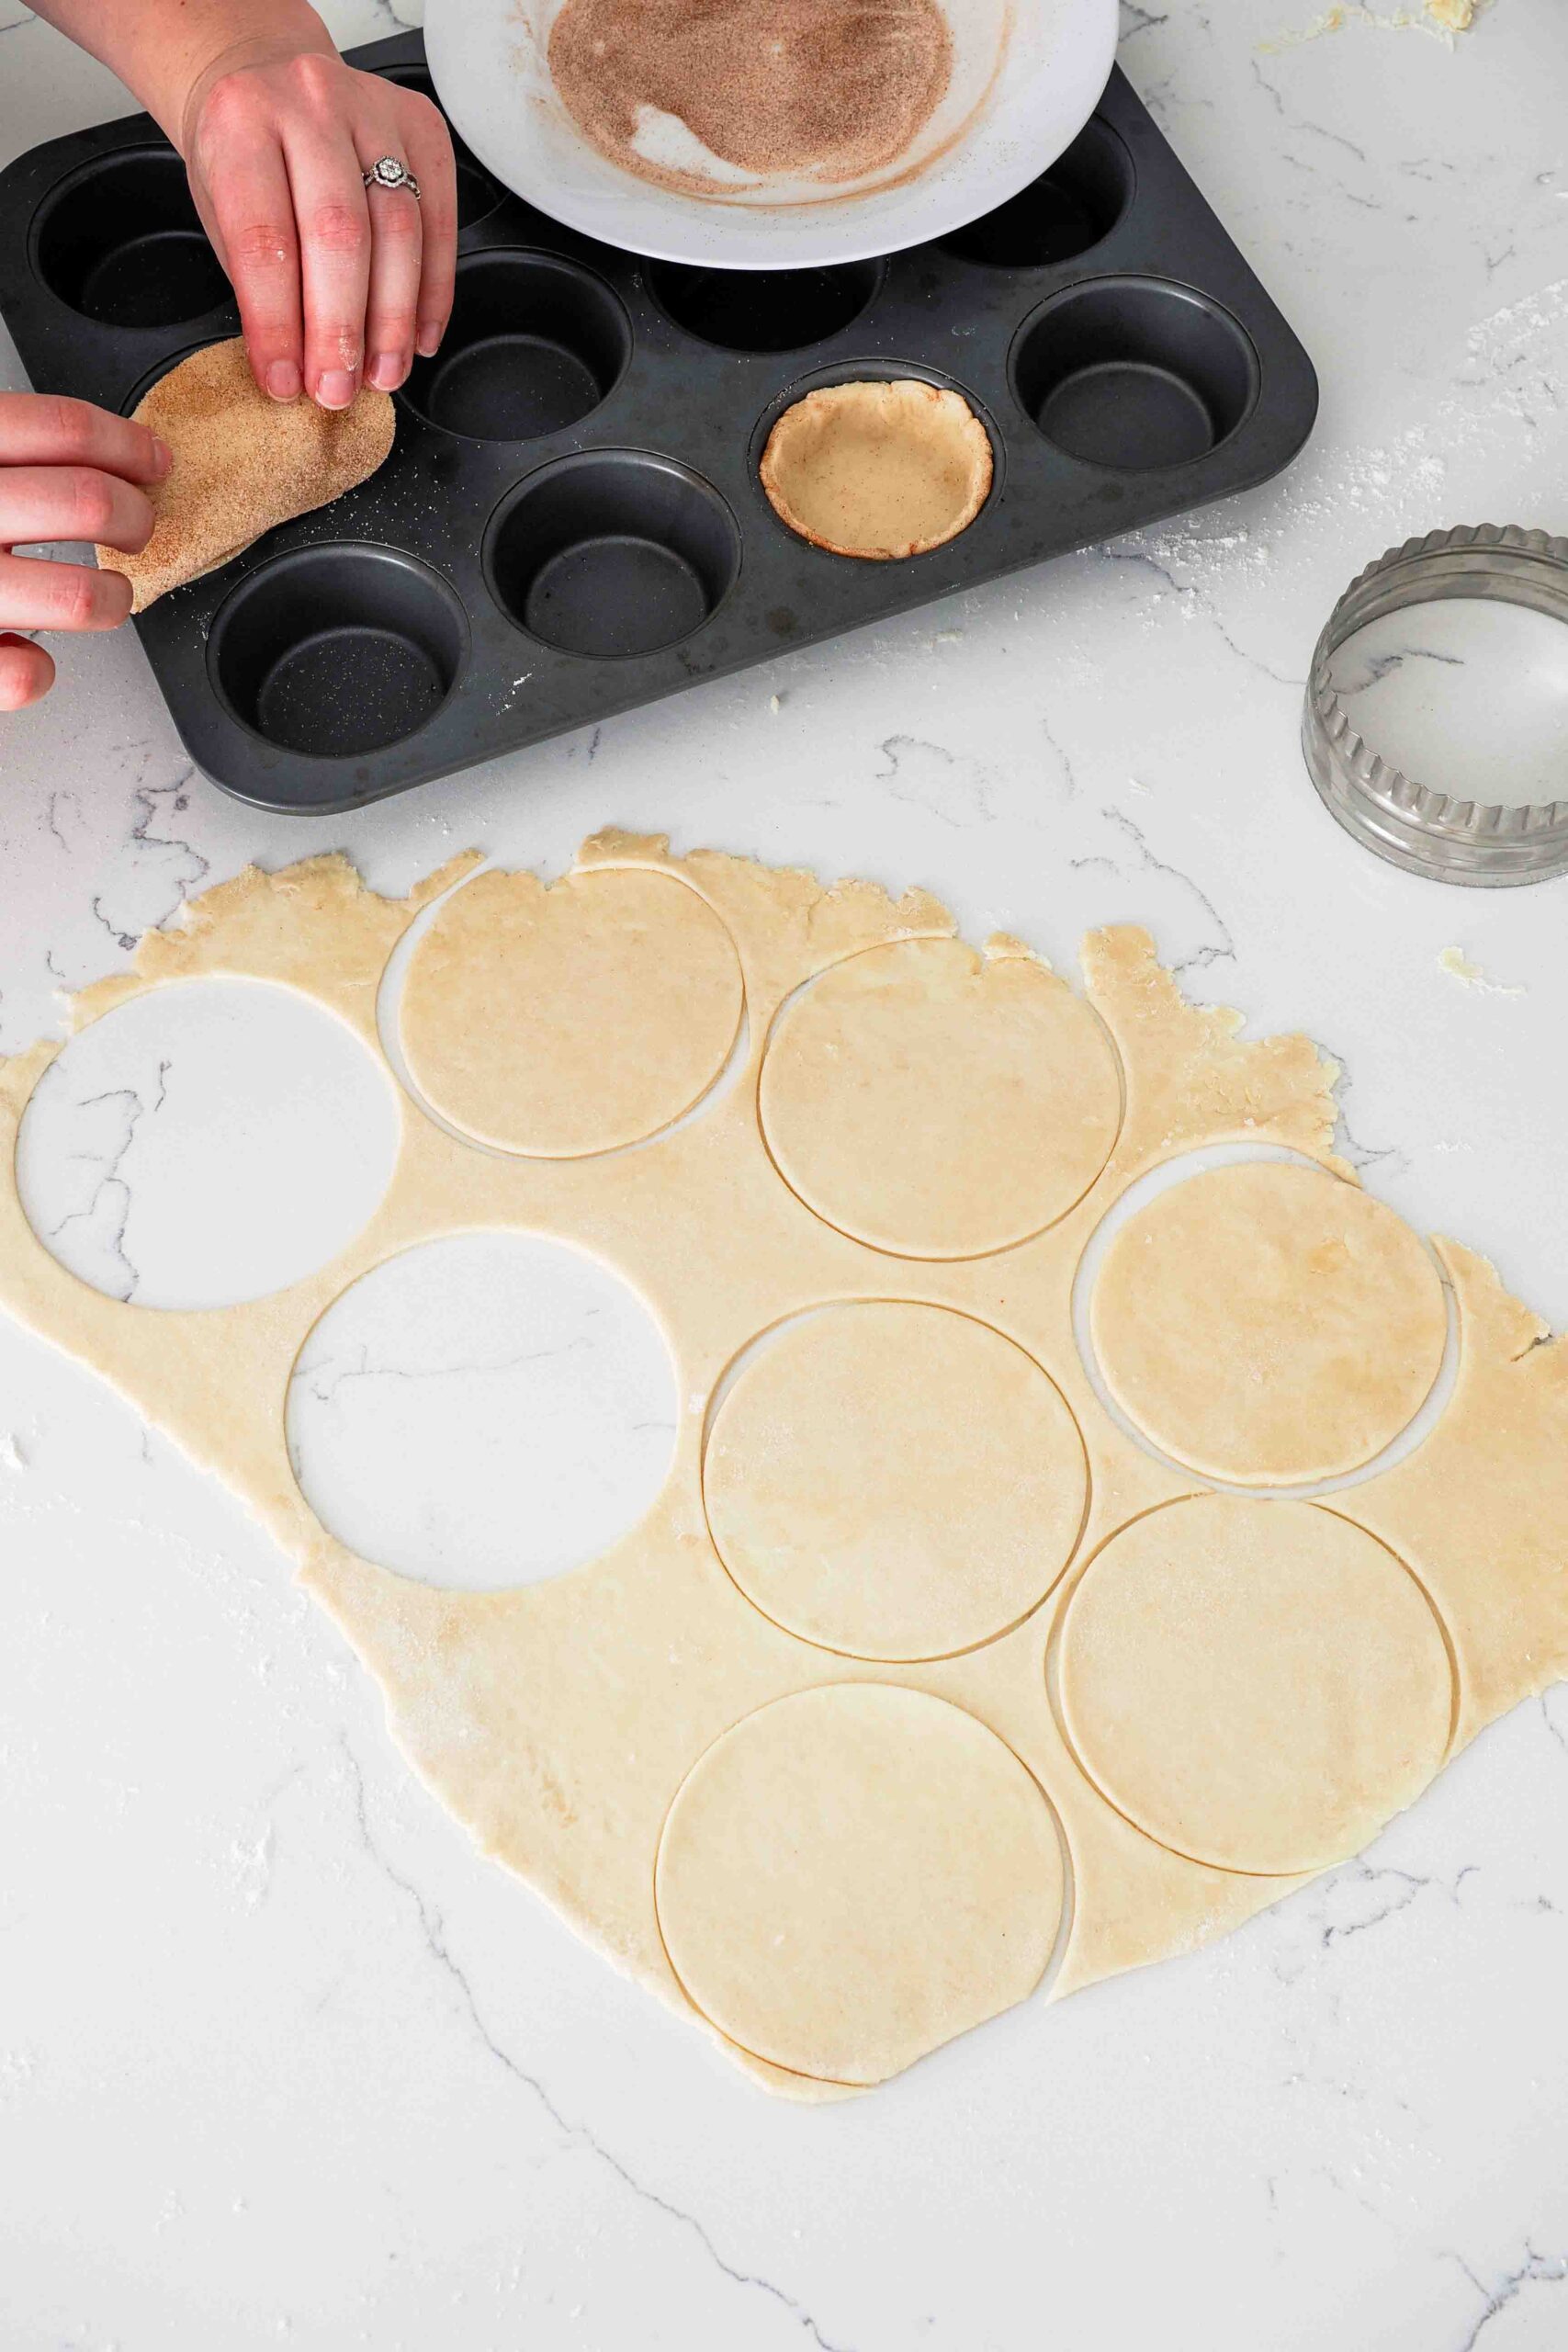
Then, gently place the sugared pie dough rounds (sugared side down) over a hole in the muffin pan. Use the pads of your fingers to gently press the dough into it, paying special attention to the edges. Note: If you have longer fingernails, they may poke holes in the dough!
The dough will stretch a little bit, then fit perfectly inside of the hole in the muffin pan. Clean up the edges if they look uneven, then get ready to add pumpkin pie filling.
If the dough sticks to your workspace, you may find it helpful to use a bench scraper to ease them off the counter. When pie crust starts to warm, it tends to get sticky—try to pop the remaining dough in the fridge for a few minutes to re-harden the butter.
Quick Tips for Filling Mini Pumpkin Pies
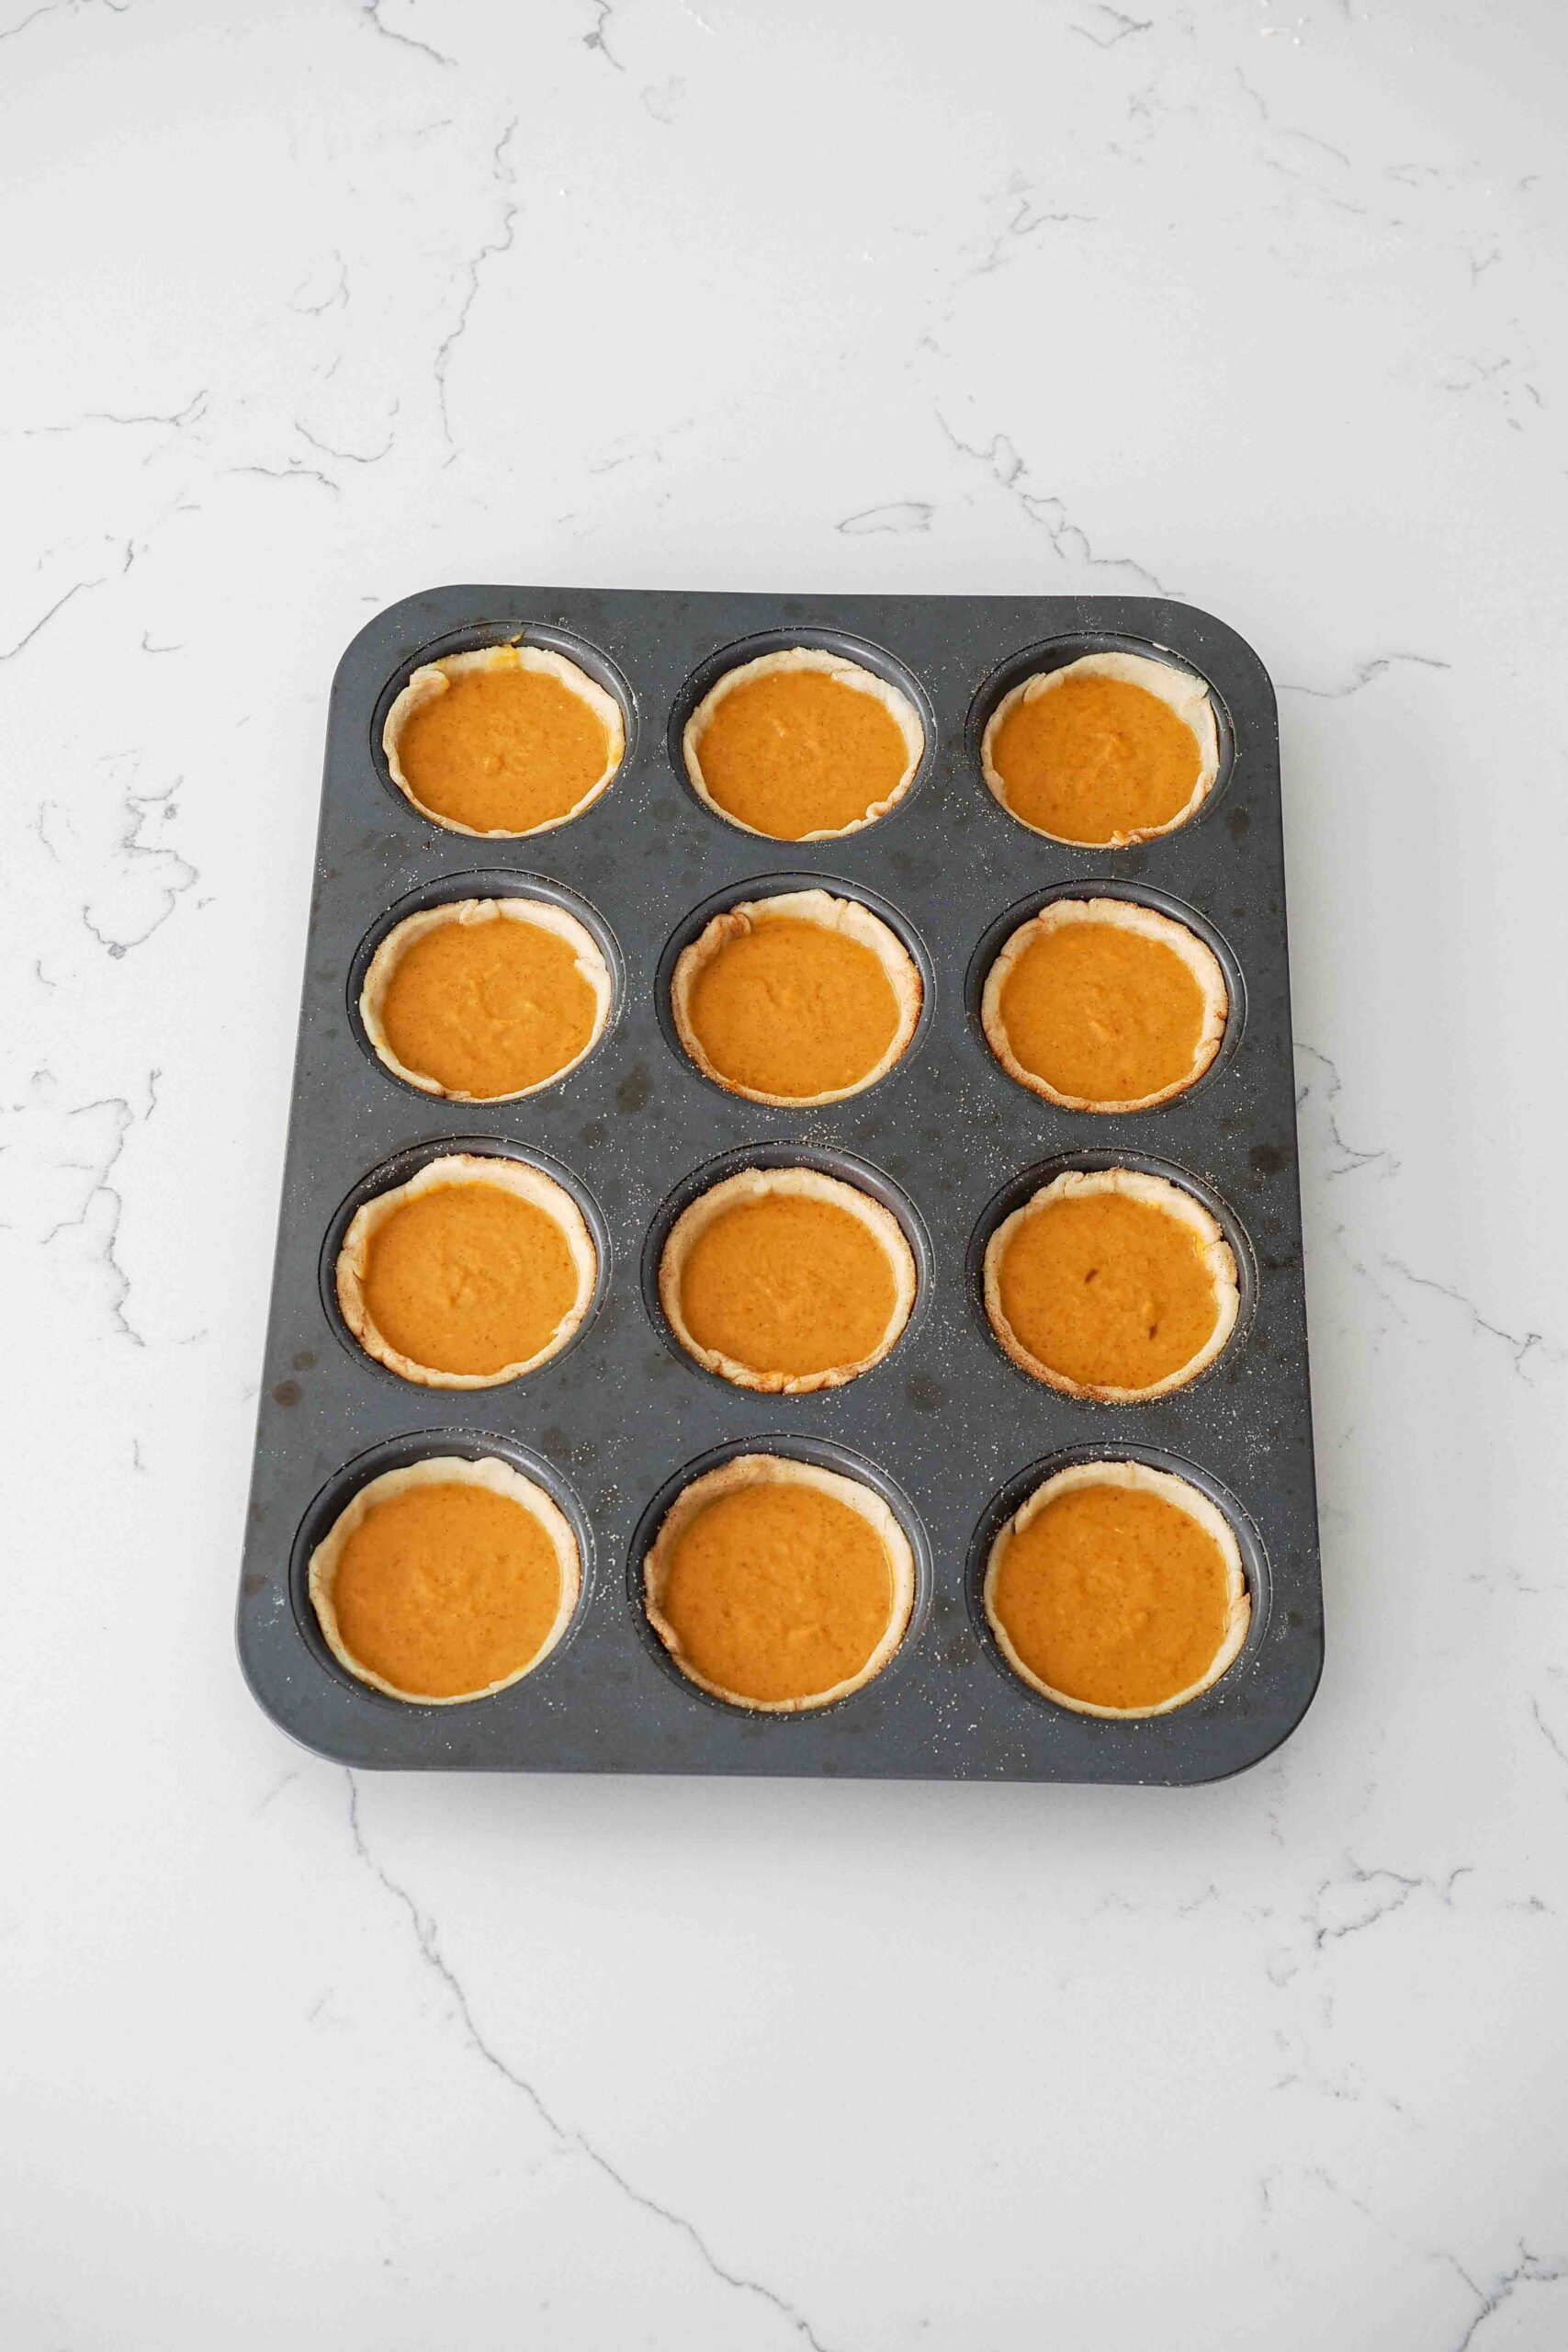
Use a tablespoon to add the pumpkin pie filling to each mini pie crust. There is enough for about two rounded Tablespoons of pumpkin pie filling for each pie. That will fill the pies about two-thirds full, which gives the crust room to shrink a little while baking.
Once all the pies are filled, tap the bottom of the muffin pan with the palm of your hand a few times to release any air bubbles in the filling. This will also smooth out the tops so that your mini pumpkin pies are completely flat!
Place in the fridge to chill for 20 minutes to allow the butter to reharden and the filling to cool. Chilling the pies helps provide an extra layer of protection against the custard cracking too early in the oven.

Quick Tips for Baking Mini Pumpkin Pies
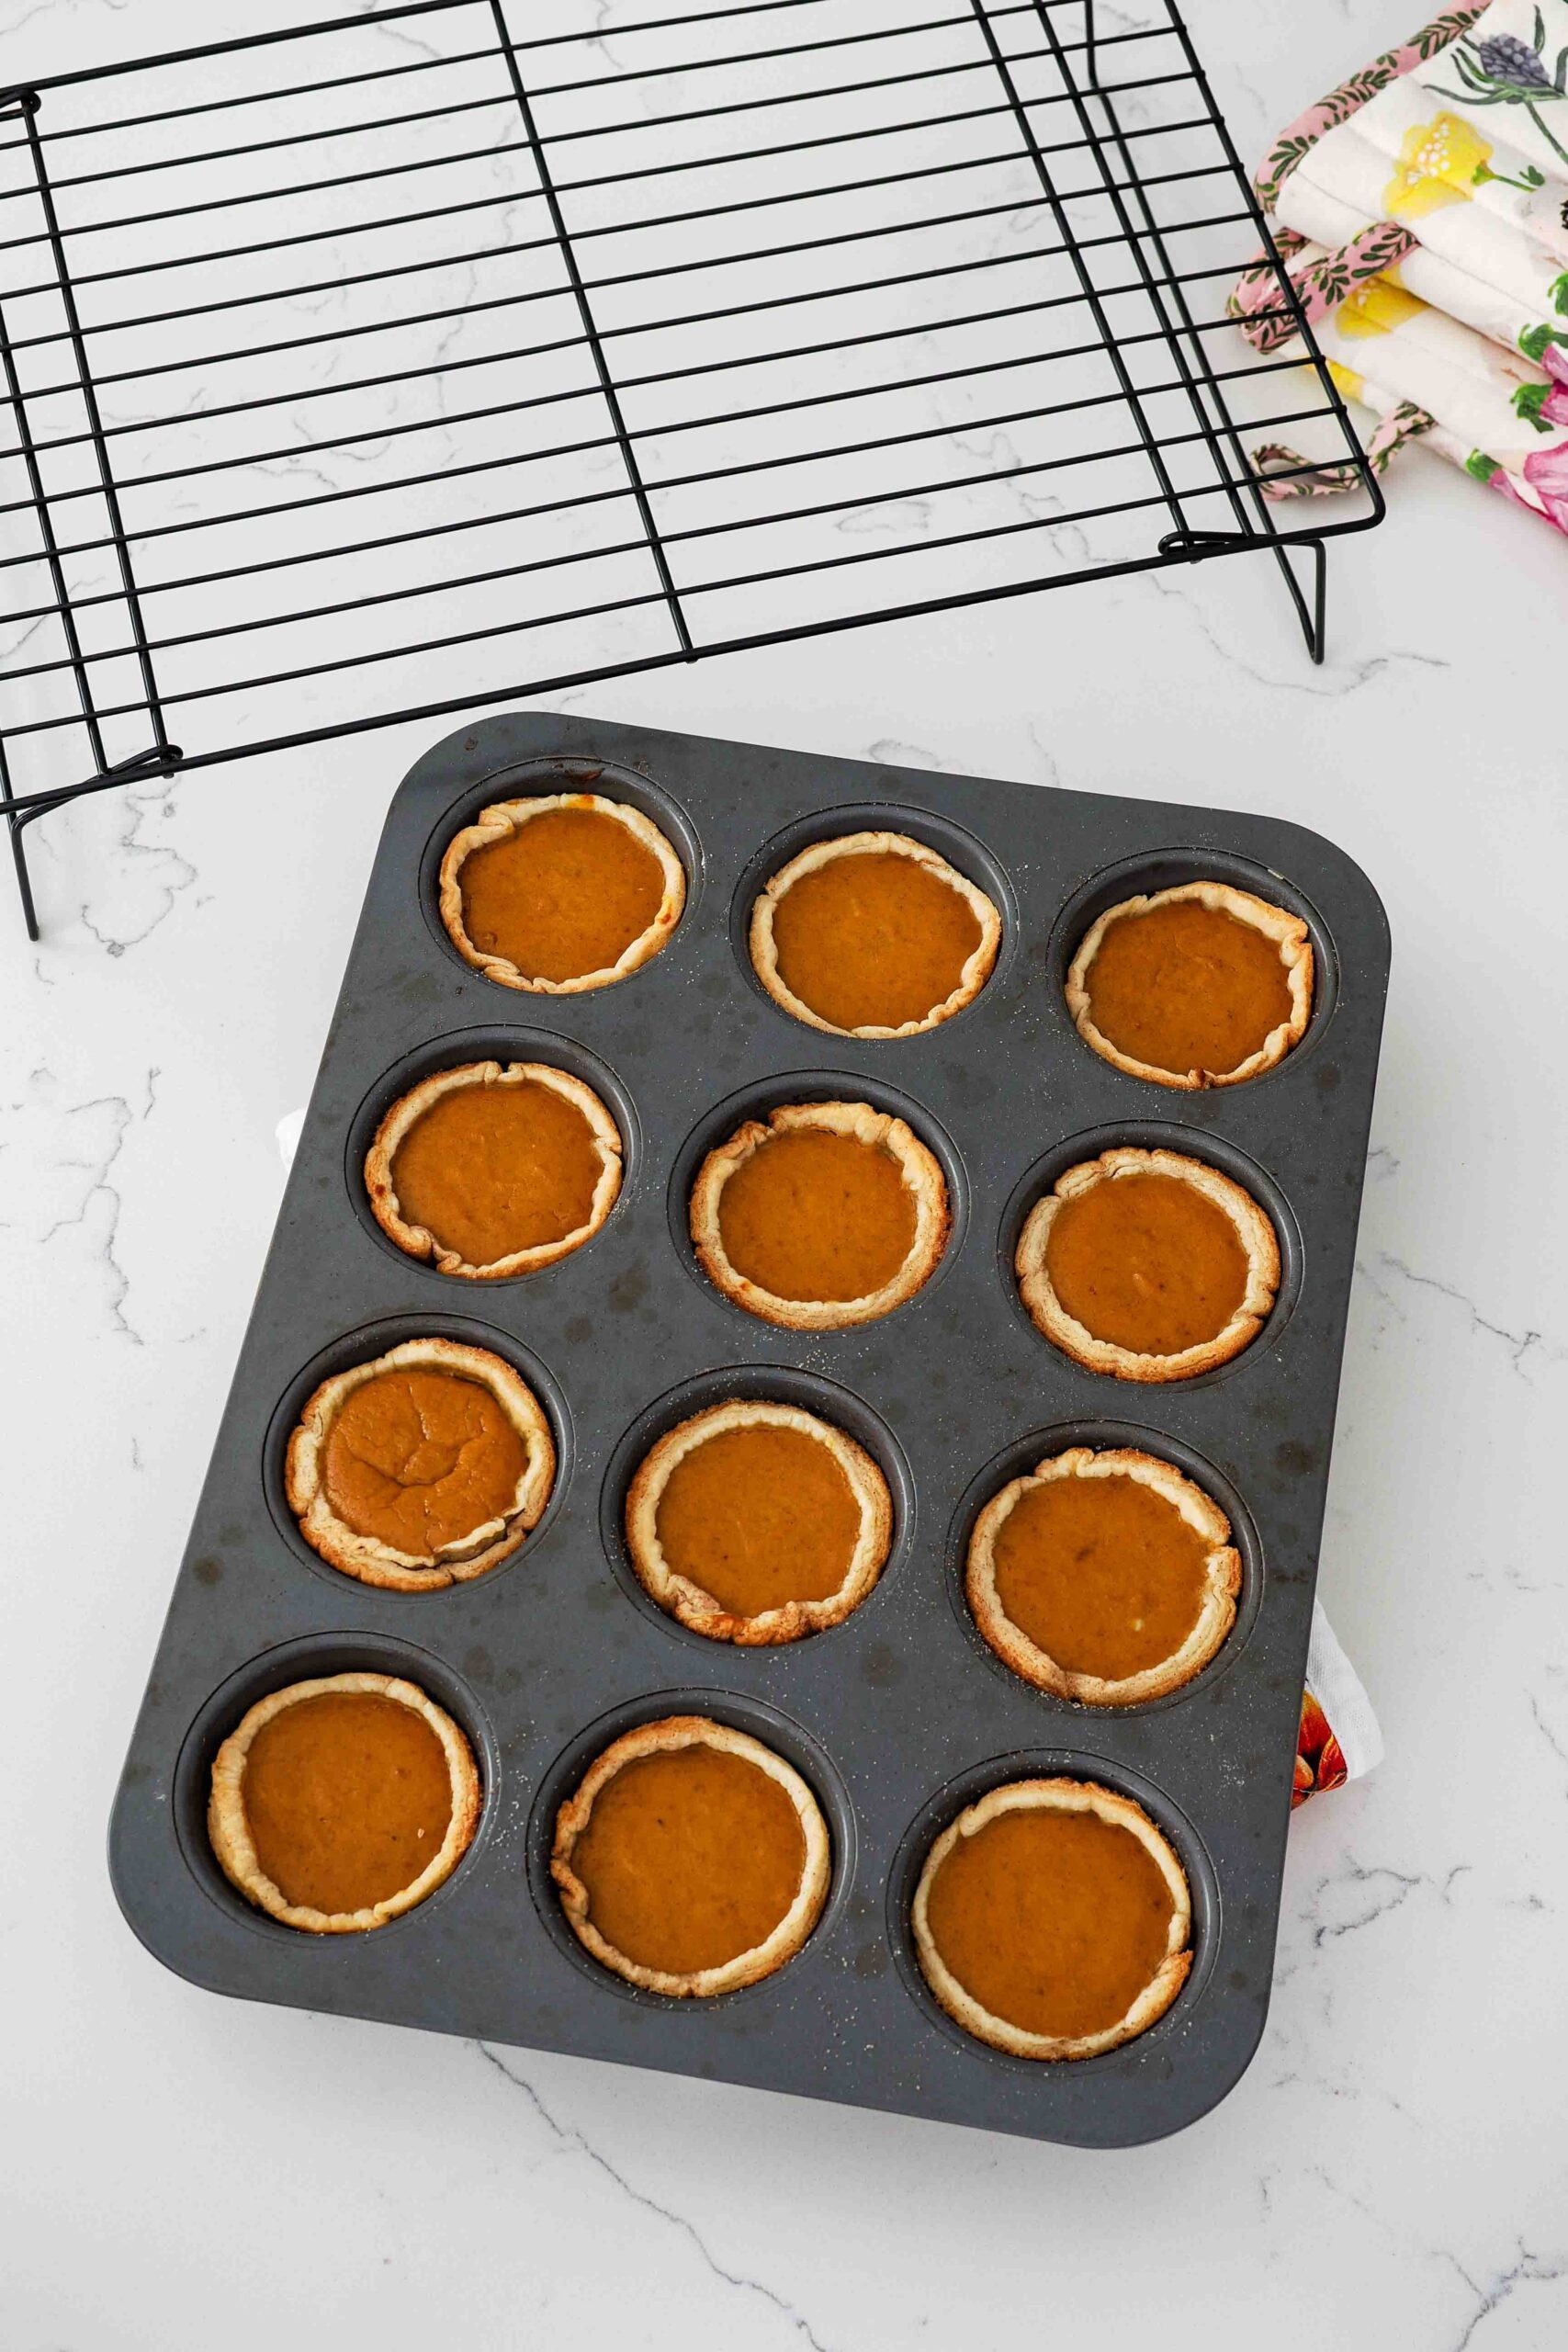
As stated before, I recommend using a dark-colored pan. Even with the thinner crust on these handheld pumpkin pies, it’s tricky balancing the time and temperature that both the crust and custard need to bake. In a dark pan, these mini pies will take on a golden color around 14-15 minutes. A lighter pan may take another couple minutes. (Read more about dark vs light pans here.)
Depending on your oven and your pan, the bake time for these mini pies can vary from 13 minutes all the way up to 20 minutes.
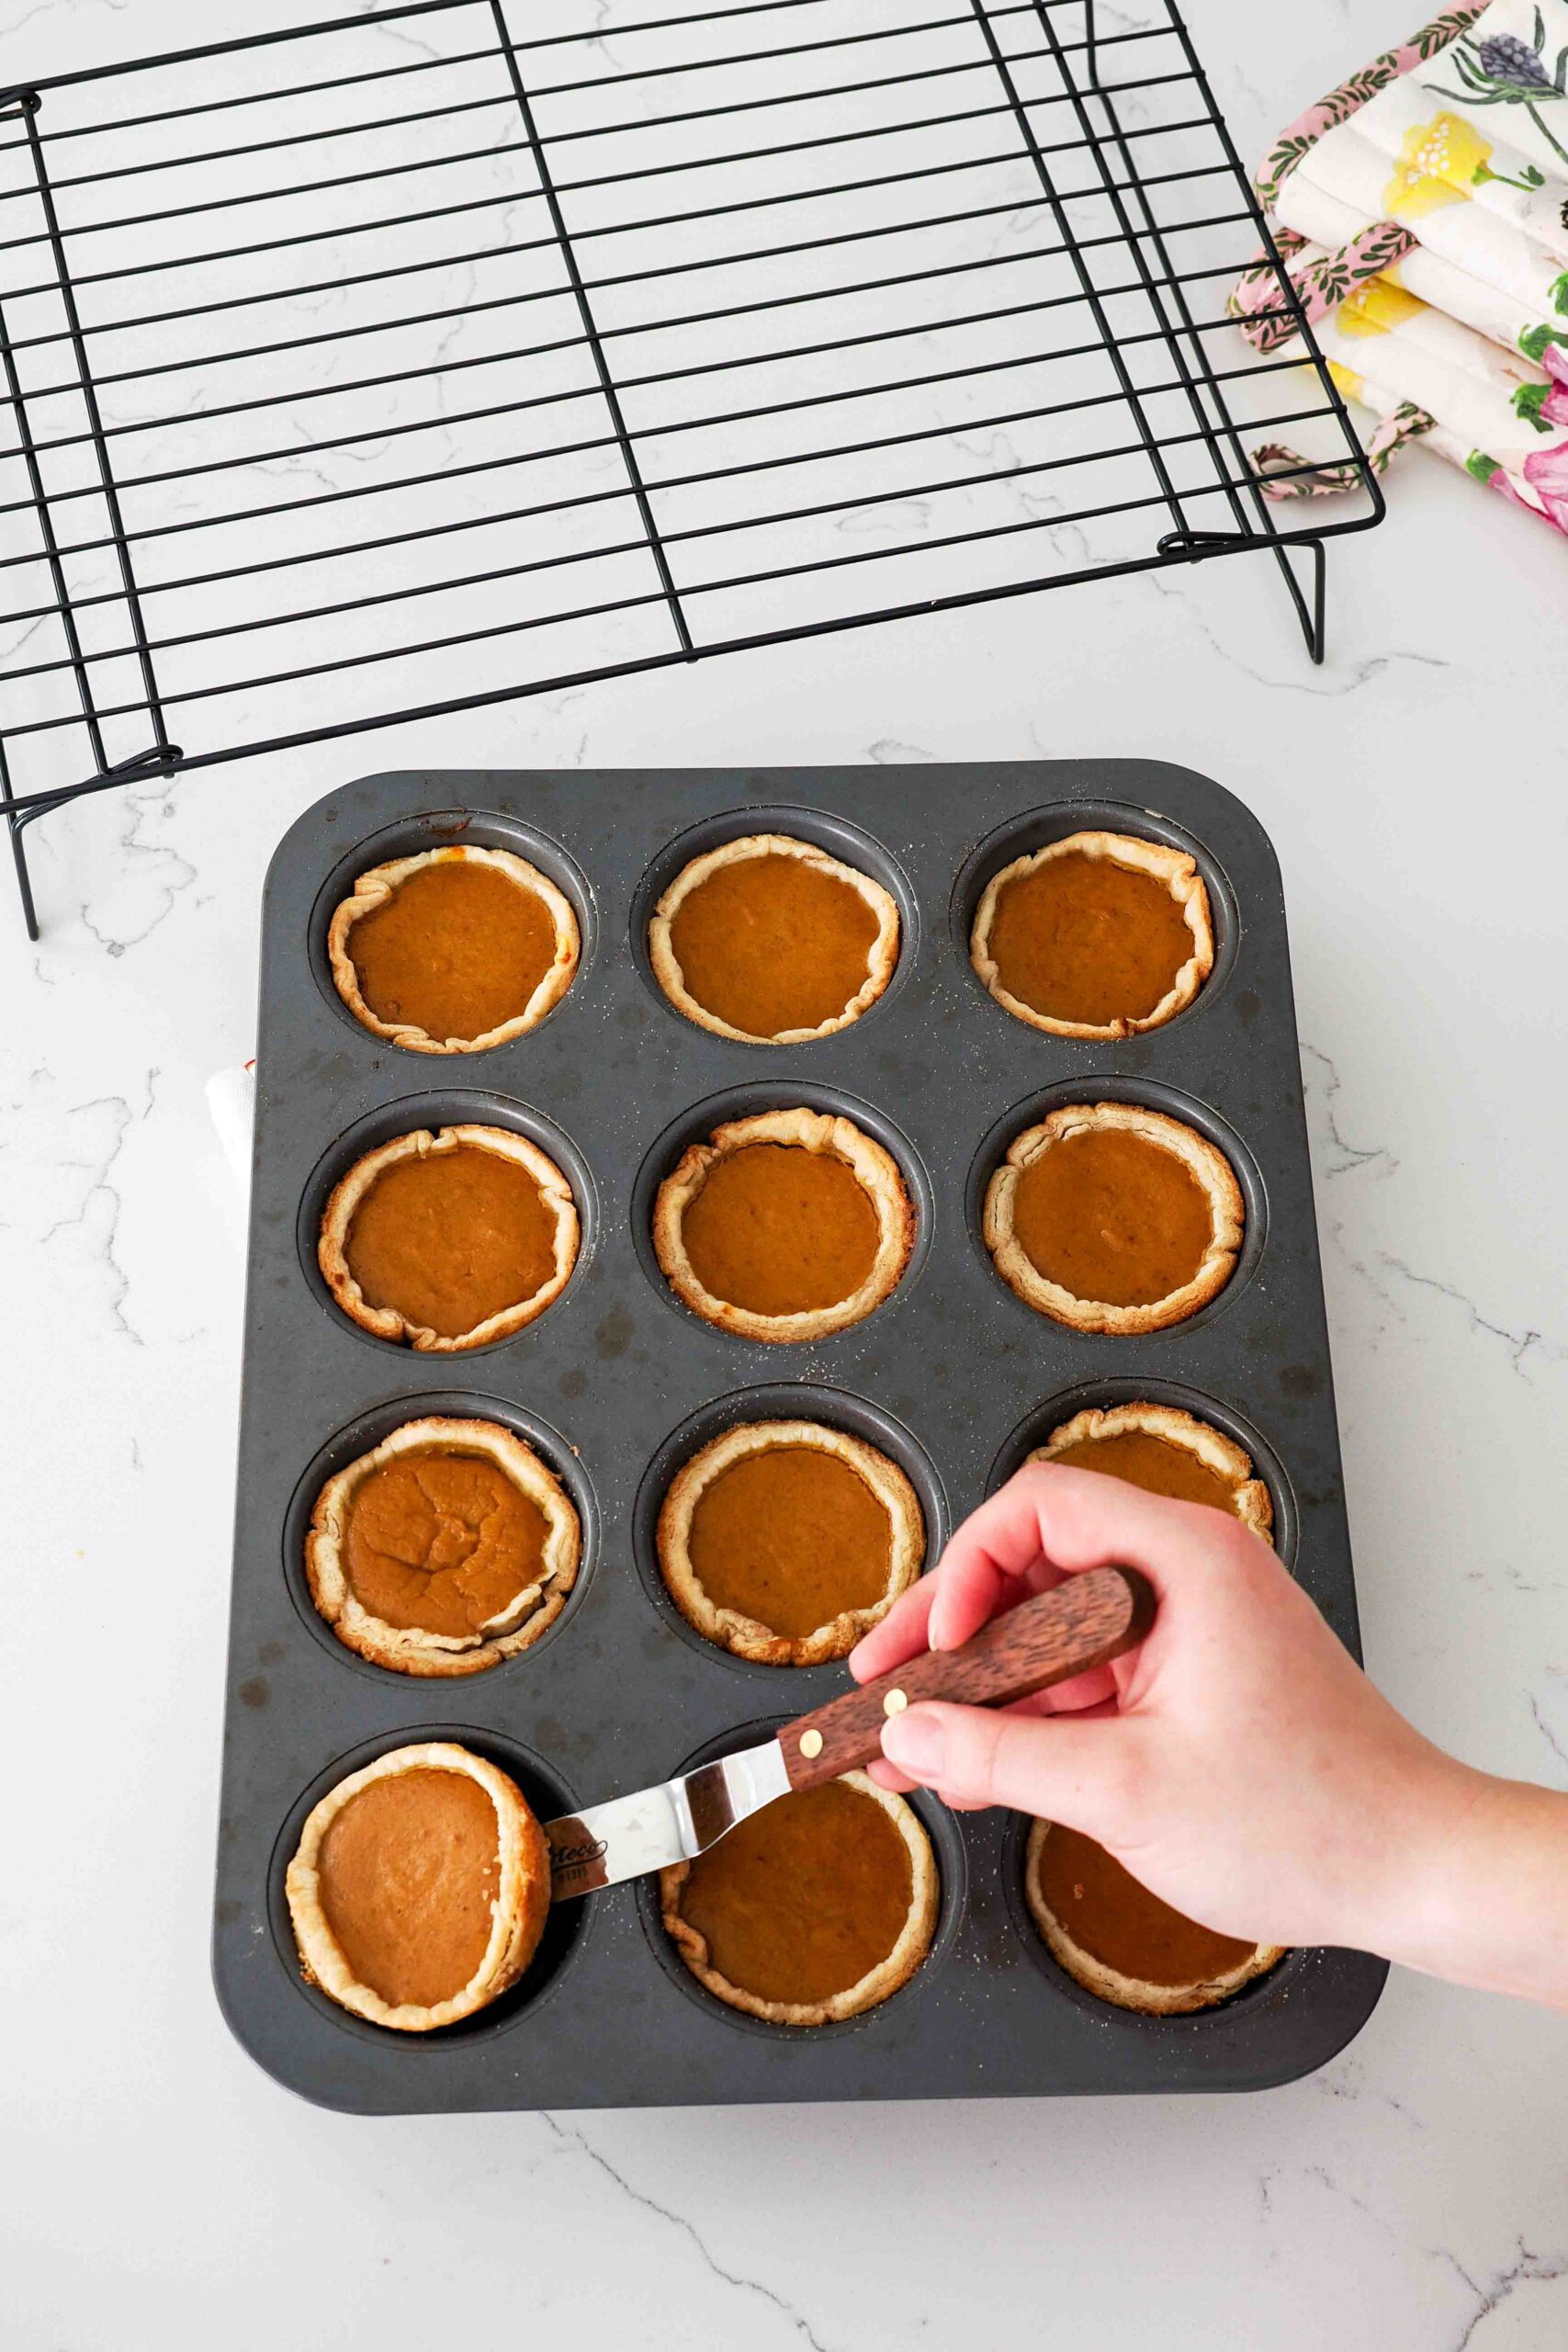
To remove the mini pumpkin pies from the muffin pan, allow the mini pies to cool for at least half an hour, then fit a fork or offset spatula in between the crust and the pan. The pies should pop out pretty easily once fully cooled; if they stick, you can try twisting the muffin pan like an ice cube tray to help separate the crust from the pan.
How to Decorate Mini Pumpkin Pies
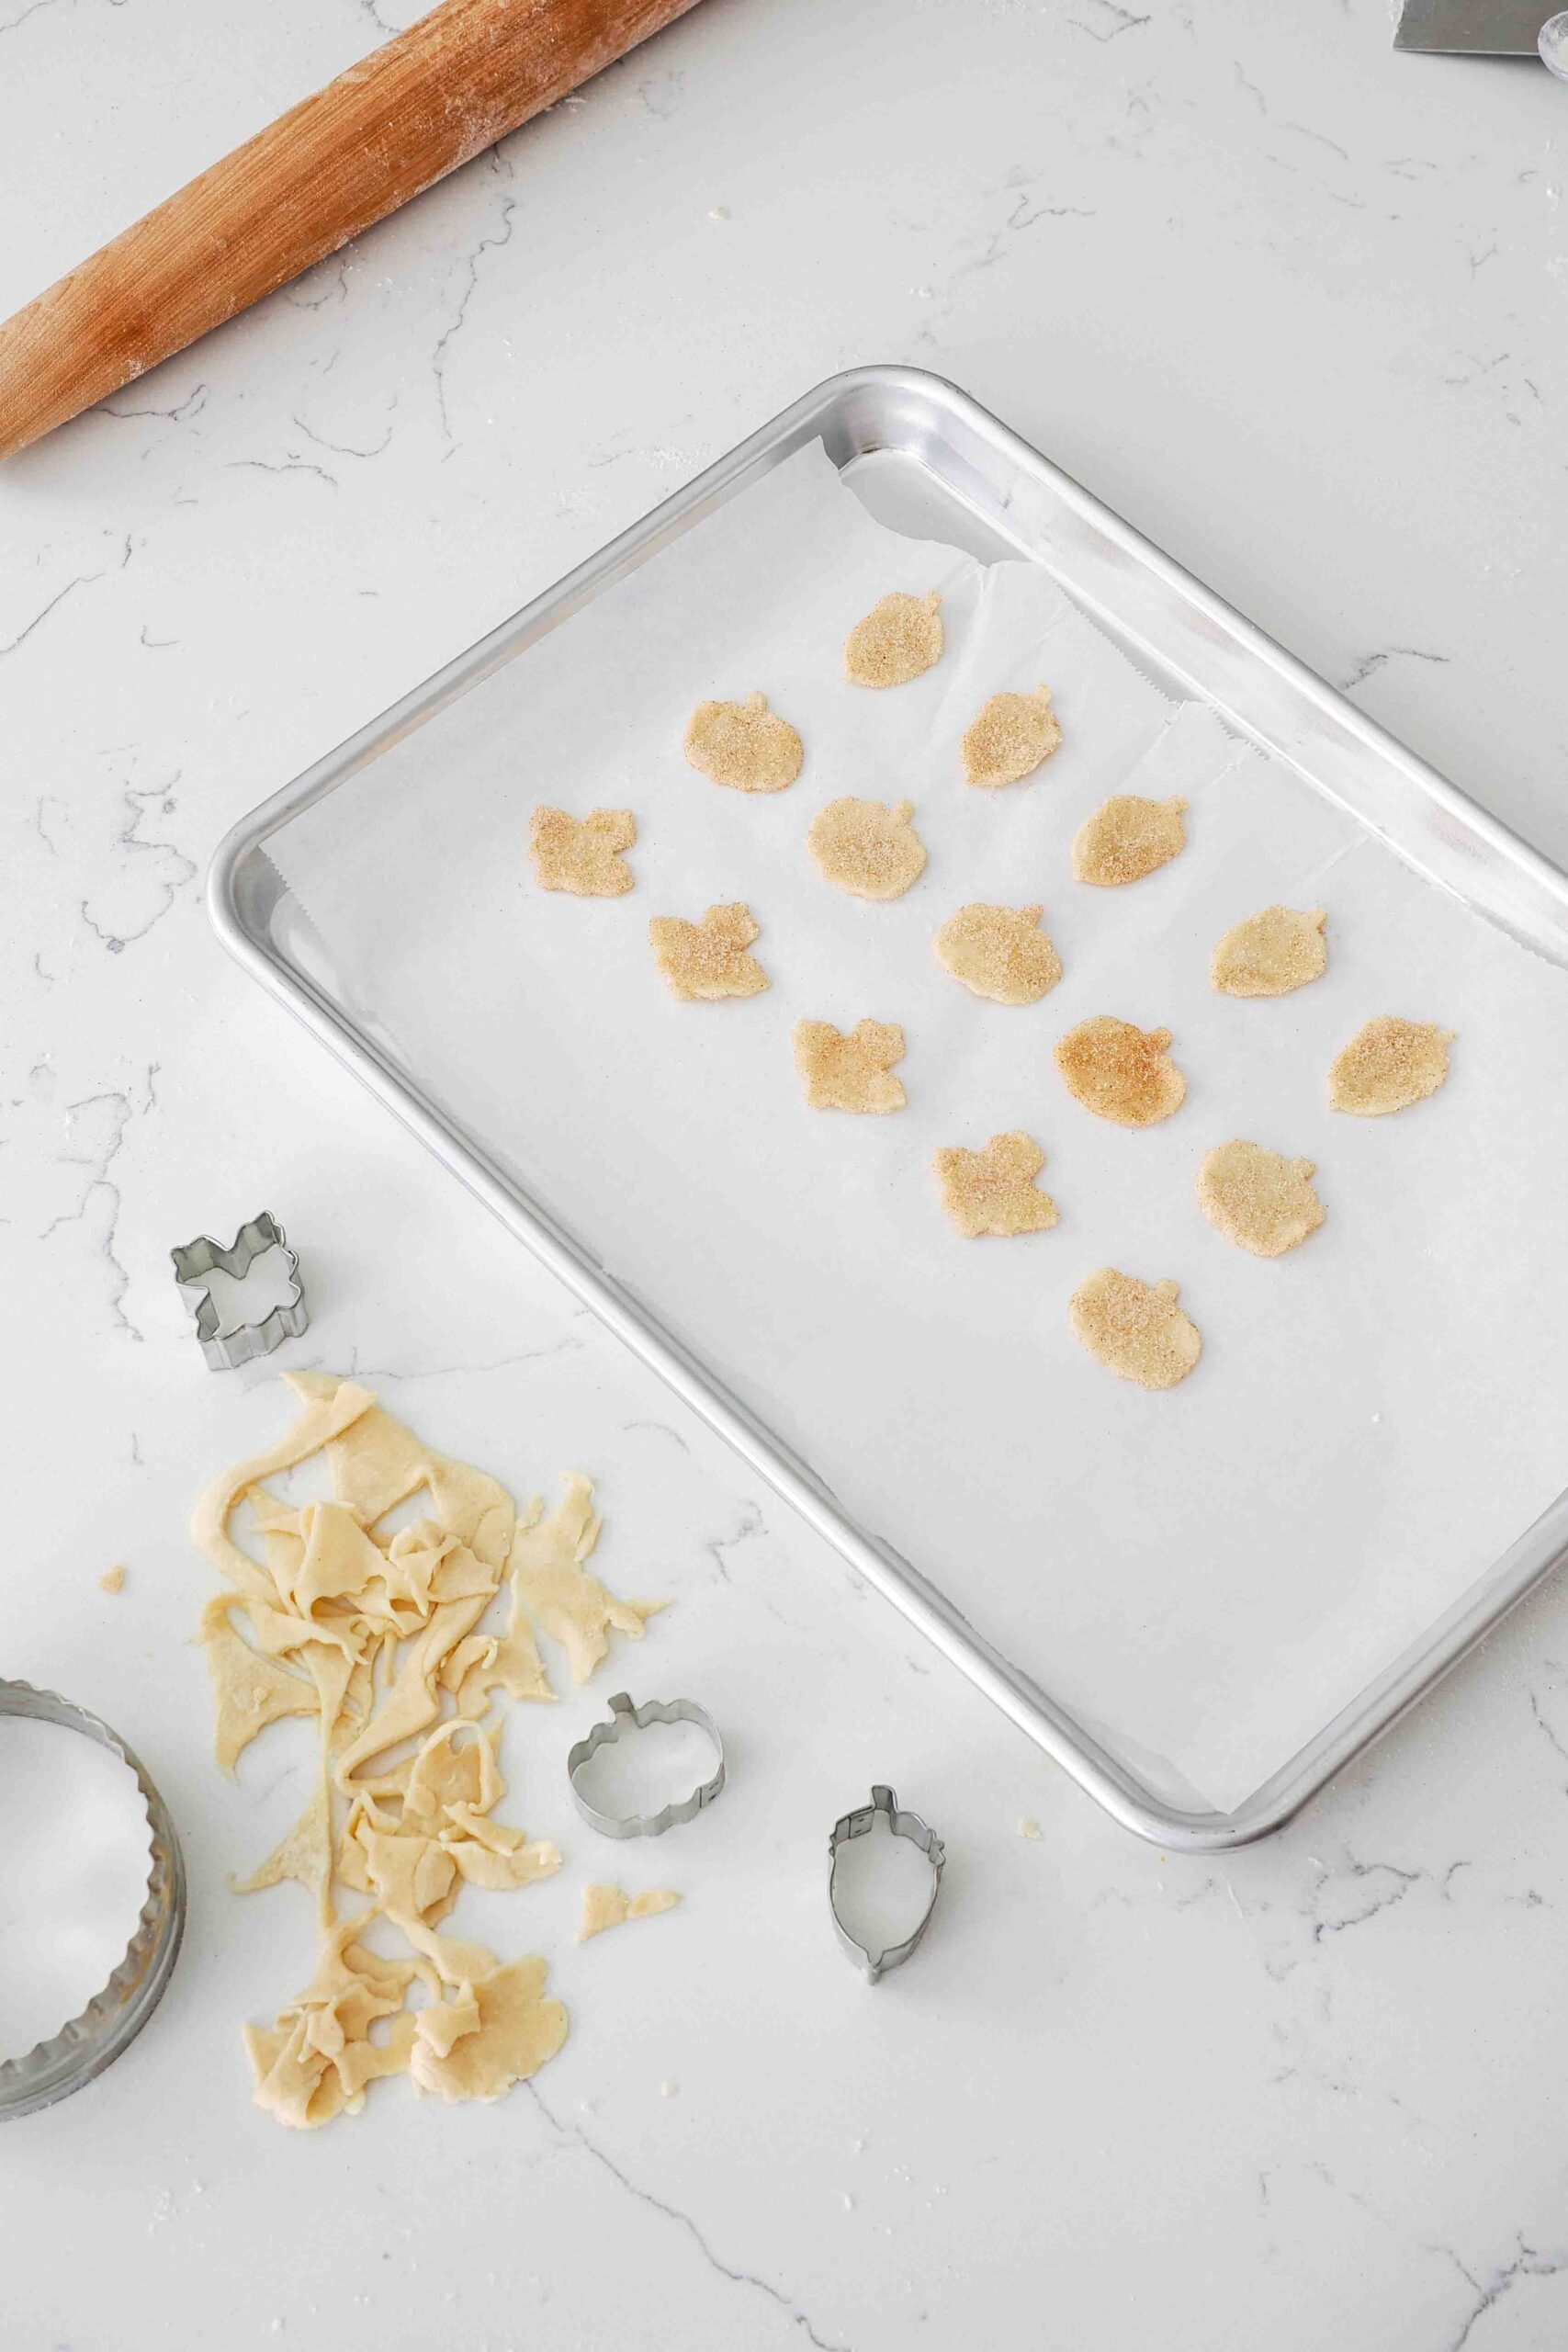
I cut out pumpkins, acorns, and leaves with mini 1″ (25 mm) fall cookie cutters in the leftover pie dough, then coated both sides in the leftover cinnamon sugar. I placed them on a parchment-lined baking sheet and baked them for 7-10 minutes while the mini pumpkin pies were chilling in the fridge.
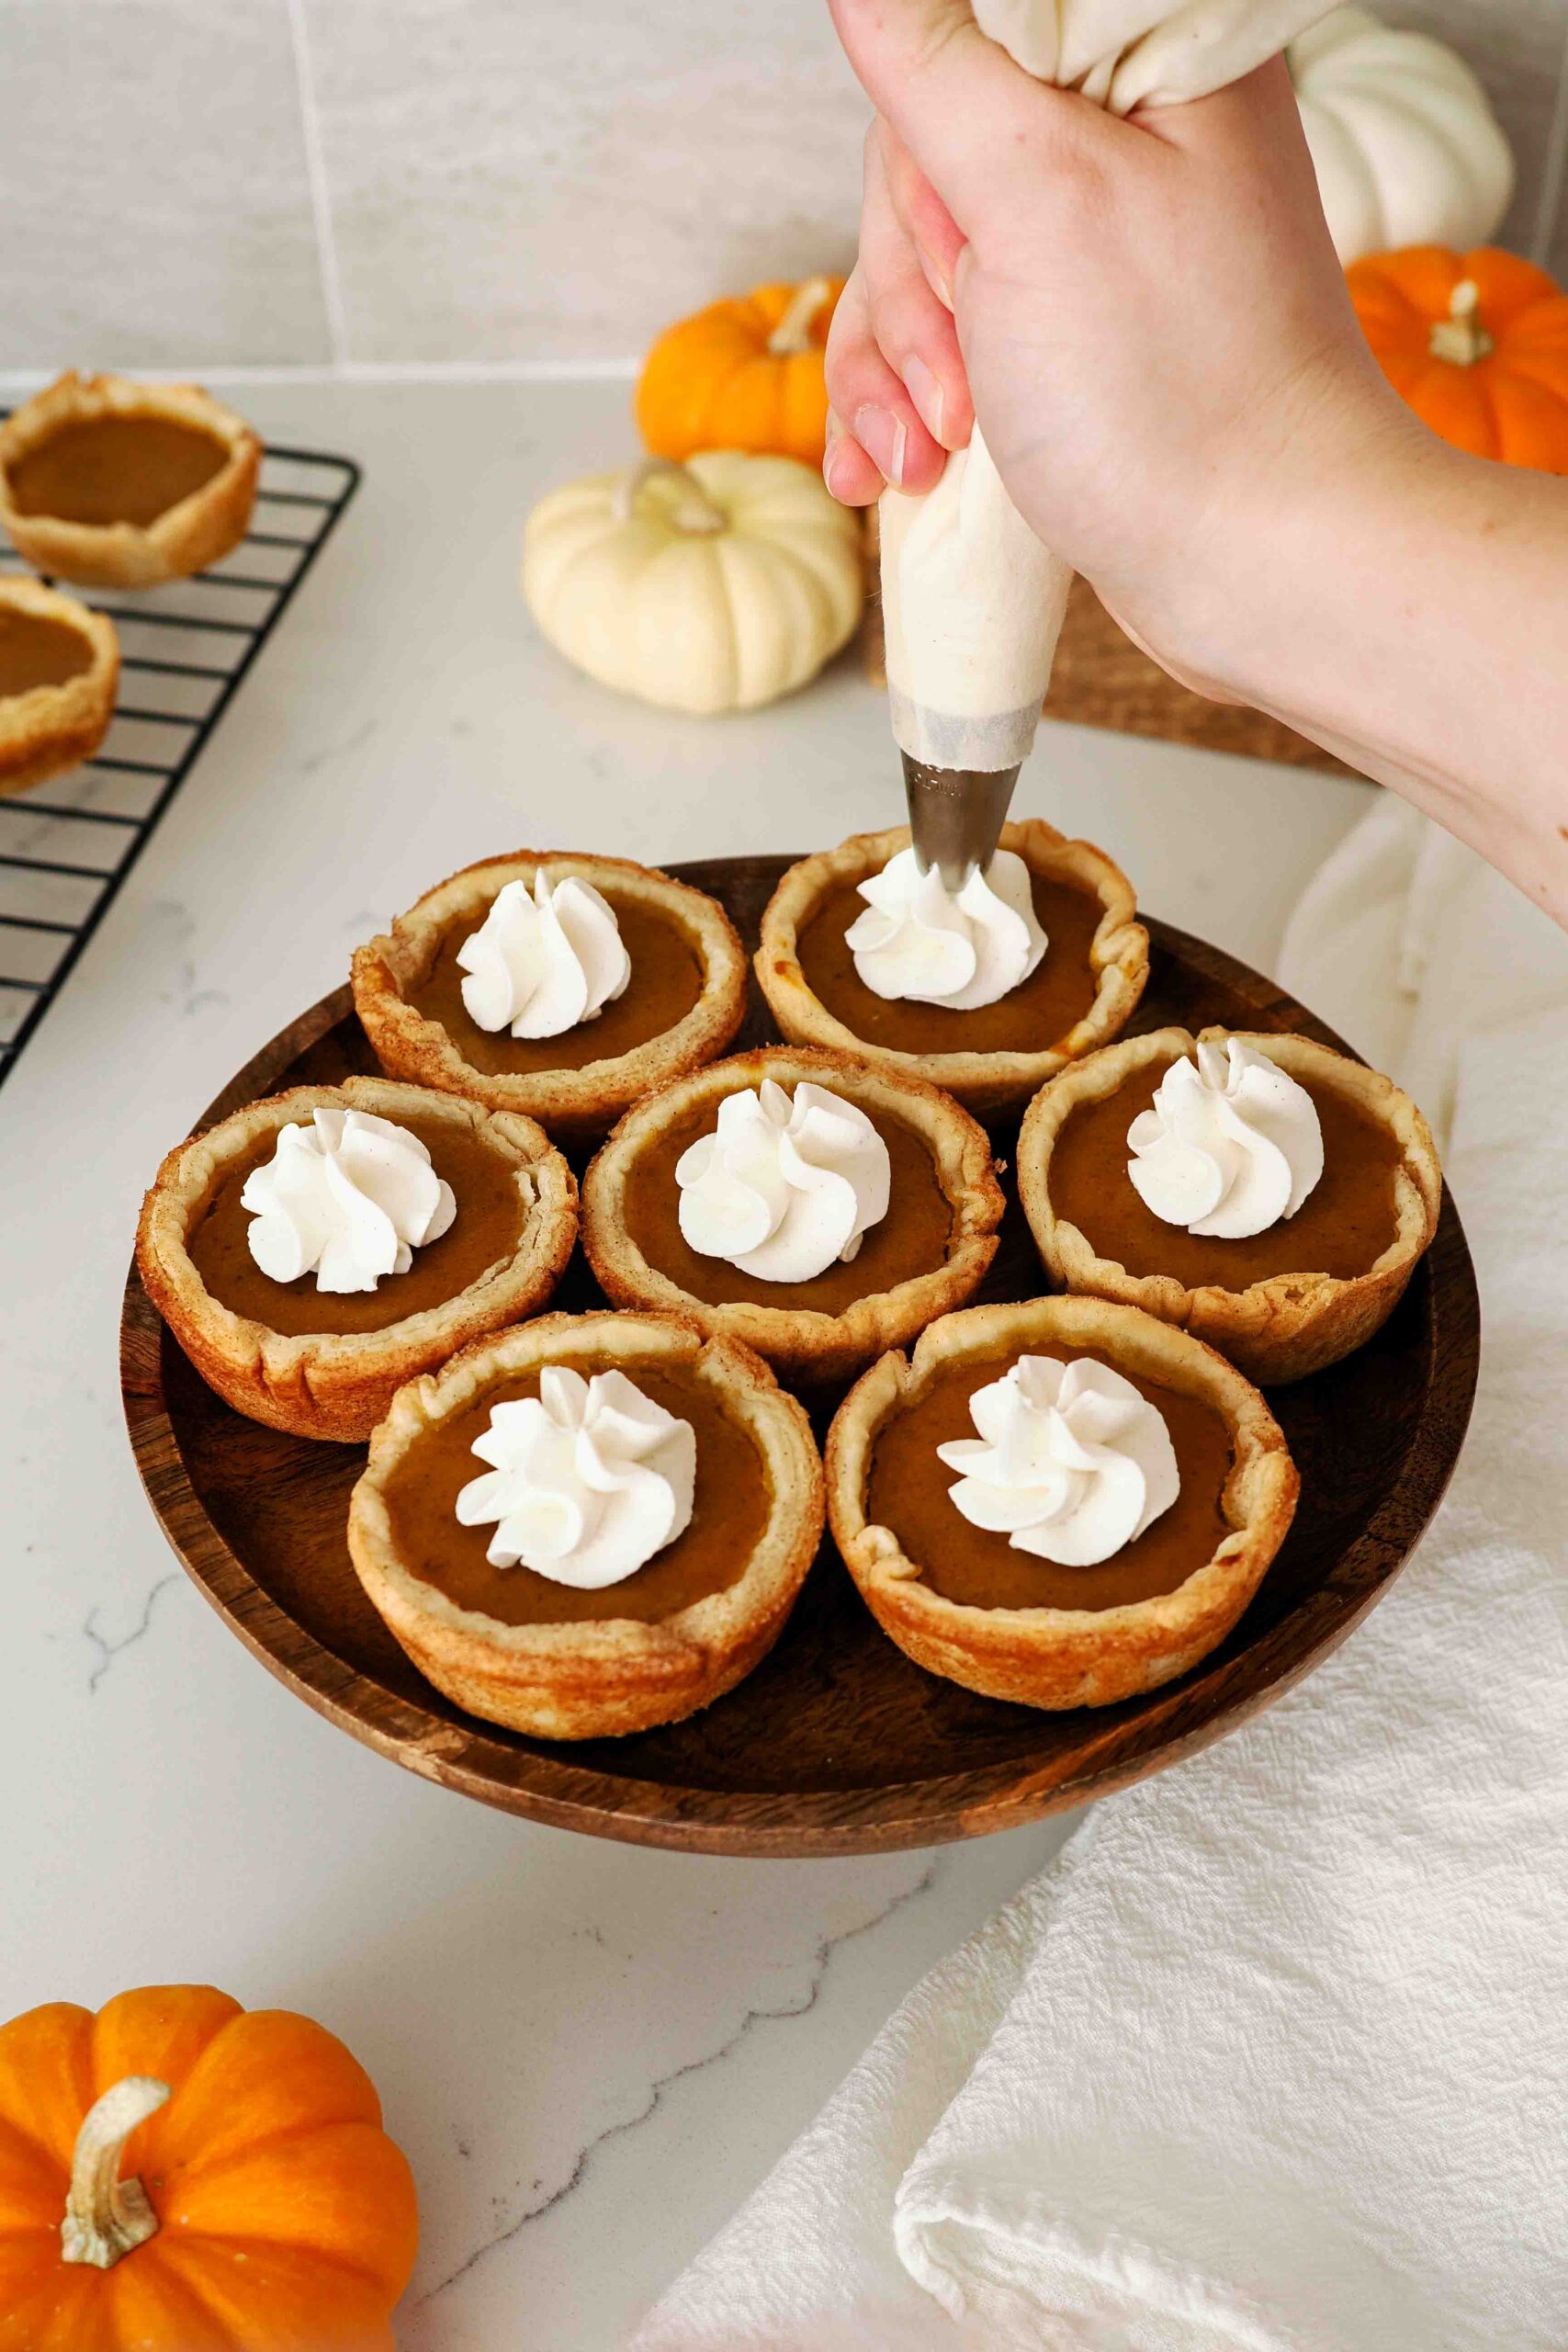
To decorate each individual pumpkin pie, I piped a small swirl of lightly sweetened vanilla whipped cream (also called Chantilly cream or créme Chantilly) in the center and then added a pie crust piece on the side.
FAQs about Individual Pumpkin Pies
I highly recommend it. The crust will shrink less, and the pumpkin pie filling will have a smaller chance of cracking when baking. If you are pressed for time and can’t spare the 20 minutes (or don’t have room in your fridge or freezer), you can bake these right away, but they may not look as nice.
They won’t last for long out on the kitchen table, I can guarantee that! Food safety-wise, these are best eaten within four days of baking when stored in an airtight container in the fridge. The pie crust absorbs the liquid from the filling and gets a little soggy past that.
Yep, just use a gluten-free pie crust!
Other Recipes You May Enjoy
This was the last recipe for Pumpkin Month 2023, where I posted a pumpkin recipe every week! Here was the lineup in case you missed one: one-bowl chocolate pumpkin muffins, pumpkin pie ice cream, and pumpkin spice caramels.
You may also like my other mini pie recipes, like my mini caramel apple pies and mini cherry pies.
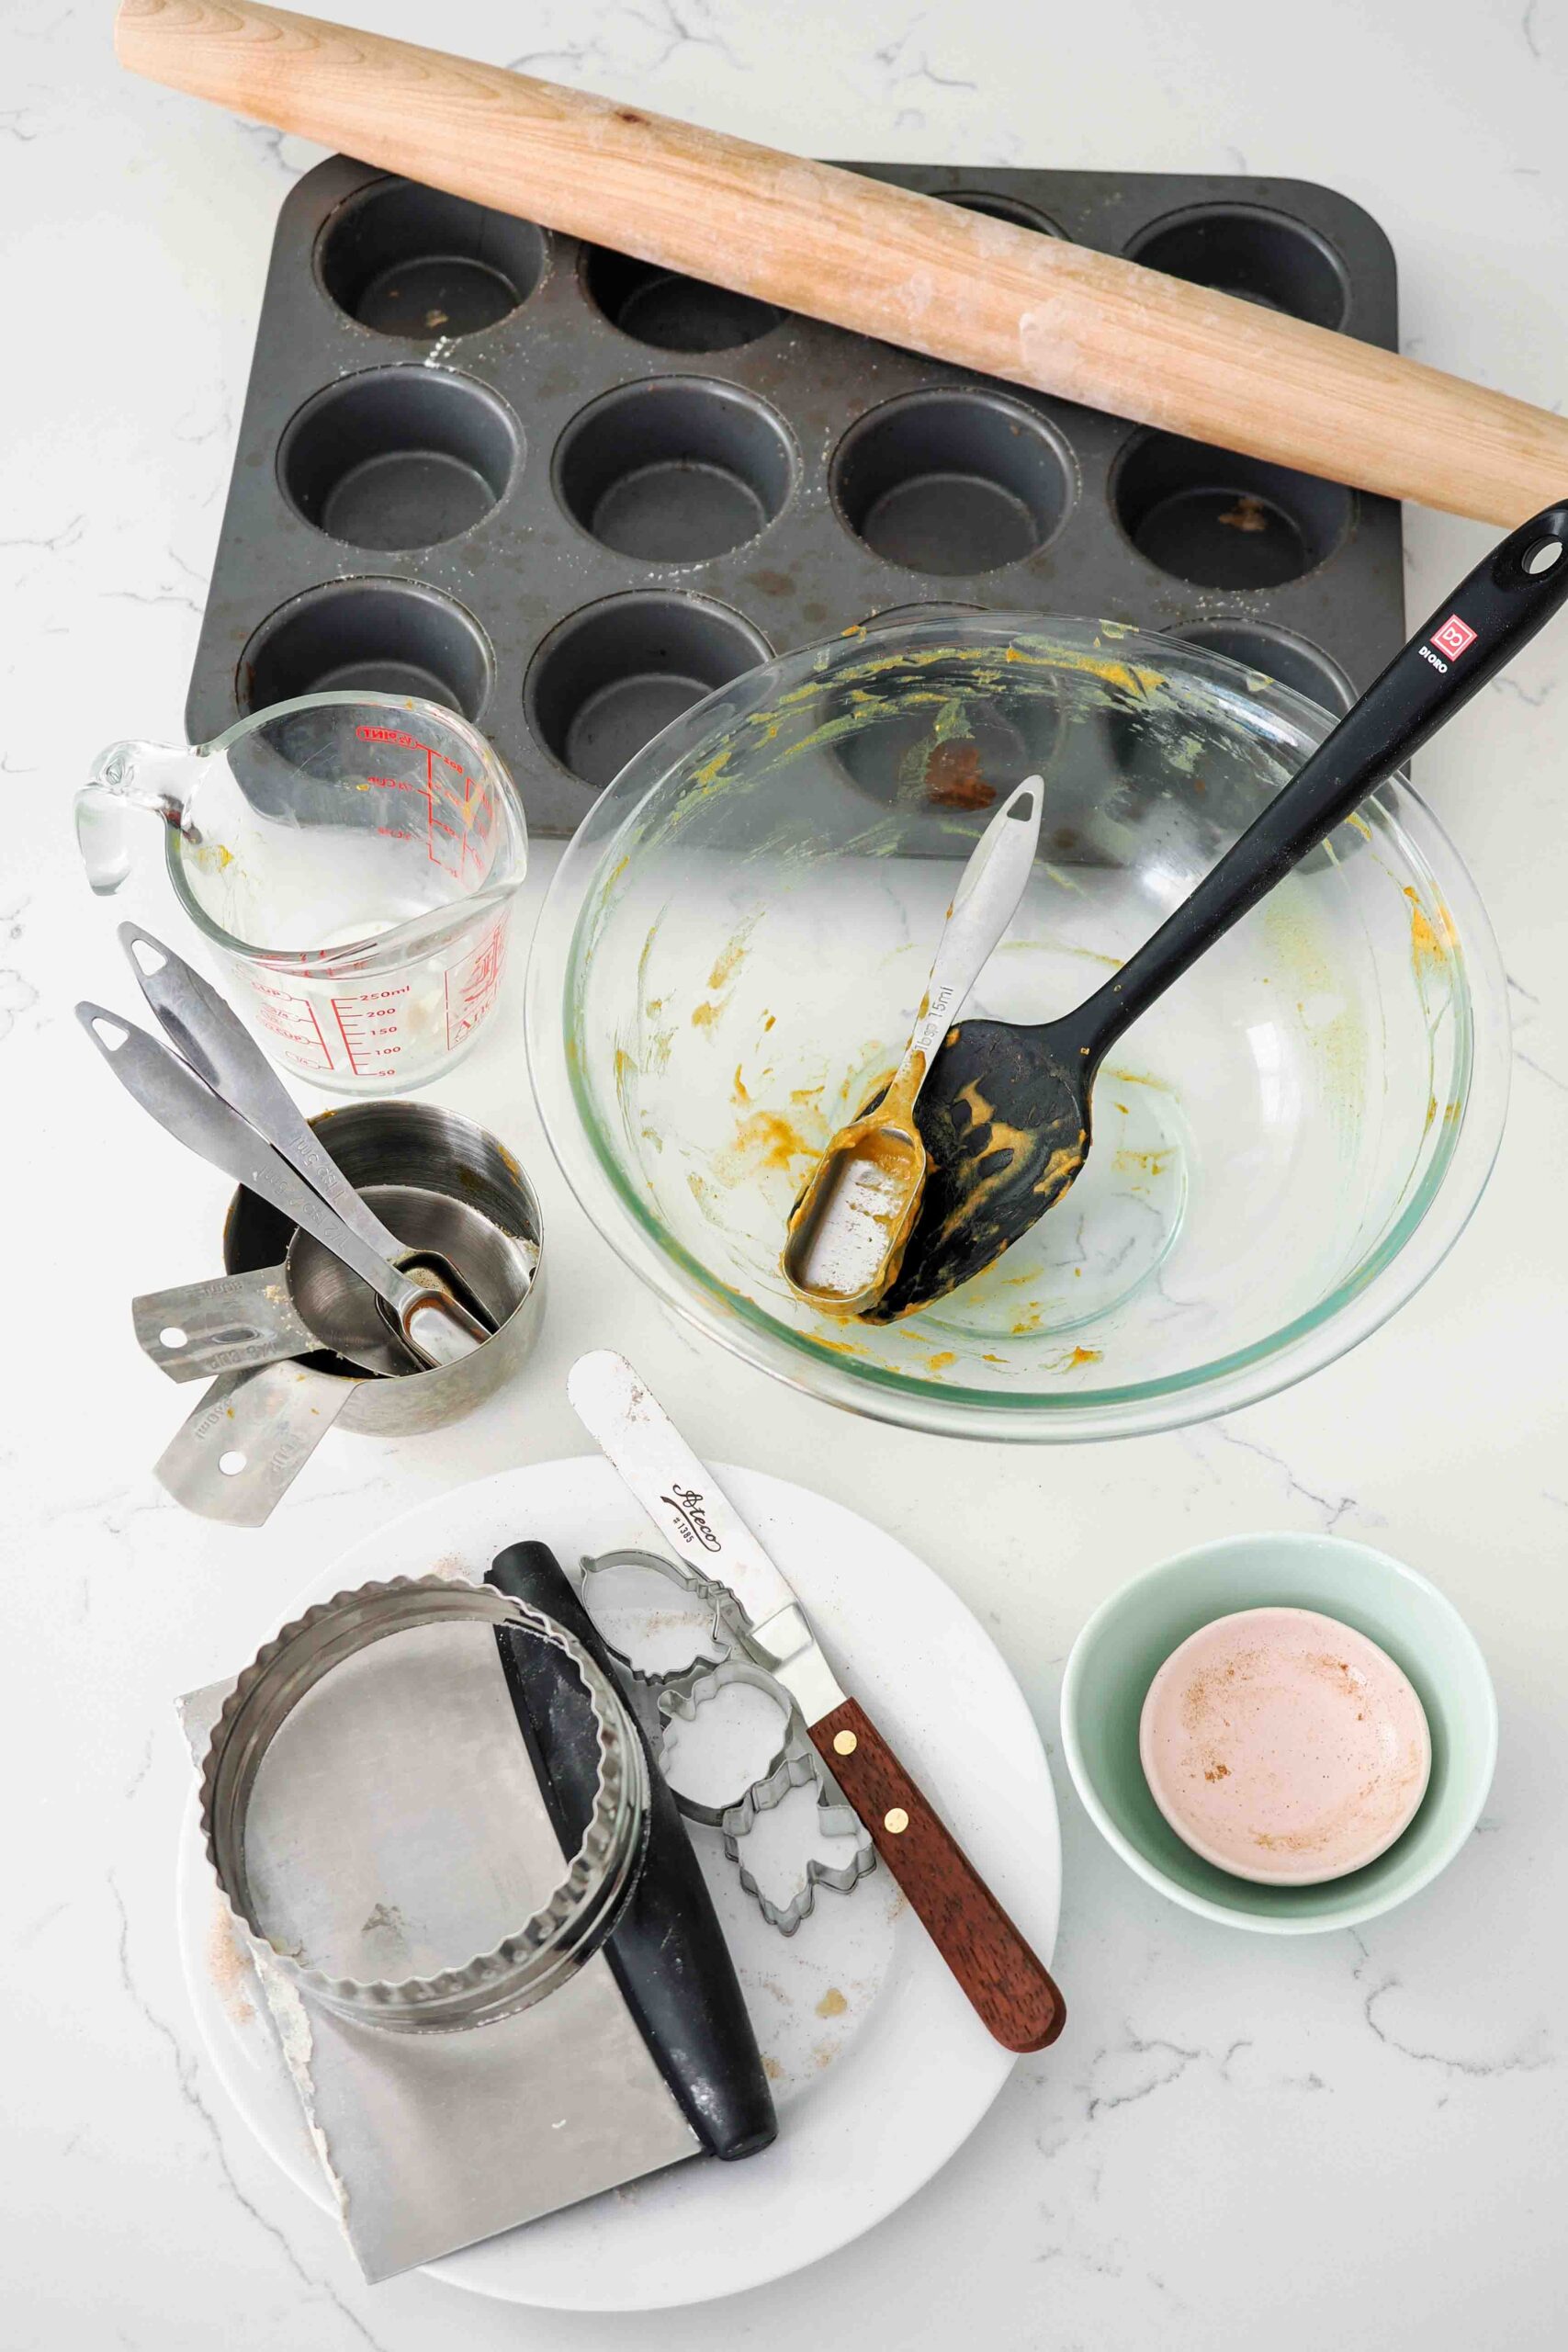
Dish Cleanup: Gonna Take a While
I rate my recipe cleanups on a scale of 1 to 5. 1 is only a handful of dishes, and 5 is everything including the kitchen sink.
My mini pumpkin pies recipe has a cleanup rating of a 4. There’s a large bowl, the muffin pan, a rolling pin, and a few measuring cups and spoons, along with mini cookie cutters if you choose to add the decor on top. Pretty standard for a mini pie recipe, even though there’s only one filling this time (unlike my mini blueberry crumble pies).
Mini Pumpkin Pies Recipe
Mini Pumpkin Pies
The cuter, individually-sized pumpkin pie we all want for Thanksgiving, these mini pumpkin pies are baked in a muffin pan with a cinnamon sugar-dusted pie crust for an extra boost of pumpkin spice.
Ingredients
For the Mini Pie Crusts
- 1 pie crust (store-bought or homemade)
- 1 Tablespoon granulated sugar (15 g)
- ½ teaspoon ground cinnamon (1 g)
- Flour, for dusting
For the Pumpkin Pie Filling
- 1 cup pumpkin puree (250 g)
- ⅓ cup brown sugar, firmly packed (75 g)
- ⅓ cup heavy cream (80 ml)
- 1 large egg
- 1½ teaspoons pumpkin pie spice* (see note for substitution) (3 g)
- 1 teaspoon vanilla extract or vanilla bean paste (5 ml)
- ¼ teaspoon salt (2 g)
Instructions
Making the Pumpkin Pie Filling
- Preheat the oven to 400°F/200°C. Use a dark-colored muffin pan for the best, crispiest results. Light-colored or aluminum pans work, but note that there may be a longer bake time for the pie crust to turn golden brown.
- In a medium bowl, stir together pumpkin puree, brown sugar, heavy cream, egg, vanilla extract, spices, and salt with a whisk or spatula until no streaks of egg remain. Set aside.
Preparing the Mini Pumpkin Pie Crusts
- Stir together granulated sugar and cinnamon on a small plate. Set aside.
- Roll out a chilled pie crust on a lightly floured surface. Rotate the dough one quarter turn after every roll to ensure it doesn't stick to your work surface. Roll only in one direction, from the center of the dough out, to help prevent sticking.
- This recipe works best with a slightly thinner pie crust rolled to about ⅒" (3 mm) thick. Any thicker of a crust has a hard time baking fully and crisping properly with such a wet filling.
- Roll out the pie crust to ⅒" (3 mm) thick (usually about 12" to 13" [30 to 32 cm] in diameter). Then, use a 4" (10 cm) circle cutter to cut 8 or 9 circles out of the dough. Peel one round up at a time, and immediately dip each one into the cinnamon sugar, lightly pressing it if needed to ensure the bottom gets fully coated.
- Place sugared pie crust rounds cinnamon sugar-side down in a hole in your muffin pan. To prevent tears, press down evenly in the center of the dough round with the fingertips of one hand while guiding the edges of the dough circle down the side of the cutout with your other. It might take a few tries to get the hang of it, but if a circle rips, just patch it up with excess dough—no one will ever know!
- For the last 3-4 circles, gather the leftover dough into a disc. If the dough is sticky and a little warm, wrap in plastic wrap or bee's wrap and chill for 10 minutes before rerolling. If the dough is still relatively cool, quickly reroll the dough. Dust lightly with flour as needed, and cut out the remaining 3 or 4 circles to fill the rest of the muffin pan holes.
- Optional: I like to use mini fall-themed cookie cutters to use up the last bits of dough and cinnamon sugar for decoration. Cut out, dip both sides in the cinnamon sugar, place on a parchment-lined baking sheet, and bake for 7-10 minutes until lightly golden brown.
Filling the Mini Pumpkin Pies
- Divide the pumpkin pie filling between the mini pie crusts—about two Tablespoons each. The pies will be about two-thirds full.
- Tap the bottom of the pan with the palm of your hand a few times to release any air bubbles. This will also smooth the tops!
- For best results, place the muffin pan in the fridge to chill, uncovered, for 20 minutes, until the filling jiggles only slightly.** This will lessen the chance of the custard cracking and help the crusts brown more evenly.
Baking the Pies
- Bake the pies for 14-15 minutes in the lower center rack of your oven until the pumpkin filling is domed and the crust edges are golden brown. If using a dark-colored pan, your mini pumpkin pies will be fully baked around 14-15 minutes. If using a light-colored pan, like aluminum, they may take closer to 17-18 minutes to turn golden brown on the edges.
- Allow the pies to cool in the pan for 30-45 minutes, then carefully remove from the pan with a fork or offset spatula. Serve immediately, or place in an airtight container in the fridge. If desired, top with a dollop of vanilla whipped cream and extra pie crust pieces, and enjoy!
Notes
*If you don't have a pumpkin pie spice mix, use ¾ teaspoon ground cinnamon, ½ teaspoon ground nutmeg, ⅛ teaspoon ground allspice, and ⅛ teaspoon ground ginger.
**If you're pressed for time or fridge/freezer space, you don't have to chill the pies before baking them, though it will help lessen the chance of the custard cracking and will help prevent the crust from sinking during baking.
Best served day of, but will also keep for up to four days when stored in an airtight container in the fridge. Freeze in an airtight container for up to three months, then thaw overnight in the fridge. Reheat by baking at 350°F/175°C for about 8-10 minutes until warm.
Recommended Products
As an Amazon Associate and member of other affiliate programs, I earn from qualifying purchases.
-
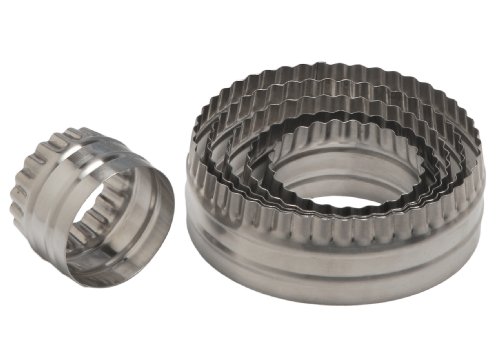
 Ateco Double Sided Round Cutters, Fluted & Plain Edges, Stainless Steel, 6 Pc Set
 -
R&M International Mini Autumn Leaf Cookie Cutters, Apple, Pumpkin, Acorn, Oak, Ivy, Maple, 6-Piece Set
-
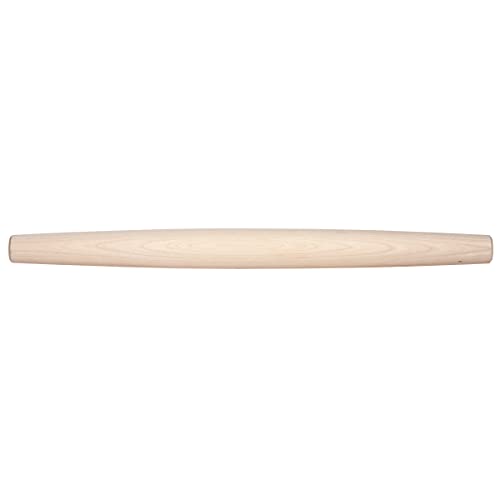
J.K. Adams Maple Wood Baking and Pastry French Rolling Pin for Pizza, Pie, Cookie Dough Roller, and More, 20.5" long x 1.75" diameter (COOP-FP1)
-
Ateco 4.5" Offset Stainless Steel Icing Spatula - Cake Frosting Filling Spreader


Nutrition Information:
Yield:
12Serving Size:
1 mini pieAmount Per Serving: Calories: 126Total Fat: 7gSaturated Fat: 3gTrans Fat: 0gUnsaturated Fat: 3gCholesterol: 23mgSodium: 114mgCarbohydrates: 15gFiber: 1gSugar: 7gProtein: 2g
The nutrition facts are estimated and may vary based on specific ingredients used.
Thanks for trying out my mini pumpkin pies recipe! Please consider rating this recipe so others find it, too.
I’d love to see how your recipe turns out: Take a photo and tag me on Instagram @floralapronblog to share with me, or use the hashtag #floralapronbakes.
I love the pie filling recipe, can I get the correct quantities for a full size pie?
Hi Mist,
I’m glad you like love the filling! I developed this recipe specifically for use in mini pies, so I haven’t tested it in a full-size version yet. I think doubling the filling ingredients would get you pretty close!
Hello!..
I Love This recipe.. And I cannot wait to try It out.. However I have Question.. What is the difference between a Muffin pan and a Cupcake pan?.. Can I use the Cupcake pan?.. Thank You!..
Hi Cyn,
Thanks so much—muffin pans and cupcake pans are the same thing, so you’re good to go with the cupcake pan! 🙂
Hi, I’m baking these tmrw but I have a question. Can i just use my own pumpkin pie filling recipe i use every year for a full pie and pour in each mini crust?
Hi Frankie,
You can use another filling recipe, but you will likely have extra pumpkin pie filling leftover—this recipe uses only 1 cup of pumpkin puree rather than the typical 15-oz can for whole pies. The bake time will probably be close, but it may be a little off for a different filling. Just keep an eye on them towards the end and add another few minutes if the center is really jiggly until it has just set 🙂
Do you have to pre bake the pie crust at all? Or are they really good to go as is? (After you chill them)
Hi Maisy,
No blind bake needed for these mini pumpkin pies! Full-size pumpkin pies have a hard time getting done in the center, but the smaller pies bake up beautifully with the higher temperature, especially in dark pans.
Lighter colored pans may require a few extra minutes to fully bake, but they will get done without the blind bake 🙂