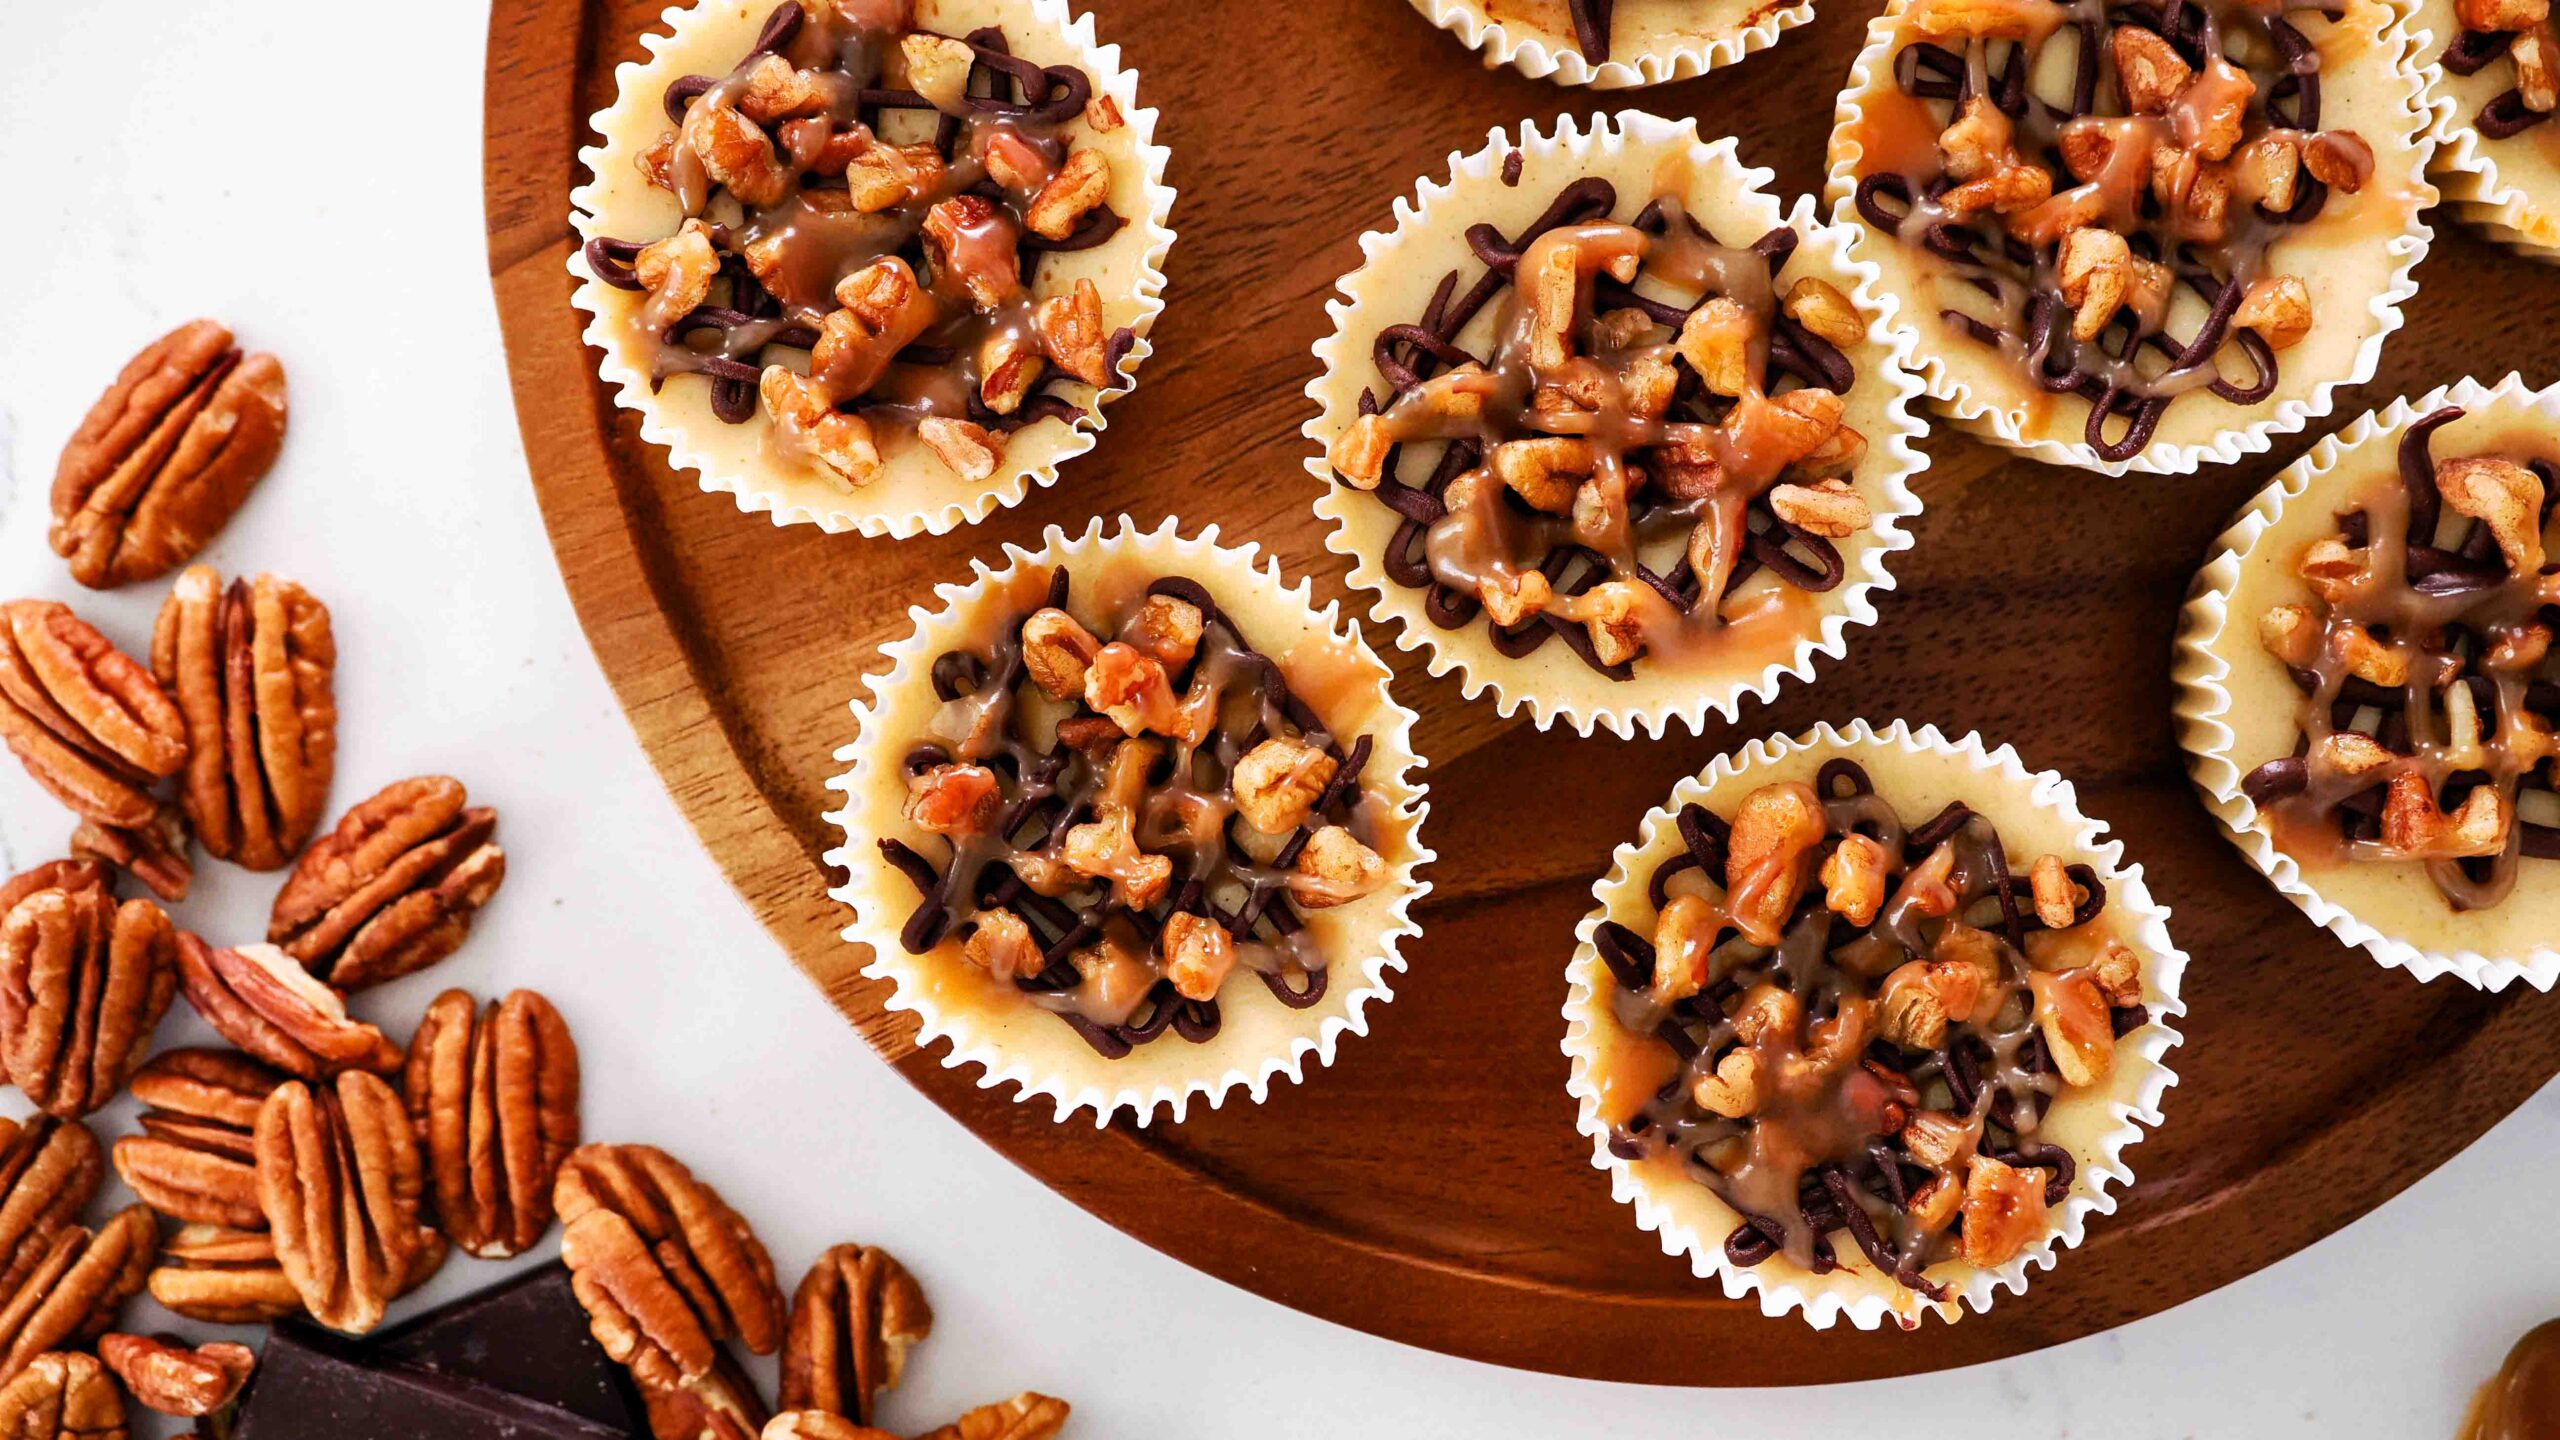
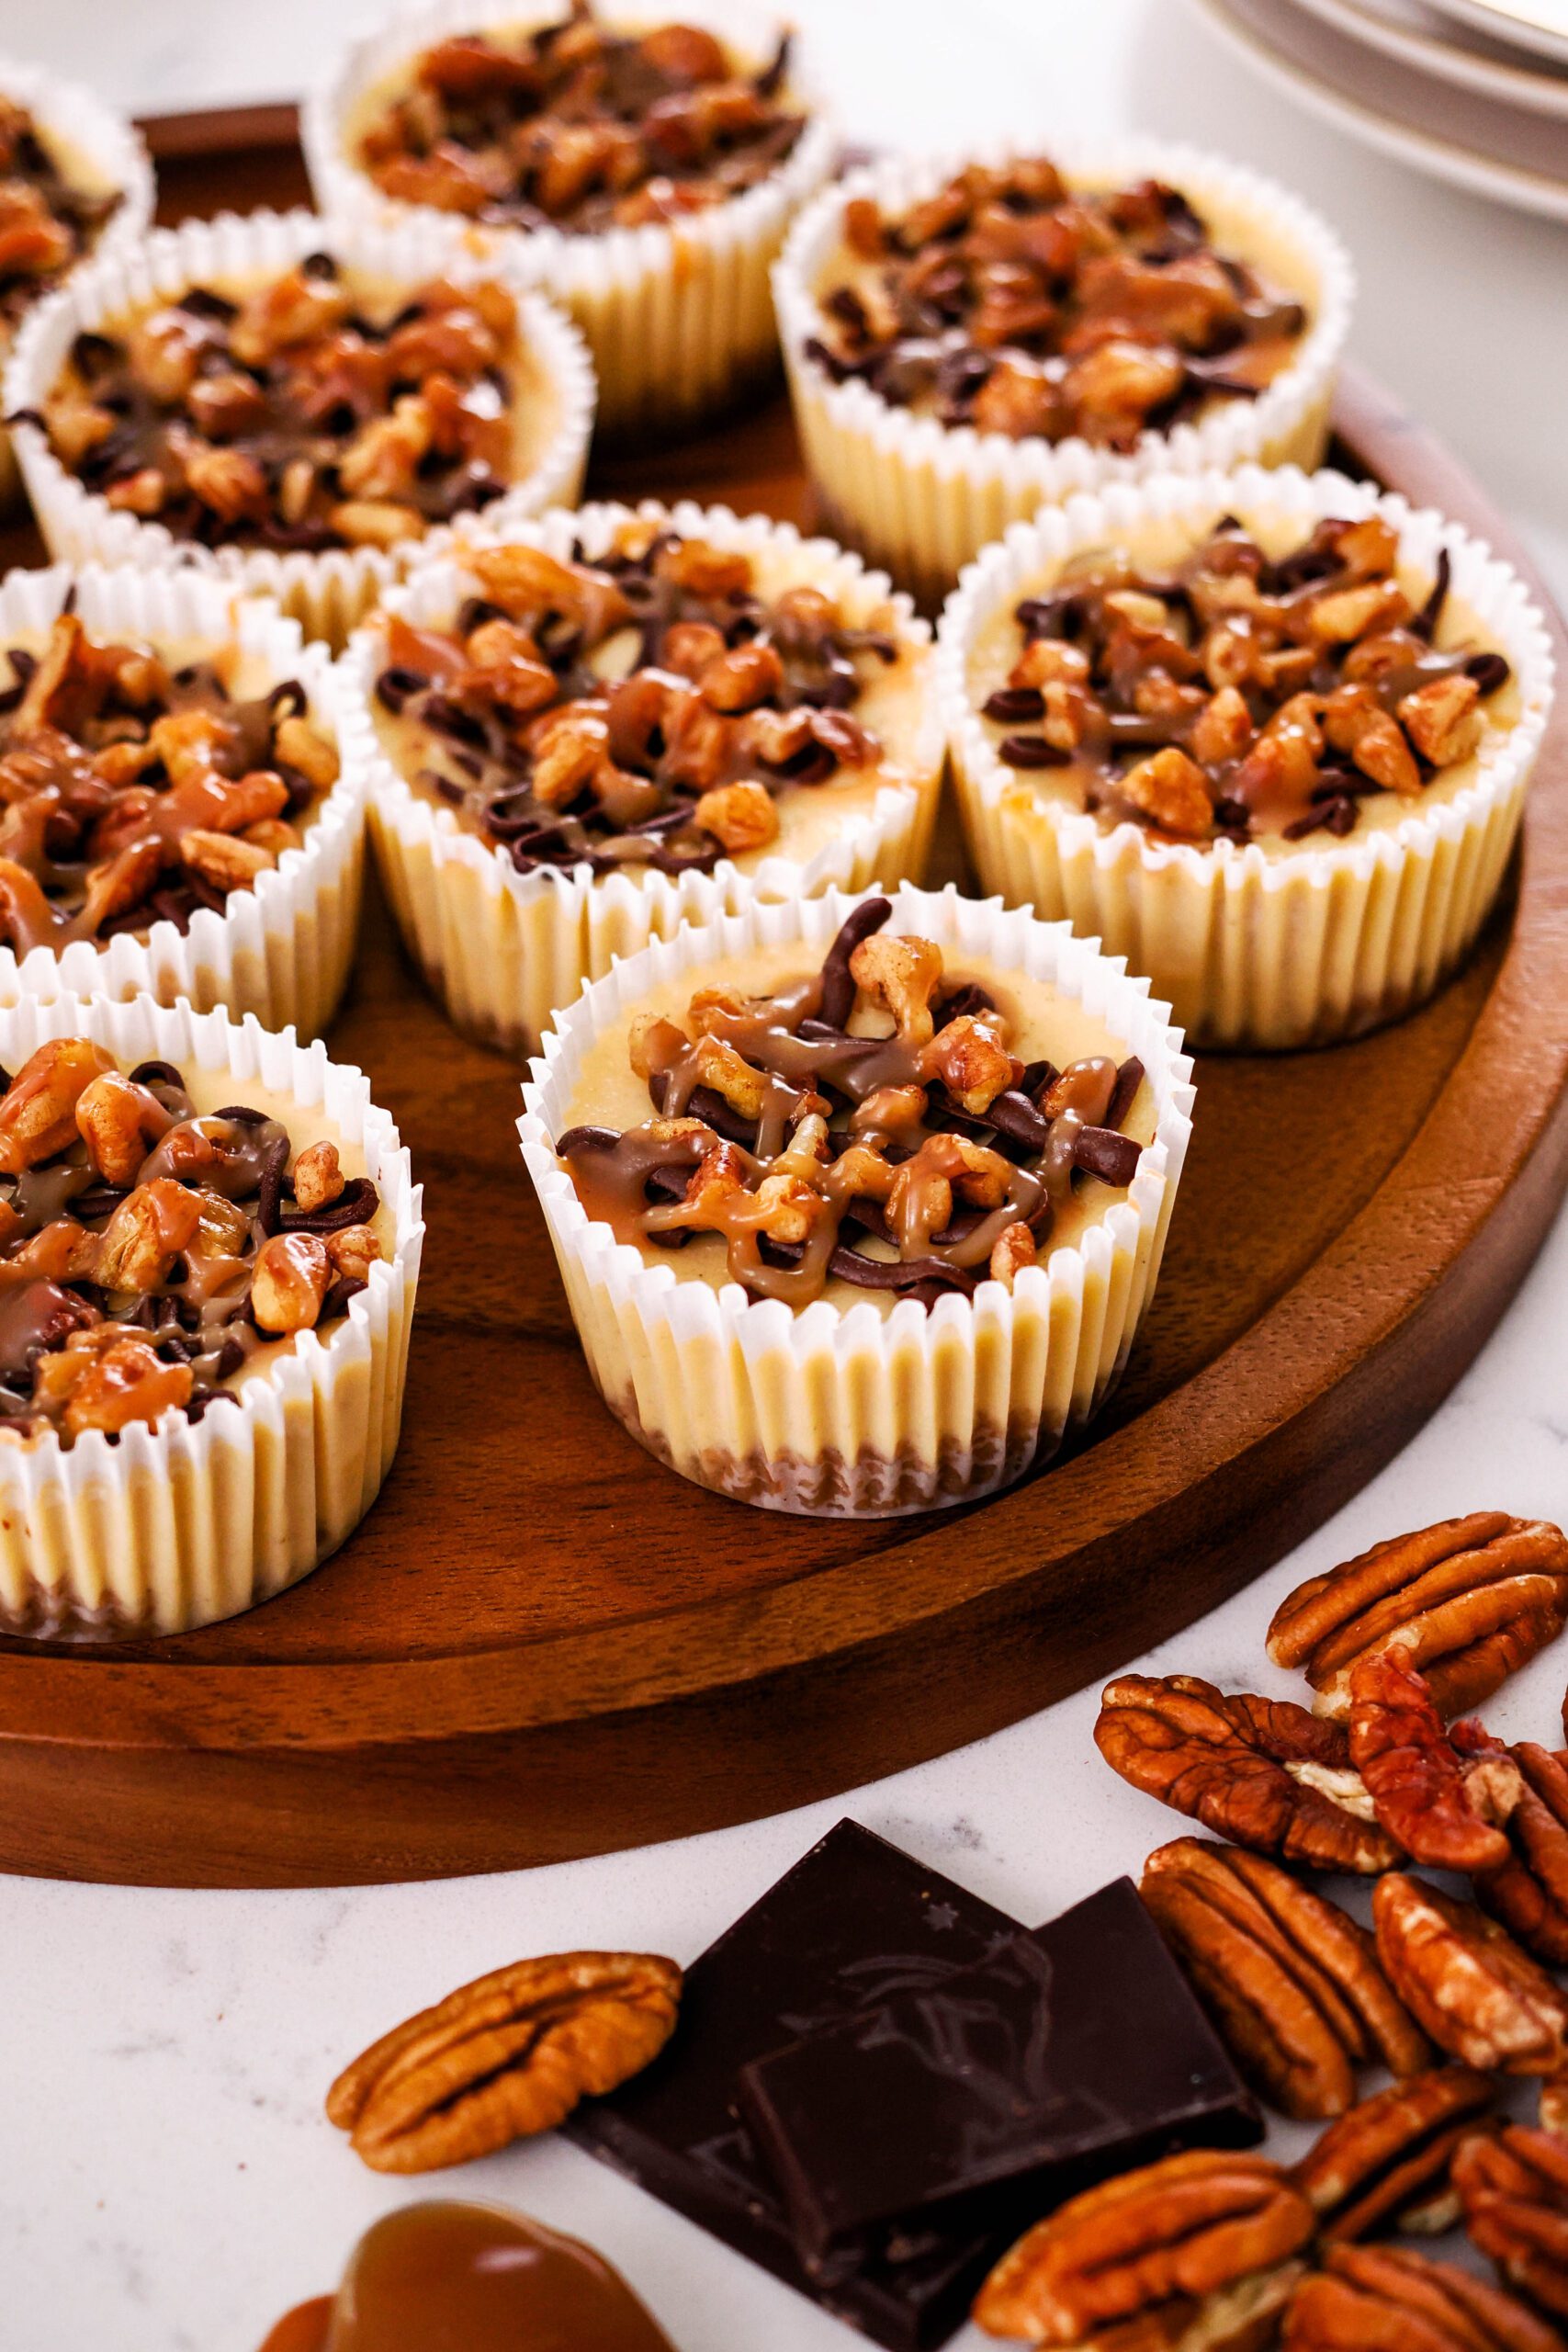
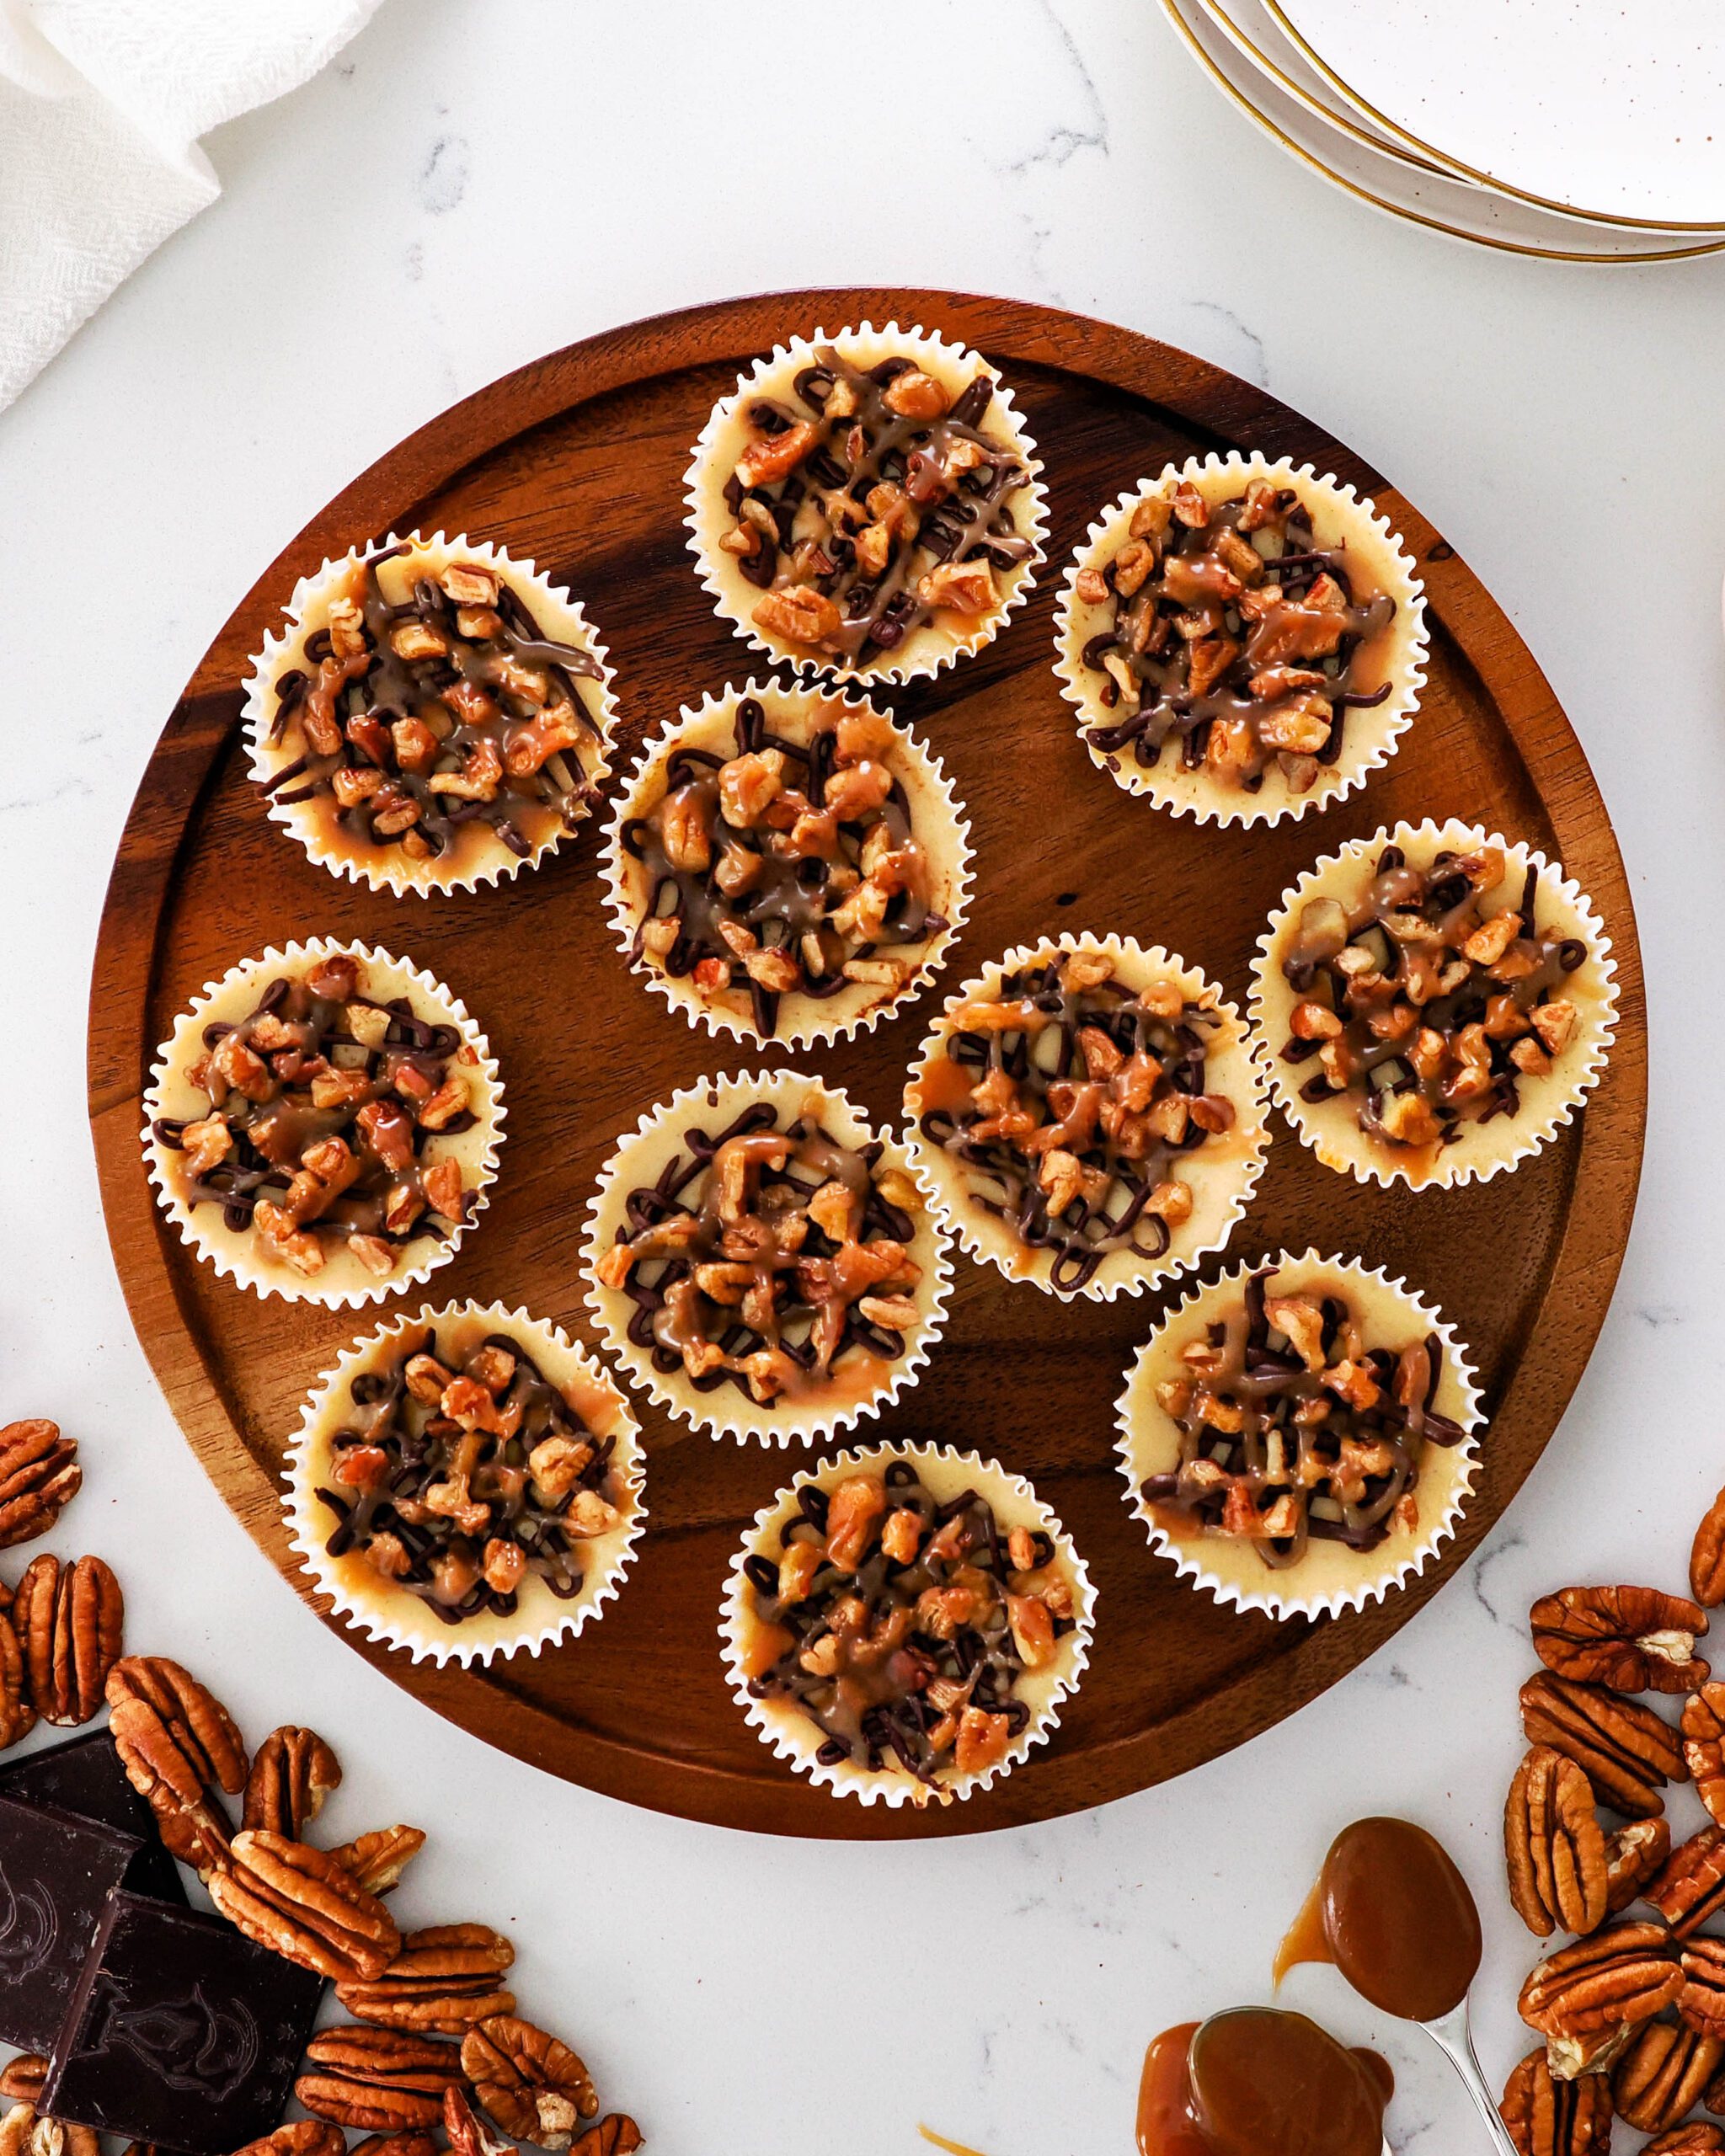
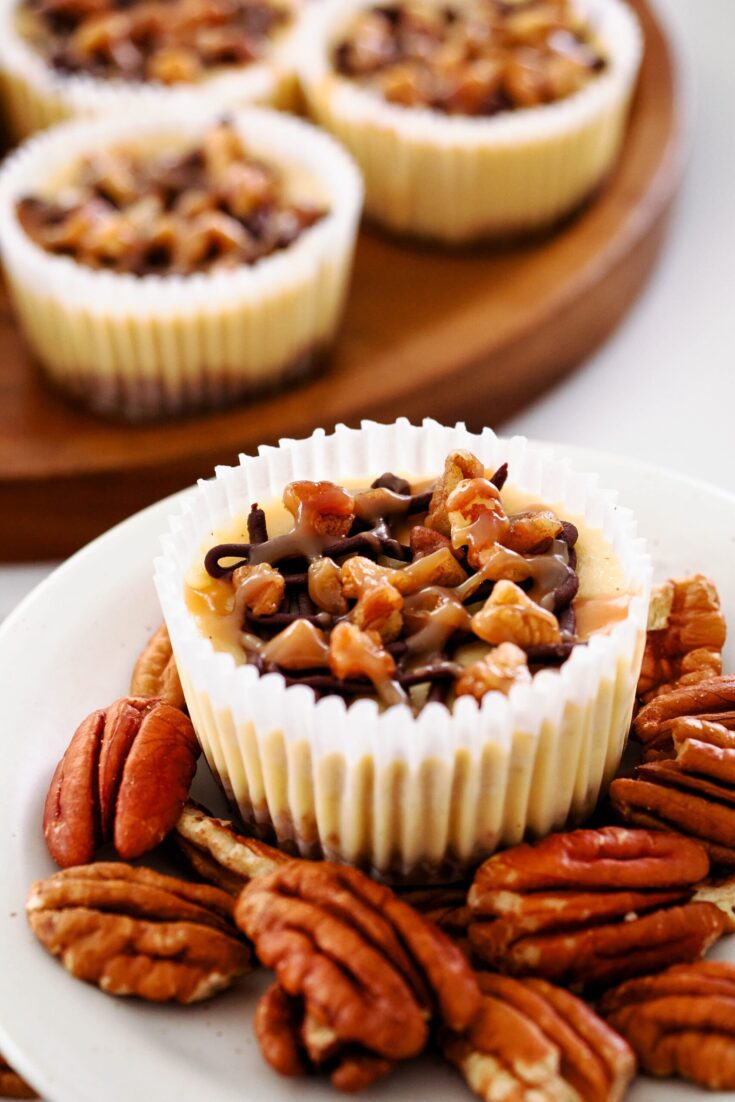
I love making mini pies in my muffin pan, so why not mini cheesecakes? With caramel cheesecake, dark chocolate ganache, pecans, and homemade salted caramel sauce, these mini turtle cheesecakes make for a rich and indulgent dessert. There are even pecans mixed into the graham cracker crust for a complete turtle experience!
Individual cheesecakes are also surprisingly simple to make compared to regular cheesecakes—don’t let the thought of full-size, springform cheesecakes intimidate you! These mini cheesecakes are made in a muffin pan and require no water bath. My taste testers absolutely love how each one is individually portioned, too: It makes them super easy to serve at gatherings, or even defrost one or two at a time for a special treat the next day!
This post contains affiliate links. If you click through and make a purchase, I may receive a small commission at no cost to you. Thank you for helping to support The Floral Apron!
Ingredients for Mini Turtle Cheesecakes
Individual caramel pecan cheesecakes are made of a graham cracker base, a caramel cheesecake filling, and a few turtle-y toppings, like pecans, salted caramel, and dark chocolate ganache. Read on for common substitutions or specifics for each ingredient:
- Honey graham crackers. Be sure to use honey-flavored, as that pairs nicely with the pecans, chocolate, and caramel. If graham crackers are unavailable, digestive biscuits make a decent substitute.
- Pecan pieces. Pieces are generally cheaper than halves, so that’s what I used, but use whichever you prefer. Any kind will do here—salted or unsalted, roasted or raw.
- Salted butter. Melted butter binds the graham cracker crumbs and pecans together, and the addition of salt balances out the sweetness nicely.
- Dark or semisweet chocolate. With all the other richness, the slightly bitter flavor in dark or semisweet chocolate pairs best here!
- Heavy cream. Warm whipping cream will thin out and soften the chocolate.
- Cream cheese. This is the main component of the cheesecake, so be sure to use full-fat cream cheese in its block form, like the 8-oz block from Philadelphia. If the cream cheese is too soft (like the kind in the tubs), the cheesecakes may not set properly.
- Salted caramel sauce. I highly recommend using homemade salted caramel sauce (my recipe or someone else’s!) for the best flavor, but you can use store-bought caramel sauce in a pinch.
- Granulated sugar. Sugar adds sweetness and plays a role in preventing the custard from cracking while baking.
- Vanilla extract. Vanilla bean paste or extract work well here for a little extra flavor.
- Eggs. Imperative for a good custard, eggs gently firm the custard while baking to result in a creamy yet set cheesecake.

Quick Tips to Make Mini Turtle Cheesecakes
Mini cheesecakes are far easier to make than regular cheesecakes! There are quite a few components to these mini cheesecakes, but nothing too complicated, and I have a ton of tips for the process below to ensure your success.
You can also watch me make these mini turtle cheesecakes below on my YouTube channel:
How to Make the Pecan Graham Cracker Crusts
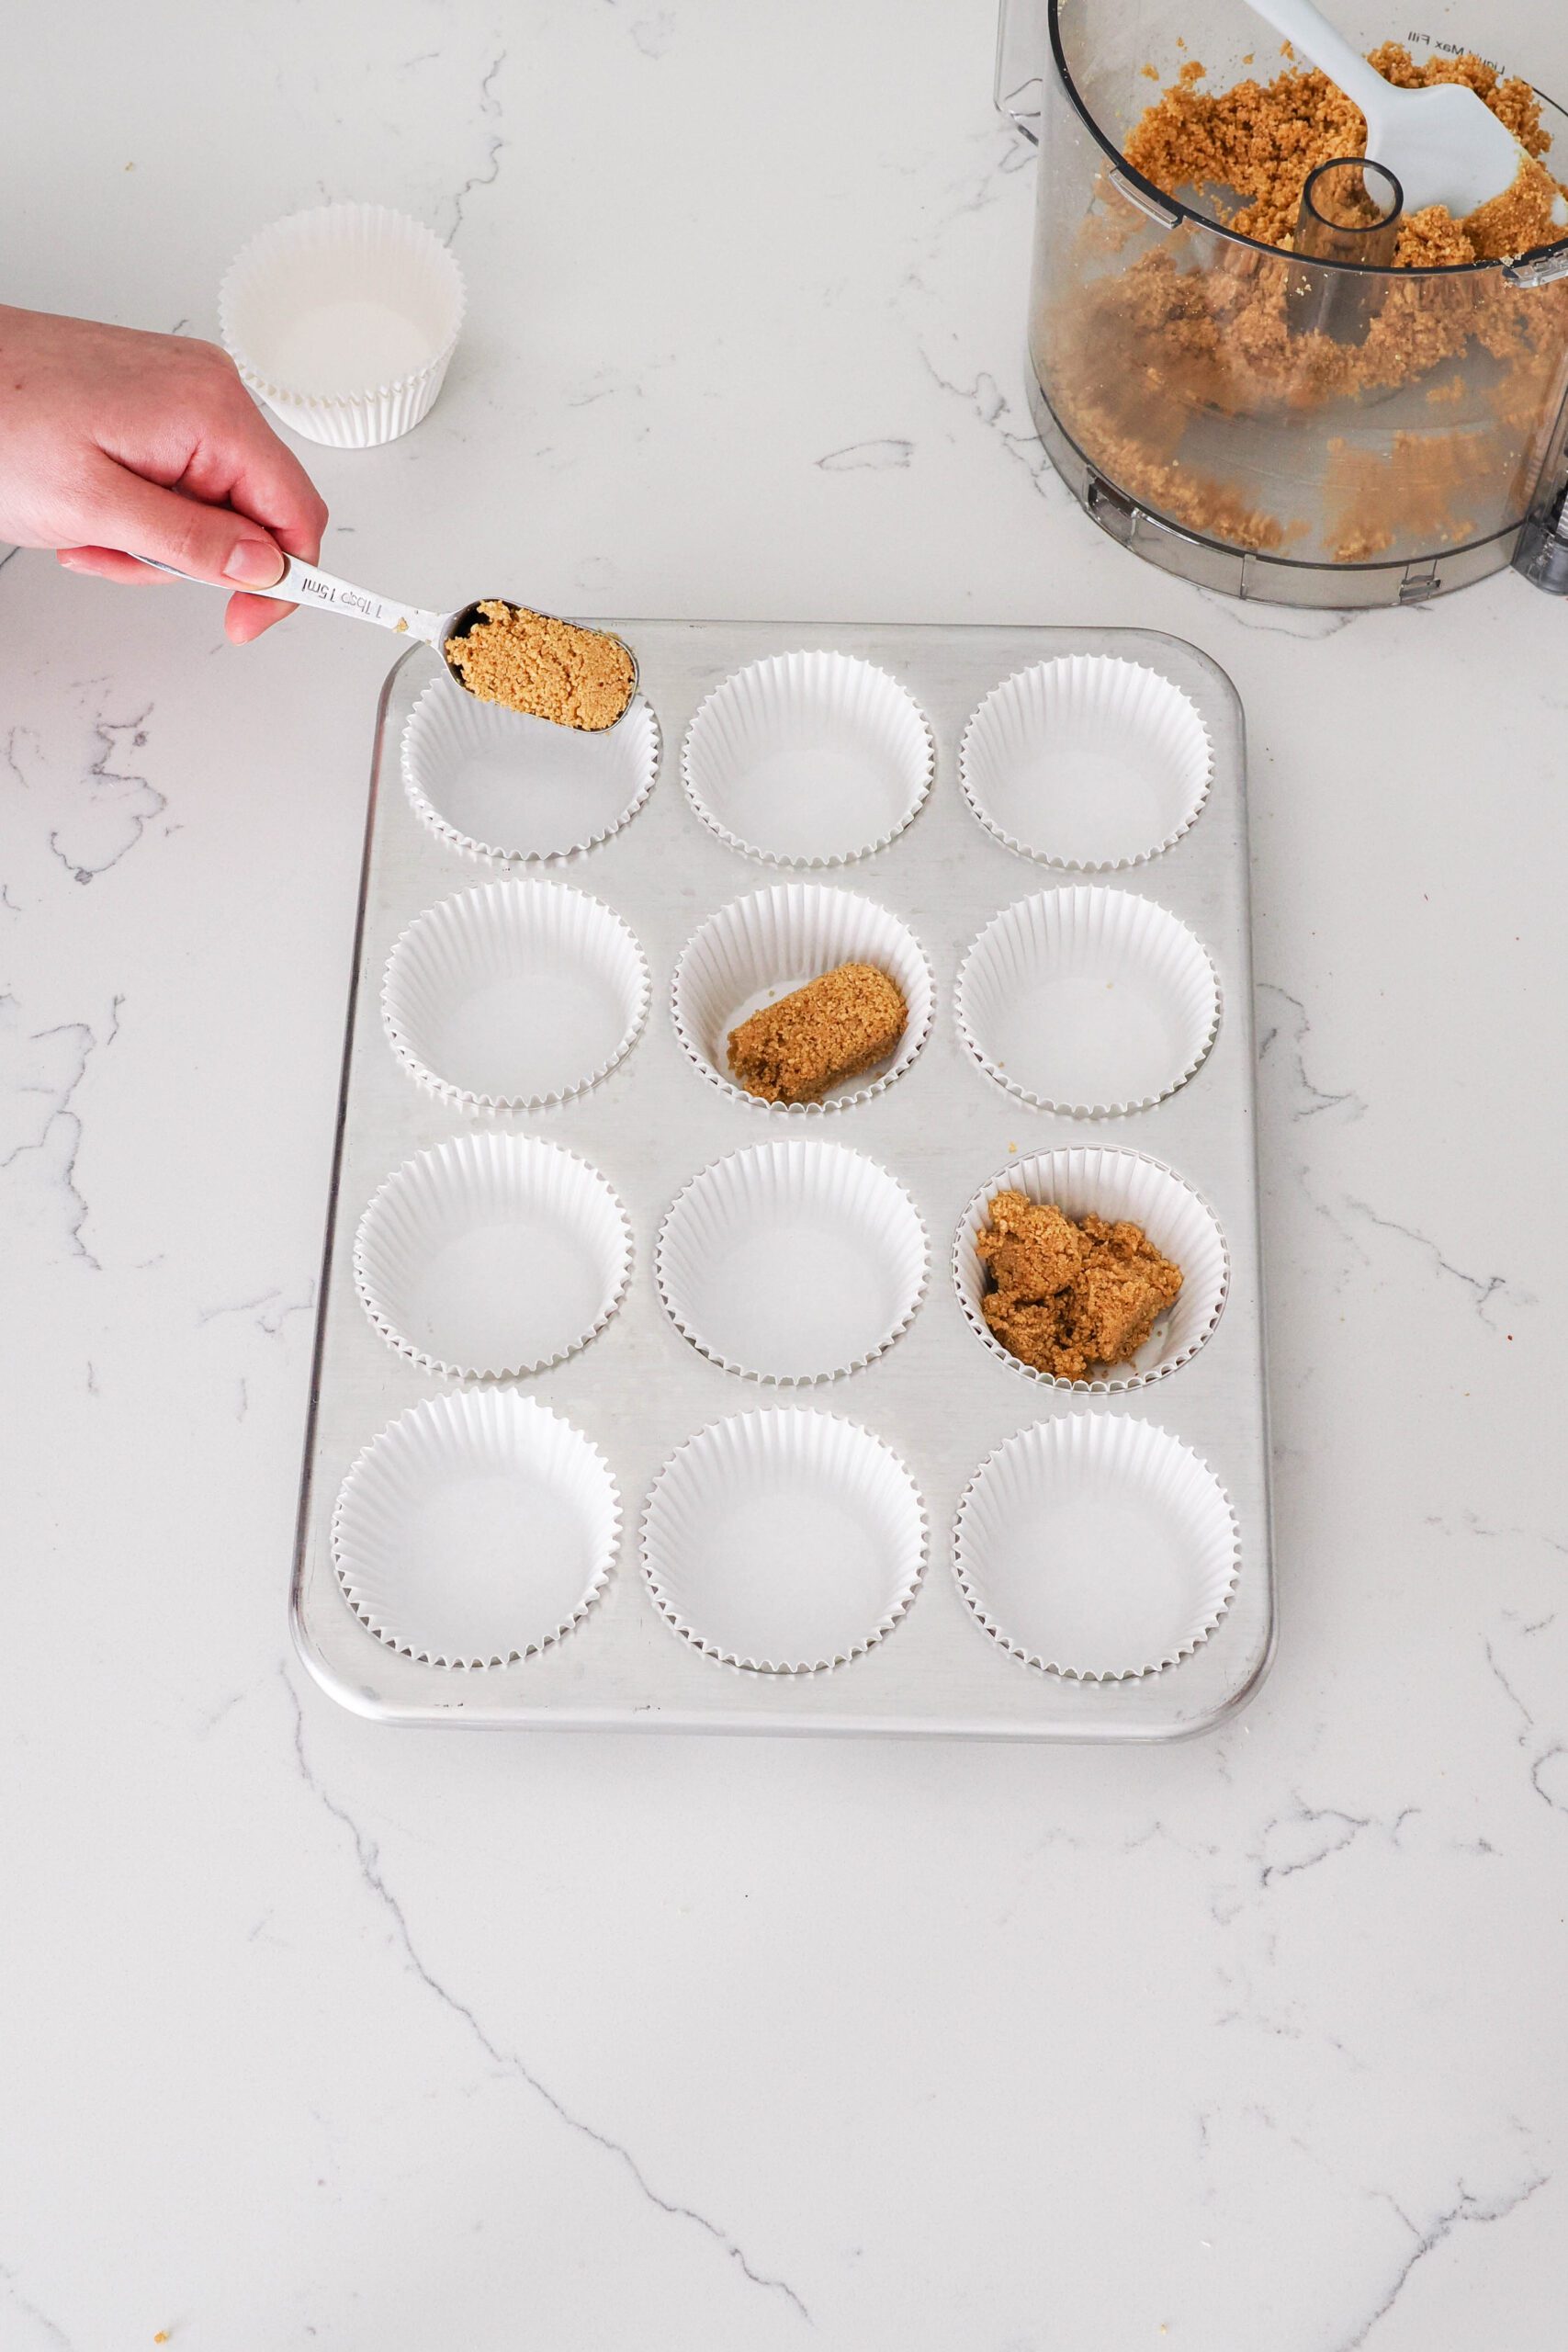
First, line a muffin pan with 12 paper liners. I use a light pan, so if you have a dark muffin pan, your bake time may be a little shorter.
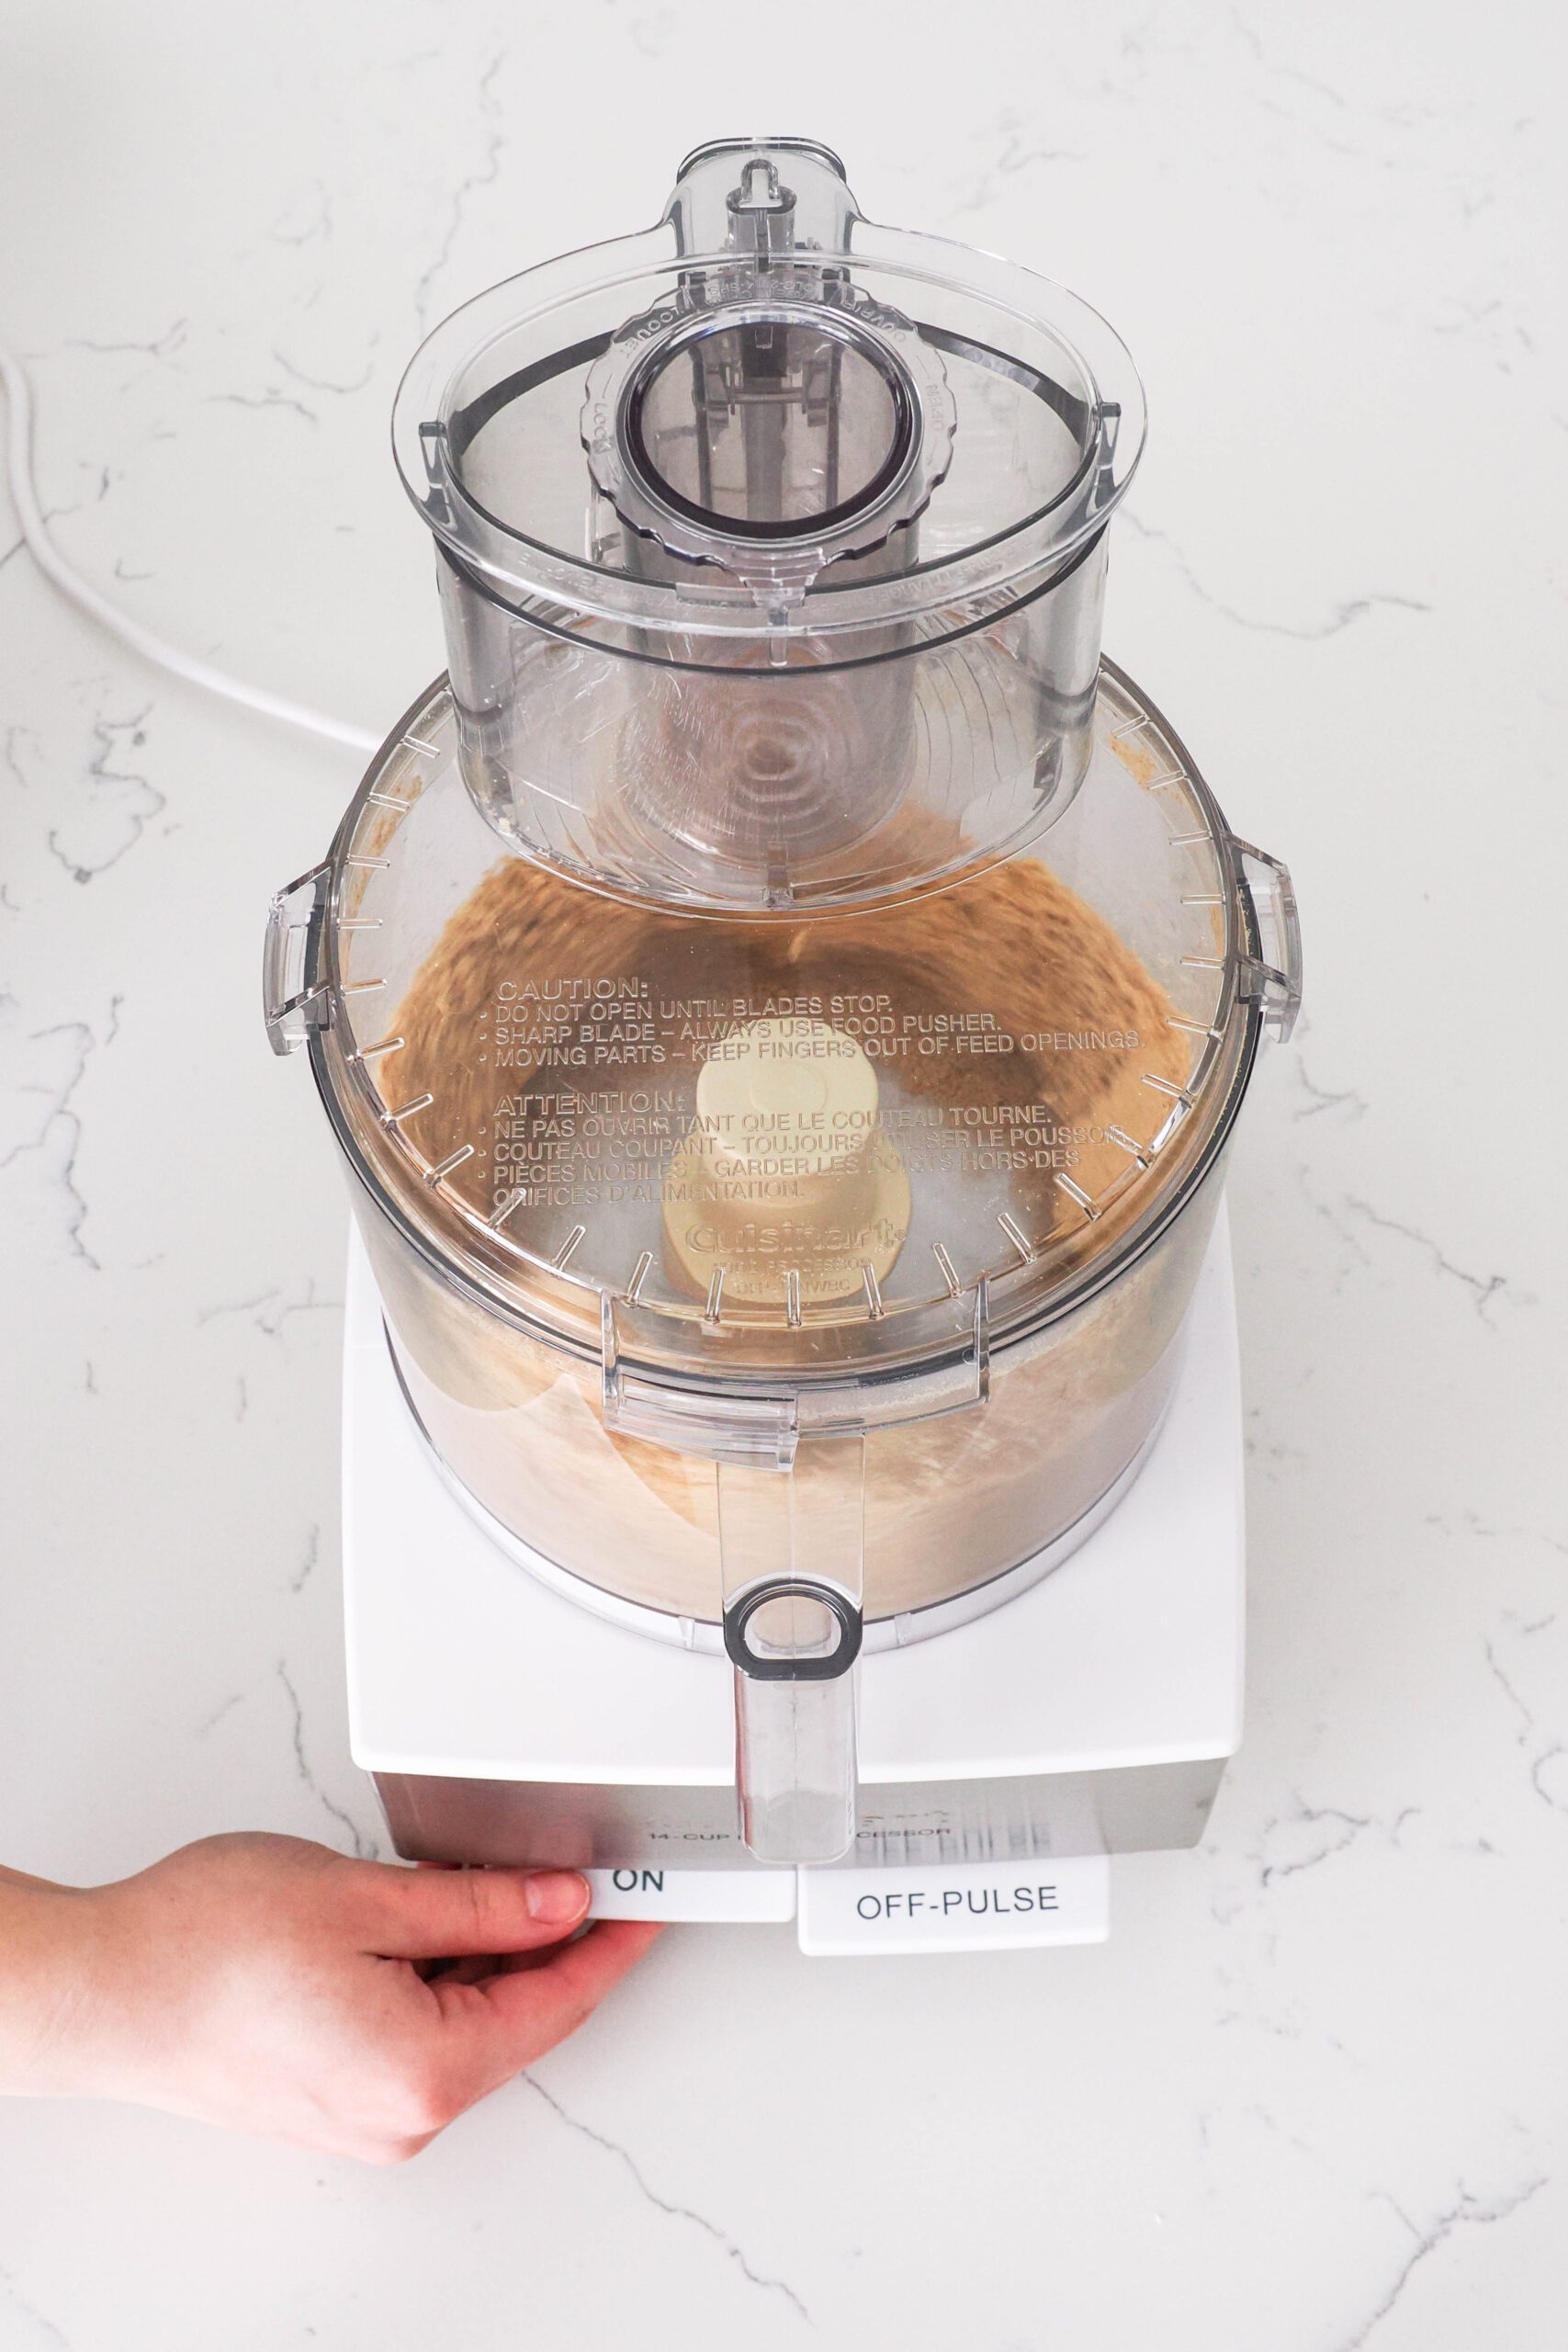
Then, process the graham crackers and the pecans in the bowl of a food processor until finely ground. Mix the melted butter into the crumbs, making sure it is well-dispersed.
I find it is easier for me to remove the blade of the food processor and mix the melted butter into the crumbs by hand with a spatula, but you can use your processor if you like.
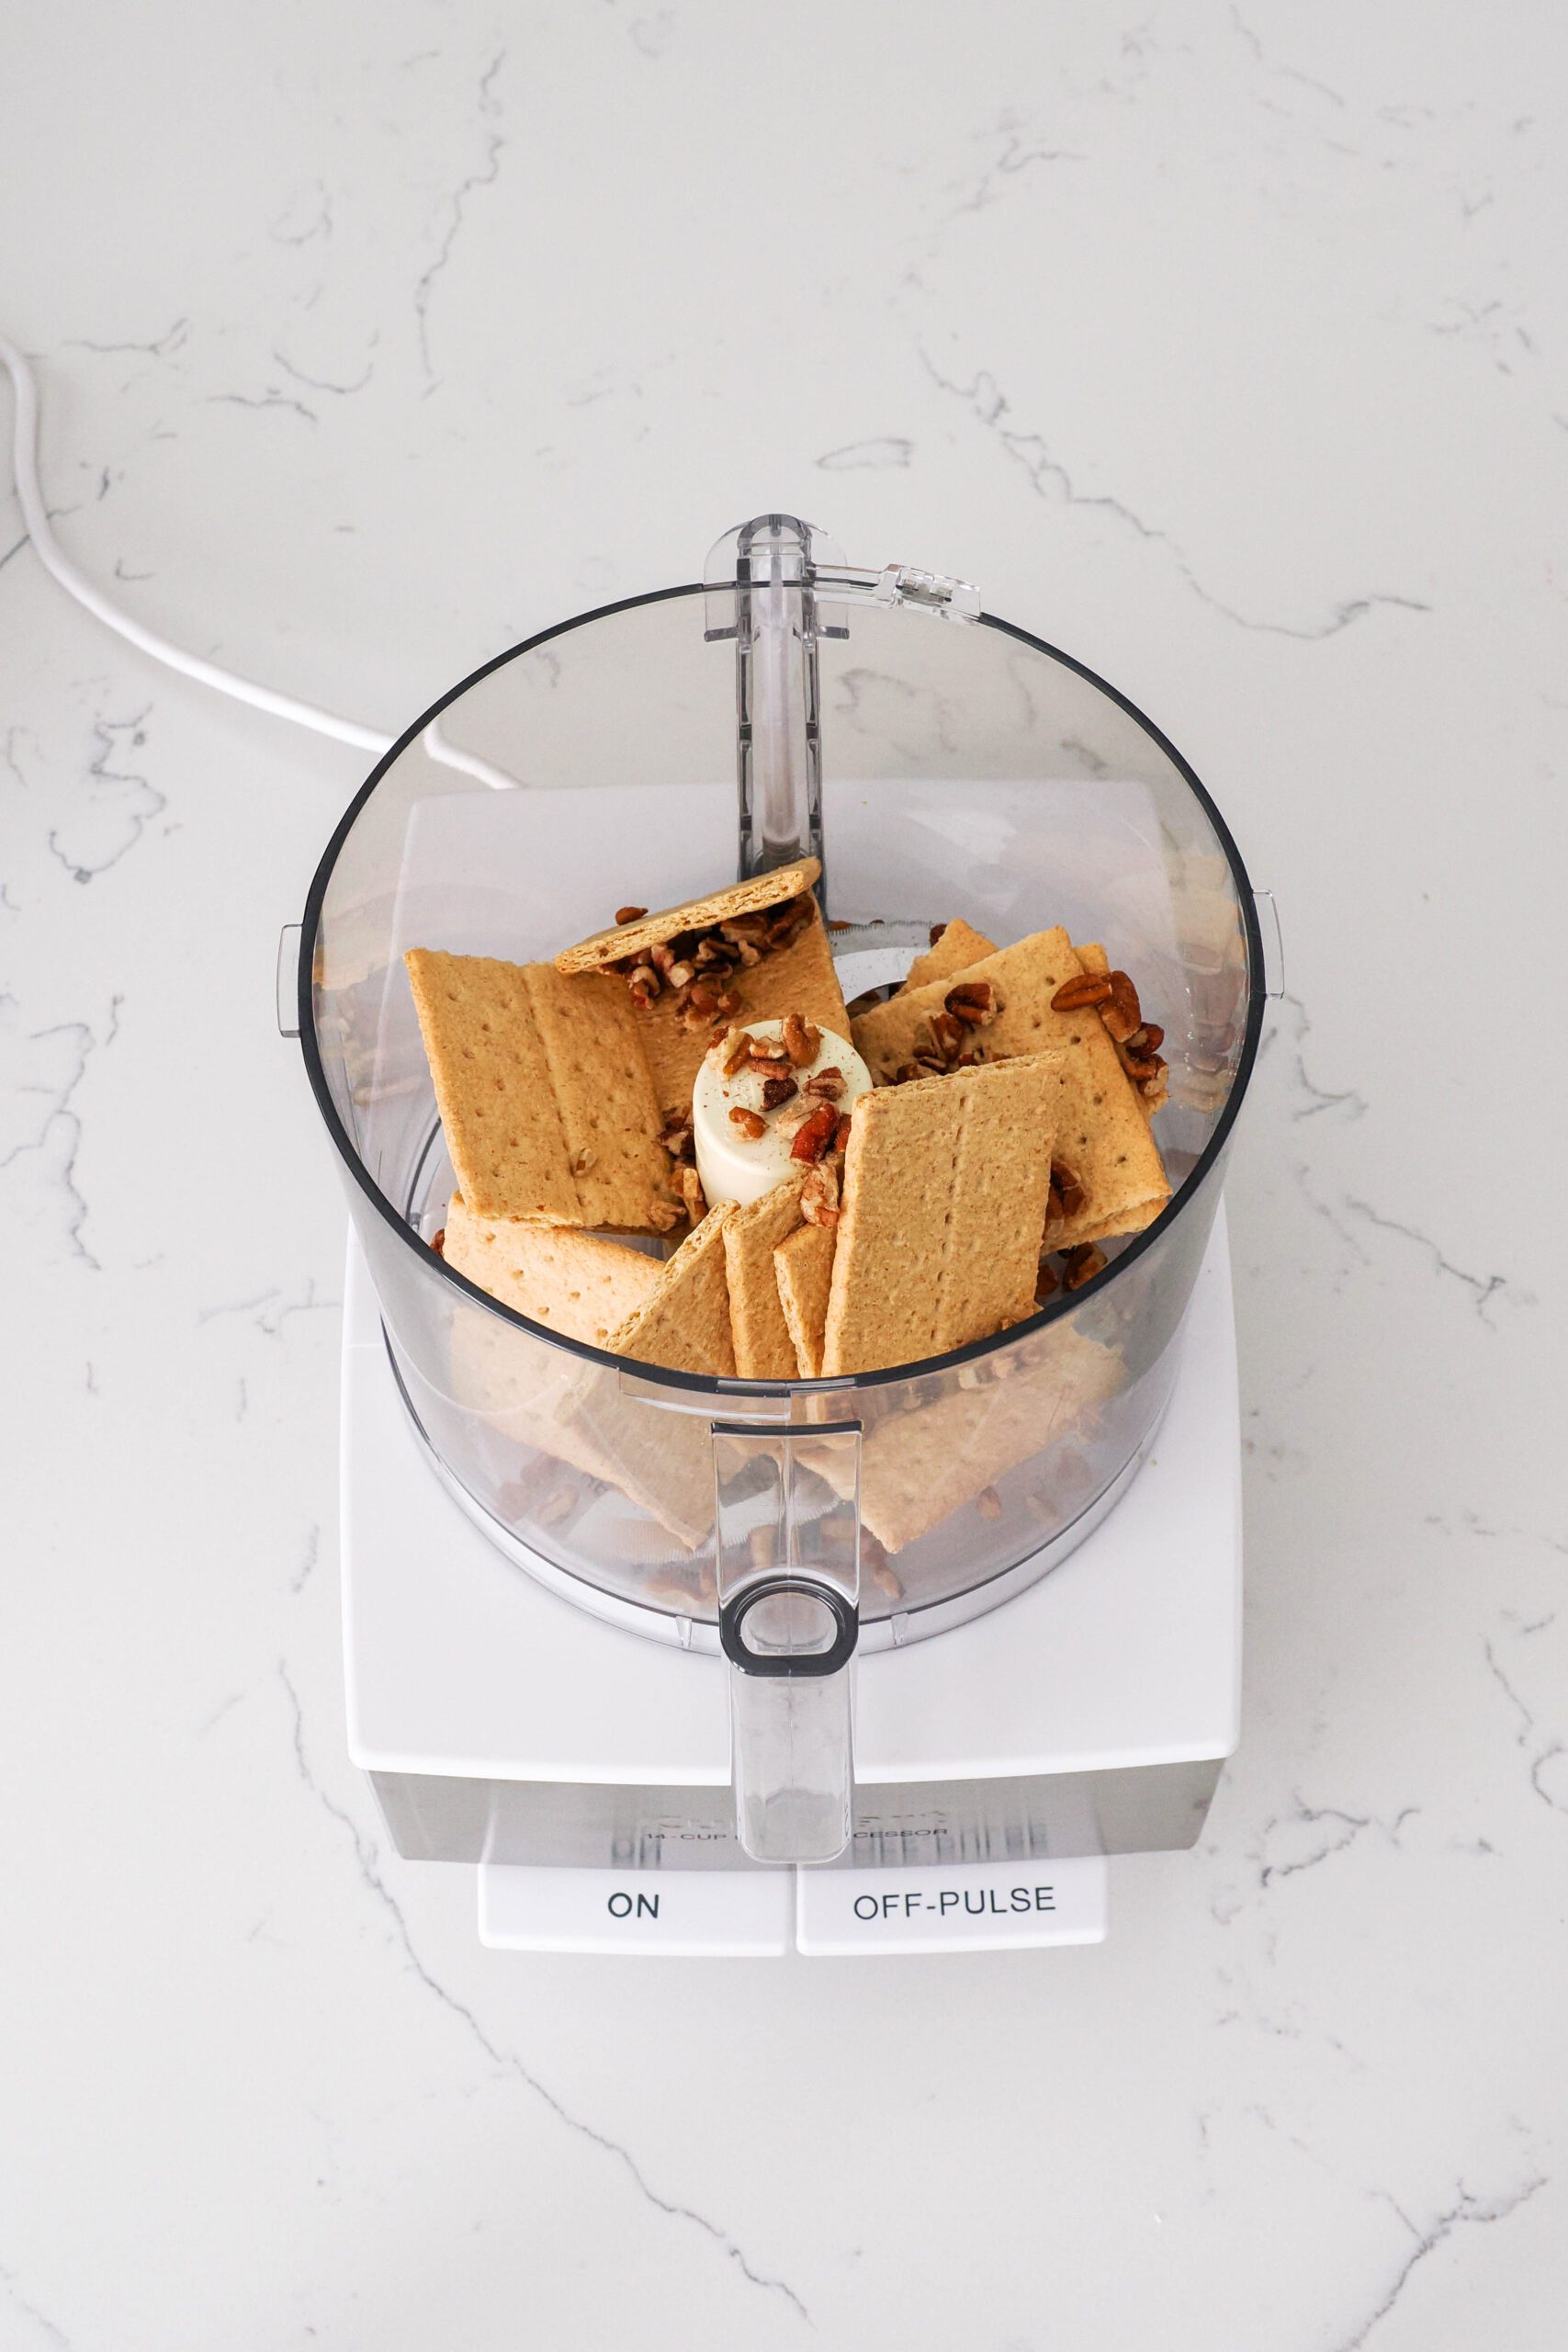
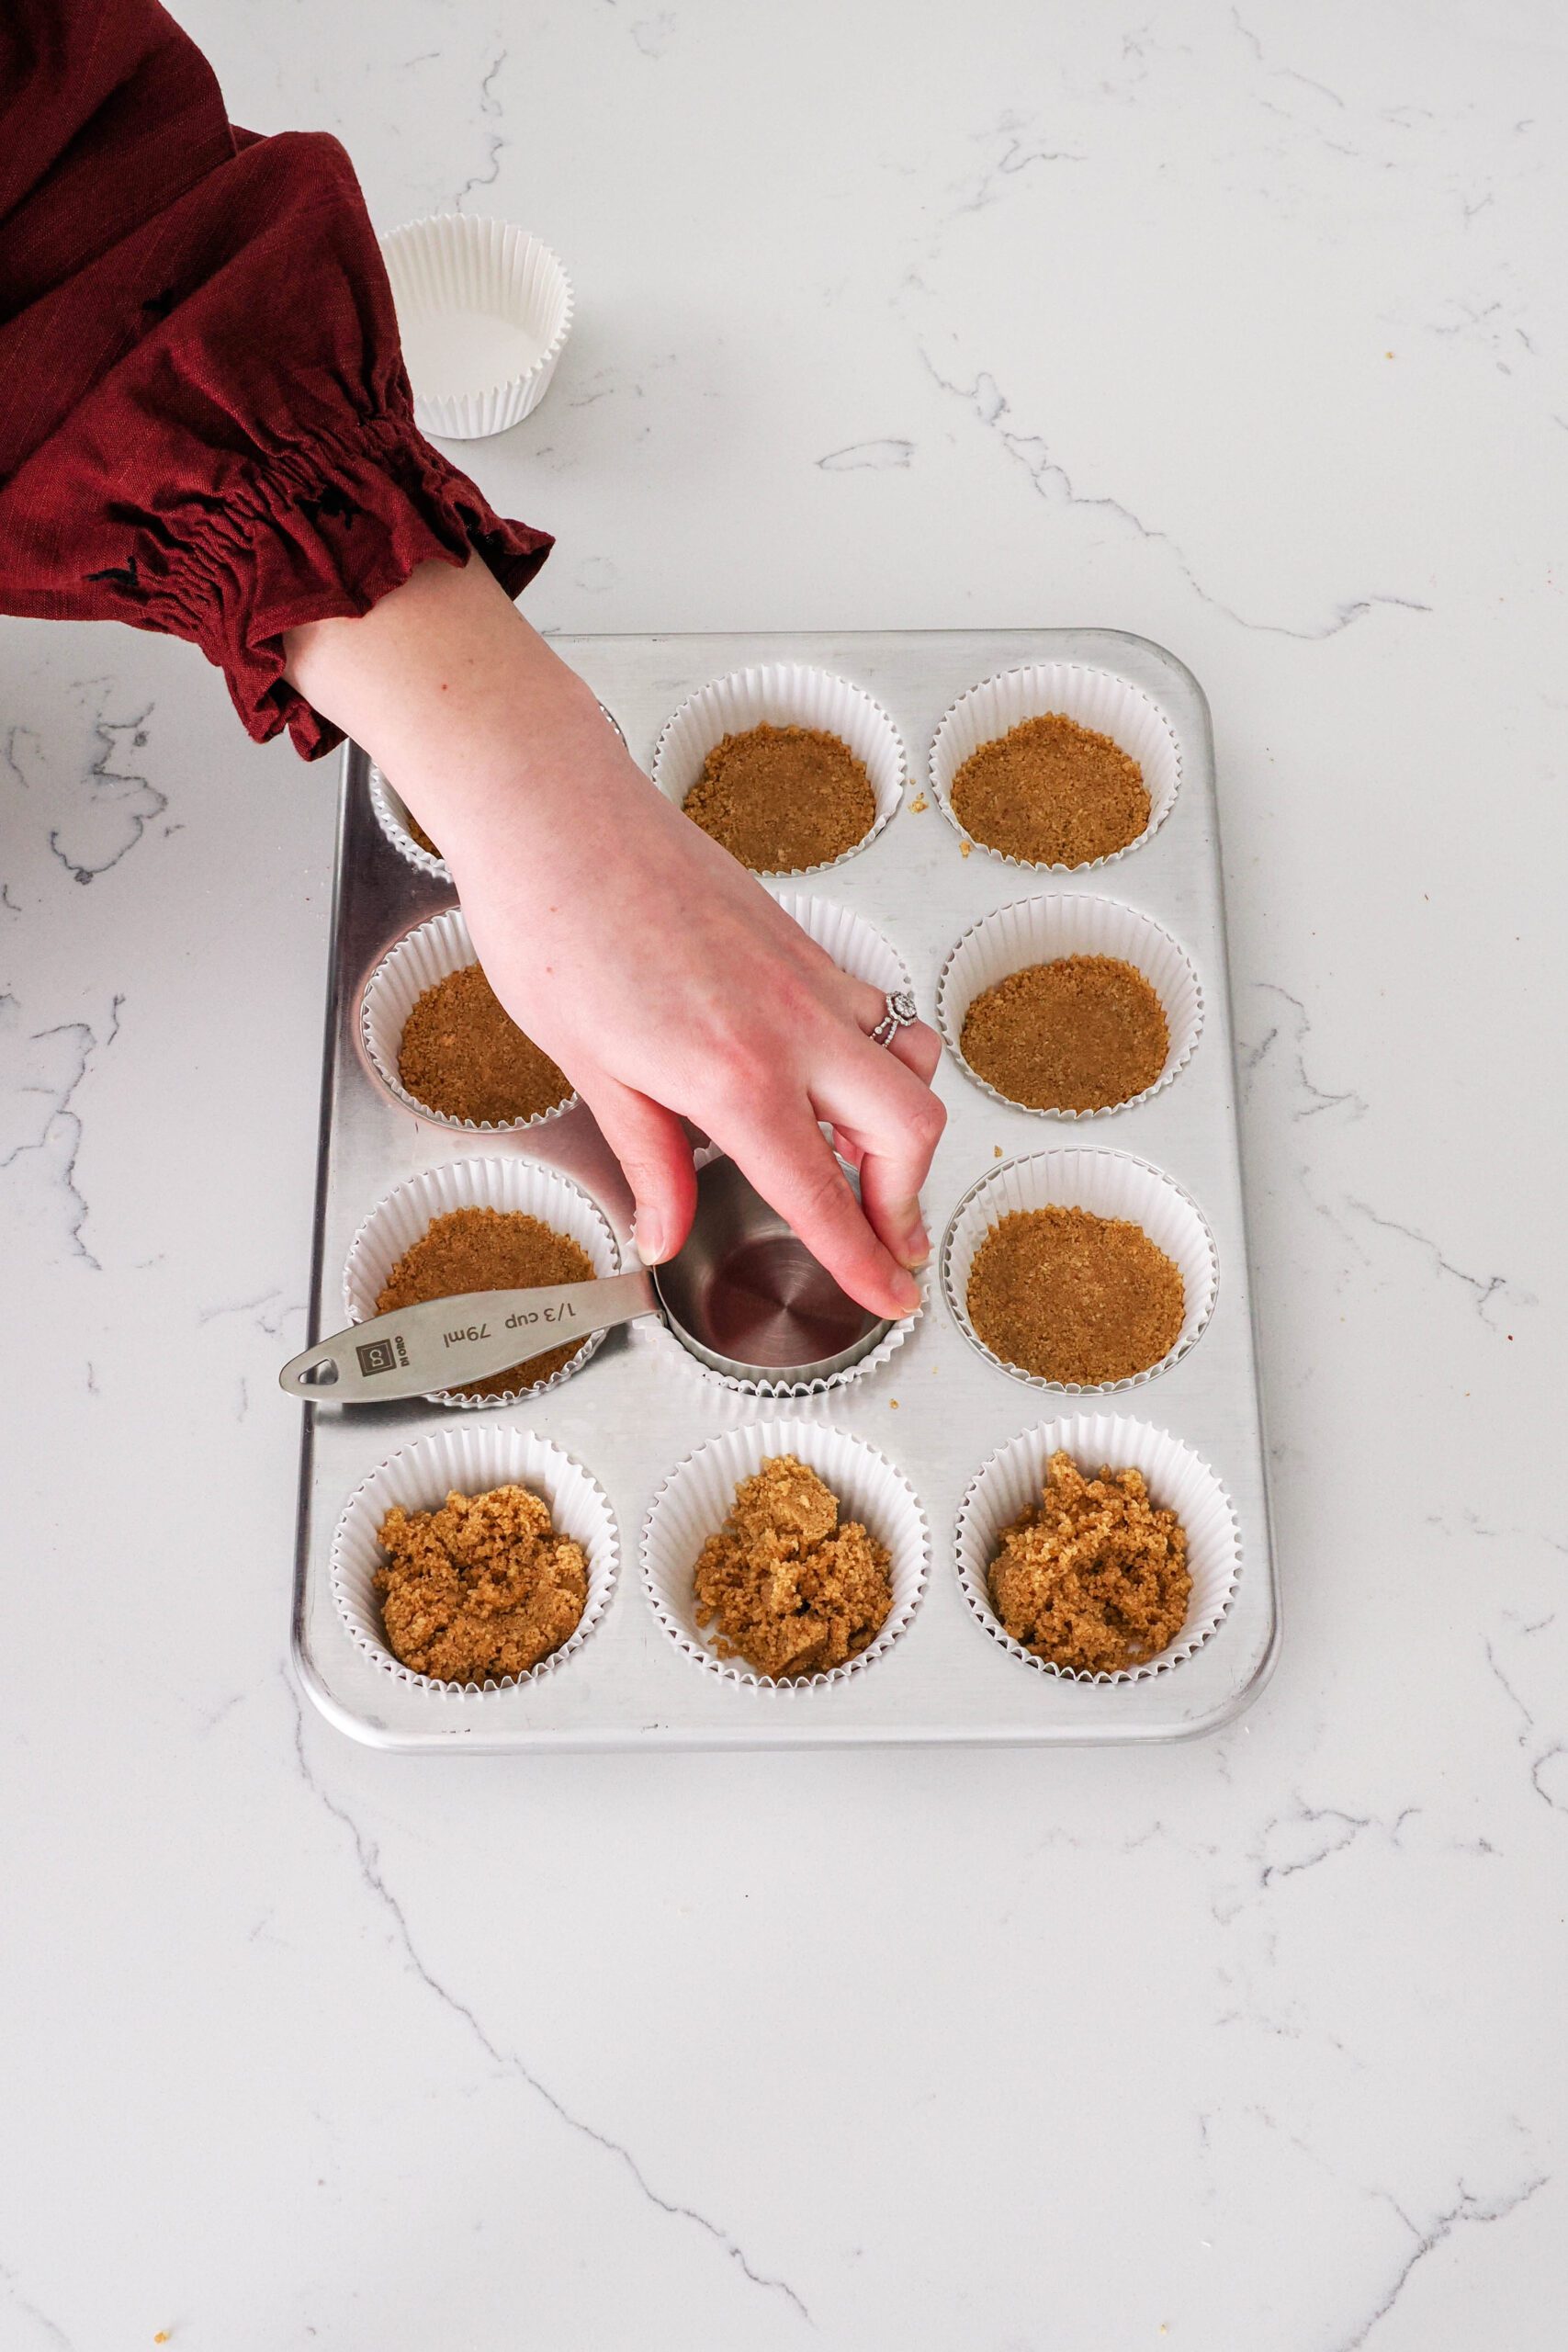
Once the butter has been incorporated, divide the graham cracker crust into the 12 paper liners. This results in about a Tablespoon in each.
To flatten the crust, place an extra paper liner on top of one of the filled liners, then place a flat-bottomed measuring cup over it. Add pressure evenly over the measuring cup, then remove it and the extra liner. You should be left with a nice, flat crust for the base!
If you don’t have a flat-bottomed measuring cup, I recommend flattening the crust with your fingers through the extra paper liner.
How to Make the Dark Chocolate Ganache
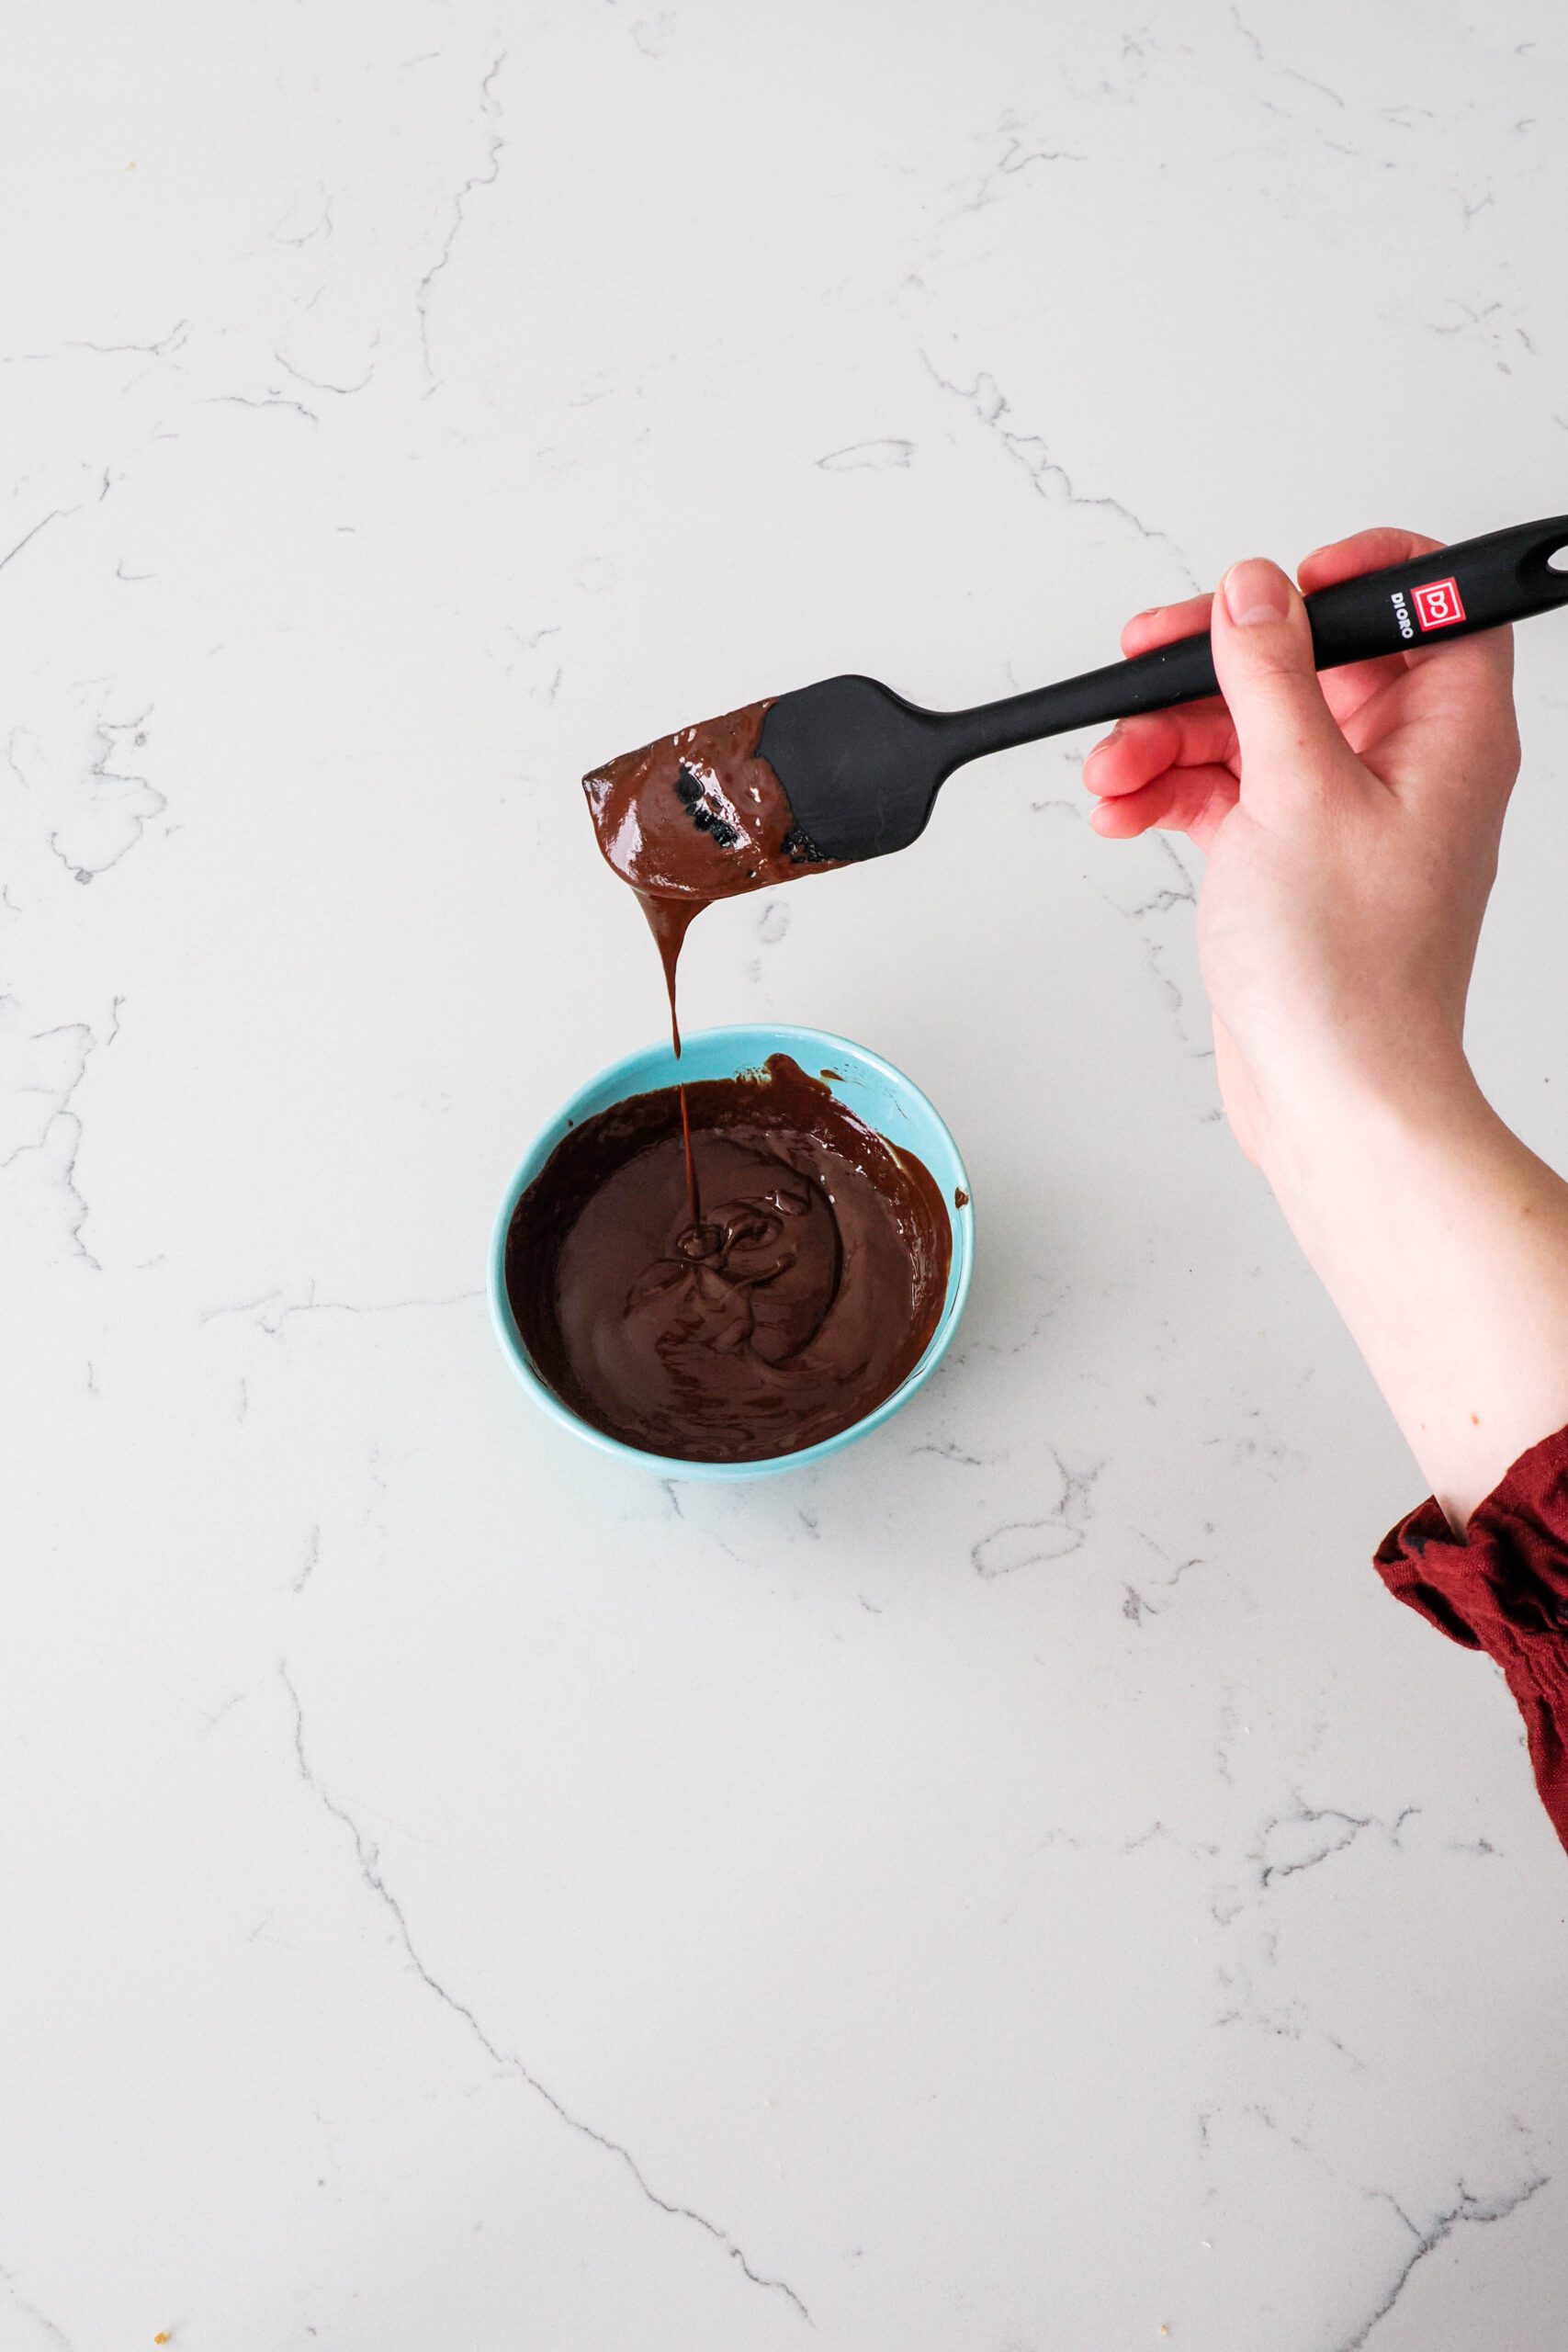
The easiest way to make a small amount of dark chocolate ganache is by heating the heavy cream and chocolate together in the microwave. You may also use a double boiler if you don’t have a microwave.
I add my ingredients to a small bowl, then heat it for about 10 seconds in the microwave and stir it all together. If the chocolate remains lumpy, I heat it for another five seconds and stir, and that usually melts all the chocolate.
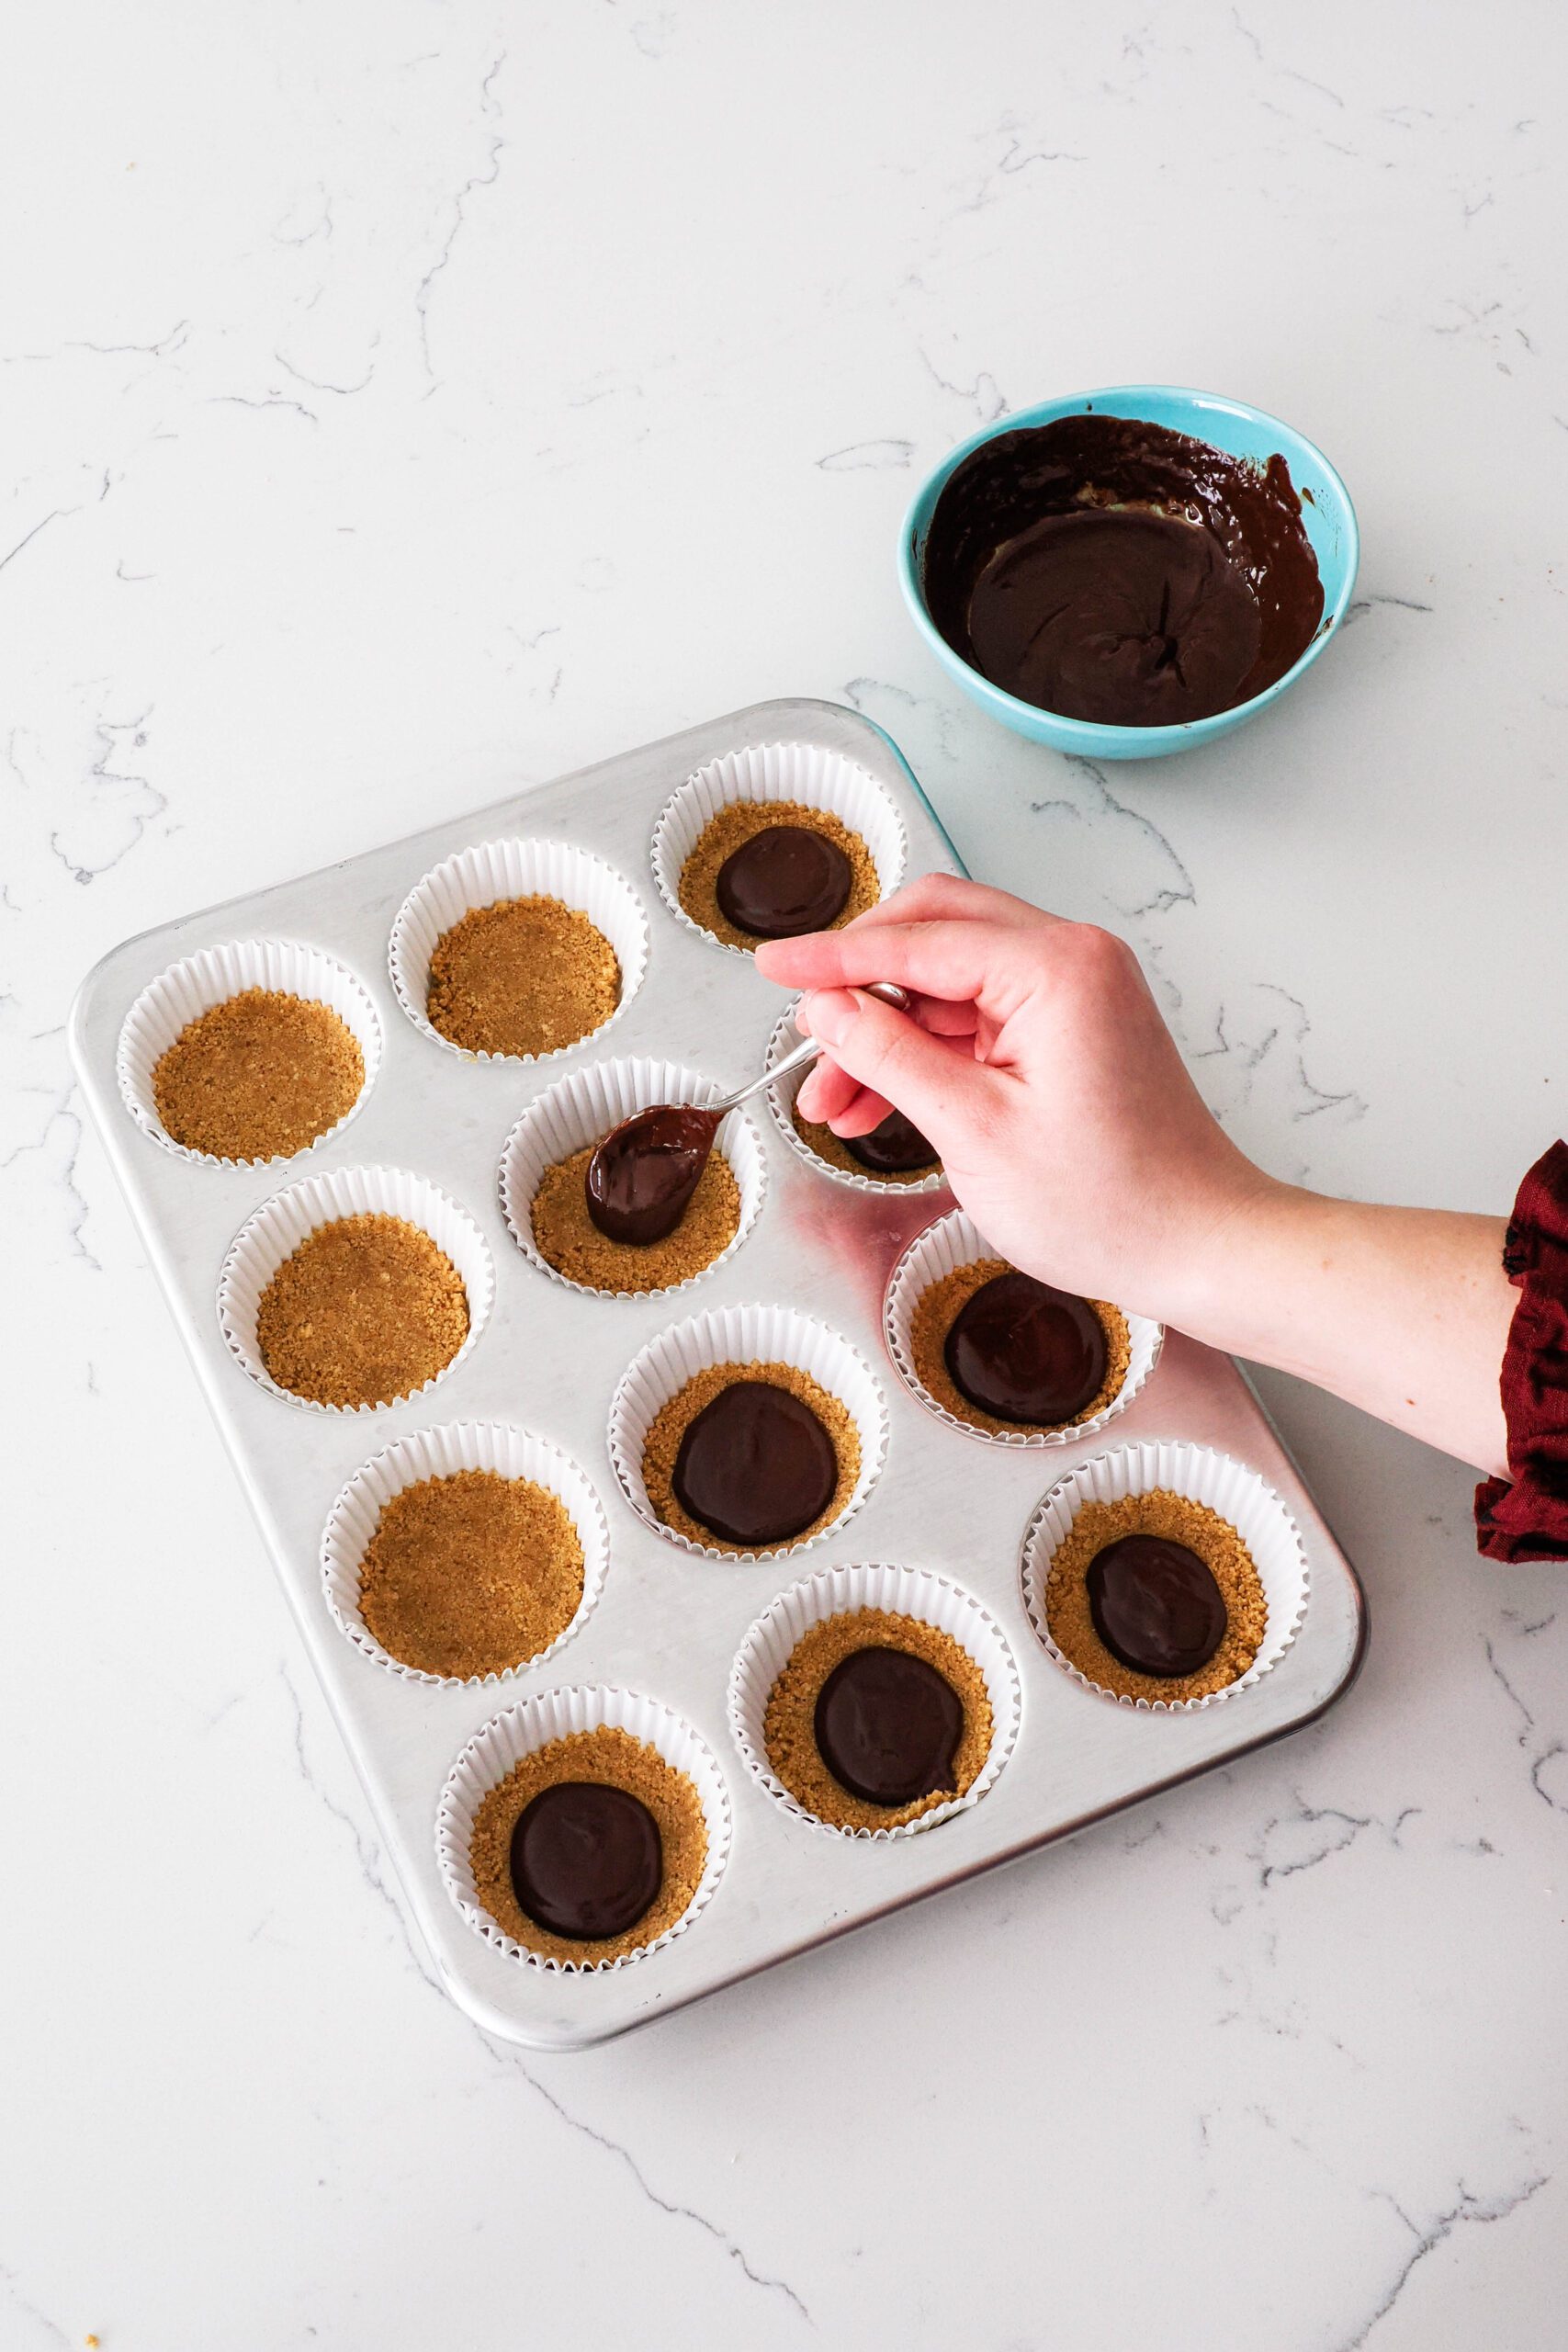
Once fully melted, add about a teaspoon of the chocolate ganache on top of each flattened crust in the paper liners. You can spread the ganache out to the edges of the liner, or you can keep it as a dollop in the center as a surprise, like I do.
How to Make the Caramel Cheesecake Filling
Cheesecakes tend to crack if the filling has been overbeaten and too much air has been incorporated. In order to combat this, I use a food processor to make my cheesecakes. The blade does not incorporate quite as much air as a beater attachment would, so it makes it a great option to use for beginners! It’s also handy because I use the food processor to make the crust right before.
If you don’t have a food processor, you can absolutely make these cheesecakes with an electric mixer, just stop beating the mixture as soon as the eggs look fully incorporated.
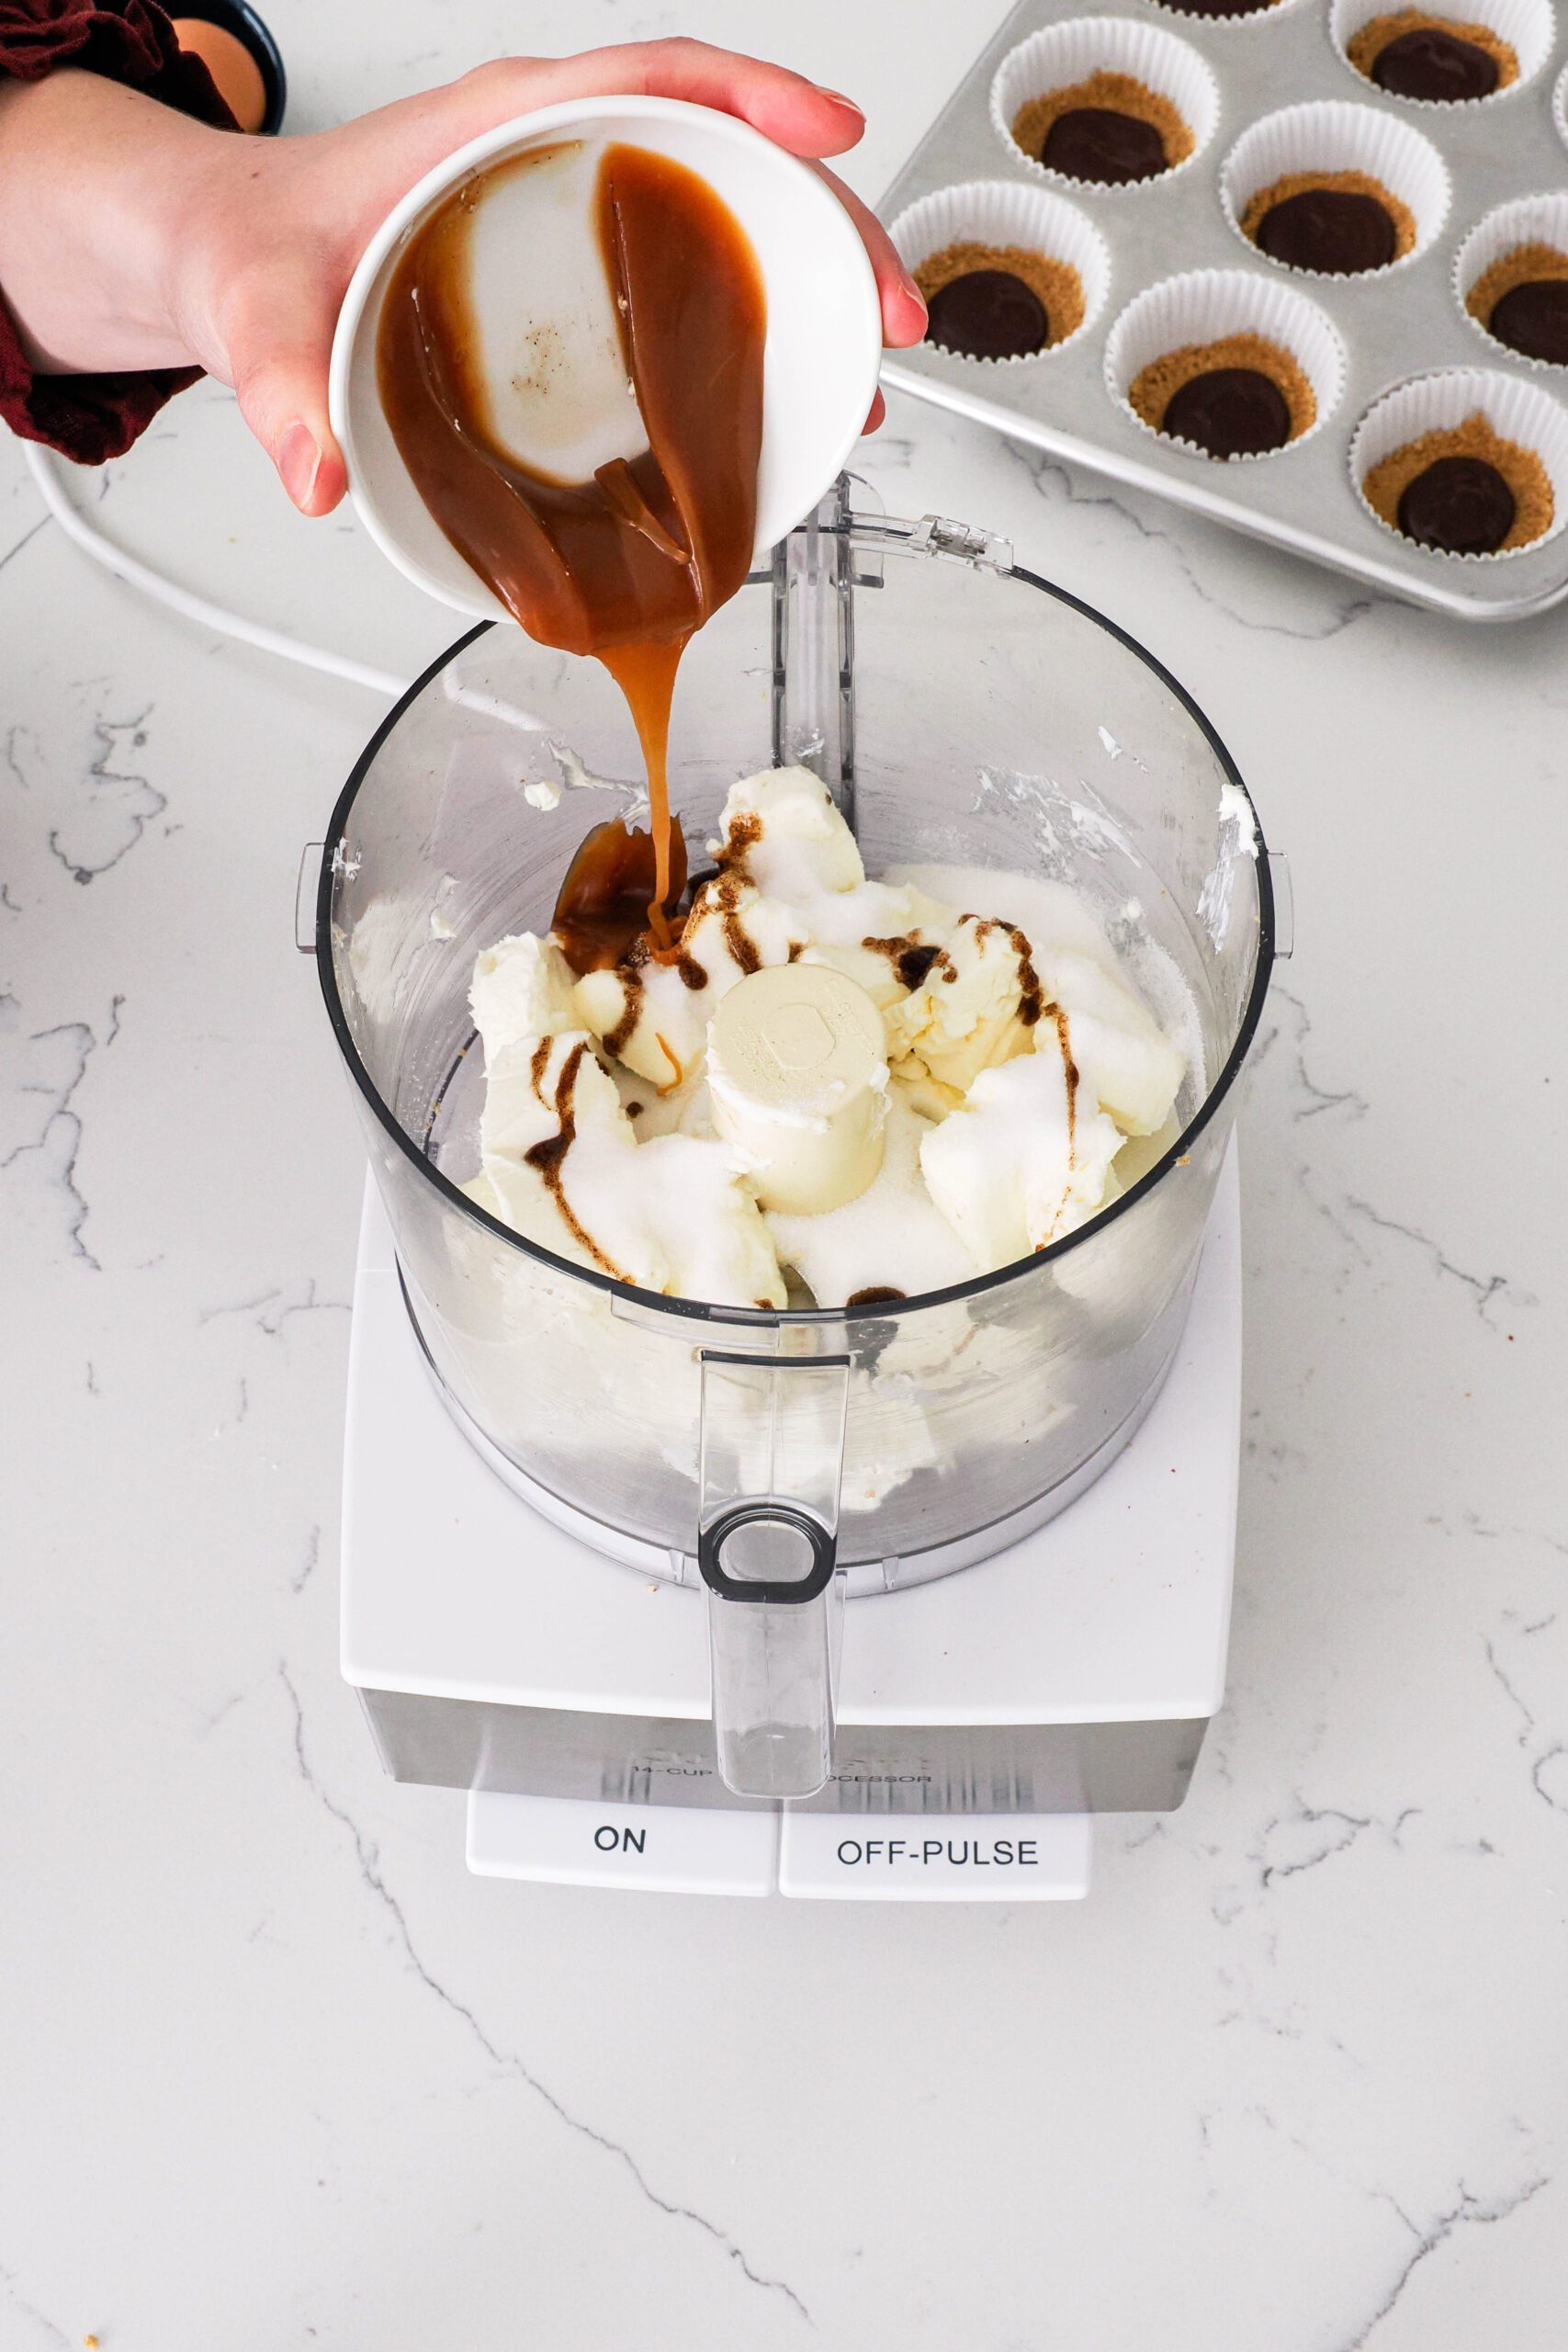
I first add the cream cheese, sugar, vanilla, and caramel to the food processor and pulse until combined. Even after that, I find there are generally there are still small clumps on the sides of the bowl. Scrape down the sides with a spatula and pulse one or two more times until smooth.

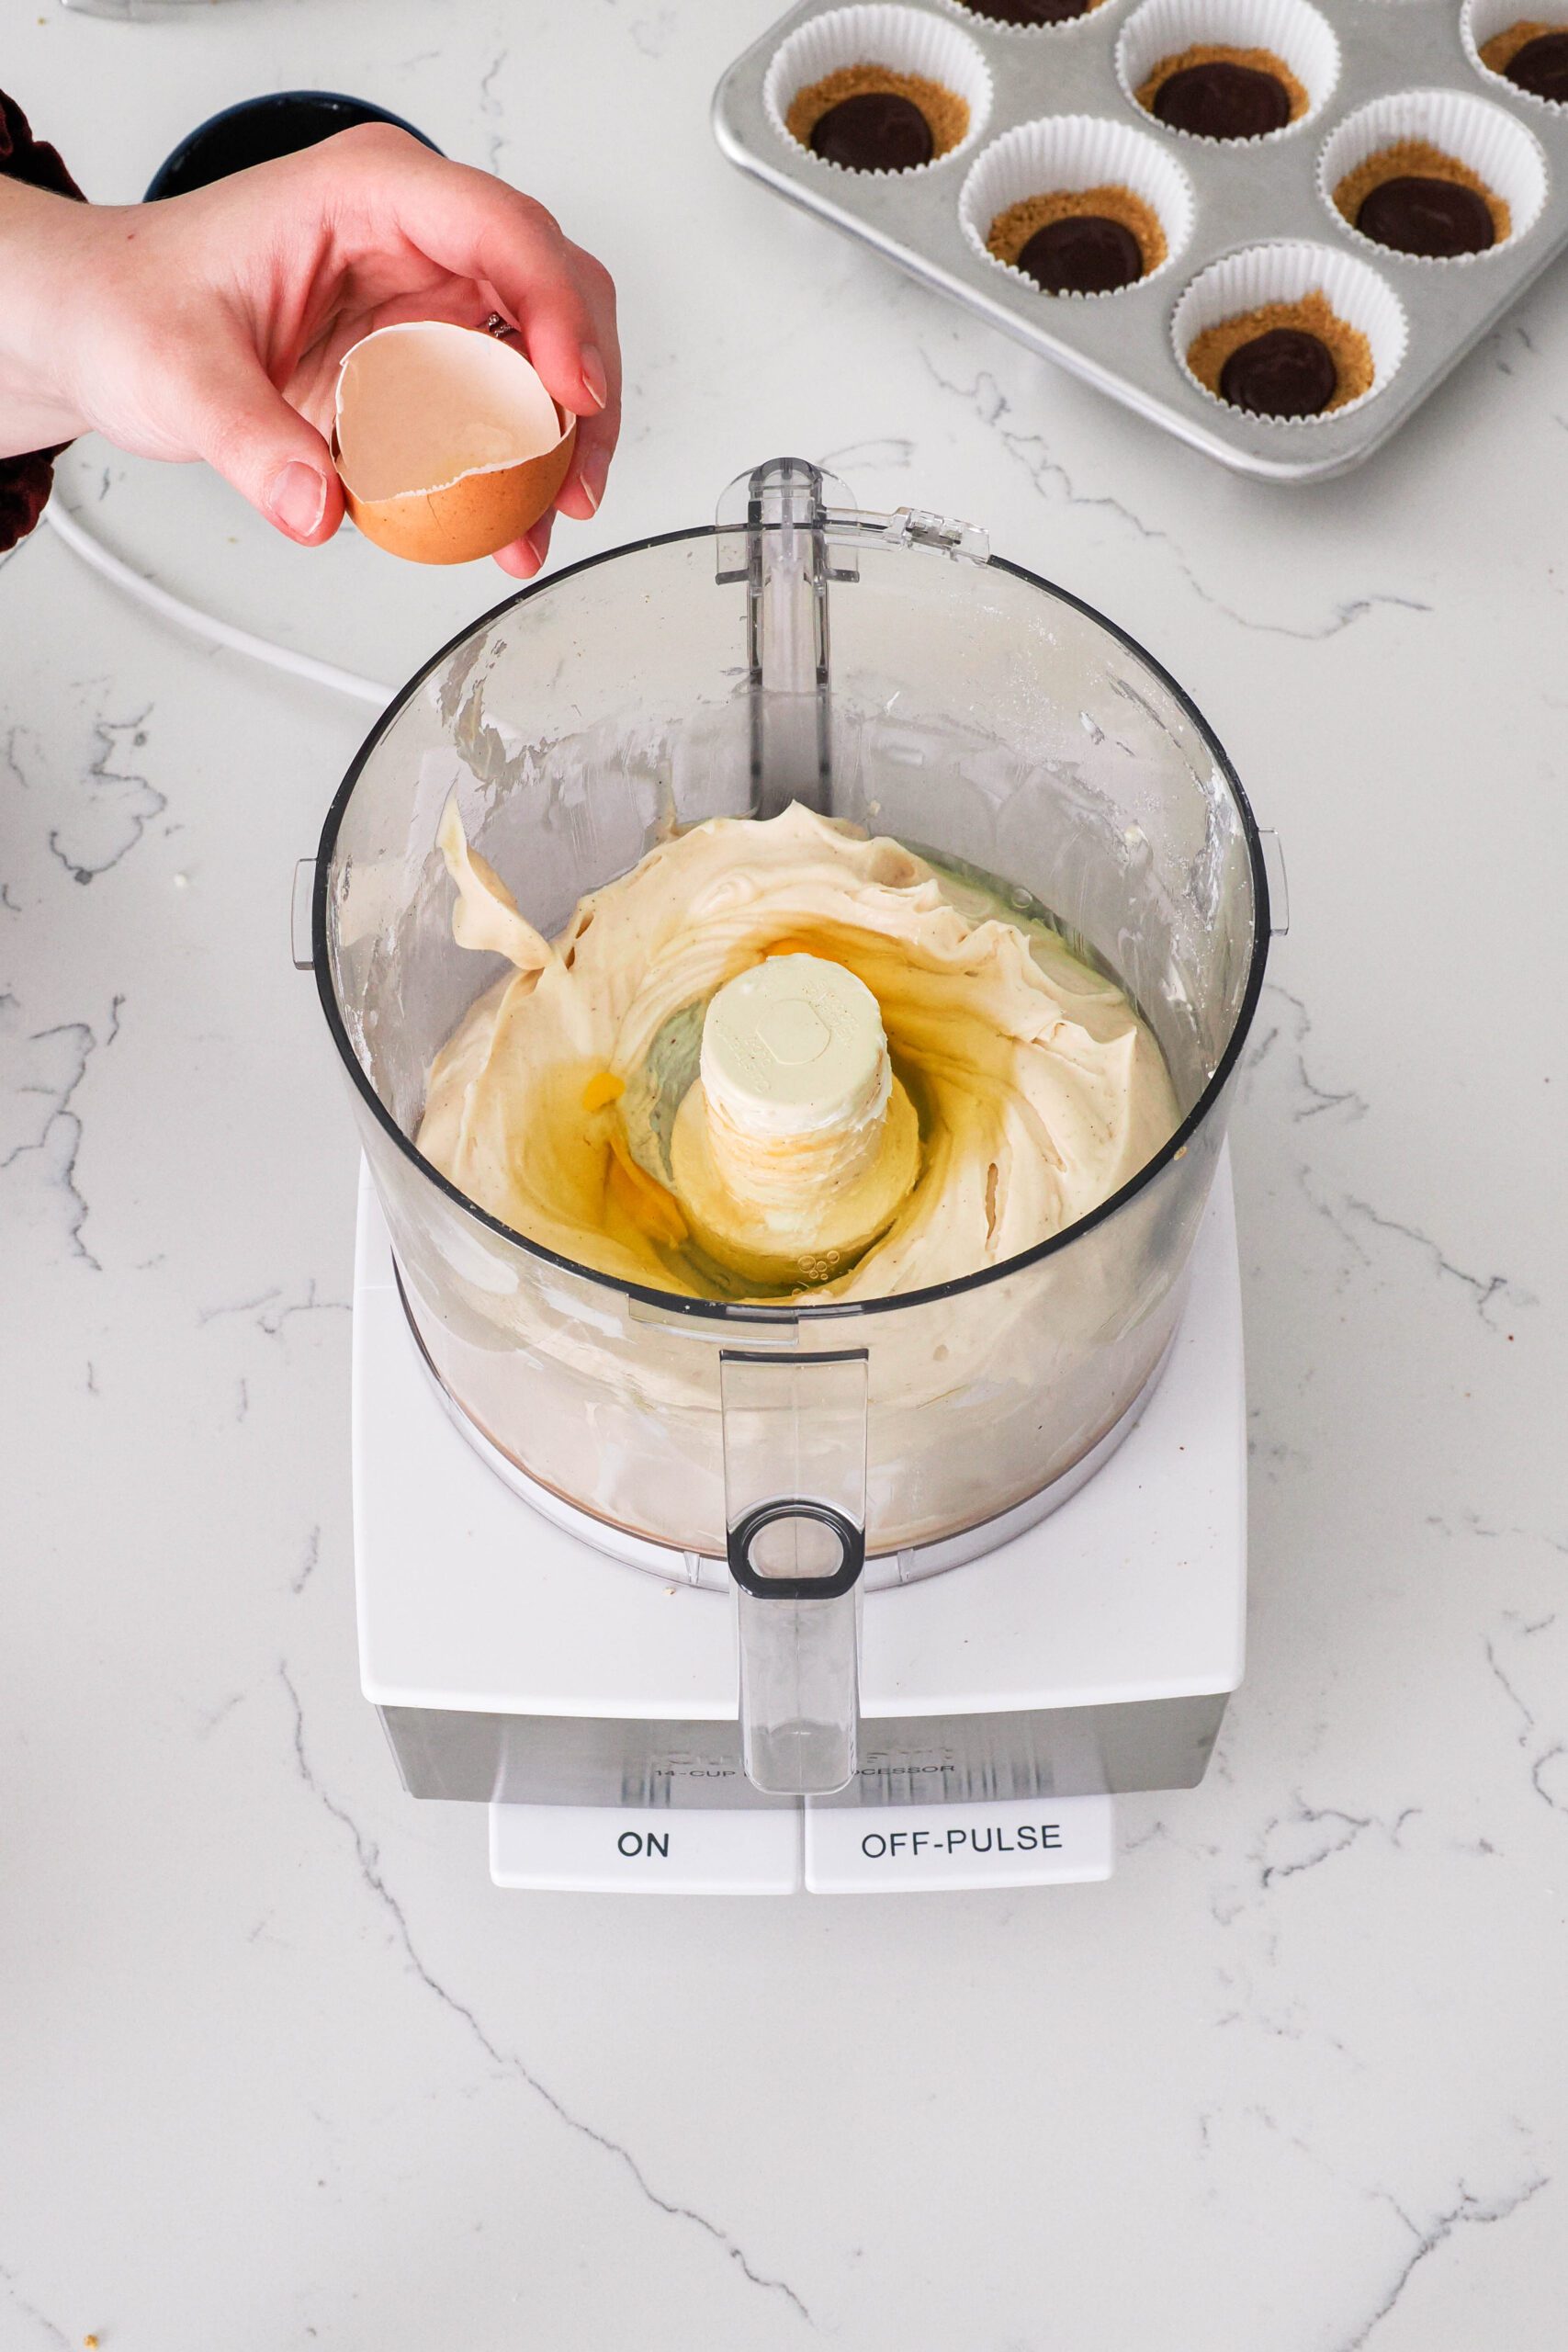
Once the caramel cheesecake mixture is smooth, add the eggs and pulse until just combined. This takes me just a few pulses, a break to scrape down the sides, and a couple final pulses.
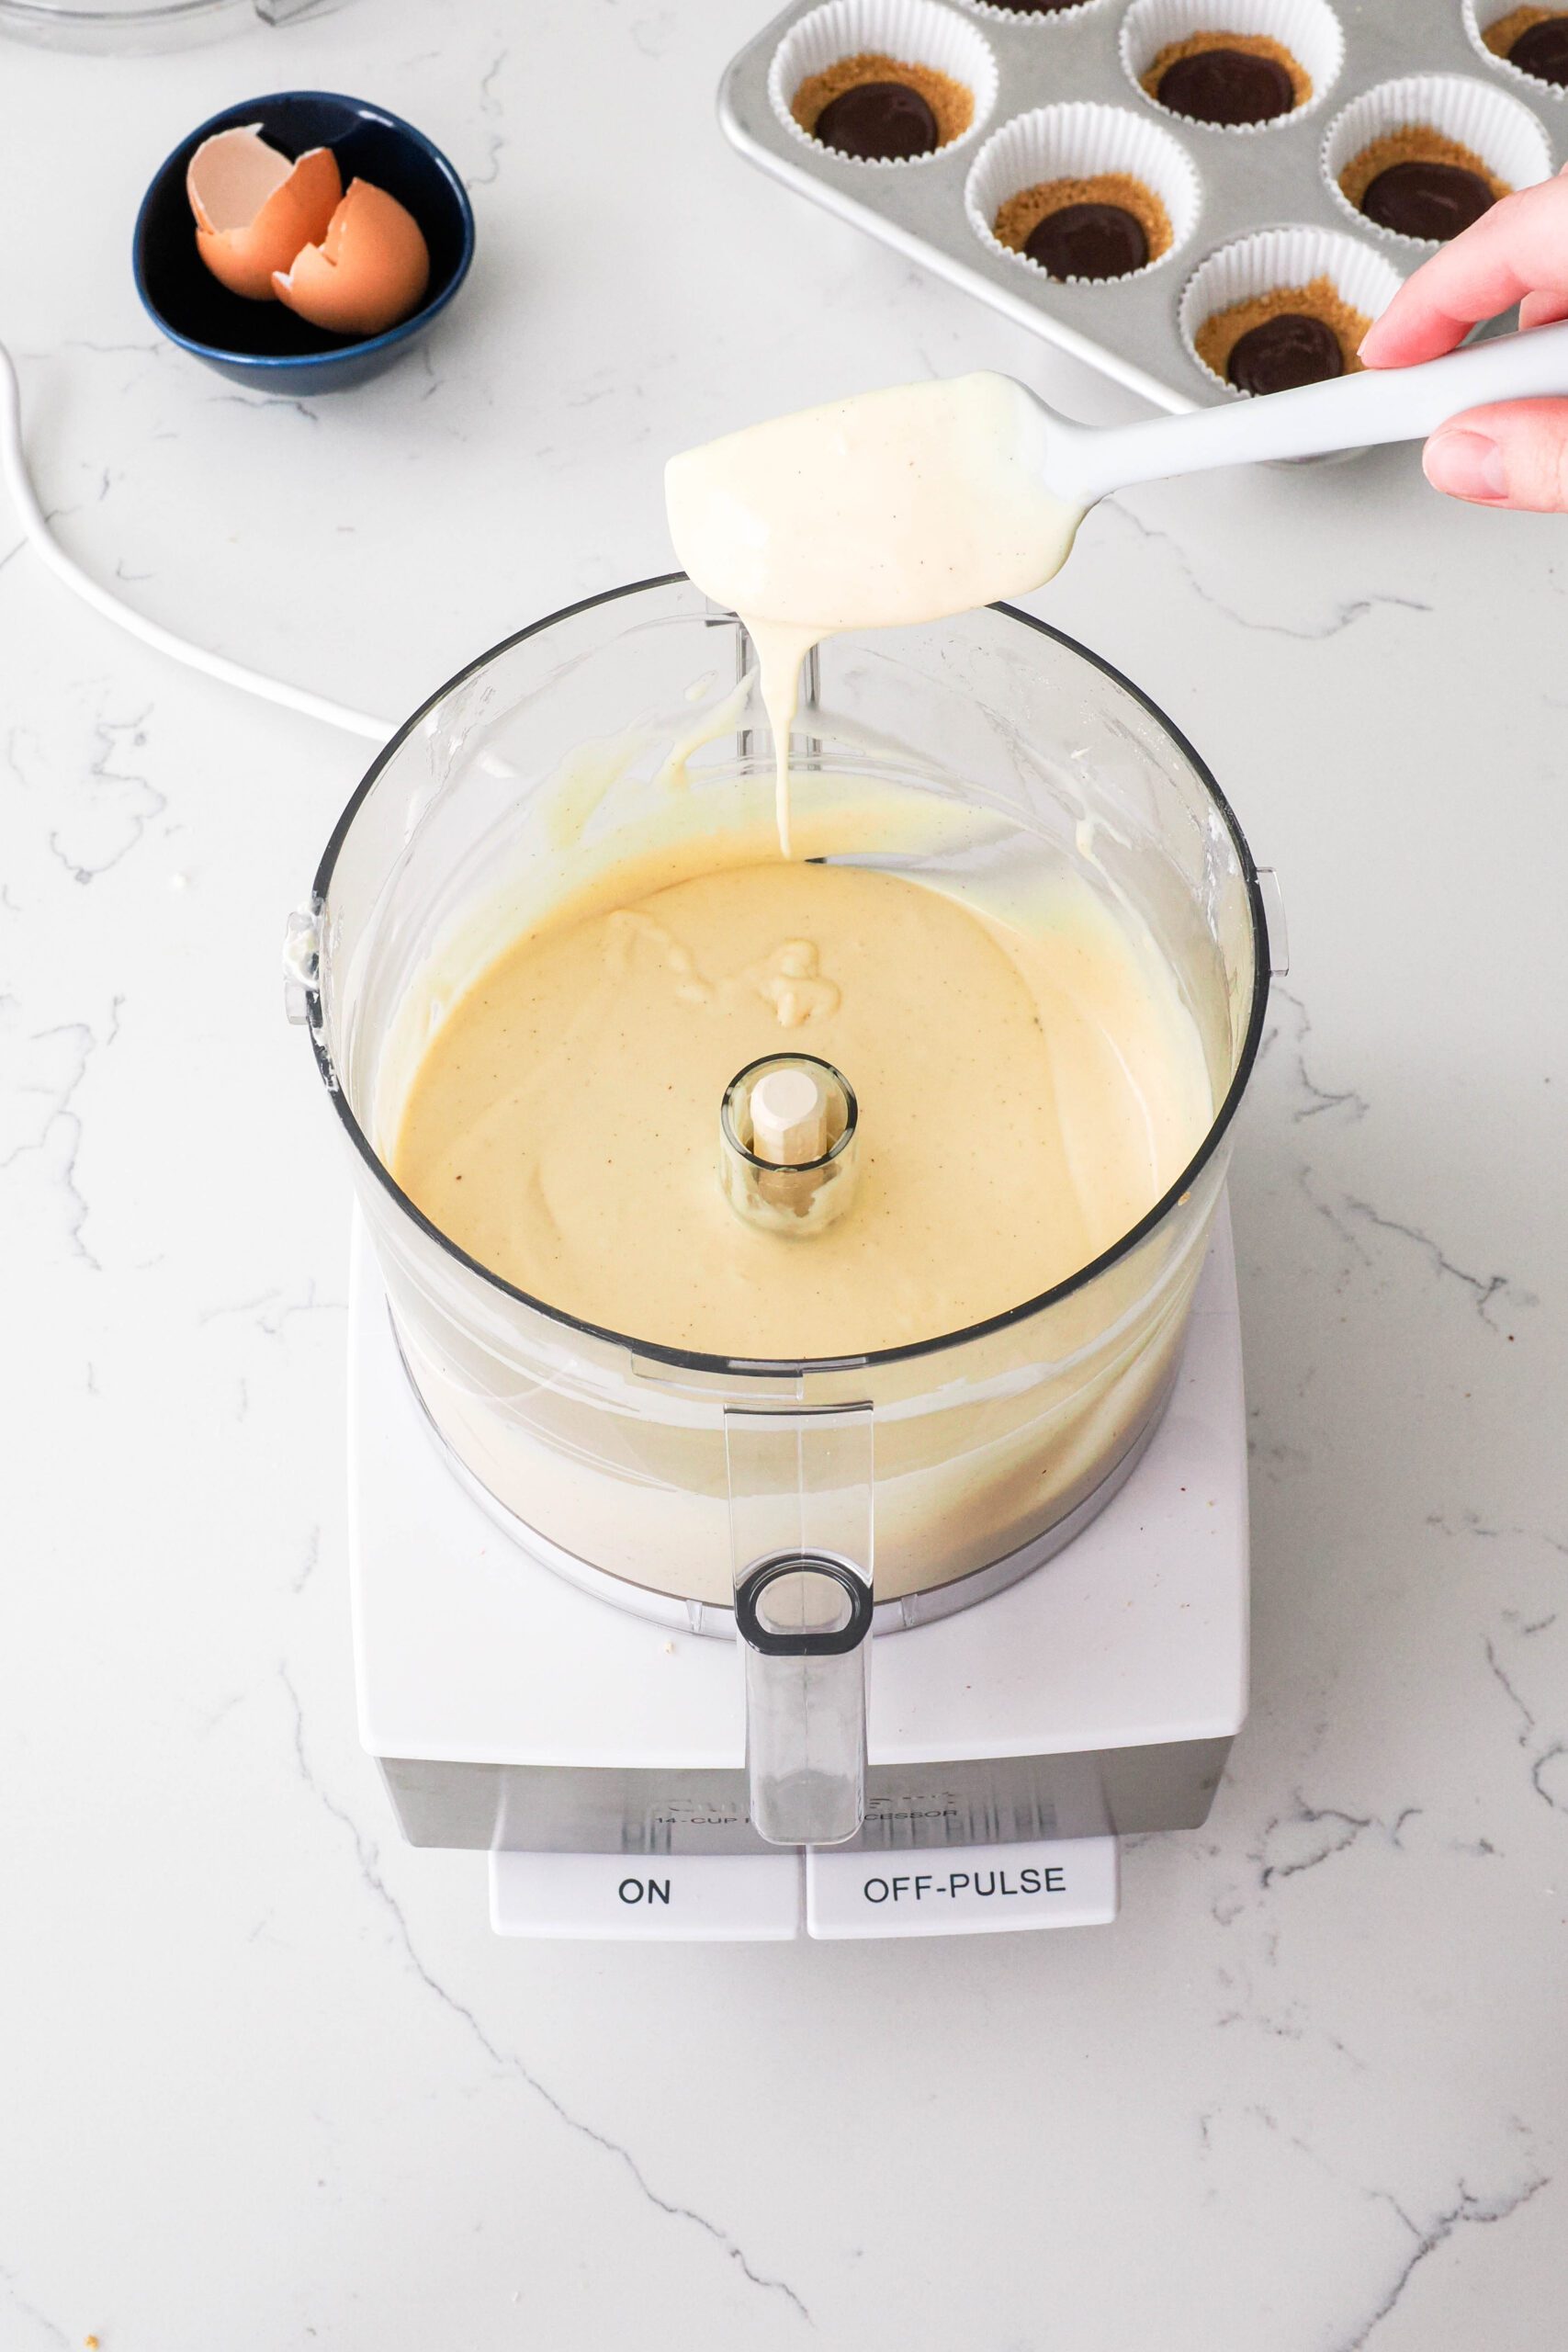
I recommend removing the blade of the food processor and giving the caramel cheesecake filling a good stir to ensure all the cream cheese at the bottom of the bowl has been incorporated. The mixture should be pretty runny!
How to Fill Mini Turtle Cheesecakes
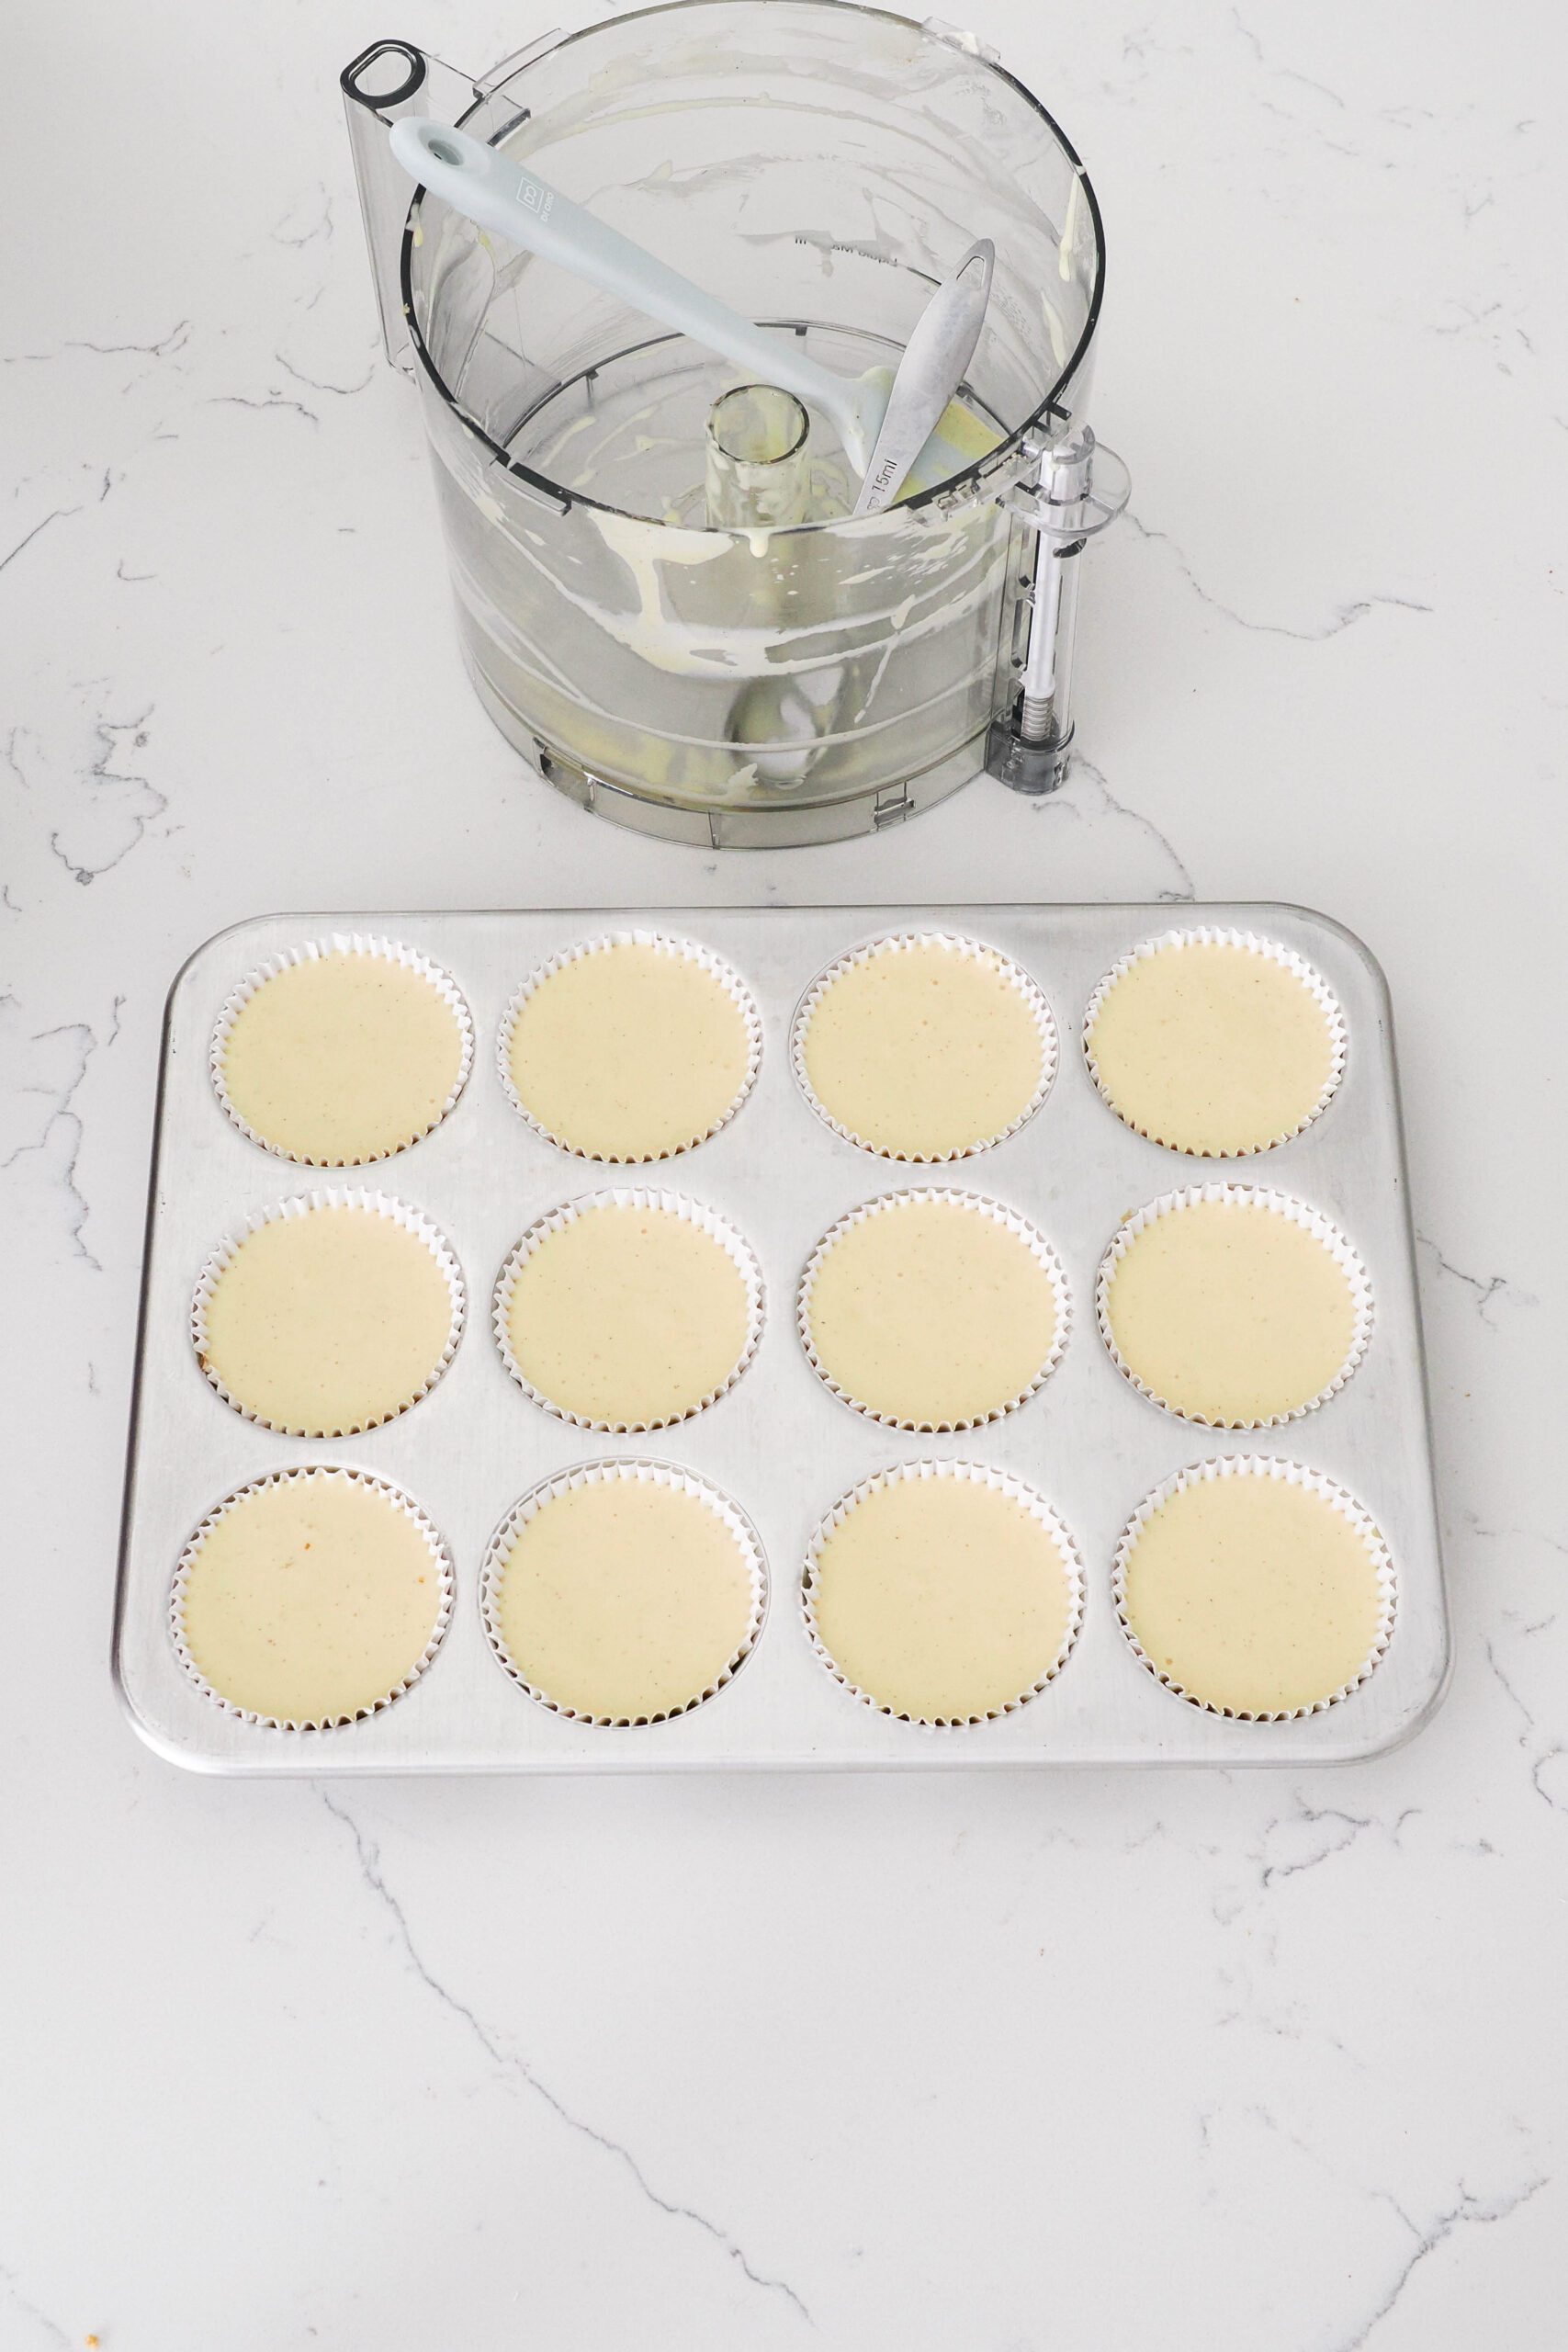
Because cheesecakes can go from just baked to overbaked within a matter of minutes, it’s important to fill each paper liner with similar amounts of cheesecake. The best way to do this is by adding a Tablespoon of the filling at a time.
The standard paper liners accommodate about one Tablespoon of crust, half a Tablespoon of ganache, and a little more than three Tablespoons of the cheesecake filling. In case your liners are larger or smaller than mine, I recommend adding just two Tablespoons of the filling to each liner to start and then adding more once you have some filling in all of them.

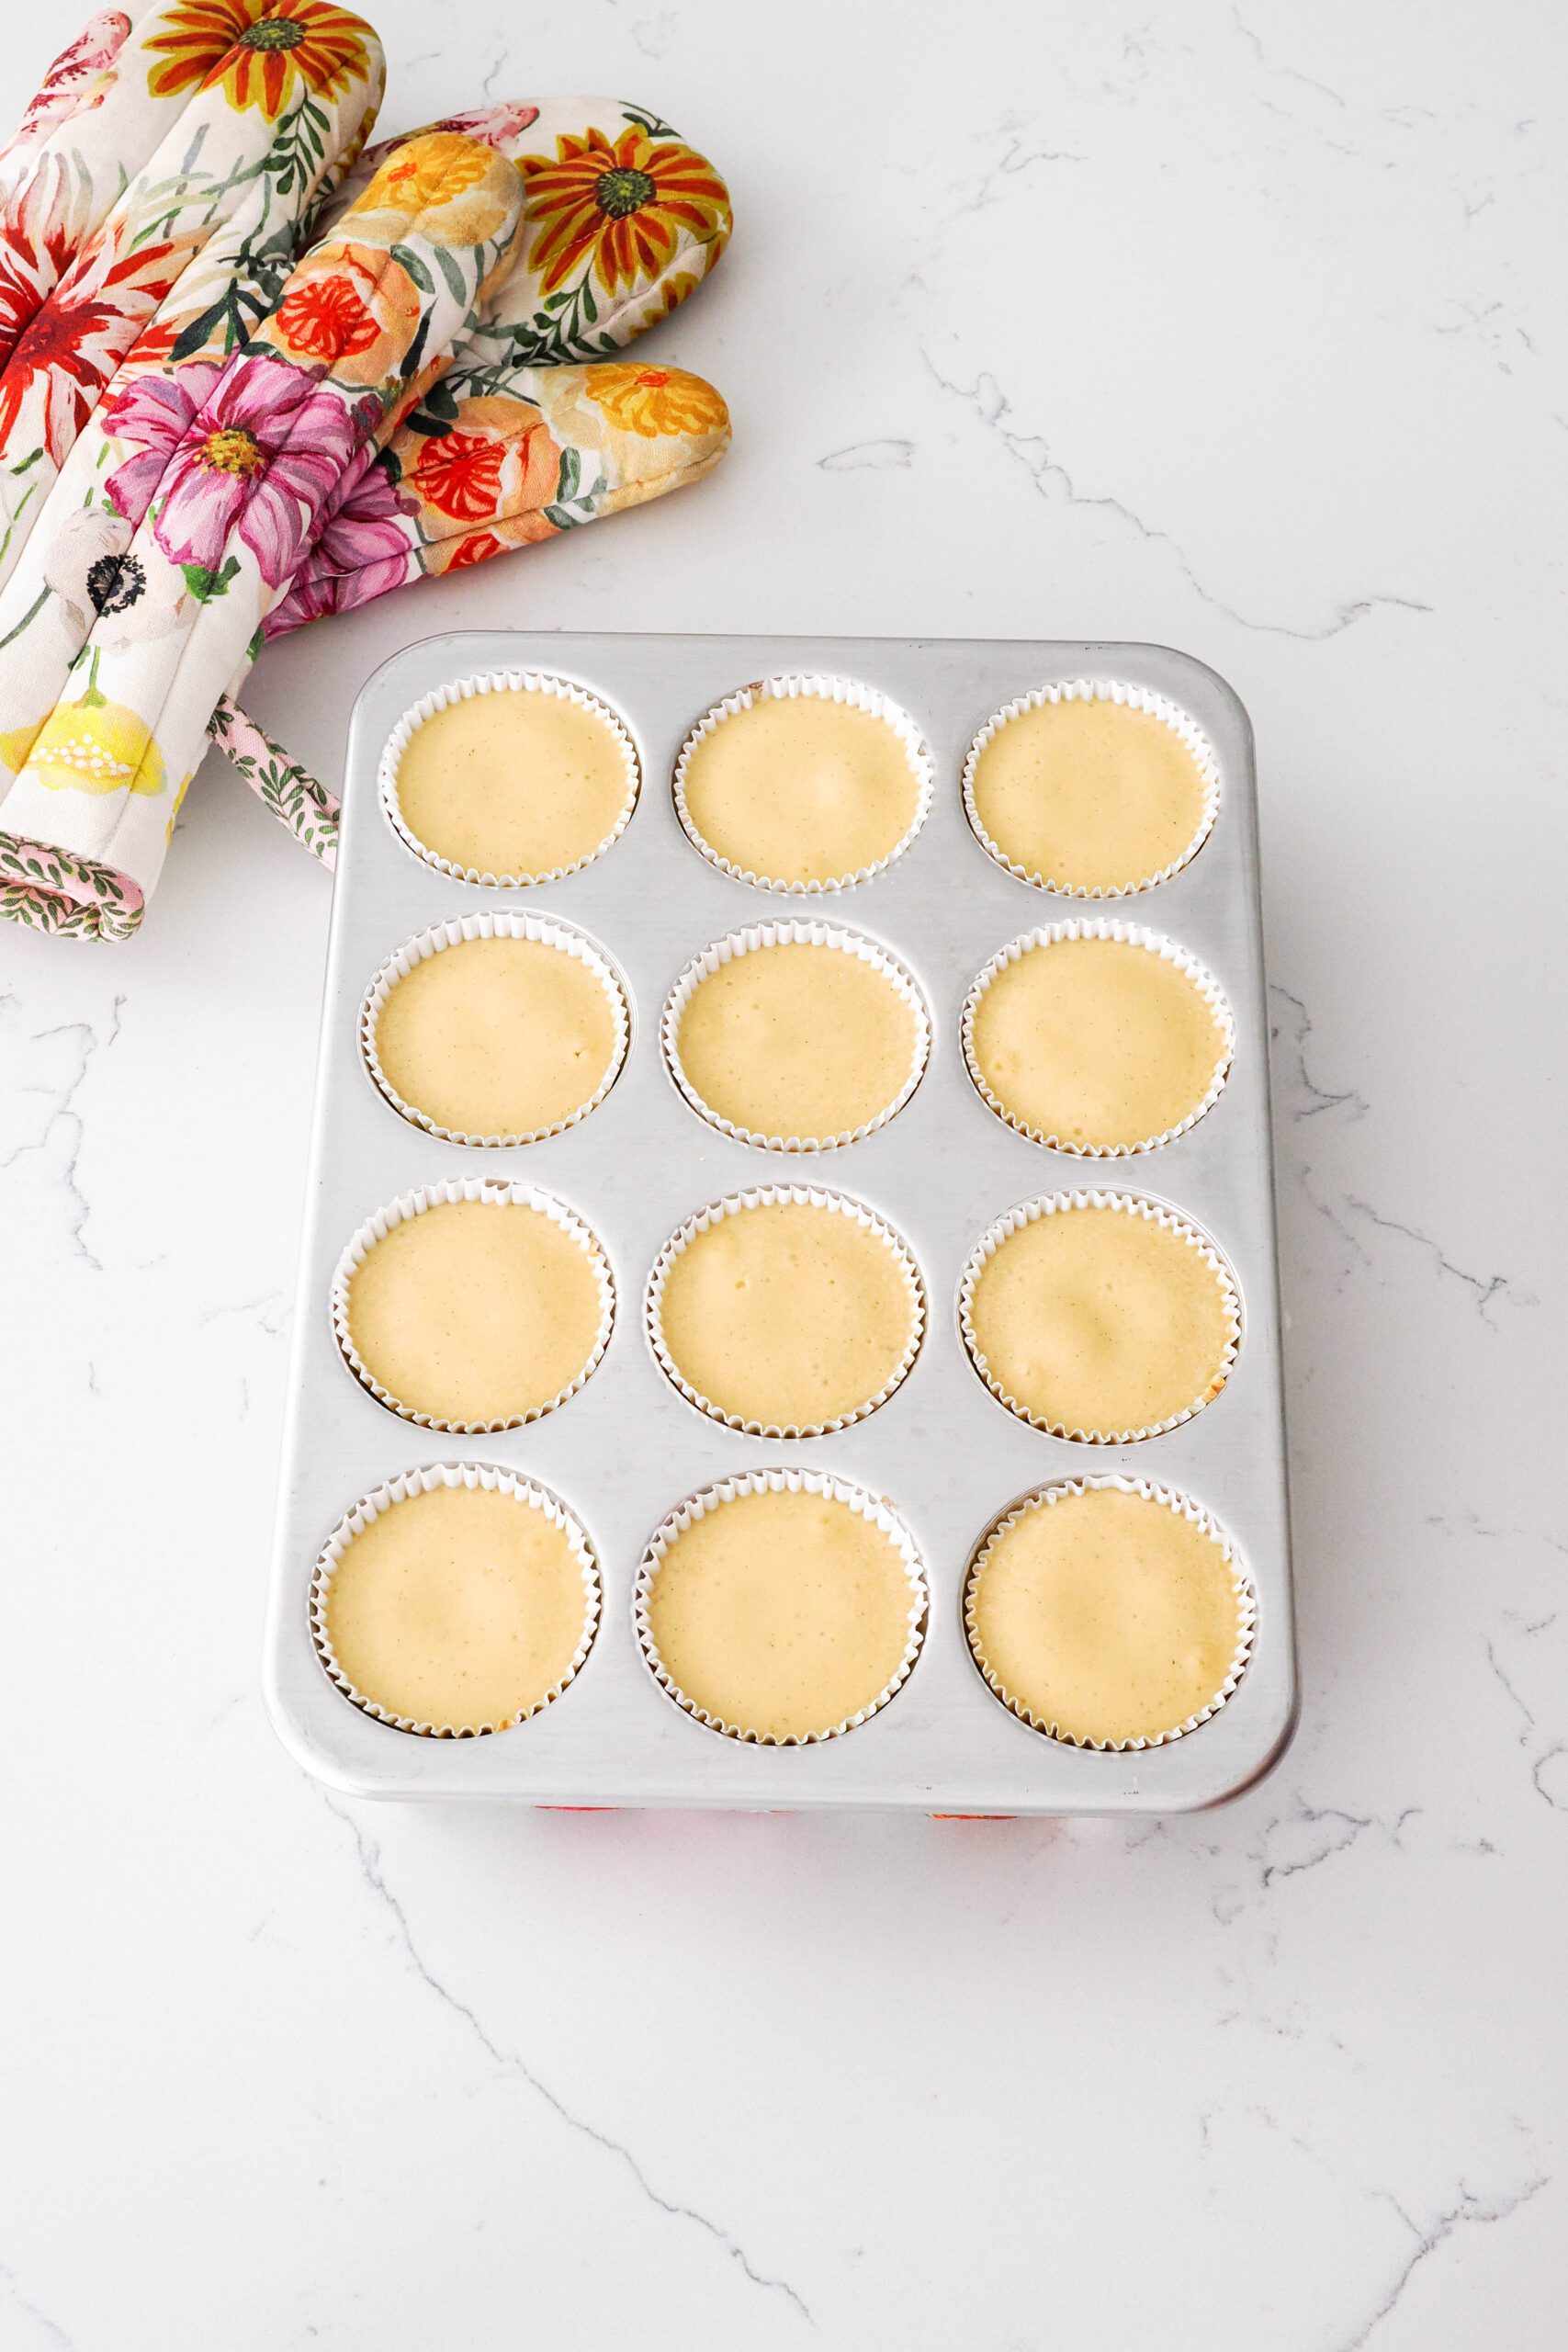
How to Bake Mini Turtle Cheesecakes
Bake the mini cheesecakes at 350°F/175°C for 18-21 minutes in a light pan, and 1-2 minutes less in a dark pan. The edges should be set and only the very centers of the cheesecakes should be slightly jiggly. It’s important to fill the cheesecakes with a similar amount of filling: Big variations will cause the cheesecakes to have different bake times!
Depending on the amount of filling in each and your oven, some cheesecakes may be fully set while others are still a little jiggly. That’s okay!
If you prefer firmer cheesecakes, bake for 20-23 minutes until all of the centers are fully set but the tops have not started to brown.
Then, remove from the oven and allow to cool in the pan for about an hour on a cooling rack.
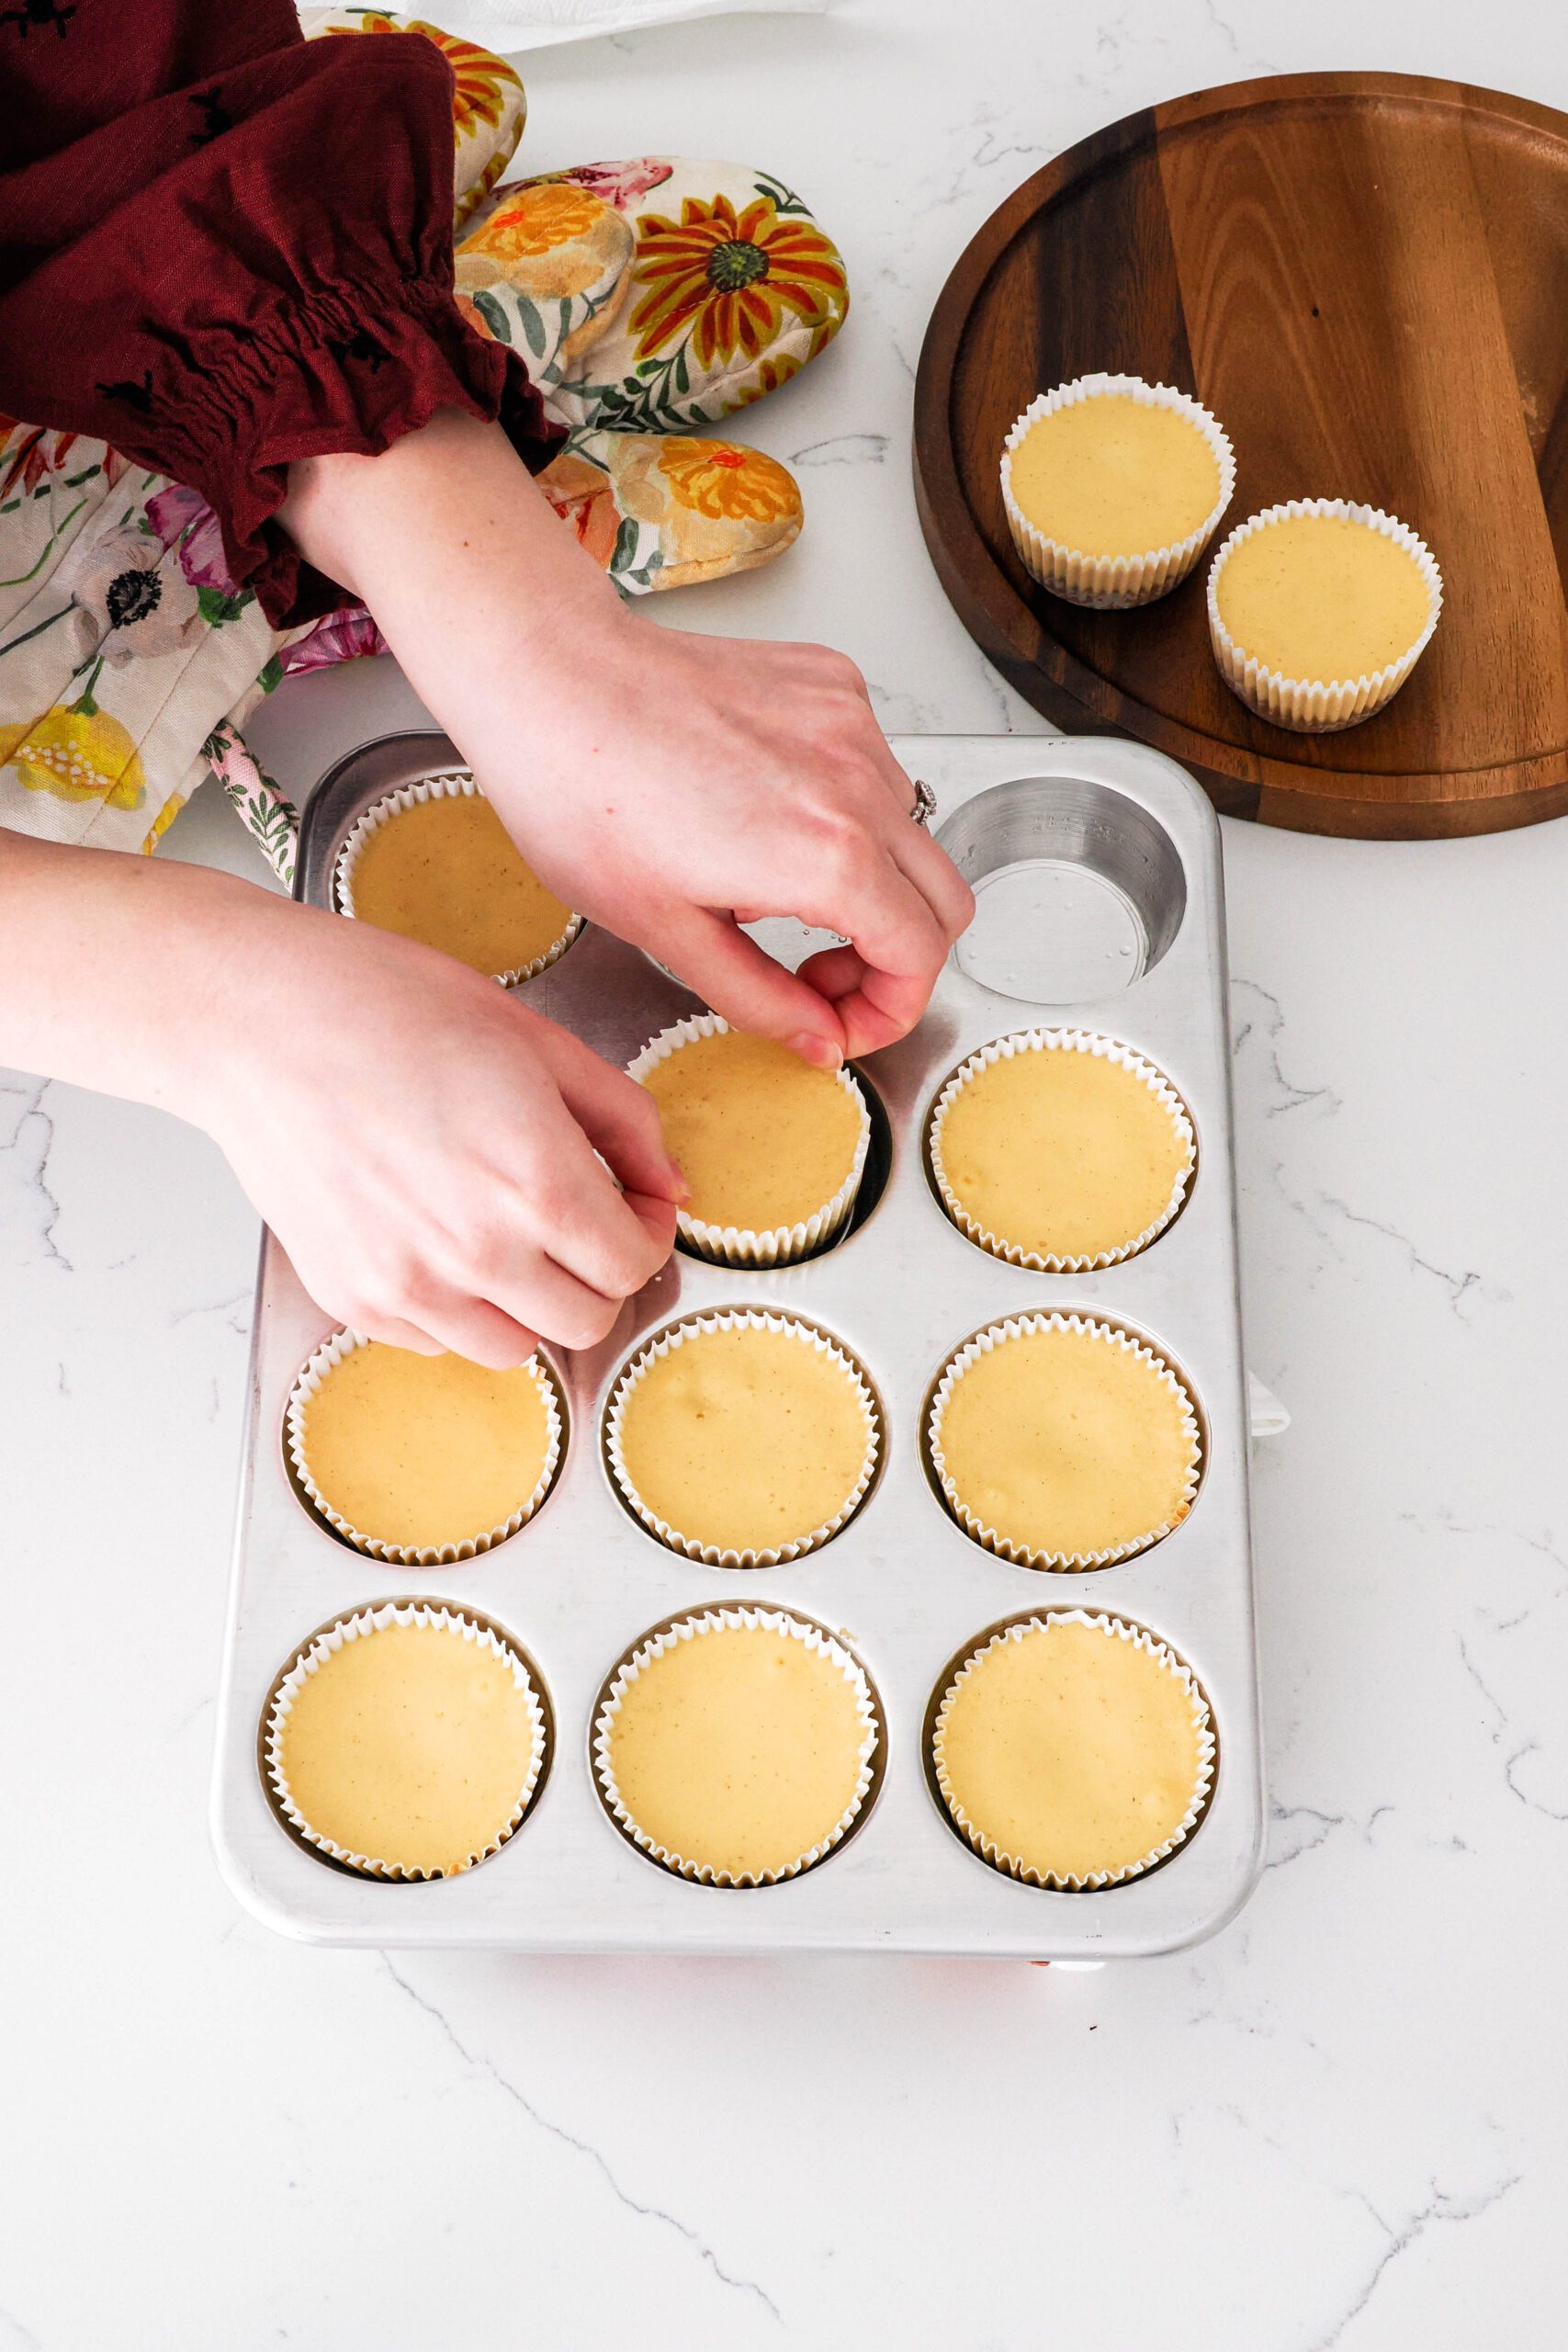
How to Remove Mini Cheesecakes from the Muffin Pan
Mini cheesecakes don’t require any special equipment to remove them from the pan! I find using clean hands the easiest, but you can also use a fork if desired.
Allow the cheesecakes to cool for about an hour, so the pan is no longer too hot to touch. Then, I pick up a cheesecake with the very tips of my fingers at the very top of the paper liner. With one hand on each side, I pinch the liner and pull up, then transfer the cheesecakes to a cooling rack or plate.
You can also slide a knife or fork in between the muffin pan and the paper liner and pry the cheesecake out from the bottom. (Depending on the kind of utensil and pan you use, this may scratch your baking pans.)
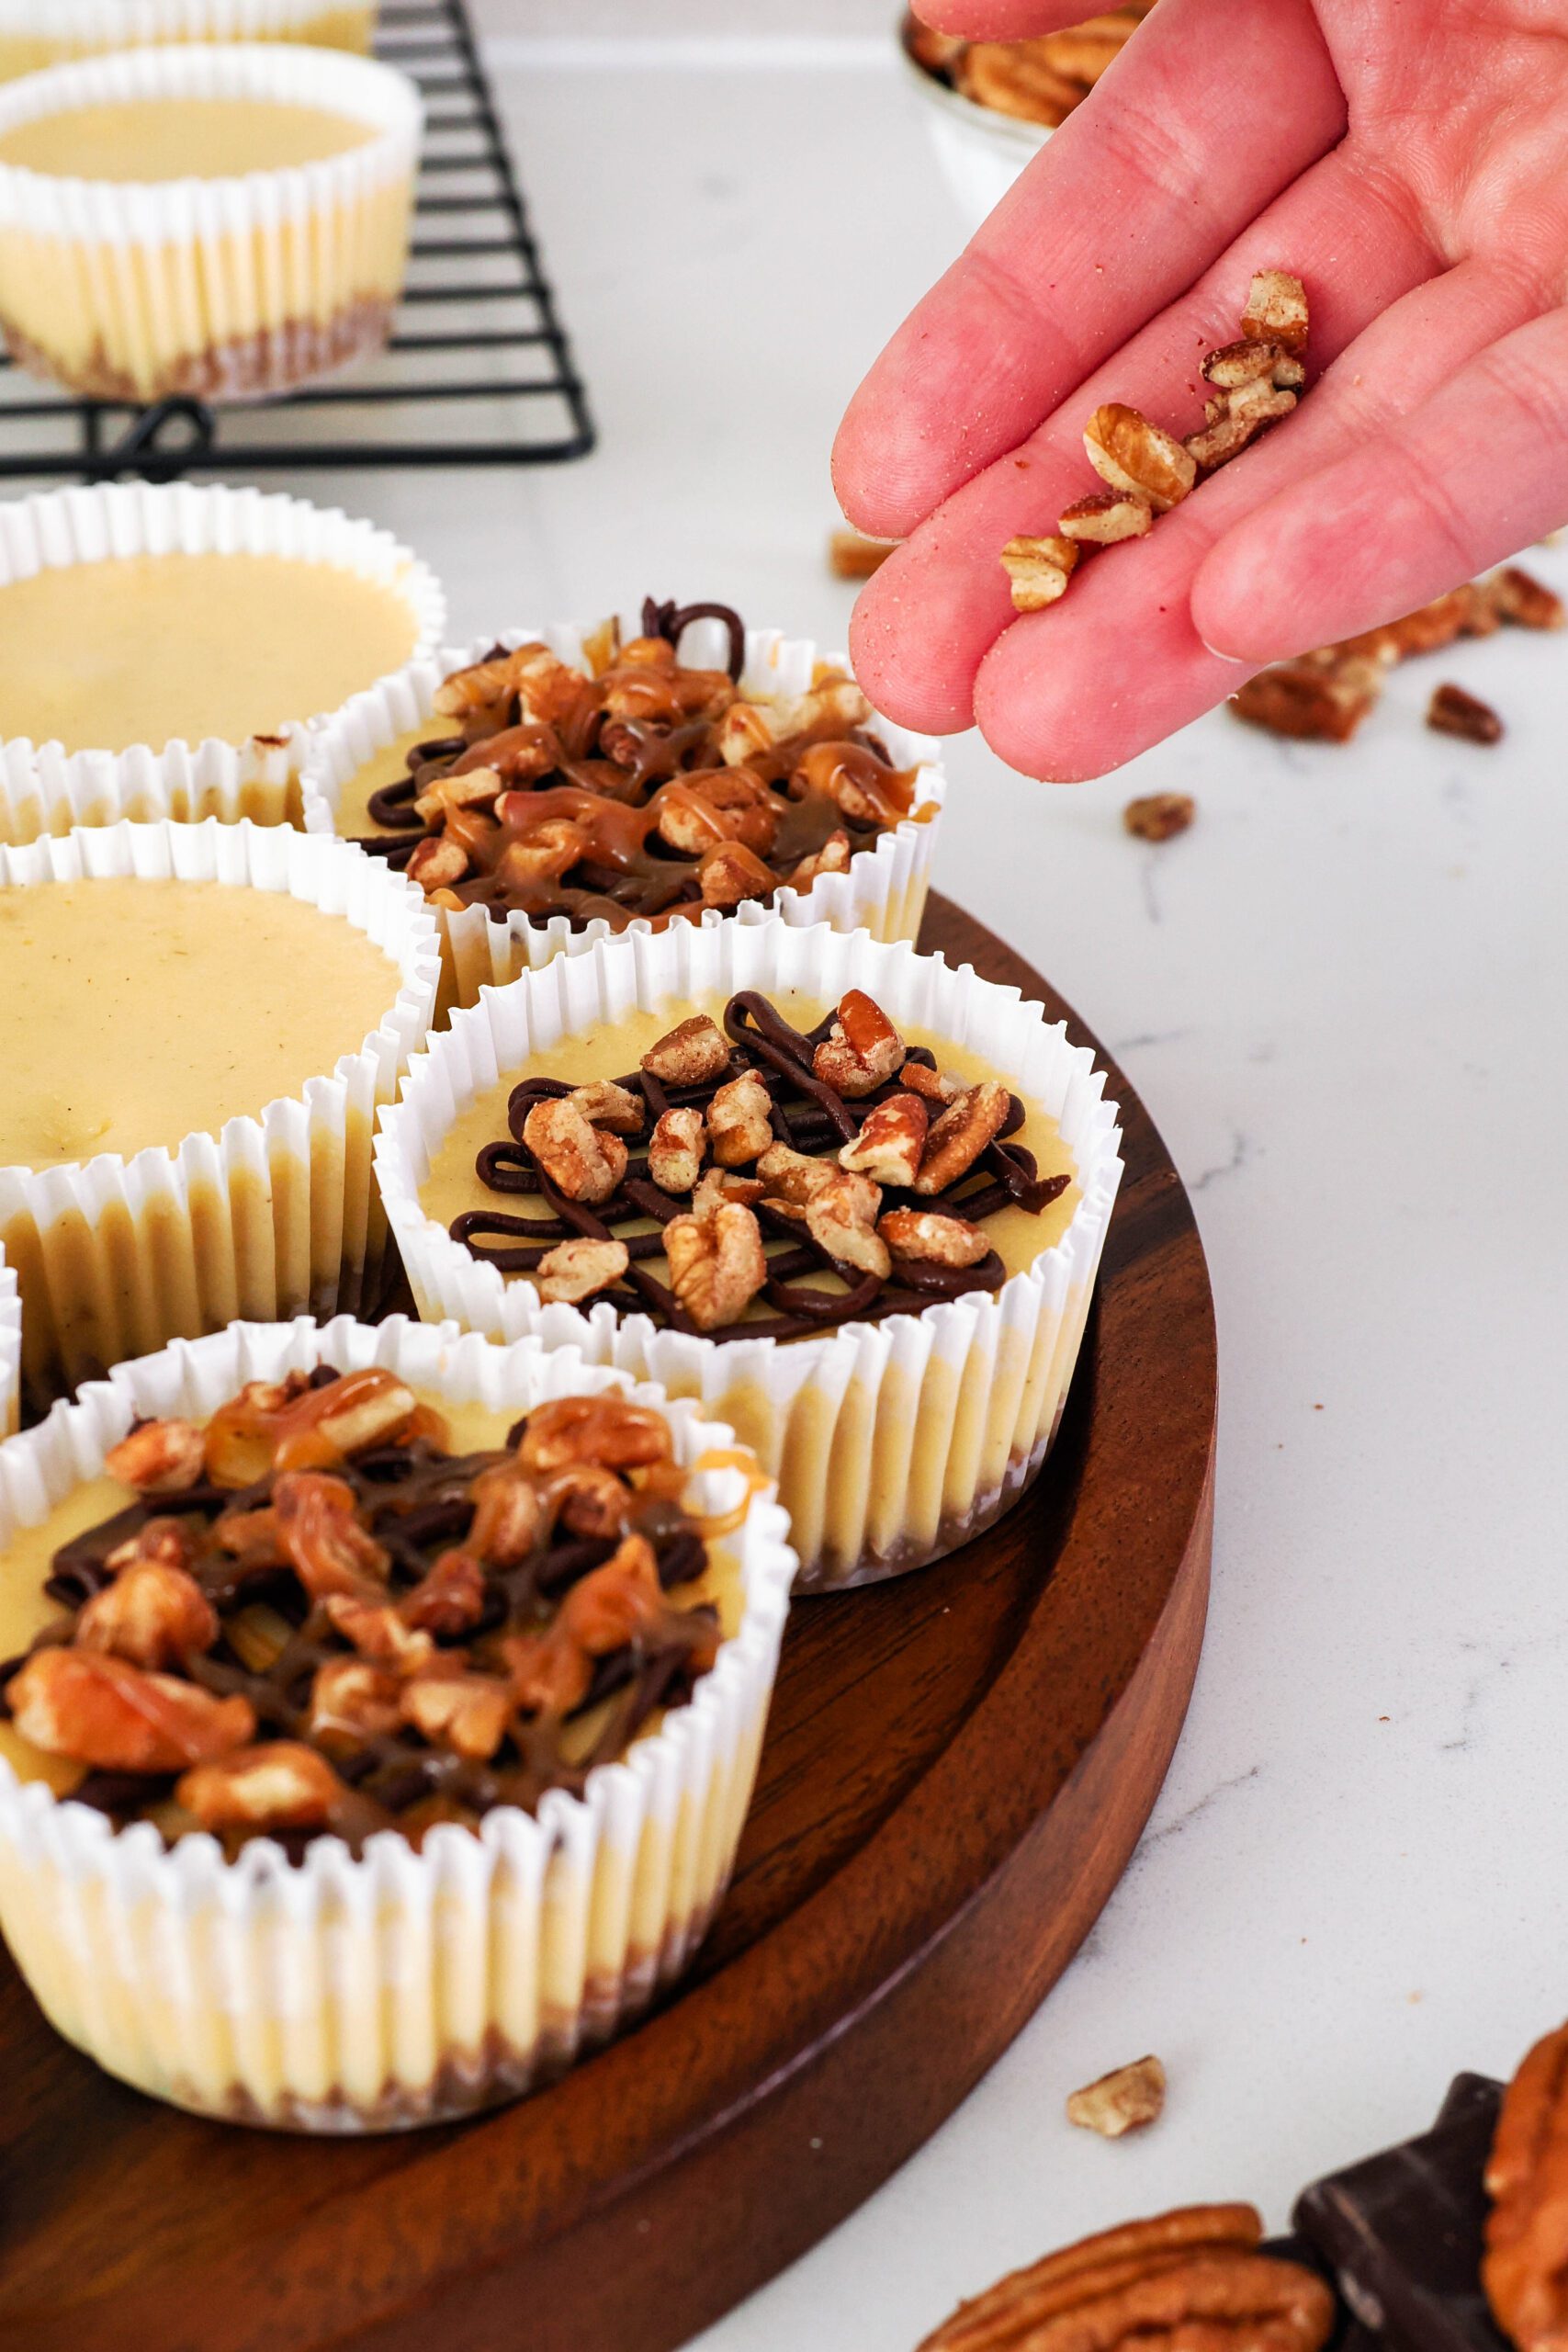
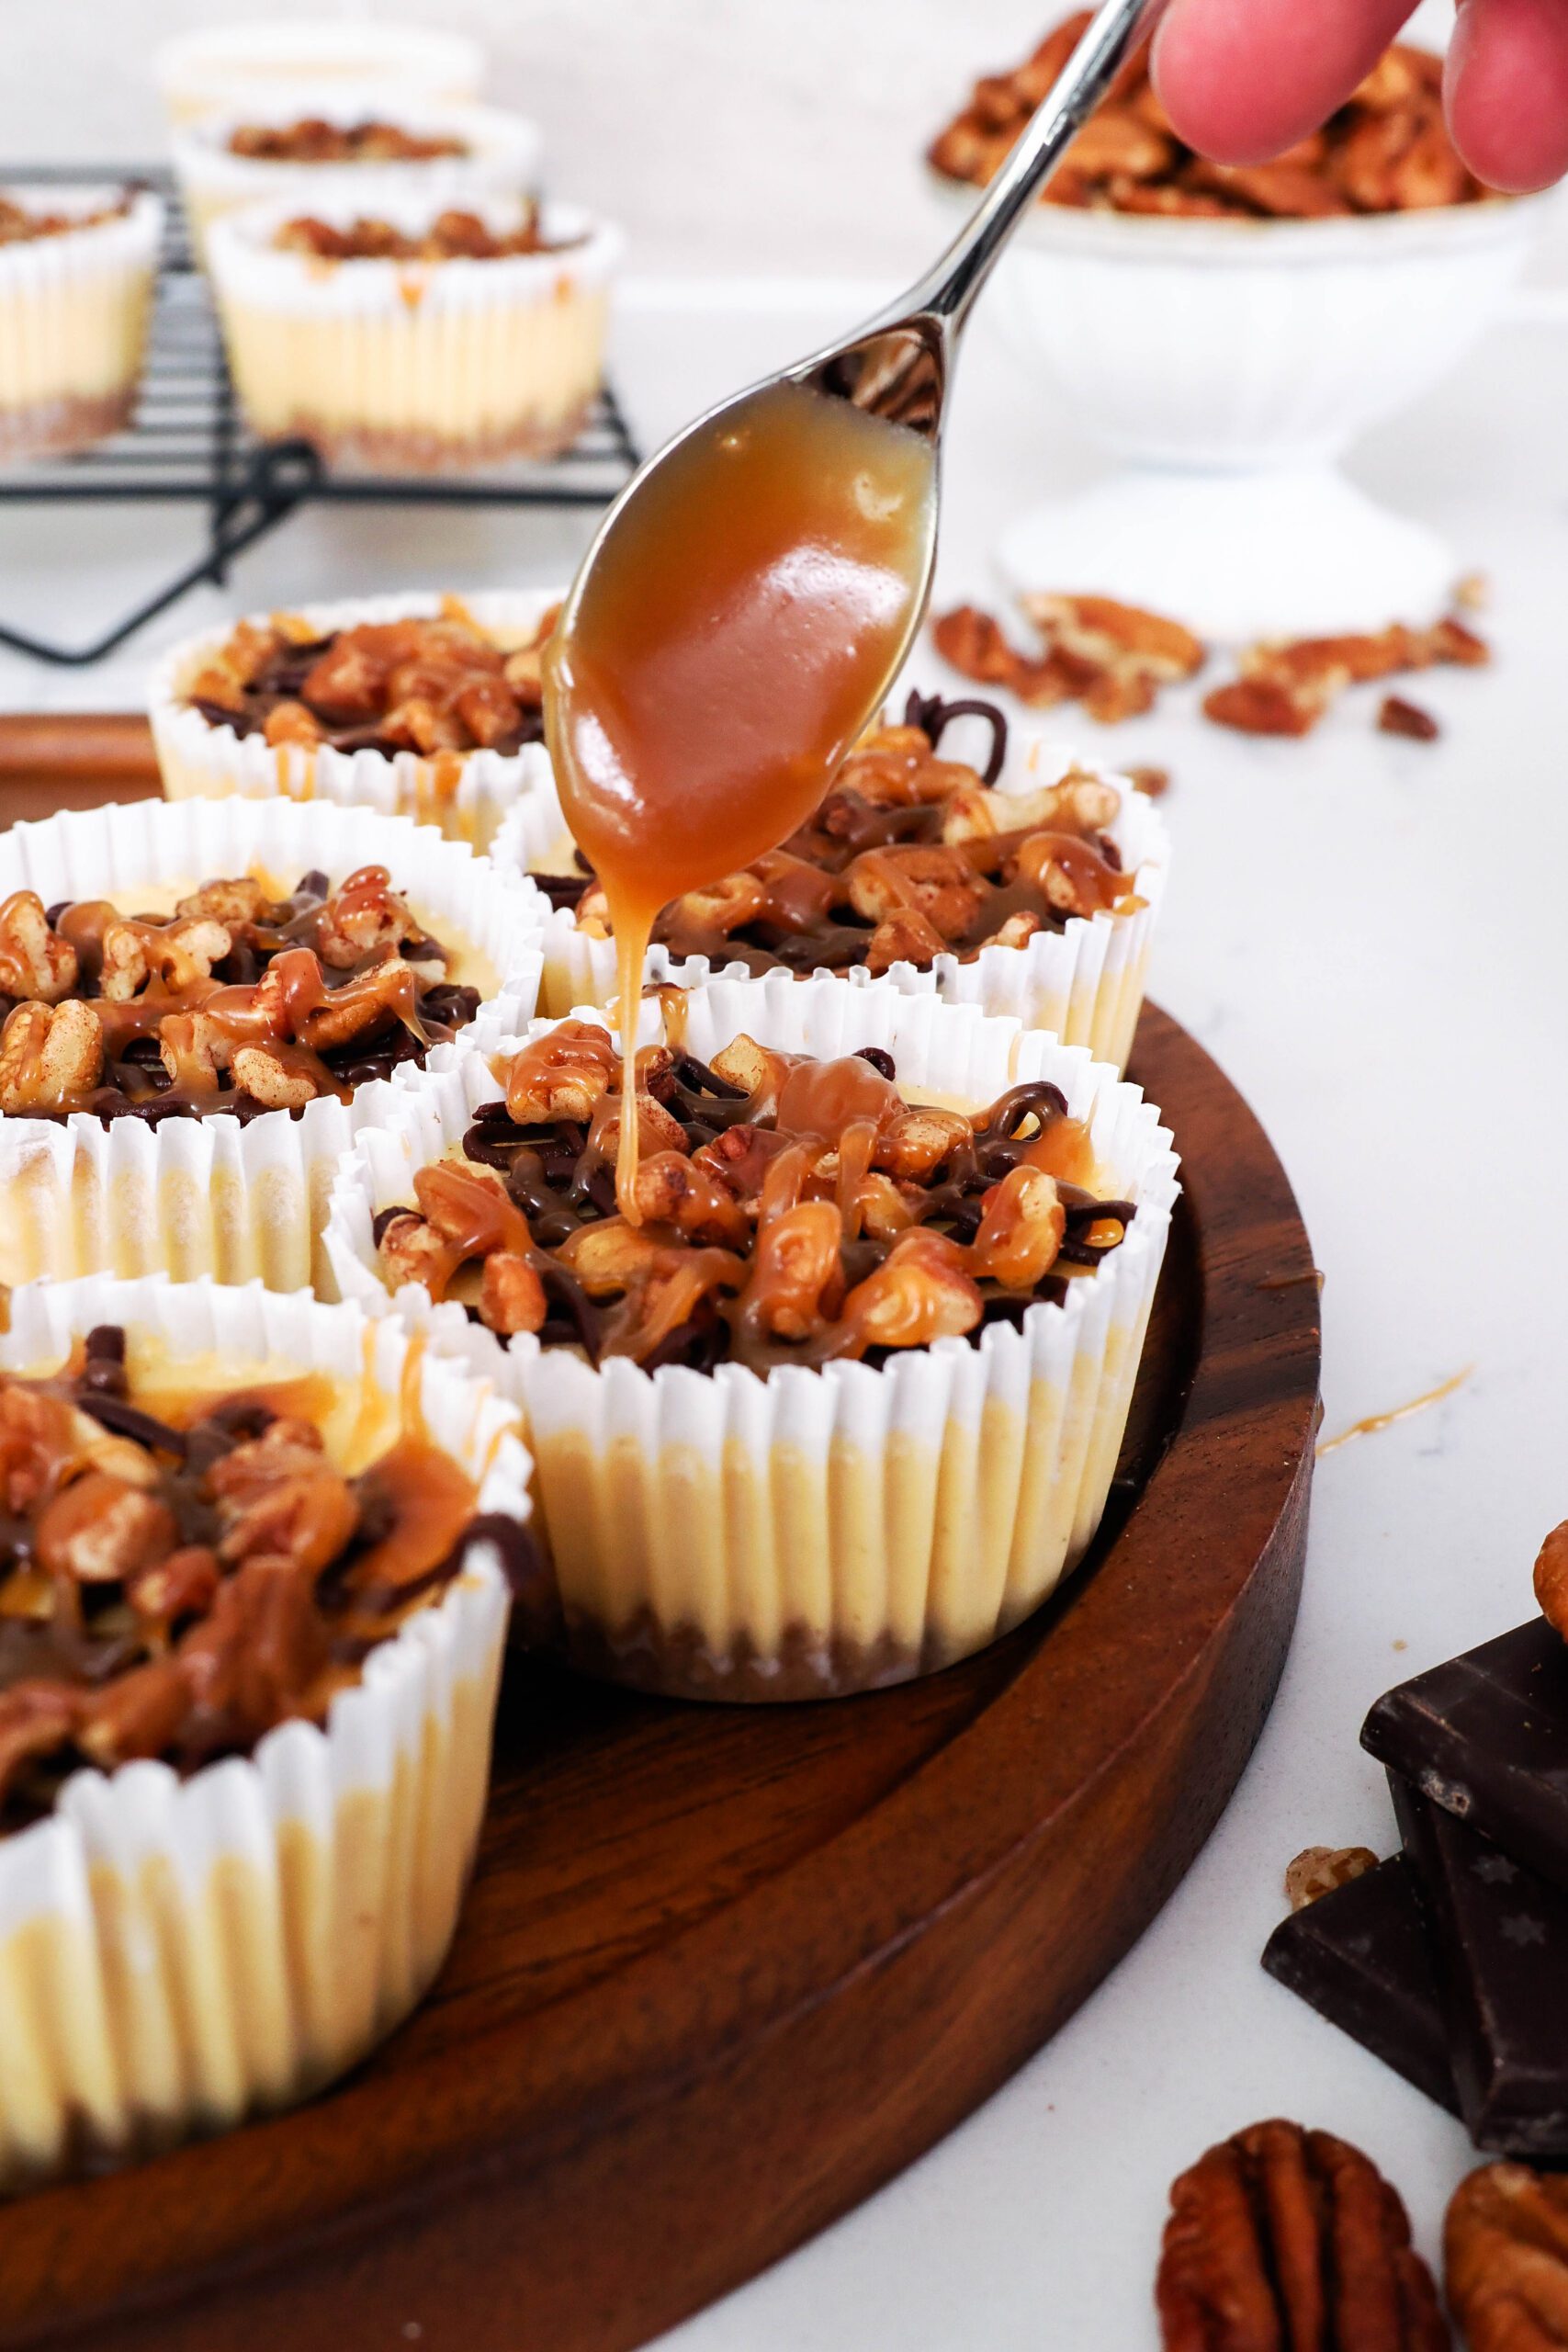
How to Top Mini Turtle Cheesecakes
Mini turtle cheesecakes are topped with a dark chocolate ganache, pecans, and salted caramel sauce. For a consistent and neat finish, I recommend using a zip-top bag to pipe the ganache and caramel onto the mini cheesecakes.
While testing this recipe, I preferred adding the ganache, then the pecans, and then topping it all with caramel. The chocolate ganache provides a nice base for the pecans to stick to, and the caramel on top of the pecans adds a beautiful shine.
You’re welcome to add the toppings in any order you like, though!
FAQs about Mini Turtle Cheesecakes
“Turtle” comes from the turtle candy, which is made from pecans, caramel, and chocolate. These cheesecakes have all those flavors, hence the name!
No, you can definitely make the cheesecake filling in a stand mixer or a large bowl with a hand mixer. Please see the notes at the bottom of the recipe card for that! I simply like using my food processor because I already used it for the crust. It also doesn’t add quite as much air to the mixture, which lessens the chance of the custard cracking.
In an airtight container, mini cheesecakes will last for up to five days in the fridge. For long-term storage, I recommend placing them in an airtight container and freezing them for up to six months.
Other Recipes You May Enjoy
I love making desserts in my muffin pans! This is the first mini cheesecake recipe made in a muffin pan that I’ve posted, but I already have more mini cheesecake recipes in the works.
Here are some other muffin pan desserts you might like:
- Mini caramel apple pies and caramel chai muffins use the same salted caramel sauce in this recipe!
- Mini cherry pies
- Mini blueberry crumble pies
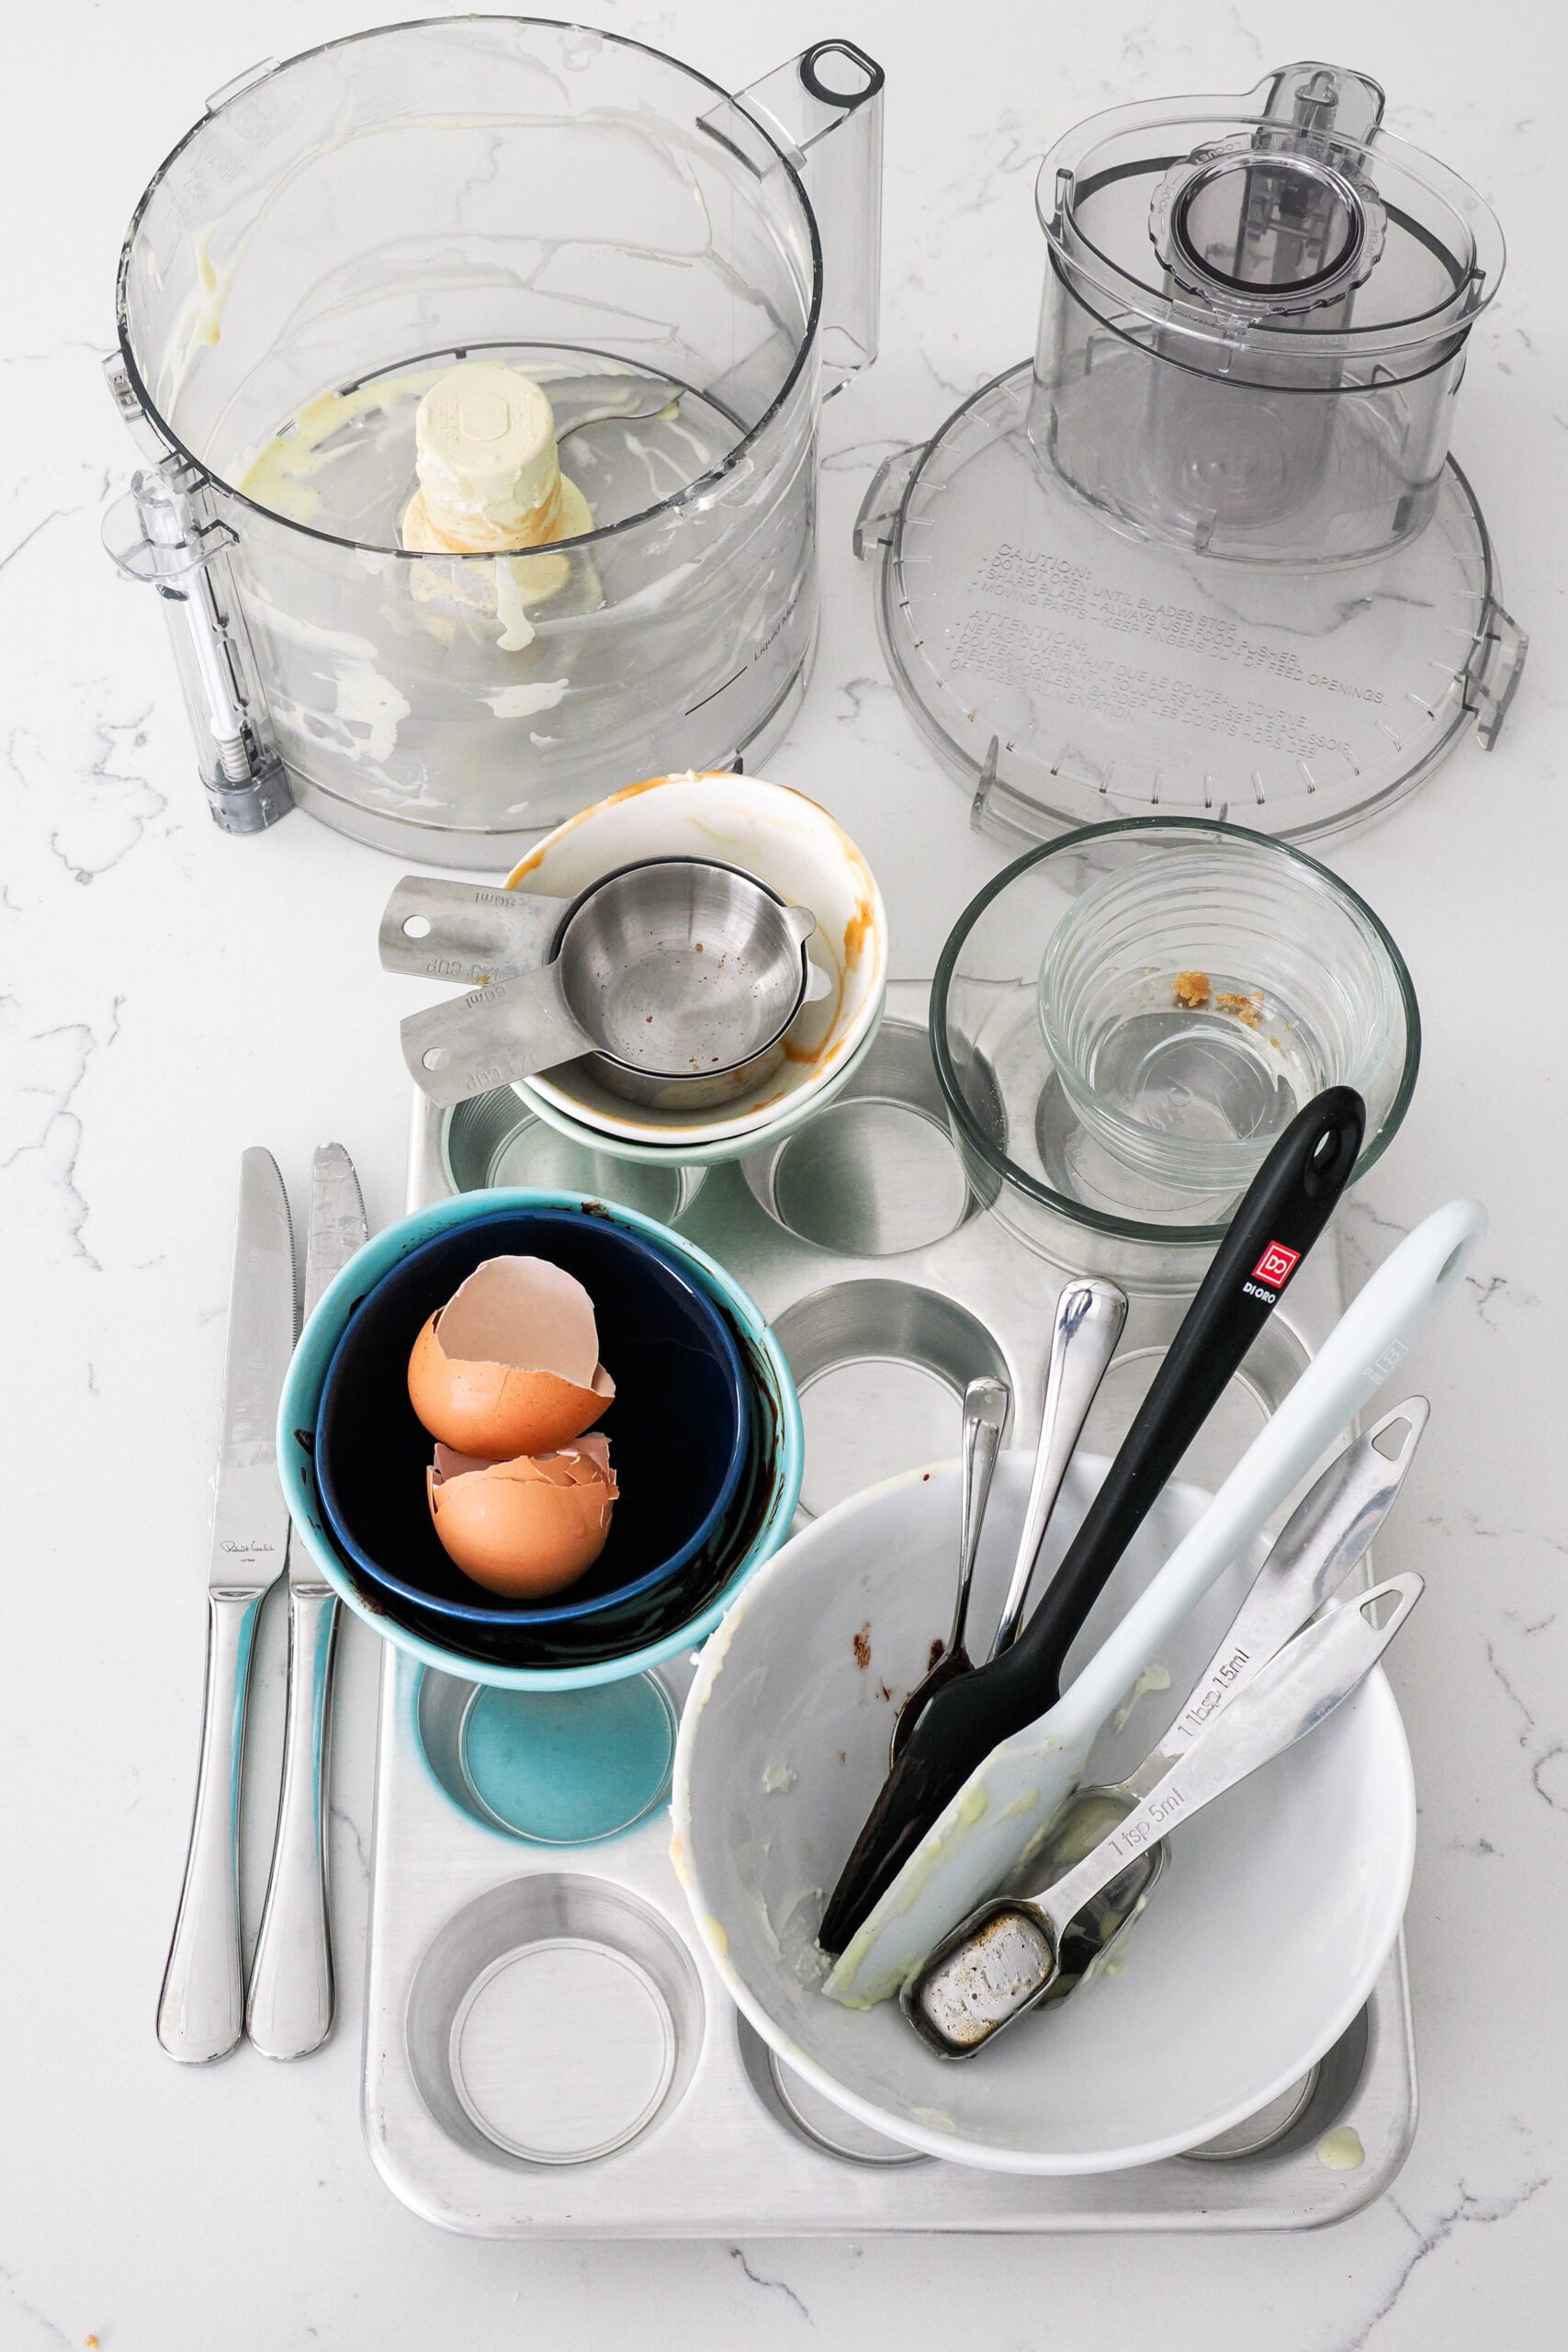
Dish Cleanup: A Lil Messy
I rate my recipe cleanups on a scale of 1 to 5. 1 is only a handful of dishes, and 5 is everything including the kitchen sink.
My mini turtle cheesecakes recipe has a cleanup rating of a 3. This is mostly due to the fact that I reuse the food processor bowl to make the cheesecake filling! If you don’t have a food processor and end up using an electric mixer to make your mini cheesecakes, you may end up with a few more dishes than I have here.
Mini Turtle Cheesecake Recipe
Mini Turtle Cheesecakes
Layered with a nutty graham cracker crust, rich caramel cheesecake filling, dark chocolate ganache, salted caramel, and pecans, these mini turtle cheesecakes are a delicious and surprisingly easy dessert!
Ingredients
For the Crust
- 6 sheets honey graham crackers (100 g)
- ¼ cup pecan pieces (36 g)
- 3 Tablespoons salted butter, melted (42 g)
For the Chocolate Ganache
- about ⅓ cup dark or semisweet chocolate chips (50 g)
- about ¼ cup heavy cream (50 g)
For the Caramel Cheesecake Filling
- 12 oz cream cheese (1.5 blocks), softened (340 g)
- 3 Tablespoons salted caramel sauce (60 g)
- ⅓ cup granulated sugar (70 g)
- 1 teaspoon vanilla extract (5 ml)
- 2 large eggs, at room temperature
Toppings
- 2-3 Tablespoons pecan pieces (20-30 g)
- 1 Tablespoon salted caramel sauce (15 ml)
Instructions
To Make the Mini Cheesecake Crusts
- Preheat the oven to 350°F/175°C, and line a muffin pan with 12 paper liners.
- Crush the graham crackers and pecan pieces until fine in the bowl of a food processor (or with a rolling pin in a bag or parchment paper). Remove the blade from the food processor bowl and pour the melted butter over the crumbs. Stir together with a spatula until fully combined.
- Divide the crumbs into the paper liners in the muffin pan, about 1 Tablespoon in each. Press the crust into the liners with your fingers or a small measuring cup to pack the bottoms, then set aside.
- To a small bowl, add the chocolate and heavy cream. Heat in the microwave for 10-15 seconds (or over a double boiler) until steamy. Stir together until no lumps of chocolate remain, and the ganache looks shiny. If lumps remain, microwave in 5-second bursts, stirring after each, until smooth.
- Place about a teaspoon of chocolate ganache on top of the crust in the center of each liner, then reserve the remaining ganache (about a quarter to a third leftover) for topping. I like to leave the ganache as a dollop in the center, but you can spread it evenly over each crust if desired.
To Make the Caramel Cheesecake Filling
- In the bowl of a food processor,* add the cream cheese, salted caramel, sugar, and vanilla. Pulse until smooth and combined, then add the eggs. Pulse a few times until smooth, then scrape down the sides of the bowl and pulse one or two more times until just combined.
- Divide the cheesecake filling evenly into the paper liners, about 3 Tablespoons per liner. The cups will be very nearly full.
To Bake the Mini Turtle Cheesecakes
- Bake for 18-21 minutes, until the edges are set and only the very centers of the cheesecakes are slightly jiggly. (Some cheesecakes may be fully set while others are still a little jiggly—that's okay!) For firmer cheesecakes all around, bake for an extra minute or two until all of the centers are fully set. Remove from the oven and allow to cool in the pan for about an hour on a cooling rack.
To Top the Mini Turtle Cheesecakes
- When only slightly warm, remove the mini cheesecakes from the pan. Drizzle with the remaining ganache and salted caramel sauce,** and sprinkle with pecan pieces.
- Lightly cover and chill in the fridge for at least two hours, until the bottoms of the mini cheesecakes feel cold, then serve. Enjoy!
Notes
*The caramel cheesecake filling can also be made in a stand mixer or a large bowl with a hand mixer. Beat the first set of ingredients on medium-low until smooth, then add the eggs. Beat the mixture only until just combined, scraping down the sides and bottom of the bowl as needed. (This will prevent beating too much air into the eggs, which can cause air bubbles and cracking.)
**The caramel may dull when it chills in the fridge. If you want extra presentation points, hold off on drizzling with the caramel until right before serving!
Store in an airtight container in the fridge for up to five days. For long-term storage, place in an airtight container in the freezer for up to 6 months.
Recommended Products
As an Amazon Associate and member of other affiliate programs, I earn from qualifying purchases.


Nutrition Information:
Yield:
12Serving Size:
1 mini cheesecakeAmount Per Serving: Calories: 272Total Fat: 20gSaturated Fat: 10gTrans Fat: 0gUnsaturated Fat: 8gCholesterol: 73mgSodium: 183mgCarbohydrates: 21gFiber: 1gSugar: 15gProtein: 4g
The nutrition facts are estimated and may vary based on specific ingredients used.
Thanks for trying out my mini turtle cheesecakes recipe!
If you liked it, please consider rating this recipe five stars so others find it, too.
I’d love to see how your recipe turns out: Take a photo and tag me on Instagram @floralapronblog to share with me, or use the hashtag #floralapronbakes.