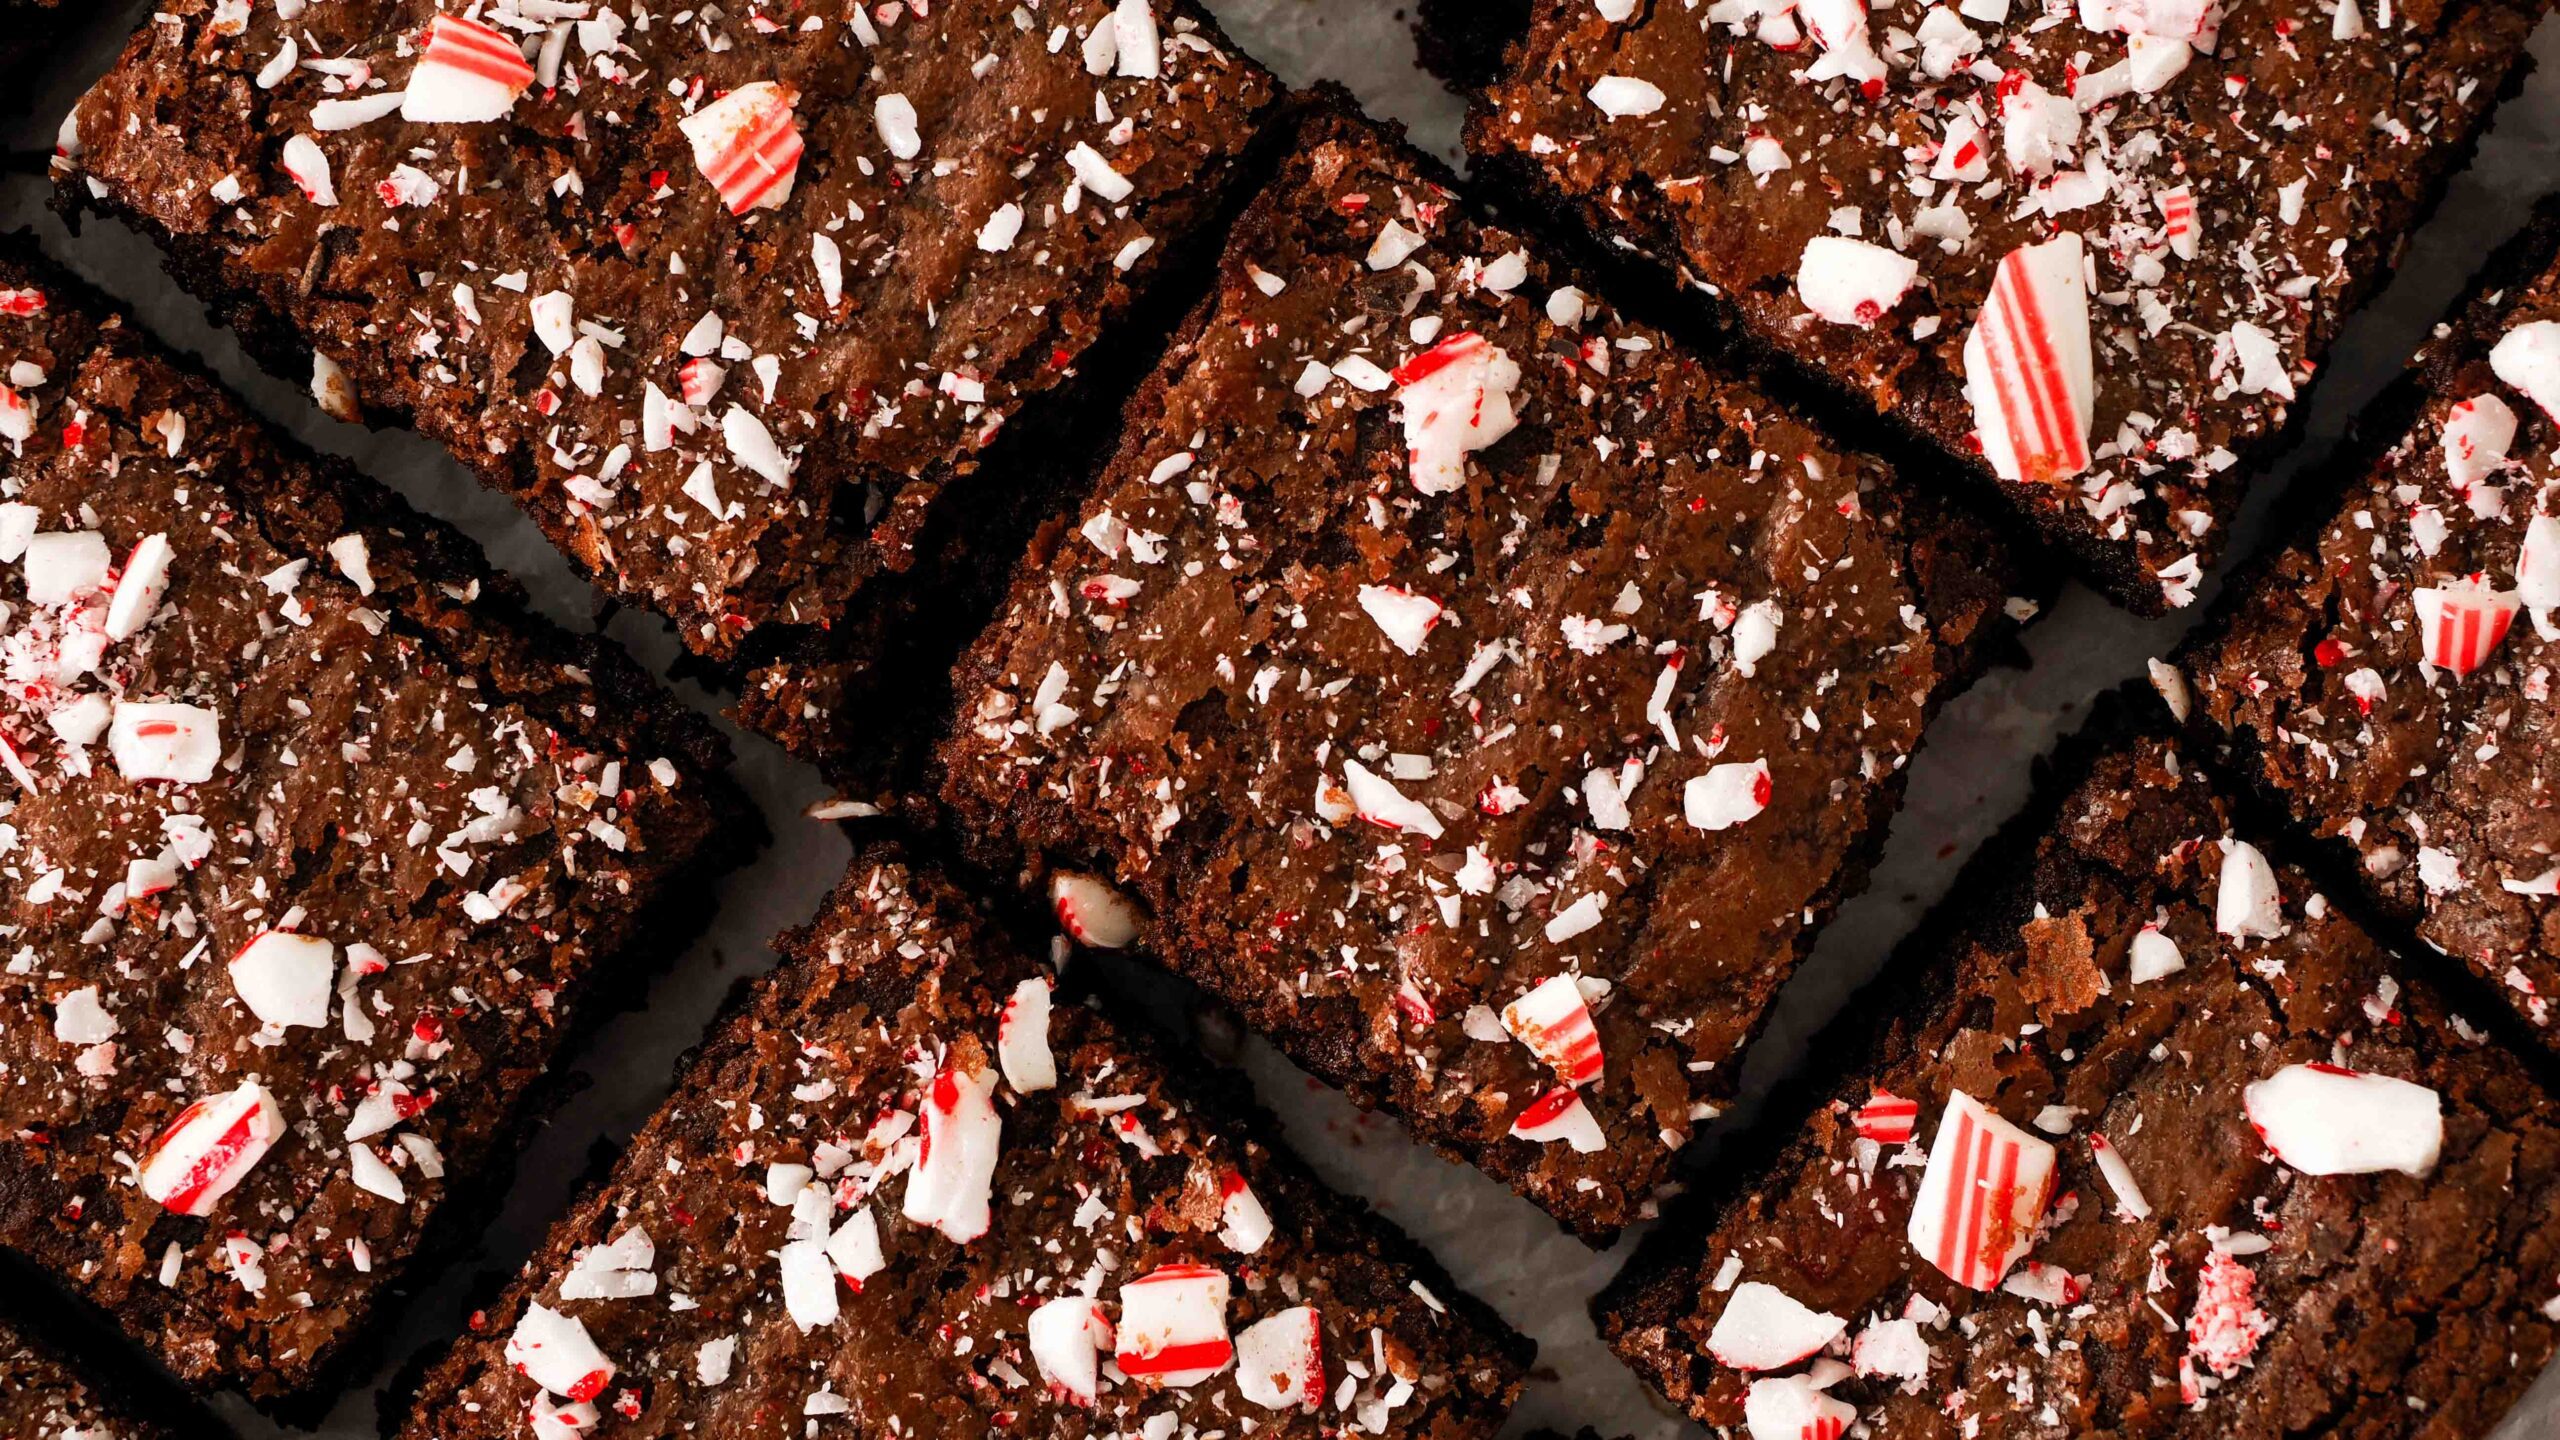
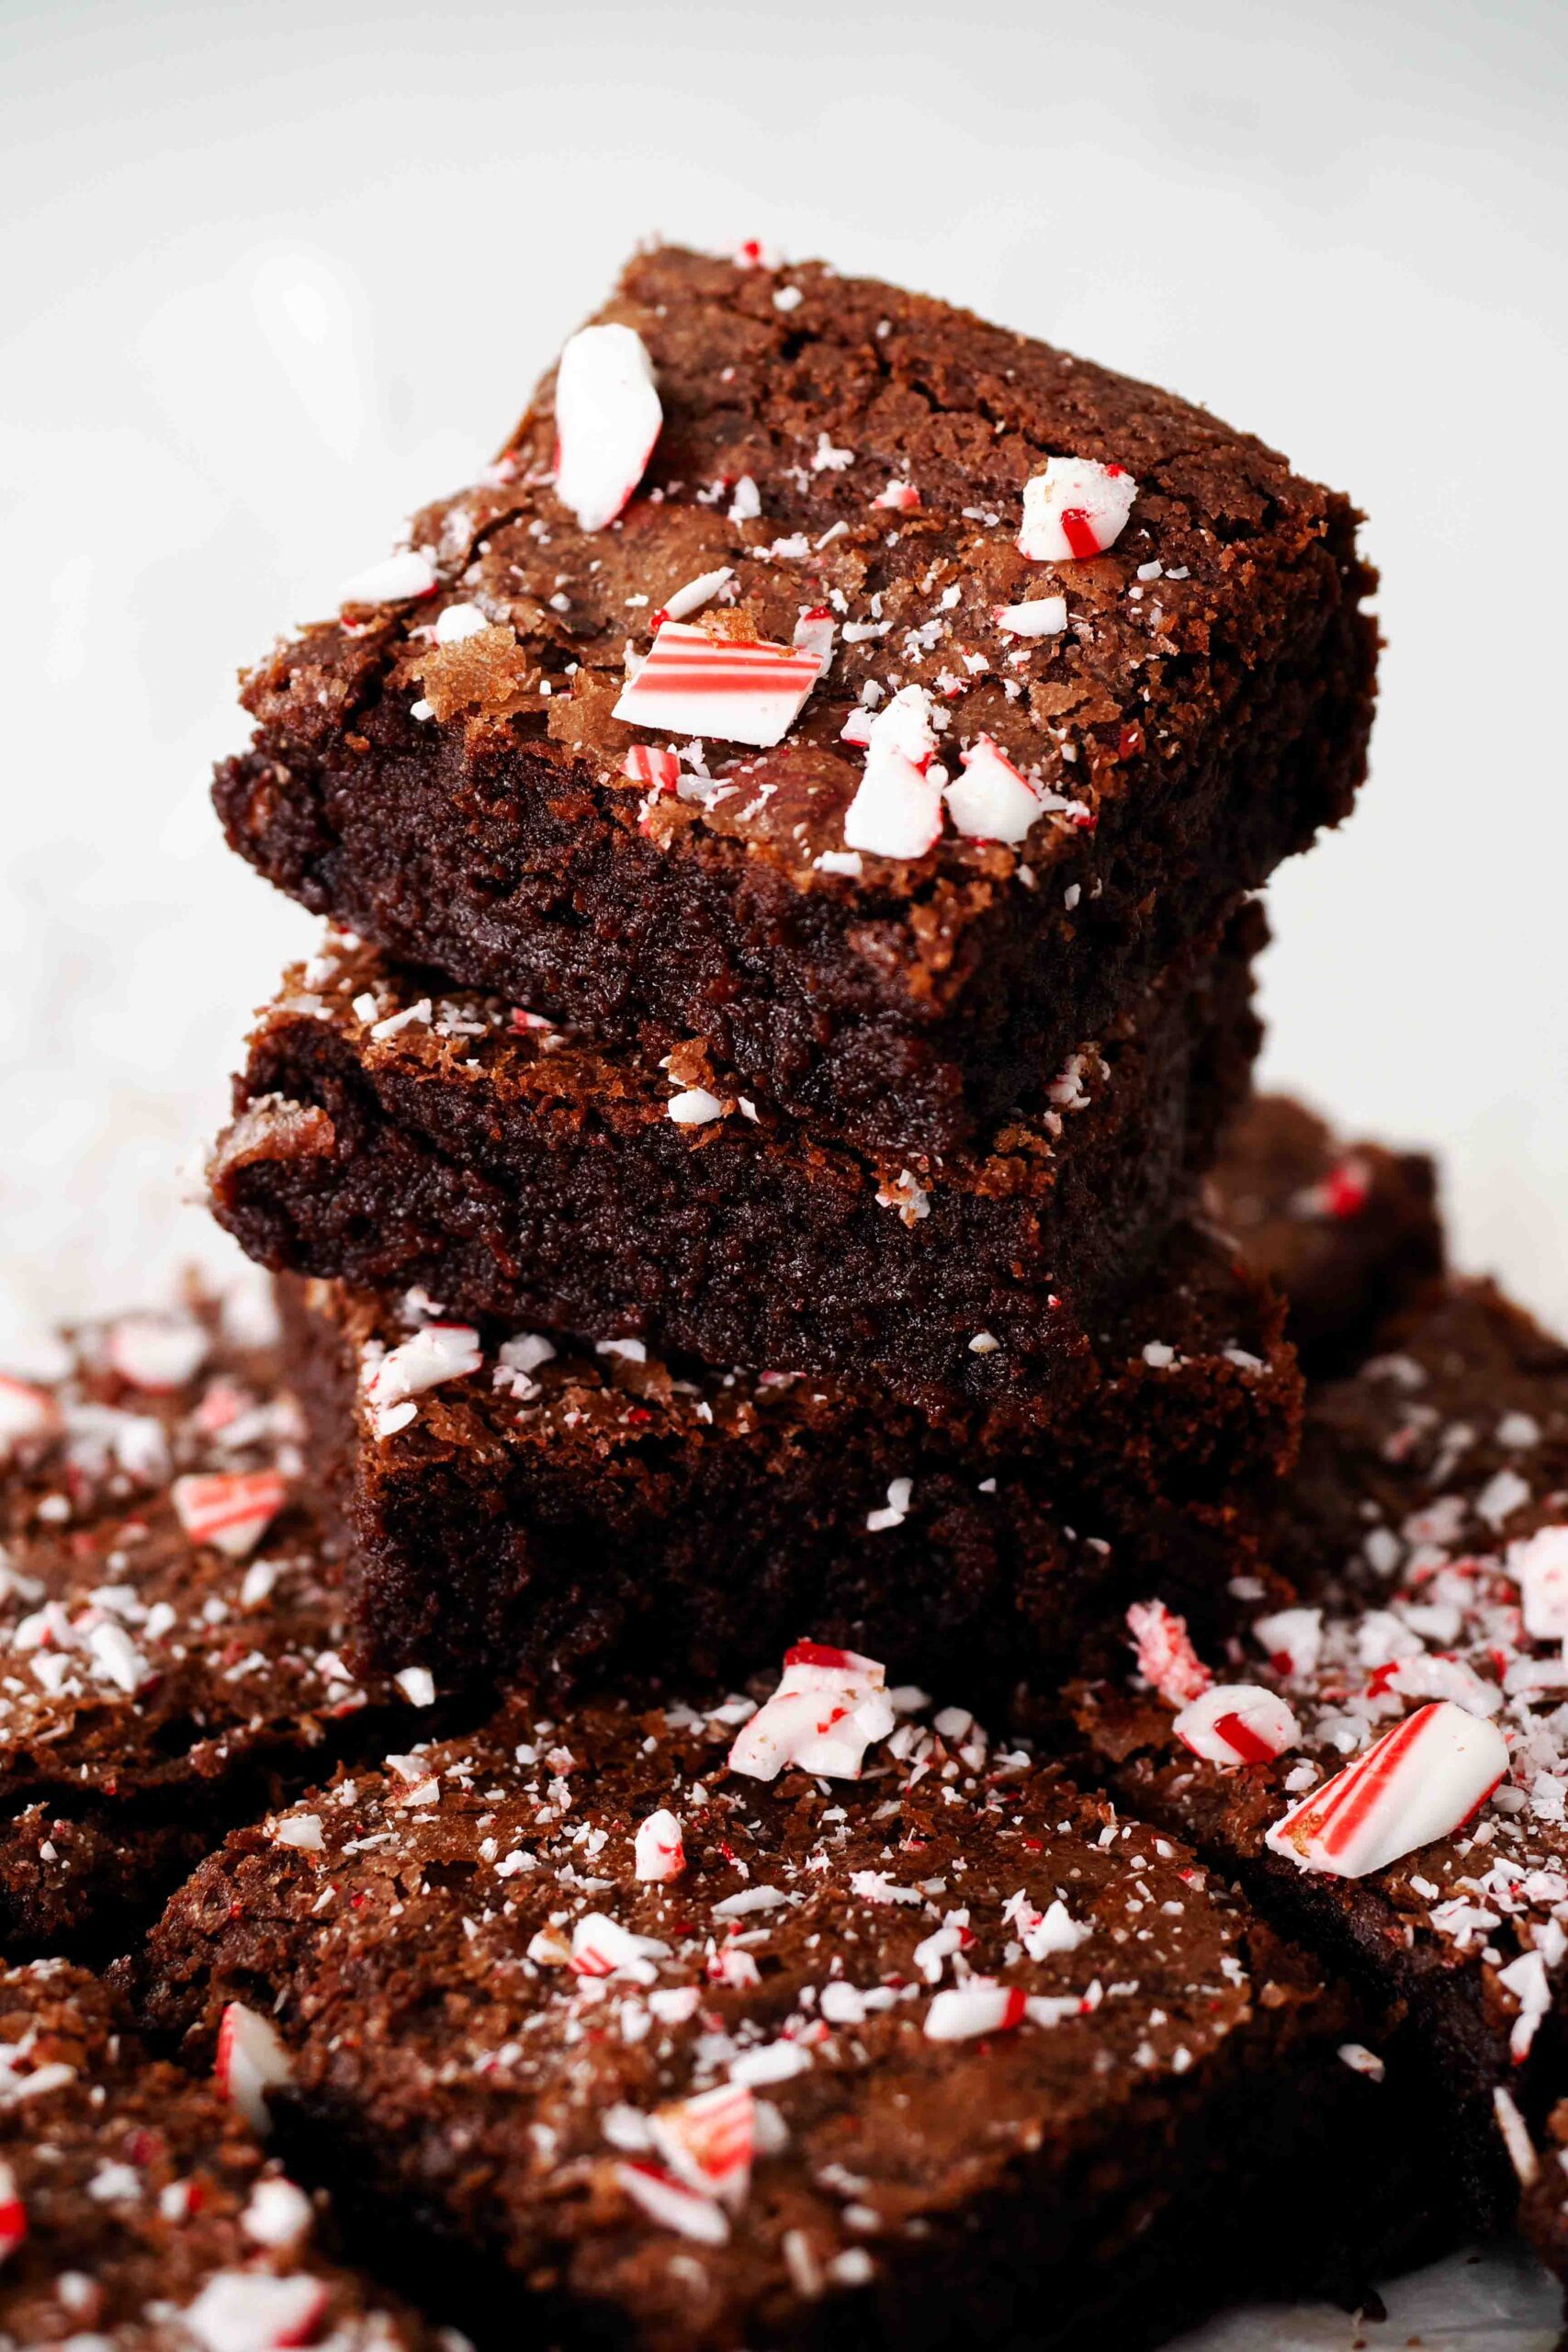
My favorite recipe to use up leftover candy canes, fudgy peppermint brownies with a crinkle top are a holiday favorite around here! These candy cane brownies are made with both melted chocolate and cocoa powder for a fudgy and truly decadent brownie. Add in some crushed candy canes for texture, and you’ve got yourself a Christmas brownie that’s perfect for gifts and holiday parties!
It’s hard to get brownies from scratch to taste as good as the ones from a boxed mix, but these will get you really close. Pro-tip: Top these minty brownies with a scoop of French vanilla ice cream or lightly sweetened vanilla whipped cream. Absolutely out of this world!
This post contains affiliate links. If you click through and make a purchase, I may receive a small commission at no cost to you. Thank you for helping to support The Floral Apron!
Ingredients for Peppermint Brownies
One-bowl peppermint brownies are made with simple ingredients that you probably already have in your pantry. These Christmas brownies are a great way to use up leftover candy canes, too!
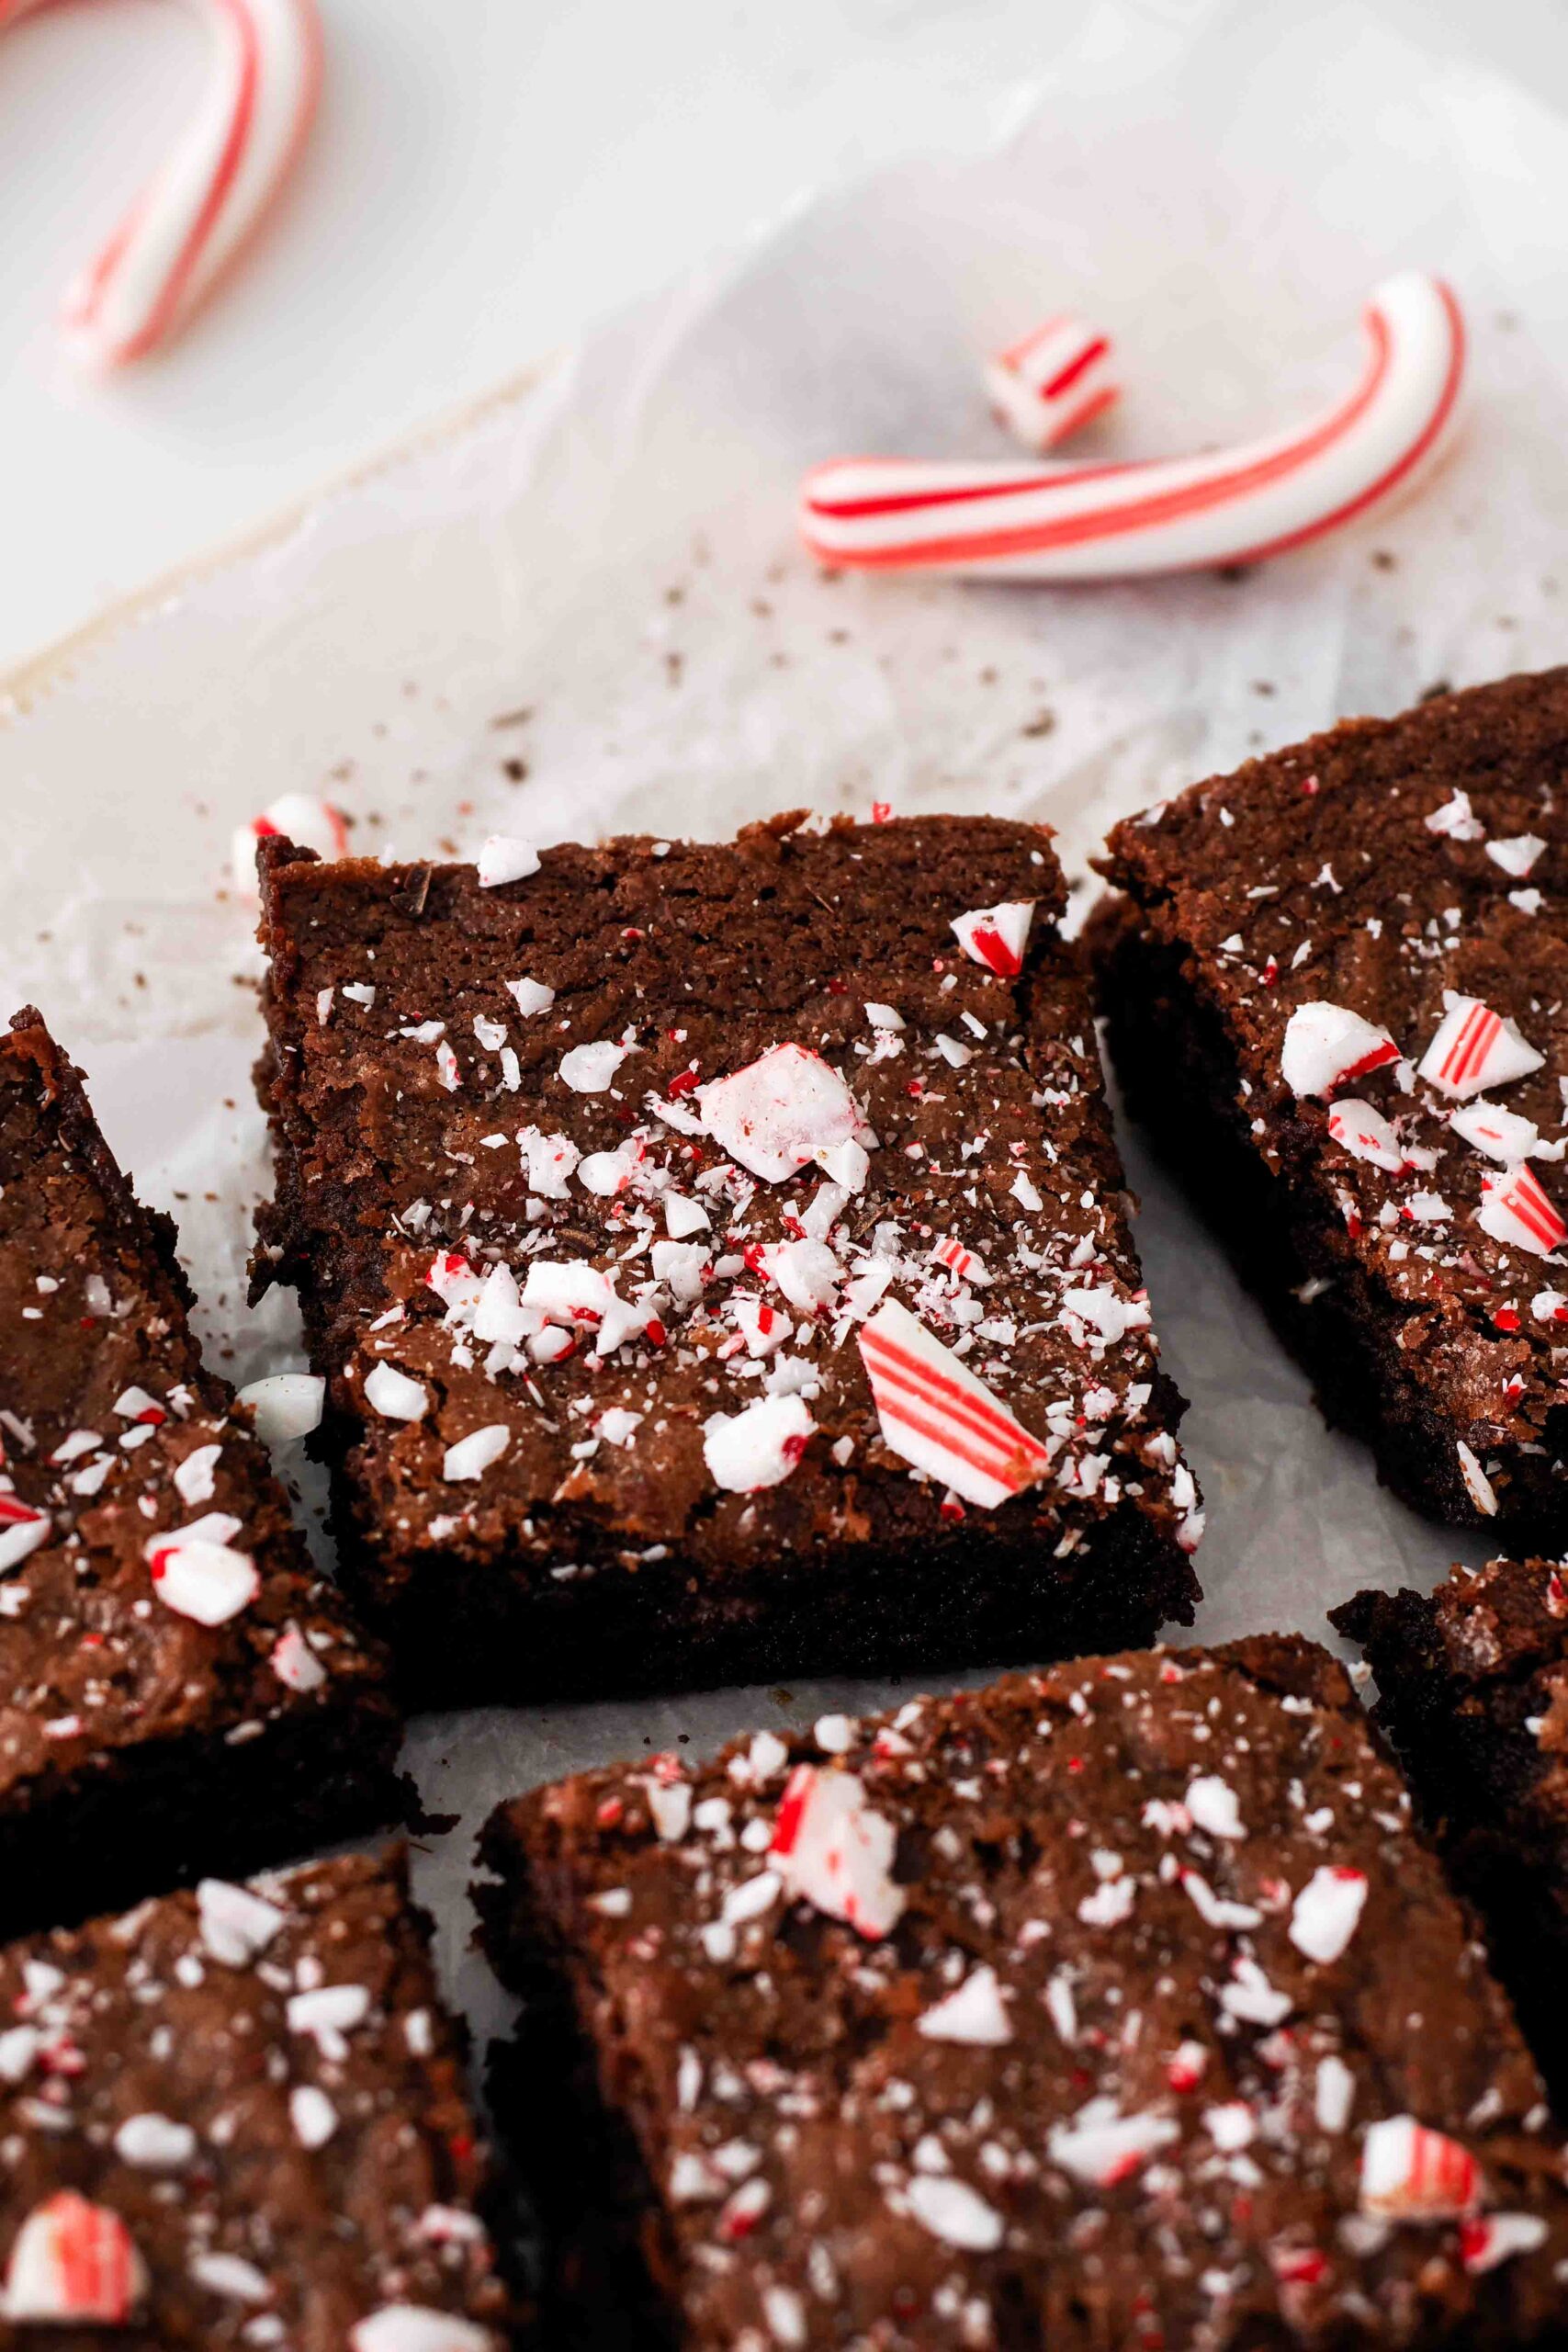
- Candy canes. Crushed bits of candy cane add a nice texture inside the brownies and offer a visual cue that these are peppermint-flavored brownies!
- Dark chocolate chunks (or chips). Dark or semisweet chopped chocolate or chips will work best. Milk chocolate chips will make these one-bowl brownies too sweet.
- Butter. I like using salted butter in these brownies, but you can also use unsalted.
- Granulated sugar. Key for that crinkly top, the granulated sugar rises to the top of the batter while baking and forms that shiny, crackly brownie top we all know and love.
- Eggs. Egg yolks contain emulsifiers that help bind all the ingredients together.
- Vanilla extract. Just a bit to intensify that homemade goodness.
- Peppermint extract. The candy canes add a little, but the majority of the peppermint flavor will come from extract.
- All-purpose flour. Regular flour produced the best results for a fudgy brownie that wasn’t cakey or too dense.
- Cocoa powder. A good unsweetened cocoa powder goes a long way here! If you want to splurge, I recommend Guittard or Scharffen Berger.
- Salt. An extra bit of salt helps balance some of the sweetness. If using salted butter, you can reduce this added salt by half if you like.

Quick Tips to Make Peppermint Brownies
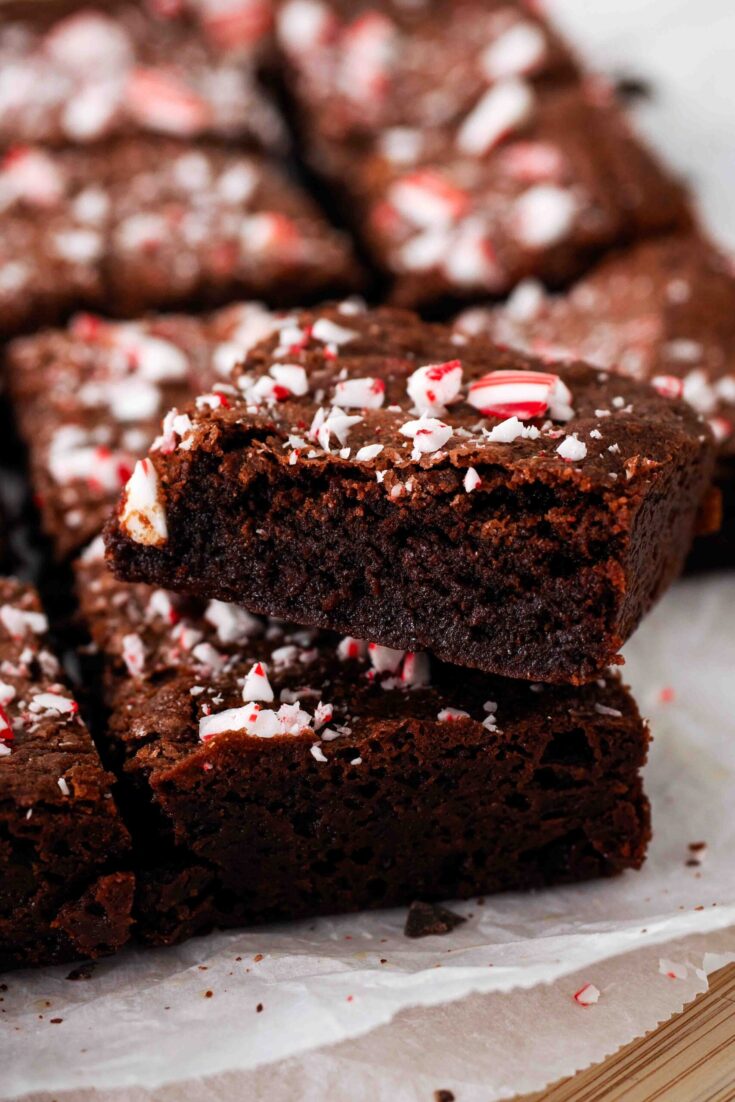
These homemade peppermint brownies with candy canes are rich, fudgy, and taste just like box mix brownies! Read on for a few tips to ensure your brownies come out fudgy rather than cakey.
Things to Prep for Peppermint Brownies
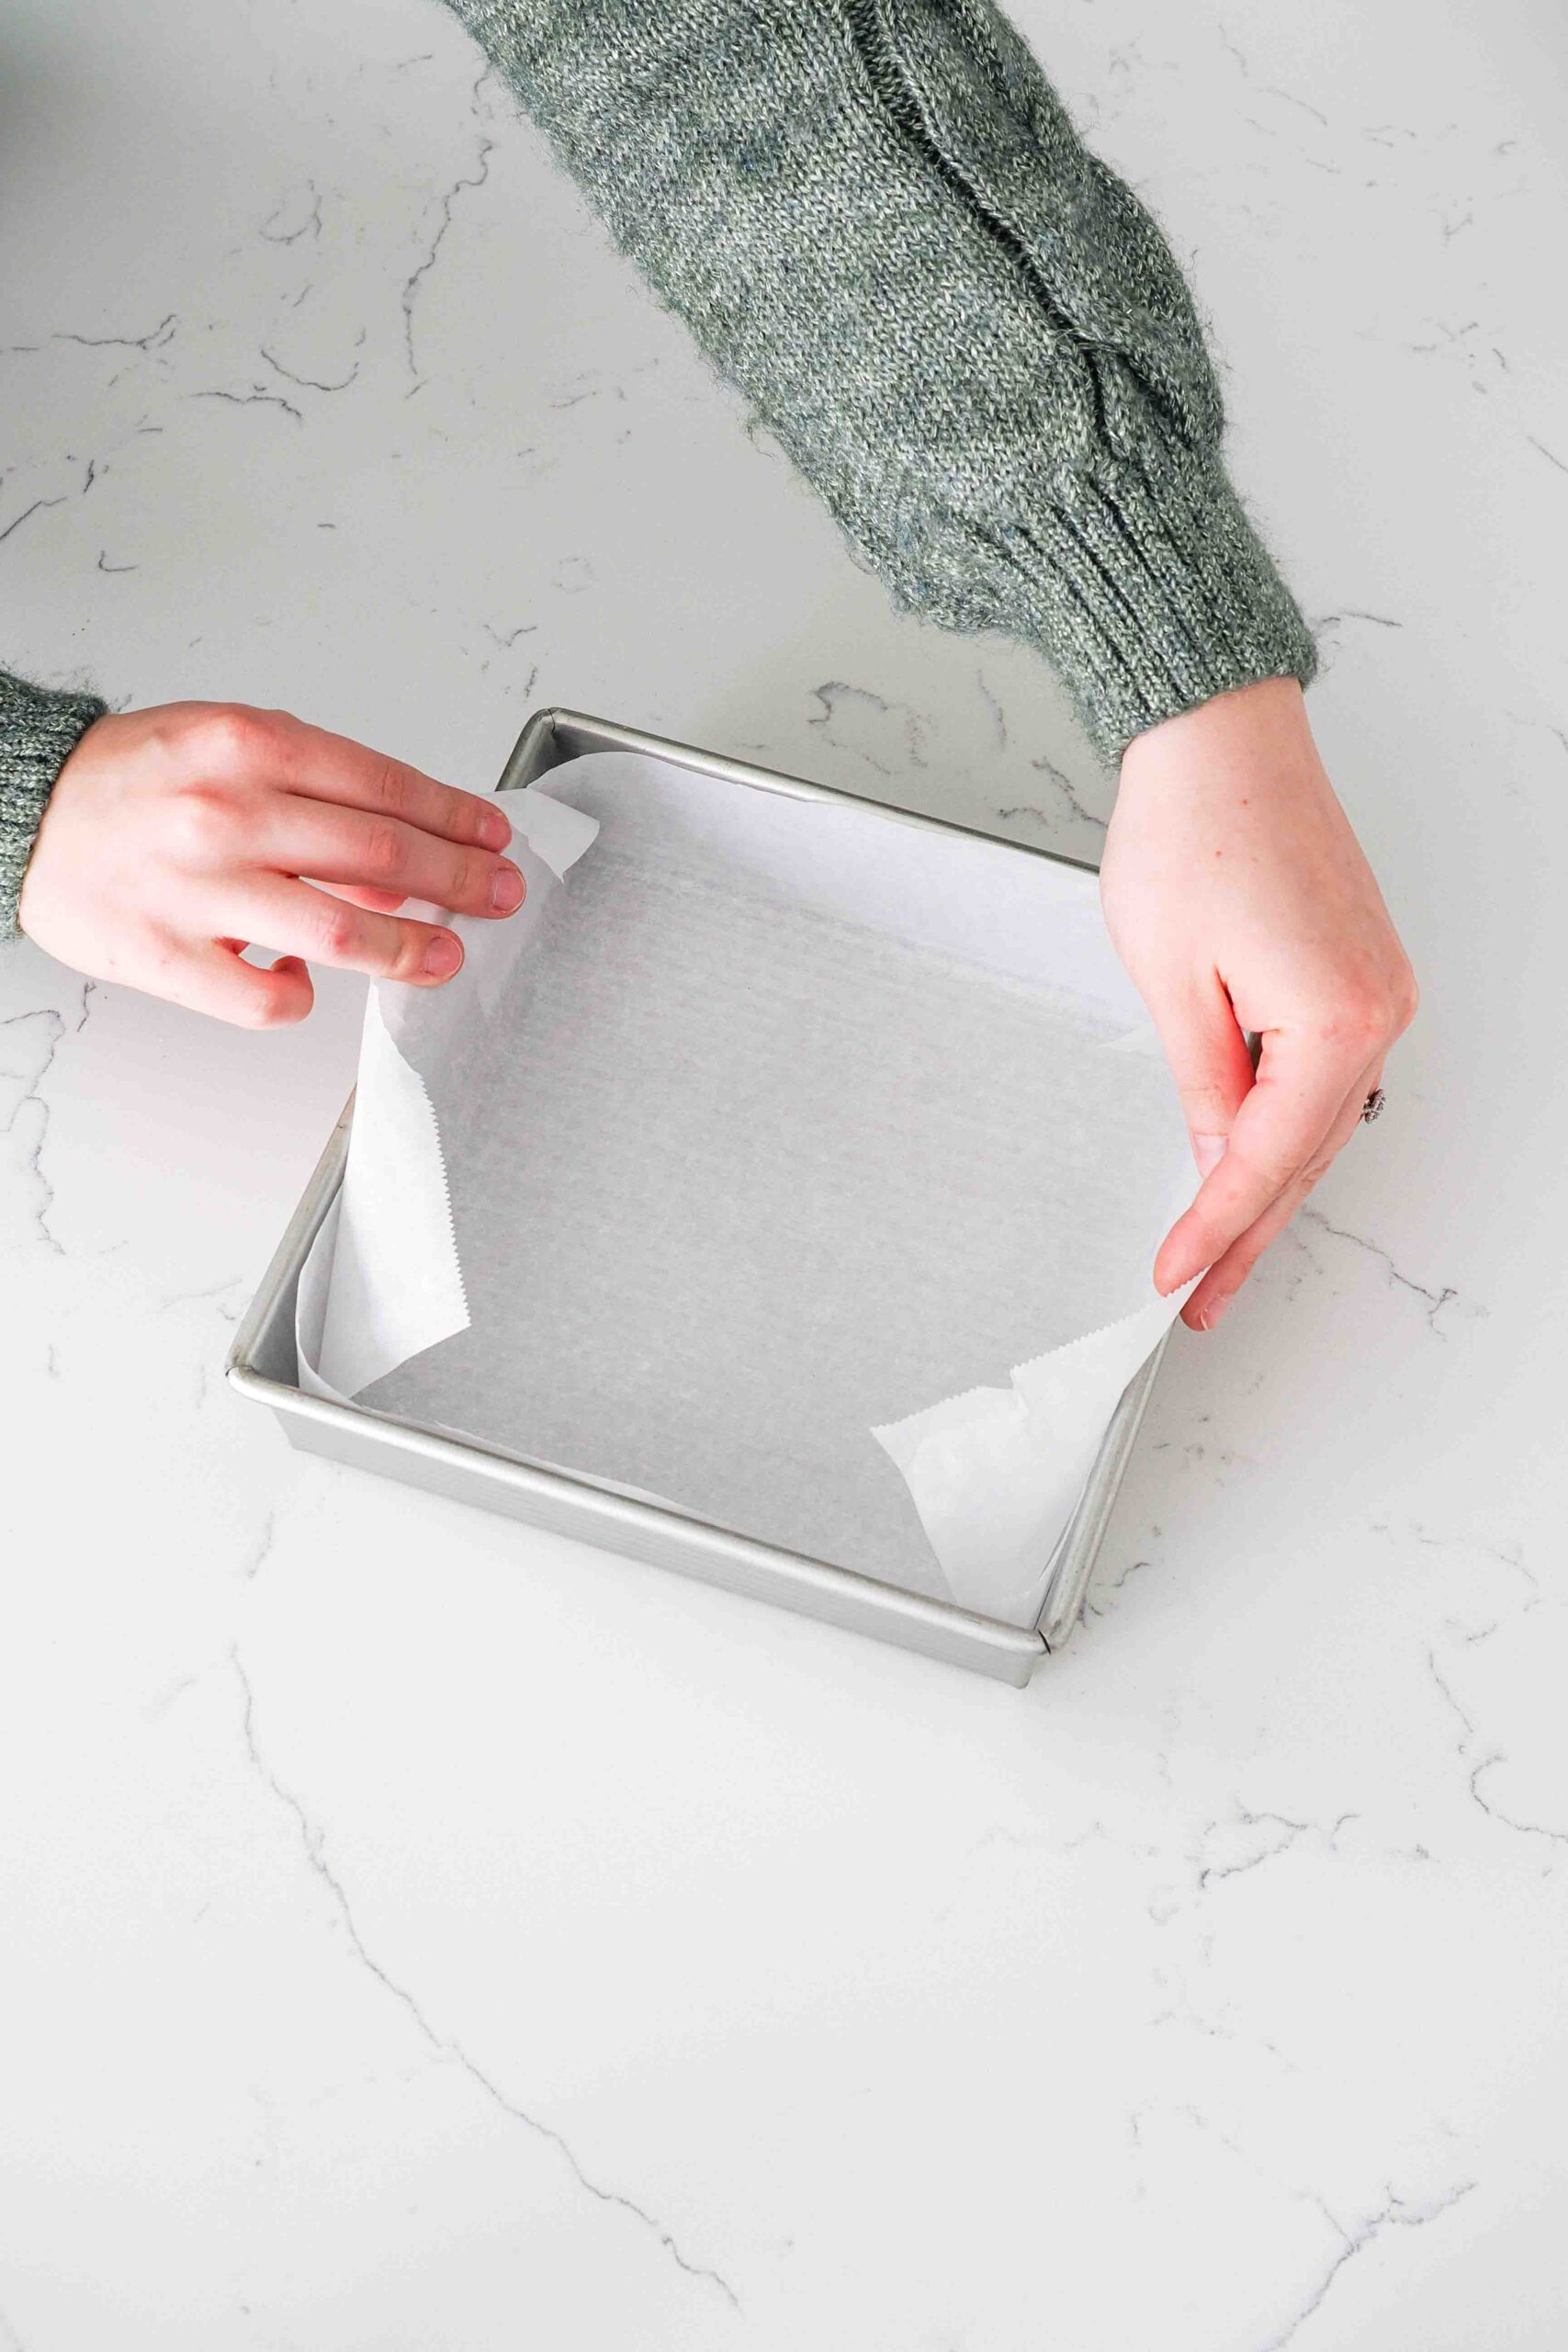
Line a square metal pan with parchment paper. An 8″ (20 cm) pan makes brownies perfectly thick and chewy, but a 9″ (22 cm) will also work; just plan on the brownies being a little thinner and taking a few minutes less to bake. I recommend using a metal pan for brownies rather than glass, because metal conducts heat much faster and will result in a better bake overall.
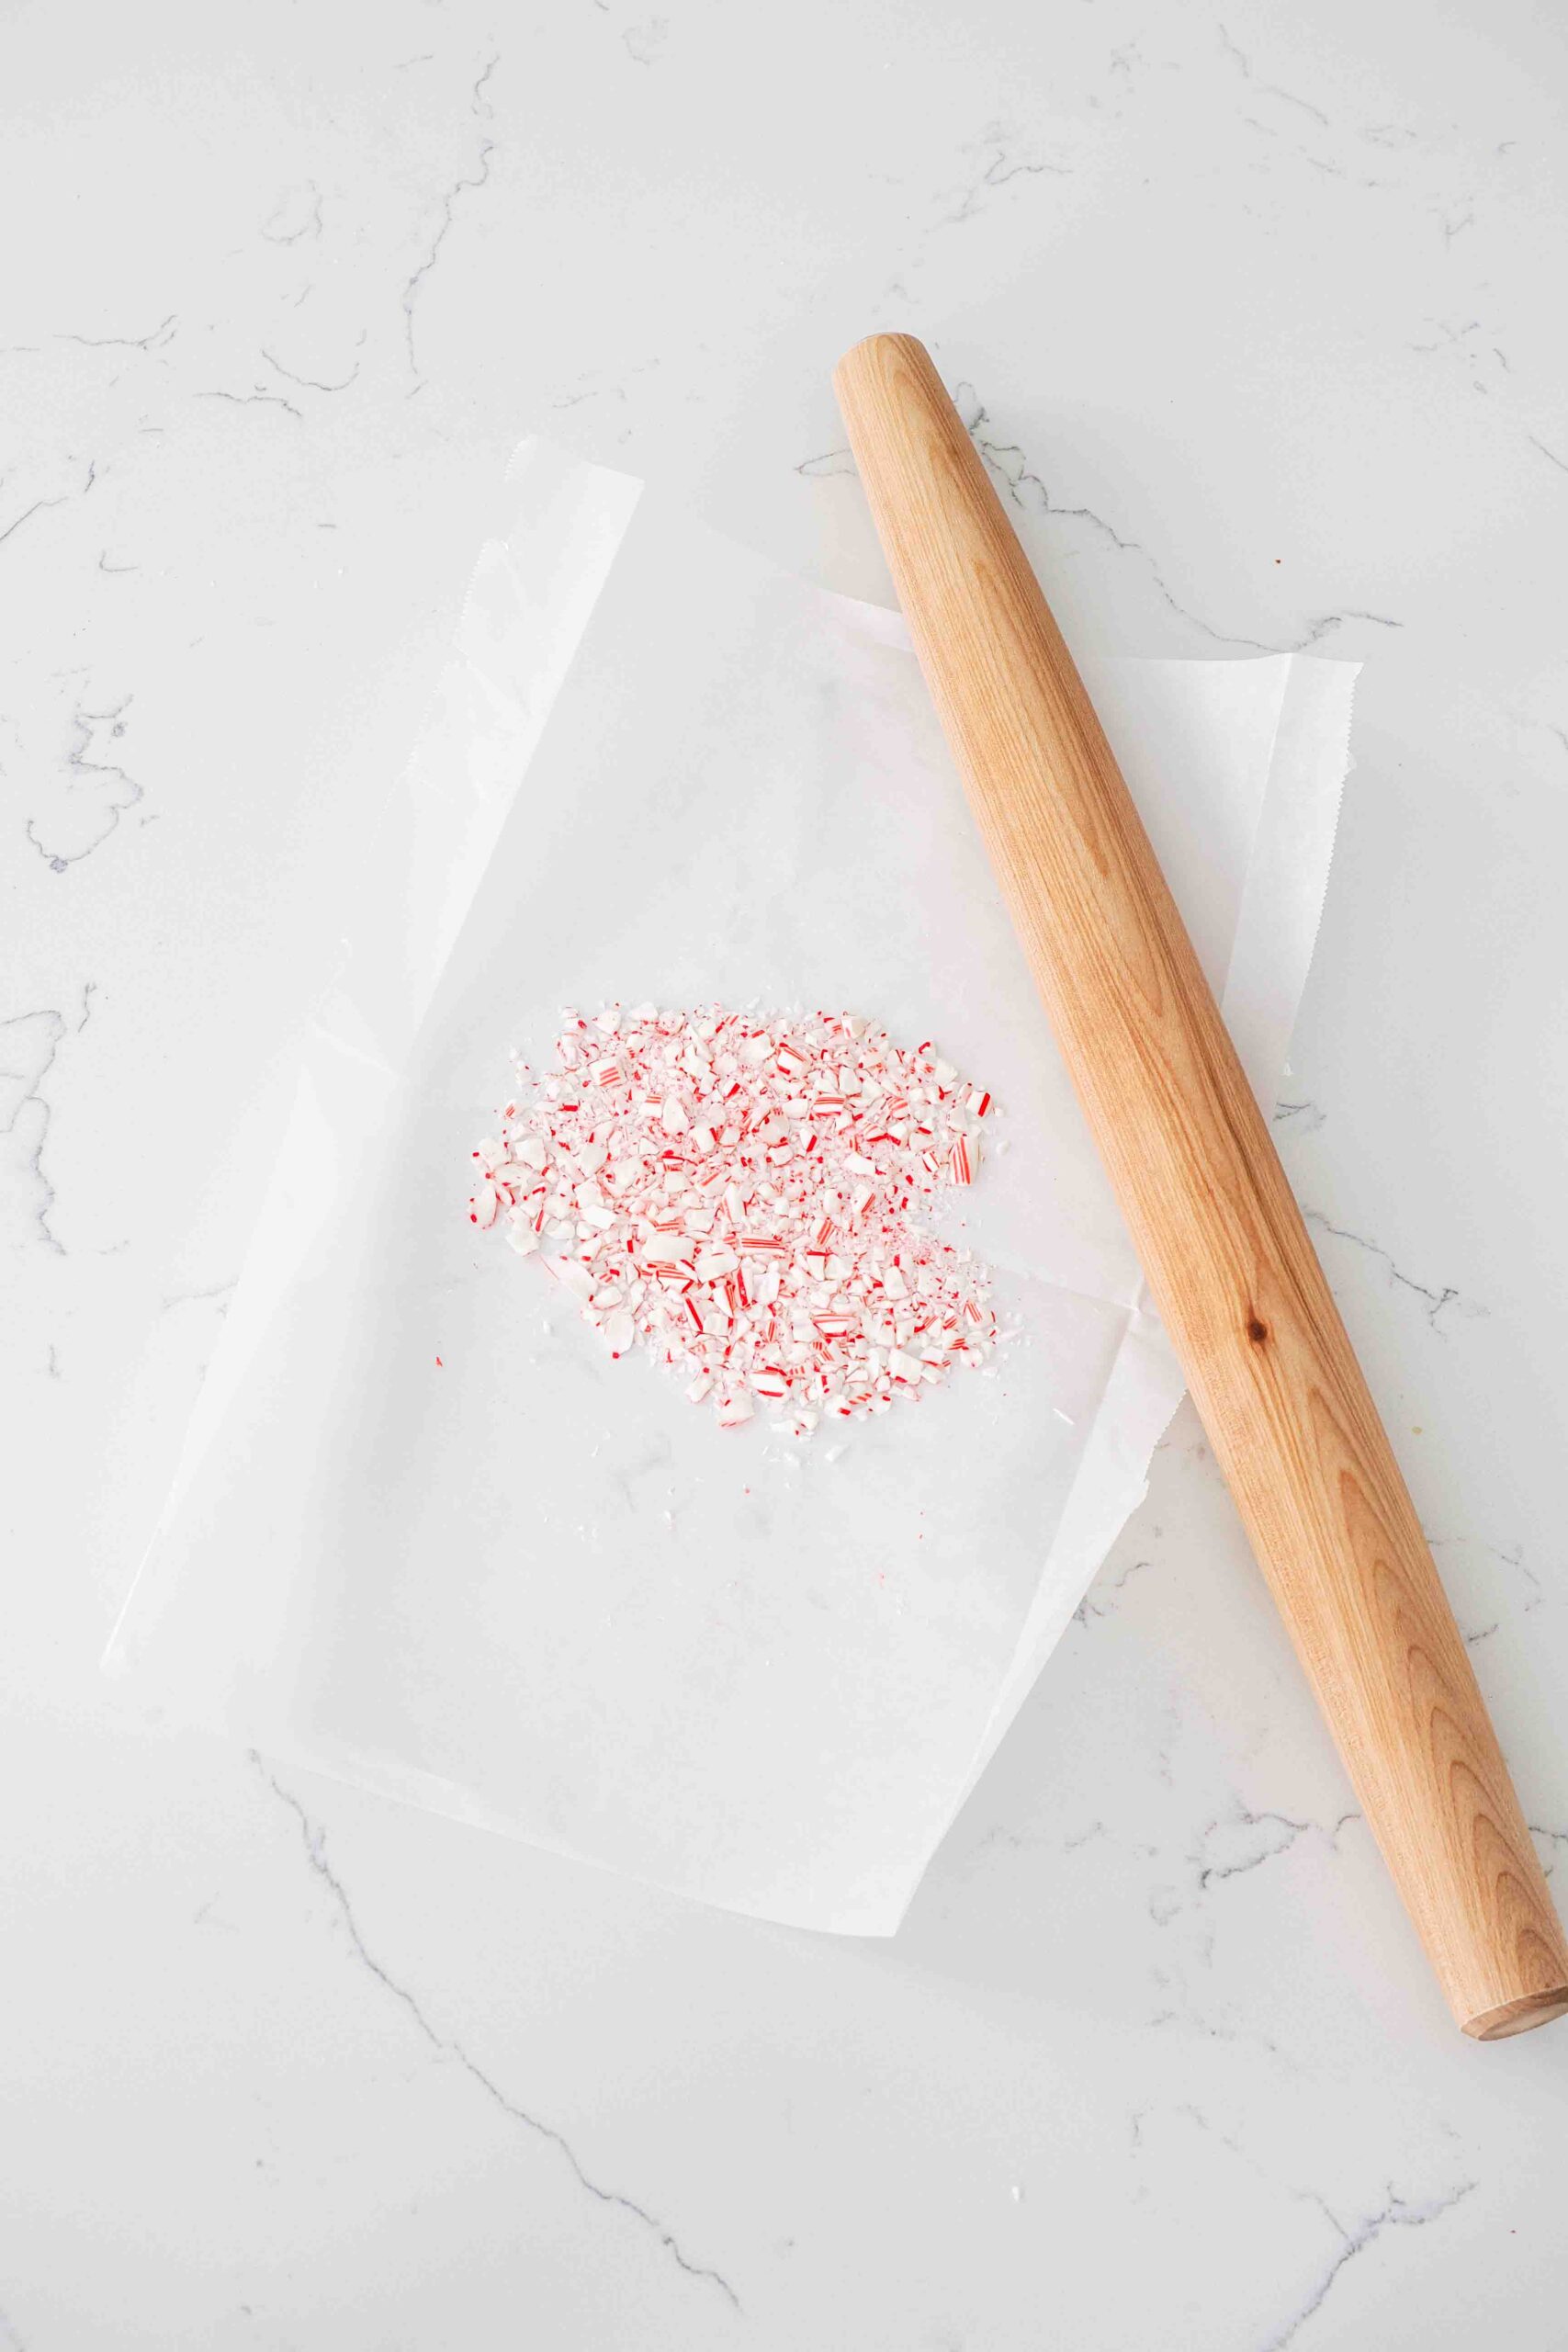
Then, crush up the candy canes via your preferred method. I make an envelope in parchment paper and place the the candy canes inside. A rolling pin or mallet works well to break up the candy canes without pulverizing them into a fine powder. We want some smaller chunks here!
Melting the Chocolate and Butter
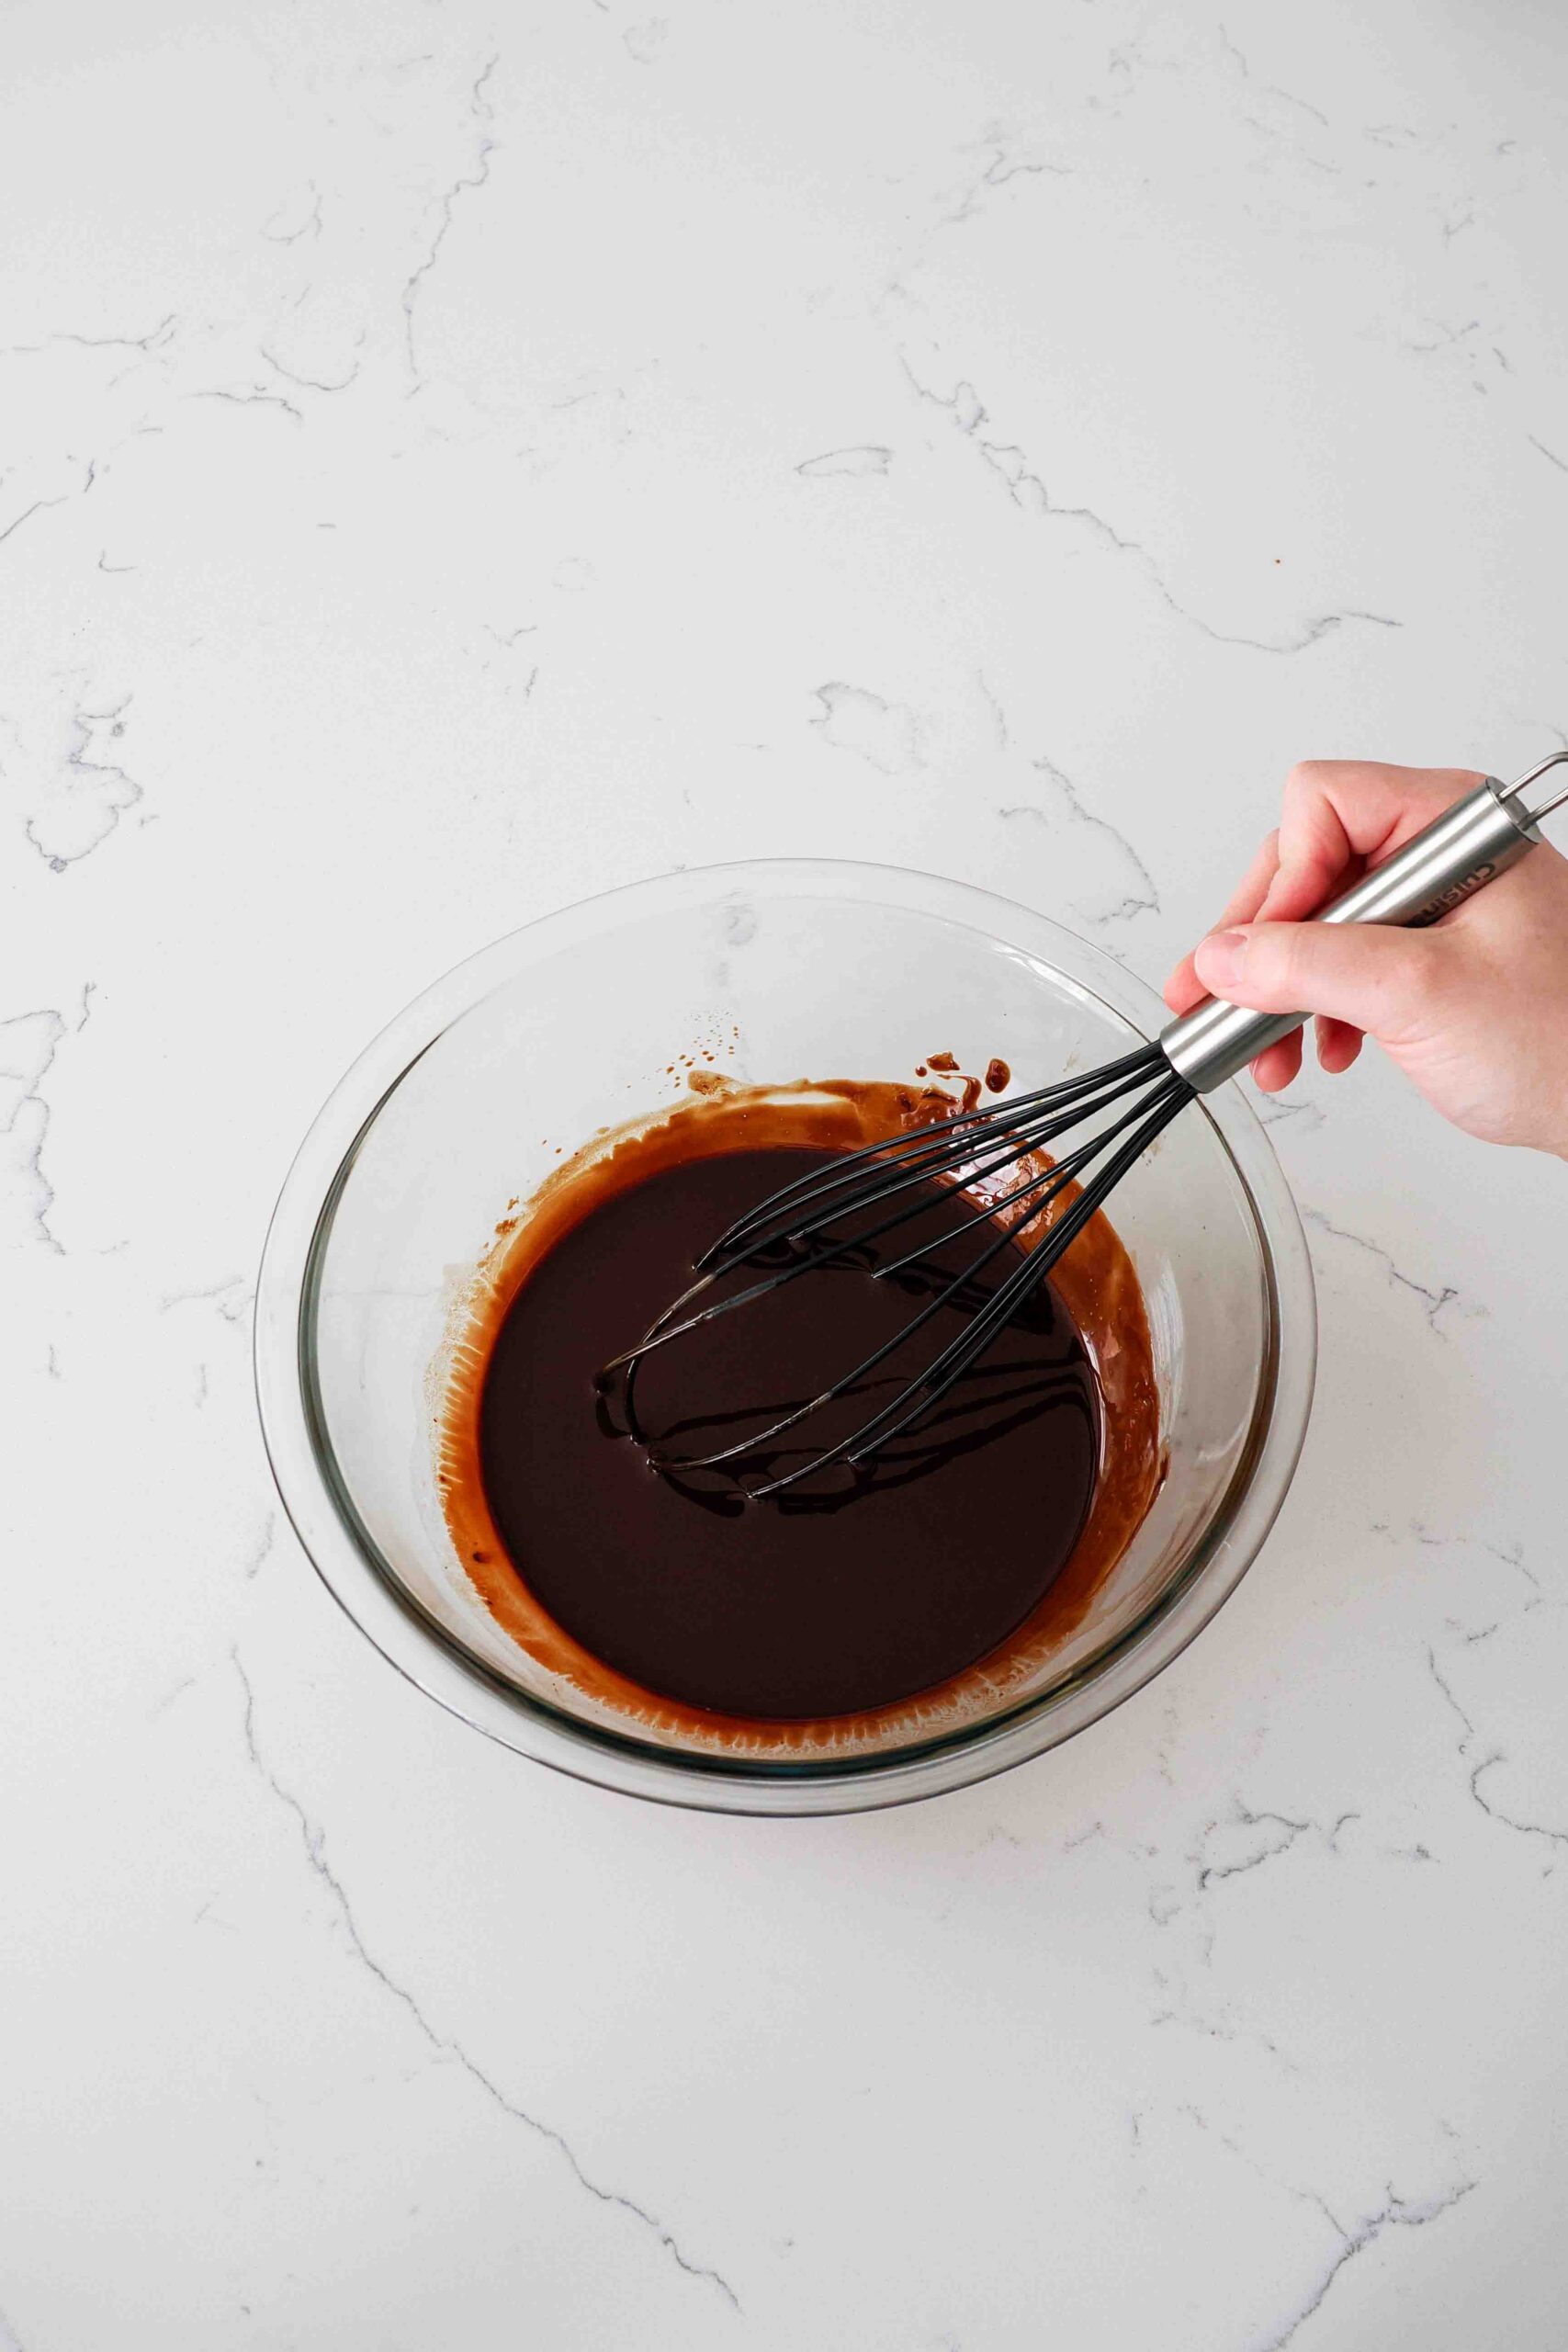
This fudgy brownie recipe uses melted dark chocolate for the best flavor and texture. To melt the dark chocolate, add it and the butter to a large heat-safe bowl, like glass. Melt the chocolate and butter in the microwave in 30-second intervals, stirring after each. If you don’t have a microwave, use a double boiler and melt the chocolate and butter over the indirect heat until no lumps remain.

Adding Sugar, Eggs, and Extract to Peppermint Brownies
Because these brownies don’t have any leavening, it’s important to whisk some air into the batter with the sugar and eggs. The addition of air gives the peppermint brownies just enough lift to keep them fudgy but not stodgy.
Add the granulated sugar to the melted chocolate and whisk together for one minute, until the chocolate has cooled down some. The batter will look grainy and feel just a touch warm, but it shouldn’t be warm enough to risk cooking the eggs prematurely.
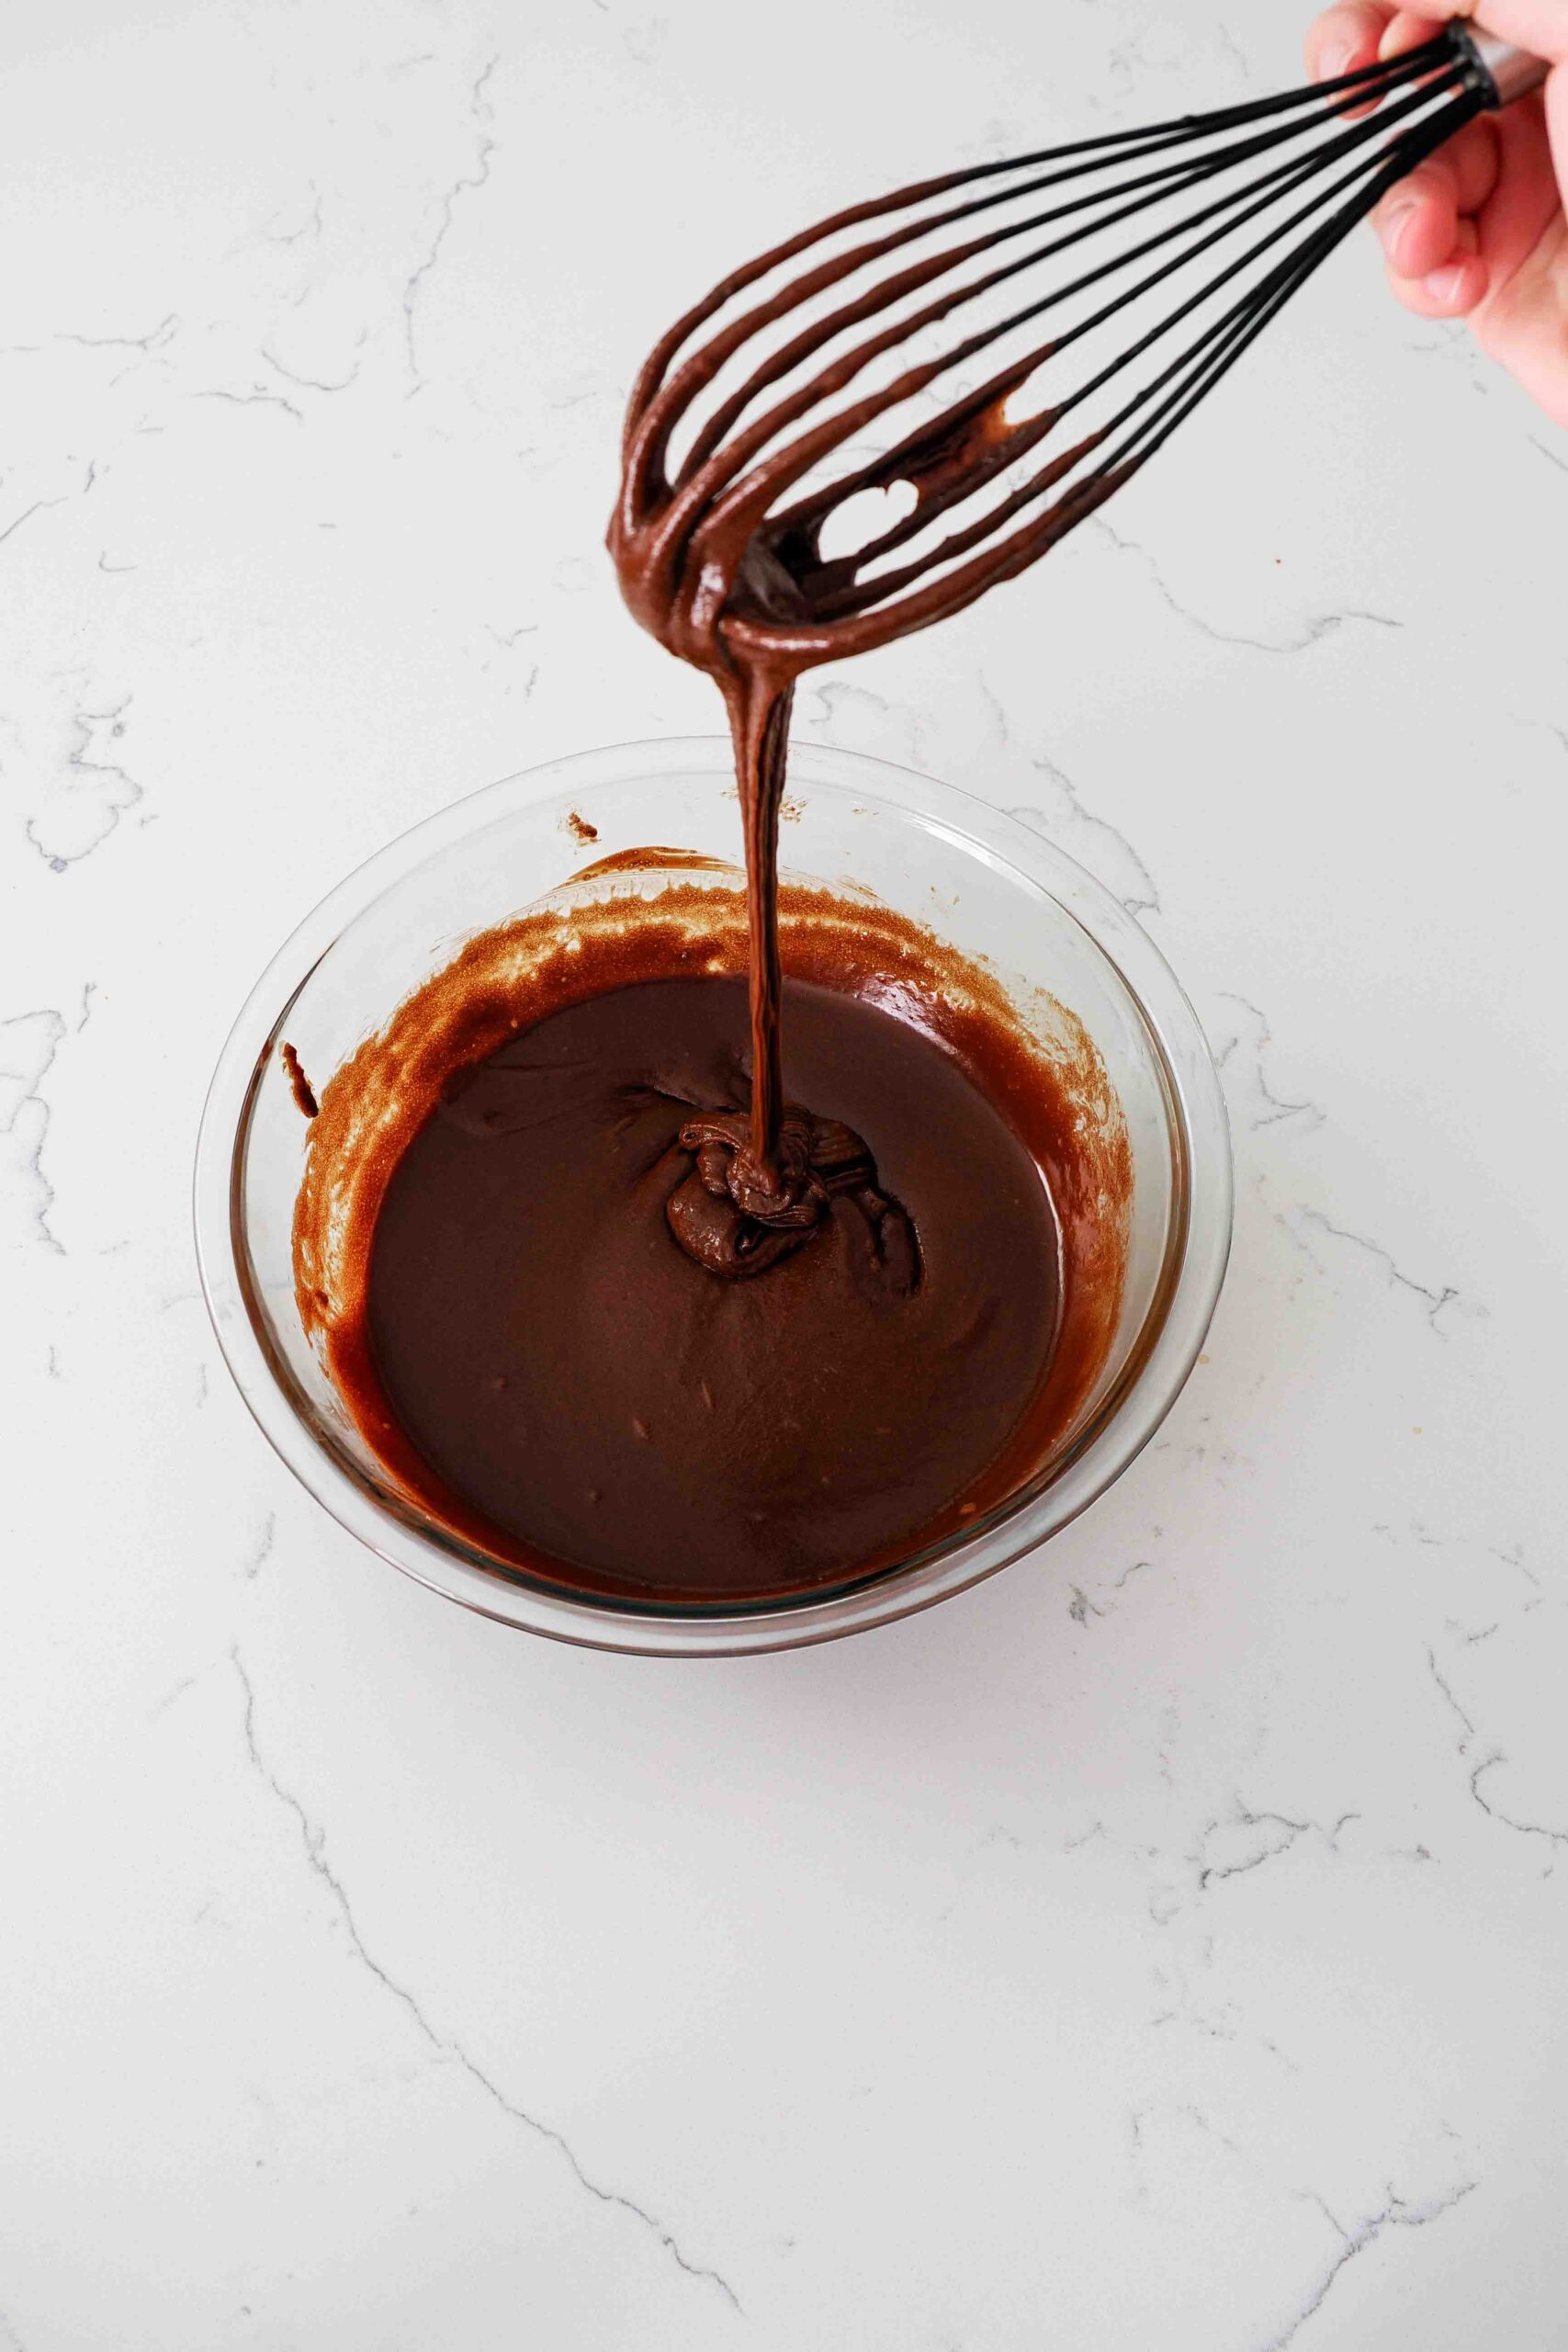
Now, add the eggs, vanilla extract, and peppermint extract, and whisk vigorously for 2-3 minutes. I use a standard balloon whisk, but you may use an electric hand mixer if you prefer.
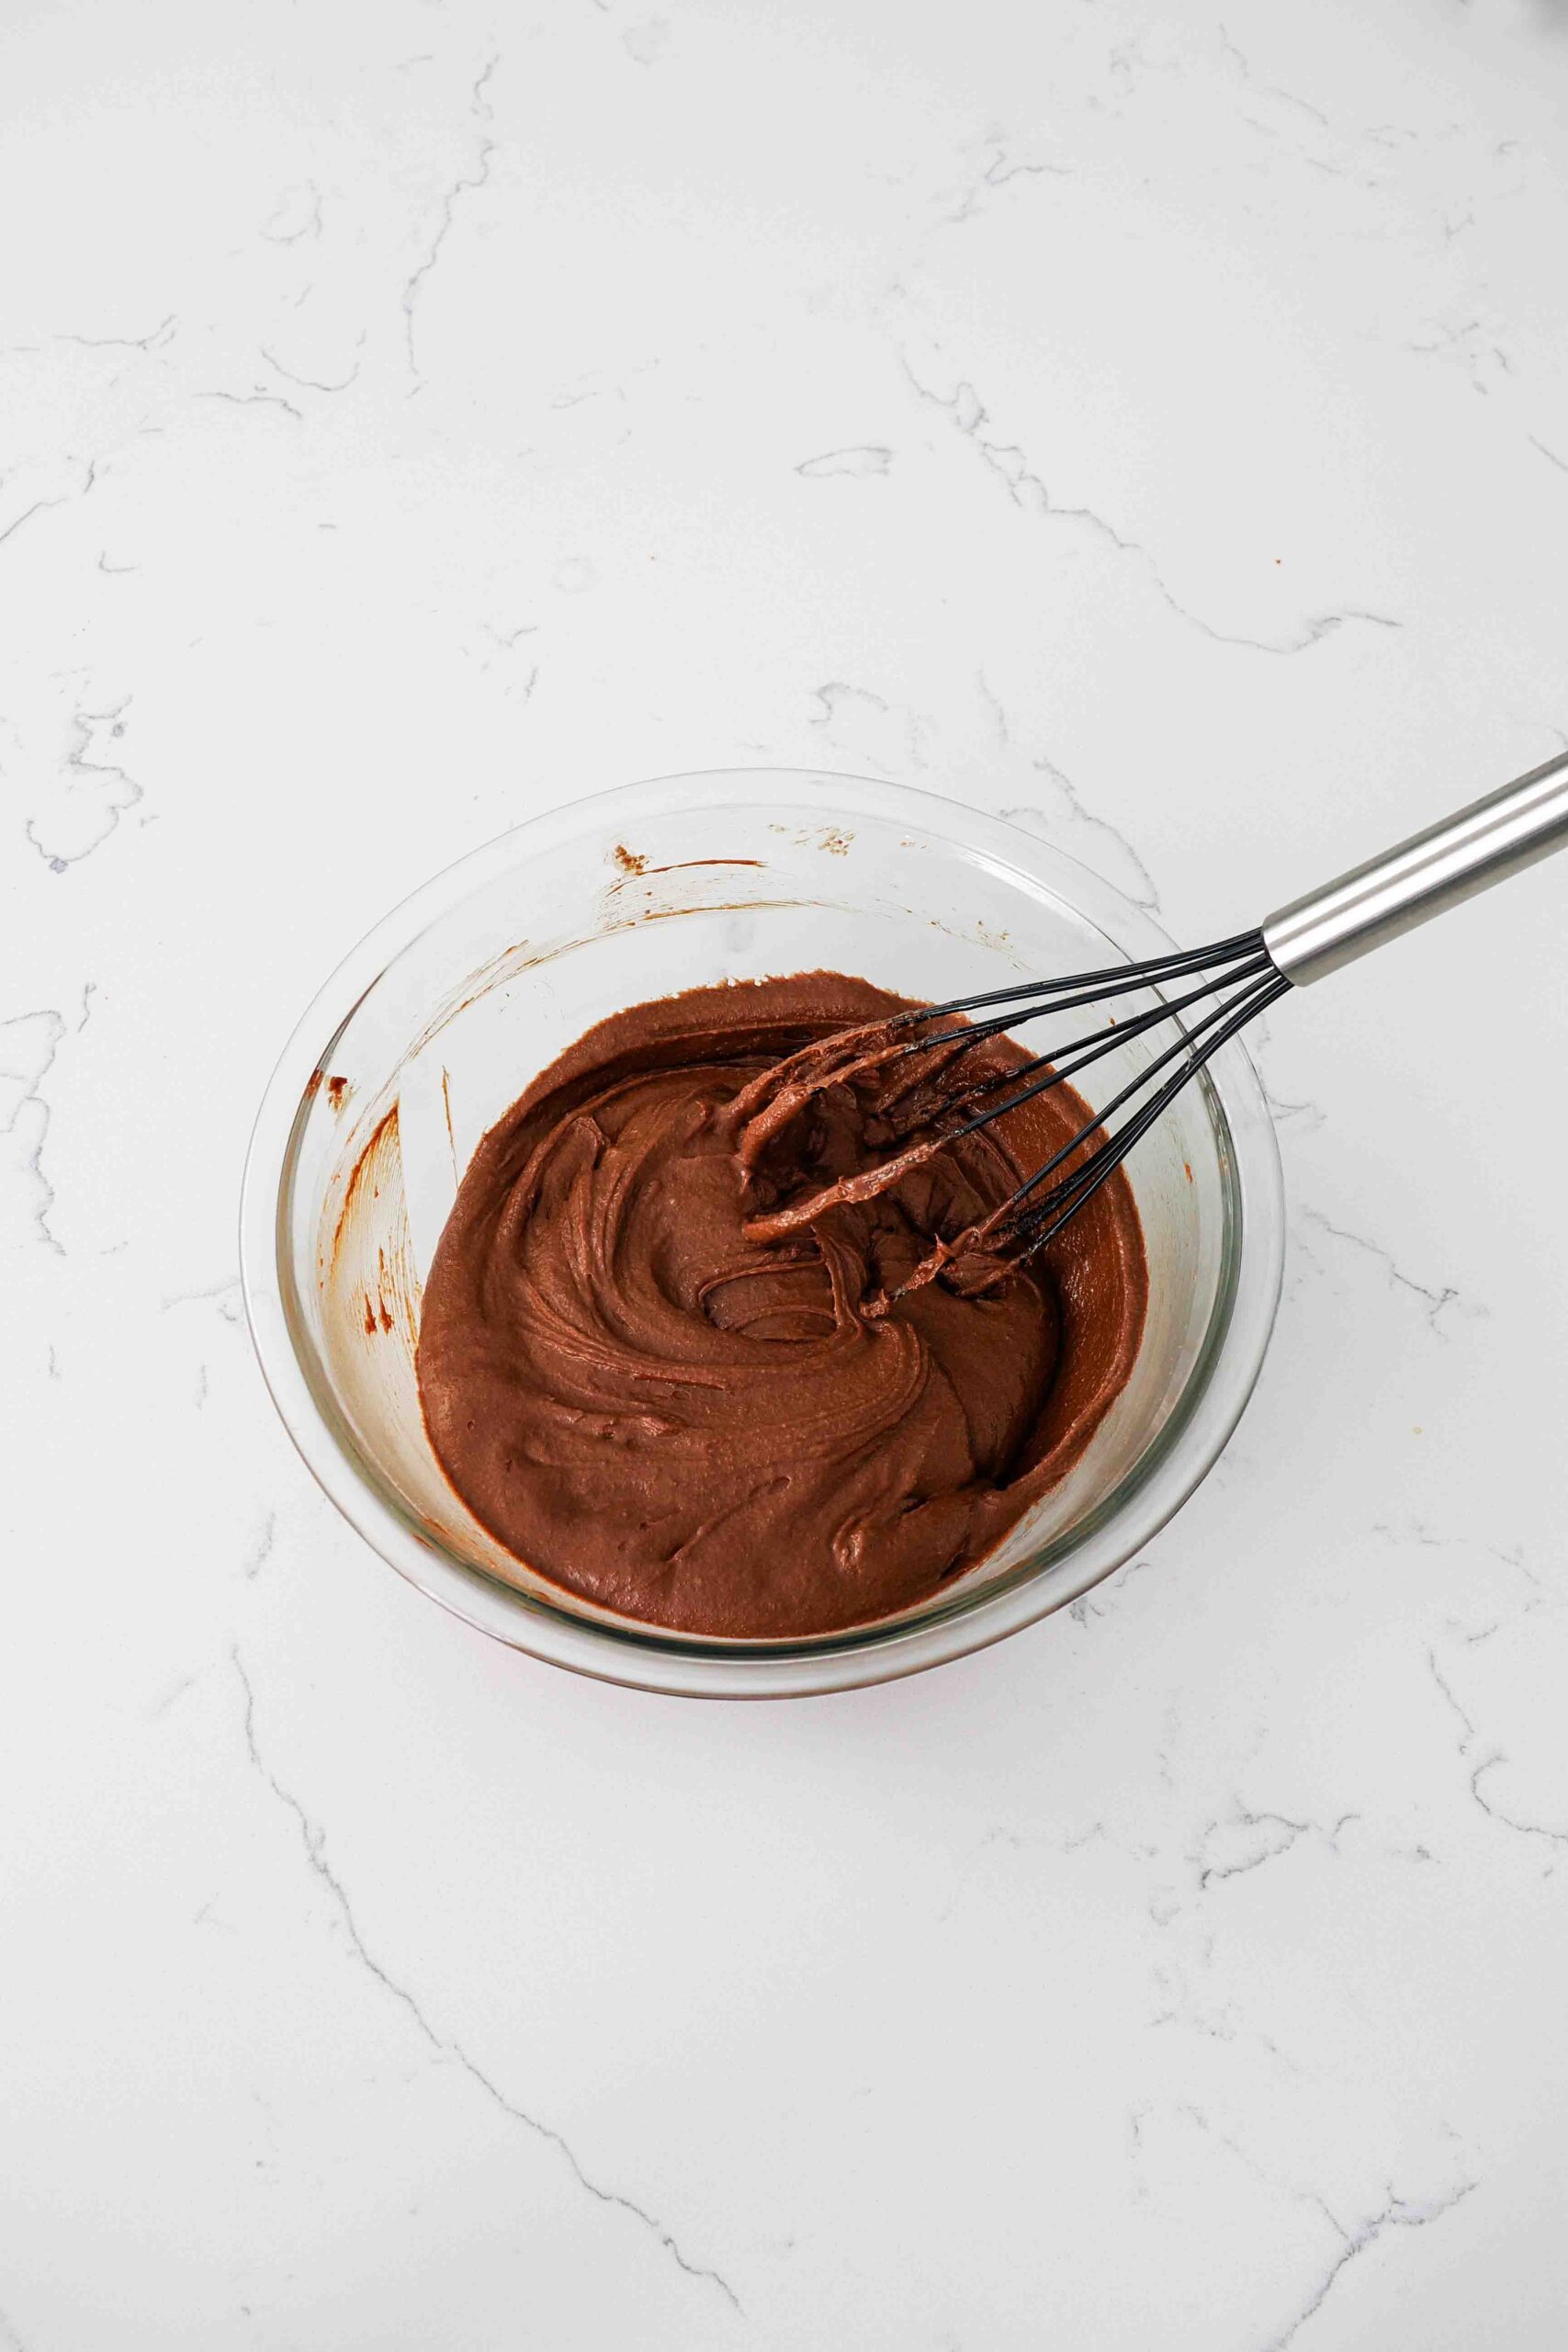
Whisk the batter together until it thickens slightly to the ribbon stage. This means that when you lift the whisk out of the batter, it will leave a visible trail of batter in a ribbon on top of the batter before fading into the bowl.
I went a little overboard when photographing this recipe, so I ended up whisking mine to thick ribbons. Fortunately, the brownies still turned out fudgy! Don’t worry if your batter ends up a little too thick—they’ll be just fine once baked.
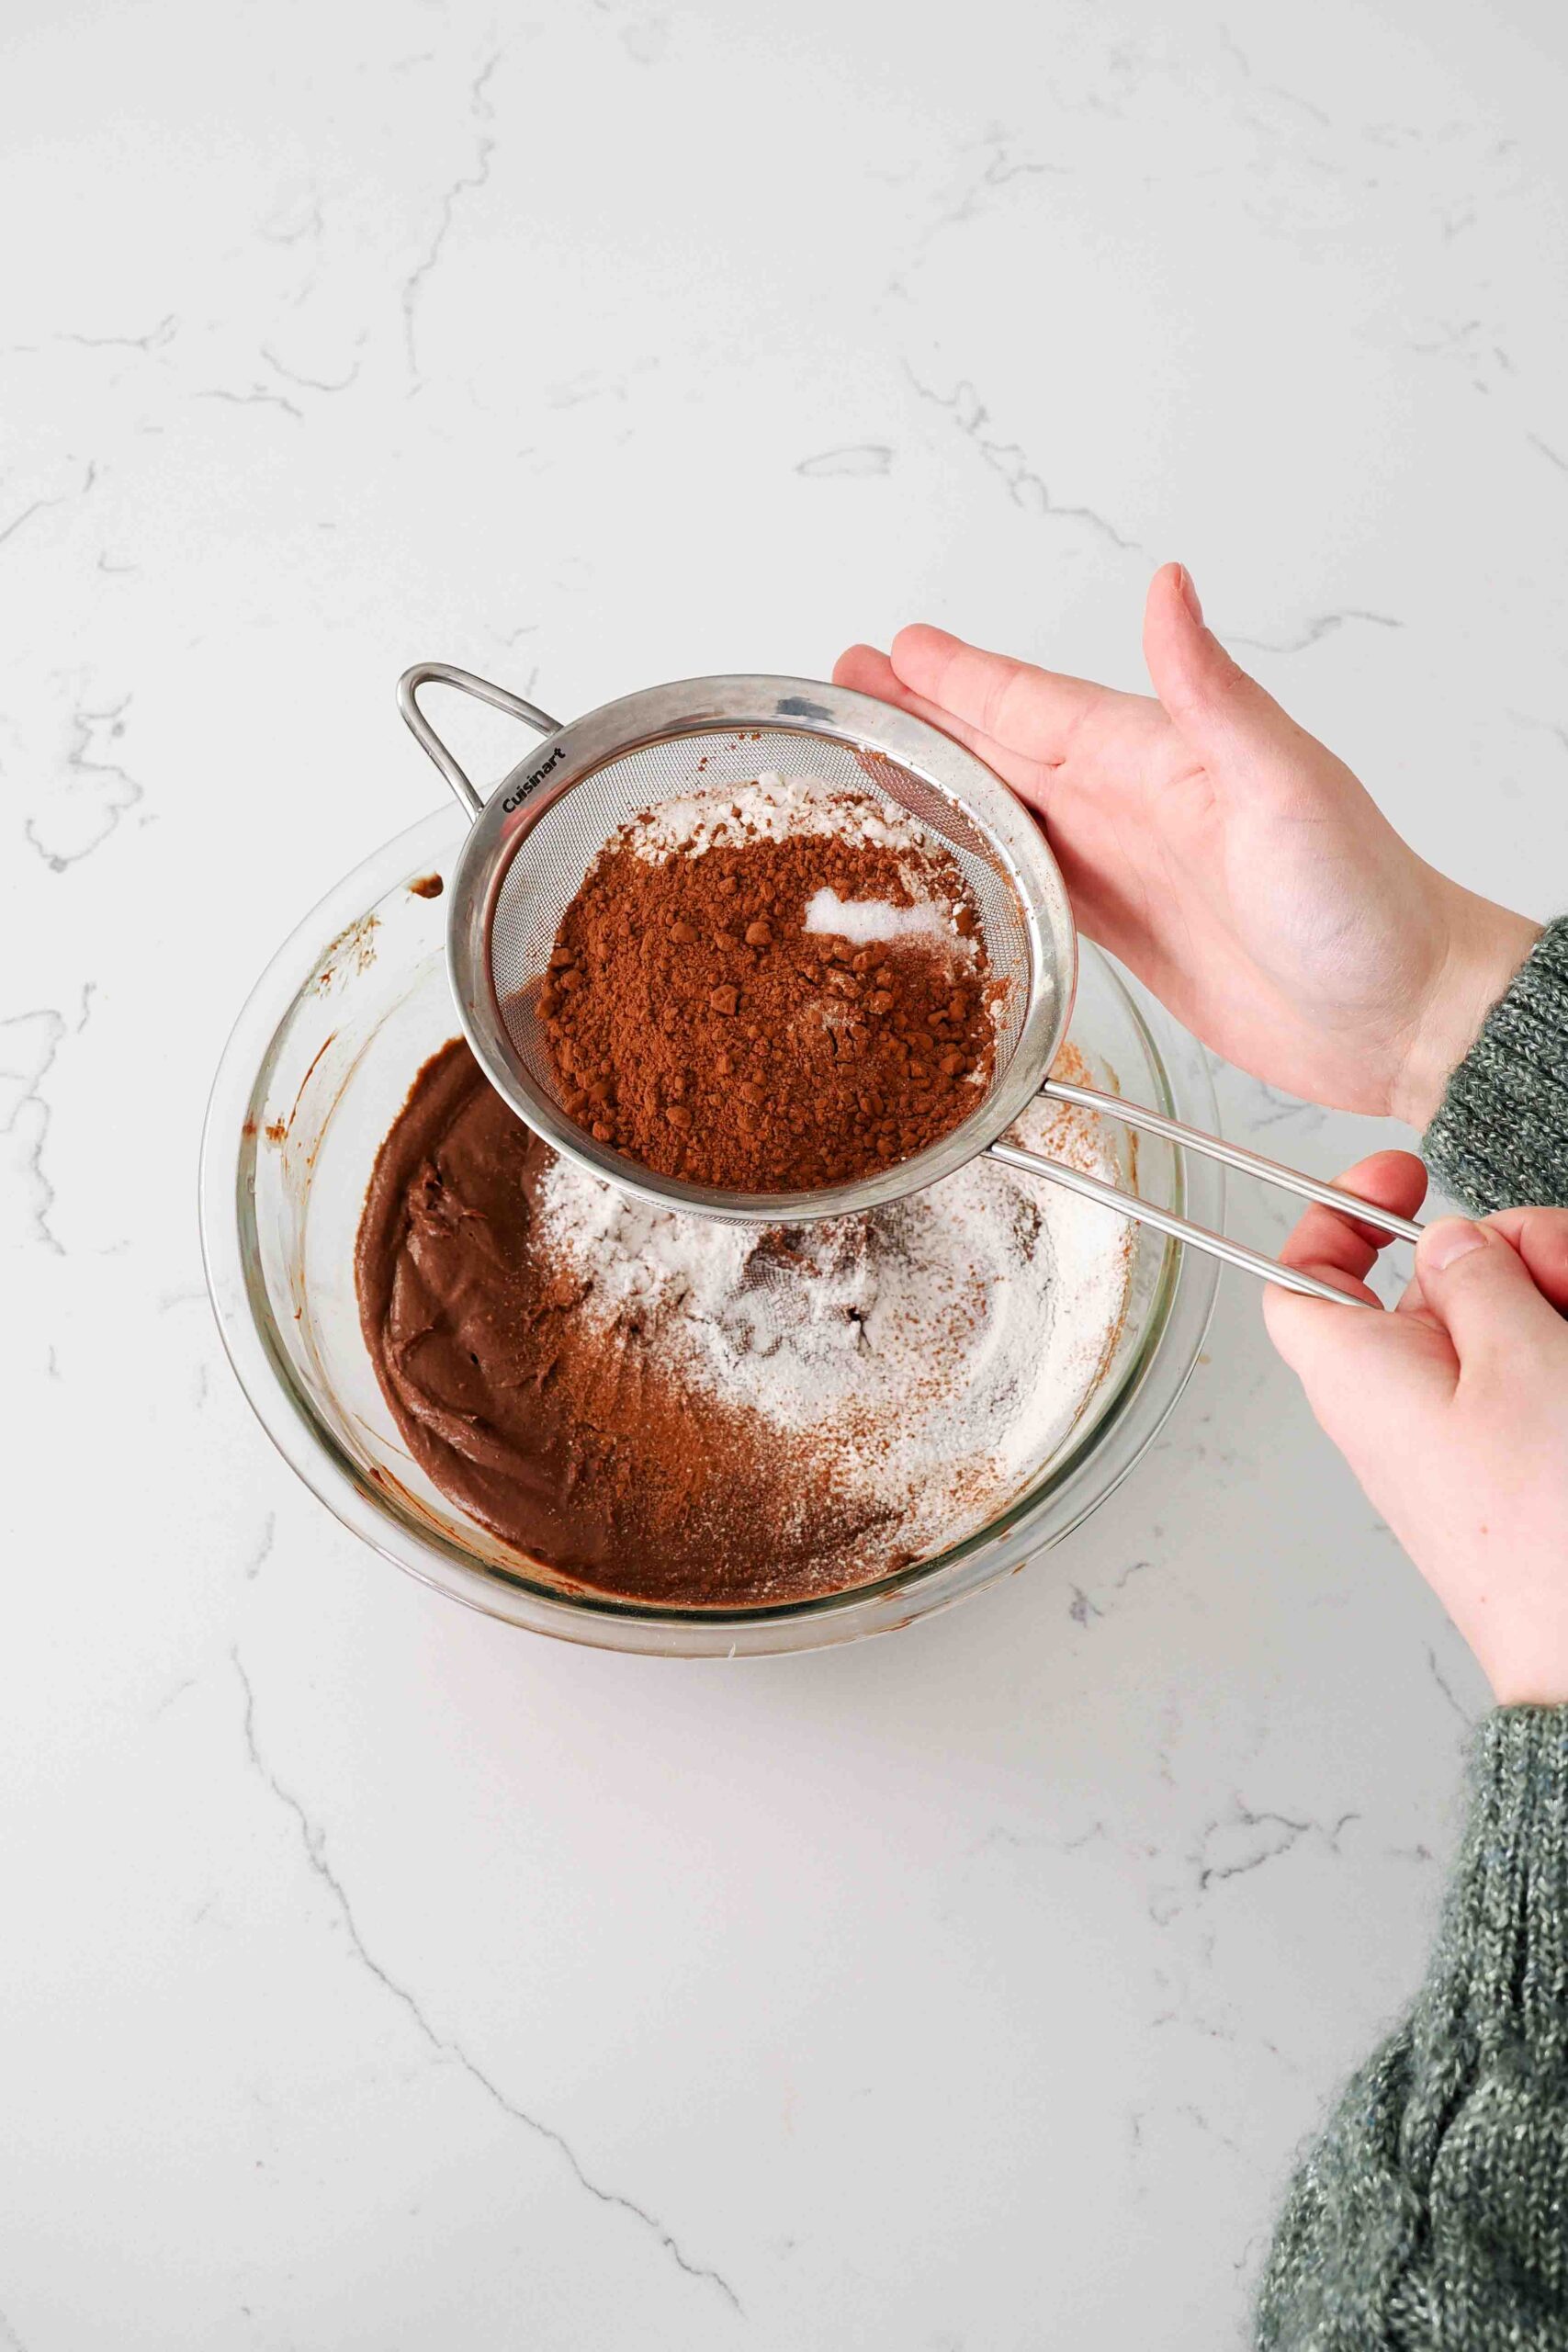
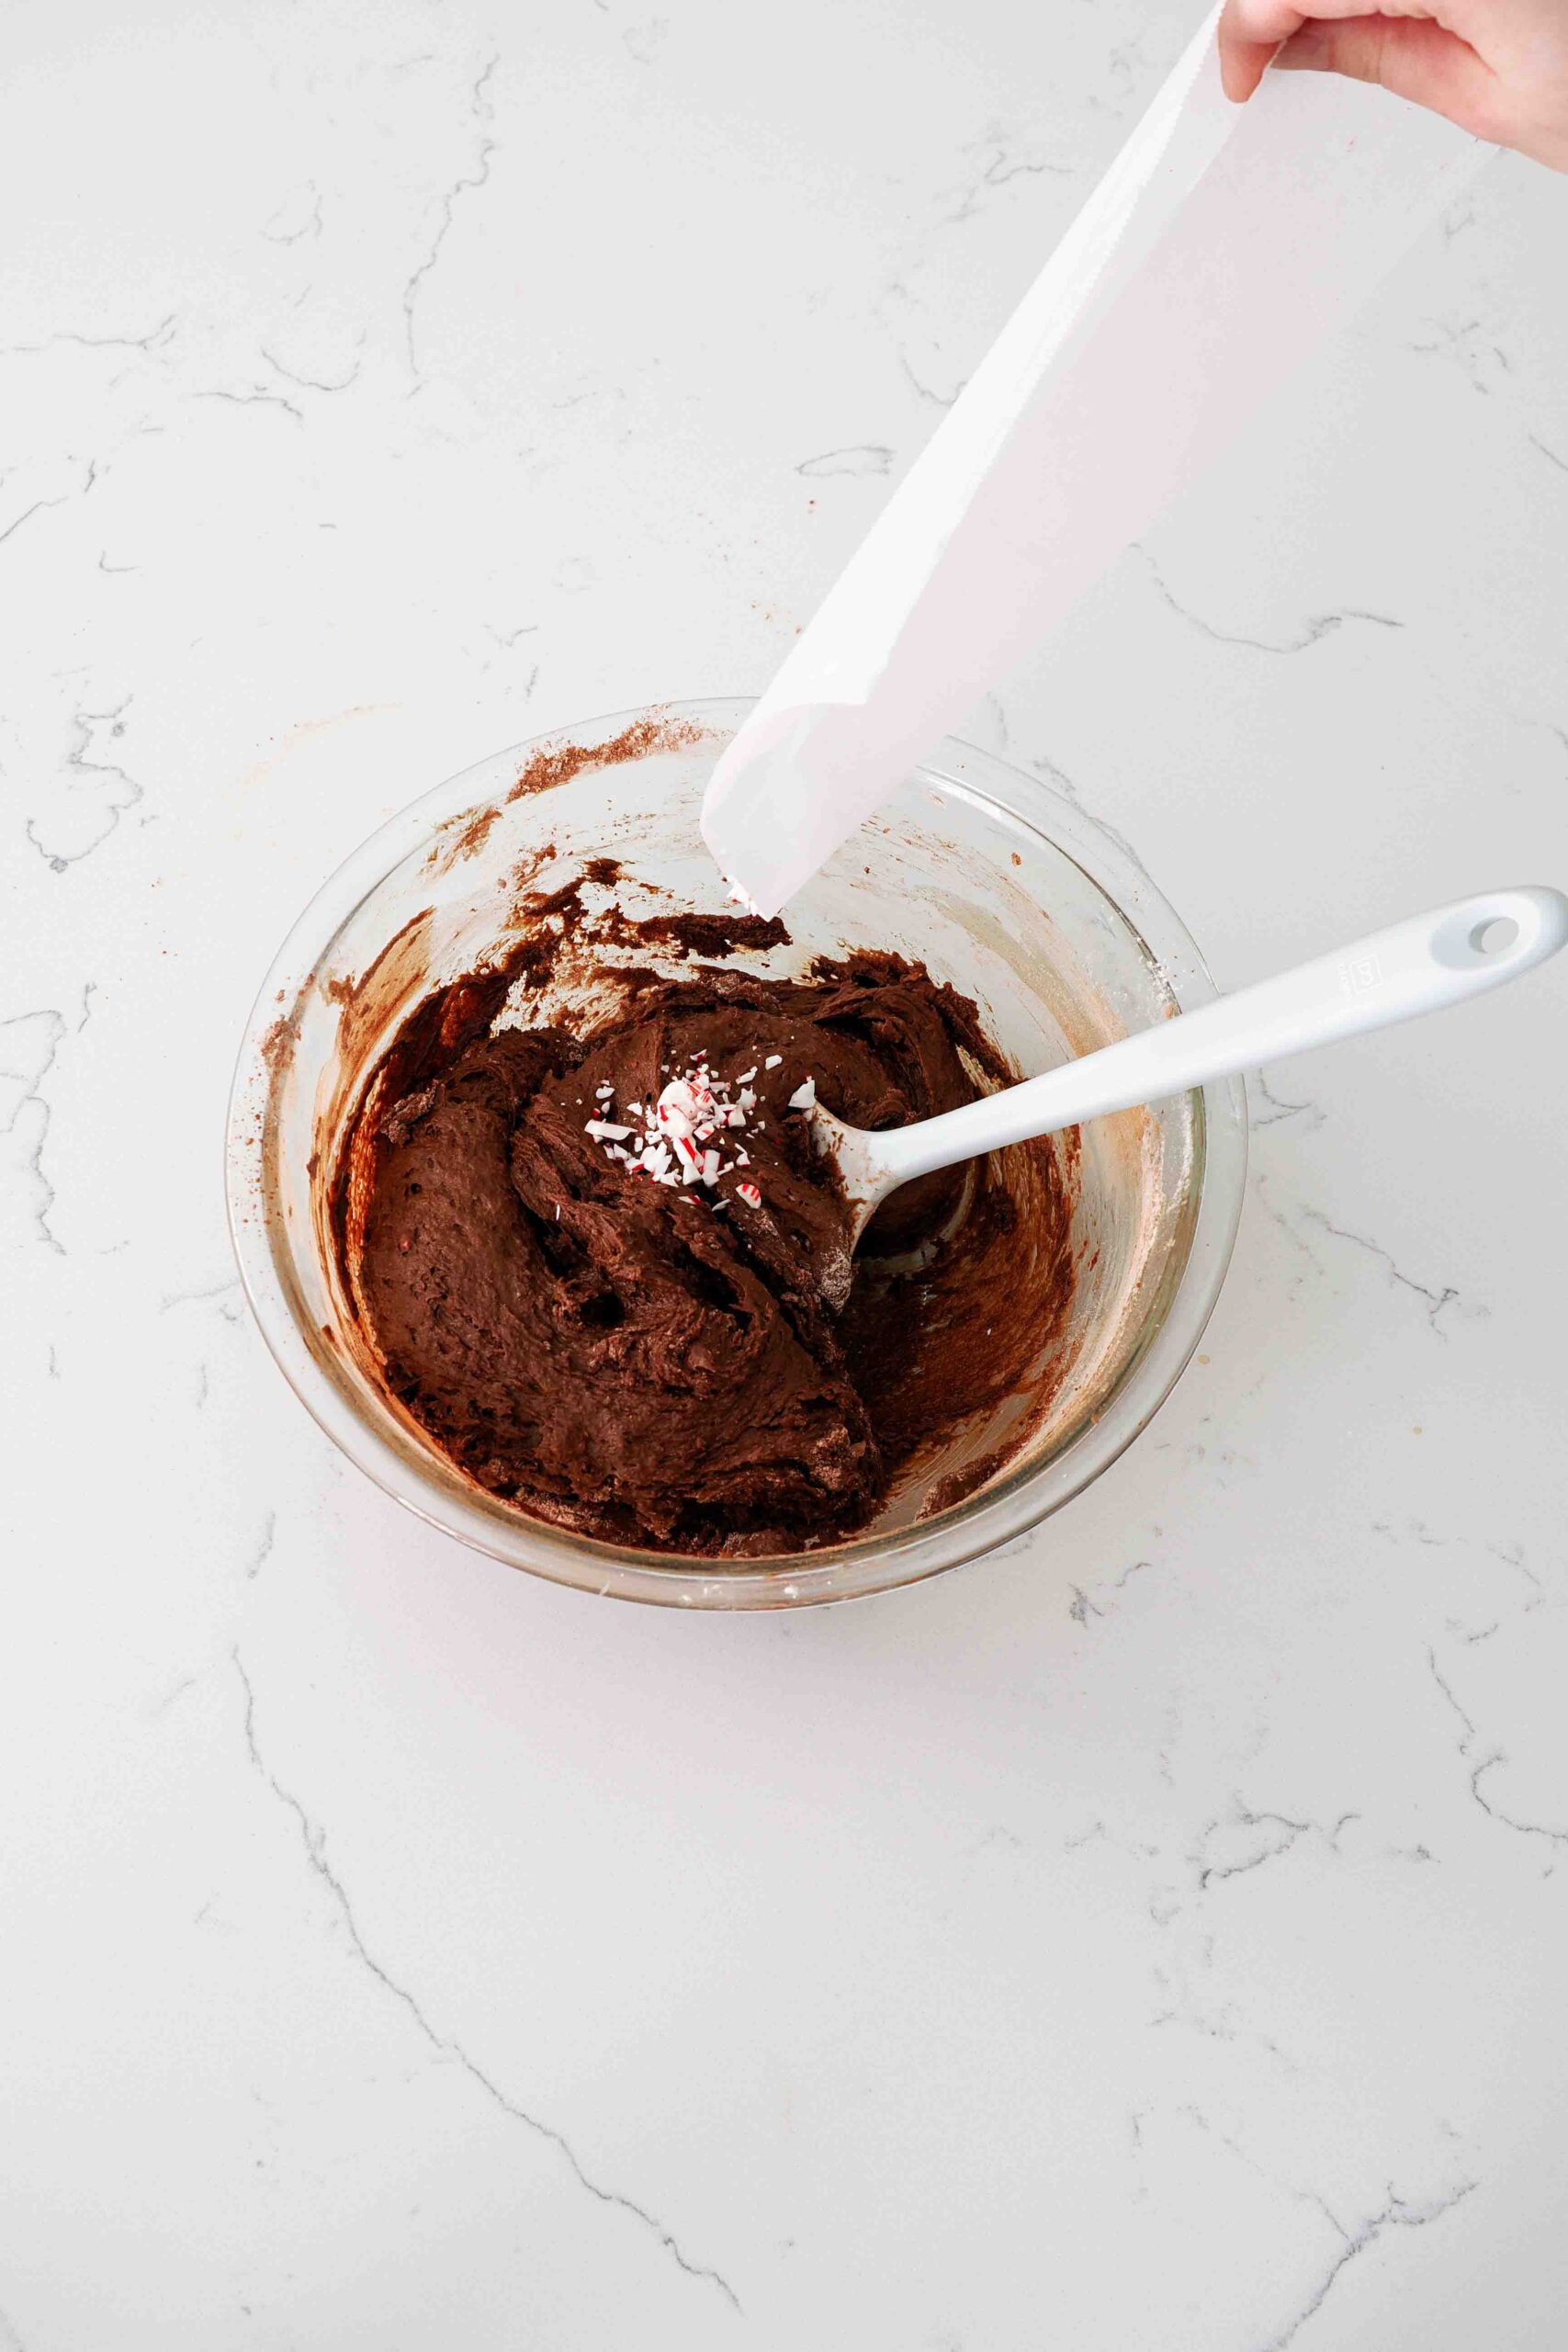
Folding in the Dry Ingredients
For best results, I recommend sifting the flour, cocoa powder, and salt into the brownie batter. Without the sifting, your batter may end up with lumps of cocoa powder.
Add half of the crushed candy cane (the rest will go on top after baking!), then fold everything together with a spatula, not the whisk. Once the dry ingredients have been properly combined, the brownie batter will be thick and glossy.
While I was testing this recipe, I tried to make brownies with just a whisk, but they always turned out cakey rather than fudgy from too much air being incorporated.
Baking Peppermint Brownies
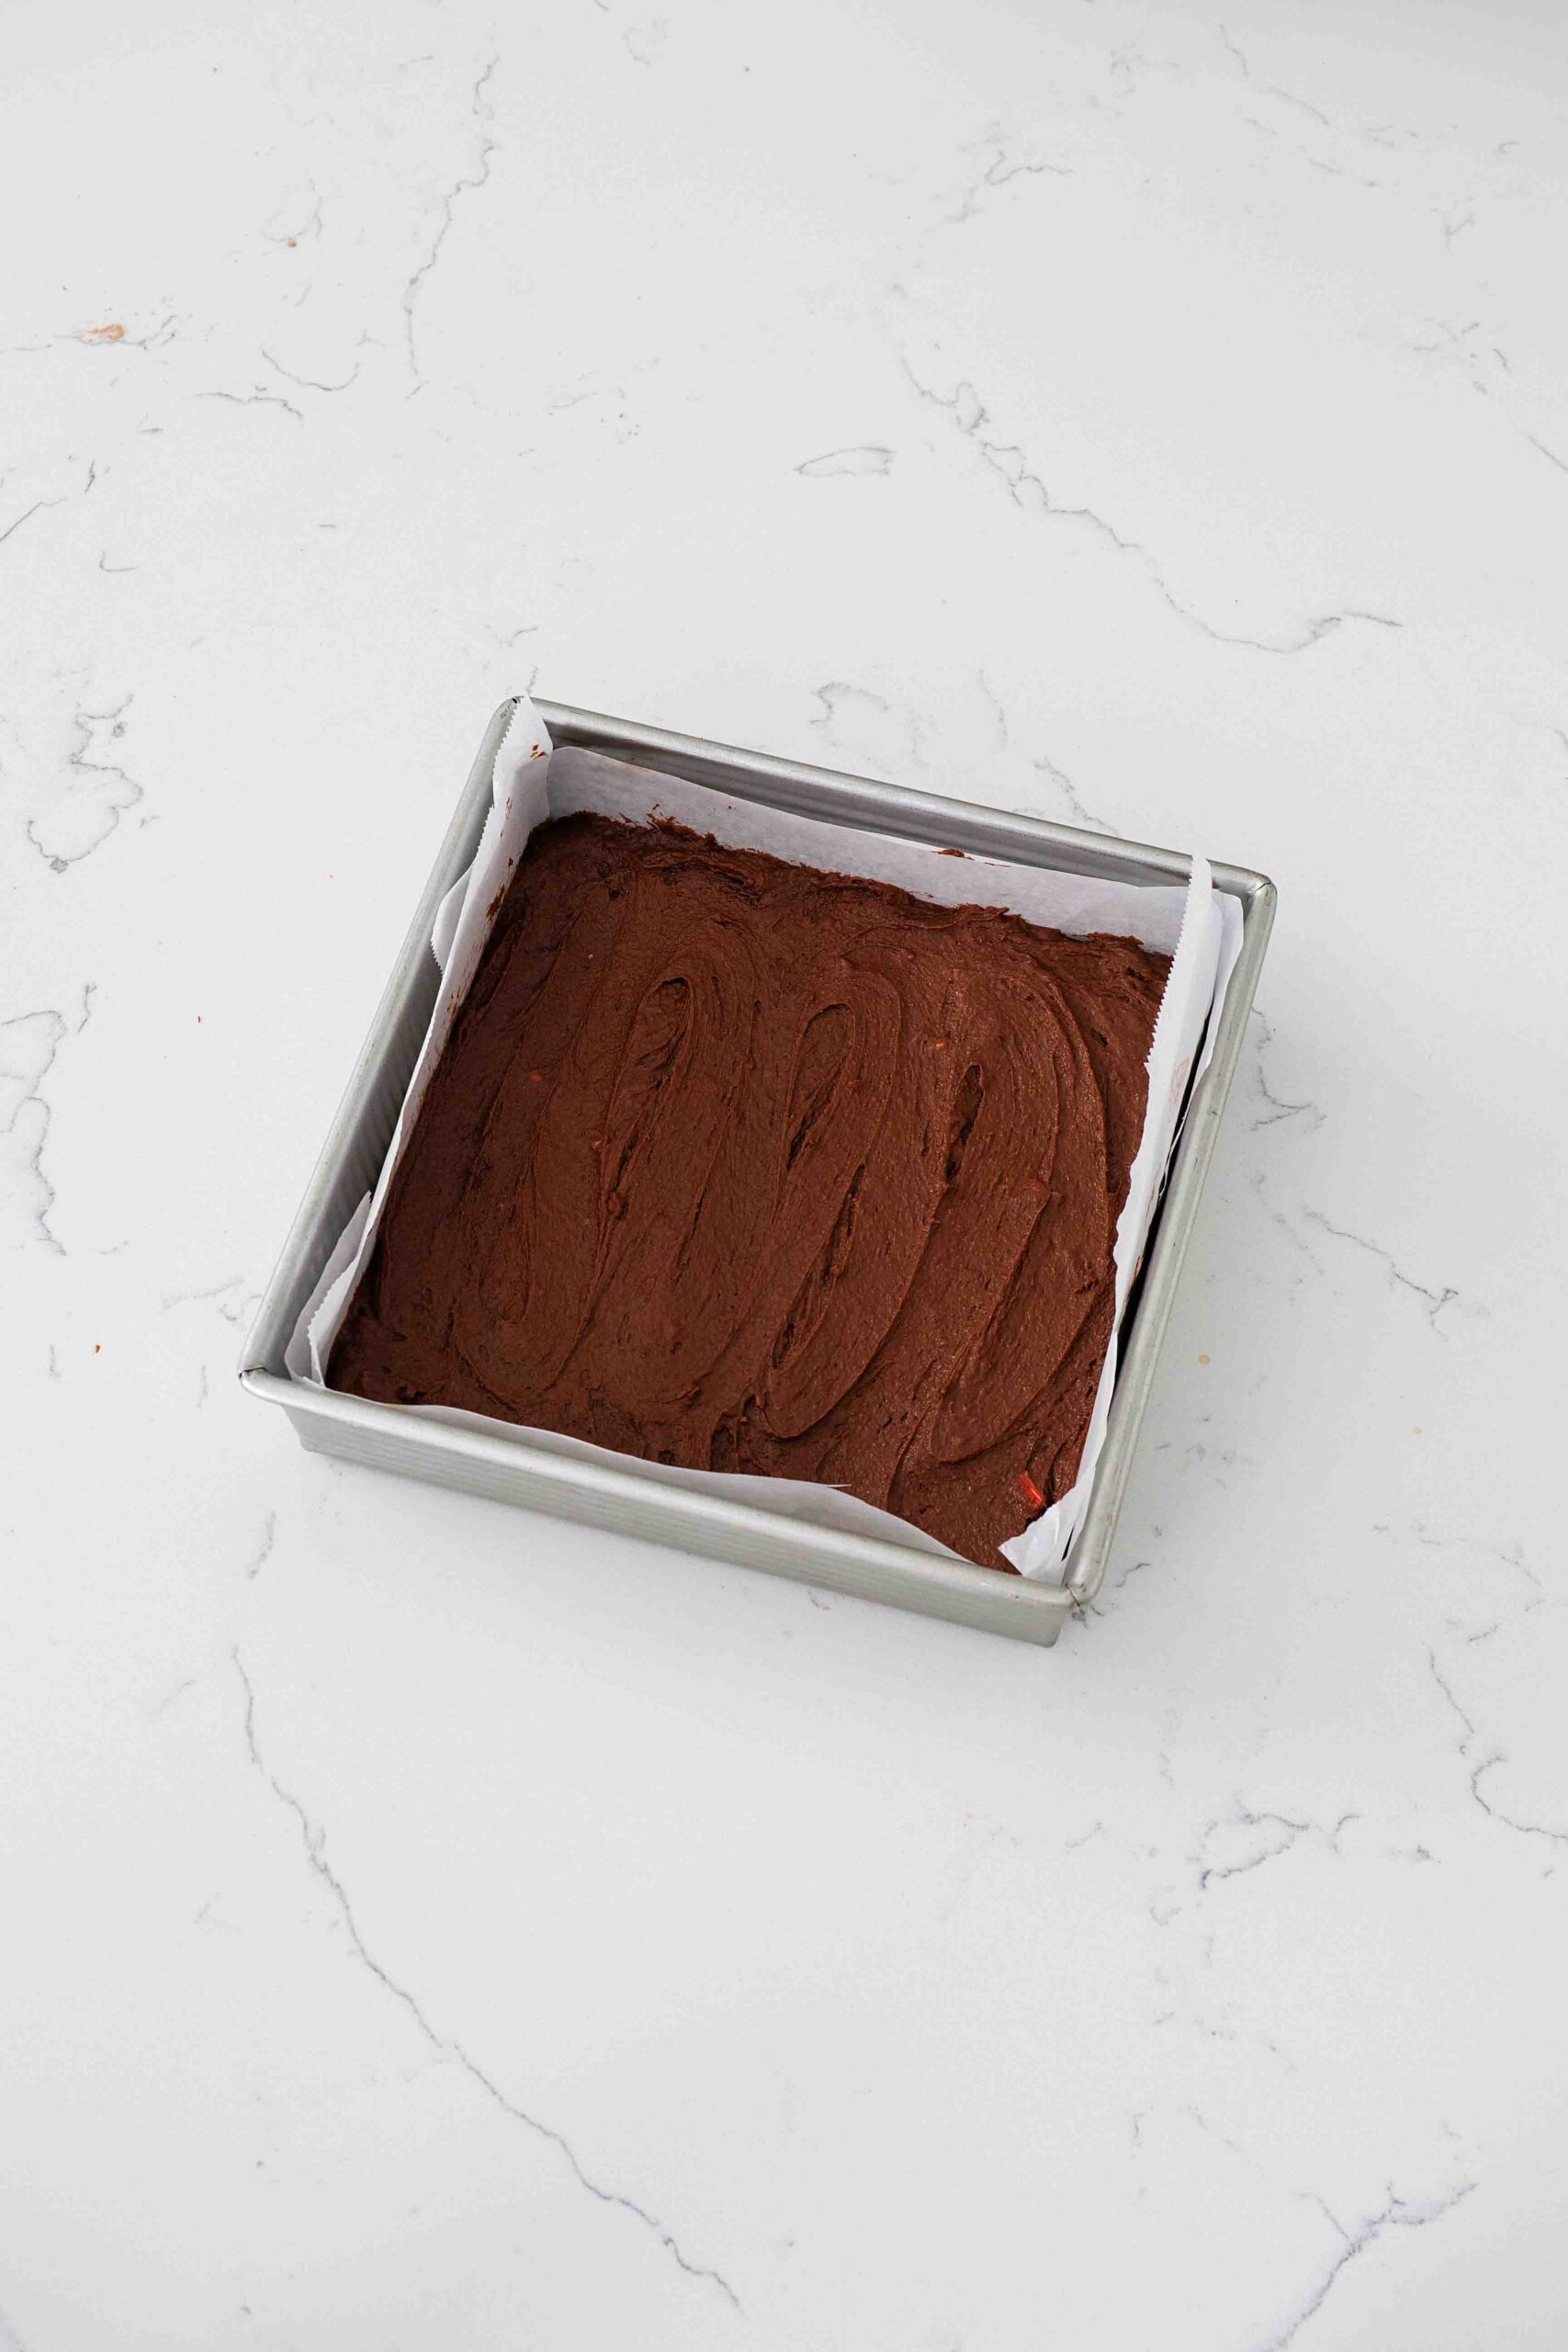
Transfer the candy cane brownie batter into your lined metal pan, and spread to the edges with a spatula if needed. My batter was a little thick from overwhisking the sugar and eggs (gotta get the shot!), but it still turned out beautiful brownies.
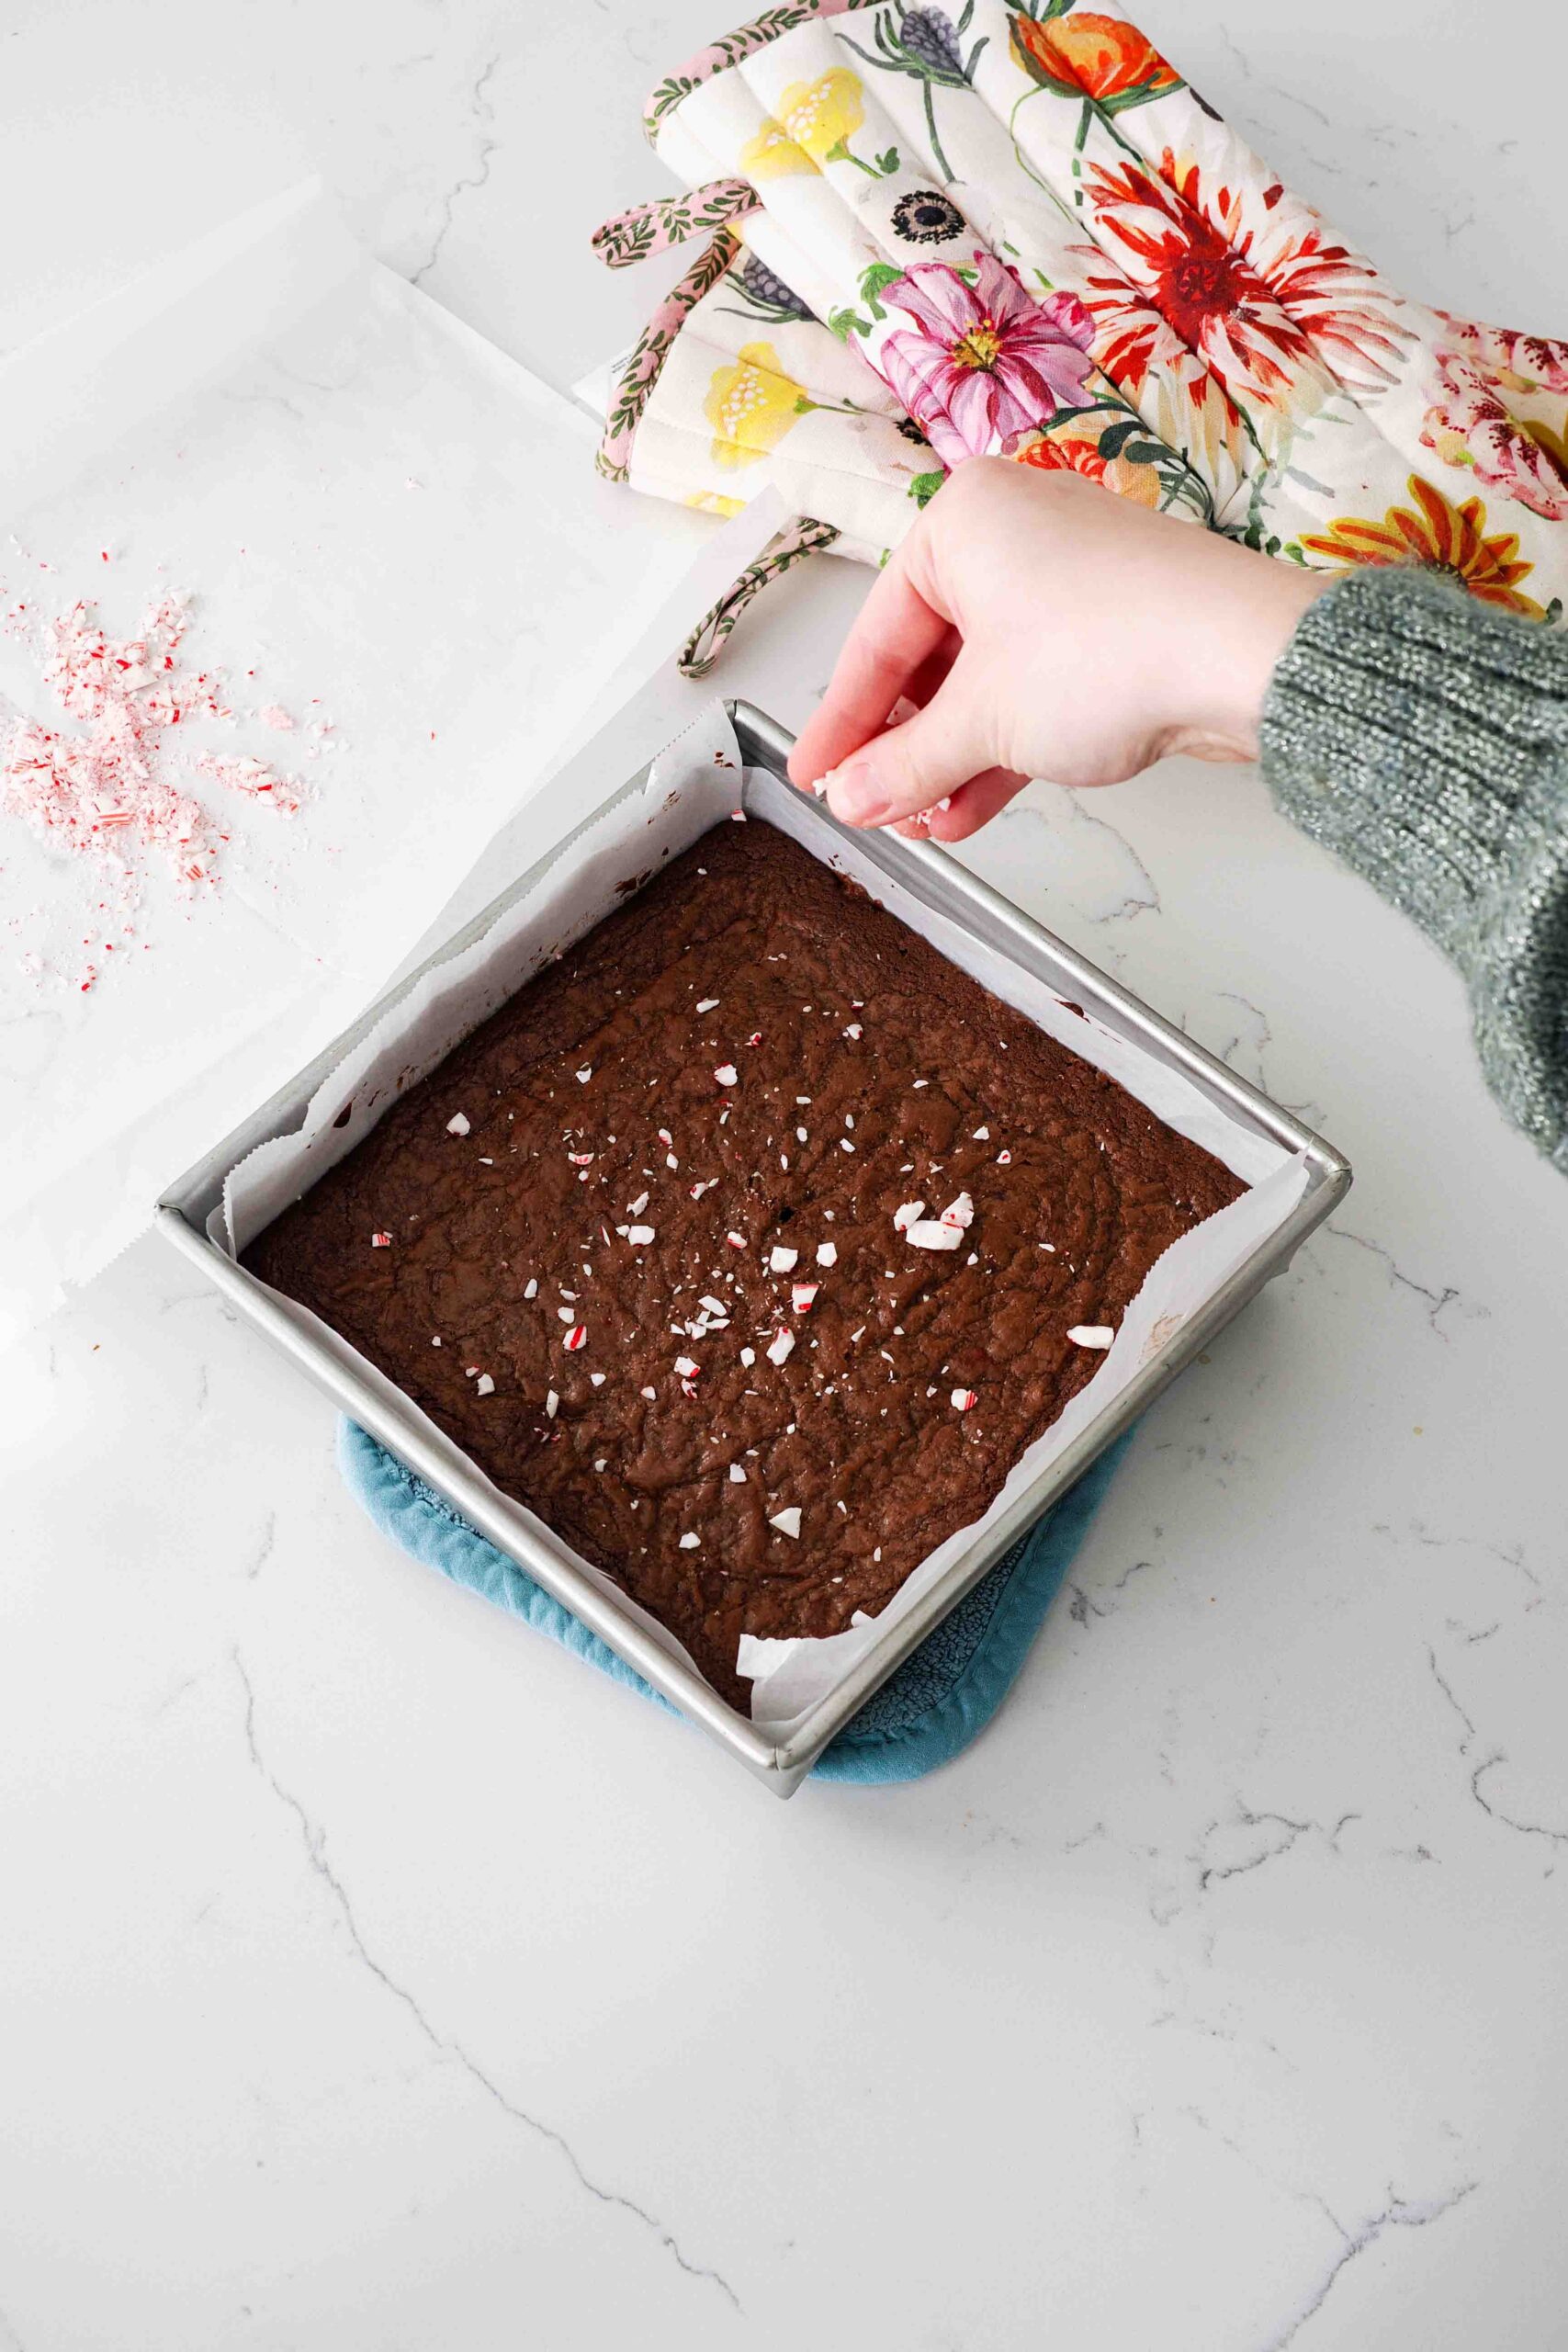
The trick to getting perfectly fudgy brownies is to take them out of the oven a little early to prevent them from overbaking. Set the oven timer for 20 minutes and check on the brownies at that point. I remove the pan completely from the oven and tilt the pan side to side. If the center of the brownies moves at all, I place the pan back in the oven for another two minutes before rechecking.
The brownies have baked just enough when the center doesn’t move or jiggle when tilted side to side or a toothpick or knife inserted comes out with a couple of baked crumbs rather than wet batter.
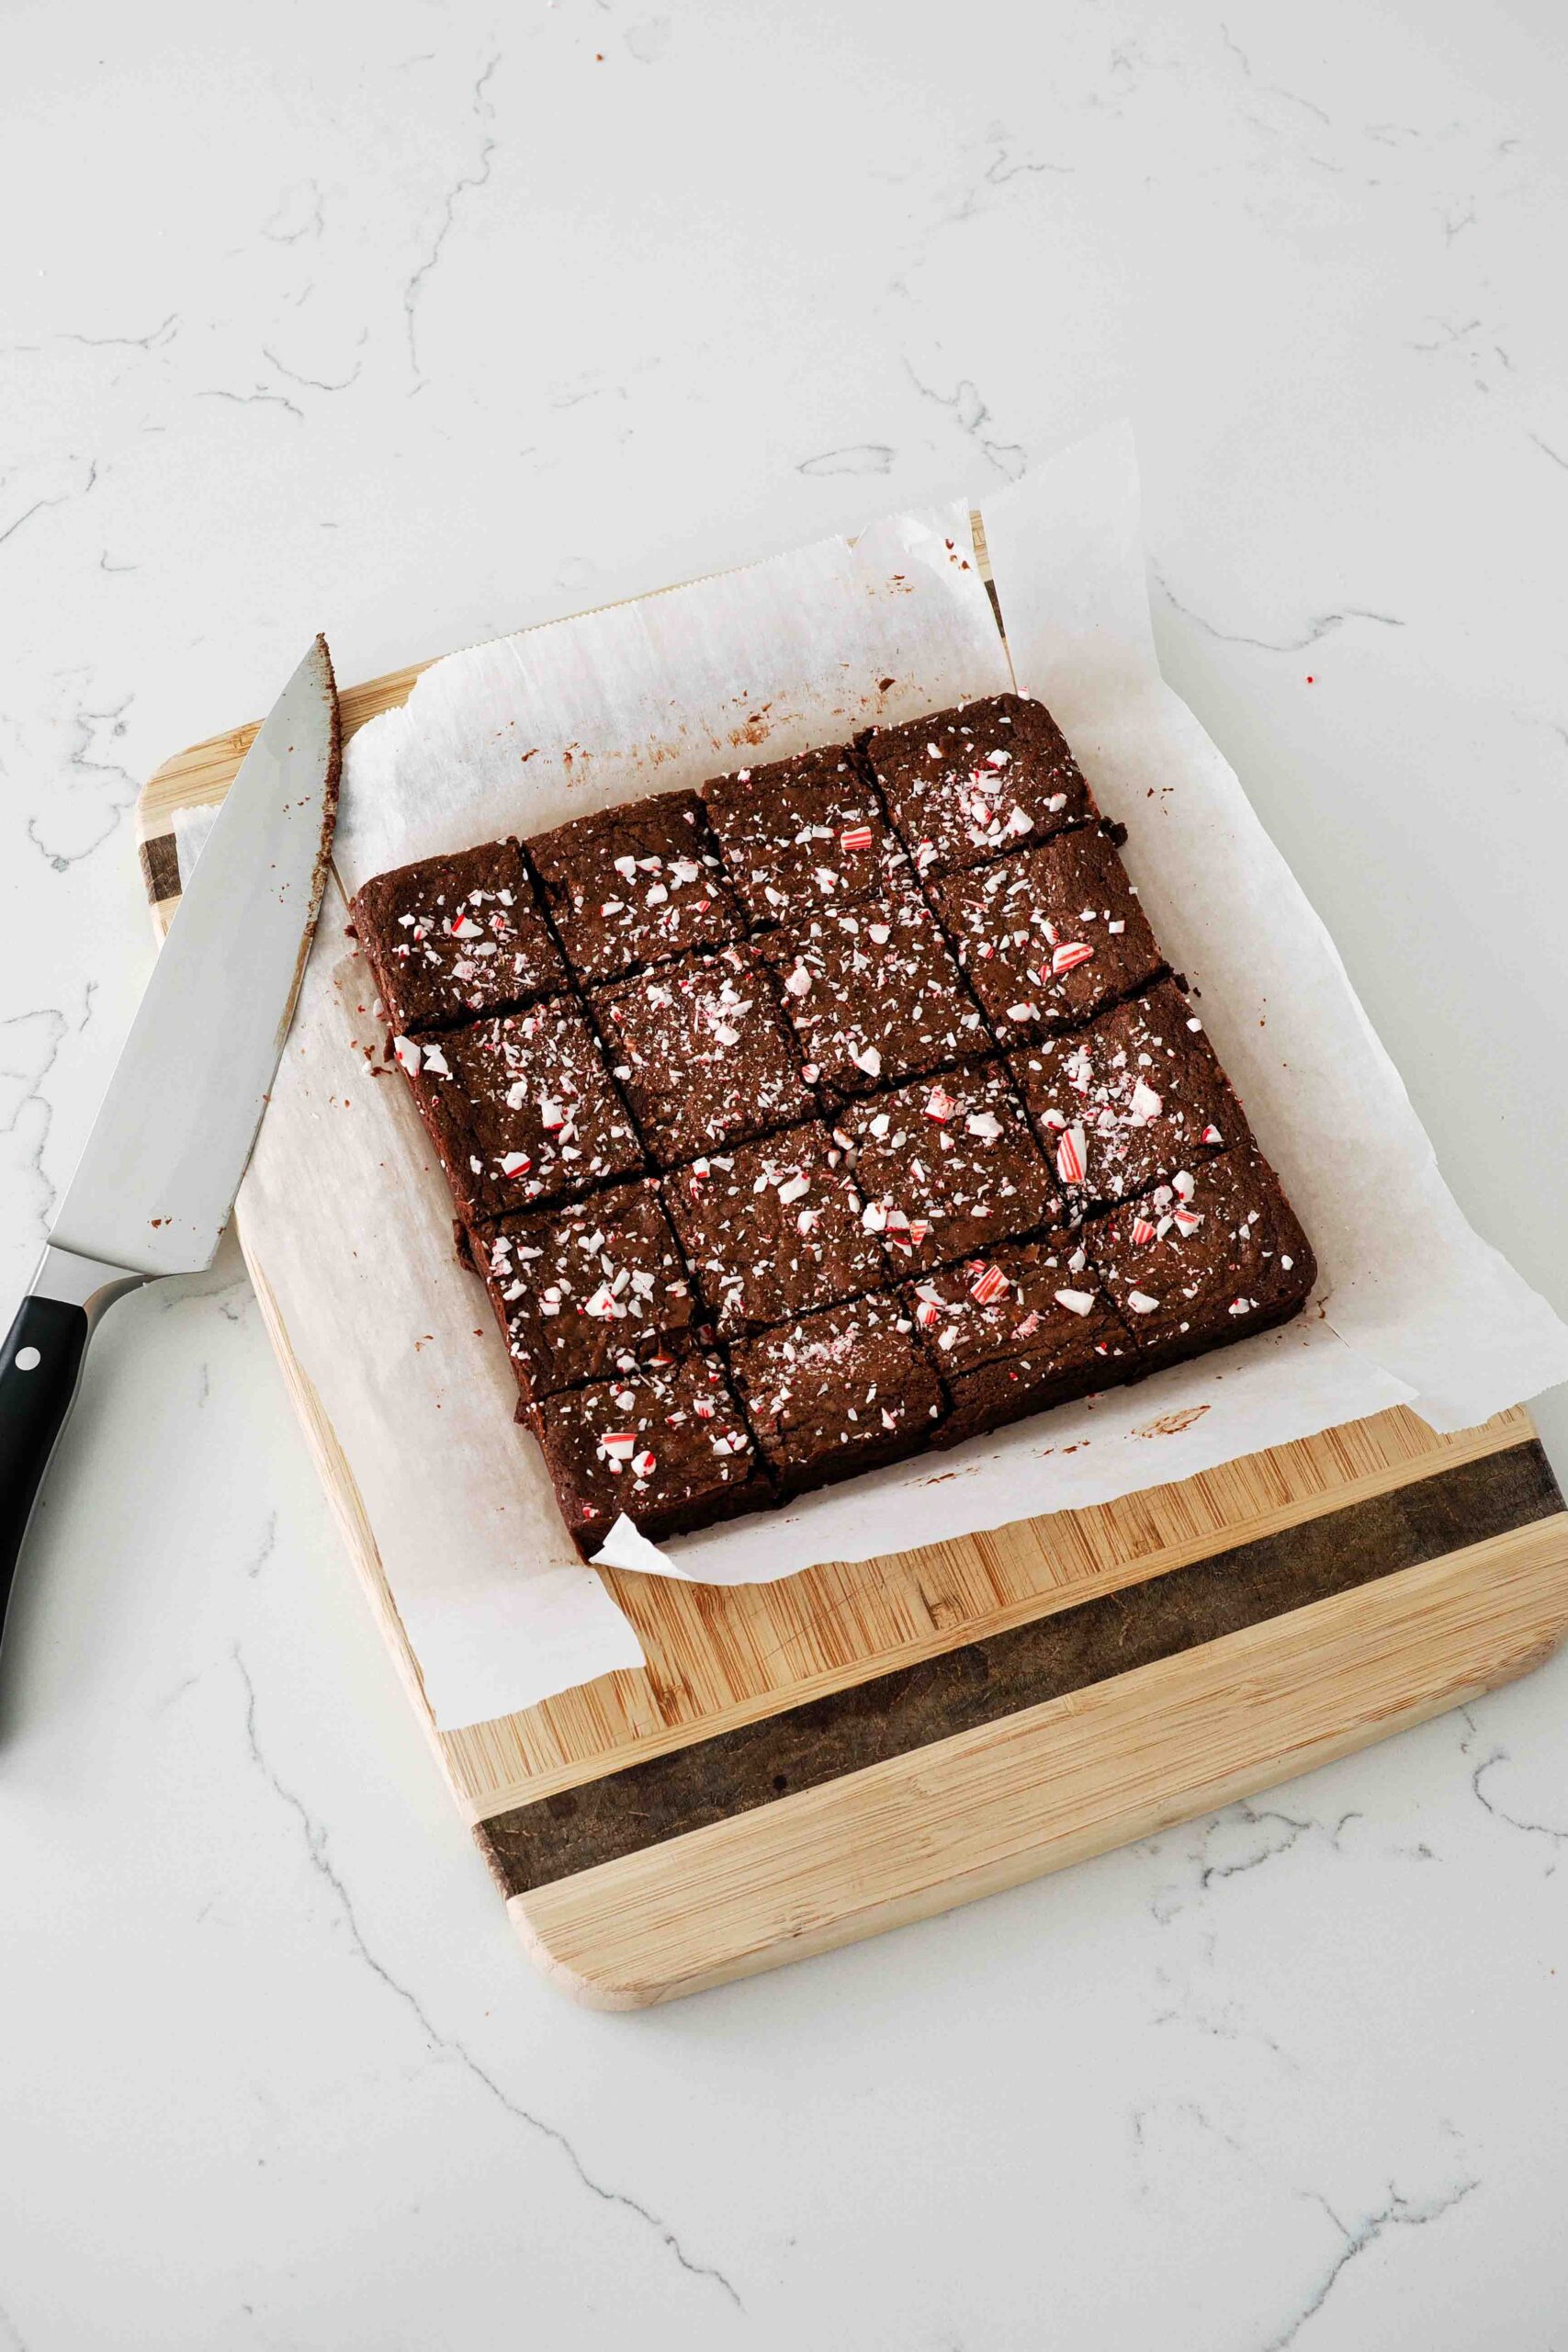
Immediately after taking the brownies out of the oven, top with the remaining crushed candy canes. The residual heat will melt the candy canes just slightly so that they stick to the top of the brownies nicely.
Cutting Peppermint Brownies
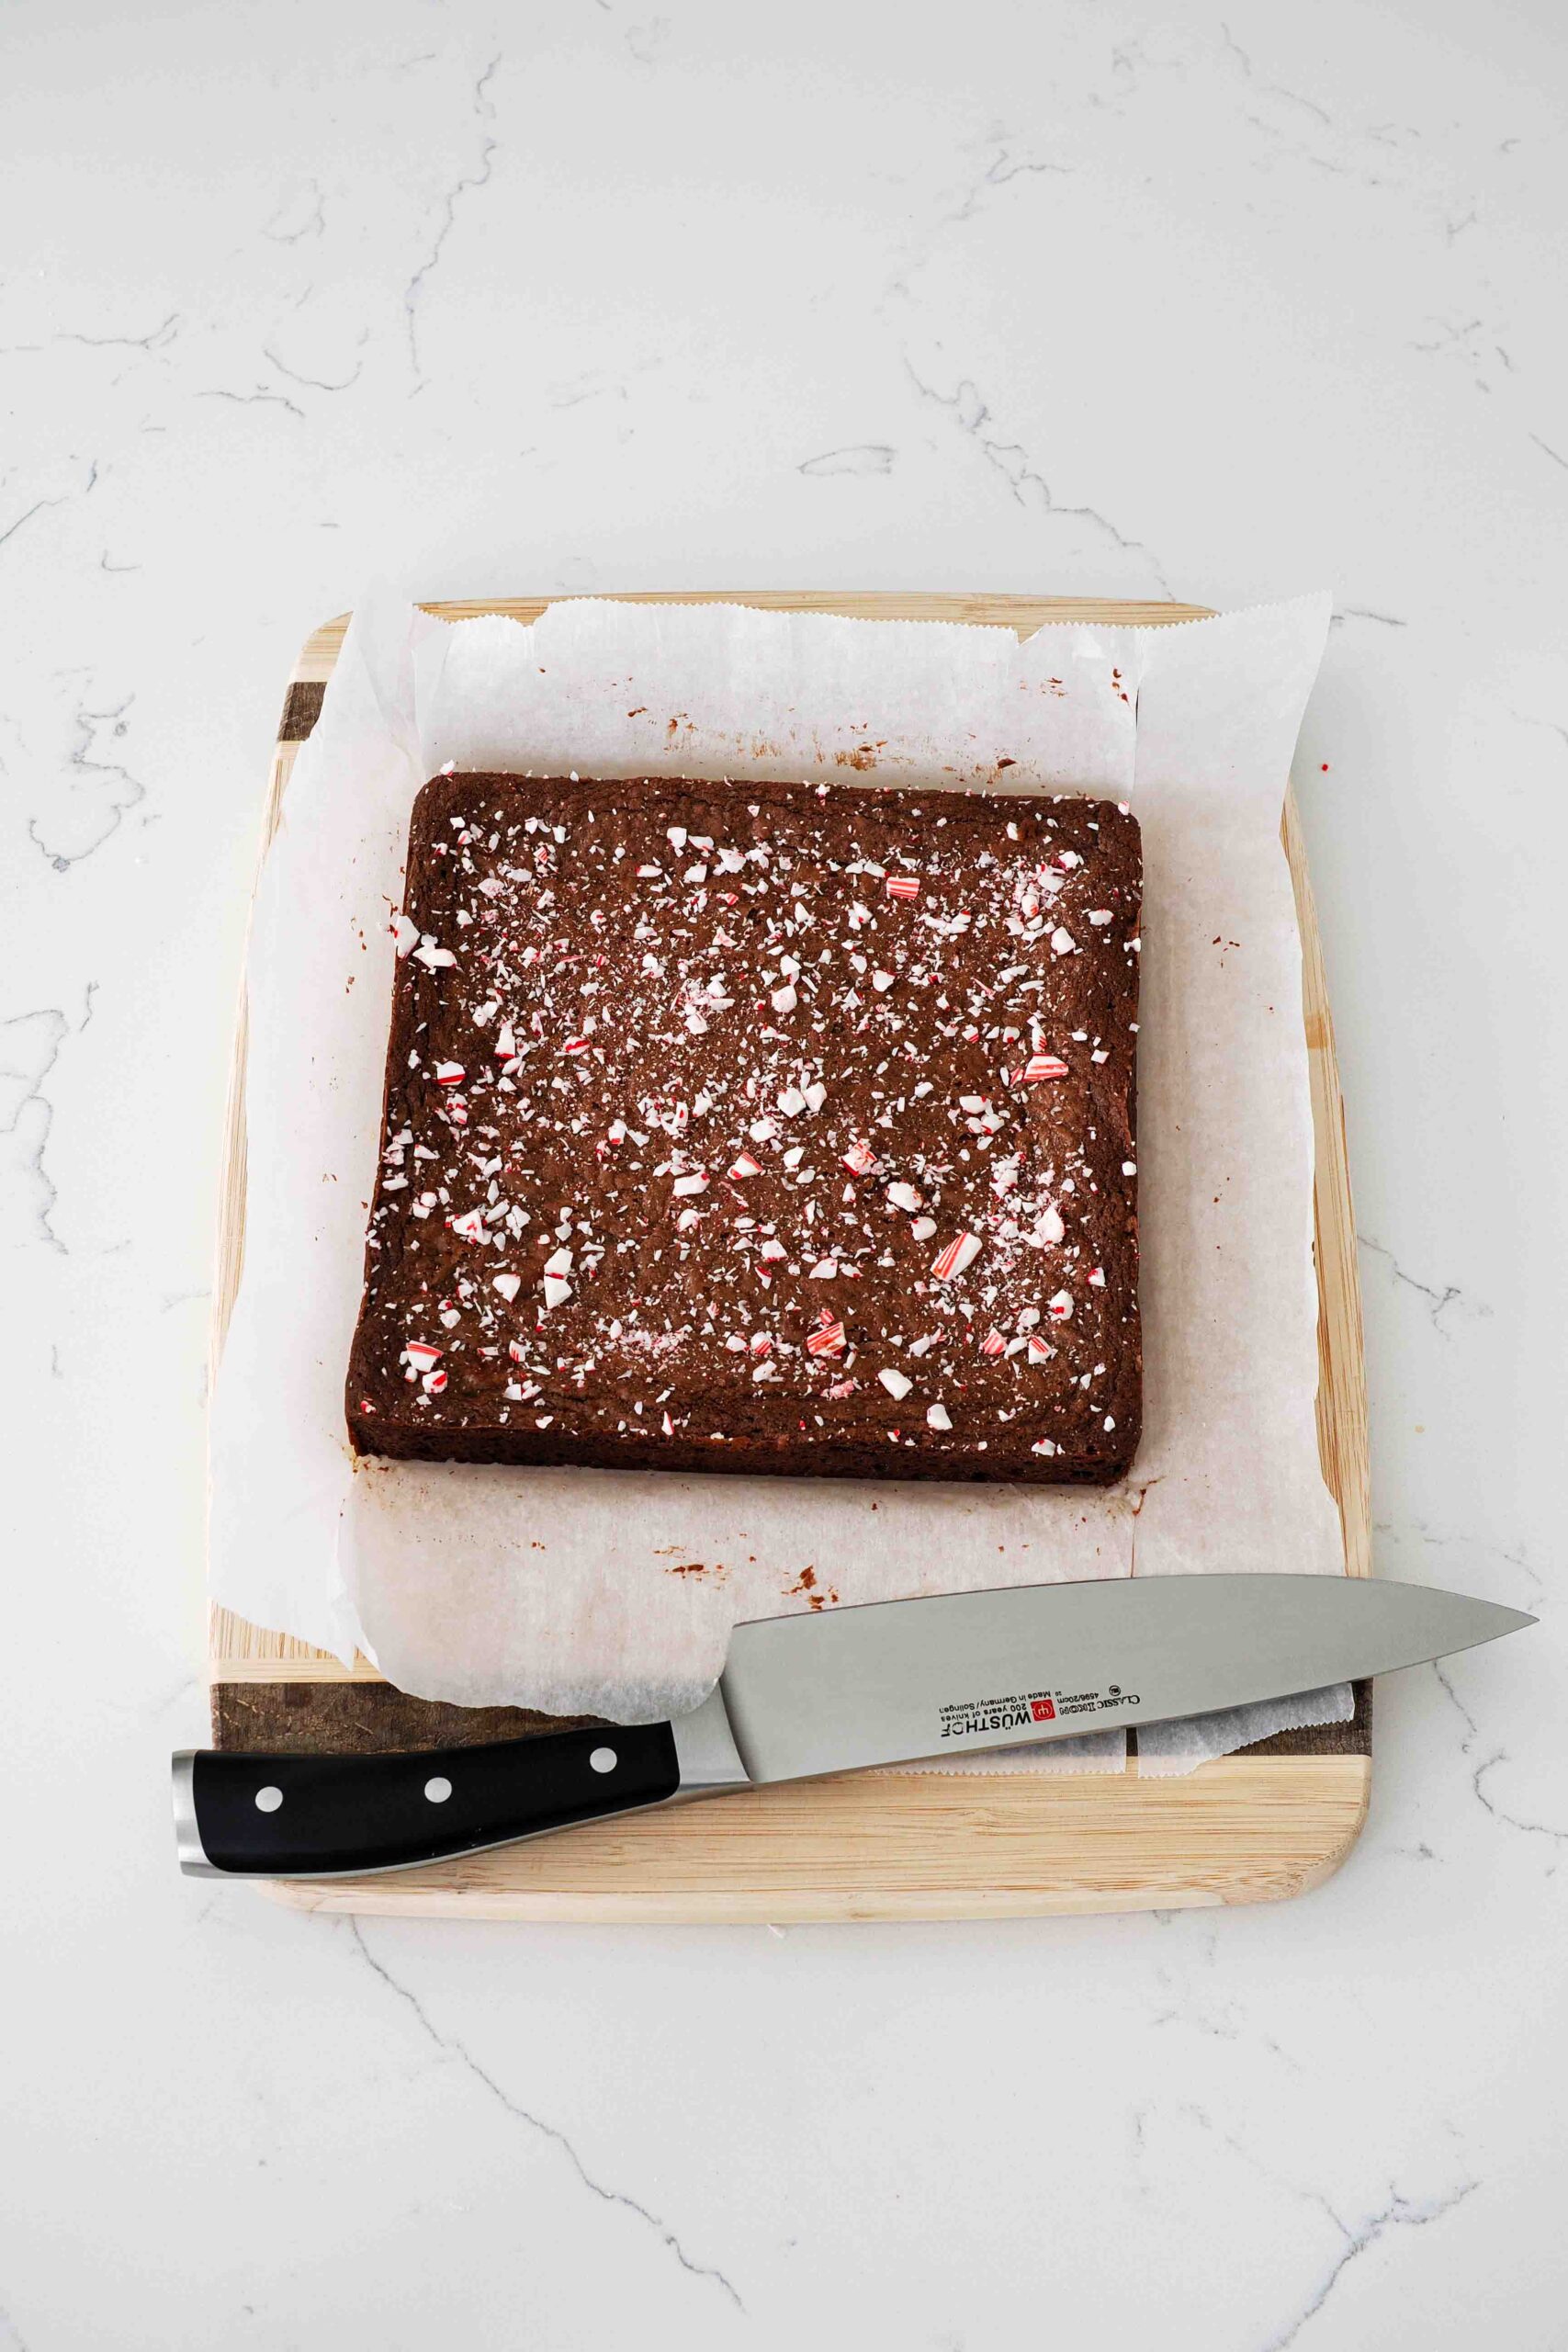
Brownies cut the best once they are fully cool. Wait at least one hour, or until the bottom of the pan is only the slightest bit warm, before cutting into the brownies to allow them to set up properly.
Then, use a sharp knife to cut the brownies into squares and serve! For clean cuts, wipe the knife clean with a paper towel or napkin after each slice.
FAQs about Candy Cane Brownies
Part of it is the recipe, but the other part is method! Use a whisk to incorporate air into the eggs and sugar, but switch to a spatula to fold in the flour and cocoa powder. We want a little air to prevent the brownies from being too dense, but not so much that the brownies turn cakey.
I think it’s the perfect balance of mint! You get a whiff of peppermint from the candy canes on top, a bit of crunch with the candy canes inside, and then you’re left with a pleasant peppermint-y aftertaste that feels fresh but not toothpaste-y.
At room temperature in a sealed container, these brownies will be best consumed within the first three days. When stored in an airtight container in the fridge, these brownies will last for up to five days.
You don’t need to add the candy canes, but without them, it’s visually hard to tell that these contain peppermint. Since some people don’t like surprise mint in their desserts, I recommend adding the candy canes on top (or including a sign noting the flavor!).
Other Recipes You May Enjoy
Other fall and holiday favorites:
- Chocolate pumpkin muffins—lightly sweetened and flavored with pumpkin
- Chocolate Bundt cake with milk chocolate ganache—a decadent chocolate dessert
- Ritzy fudge—easy, five-ingredient fudge topped with salted caramel and Ritz crackers
- No-bake Protein Granola Bars—for when you’re craving chocolate but want some sustenance
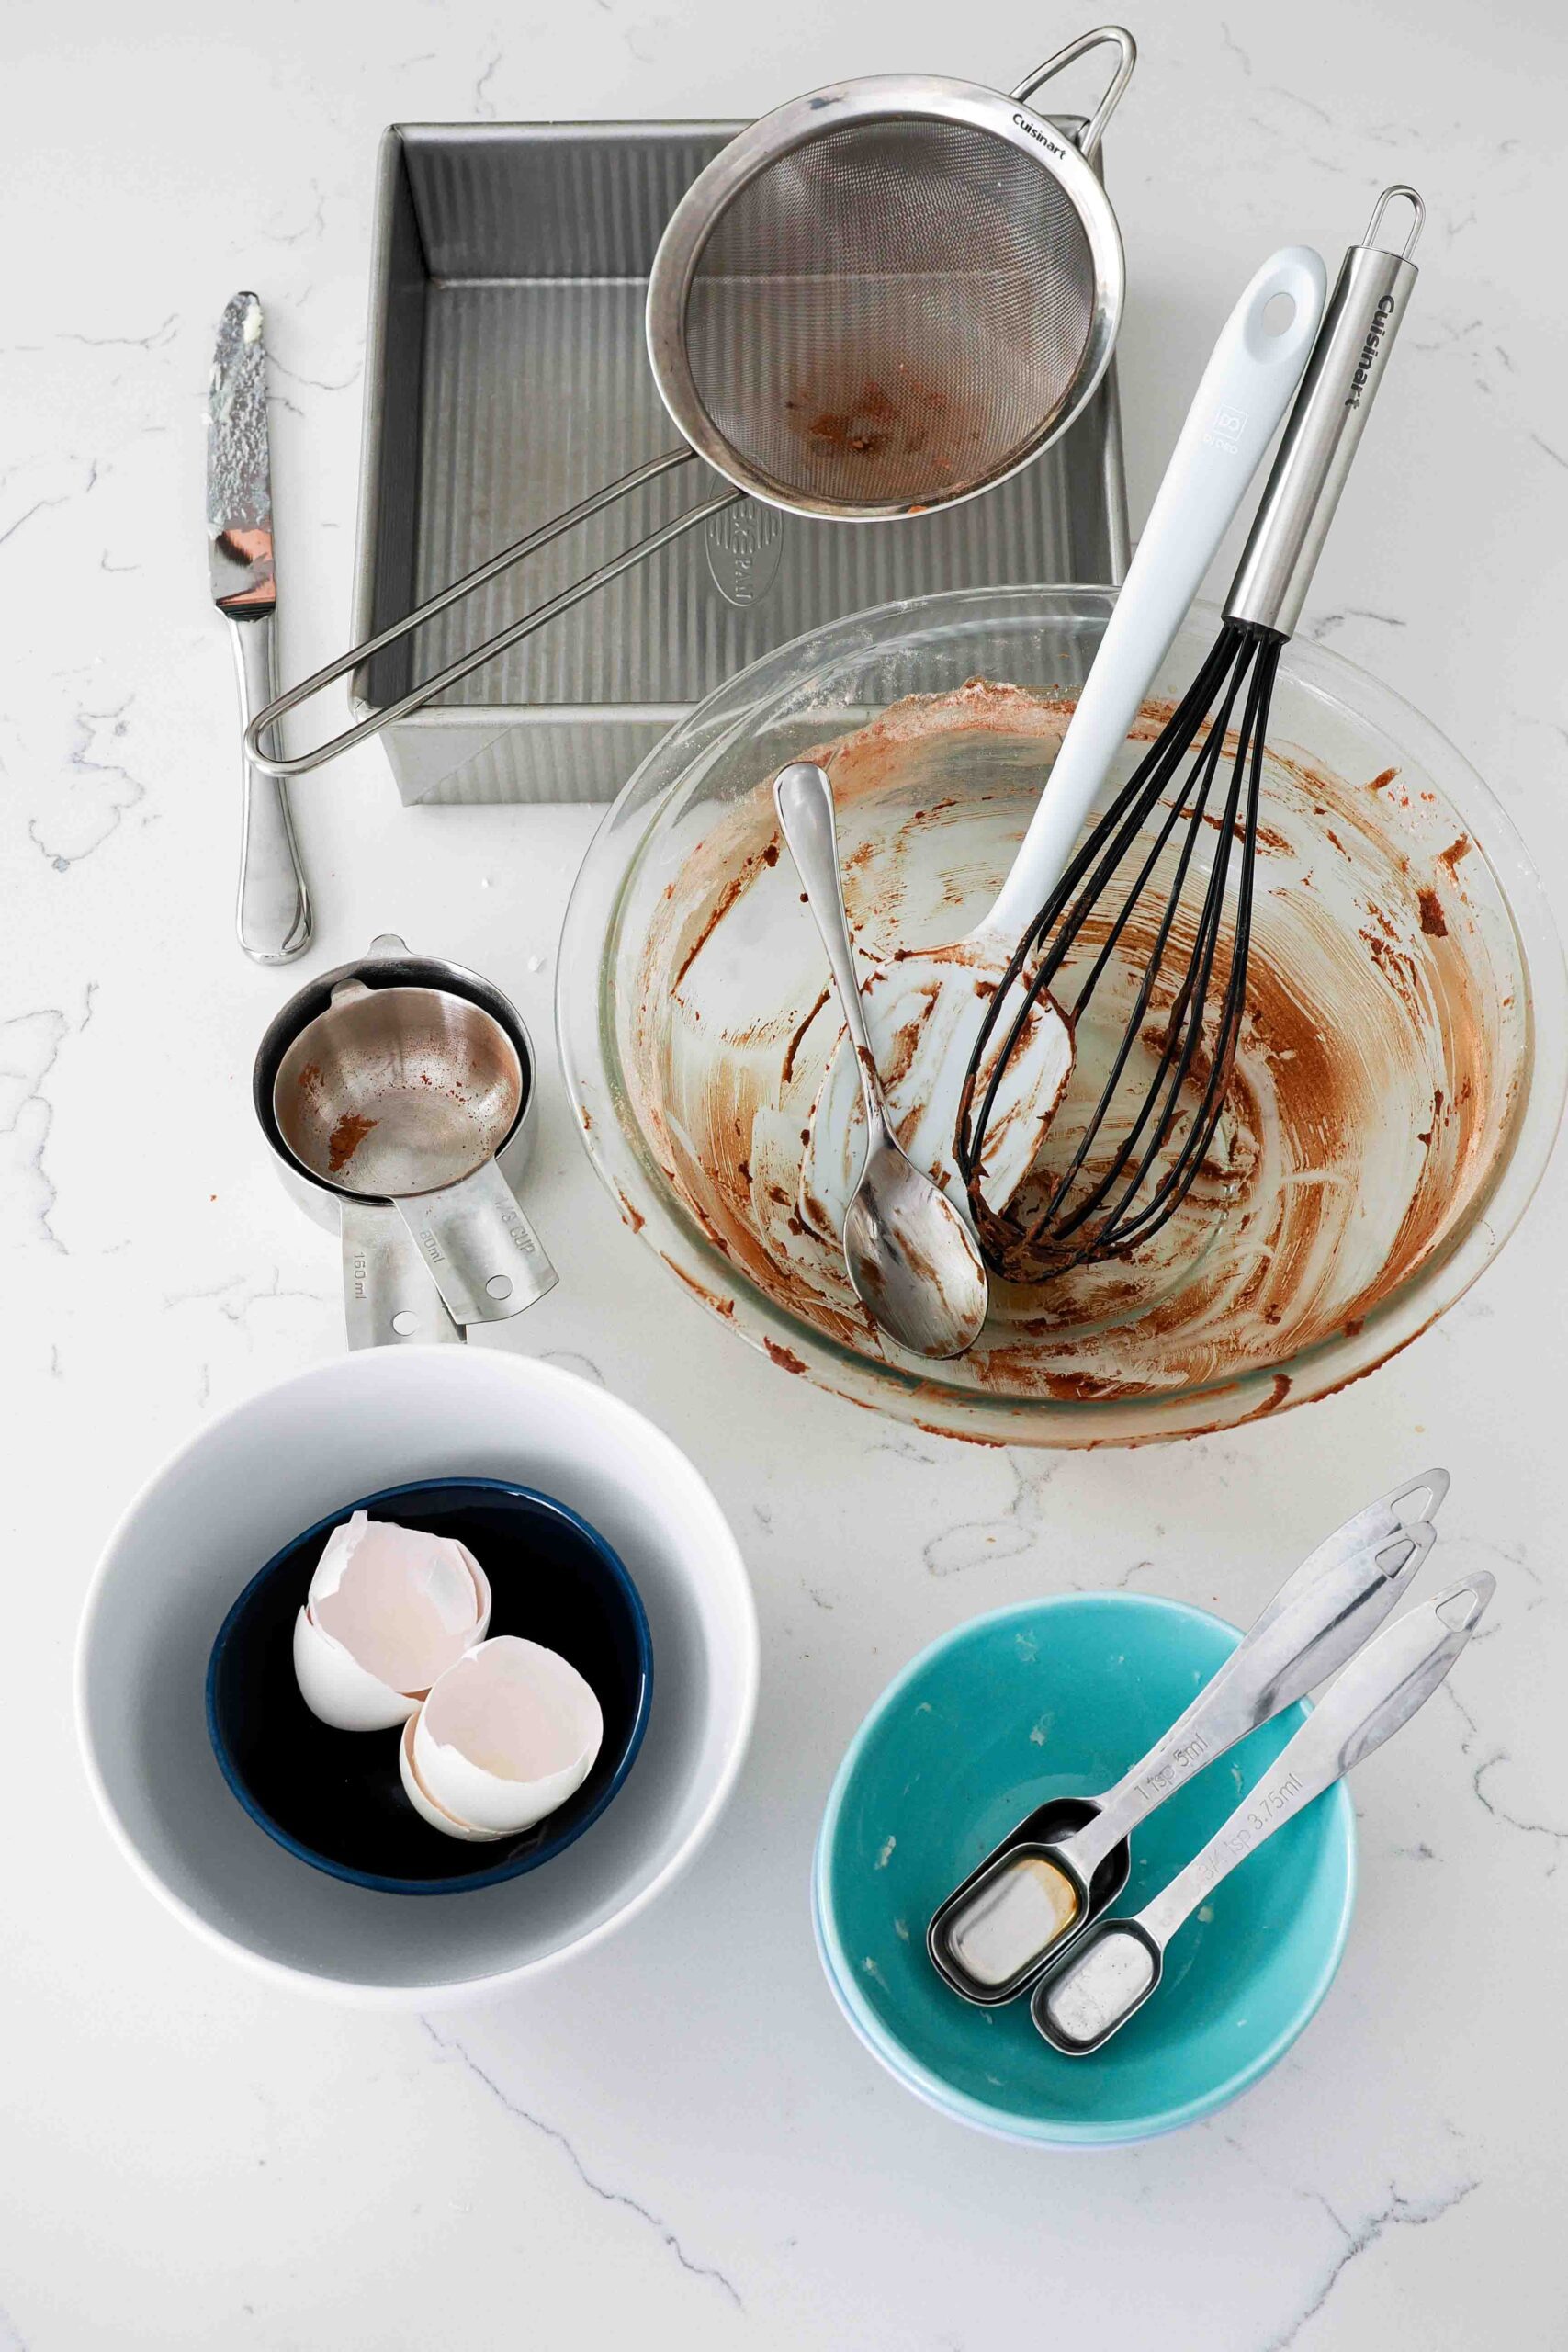
Dish Cleanup: A Lil Messy
I rate my recipe cleanups on a scale of 1 to 5. 1 is only a handful of dishes, and 5 is everything including the kitchen sink.
This peppermint brownie recipe has a cleanup rating of a 3. There’s one large bowl, a few utensils, a pan, and a sifter, along with a few measuring cups. I tried to make this recipe with just the whisk, but it made these brownies cakey rather than fudgy from the extra air. You might not think the sifter is necessary, but cocoa powder is notorious for being lumpy, so I recommend using one anyway.
Candy Cane Brownies Recipe
One-Bowl Peppermint Brownies
Flavored with crushed candy canes and peppermint extract, these fudgy peppermint brownies with a crinkle top come together in one bowl and can be ready to eat in just about 90 minutes!
Ingredients
- 2 peppermint candy canes (24 g)
- 4 ounces dark chocolate chunks, around ⅔ cup (113 g)
- 10 Tablespoons butter (140 g)
- 1 ½ cups granulated sugar (300 g)
- 2 large eggs
- 1 teaspoon vanilla extract (5 ml)
- 2 teaspoons peppermint extract (10 ml)
- ⅔ cup all-purpose flour (90 g)
- ⅓ cup cocoa powder (35 g)
- ¾ teaspoon salt (3 g)
Instructions
- Crush two candy canes between parchment paper or in a plastic bag, then set aside. Line a square 8" (20 cm) metal pan with parchment paper, and preheat the oven to 350°F/175°C.*
- In a large heat-safe bowl, like glass, add the dark chocolate and butter. Melt in the microwave in 30-second intervals, stirring after each, or over a double boiler until no lumps remain.
- Add the granulated sugar and whisk together for one minute until the batter has cooled down some and looks grainy.
- Add the eggs to one side of the bowl and the extracts to the other. (This will avoid accidentally "cooking" the eggs with the peppermint extract.) Then, whisk the batter together vigorously for 2-3 minutes by hand or with an electric mixer until the batter has thickened slightly to the ribbon stage: You should be able to track a ribbon of batter flowing off the whisk before it disappears into the batter within five seconds.**
- Sift the flour, cocoa powder, and salt into the chocolate batter, then add only half of the crushed candy cane pieces. Switch to a spatula or wooden spoon and fold the batter together until no streaks of flour or cocoa powder remain. The batter will be thick and glossy.
- Pour the brownie batter into the lined pan and spread to the edges if needed. Bake for 23-26 minutes, until the center does not jiggle when you tilt the pan side to side and a toothpick or knife inserted in the center comes out mostly clean with only a few crumbs (not batter) on it.
- Immediately after removing from the oven, sprinkle the remaining candy cane pieces over the top of the brownies. The residual heat will melt the candy just enough to stick to the top.
- Allow to cool completely, at least one hour, before cutting into squares and serving. Enjoy!
Notes
*I do not recommend using a glass pan to bake brownies. They will take much longer to bake, and the outside may get dry before the center is fully baked.
**If you whisk the batter for longer, to the point where ribbons are really thick and do not fade back into the batter, don't worry: Your brownies will still turn out okay!
Store in a single layer in an airtight container at room temperature for up to three days or in the fridge for up to five days.
Recommended Products
As an Amazon Associate and member of other affiliate programs, I earn from qualifying purchases.


Nutrition Information:
Yield:
16Serving Size:
1 brownieAmount Per Serving: Calories: 228Total Fat: 11gSaturated Fat: 7gTrans Fat: 0gUnsaturated Fat: 4gCholesterol: 43mgSodium: 168mgCarbohydrates: 30gFiber: 1gSugar: 24gProtein: 2g
The nutrition facts are estimated and may vary based on specific ingredients used.
Thanks for trying out my peppermint brownies recipe! Please consider rating this recipe so others find it, too.
I’d love to see how your recipe turns out: Take a photo and tag me on Instagram @floralapronblog to share with me, or use the hashtag #floralapronbakes.
These are amazing!! Everyone loved them and they’re so easy to make. Will definitely be making again
Yay, glad to hear that!! Thanks so much for sharing, Ally!