This is a deeply chocolatey Bundt cake that doesn’t need sour cream, yogurt, or melted chocolate! The secret lies in blooming the cocoa powder. Mixing the cocoa powder with hot oil intensifies the flavor and gives you a stronger chocolate flavor than if you simply added the cocoa powder in with the dry ingredients.
Many bakers and bloggers refer to Bundt cakes with a lowercase “b,” but the term is copyrighted by Nordic Ware (because they sensed they were onto something when they created it in the 1950’s) and should be capitalized. Fun fact, right?
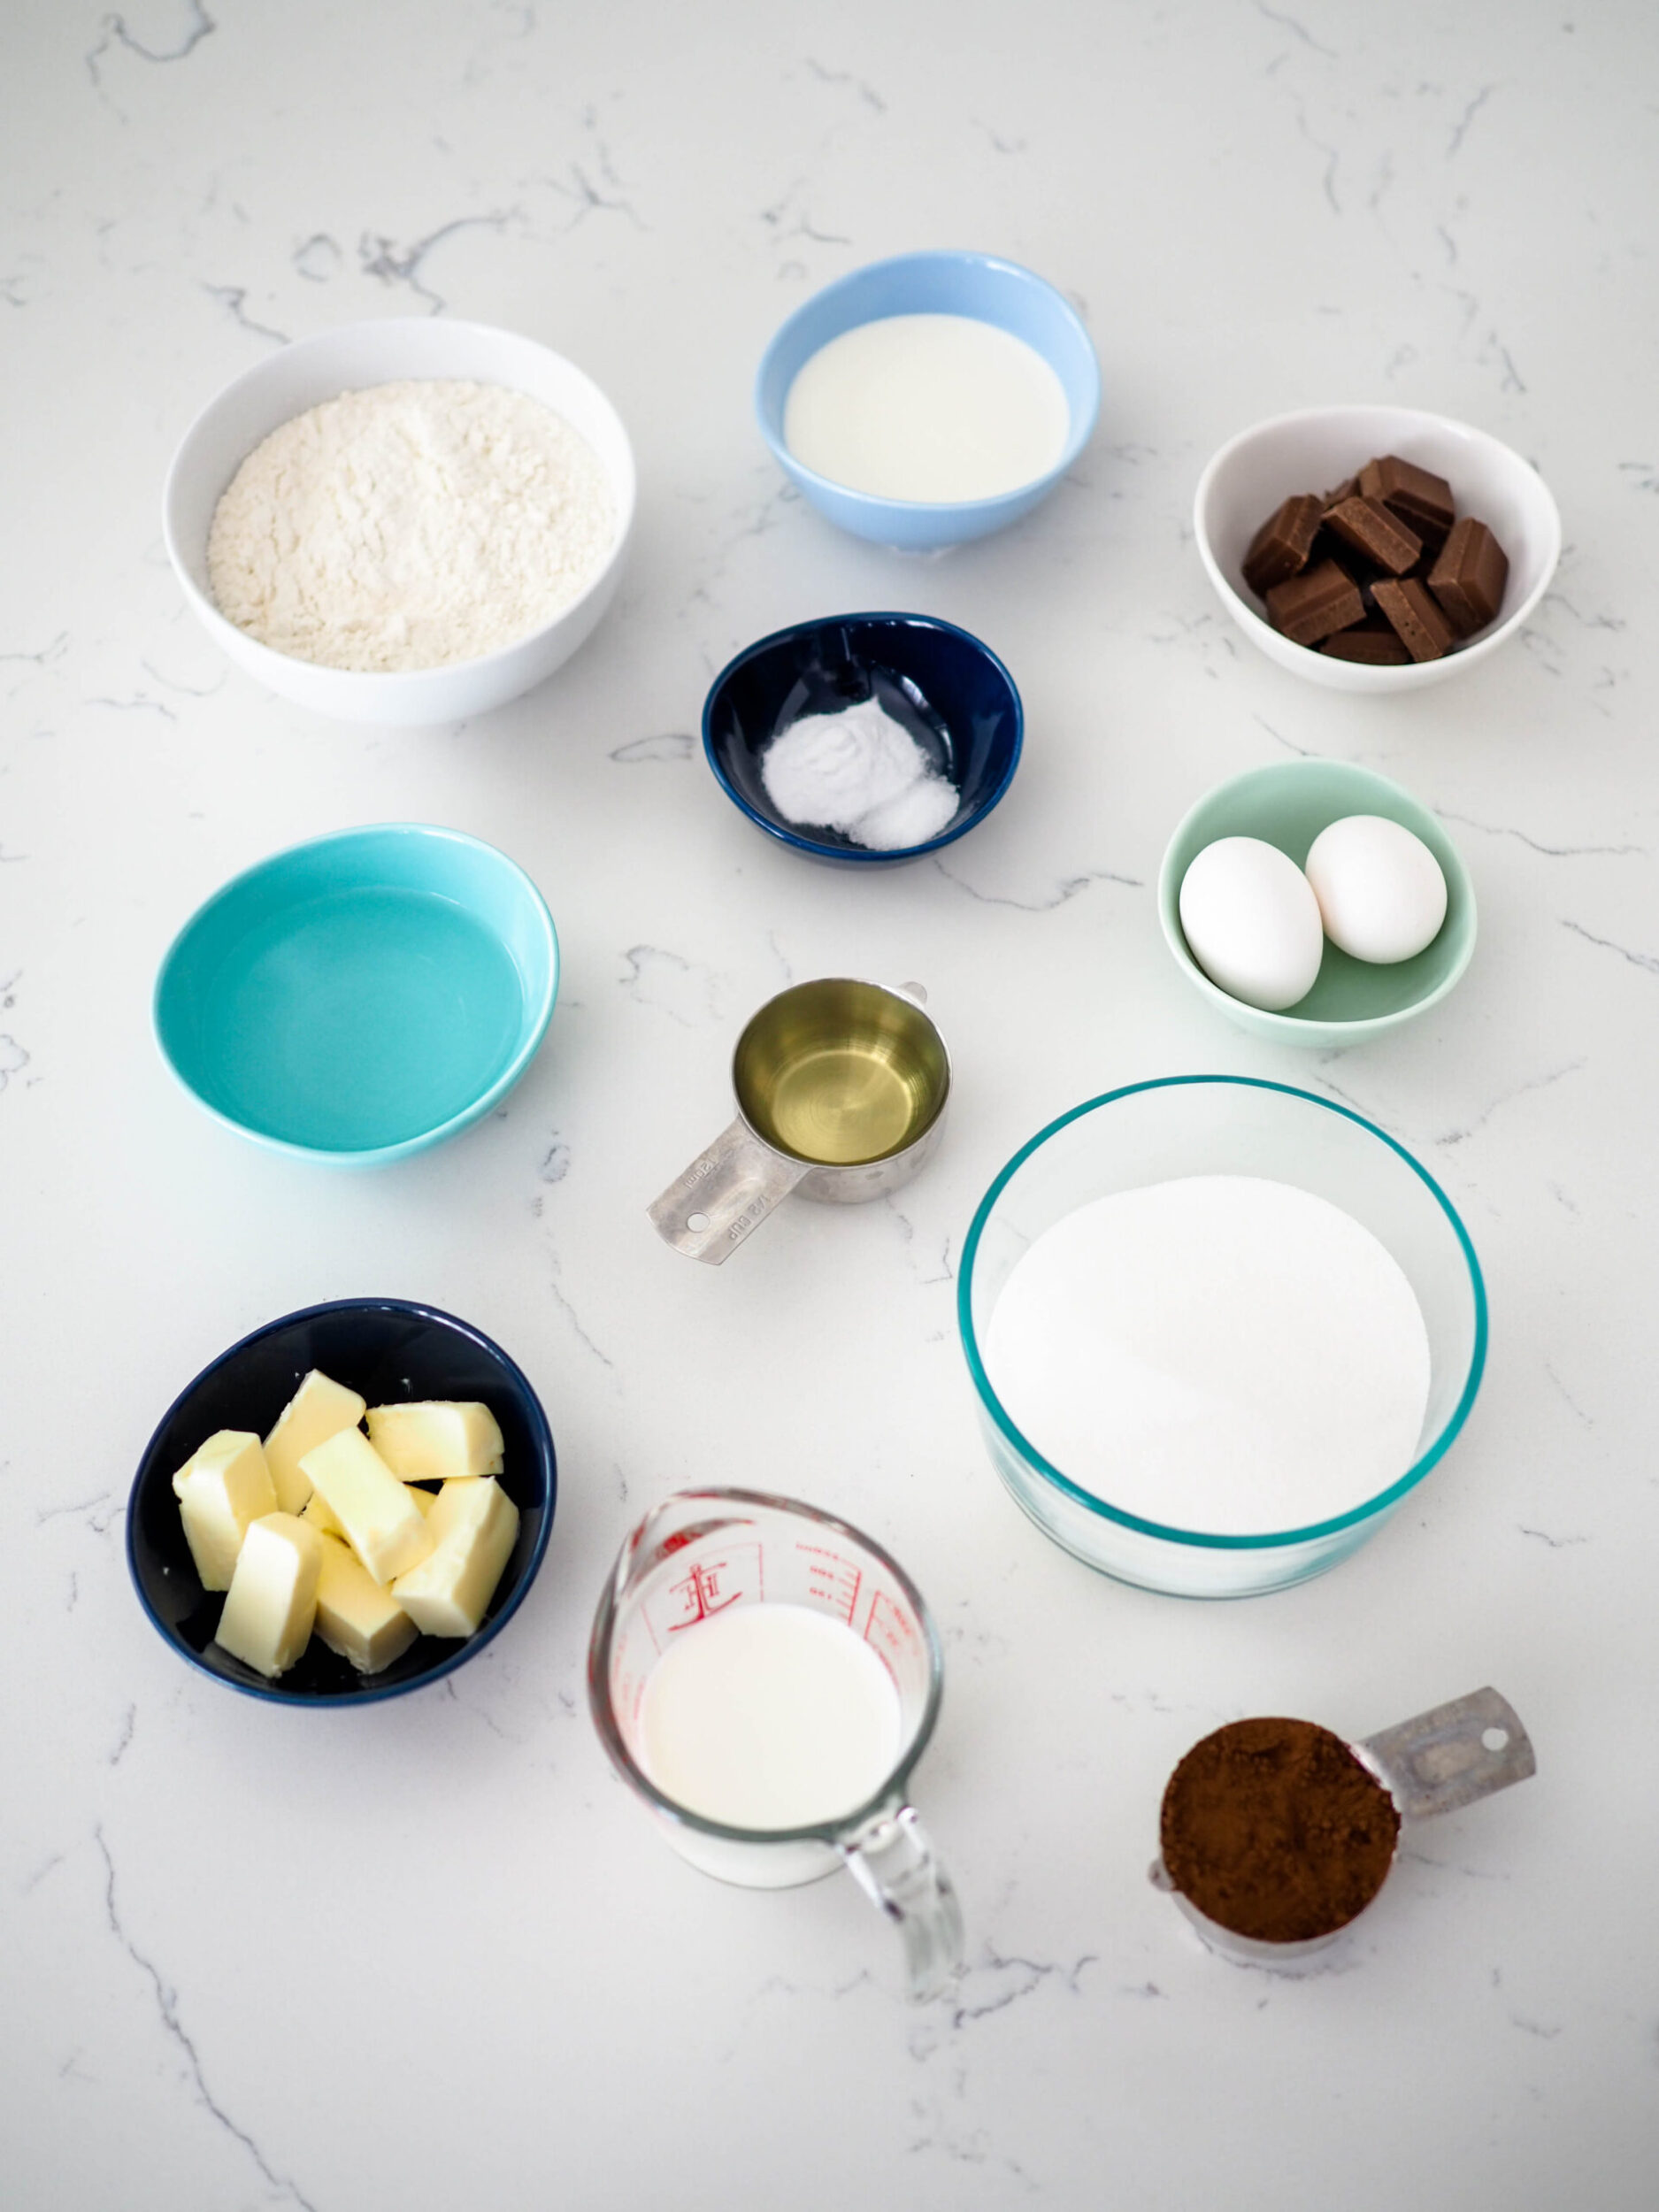
Ingredients for Chocolate Bundt Cake
To get a moist and intensely chocolate-flavored Bundt cake, you don’t need very many ingredients—but you do need to know how to use them. This recipe calls for salted butter, Dutch-processed cocoa powder, and baking soda. The result is a fabulous chocolate Bundt cake that doesn’t take too much added effort (but definitely tastes like it did).
- Salted butter
- Dutch-processed cocoa powder
- Canola oil—you may use use vegetable oil, rapeseed oil, or another neutral oil of your preference
- Milk
- Water
- Eggs
- All-purpose flour
- Baking soda—yes, baking soda. Baking powder is typically paired with Dutch-processed cocoa powder, but this recipe gives you a rich, well-risen cake with just baking soda (I promise!)
- Granulated sugar
- Salt
- Milk chocolate—feel free to use dark chocolate for a less sweet ganache, if desired
- Heavy cream
Quick Tips for Prepping Chocolate Bundt Cake
This chocolate Bundt cake made with Dutch-processed cocoa is a beginner-friendly and easy recipe to make. There are a few tips and tricks I’ve compiled to make sure that even if this is your first Bundt cake, it will come out beautifully. And hey, even if you’re a pro, you might learn something new!
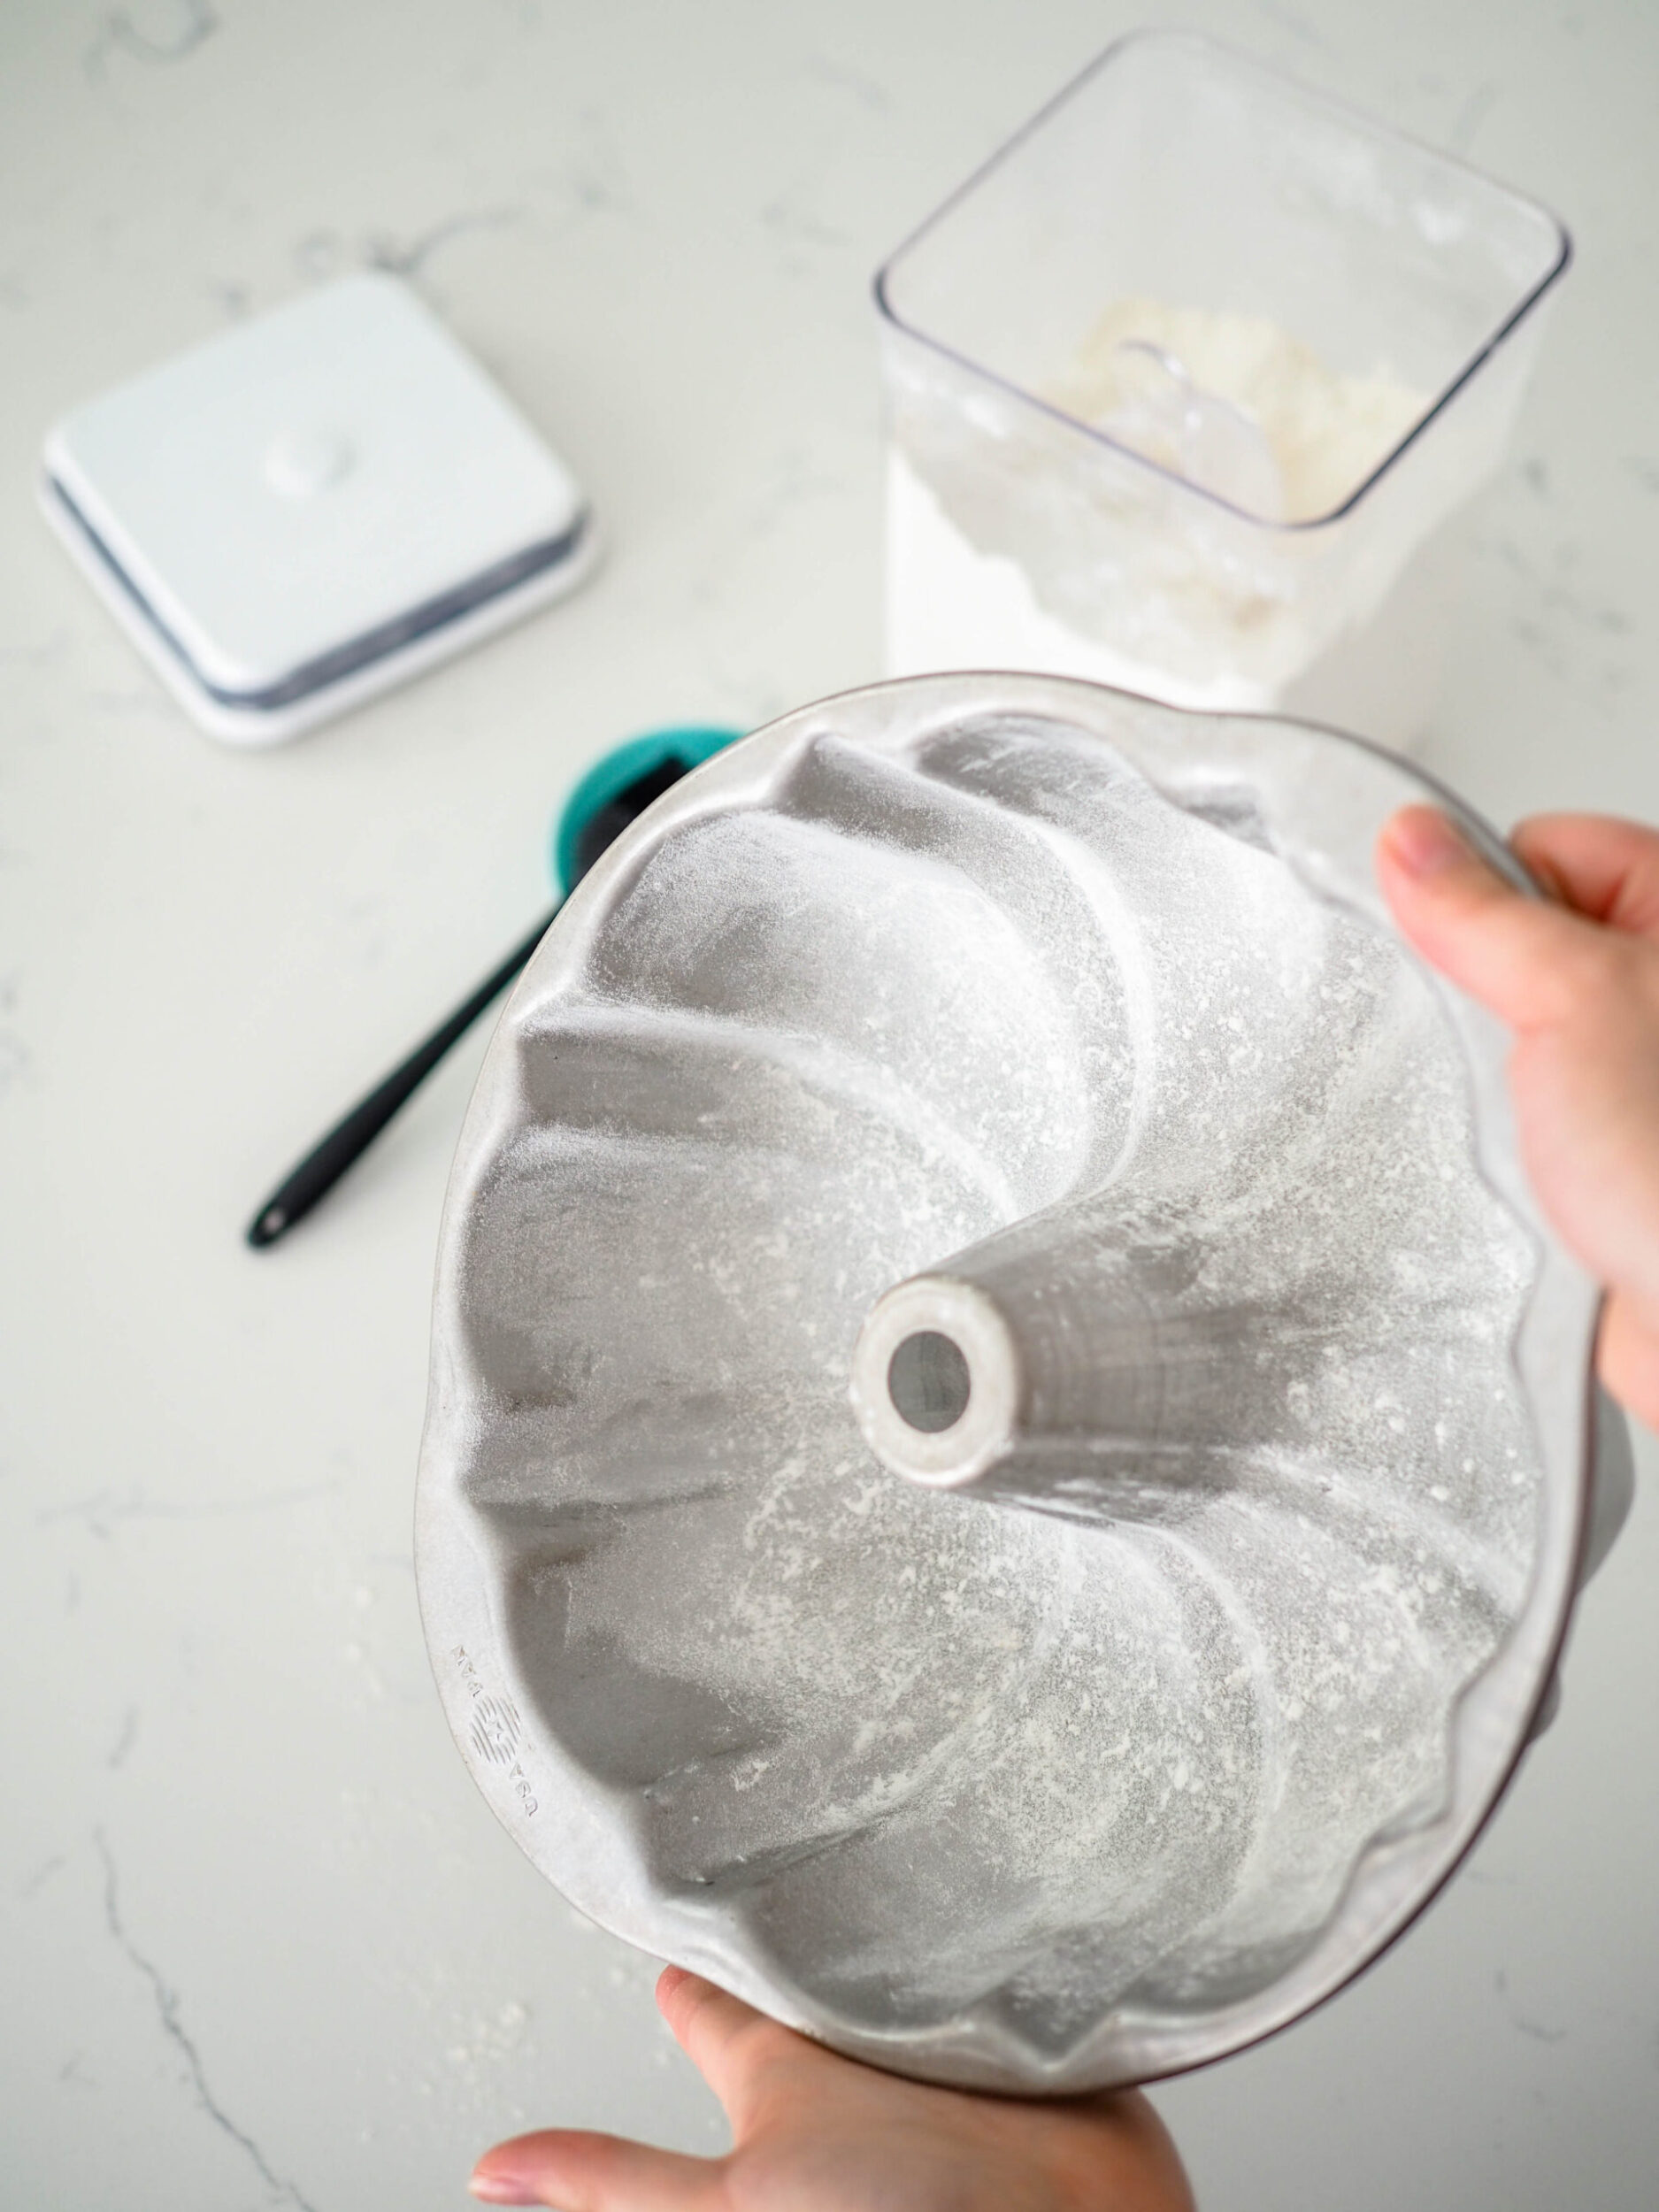
Properly Preparing Your Bundt Pan
Properly greasing and flouring your Bundt pan is of the utmost importance. Even if you grease most of the pan, missing just one spot risks the cake sticking and a piece breaking off when you turn it out—and we definitely don’t want that!
If you’re a beginner and a little nervous about your cake sticking, I highly recommend using USA Pan’s Bundt cake pan. I put this pan to the ultimate test as soon as I got it and didn’t grease it before baking in it. Nothing stuck!
Not all Bundt pans are made alike, though, so if you’re unsure about the nonstick qualities of your Bundt pan, I recommend greasing and flouring the pan just to be on the safe side.

To grease and flour your Bundt pan, use a pastry brush and a bit of melted butter. The melted butter more easily gets into the cracks than cold or even room temperature butter. Brush the entire inside of the pan with butter in long strokes that follow the curves of the pan.
Then, dust the whole thing with a bit of flour (about one or two Tablespoons). Pick up the Bundt pan and hold it at an angle, tapping occasionally, to get the flour to stick to the melted butter.
Once the sides and bottom are completely covered in flour, flip the pan upside down over the sink or trash can. Give the pan a hard rap or two with the palm of your hand to get any leftover flour out. Now your cake won’t stick to the pan!
Blooming the Cocoa Powder
A lot of recipes add the cocoa powder in with the dry ingredients, but I much prefer going the extra step to get a much stronger, more pronounced chocolate flavor in my chocolate baked goods. You can obtain a stronger chocolate flavor from cocoa powder just by blooming it in advance.
I’ve looked up the science behind why this is, but I haven’t found any satisfactory explanations. The best guesses revolve around the idea that the heat releases flavor compounds in the cocoa (which may or may not be fat-soluble). No one seems to have an explanation on why the heat of baking doesn’t release the same flavor compounds, but if I learn anything about it, I’ll keep you updated!
I’m also curious if this is the reason the recipe works well with baking soda as opposed to baking powder…. Stay tuned!
You can bloom cocoa powder in hot water or hot oil (or hot coffee, but that’s not used in this particular recipe). I prefer to bloom my cocoa powder in hot oil, which essentially sautés the cocoa powder in butter. The result is a much richer, more developed chocolatey flavor.
If you’re not fully attached to your cocoa powder, I have recently fallen in love with Rodelle Vanilla’s Dutch-processed cocoa powder and highly recommend it. Even my husband noticed how much more chocolatey my recipes are when I use their cocoa powder over other popular brands!
Quick Tips for Prepping the Chocolate Ganache
The chocolate ganache is by far the simplest part of this recipe. (Which is saying something, because this is a pretty easy chocolate Bundt cake made with Dutch-processed cocoa powder!)
I used milk chocolate, but feel free to substitute the same amount of dark chocolate for a slightly less sweet cake.
I prefer using chopped up chocolate, but you can also use chocolate chips if that’s what you have on hand. For the best results, chop up the chocolate into small pieces that are all relatively the same size. This will help prevent a chunky ganache.
Heat your heavy cream in a microwave-safe bowl or in a small saucepan over low heat, then pour over your chocolate. Whisk together for a couple of minutes until fully combined and a dark, rich color.
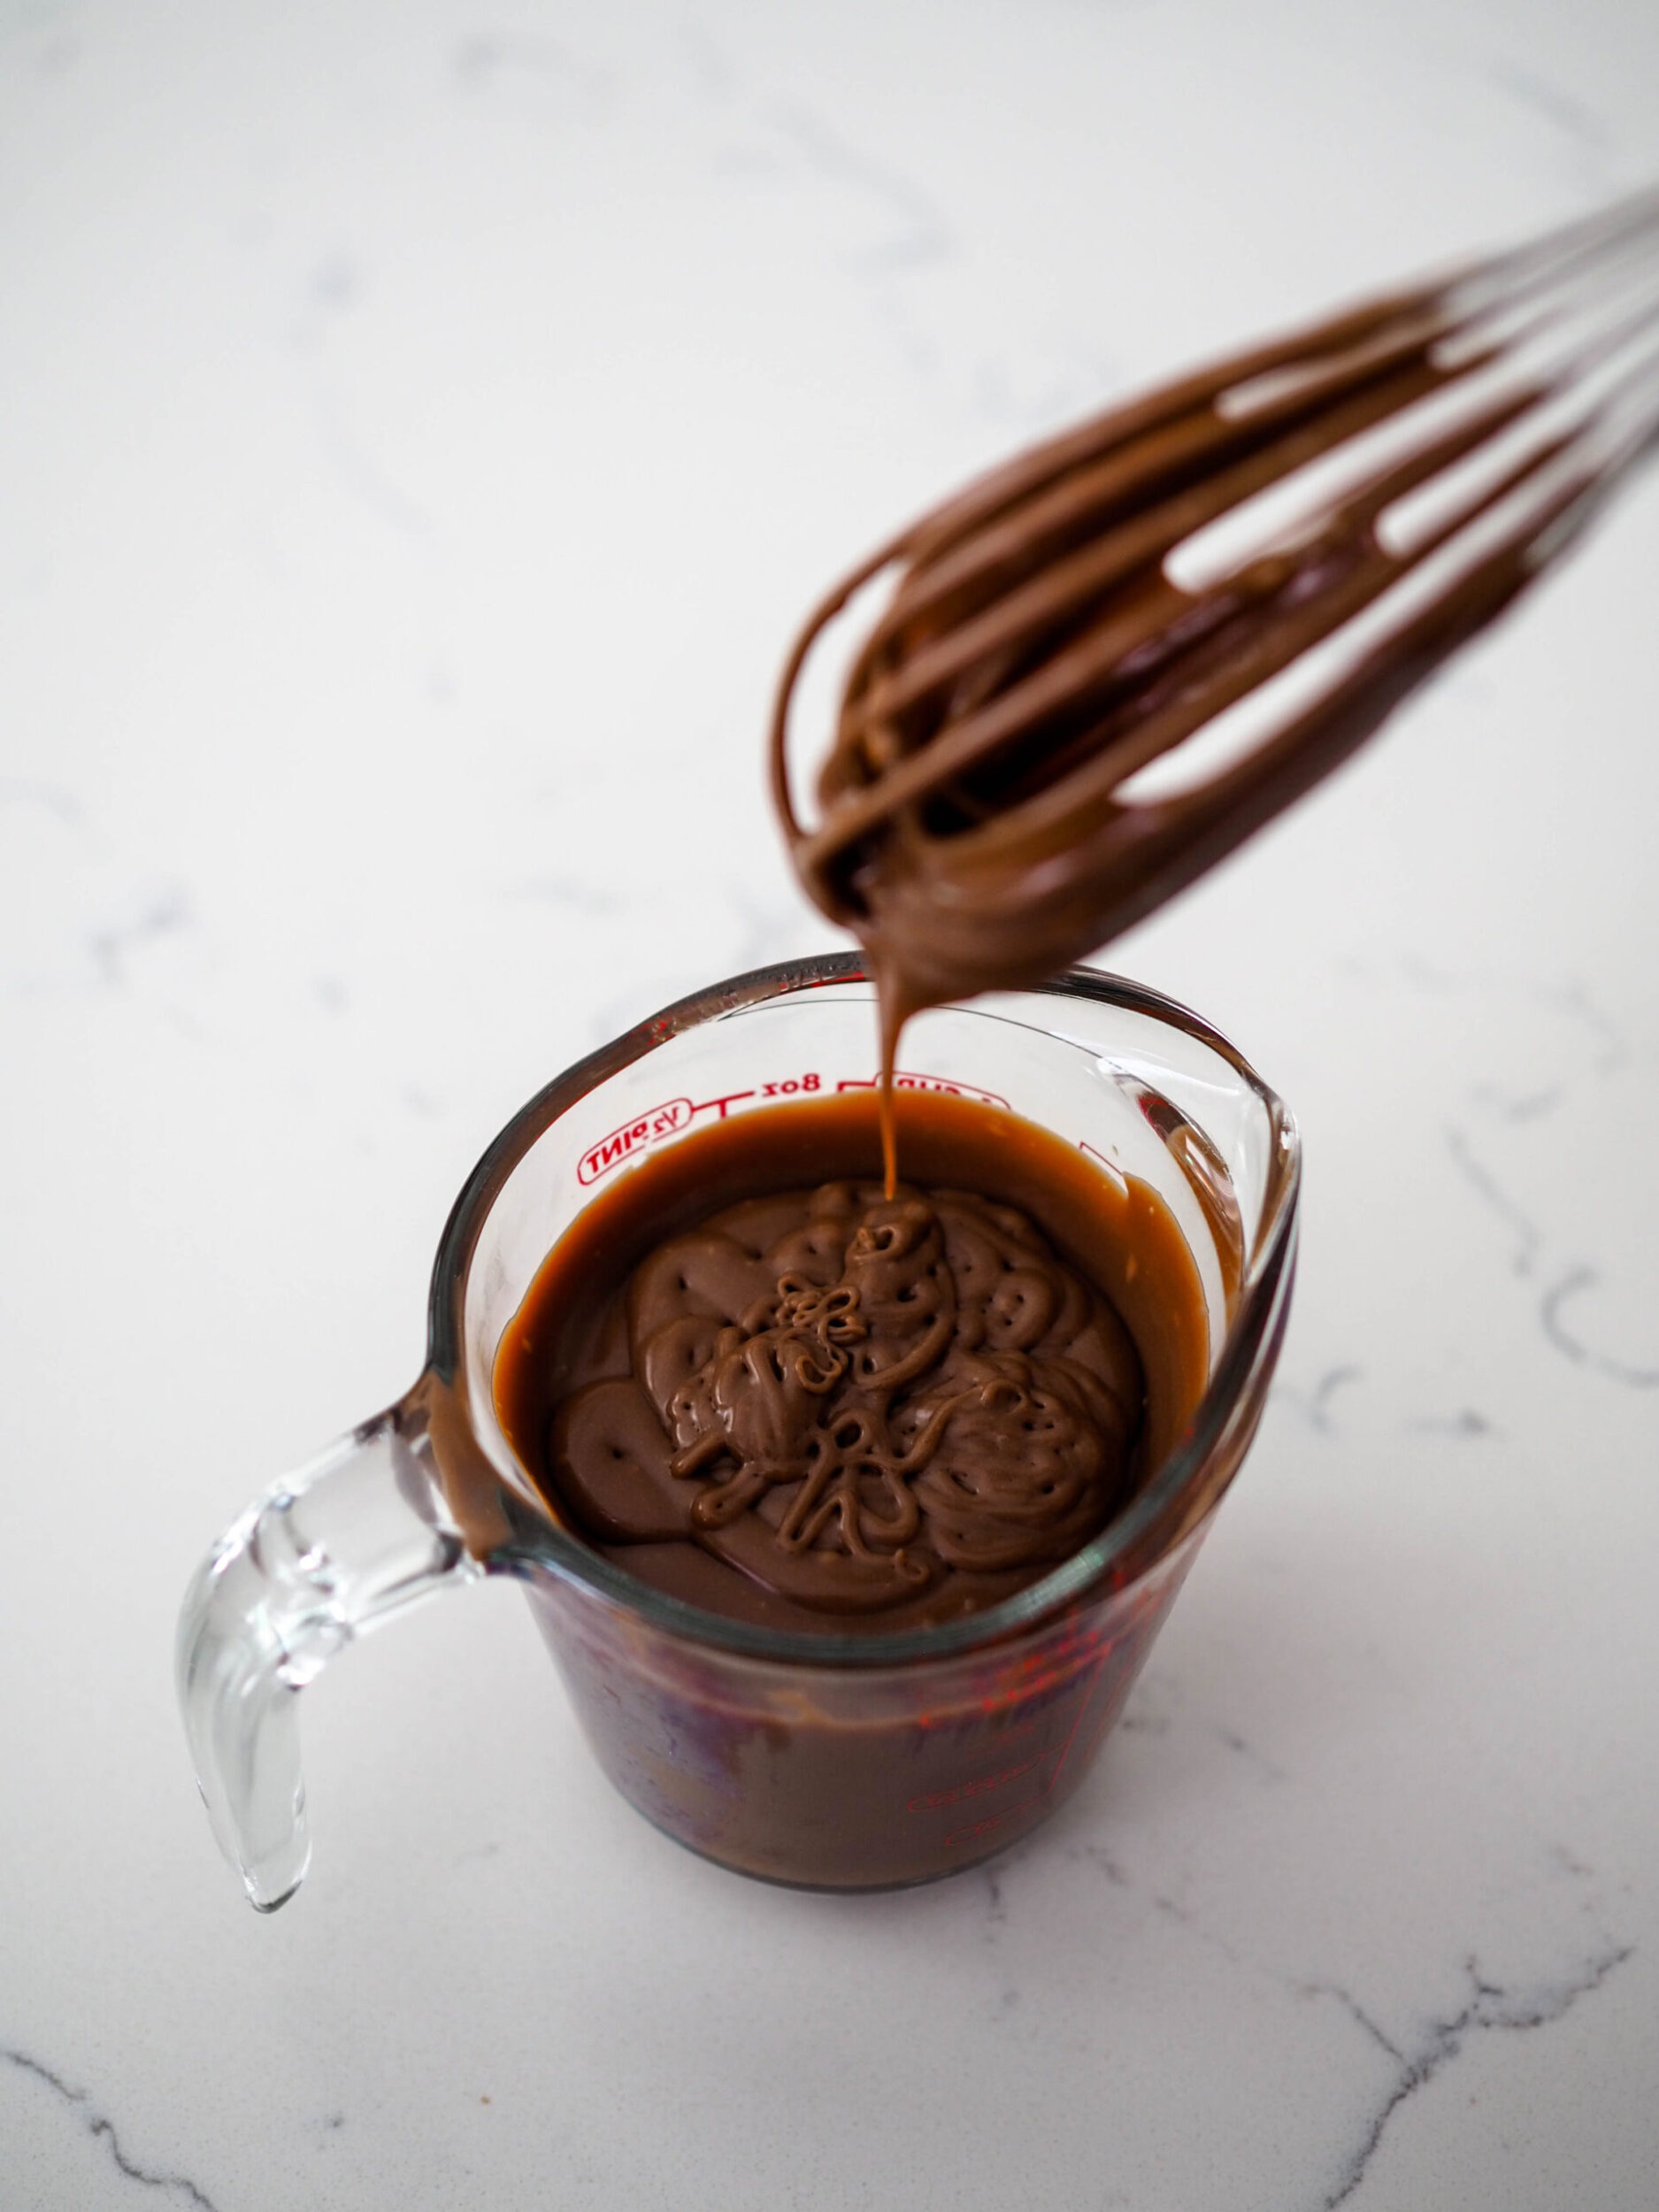
Place in the fridge to cool for at least half an hour for the best thickness for pouring. The ganache should form ribbons that sit on top of the surface of the ganache before fading back into the chocolate. See the photo below for an example.
If you make the ganache in advance, let the ganache sit out at room temperature for 15-20 minutes to warm up before pouring on top of the cake.
Quick Tips for Turning Out Your Bundt Cake
Immediately after you remove your Bundt pan from the oven, take a look at the sides of the cake. They will be very near, if not touching, the walls of the pan.
As the cake cools, the cake will shrink away from the edges. Wait to remove the cake from the pan until you see evidence that the cake has pulled away from the edges of the pan. This usually takes 30 minutes to an hour.
Once the cake has pulled away from the edges of the pan, center the pan on top of a pot holder. I’ve found a flexible, fabric pot holder works best, as you can wrap your hand around the rounded shape of the Bundt more easily.
Place a wire cooling rack upside down over the top of the pan and hold it in place with your left or nondominant hand. Slide your right or dominant hand under the pot holder. Slide the pan off the counter as you center your hand under the Bundt pan.
In one fluid motion, flip your hands. Slowly bring the cooling rack back to the surface of your workspace. Slide your hand out from under the cooling rack, and ensure the Bundt pan is centered on the rack before letting go.
Sometimes, Bundt cakes pop right out. Other times, they require a few gentle taps. If needed, tap the pot holder still on top of the Bundt cake a few times. If it still does not release, let it cool for another few minutes before tapping it again.
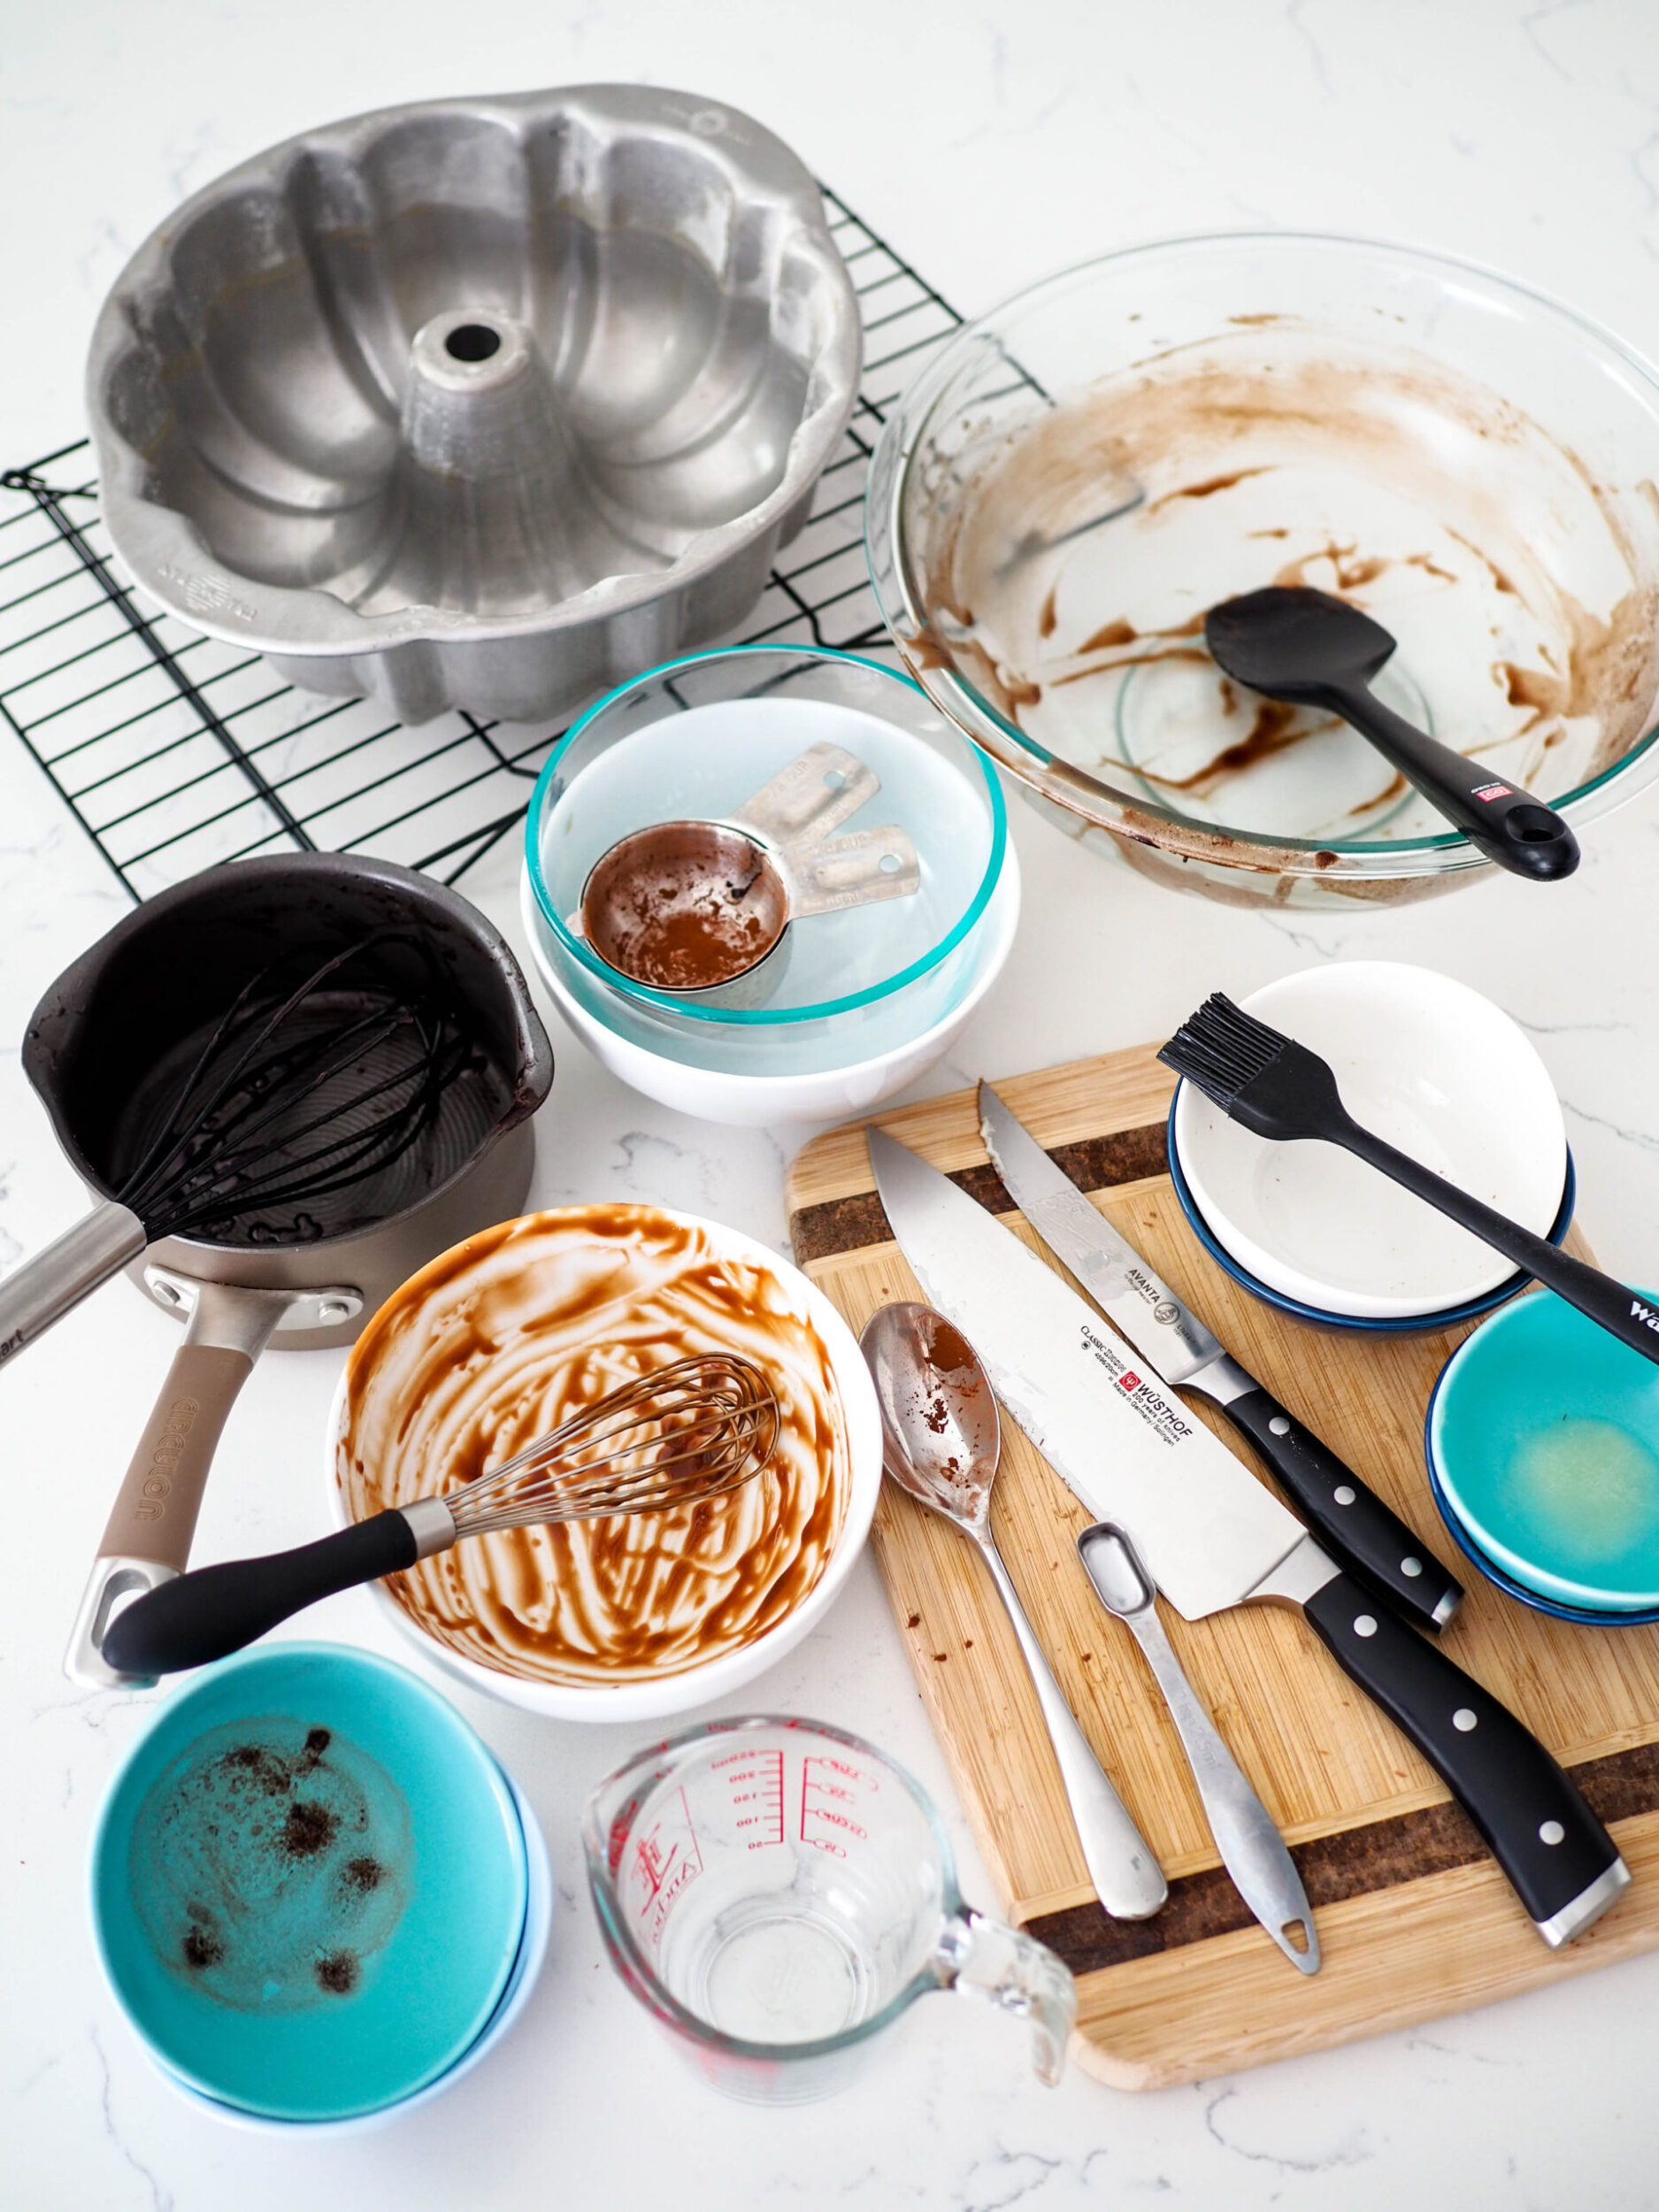
Cleanup Rating: Gonna Take a While
I rate my recipe cleanups on a scale of 1 to 5. 1 is only a handful of dishes, and 5 is everything including the kitchen sink.
My chocolate Bundt cake recipe has a cleanup rating of a 4. If most of your kitchen bowls are dishwasher-safe, there isn’t too much heavy cleanup. Surprisingly, the Bundt pan isn’t too bad to clean (probably because of my USA Pan’s nonstick qualities—try it!).
To make cleaning the ganache bowl a little easier, heat it in the microwave for a few seconds until the ganache is really runny. Then, wipe it out with a paper towel. The remaining bits will come off easily with soap and warm water, and it won’t dirty up your dish water nearly as much.
If you’re looking to reduce the cleanup, you can use chocolate chips in the ganache, and that will prevent you from having to wash a knife and cutting board.
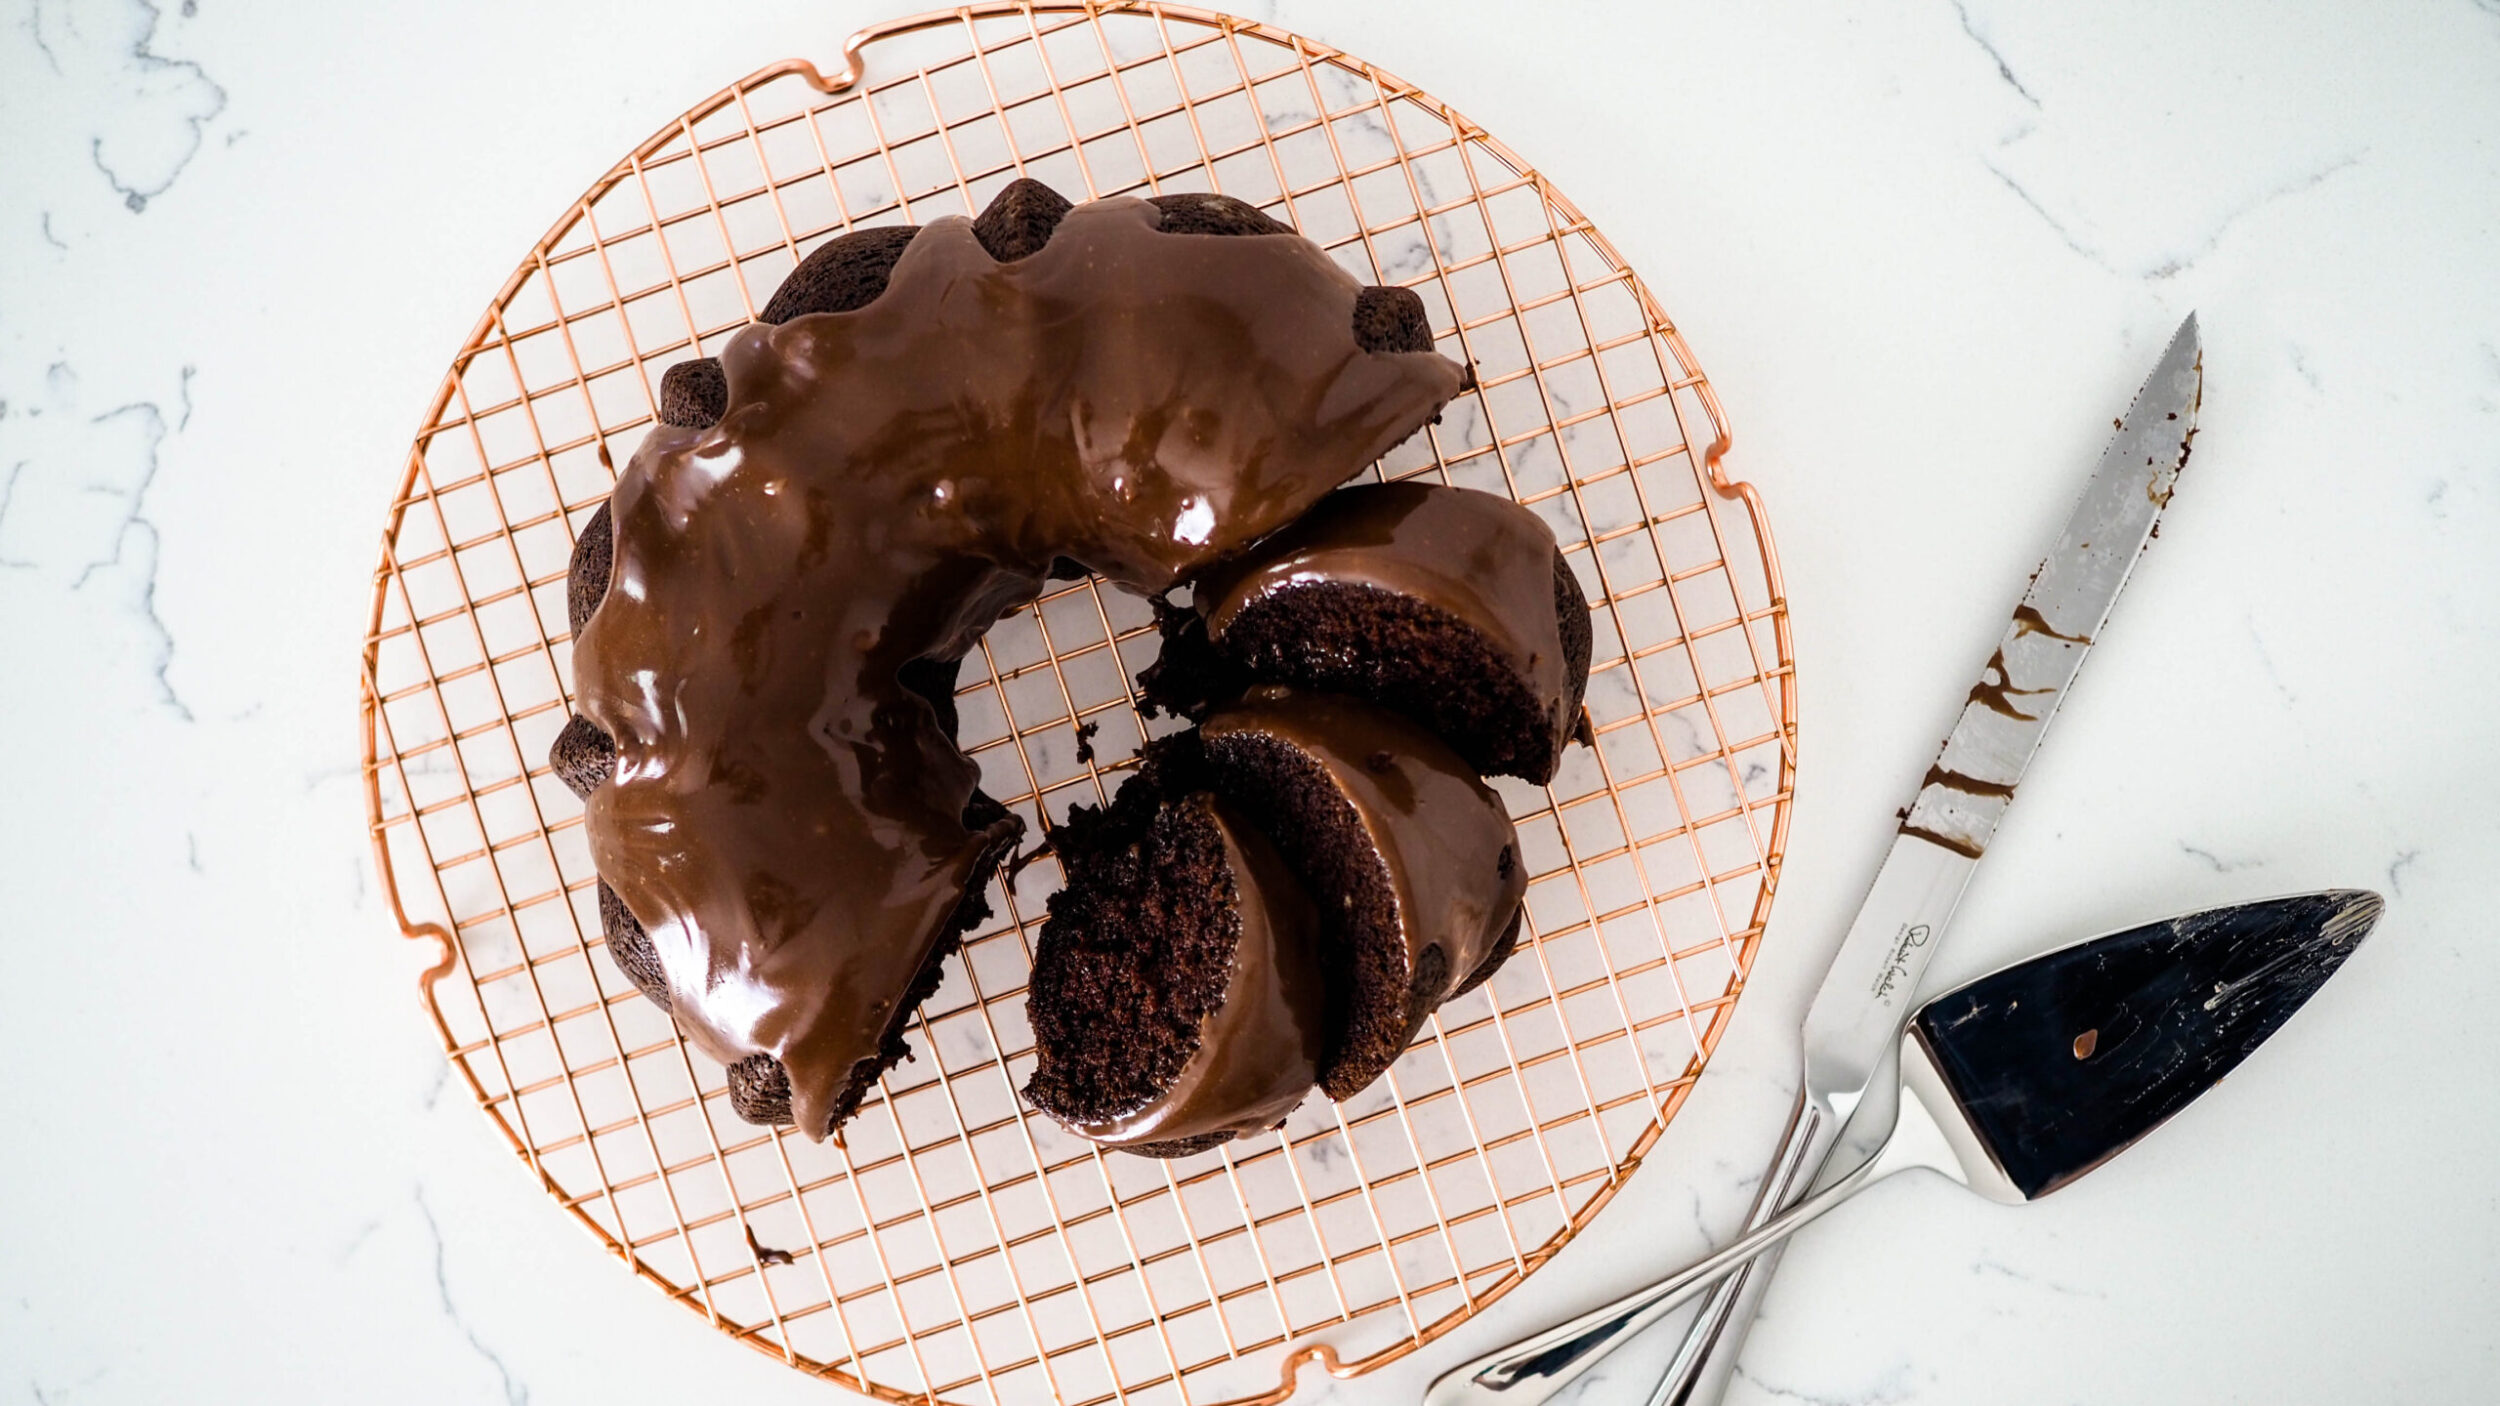
Chocolate Bundt Cake Recipe
Chocolate Bundt Cake
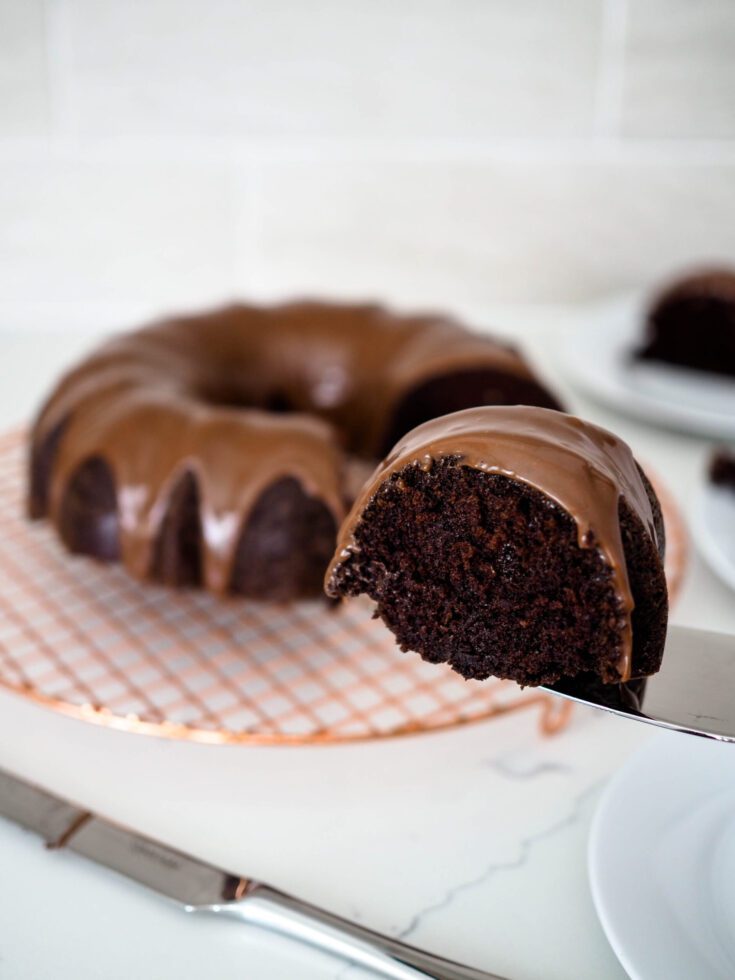
A deeply chocolatey Bundt cake made with Dutch-processed cocoa powder that doesn't require sour cream or yogurt to be moist and completely irresistible.
Ingredients
Chocolate Bundt Cake
- ½ cup salted butter (113 g, one stick)
- ⅓ cup Dutch-process cocoa powder (30 g)
- ½ cup canola oil (or another neutral oil) (120 ml)
- ½ cup milk (120 ml)
- ½ cup water (120 ml)
- 2 cups all-purpose flour (270 g), plus more for dusting the pan
- 1 ½ teaspoons baking soda (7 g)
- 1 ½ cups granulated sugar (150 g)
- ½ teaspoon salt (3 g)
- 2 large eggs
Chocolate Ganache
- 130 g good-quality milk chocolate (about ½ cup or 4 oz)
- 130 g heavy cream (about ½ cup or 100 ml)
Instructions
Making the Chocolate Bundt Cake
- Preheat the oven to 350°F/180°C. Butter your Bundt pan, using melted butter and a pastry brush to get into the all crevices. Then dust lightly with flour until the pan is completely coated, dumping the excess out. Or, alternatively, use a nonstick baking spray.
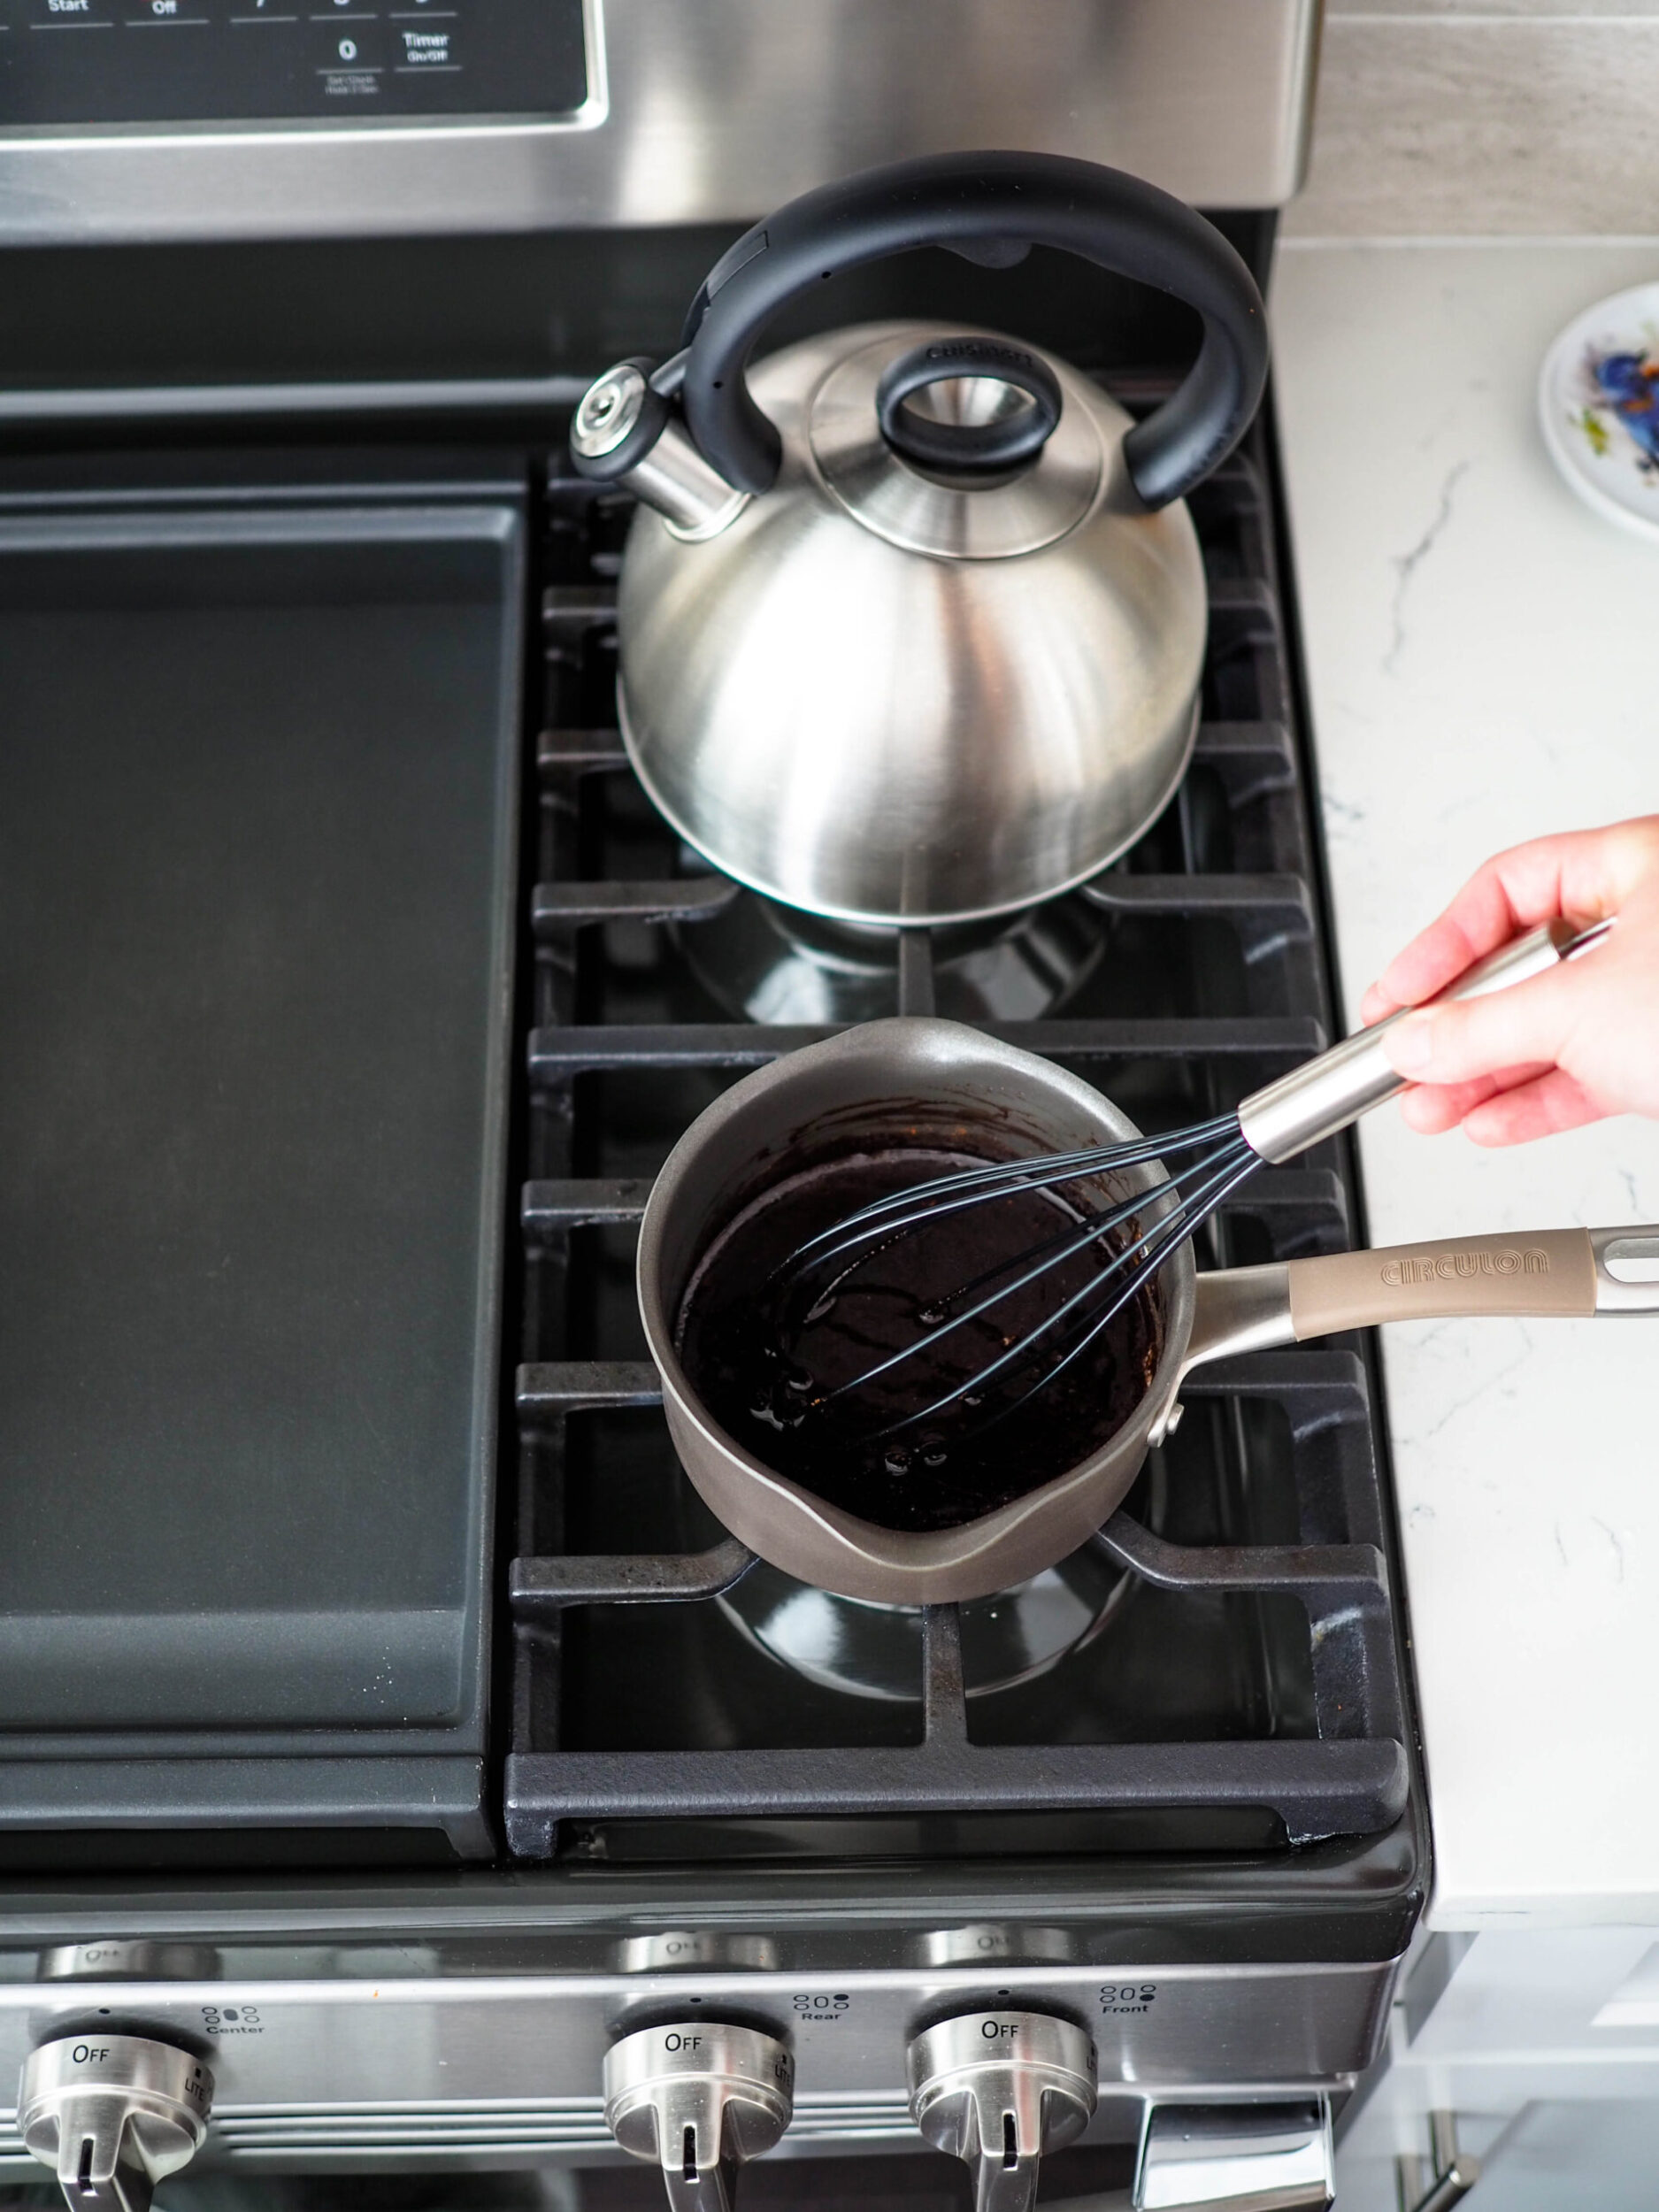
- In a small saucepan over medium heat, melt the butter until it starts to boil. Remove from heat, then add the cocoa powder and whisk together until fully combined. (This is called blooming the cocoa, and it will give the cake a more intense chocolate flavor.)
- Add in the canola oil, milk, and water to the cocoa mixture. Whisk together until fully combined; this will cool down the mixture considerably. Add in the eggs and mix together.
- In a large bowl, add the flour, baking soda, sugar, and salt. Pour in the cocoa mixture. Whisk the batter together, scraping the sides and bottom of the bowl, until the batter is just combined.
- Pour into your prepared Bundt pan and place in the oven. Bake for 40-45 minutes, until the center is no longer jiggly. To further test doneness, insert a toothpick or knife into the tallest part of the cake. If the toothpick or knife comes out wet, place it back in the oven. If the toothpick or knife has a few crumbs attached or comes out completely clean, the cake is done.
Making the Chocolate Ganache
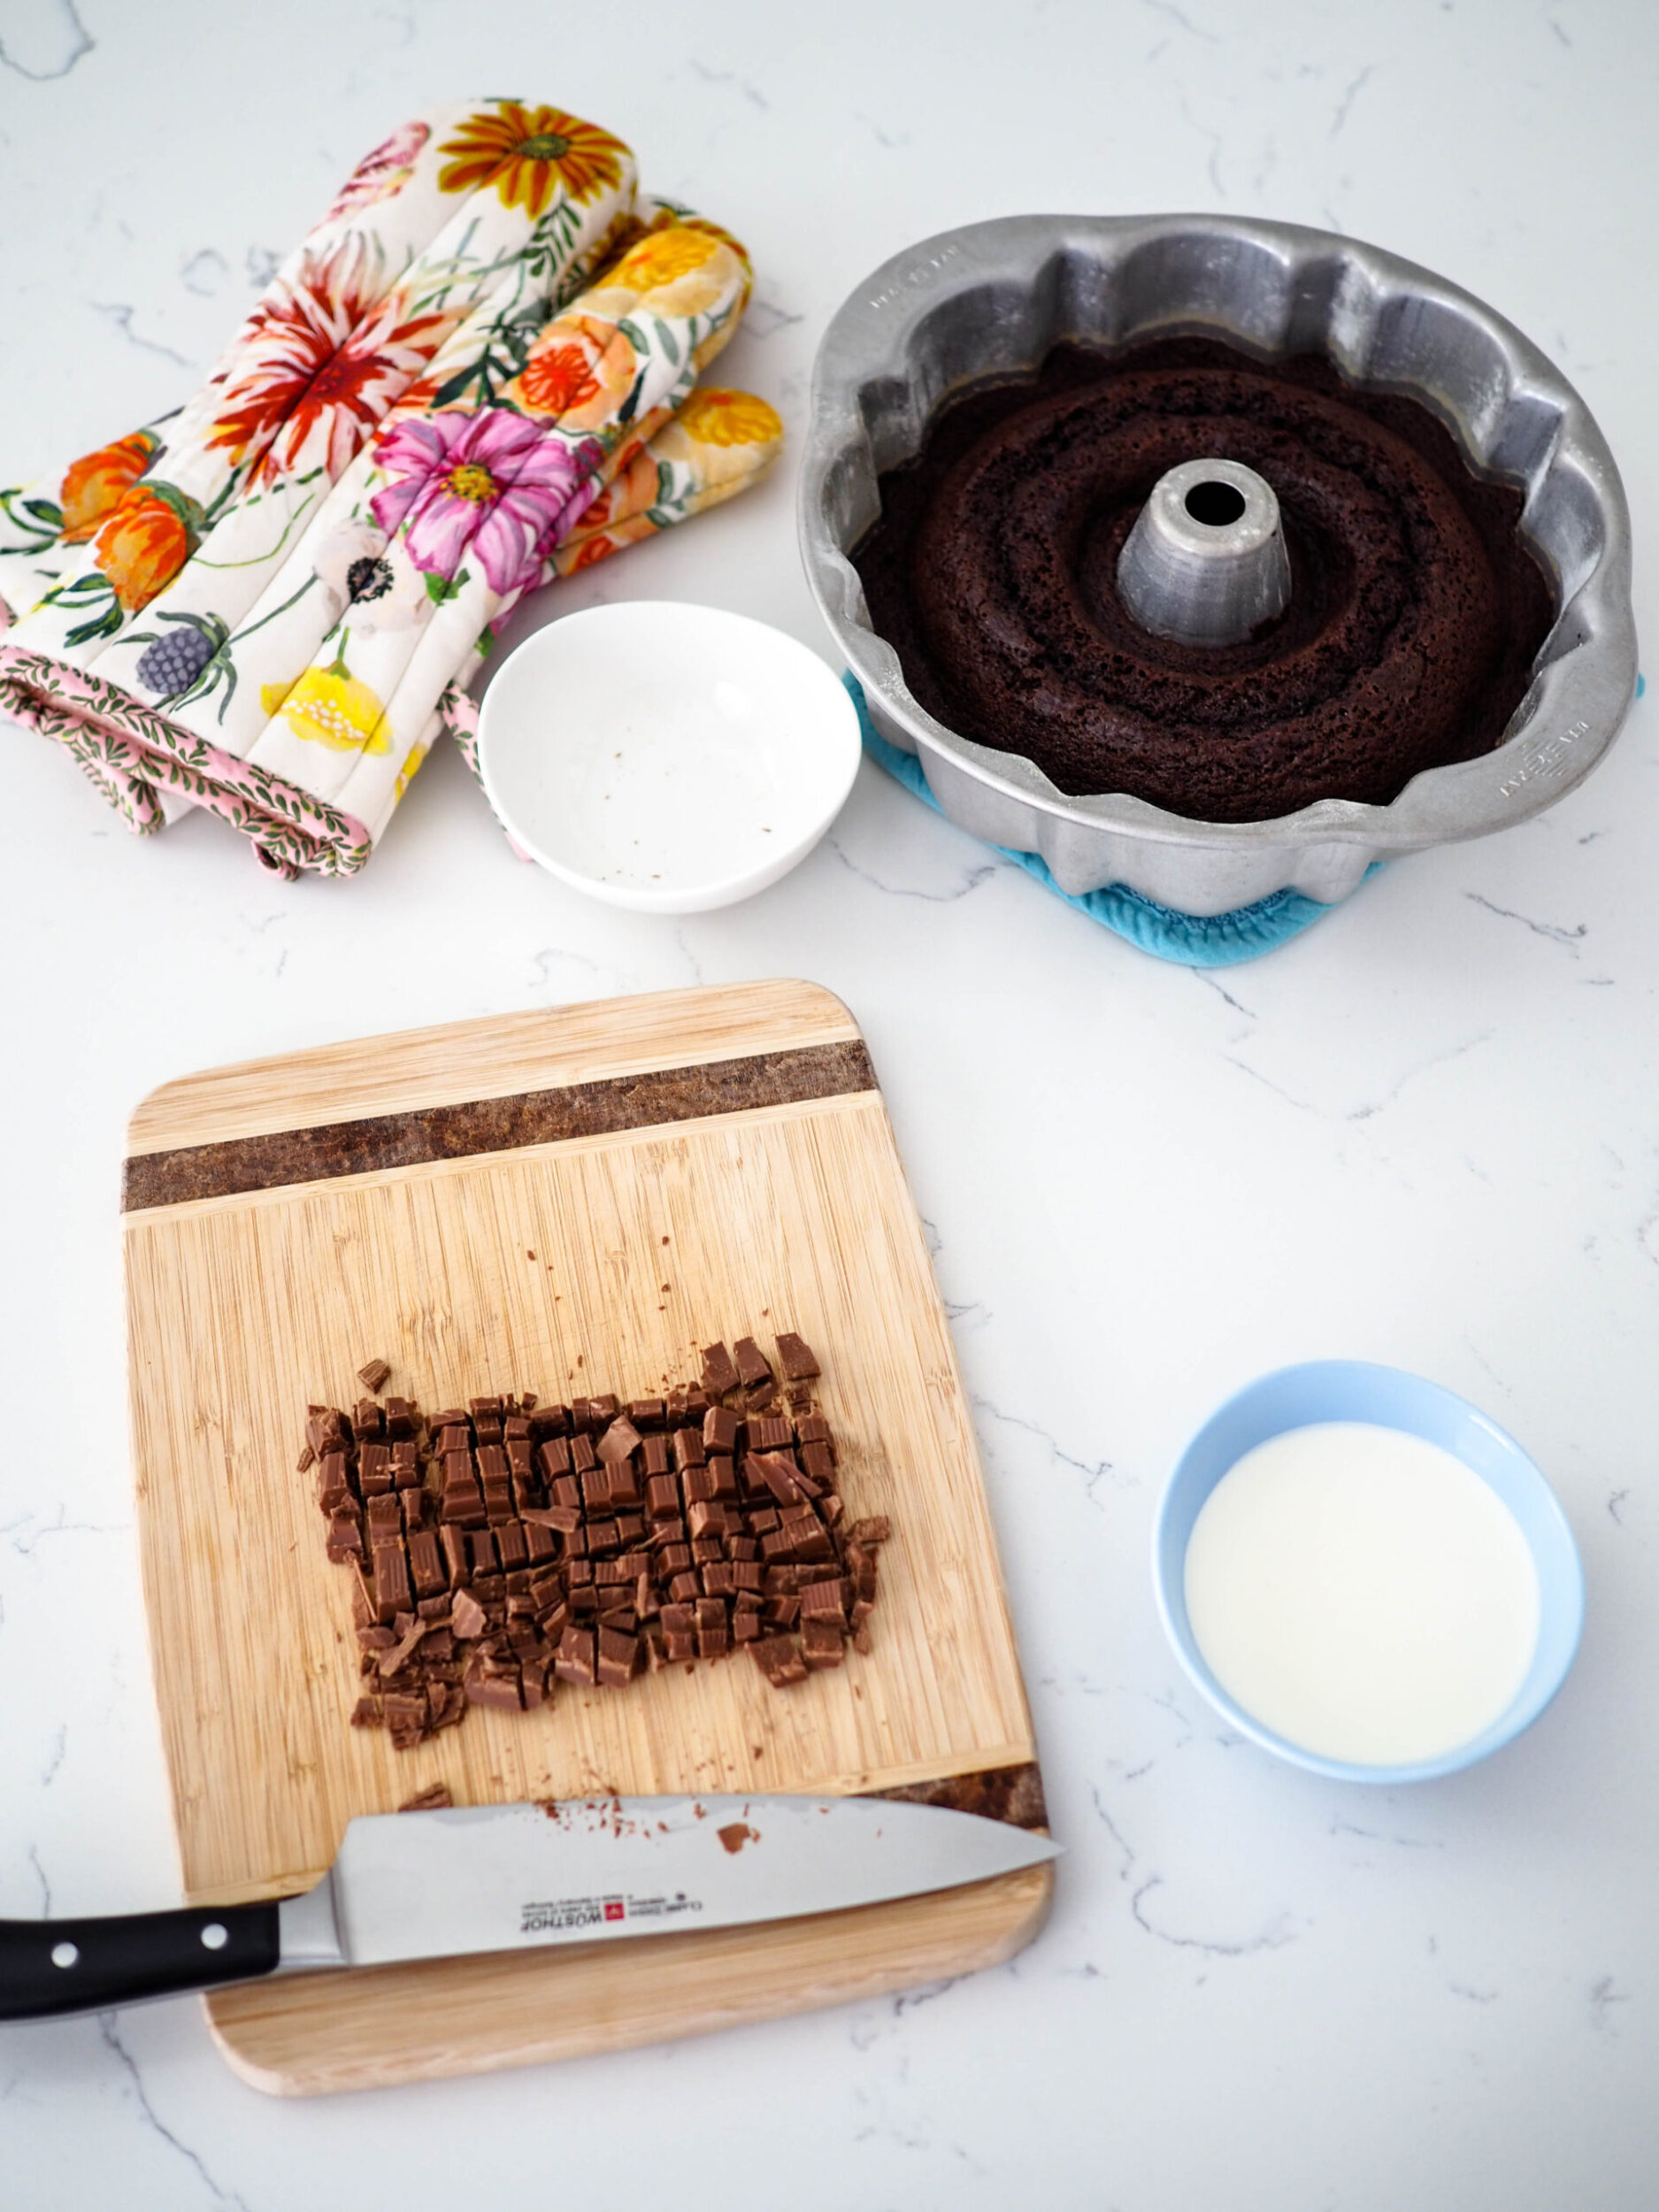
- While you wait for the cake to cool, chop up your milk chocolate into small ¼" (6mm) cubes and place in a medium bowl.
- Heat your heavy cream until it's steamy via a small saucepan on low over the stove or the microwave in 15-second intervals. Pour the hot heavy cream over the chocolate pieces and whisk together until the mixture is fully combined.
- The ganache will thicken as it cools, and it is much easier to decorate your Bundt cake with cool ganache than it is with warm ganache. Place the ganache in the fridge for at least 30 minutes, stirring occasionally. Transfer to a container with a pour spout, if desired, for easier decorating.
- How to tell when the ganache is at the ideal temperature for decorating: Stir the ganache with a whisk, then pick up the whisk and drizzle the ganache back into the container. You want the ganache ribbons to sit on the surface of the ganache for a few seconds before fading into it. If the ganache ribbons fade immediately into the rest of the ganache, it has not yet cooled enough. Place it back in the fridge for another 5-10 minutes before retesting.
Removing the Bundt Cake from the Pan
- Let the cake cool in the pan for at least half an hour before attempting removal. It will be obvious when the Bundt cake is ready to come out of the pan, as the edges of the cake will have started to pull back from the pan walls. (See the body of the blog post for a photo.)
- Even though the cake has cooled down, the pan will still be quite warm to the touch, so center the pan on top of a pot holder. (You may also use a trivet, but I have found the flexibility of a thick, fabric pot holder works best.) Move the pan and pot holder near the edge of your workspace.
- Place a wire cooling rack upside down over the top of the pan and hold it in place with your nondominant hand. Slide your dominant hand under the pot holder. Slowly slide the pan off the counter as you center your dominant hand under the Bundt pan, making sure the weight is evenly distributed. Your nondominant hand should be higher than your dominant hand.
- In one fluid motion, flip your hands so that your dominant hand is now higher than your nondominant hand. Keeping your grip on the pot holder with your dominant hand, slowly bring the cooling rack back to the surface of your workspace. Slide or angle your nondominant hand out from under the cooling rack, and ensure the Bundt pan is centered on the rack before letting go.
- My Bundt cakes sometimes require a few gentle taps to release from the pan. Tap the hot pad still on top of the Bundt cake a few times. Then, use both hands to grab opposite sides of the pan, lift up the pan at an angle away from you, and peek inside. If you see that the Bundt cake has yet to release, try tapping it a few more times. If it still does not release, let it cool for another few minutes before repeating this step.
- If the Bundt cake is not already, let it come to room temperature before decorating.
Decorating the Chocolate Bundt Cake
- Place your Bundt cake on the cake stand or serving platter. Use a whisk to pick up a little ganache at a time and draw concentric rings over the top of the Bundt cake. By adding the ganache a little at a time, the ganache will slowly coat the sides of the Bundt cake and will limit pooling on the cake stand. Please note: You may not use all of the ganache.
Notes
Store this Bundt cake in an airtight container at room temperature for up to three days. For longer-term storage, place in an airtight container in the fridge for up to one week.
Nutrition Information:
Yield:
14Serving Size:
1 sliceAmount Per Serving: Calories: 378Total Fat: 22gSaturated Fat: 9gTrans Fat: 0gUnsaturated Fat: 11gCholesterol: 57mgSodium: 288mgCarbohydrates: 42gFiber: 1gSugar: 27gProtein: 4g
The nutrition facts are estimated and may vary based on specific ingredients used.
Thanks for trying out my chocolate Bundt cake with Dutch-processed cocoa recipe! Please consider rating this recipe so others find it, too.
I’d love to see how your Bundt cake turns out: Take a photo and tag me on Instagram @floralapronblog to share with me, or use the hashtag #floralapronbakes.
This post contains affiliate links. If you click through and make a purchase, I may receive a small commission at no cost to you. Thank you for helping to support The Floral Apron!
Other Recipes You May Like
Got chocolate on the mind? My rosy Earl Gray truffles come together quickly and are the perfect dessert for my vegetarian, vegan, and gluten-free friends!
If you’re looking for a meal to have before this cake, try my Cajun tortilla chip-crusted tilapia. It’s a house favorite and has an easy cleanup!