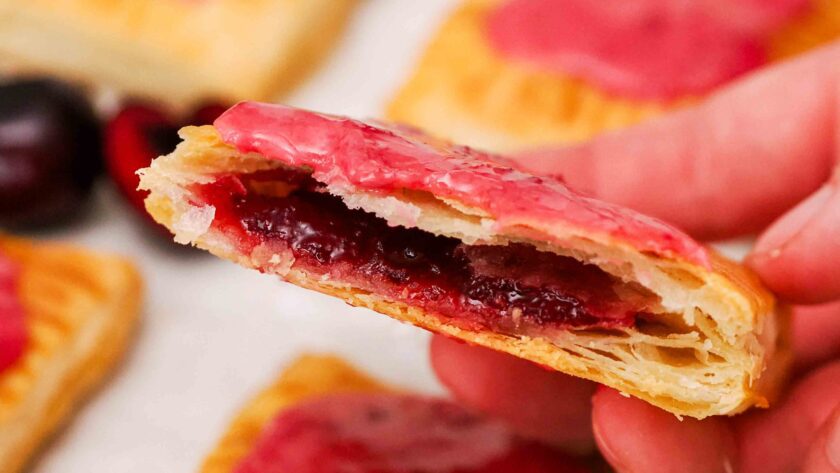
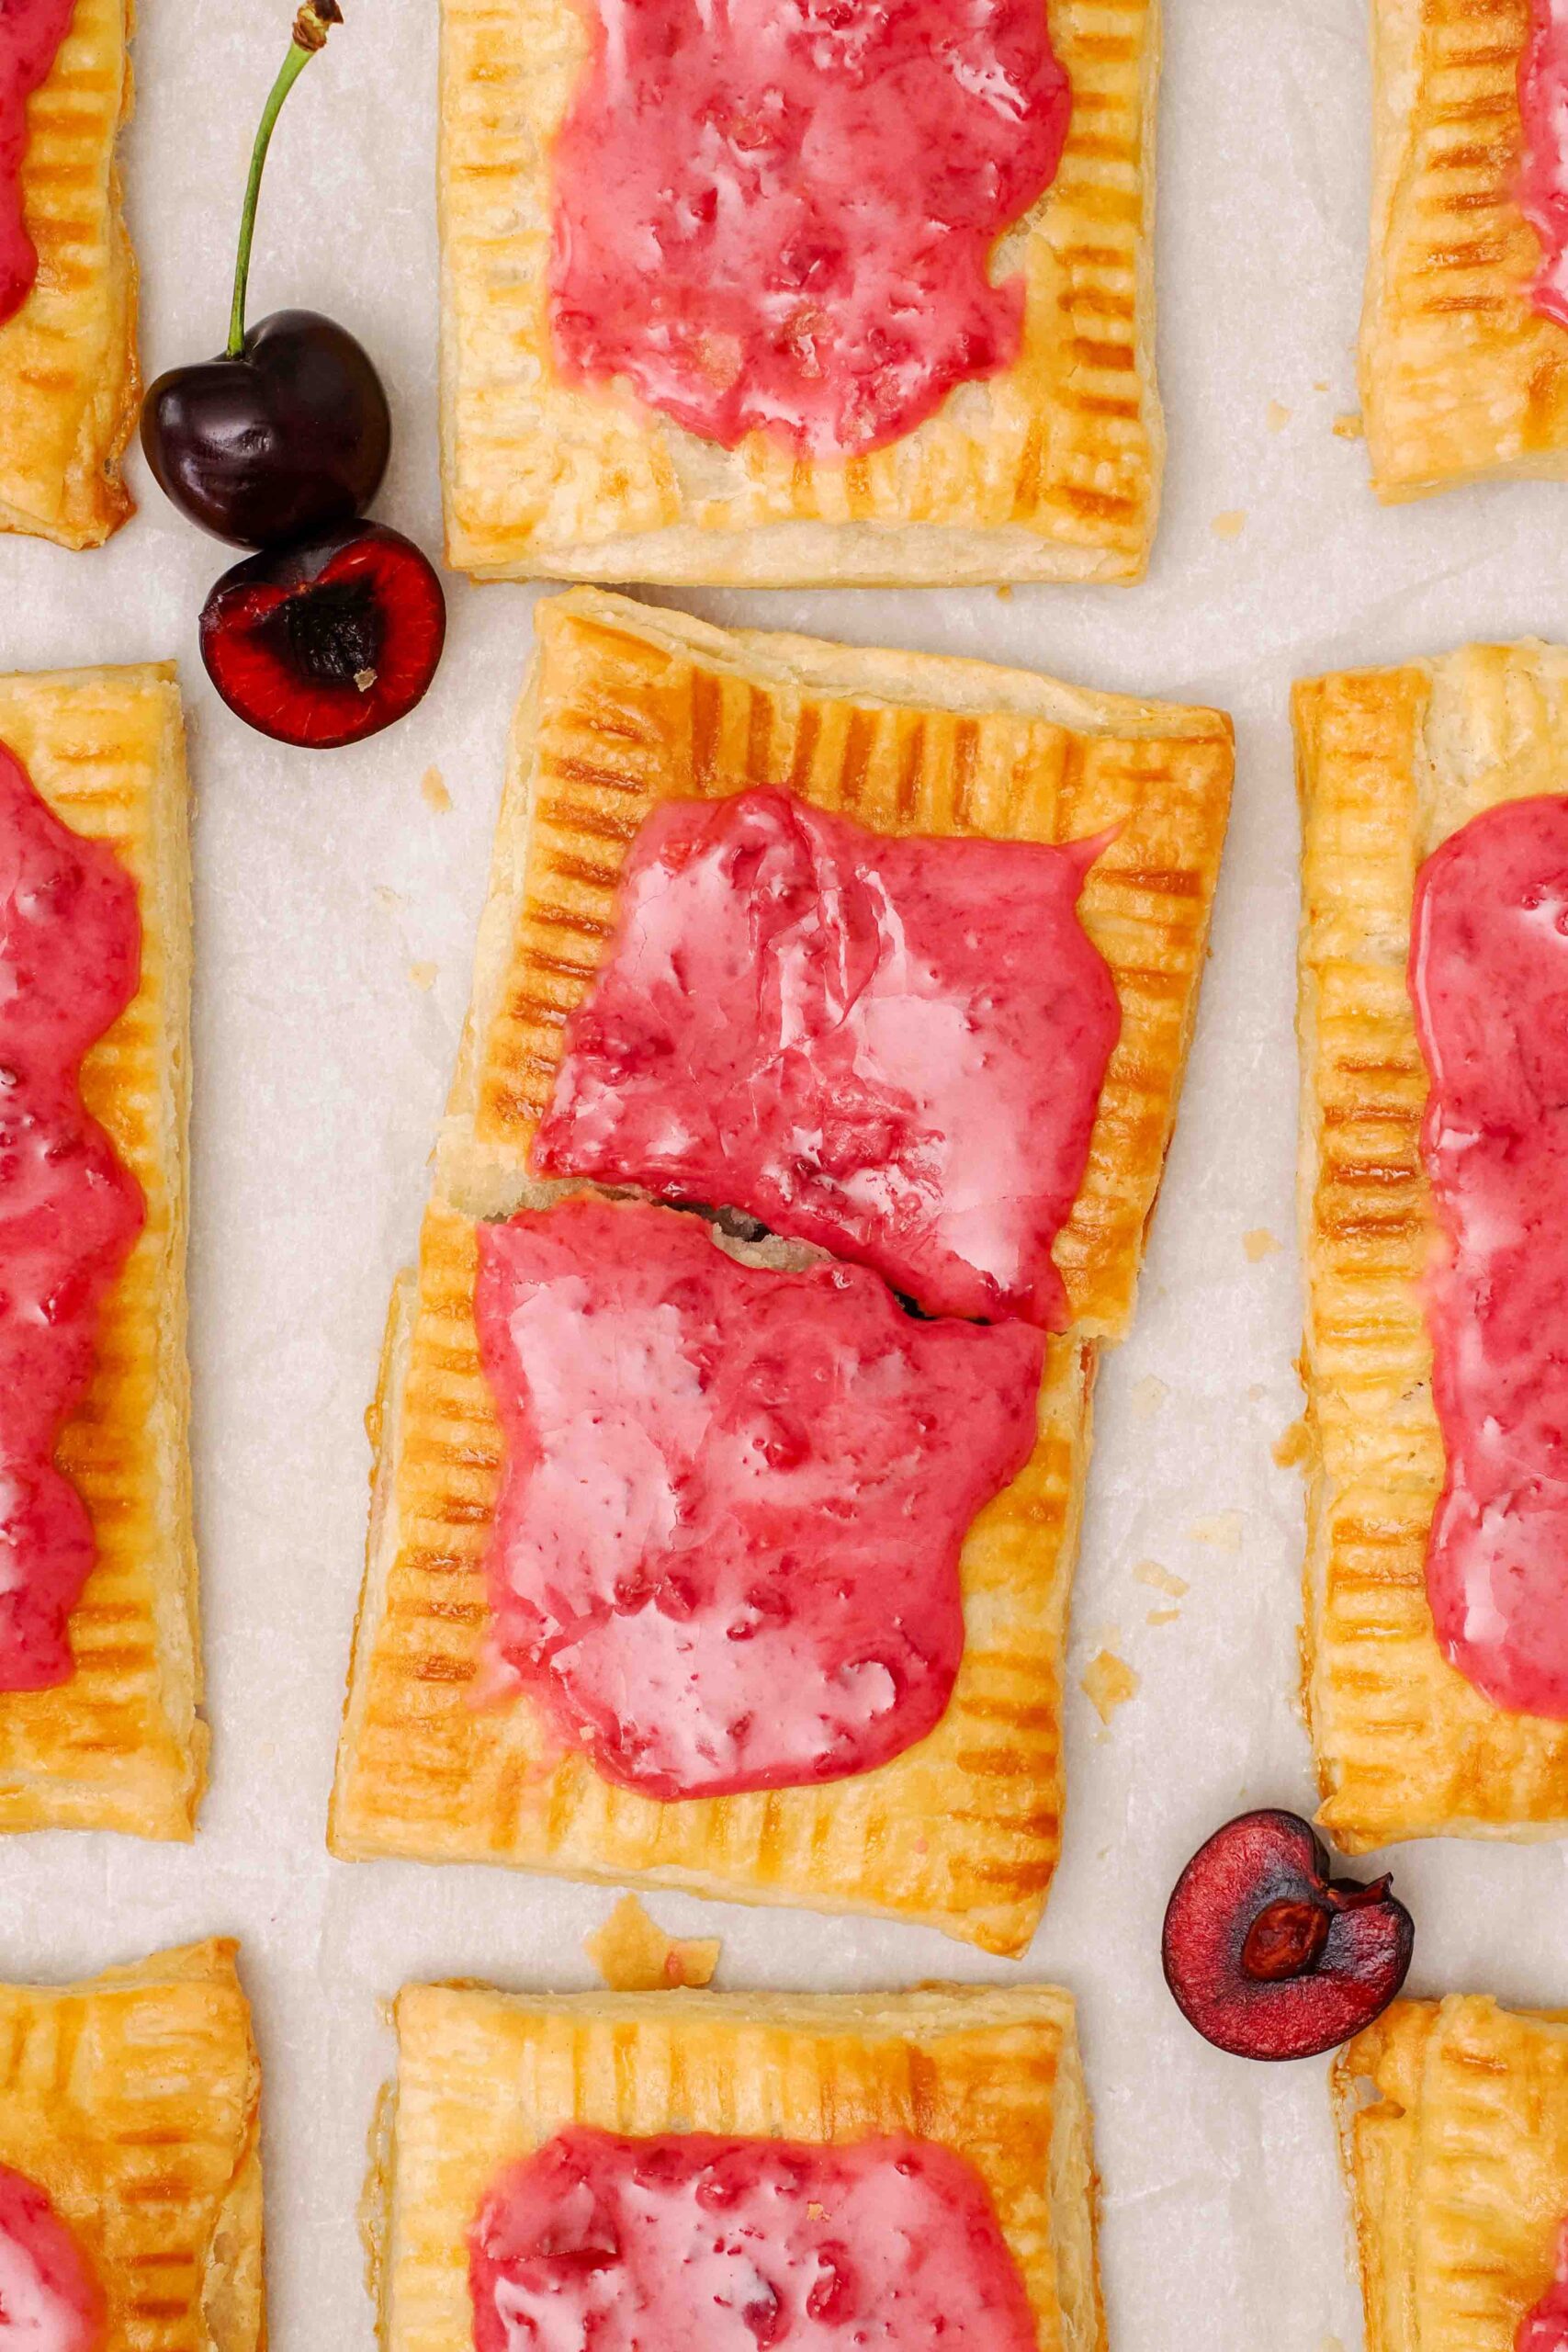
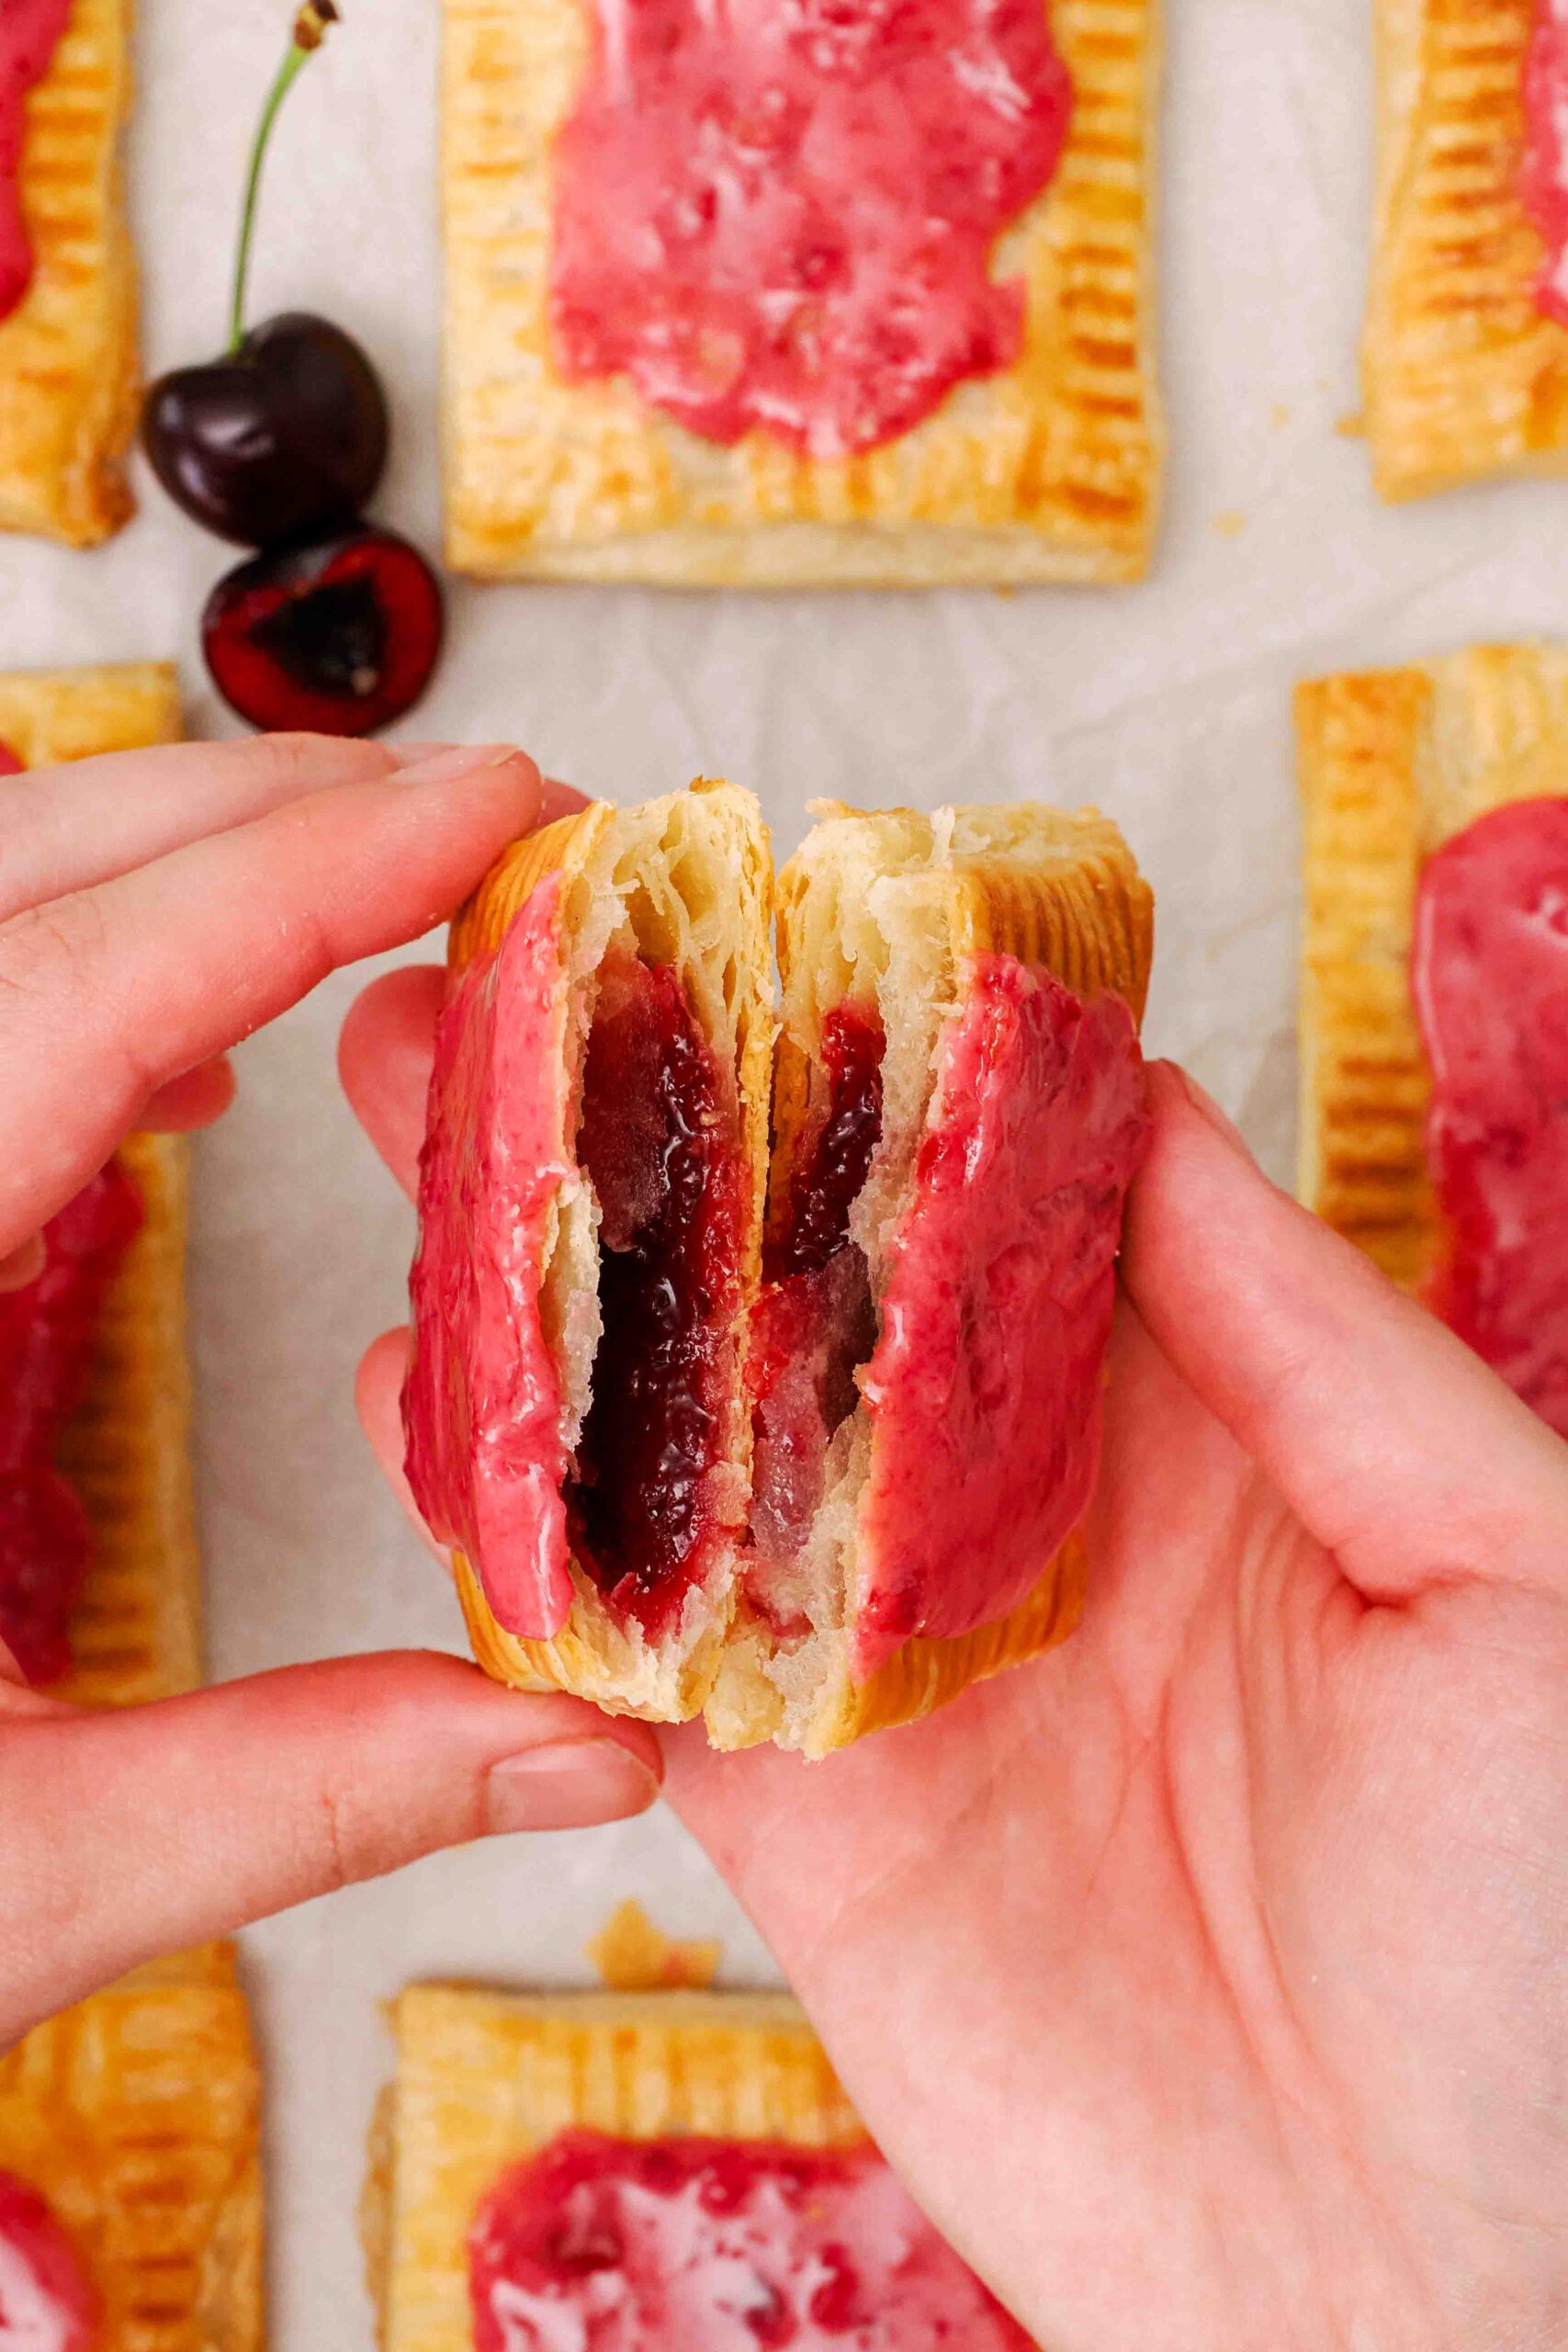
Move over, boxed breakfast pastries—these homemade cherry pop tarts are flaky with just the right amount of sweetness from a jam filling and an easy, two-ingredient icing. Even better, they’re made with only four simple ingredients, and the bright pink icing is naturally colored from cherry jam!
I use a lot of homemade ingredients for these homemade breakfast pastries when I make them, but you can absolutely use the store bought versions for all of them. (I do recommend using homemade vanilla pie crust for the absolute flakiest pastry to rival even store bought toaster strudels—that’s what I used here for these images!) Either way, there’s a reason these easy pop tarts are my favorite homemade breakfast pastries with cherry jam.
This post contains affiliate links. If you click through and make a purchase, I may receive a small commission at no cost to you. Thank you for helping to support The Floral Apron!
Ingredients for Homemade Cherry Pop Tarts
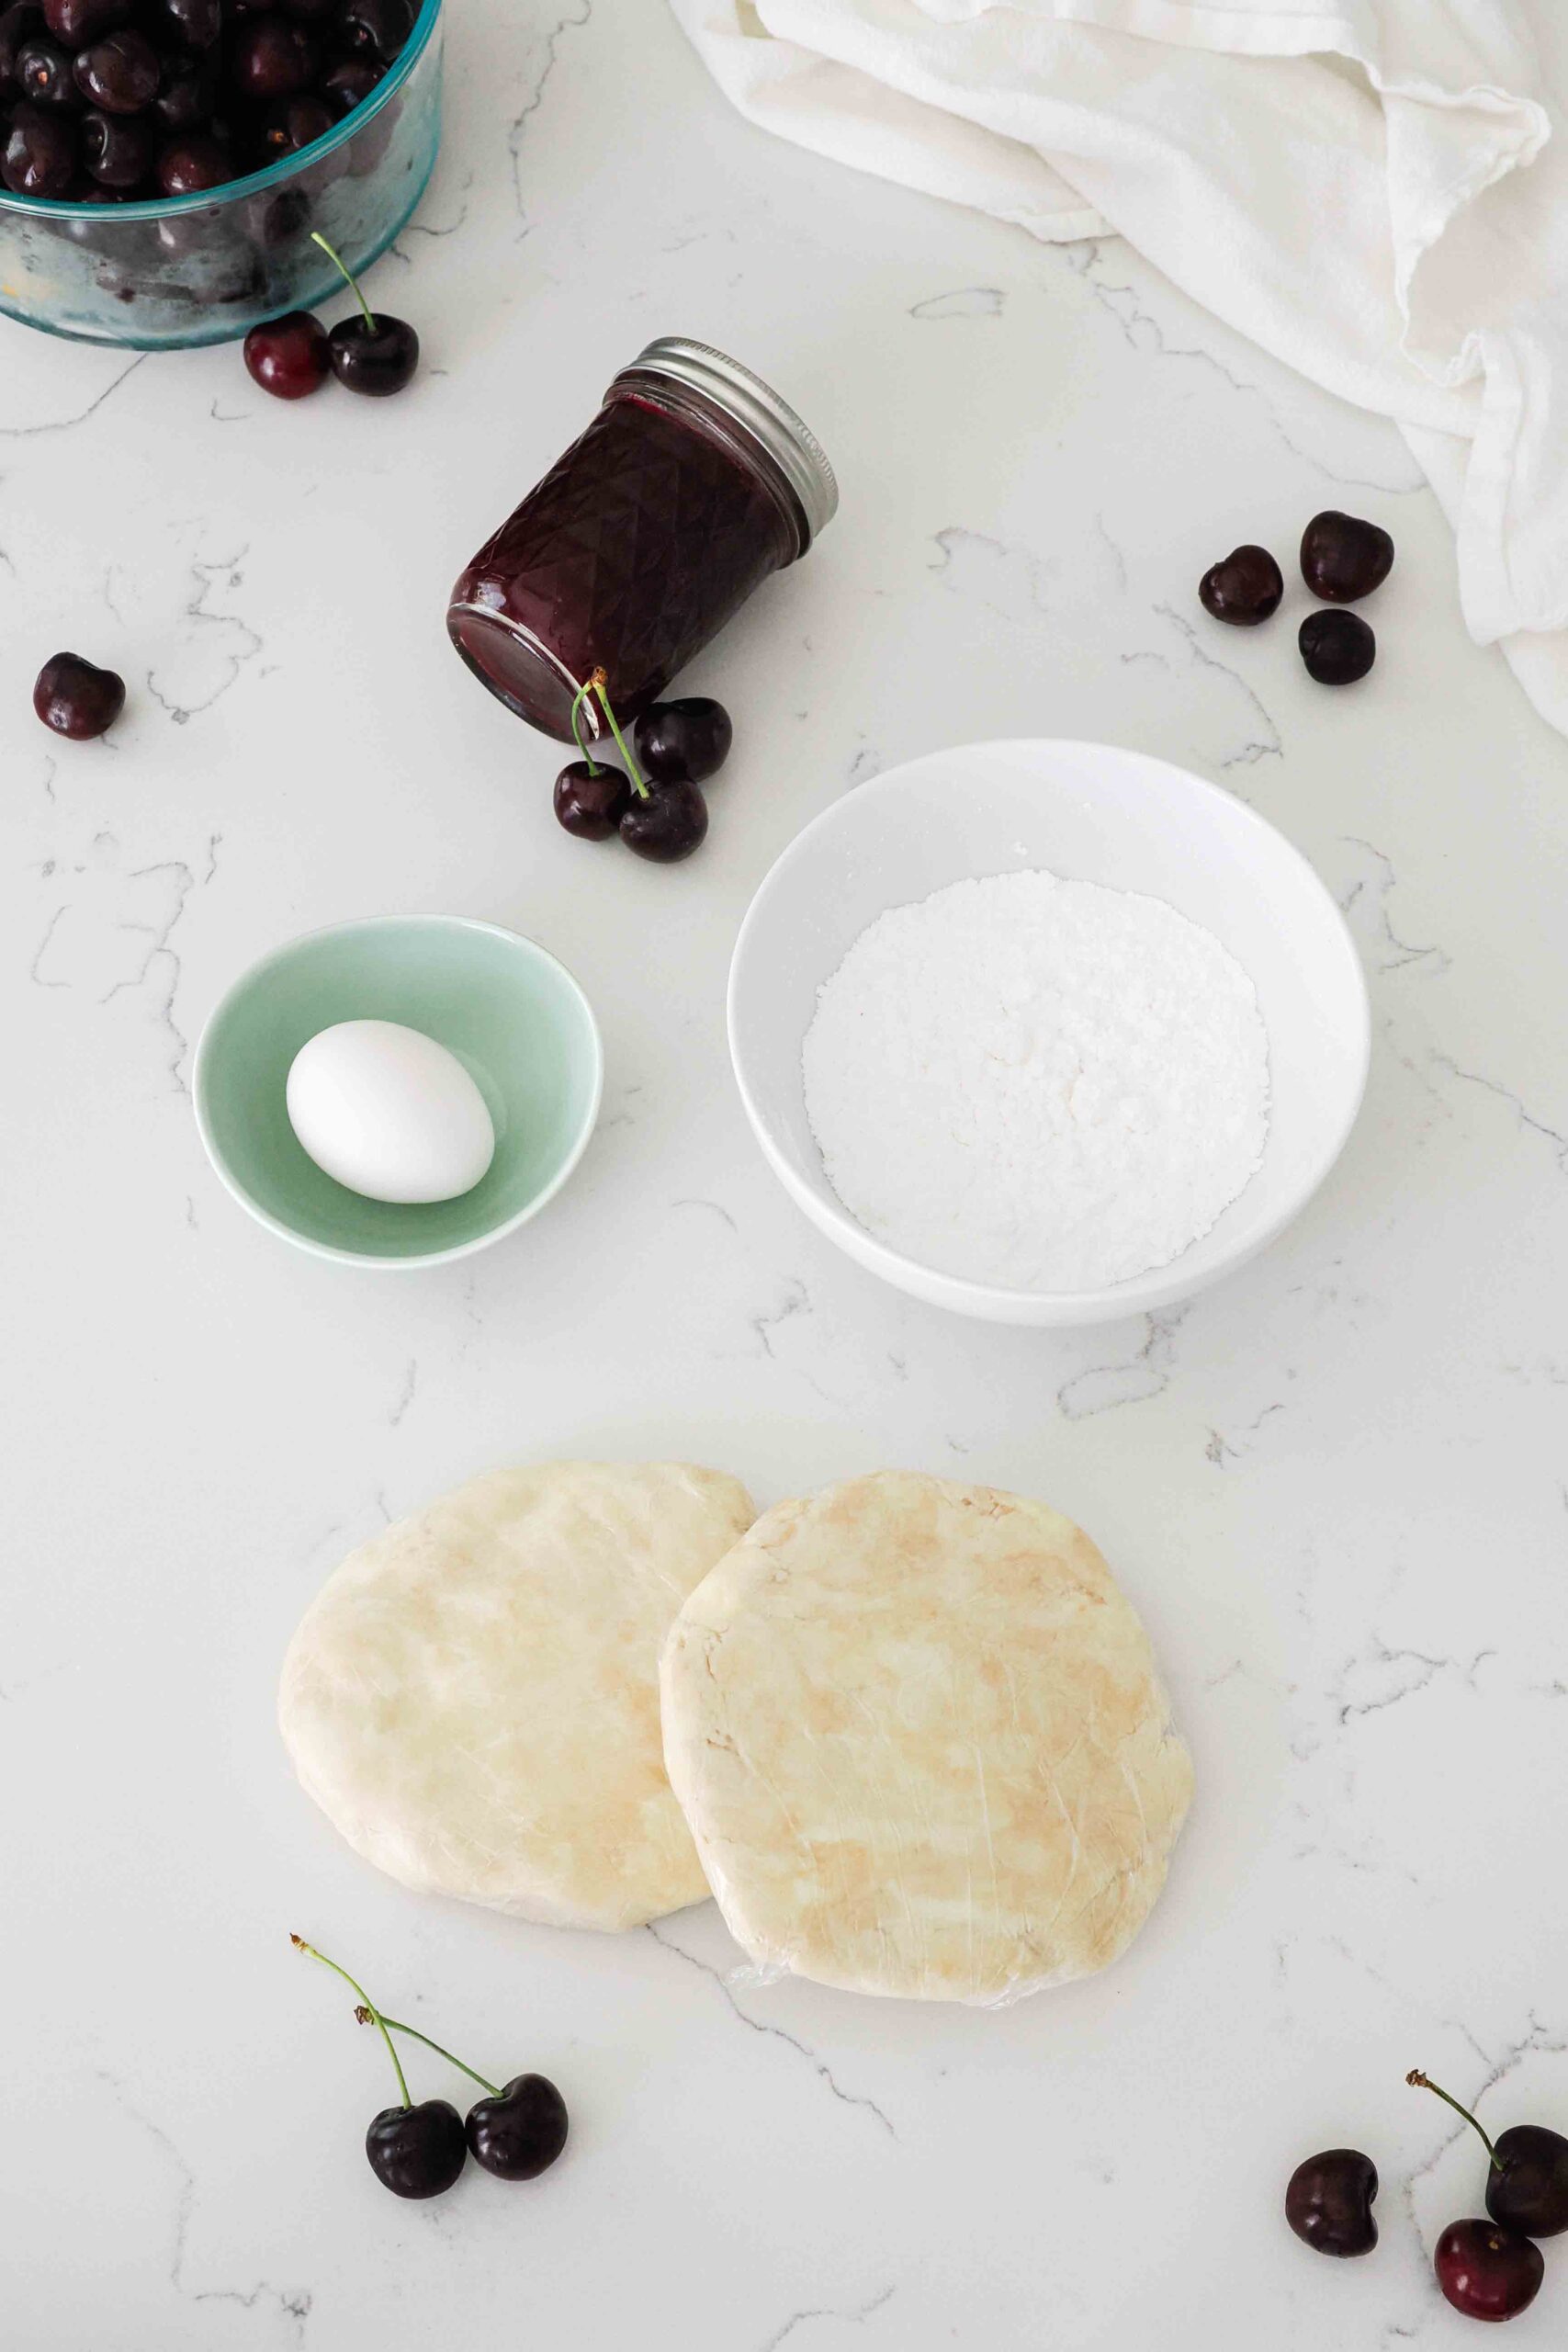
These cherry jam-filled pastries couldn’t have an easier ingredient list! I use homemade ingredients, but you can absolutely use store bought ingredients for a semi-homemade version of cherry pop tarts. You will also need flour for dusting and a teaspoon of water for the egg wash. See suggestions and substitutions for each ingredient below:
- Pie crust. For the flakiest pie crust, I recommend using my all-butter vanilla pie crust with vanilla extract—that’s what I used for these images. But if you’d prefer, you can totally use store bought pie crust or puff pastry!
- Cherry jam. I stock up on dozens of pounds of cherries from a nearby orchard each summer and make my own small batch cherry jam. You’re welcome to use cherry preserves from the store, or even another kind of jam, if you like!
- Egg. Adding an egg wash helps turn the pastry a deep golden brown in the oven. If you don’t want to use an egg here, I’d recommend using water to seal the edges of the pastry and brushing the tops lightly with heavy cream or milk instead.
- Powdered sugar. Just a little bit of powdered sugar thickens up the cherry jam to make a simple and sweet cherry frosting that’s naturally colored!
To make these homemade pastries dairy-free, simply use a dairy-free pie crust. To also make them vegan, substitute a plant-based milk for the egg wash.
How to Make Homemade Cherry Pop Tarts
These homemade cherry breakfast pastries are fairly easy to make with only a little technical skill required. The key lies in rolling out the pastry to the right thickness and properly sealing all the edges to prevent the jam from spilling out. You can watch a short tutorial on how to make homemade pop tarts with jam on my YouTube channel in a couple of days!
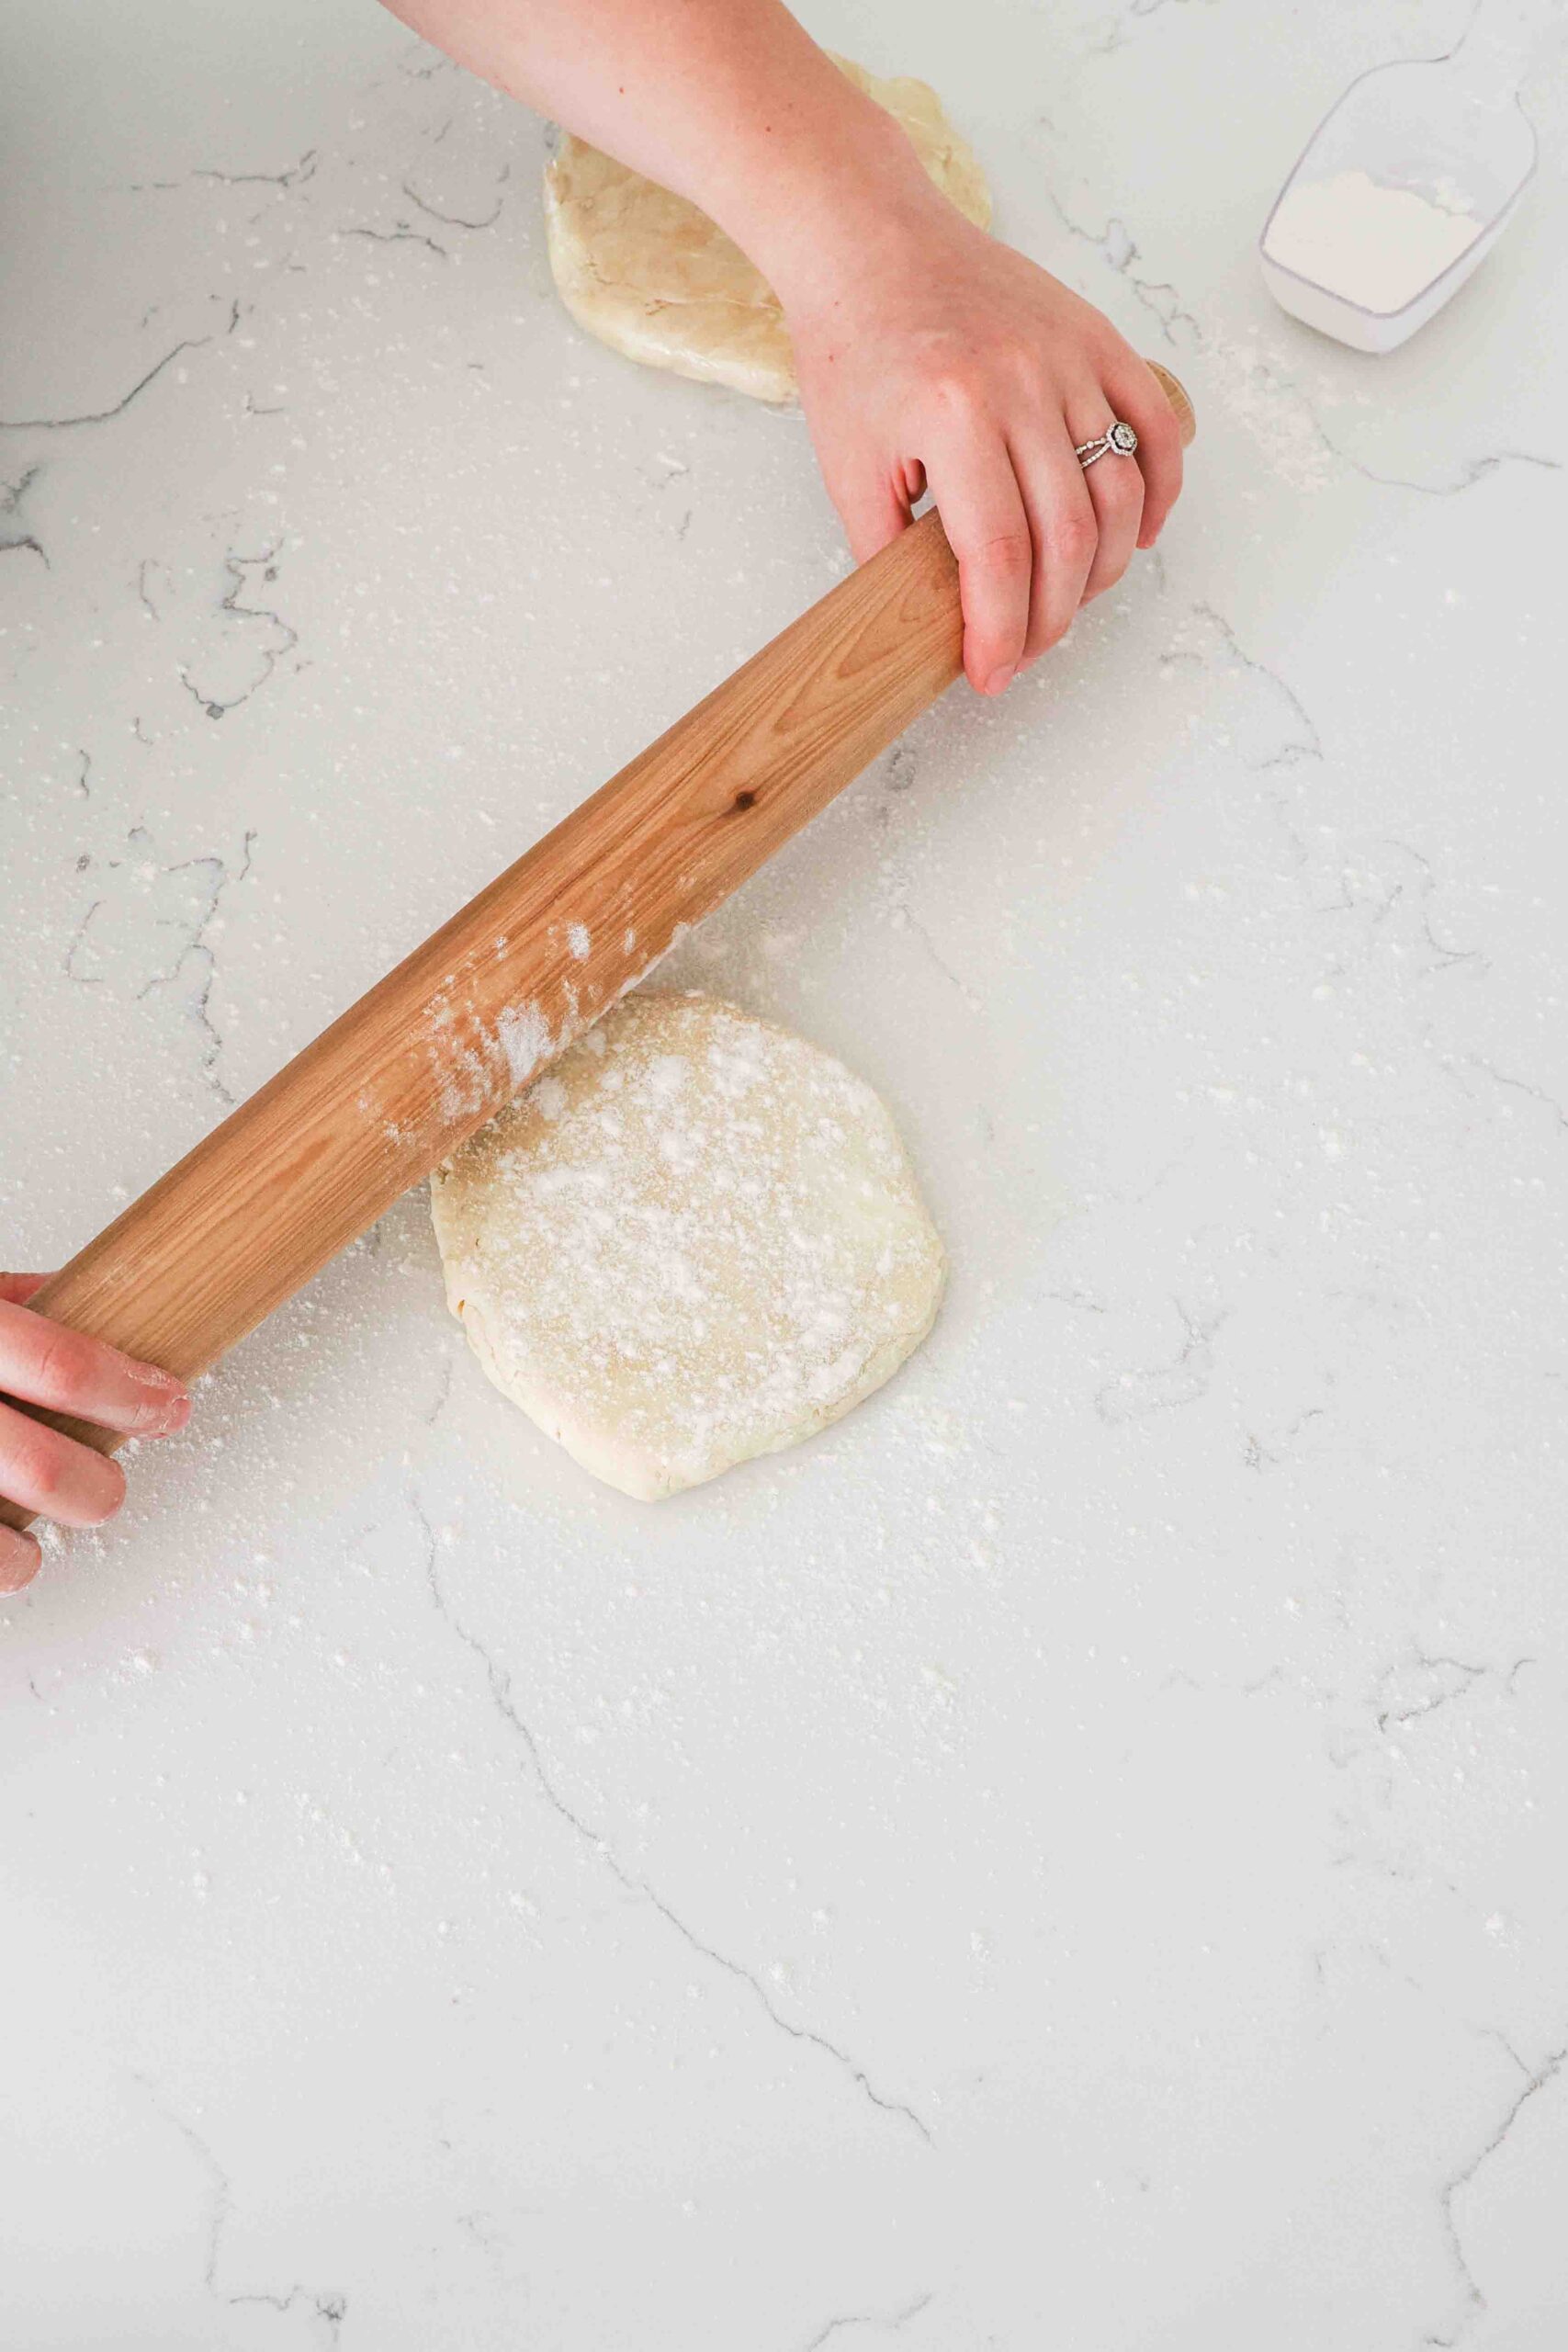
Rolling out the Pie Dough
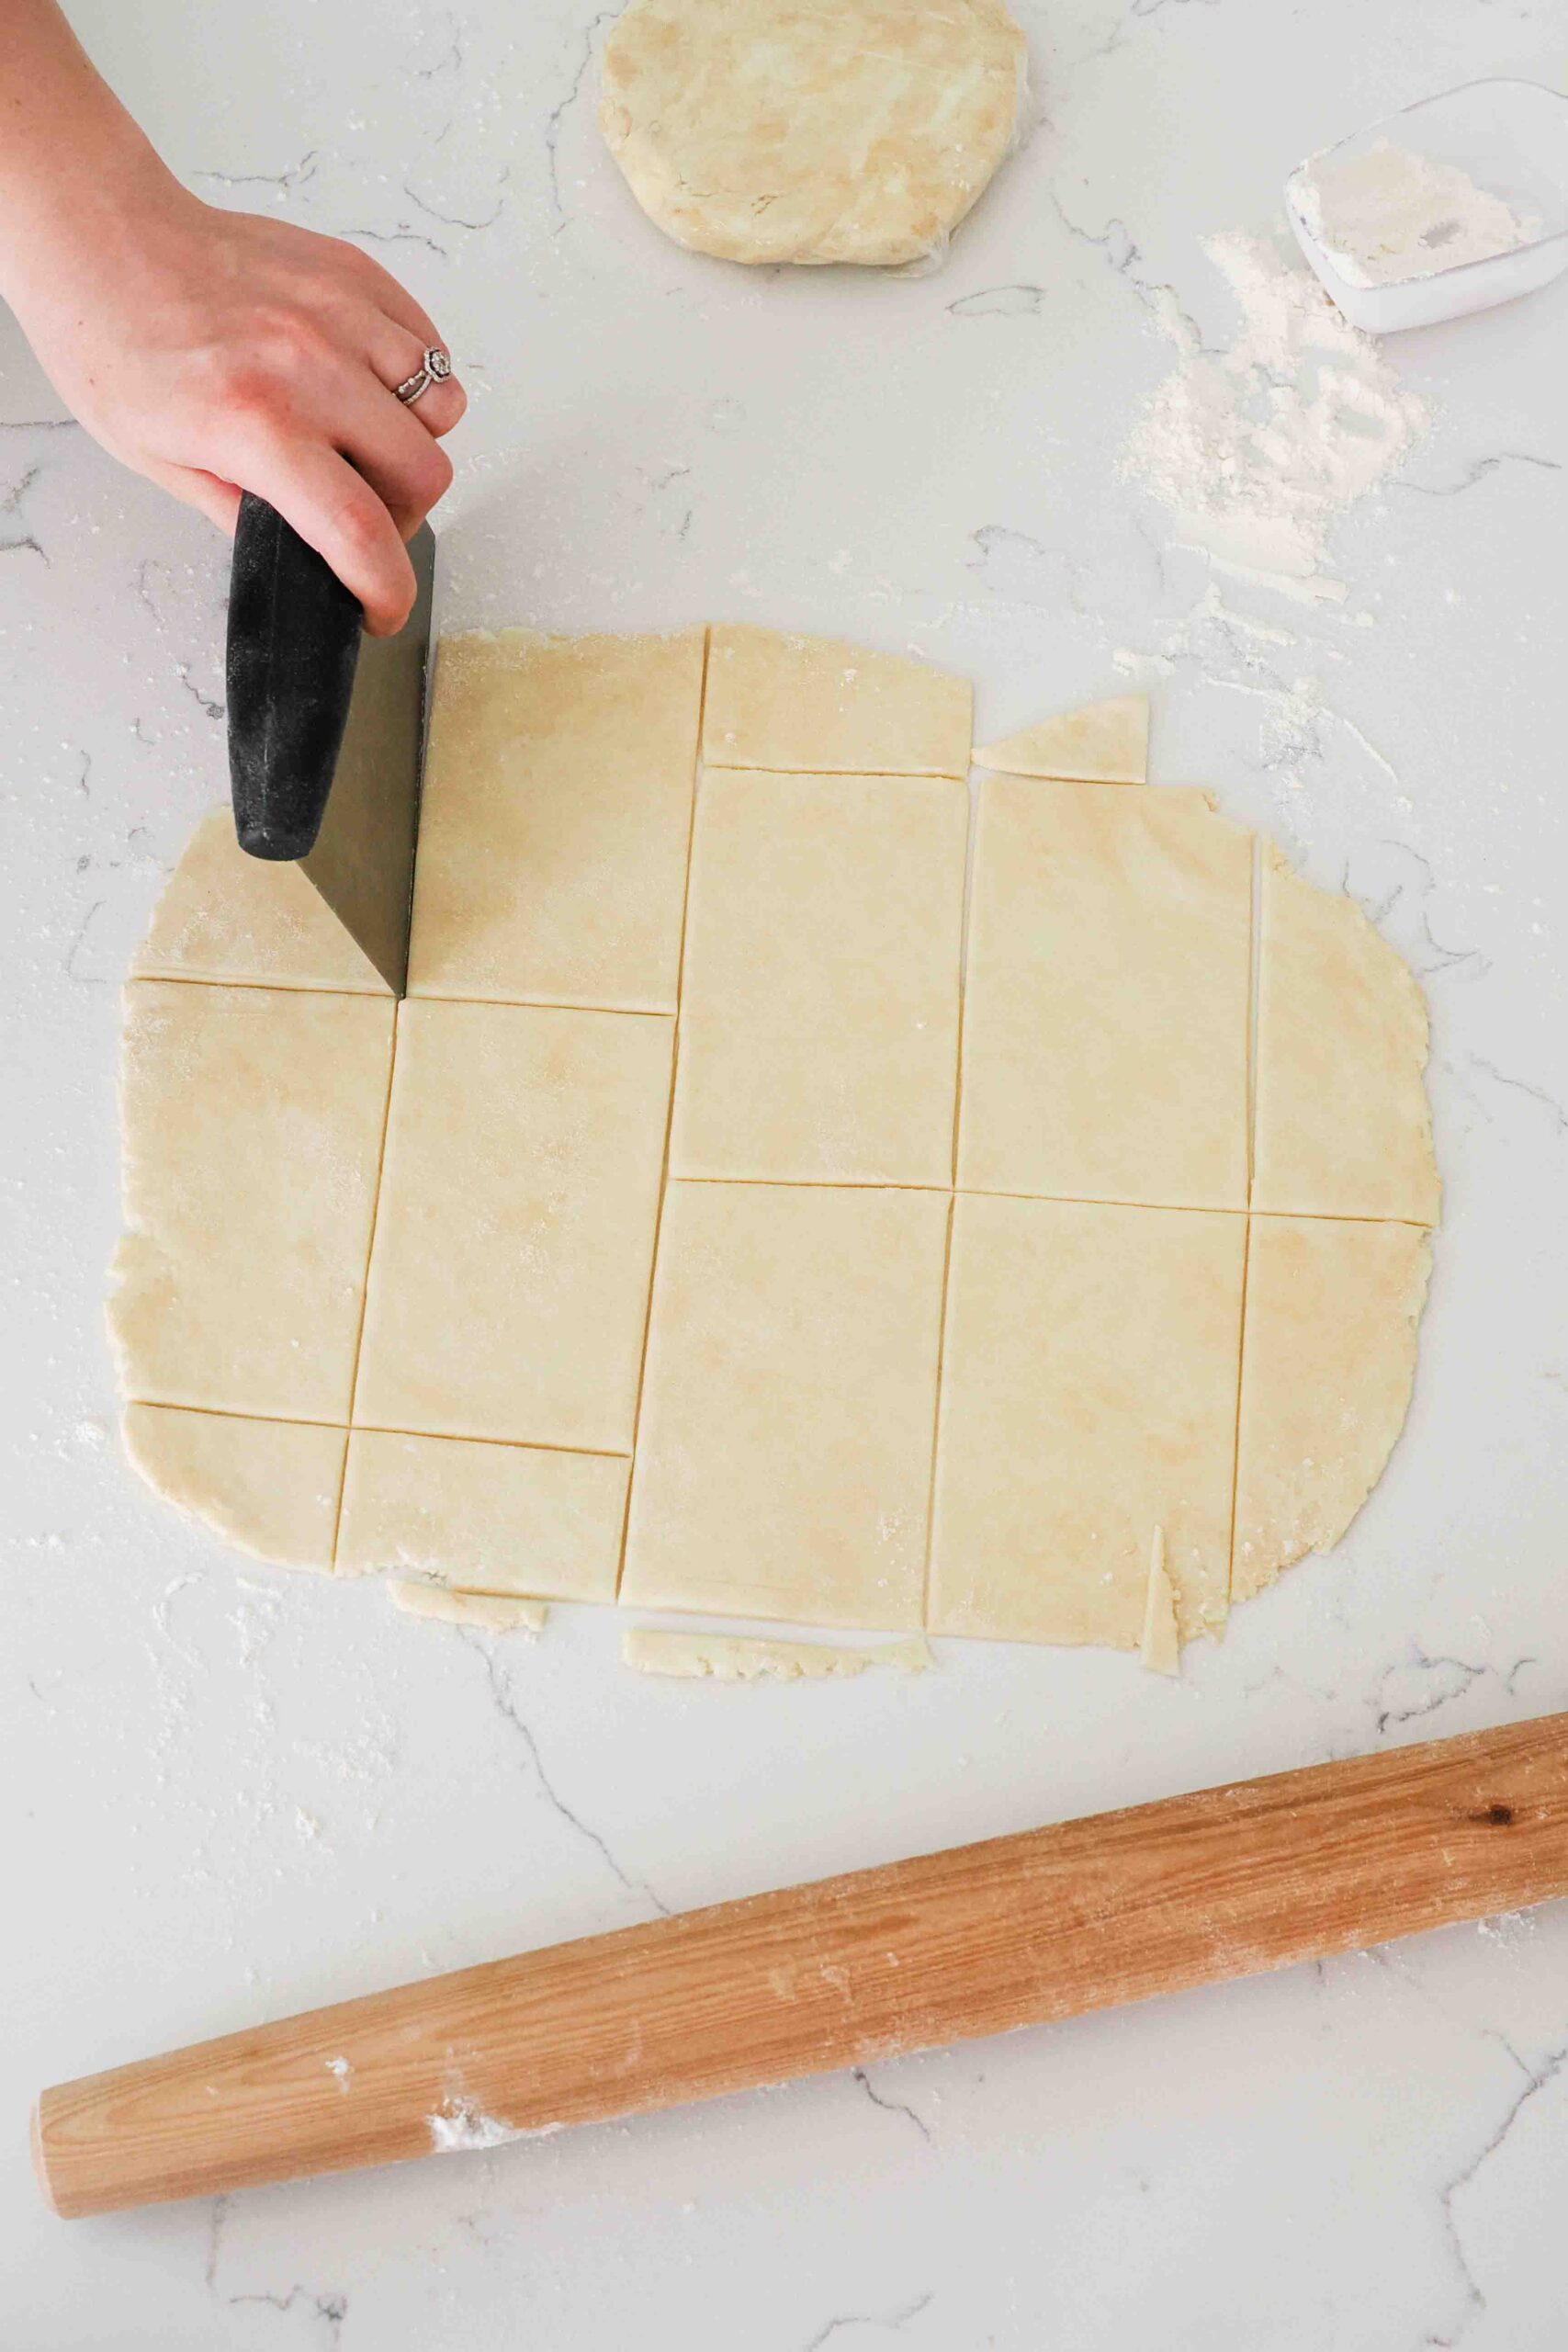
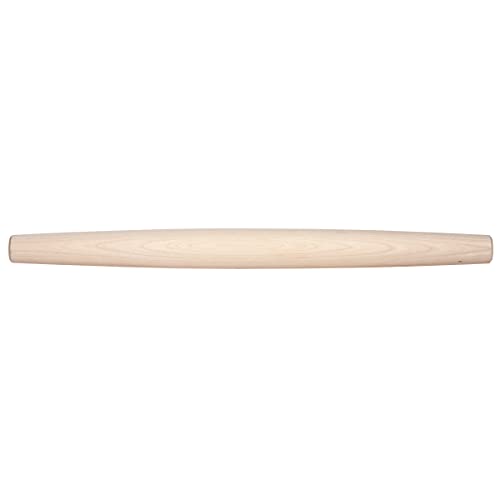
You’ll first want to roll out one pie crust at a time to about ⅛”, or 3 mm, thick with a rolling pin. This ensures that the dough is thin enough to bake completely but is strong enough to hold the jam filling.
If you can, roll the dough in a rectangle rather than the typical circle. It makes it a lot easier to cut even 3″ by 5″ (8 cm by 13 cm) rectangles out of the dough, and you won’t have to reroll quite as many scraps. (It sounds like a fairly obvious tip, but sometimes you roll dough on autopilot!)
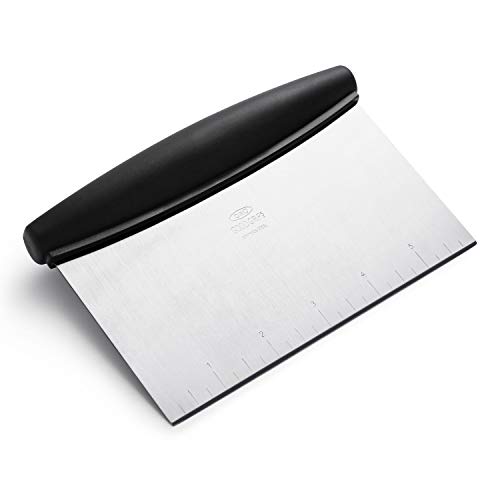
I prefer to use a bench scraper to cut out the dough because mine has a built-in ruler. You can also use a pastry wheel or a knife.
Filling and Baking the Homemade Pop Tarts
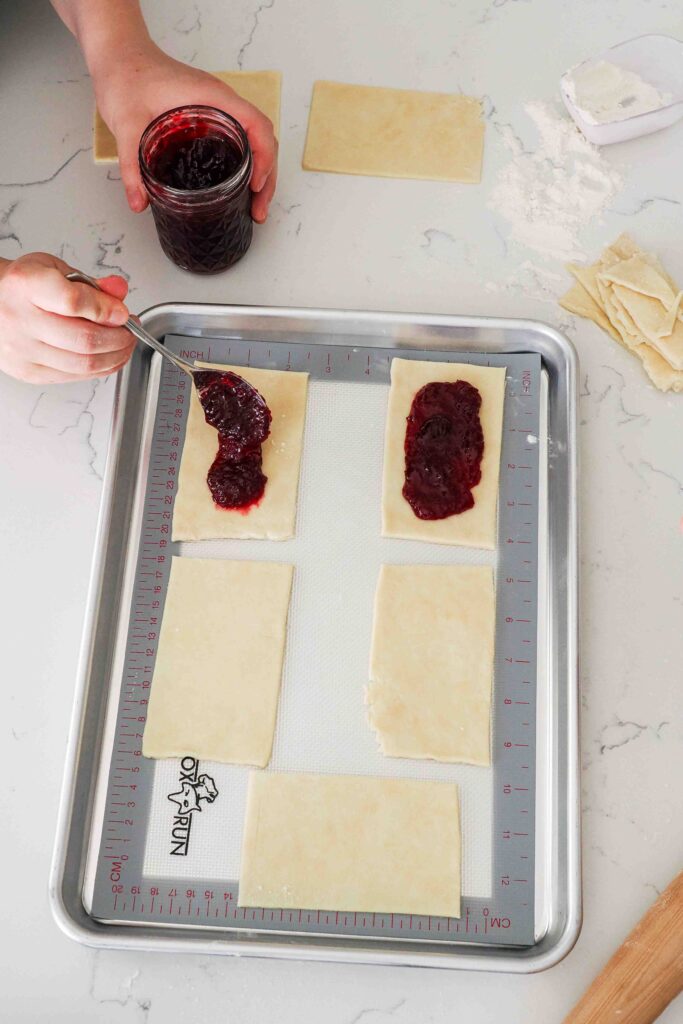
Then, place the dough rectangles on a baking sheet lined with parchment paper or silicone mats. I space each one about 2″ (5 cm) apart to give me enough room to crimp the edges later.
Add a heaping teaspoon of cherry jam to the center of each rectangle, then spread it out slightly. Your goal is an even layer with a somewhat wide border of about ½” (12 mm). A border this thick will help the dough seal to itself better and prevent the jam from leaking out in the oven.
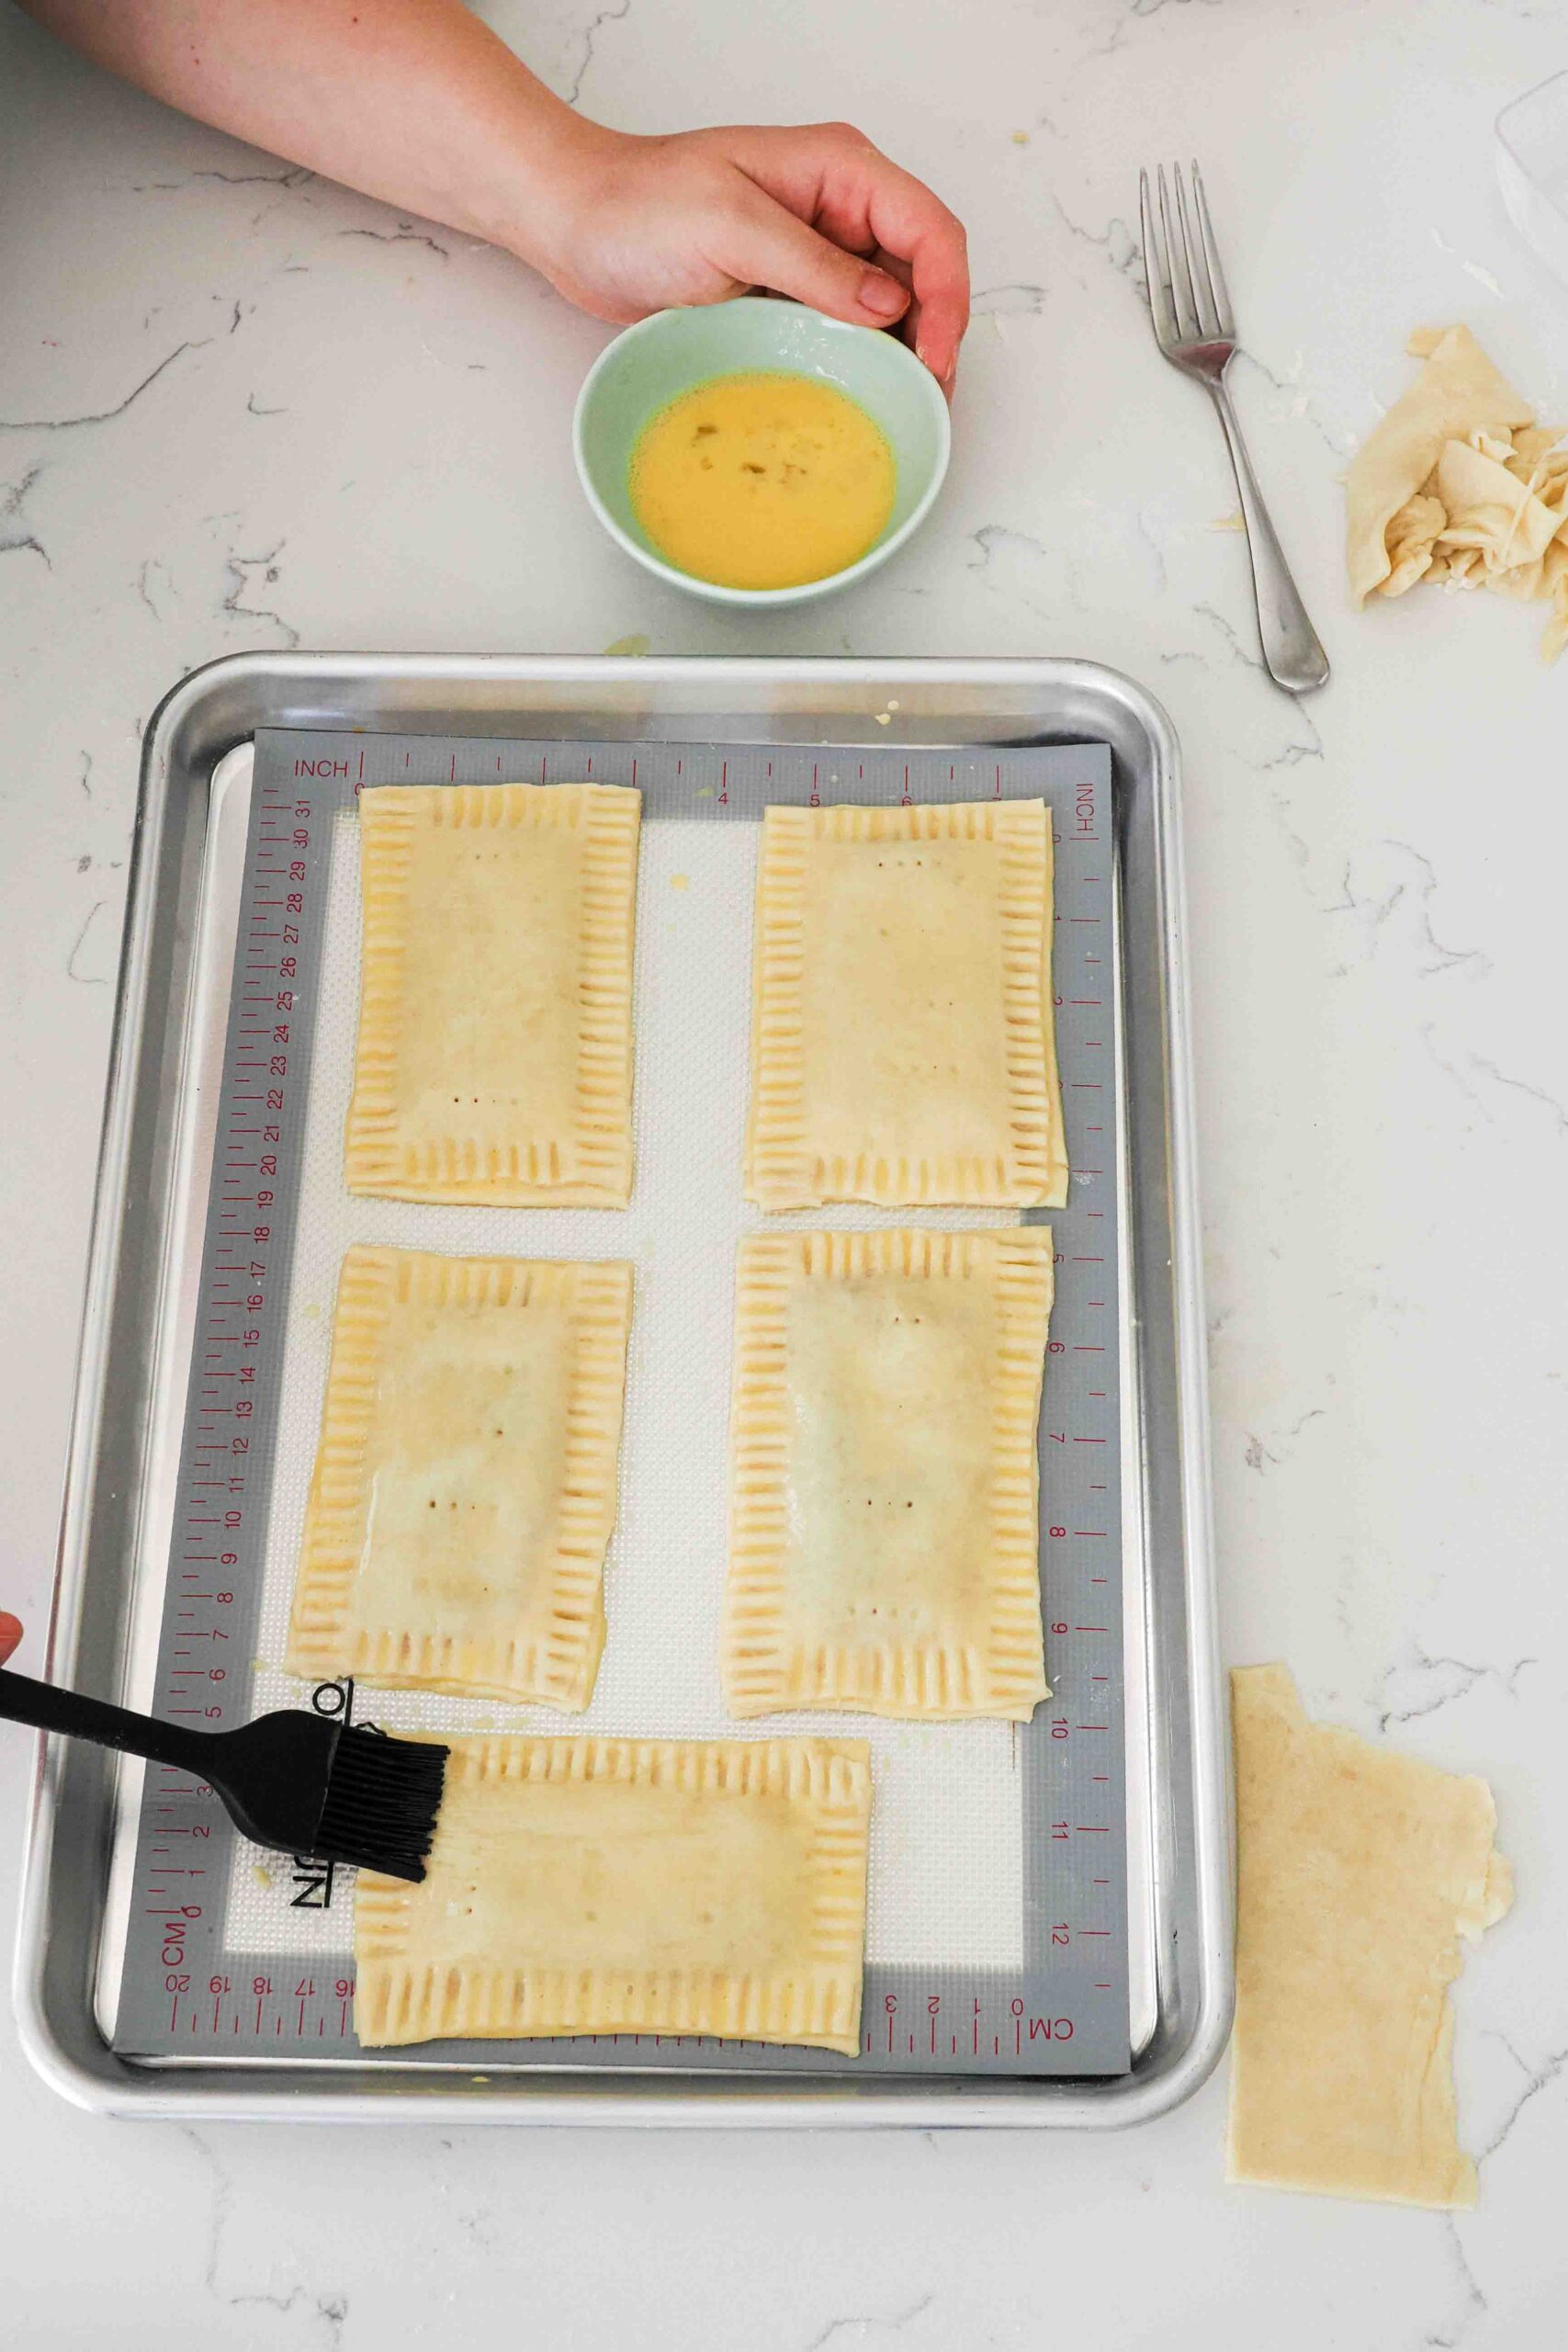
Dock another piece of dough 3-4 times with a fork to create vents. Then, brush the edges of the dough on the baking sheet lightly with egg wash. Gently place a second rectangle of dough on top of the first, and press the edges to seal.
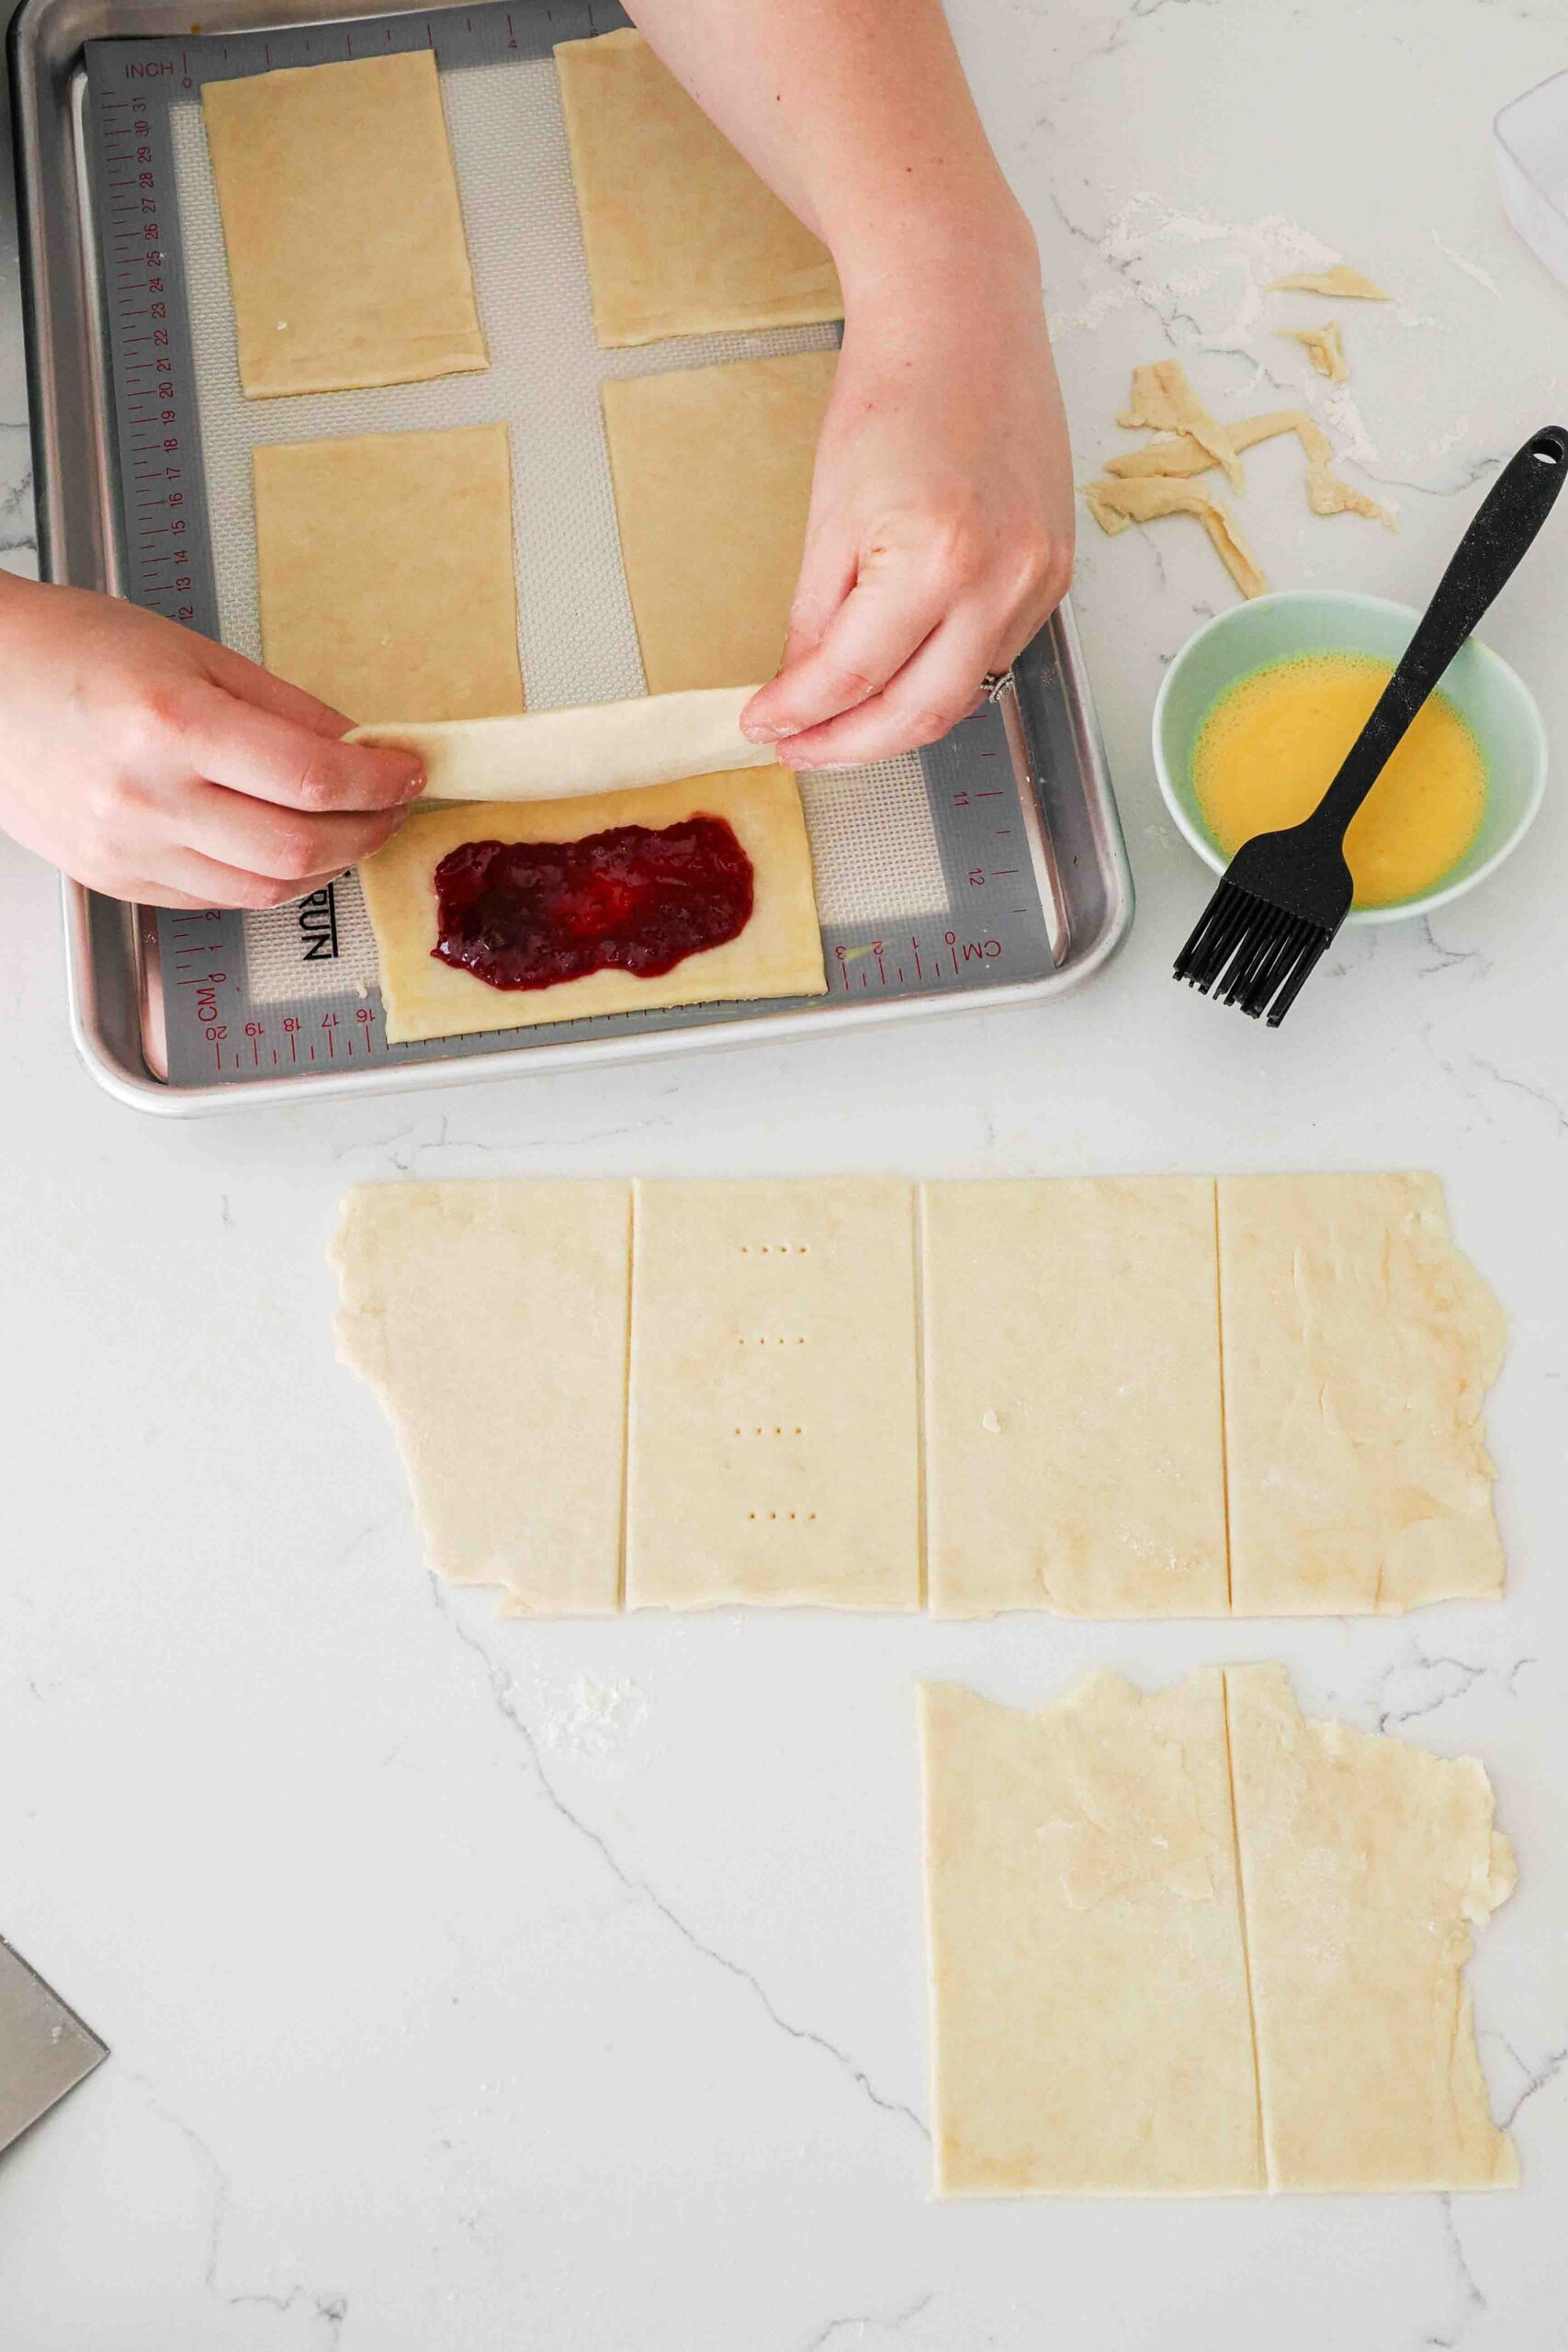
Use a fork to crimp the edges together. This will also help prevent the jam from spilling out while baking. Finally, brush lightly with the remaining egg wash, and bake for about 15 minutes at 400°F/205°C.
The homemade pop tarts are done when the top of the pastry is a deep golden brown and the bottom is a light golden brown. (If using a dark pan, the bottoms may get dark faster than the top—keep an eye on them just in case!)
Leave the pastries on the pan or transfer them to a wire rack to cool completely before frosting.

How to Make Two-Ingredient Cherry Icing
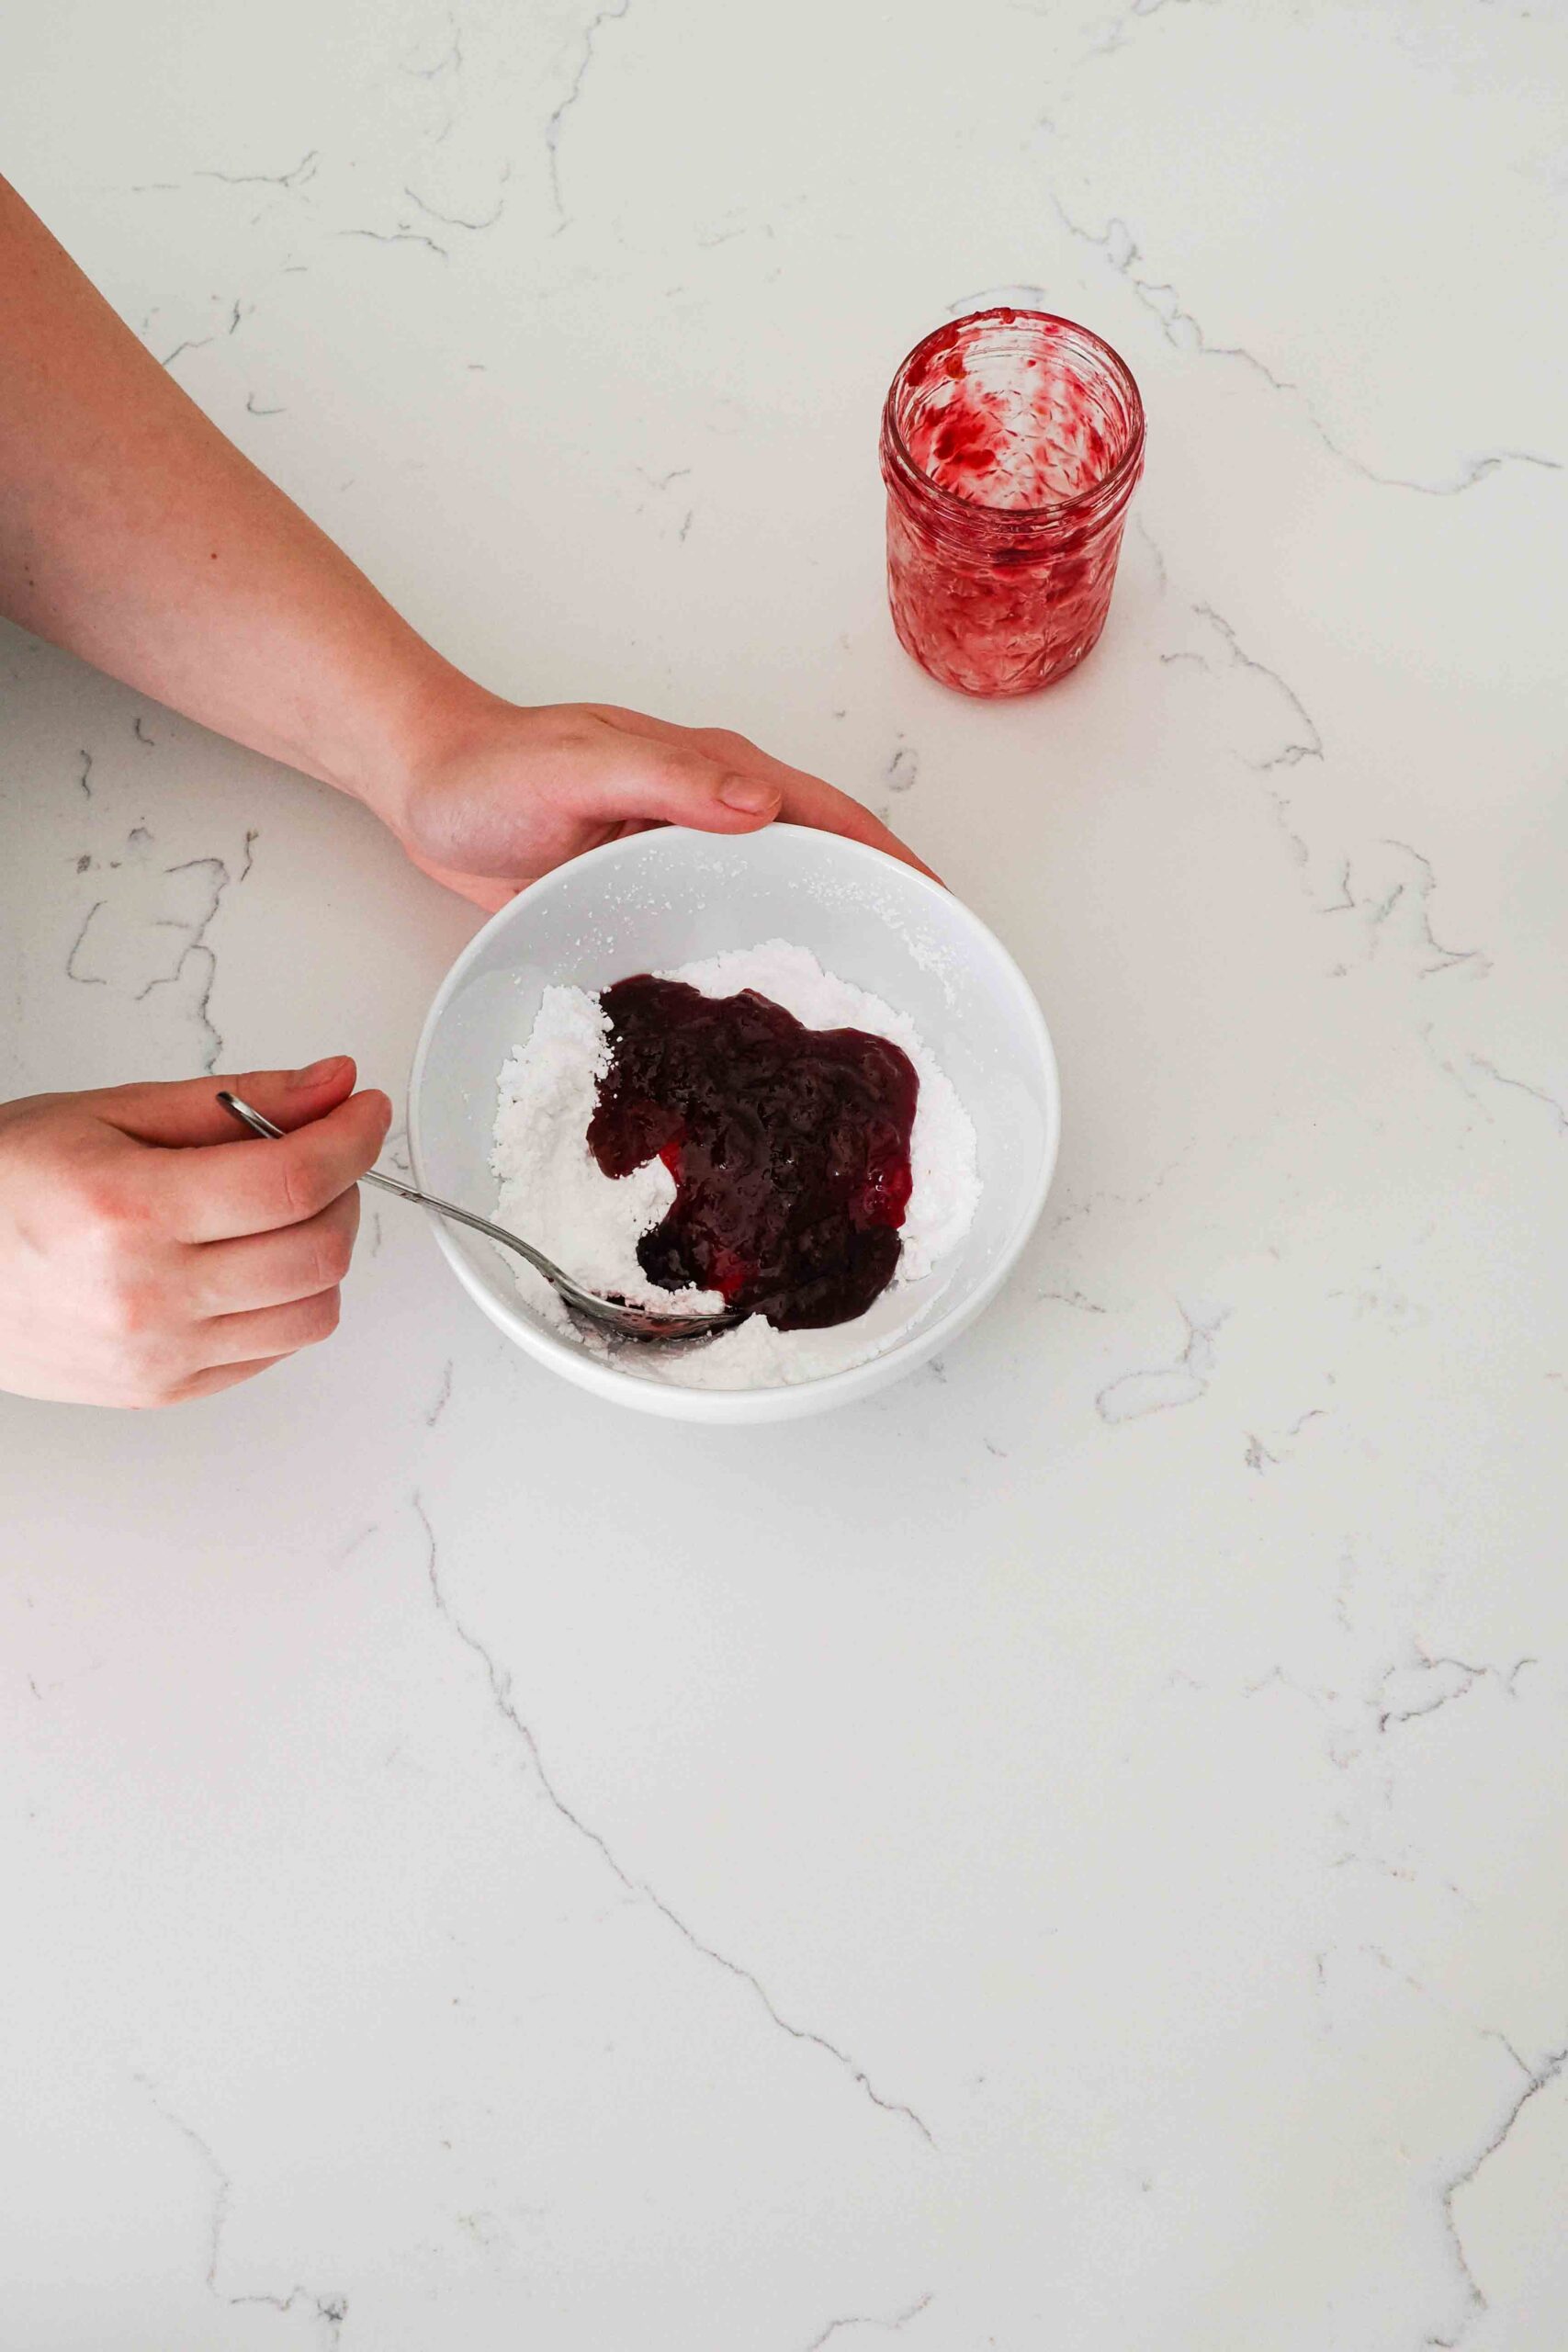
While the cherry breakfast pastries cool, stir together cherry jam and powdered sugar in a medium bowl until combined. That’s it! The flavor remains from the cherry jam, but the extra sugar helps to thicken and preserve it, making a perfect icing!
For the smoothest icing, I recommend sifting the powdered sugar first. You can get away without sifting the icing sugar if you use a spoon and are comfortable smashing down any clumps.
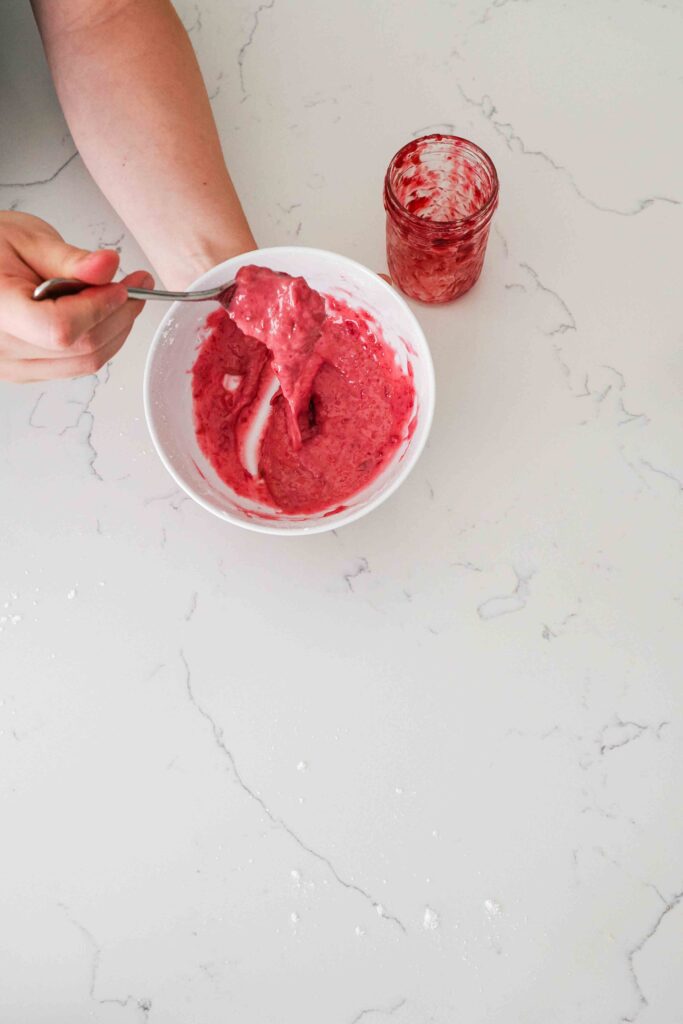
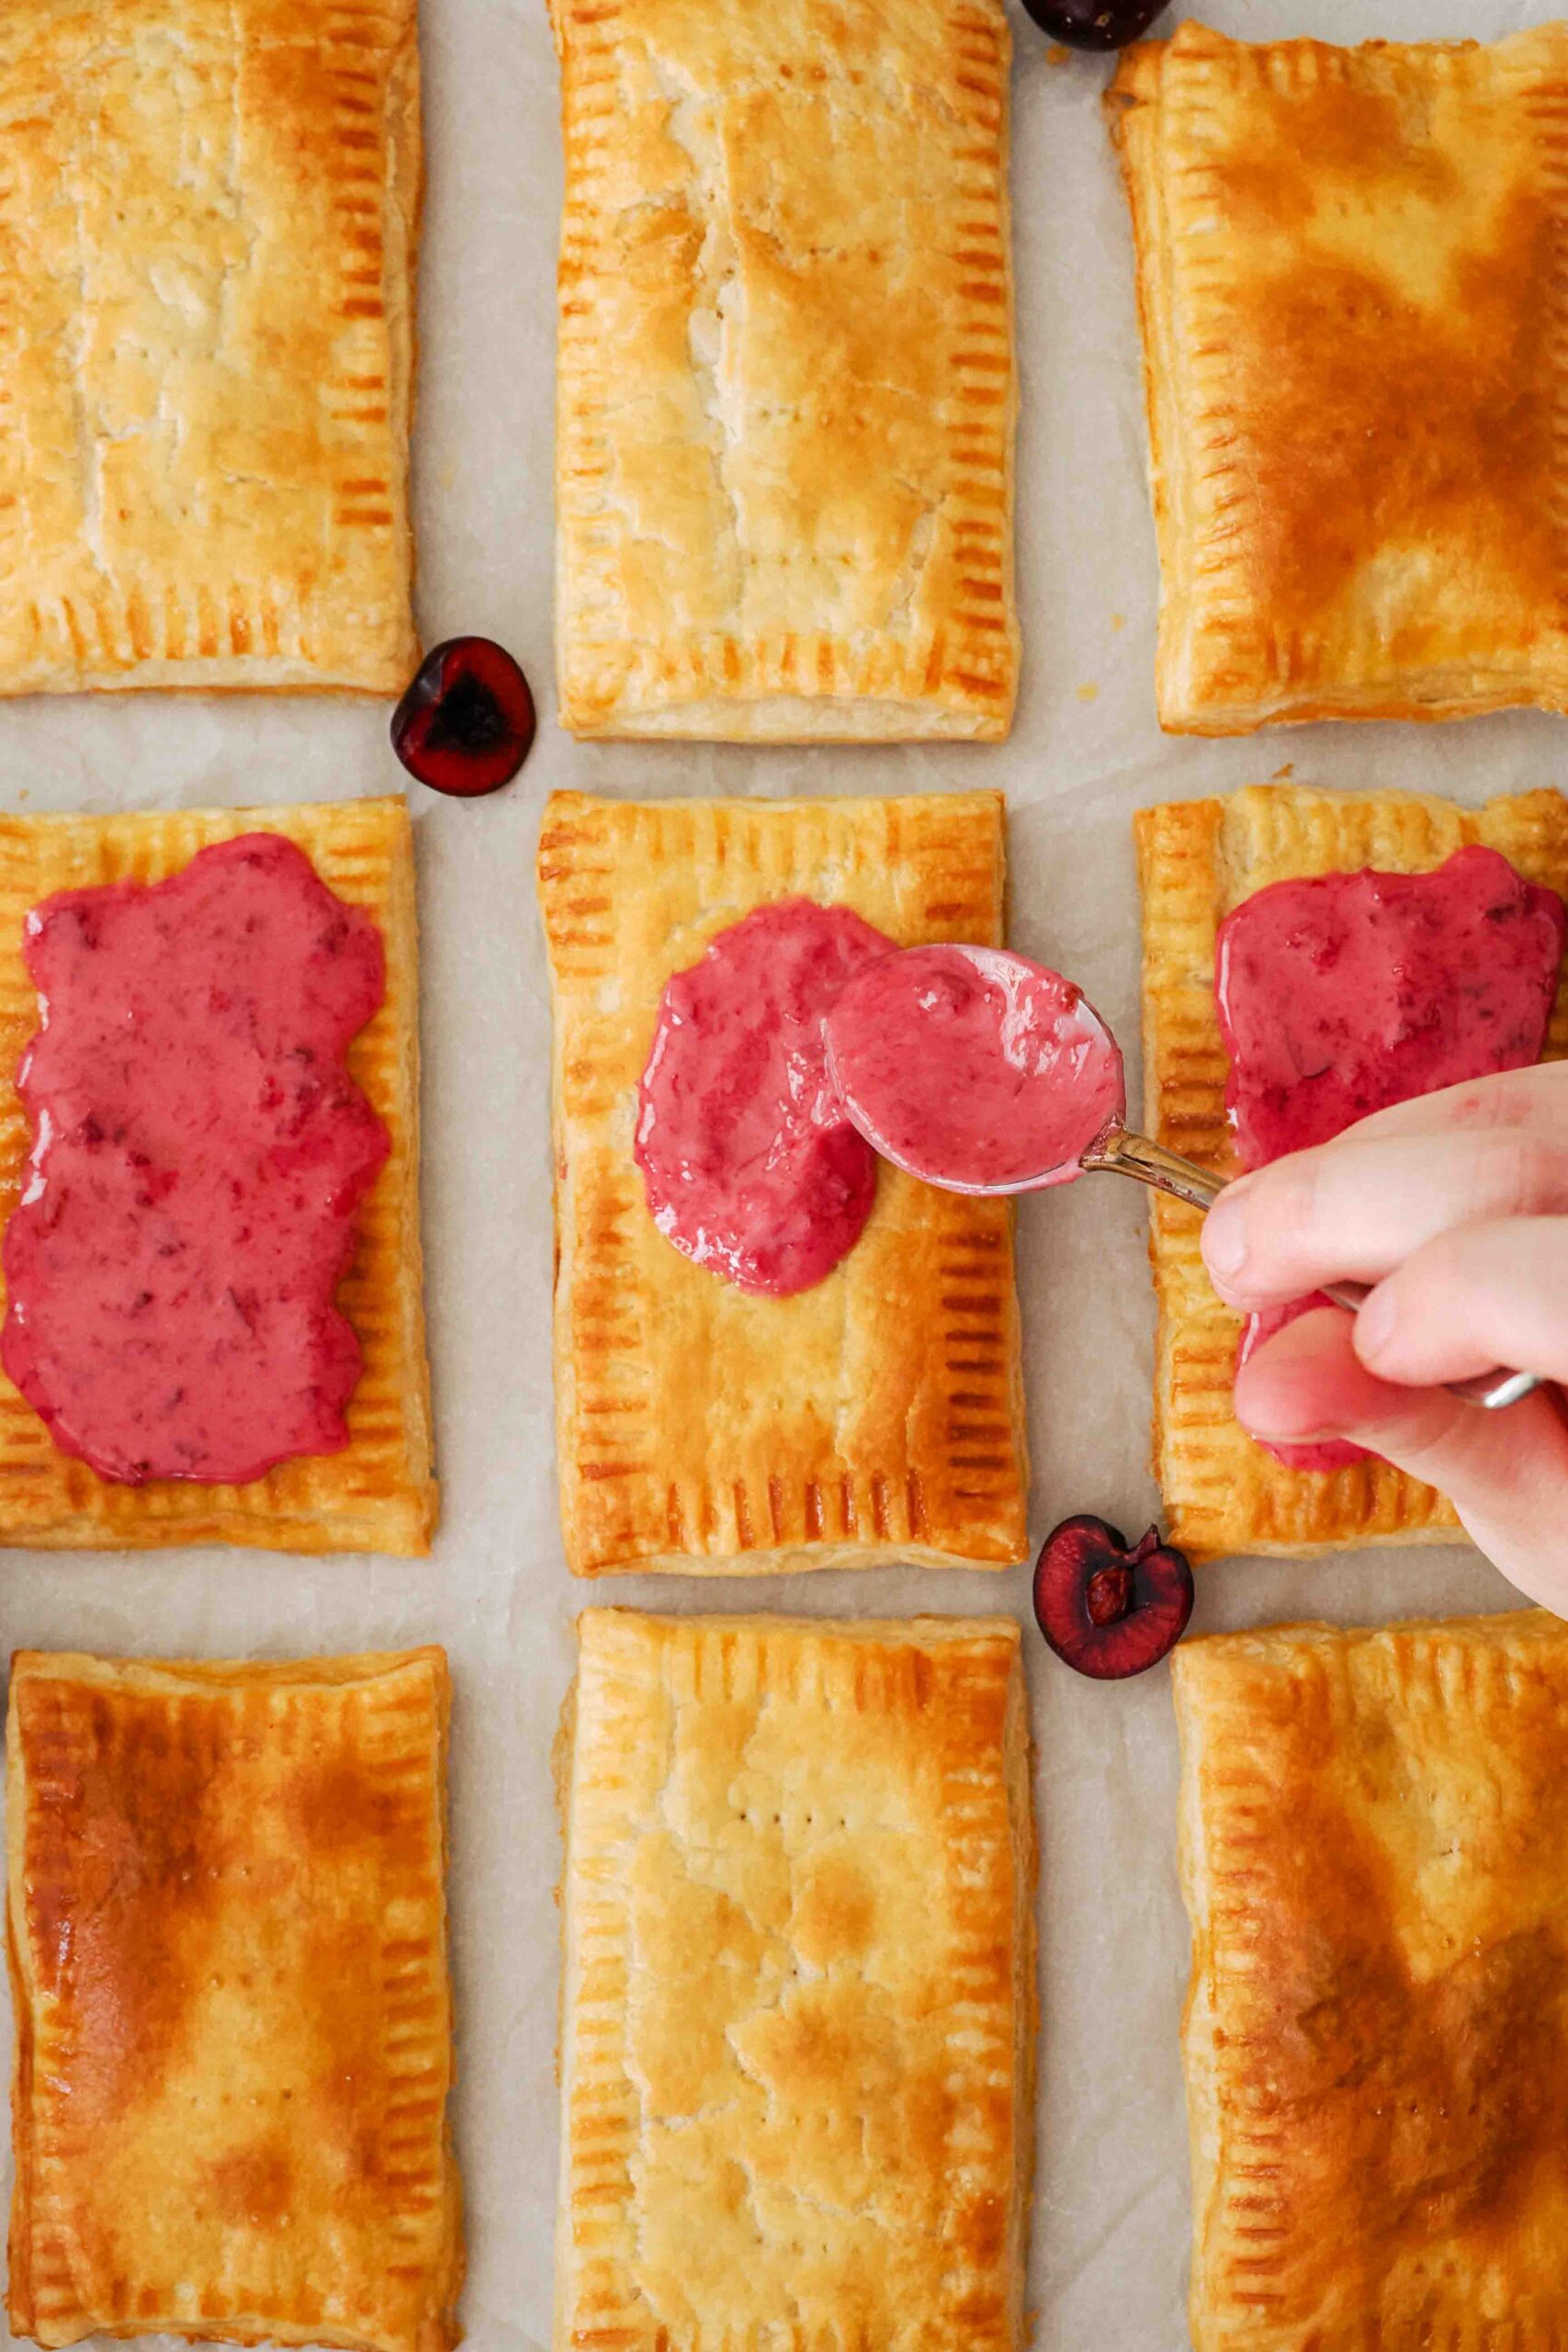
Once the pastries have cooled and are no longer warm to the touch, add a spoonful of the cherry frosting to the center of a homemade pop tart. Spread the icing over the top of the pastry with the back of the spoon, then allow to set for at least an hour, preferably two, before attempting to stack the pastries.
FAQs about Homemade Cherry Pop Tarts
They’re more similar to Pillsbury’s Toaster Strudels with all the flaky pastry layers, but it’s pretty common to see the homemade versions called Pop Tarts either way. You can make these less flaky (if you really want…) by using store bought pie crust rather than my flaky, all-butter vanilla pie crust.
The best way to store homemade, jam-filled pastries is covered at room temperature for up to three days, or in an airtight container in the freezer for up to three months. I don’t recommend storing these pastries in the fridge, as the flaky pastry can get a little soggy.
Yes! The cherry jam is sealed inside the pastry, and the cherry frosting has been preserved with extra sugar, so they are safe to eat within three days when stored at room temperature in an airtight container.
Yes! Simply use a vegan pastry, like store bought puff pastry, and plant-based milk rather than an egg wash.
Other Recipes You May Enjoy
If you’re craving cherry pie, these cherry pop tarts are a quick fix! But if you have cherries you want to use up, my cherry pie with almond extract is a reader favorite.
You will also love my mini cherry pies, which are individual cherry pies made in a muffin pan with a cute lattice top.
And if you’d rather eat ice cream than cherry pie, you can feel like you’re doing both with my custard-based black cherry ice cream and simple cherry pie ice cream recipes!
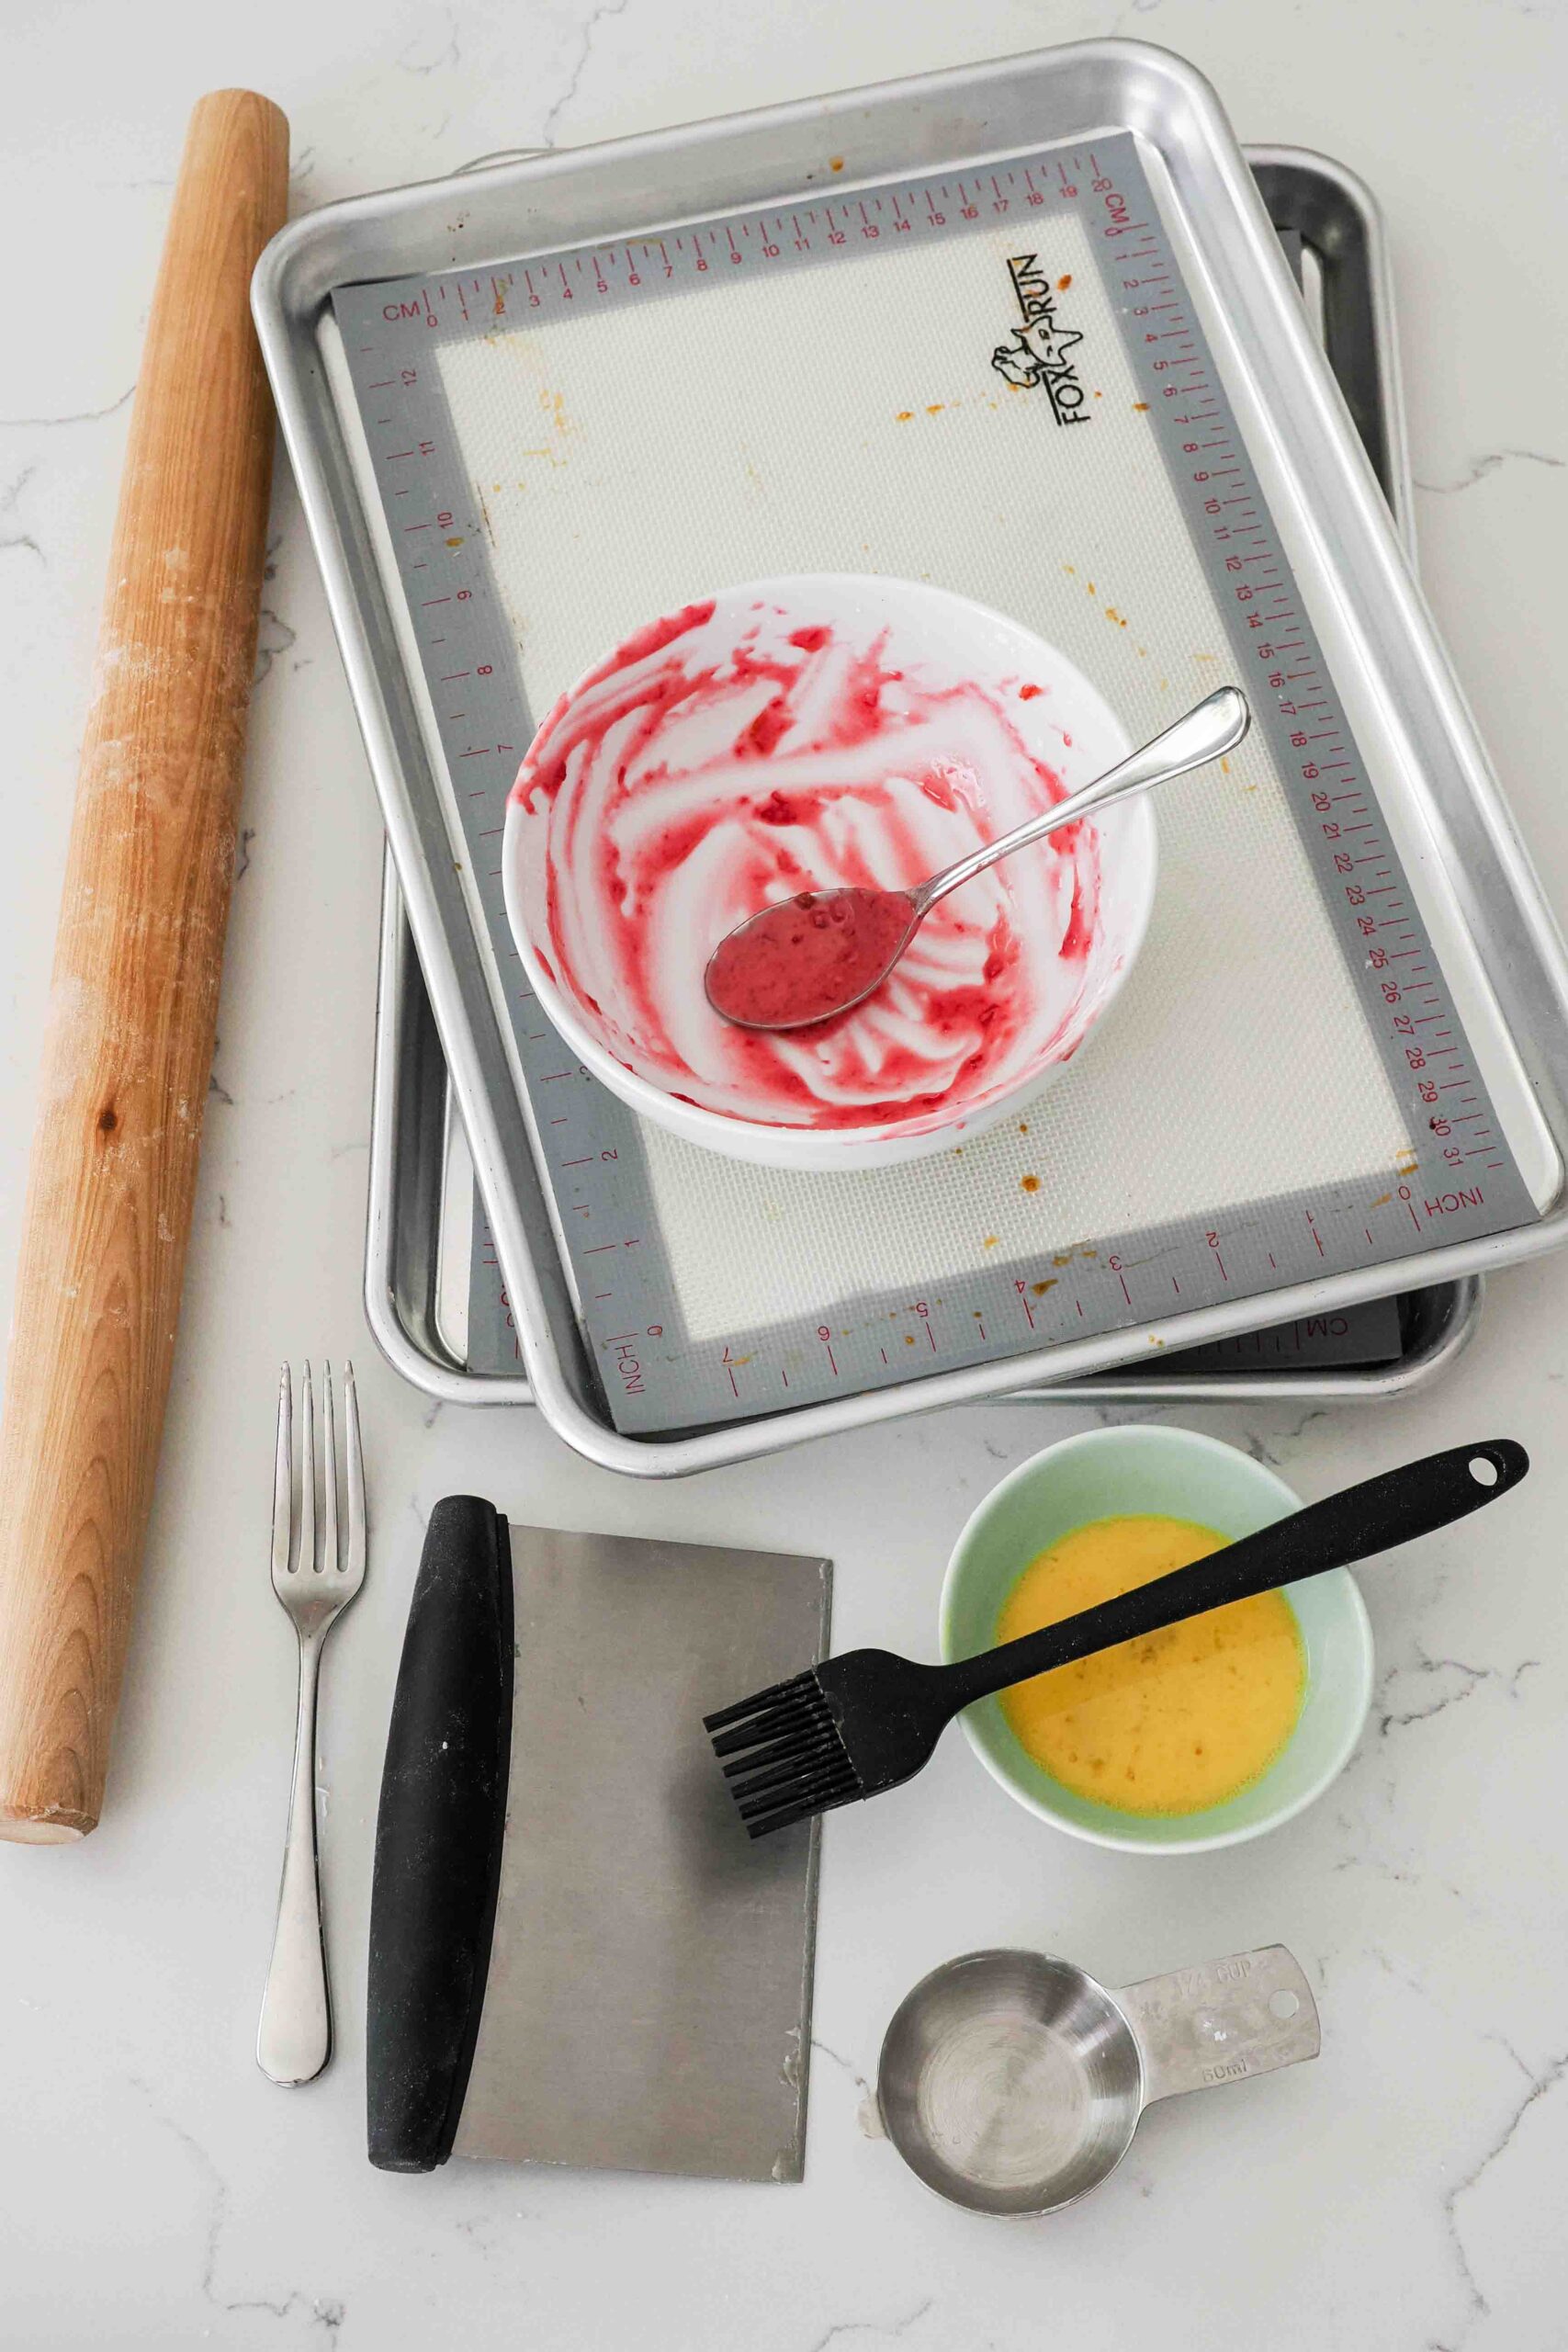
Dish Cleanup: A Lil Messy
I rate my recipe cleanups on a scale of 1 to 5. 1 is only a handful of dishes, and 5 is everything including the kitchen sink.
These homemade pop tarts with cherry jam have a cleanup rating of a 3. If you use larger baking sheets, you may be able to reduce the cleanup to a 2—I used smaller baking sheets that ended up getting some egg wash on the sides. Either way, you’re left with just a rolling pin, a few small bowls, a pastry brush, and pans. If the icing has dried onto the bowl before you get to the dishes, a quick 10-minute soak to dissolve the sugar does wonders!
Easy Homemade Cherry Toaster Strudels Recipe
Thanks so much for stopping by!
If you make these homemade cherry pop tarts and love them, please don’t forget to rate the recipe five stars.
Homemade Cherry Pop Tarts
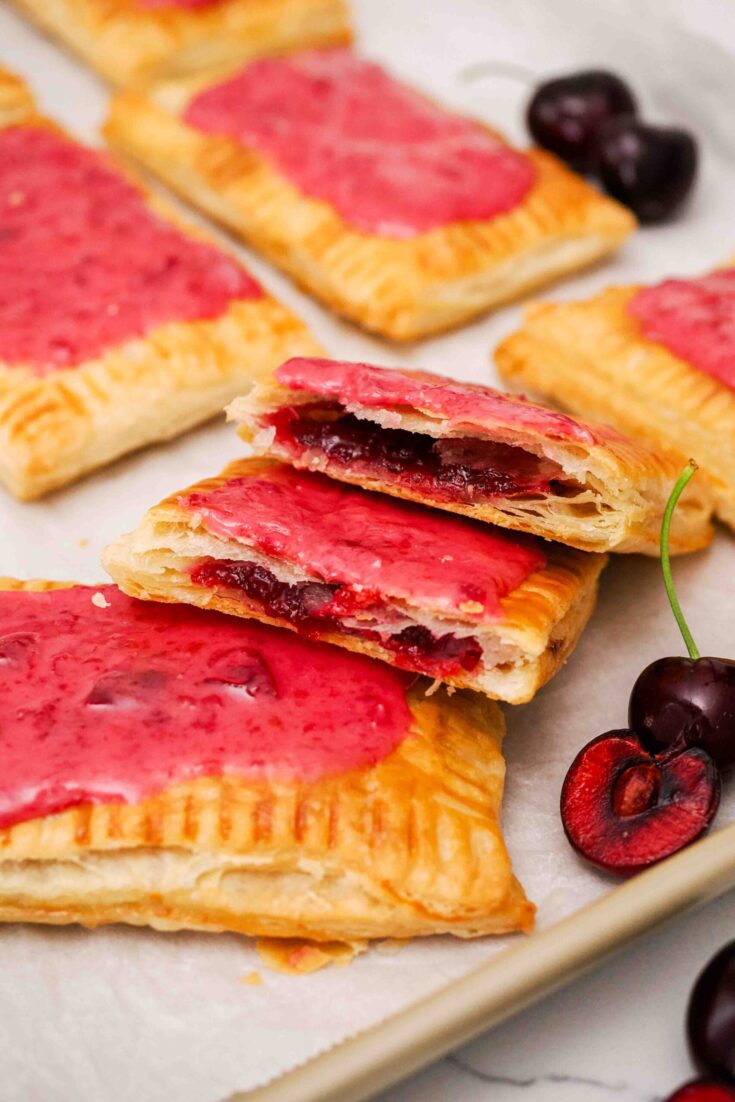
Naturally colored and made with just four ingredients, these homemade cherry Pop Tarts couldn't be easier to make—or eat! Cherry jam is sandwiched between flaky pie crust, then topped with an easy cherry frosting for a grown-up version of store bought classic.
Ingredients
- 2 pie crusts (store bought, or homemade for a flakier pastry)
- about 1 cup cherry jam, divided (240 ml)
- 1 large egg
- ¾ cup powdered sugar (90 g)
Instructions
Making the Cherry Pop Tarts
- Preheat the oven to 400°F/205°C.
- On a lightly floured surface, roll out one pie crust at a time to a rectangle about ⅛" (3 mm) thick.*
- Using a knife or pastry wheel, cut out 3" by 5" (8 cm by 13 cm) rectangles in the dough—usually about 10 from one pie crust with rerolling any scraps. Place half of the rectangles at least 2" (5 cm) apart on a baking sheet lined with parchment paper.
- Add a heaping teaspoon of cherry jam in the center of the dough. Spread it out a little, but keep the jam at least ½" (12 mm) away from the edges of the dough to prevent leaks.
- Whisk an egg with 1 teaspoon of water in a small bowl, then brush all four edges lightly with the egg wash.
- Poke the remaining dough rectangles with a fork 3-4 times to vent, then gently lay them on top of the jam-topped rectangles. Seal the sides by pressing down gently with your fingers, then use a fork to crimp the edges together. Brush each pastry lightly with egg wash.
- Bake for 13-17 minutes, until the tops of the pastries are a deep, golden brown. Remove from the oven and let cool in the pan.
Making the Cherry Frosting
- While the pies are cooling, mix together 3 Tablespoons of cherry jam with the powdered sugar.** The frosting should be bright pink and very thick. (If your jam has large pieces of cherries, consider straining them out for easier spreading.)
- Once the pies have cooled, top each pastry with about a teaspoon of the frosting, then allow the frosting to set for 1-2 hours.
Notes
*If using store bought pie crust, simply unroll the dough and skip to Step 3!
**If you want a thicker layer of frosting, mix together an additional Tablespoon of cherry jam and ¼ cup (30 g) of powdered sugar.
Store covered at room temperature for up to 3 days, or freeze for up to 3 months. I don't recommend refrigerating these pies, as the pie crust can be a little soggy straight from the fridge.
Recommended Products
As an Amazon Associate and member of other affiliate programs, I earn from qualifying purchases.
-
 Nordic Ware Natural Aluminum Commercial Baker's Half Sheet, 2-Pack, Silver
 -
OXO Stainless Steel Bench Scraper
-
Stainless Steel Ravioli/Pastry Wheel
-
Walfos Silicone Basting Pastry Brushes (2 Pcs)
-
J.K. Adams Maple Wood Baking and Pastry French Rolling Pin for Pizza, Pie, Cookie Dough Roller, and More, 20.5" long x 1.75" diameter (COOP-FP1)
-
Snapware Snap 'N Stack Portable Carrier with Lid for Desserts


Nutrition Information:
Yield:
10Serving Size:
1 hand pieAmount Per Serving: Calories: 285Total Fat: 9gSaturated Fat: 3gTrans Fat: 0gUnsaturated Fat: 6gCholesterol: 19mgSodium: 161mgCarbohydrates: 48gFiber: 1gSugar: 25gProtein: 3g
The nutrition facts are estimated and may vary based on specific ingredients used.
I’d love to see how your easy cherry hand pies turn out: Take a photo and tag me on Instagram @floralapronblog to share with me, or use the hashtag #floralapronbakes.