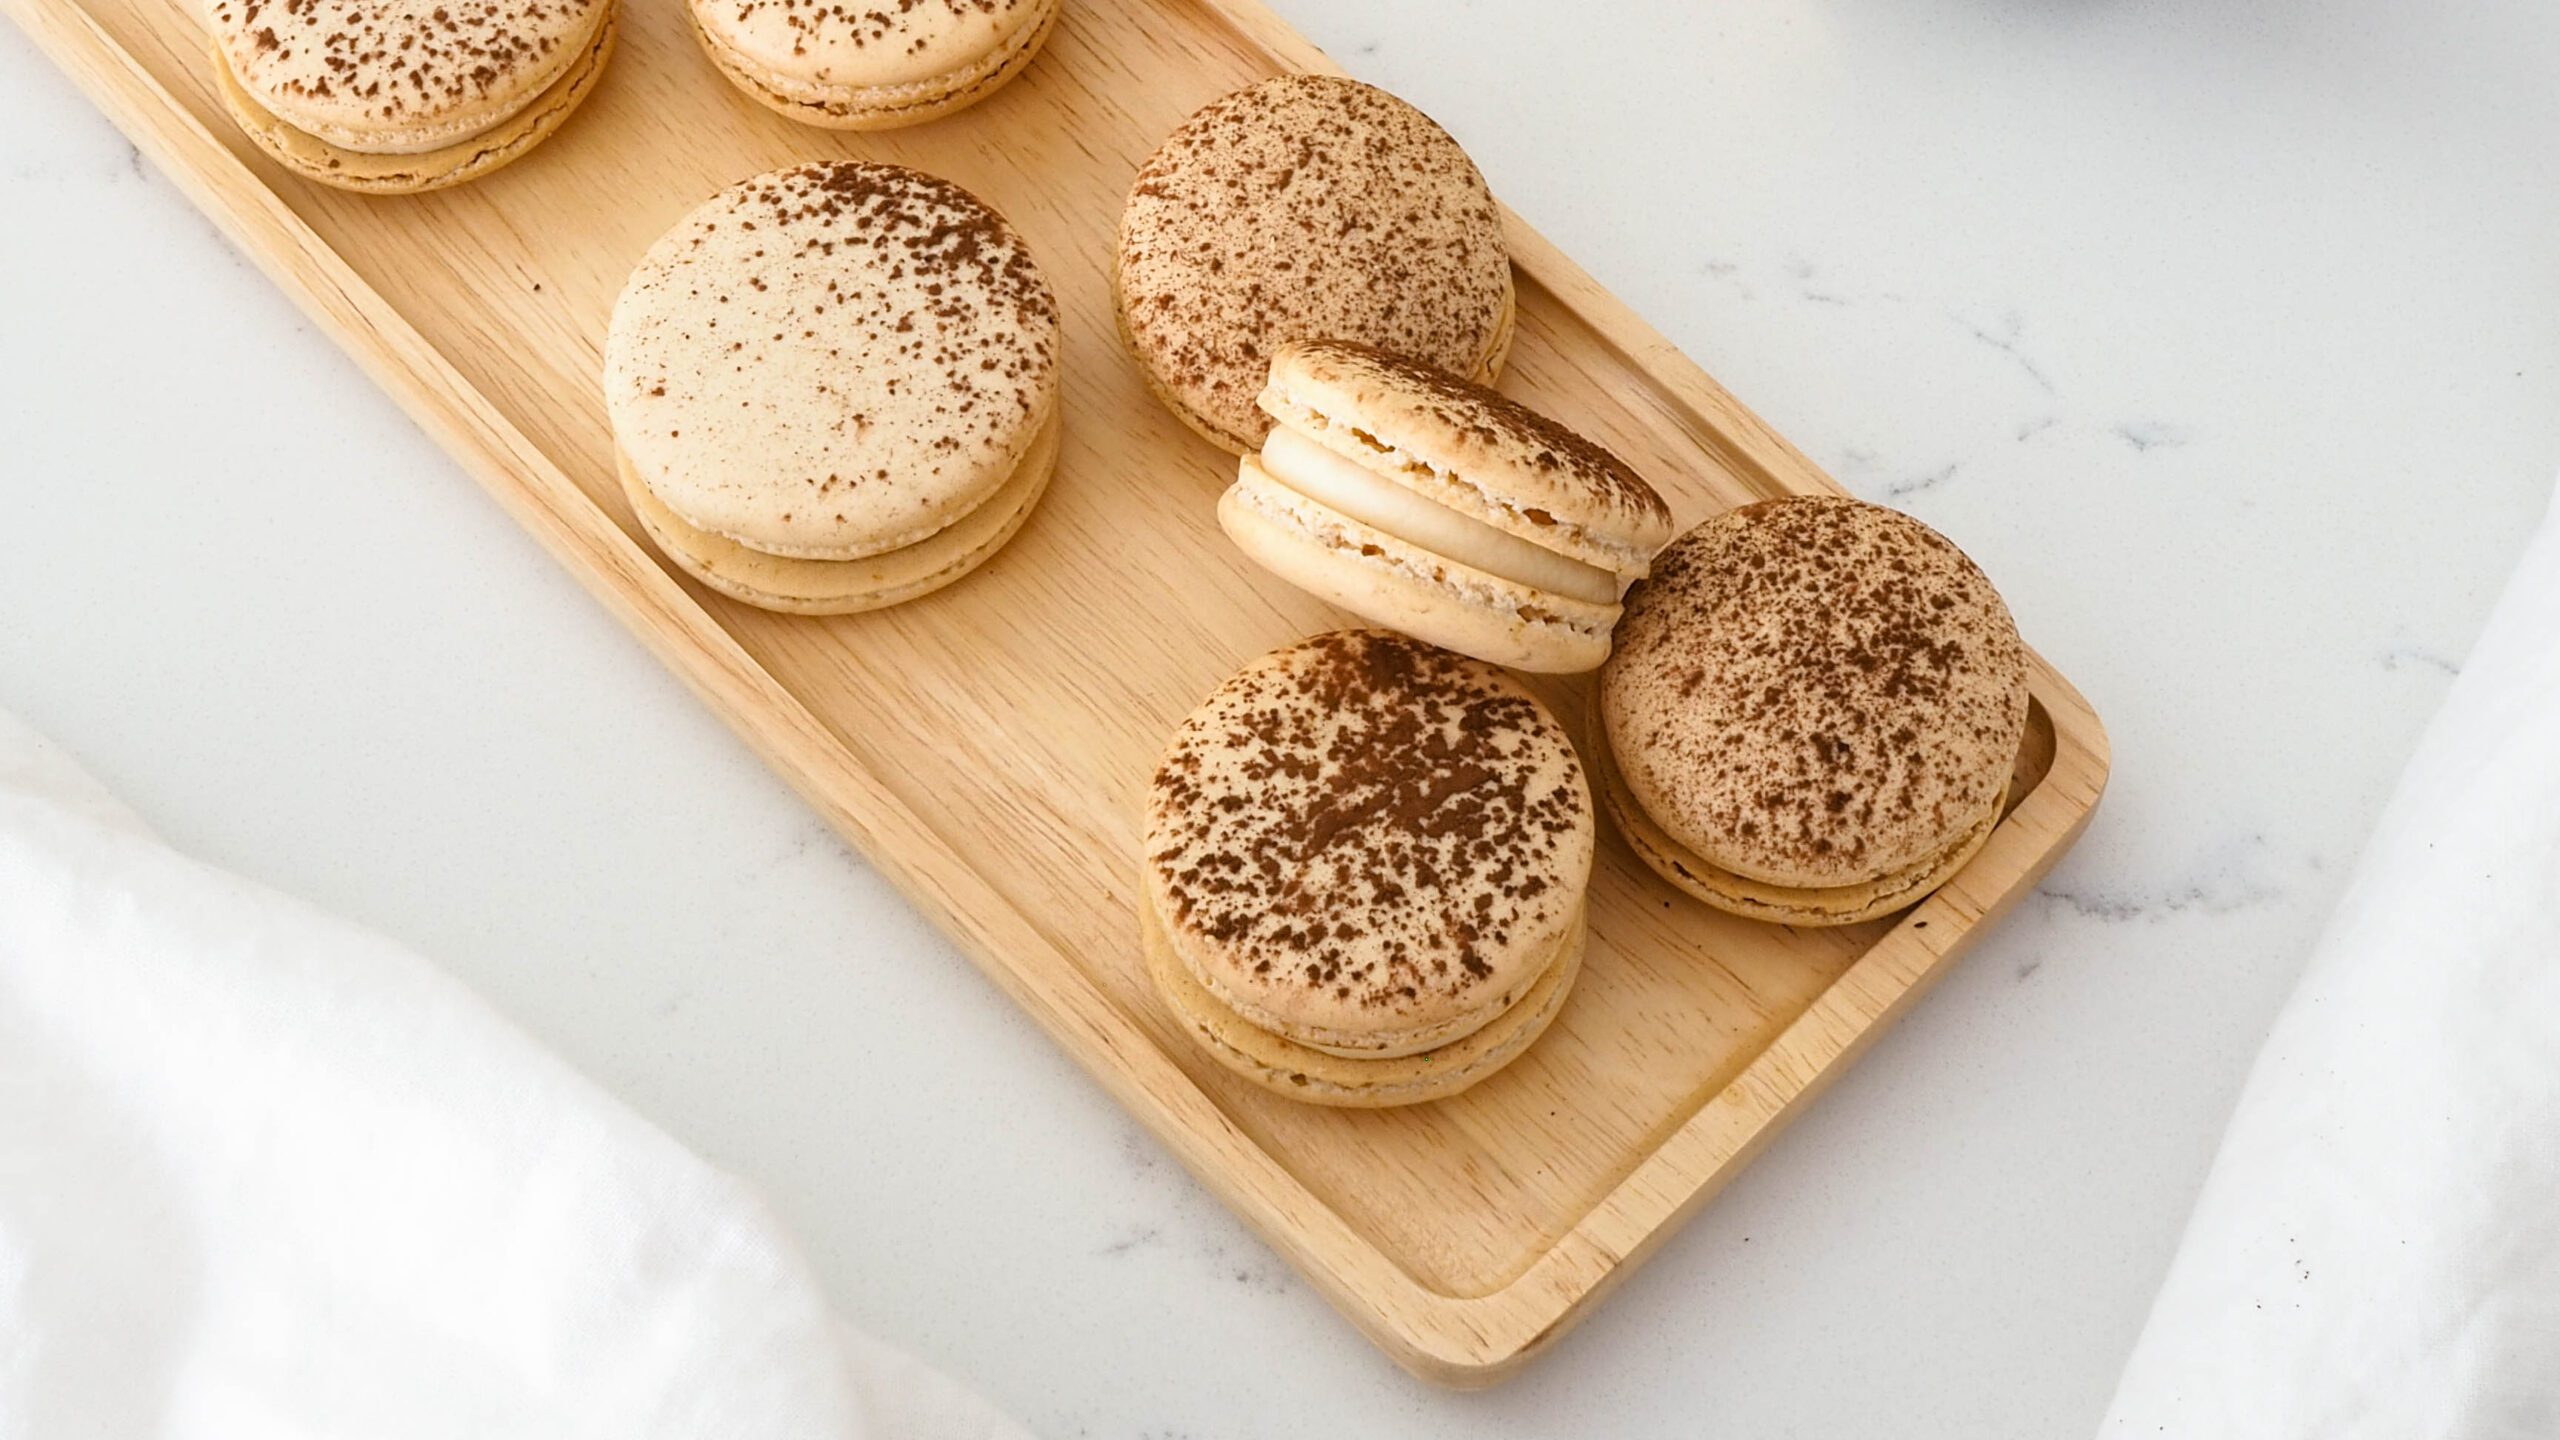
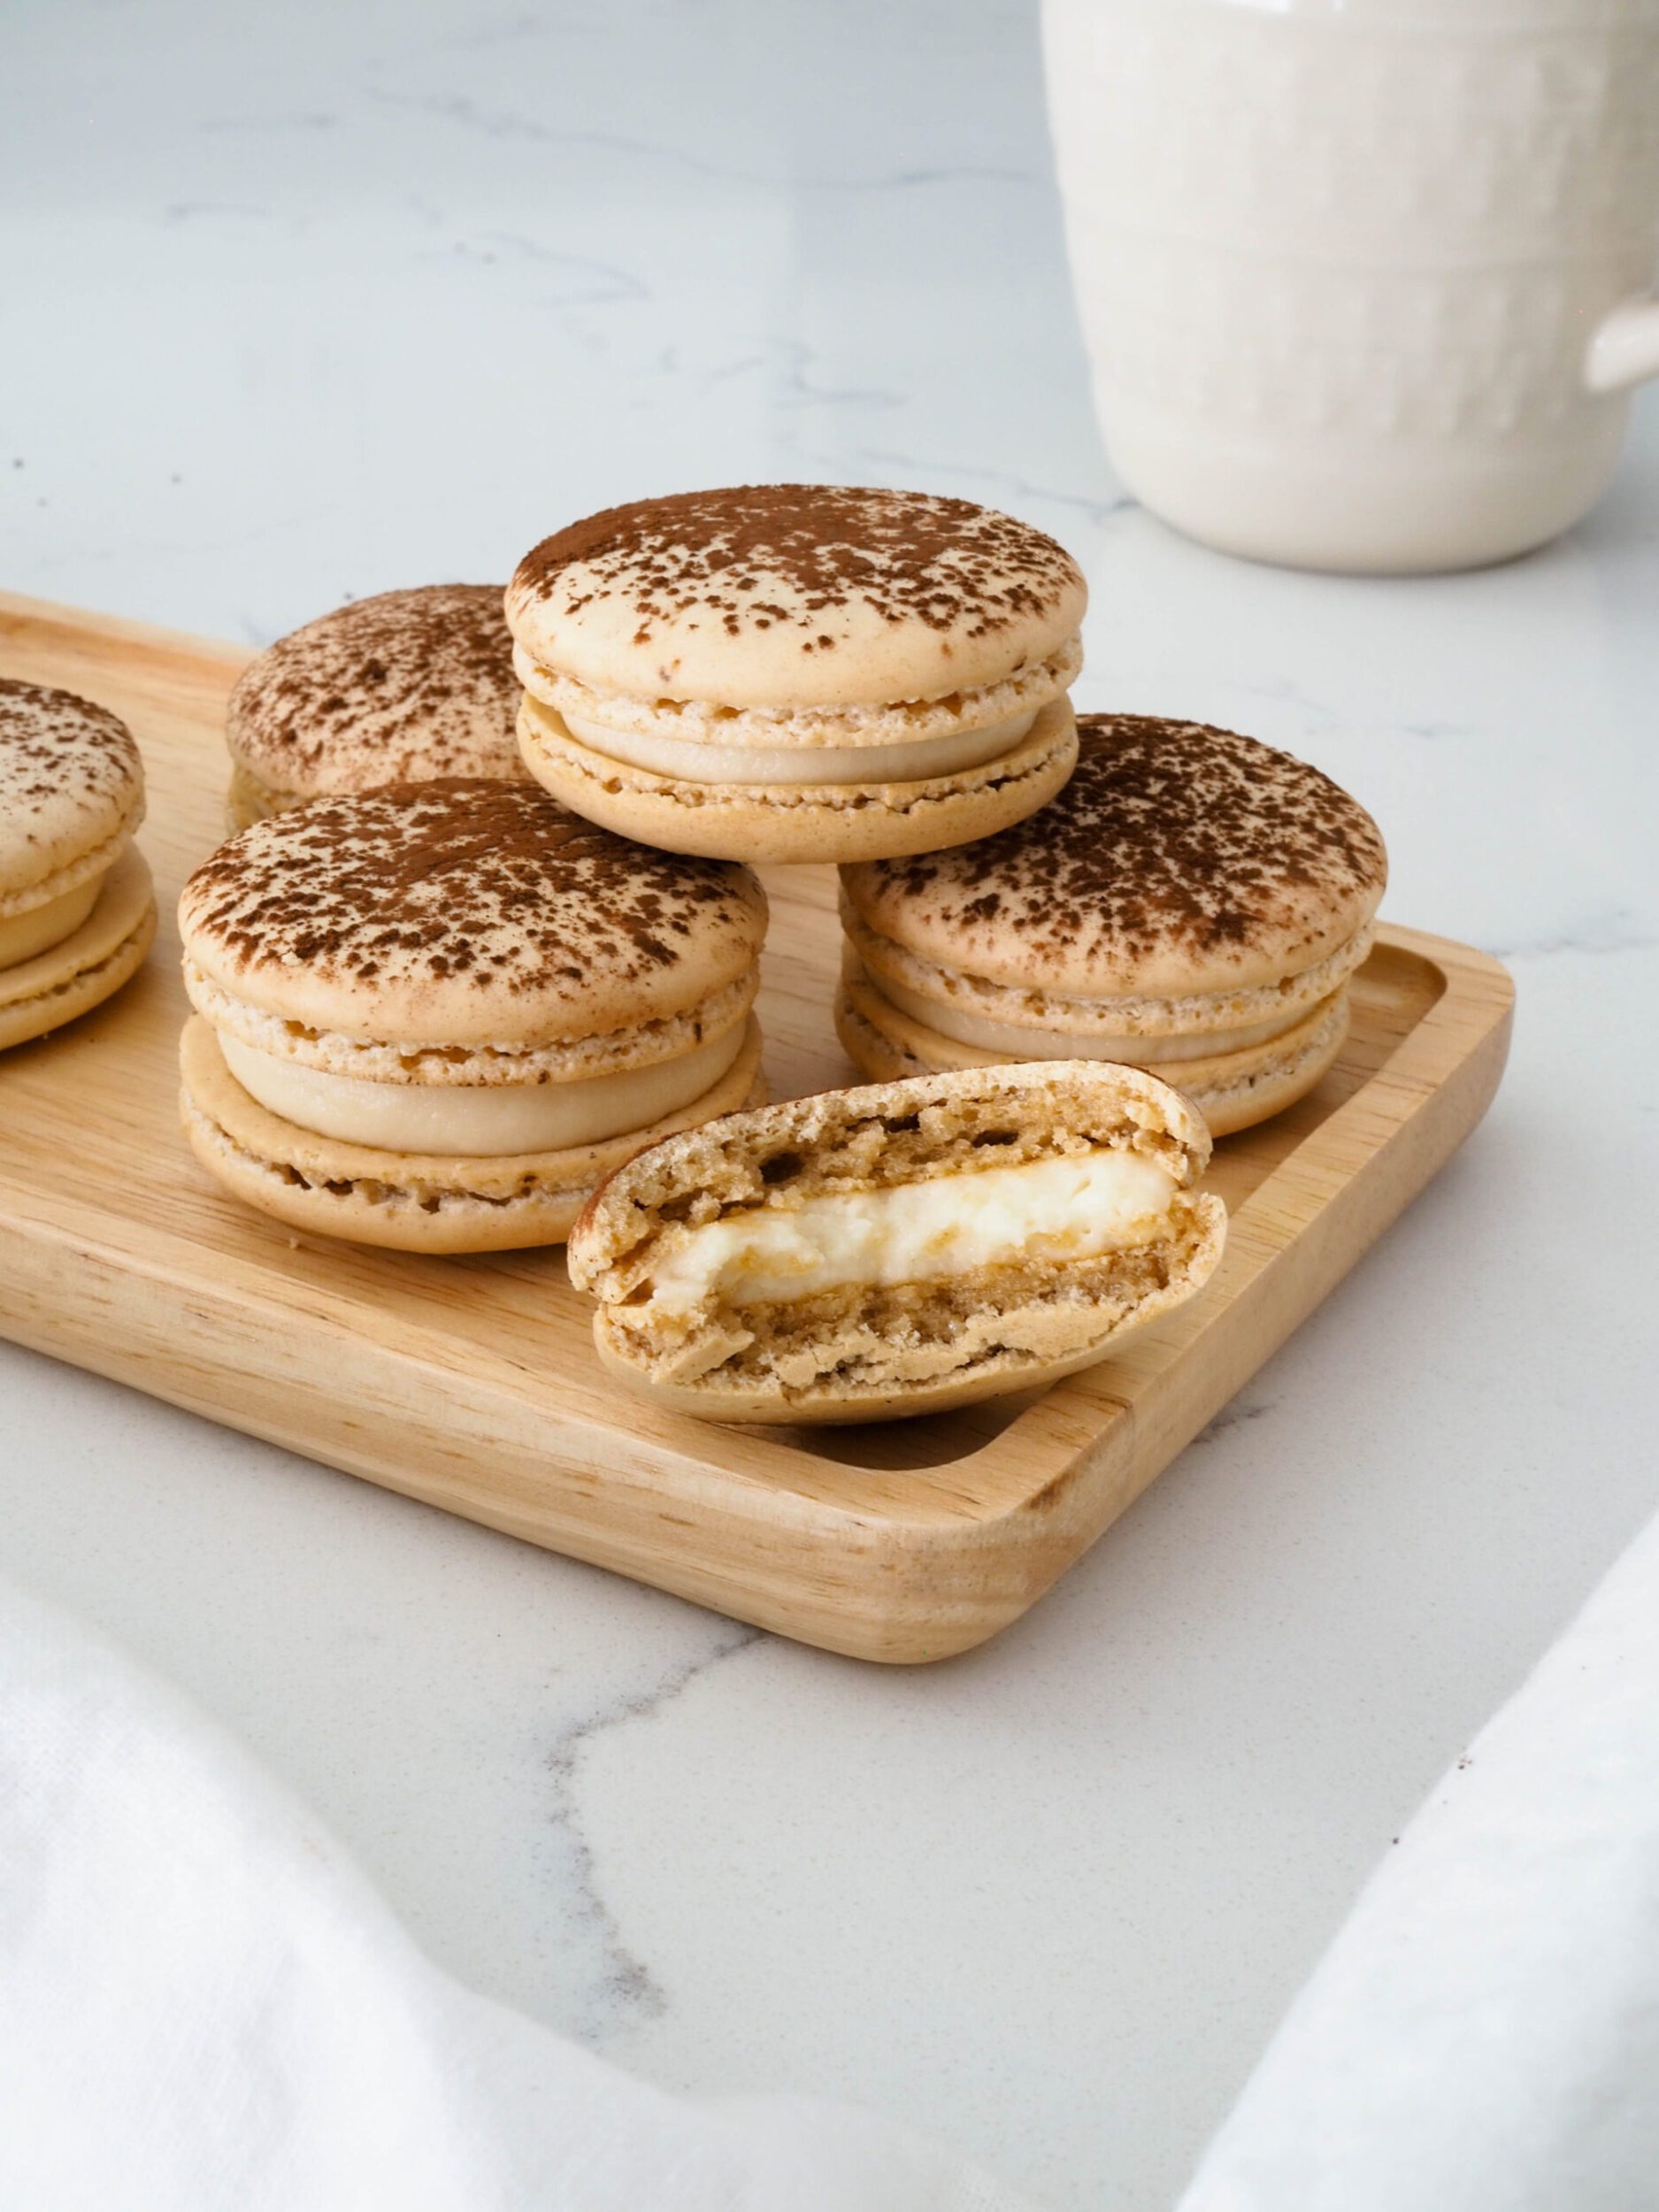
Espresso-flavored Swiss macarons meet a mascarpone and Kahlua filling that tastes exactly like tiramisu cream. The espresso powder doesn’t fully dissolve into the macaron batter, so it leaves behind subtle speckles that you can accentuate with a light dusting of cocoa powder on the top. This tiramisu macaron recipe tastes just like the real thing, but it doesn’t require a fork and plate to eat, which makes it perfect for parties and get togethers with finger foods.

Ingredients for Tiramisu Macarons
As far as desserts go, basic macarons are one of the few with only a handful of ingredients. This Swiss macaron recipe is pretty basic, with additional espresso powder and cocoa powder.
- Egg whites—be sure to use fresh egg whites, as carton egg whites typically won’t whip into a meringue!
- Granulated sugar
- Almond flour
- Powdered sugar
- Espresso powder—not instant coffee
- Cocoa powder (optional)
- Mascarpone—straight from the fridge and cold!
- Kahlua or coffee liqueur
- Vanilla extract
- Heavy cream—straight from the fridge and cold!
Are Macarons Hard to Make?
Yes and no. Macarons are notoriously finicky creatures, as there are a lot of variables that can change the outcome of your meringue cookie. It can take quite a few tries before you get a perfect batch of macarons.
The good news? Once you figure out the correct set of variables for your kitchen, macarons are one of the easiest recipes to make!
If you’re new to making macarons and are nervous to start, I would recommend making my ladyfingers recipe first. The steps are similar to macarons but the batter is far more forgiving. It’s a great stepping stone that gets you familiar with the process of making macarons but without as much frustration.
Quick Tips for Prepping Tiramisu Macarons
The most important thing to remember is that macarons are finicky. Even if they don’t look perfect (they’ve cracked or don’t have super tall feet), they’ll still taste great!
Do I Need to Weigh the Ingredients for Tiramisu Macarons?
This is the second macaron recipe I’ve posted with volumetric measurements (cups), though I always make it according to the mass (weight) measurements. Please make sure to spoon and level your almond flour and powdered sugar into the measuring cups instead of packing them in straight from the bag. That makes a huge difference in the overall quantity of ingredients!
But if you’ve been wanting a kitchen scale and need an excuse to buy one, I have this kitchen scale from OXO and love it.
Do I Need to Dust Cocoa Powder over the Tops of the Macaron Shells before Baking?
I think the cocoa powder makes these macarons instantly recognizable as tiramisu macarons, but if you don’t want the cocoa powder on top, feel free to leave it off.
To prevent an excess of cocoa powder in my mouth when eating these, I only dust one pan of macarons (the ones that will go on top) before they go in the oven. The cocoa powder also helps dry out the tops, which can help prevent cracking.
Use Cold Ingredients for the Tiramisu Filling
Generally, room-temperature ingredients are recommended when baking. This recipe is an exception.
Your mascarpone and heavy cream should stay in the fridge until immediately before you start making the filling. Mascarpone is prone to curdling if it gets too warm, and it also curdles if it has too much air beaten into it. Heavy cream whips up much faster when it’s cold (in less than half the time), so use that to your advantage!
Beat together your mascarpone, coffee liqueur, and extract until just barely combined, and do the same with the powdered sugar. Then, stream in your cold heavy cream and beat for 2-3 minutes until the filling is thick enough to pipe.
(You’ll feel like you’ve added too much heavy cream, but it comes together with time. Promise!)
Can I Make the Tiramisu Filling Thicker?
Yes, you can! I love the creaminess of this filling, but if you want it to be more like a buttercream, add an extra 1/2 cup of powdered sugar. That will thicken it up and prevent the macarons from absorbing too much extra moisture (making them last a little longer before they go soggy).
What’s the Difference between French and Swiss Meringue?
These tiramisu macarons are made with a Swiss meringue, which is more stable than a French meringue.
French meringue is made from raw egg whites and granulated sugar whisked together at room temperature. The sugar to egg white ratio is usually around 1:2 or even up to 2:1. It’s known as the least stable meringue, but it’s also the least fussy to make. (There’s probably a correlation there.) My French macaron recipe contains half the weight of sugar as egg whites.
Swiss meringue is made from raw egg whites and granulated sugar but is first heated to dissolve the sugar and then whisked together at room temperature. The sugar to egg white ratio is usually about 1:1. Both Swiss and Italian meringues are more stable than French meringues.
Why Does Dissolving the Sugar Result in a More Stable Meringue?
Imagine playing kids “crack the egg” on a trampoline. A child rolls up into a ball and holds her body tight to prevent from “breaking open” while other kids jump on the trampoline around her. Eventually, the bouncing and jostling eventually is too much for the child, and the child opens her arms or her legs slip out of the ball, like an egg that’s been cracked open.
That’s essentially what happens with the protein inside an egg white. Once the amino acid chains have been jostled or heated enough, they unfurl and bond with other amino acids (or even the air itself). Those bonds trap the air and water particles in place, creating volume in the egg whites.
When whisking egg whites, you’re beating tiny particles of air into the egg white. With heating, the amino acid chains unfurl and begin to bond with other amino acids. But by beating air into the egg white, you’re also trapping little particles of air inside those bonds, which adds volume to the egg whites.
Over time, these bonds begin to break. By adding a stabilizer (in this case, sugar), you prolong the time it will take for the bonds to break. The higher the sugar ratio, generally, the more stable your meringue. And the more stable your meringue, the longer it will take to break down.
If you’re still intrigued, here’s a short article talking all about the science of eggs.
Do Macarons Made from Swiss Meringue Have Hollows?
In my experience, macarons made with Swiss meringue are typically fuller than macarons made with French meringue.
If your macarons are perfect except for a slightly hollow center, try changing up the recipe for your meringue. Adding more sugar to a French meringue can help stabilize it just long enough for the macarons to dry and bake without the meringue breaking down too much.
The Perfect Macaron Batter Consistency
Macaron batter needs to be a certain consistency in order to develop feet. The consistency and process is so important that it has its own name: “macaronage.”
Many beginner macaron makers think of macaronage as an end result, when it’s really a process.
Macaronage as a Process
The egg whites start out as liquid with no air in them. Then you whisk a lot of tiny air bubbles into the egg whites to form a meringue. You have added so much air into the egg whites that now they essentially function as a solid instead of a liquid.
Then, you fold in almond flour and powdered sugar. As you fold the batter with a spatula, you are knocking the air out of the meringue. That helps to transform our previously solid meringue back into a liquid batter. The more folds you give the batter, the more liquid the batter becomes. (My husband says this is called viscosity, but that’s a bit technical.)
The perfect consistency of macaron batter will look grainy as it flows off the spatula in one long, stacking ribbon. Then, it will begin to absorb back into the rest of the batter (within 10-15 seconds) and will leave a smooth and shiny surface.
If your batter takes more than 15 seconds to absorb, you need to knock a little more air out of the meringue. If your batter takes closer to 5 seconds to absorb, it’s likely overmixed; however, it will probably still turn out decent macarons. Unfortunately, if your batter absorbs immediately, there is not enough air left in the meringue to form proper macarons. I recommend starting over.
Recommended Supplies for Making Tiramisu Macarons
Each oven and home varies, so while these supplies are the cream of the crop when it comes to making macarons, you may find something that works better for you in your home.
In my old house and old oven, I could use a dark nonstick pan and parchment paper on top of silicone macaron mats with no issues. In my new house and new oven, I have to use aluminum pans with silicone macaron mats (affiliate links).
I still use parchment paper from time to time, but my macarons tend to bleed a little on parchment paper. I’m particular about how circular my macarons are, so I stick to silicone mats.
If you are following all the steps and your macarons still aren’t consistent after three batches, I would look into your supplies. Try changing one variable at a time to determine what the problem is.
Dish Cleanup: Gonna Take a While
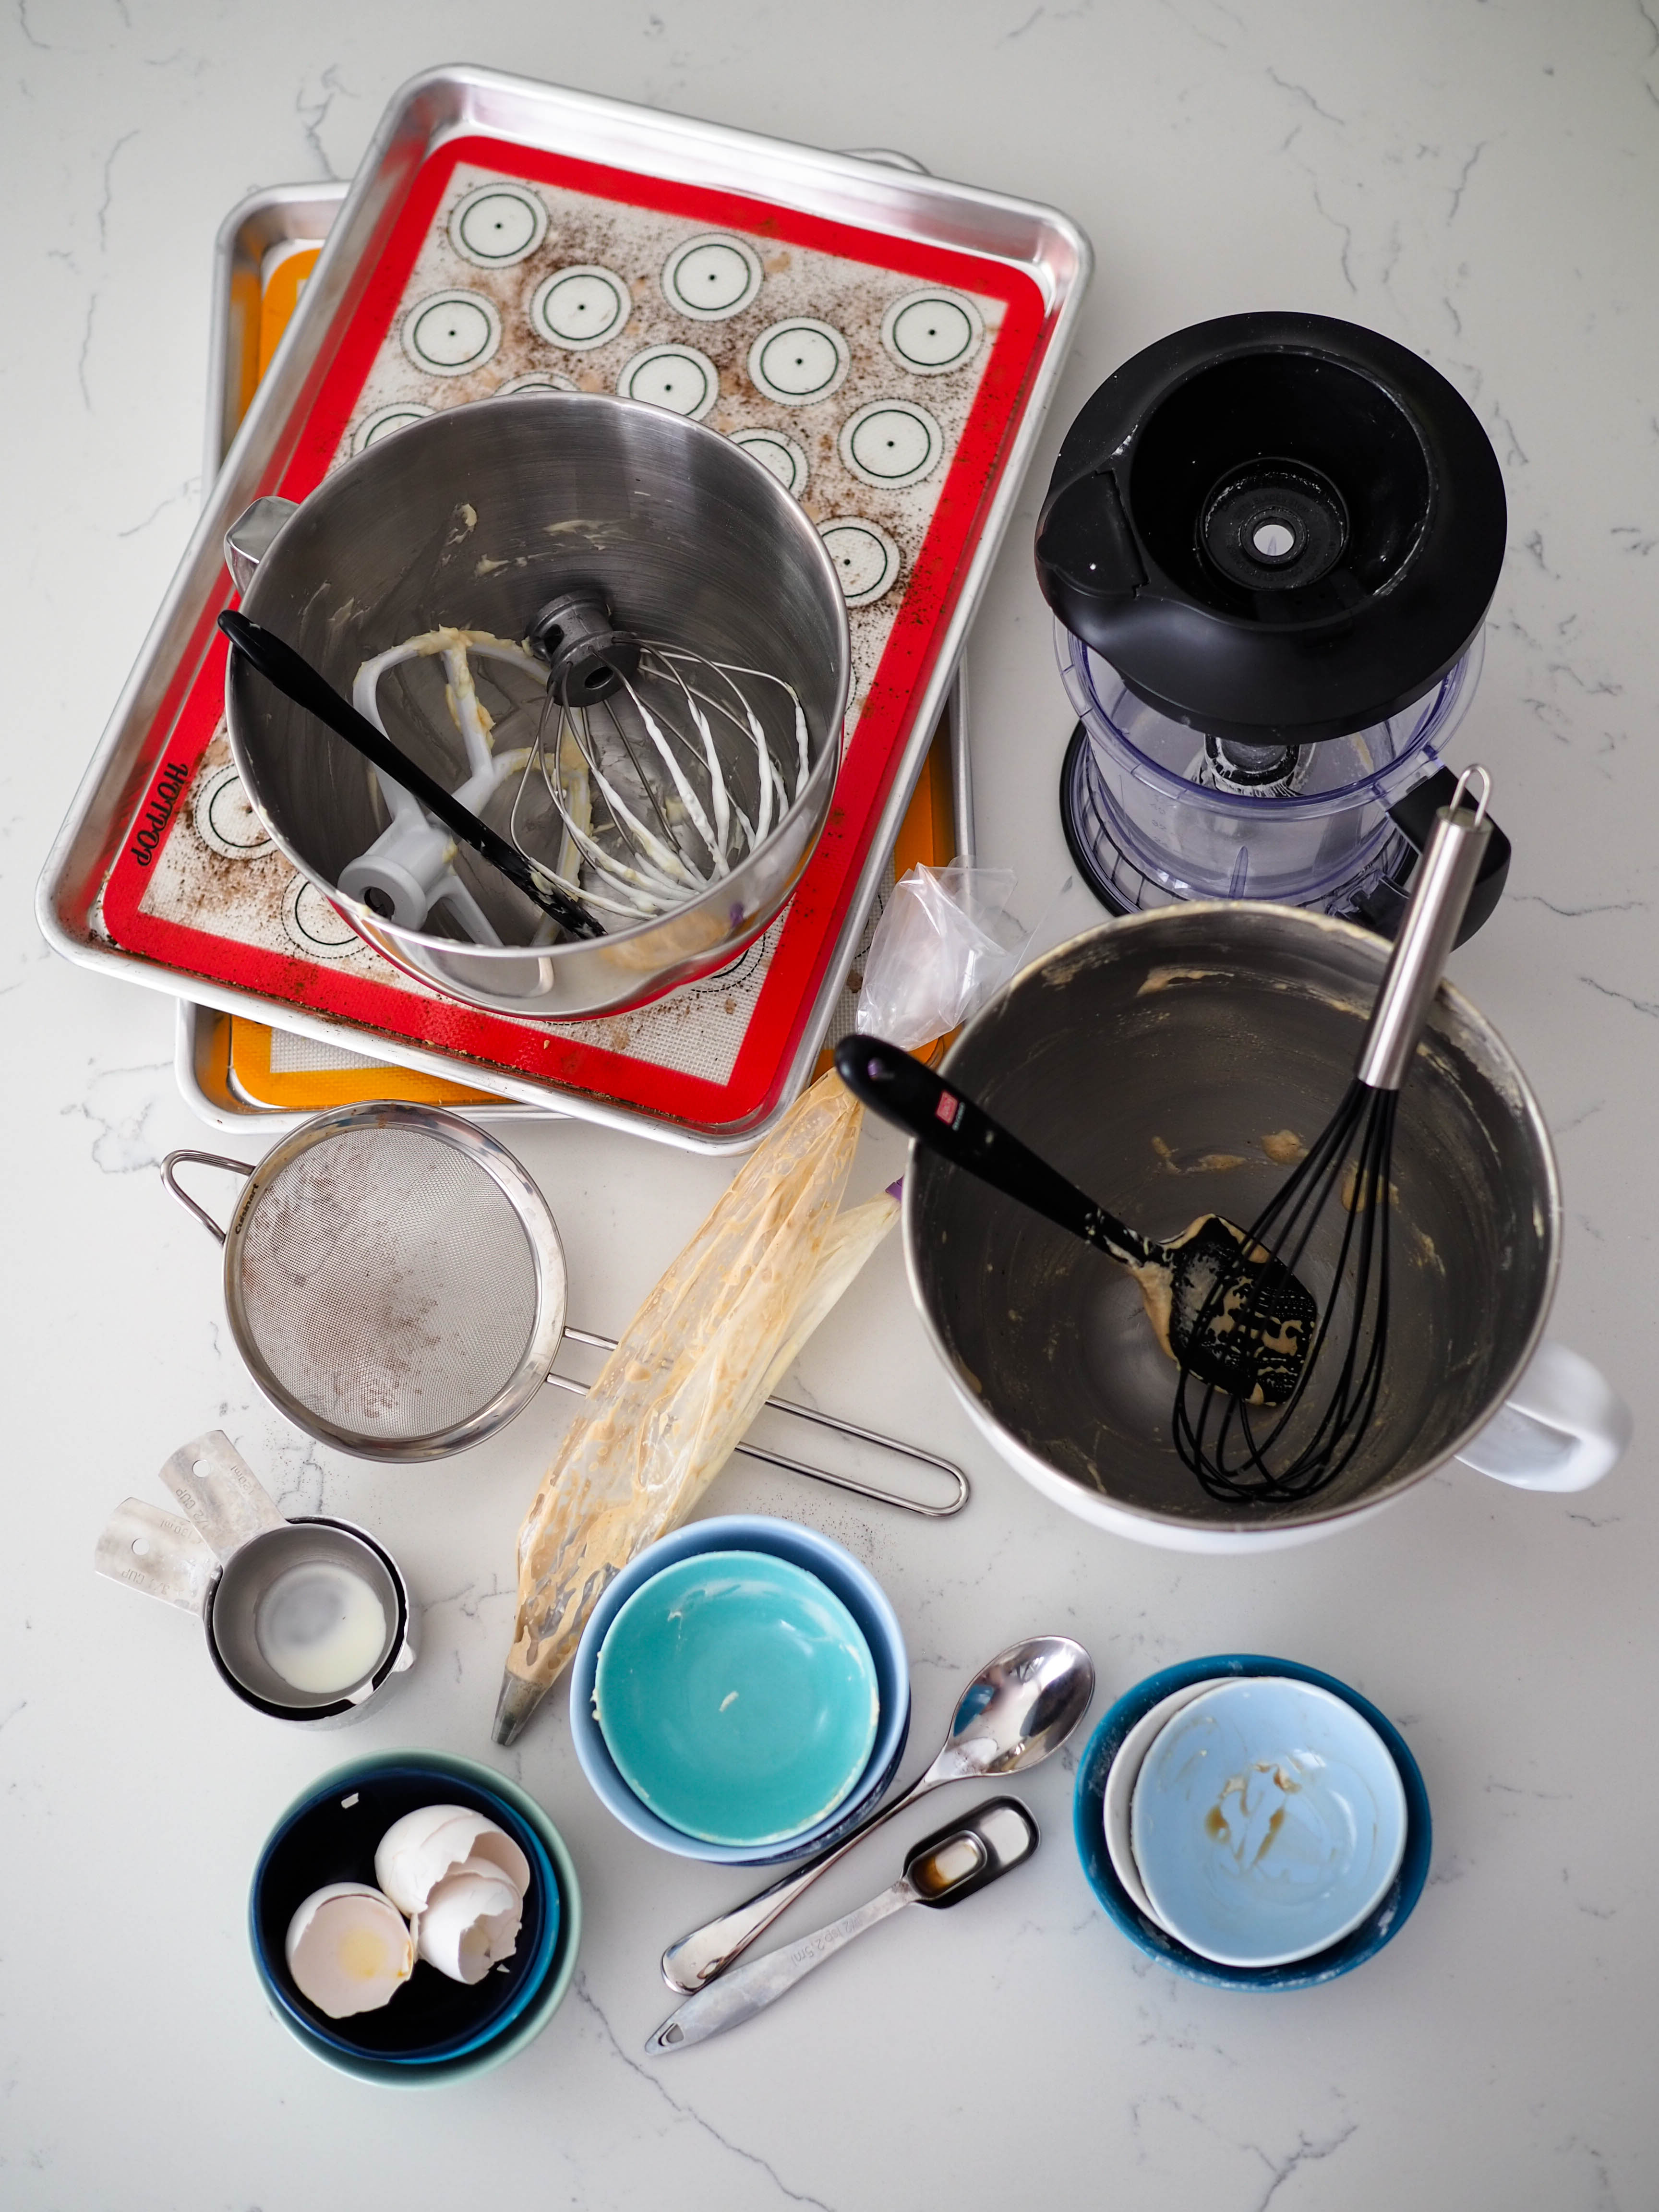
I rate my recipe cleanups on a scale of 1 to 5. 1 is only a handful of dishes, and 5 is everything including the kitchen sink.
My tiramisu macarons recipe has a cleanup rating of a 4. The recipe will dirty two large bowls and a handful of small bowls used to weigh ingredients. Realistically, you’ll probably only use half as many prep bowls when making this recipe. When I’m not photographing every step, I weigh everything in the bowl it will eventually end up in rather than weighing ingredients in cute little prep bowls. That cuts down on quite a few dishes alone!
Tiramisu Macaron Recipe
Tiramisu Macarons
Espresso-flavored Swiss macarons meet a mascarpone and Kahlua filling that tastes exactly like tiramisu cream—just without the egg yolks!
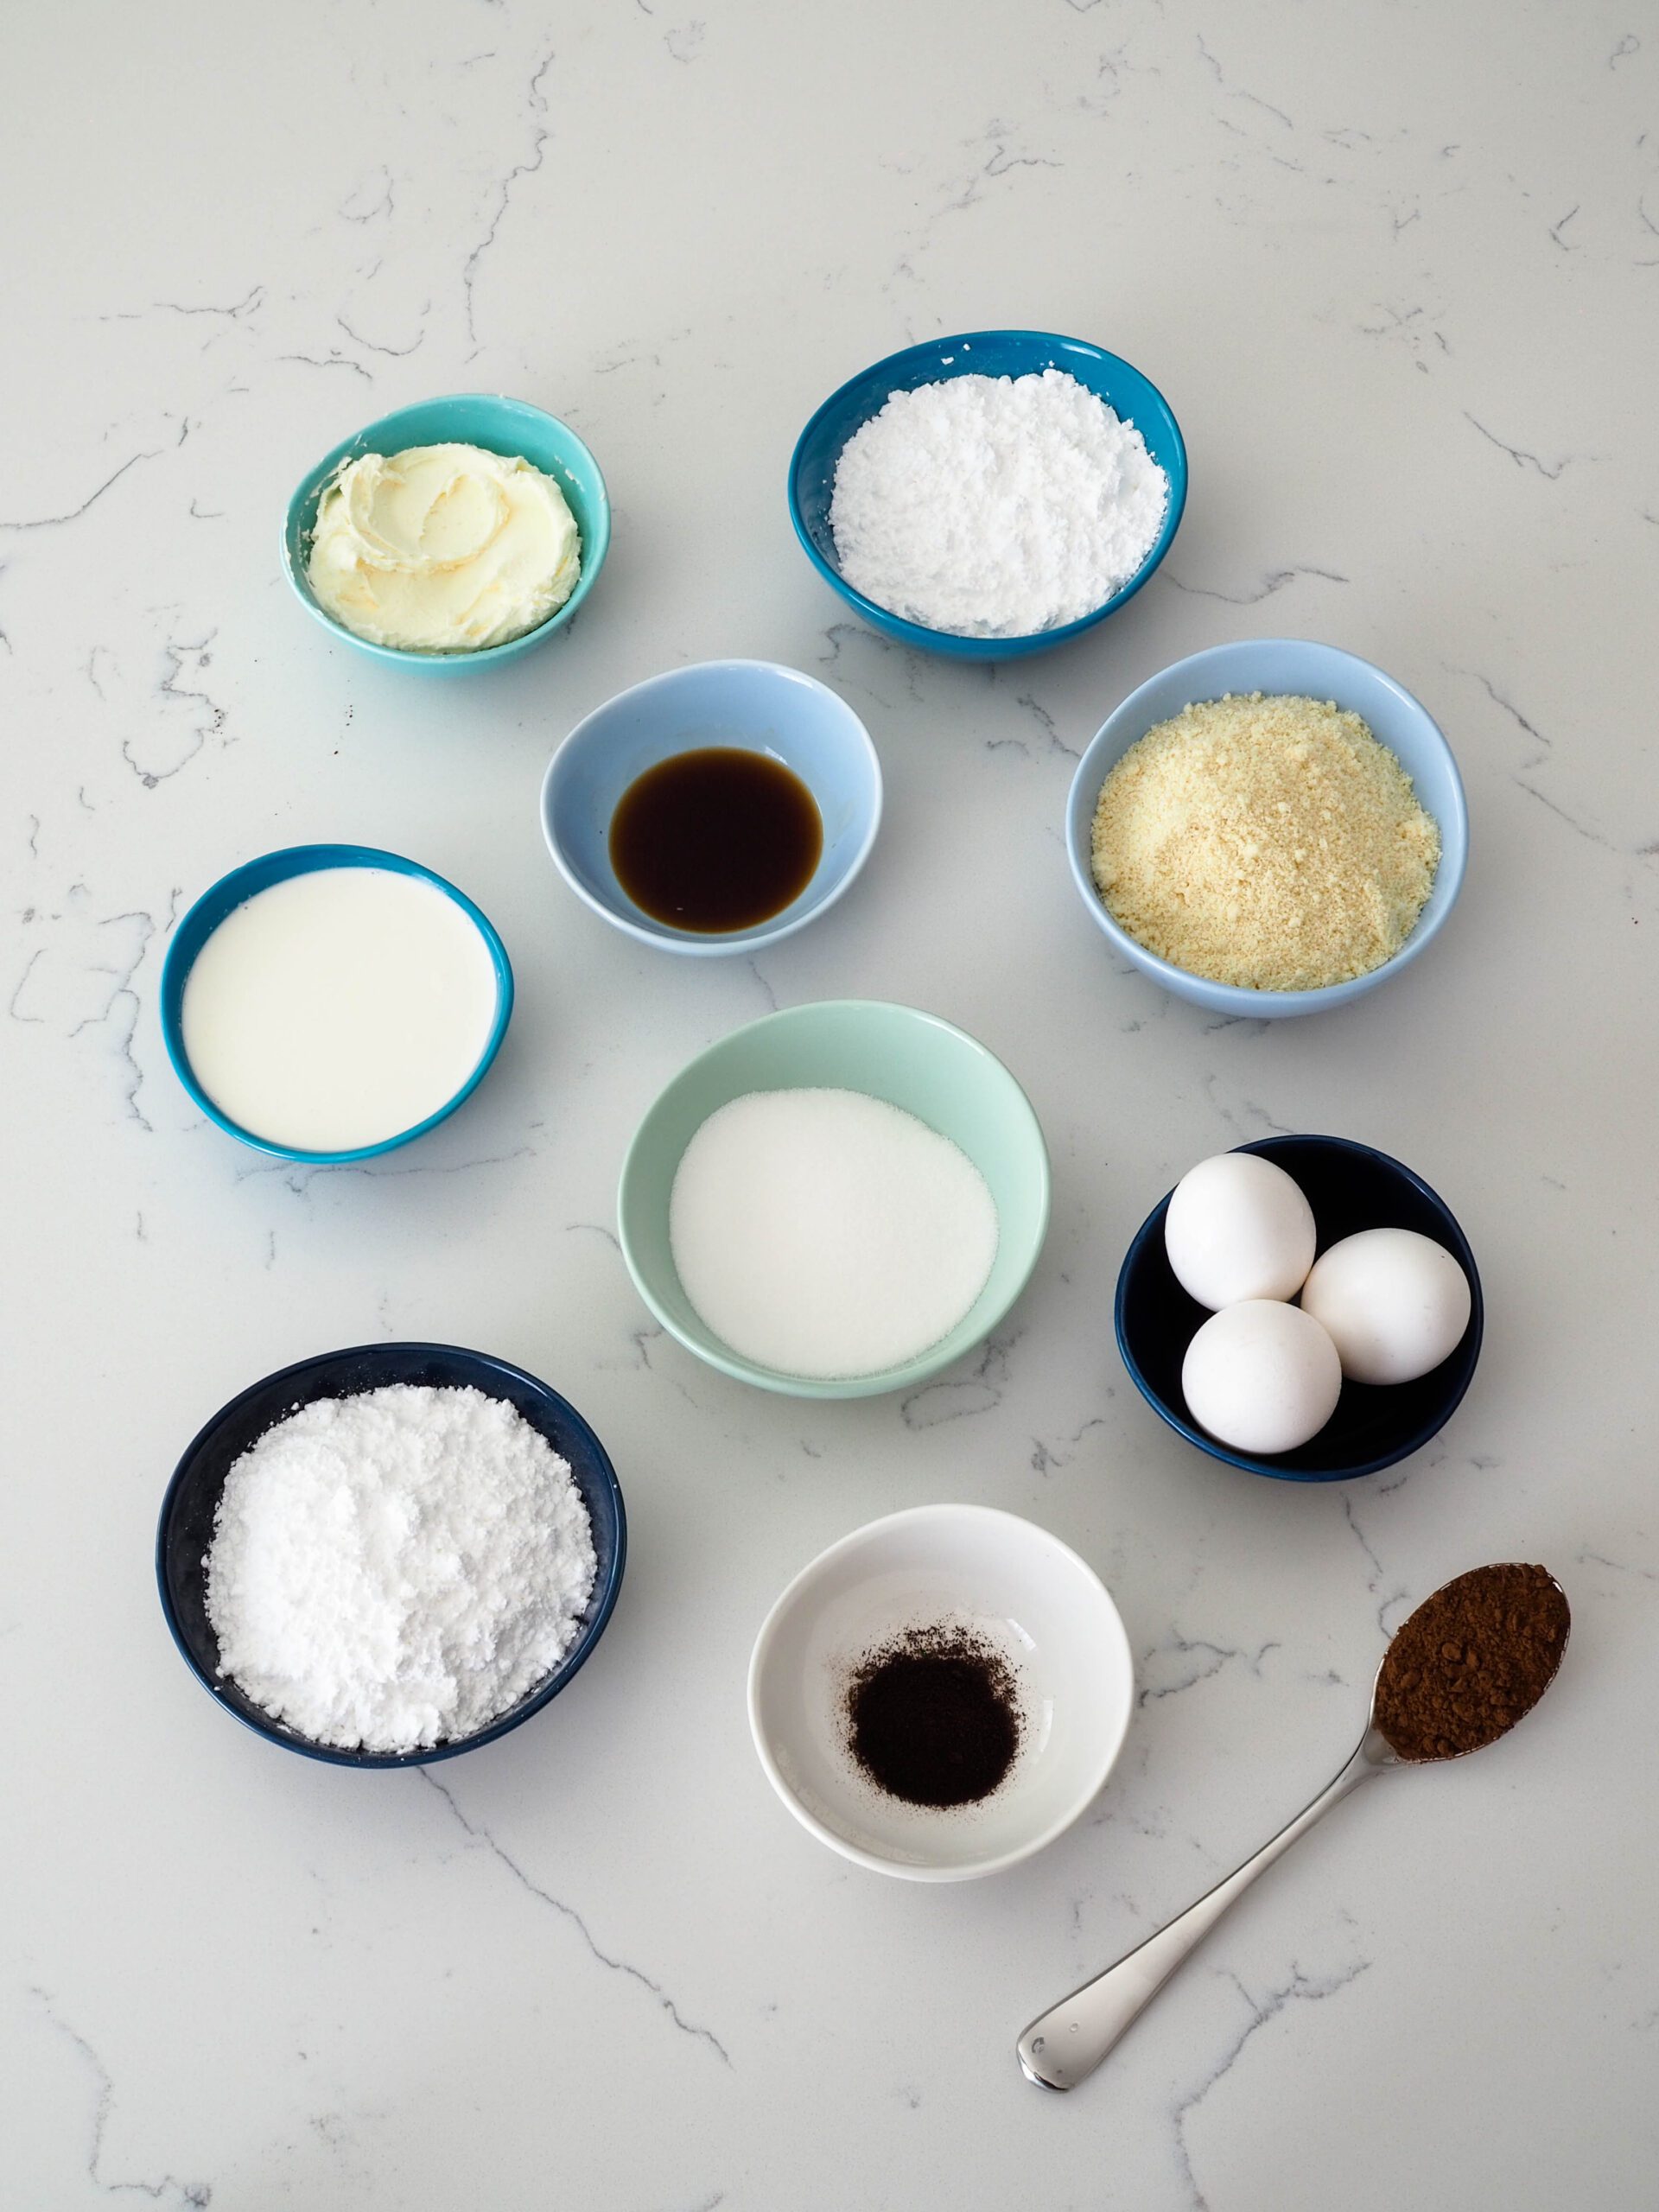
Ingredients
For the Macaron Shells
- 100g egg whites (from three eggs)
- 100g granulated sugar (1 cup)
- 110g almond flour (1 cup)
- 100g powdered sugar (1 cup)
- 1-2 teaspoons cocoa powder (6g)
- 1 teaspoon instant espresso powder (1.5g)
For the Tiramisu Filling
- 4 oz mascarpone cheese, cold (115g)
- 3/4 cup confectioners' sugar (85g)
- 1/2 cup heavy whipping cream, cold (120ml)
- 1 Tablespoon Kahlua or coffee liqueur
- 1 teaspoon vanilla extract
Instructions
Making the Swiss Meringue
- Heat about an inch of water in a pot over medium heat. Prepare two baking sheets with macaron silpats or parchment paper. Prepare a piping bag fitted with a round tip (I use Wilton #12 or Ateco 808) and set aside.
- Process the almond flour, powdered sugar, and espresso powder in a food processor (or at the very least, sift them together). This is necessary for perfectly smooth shells. Set aside.
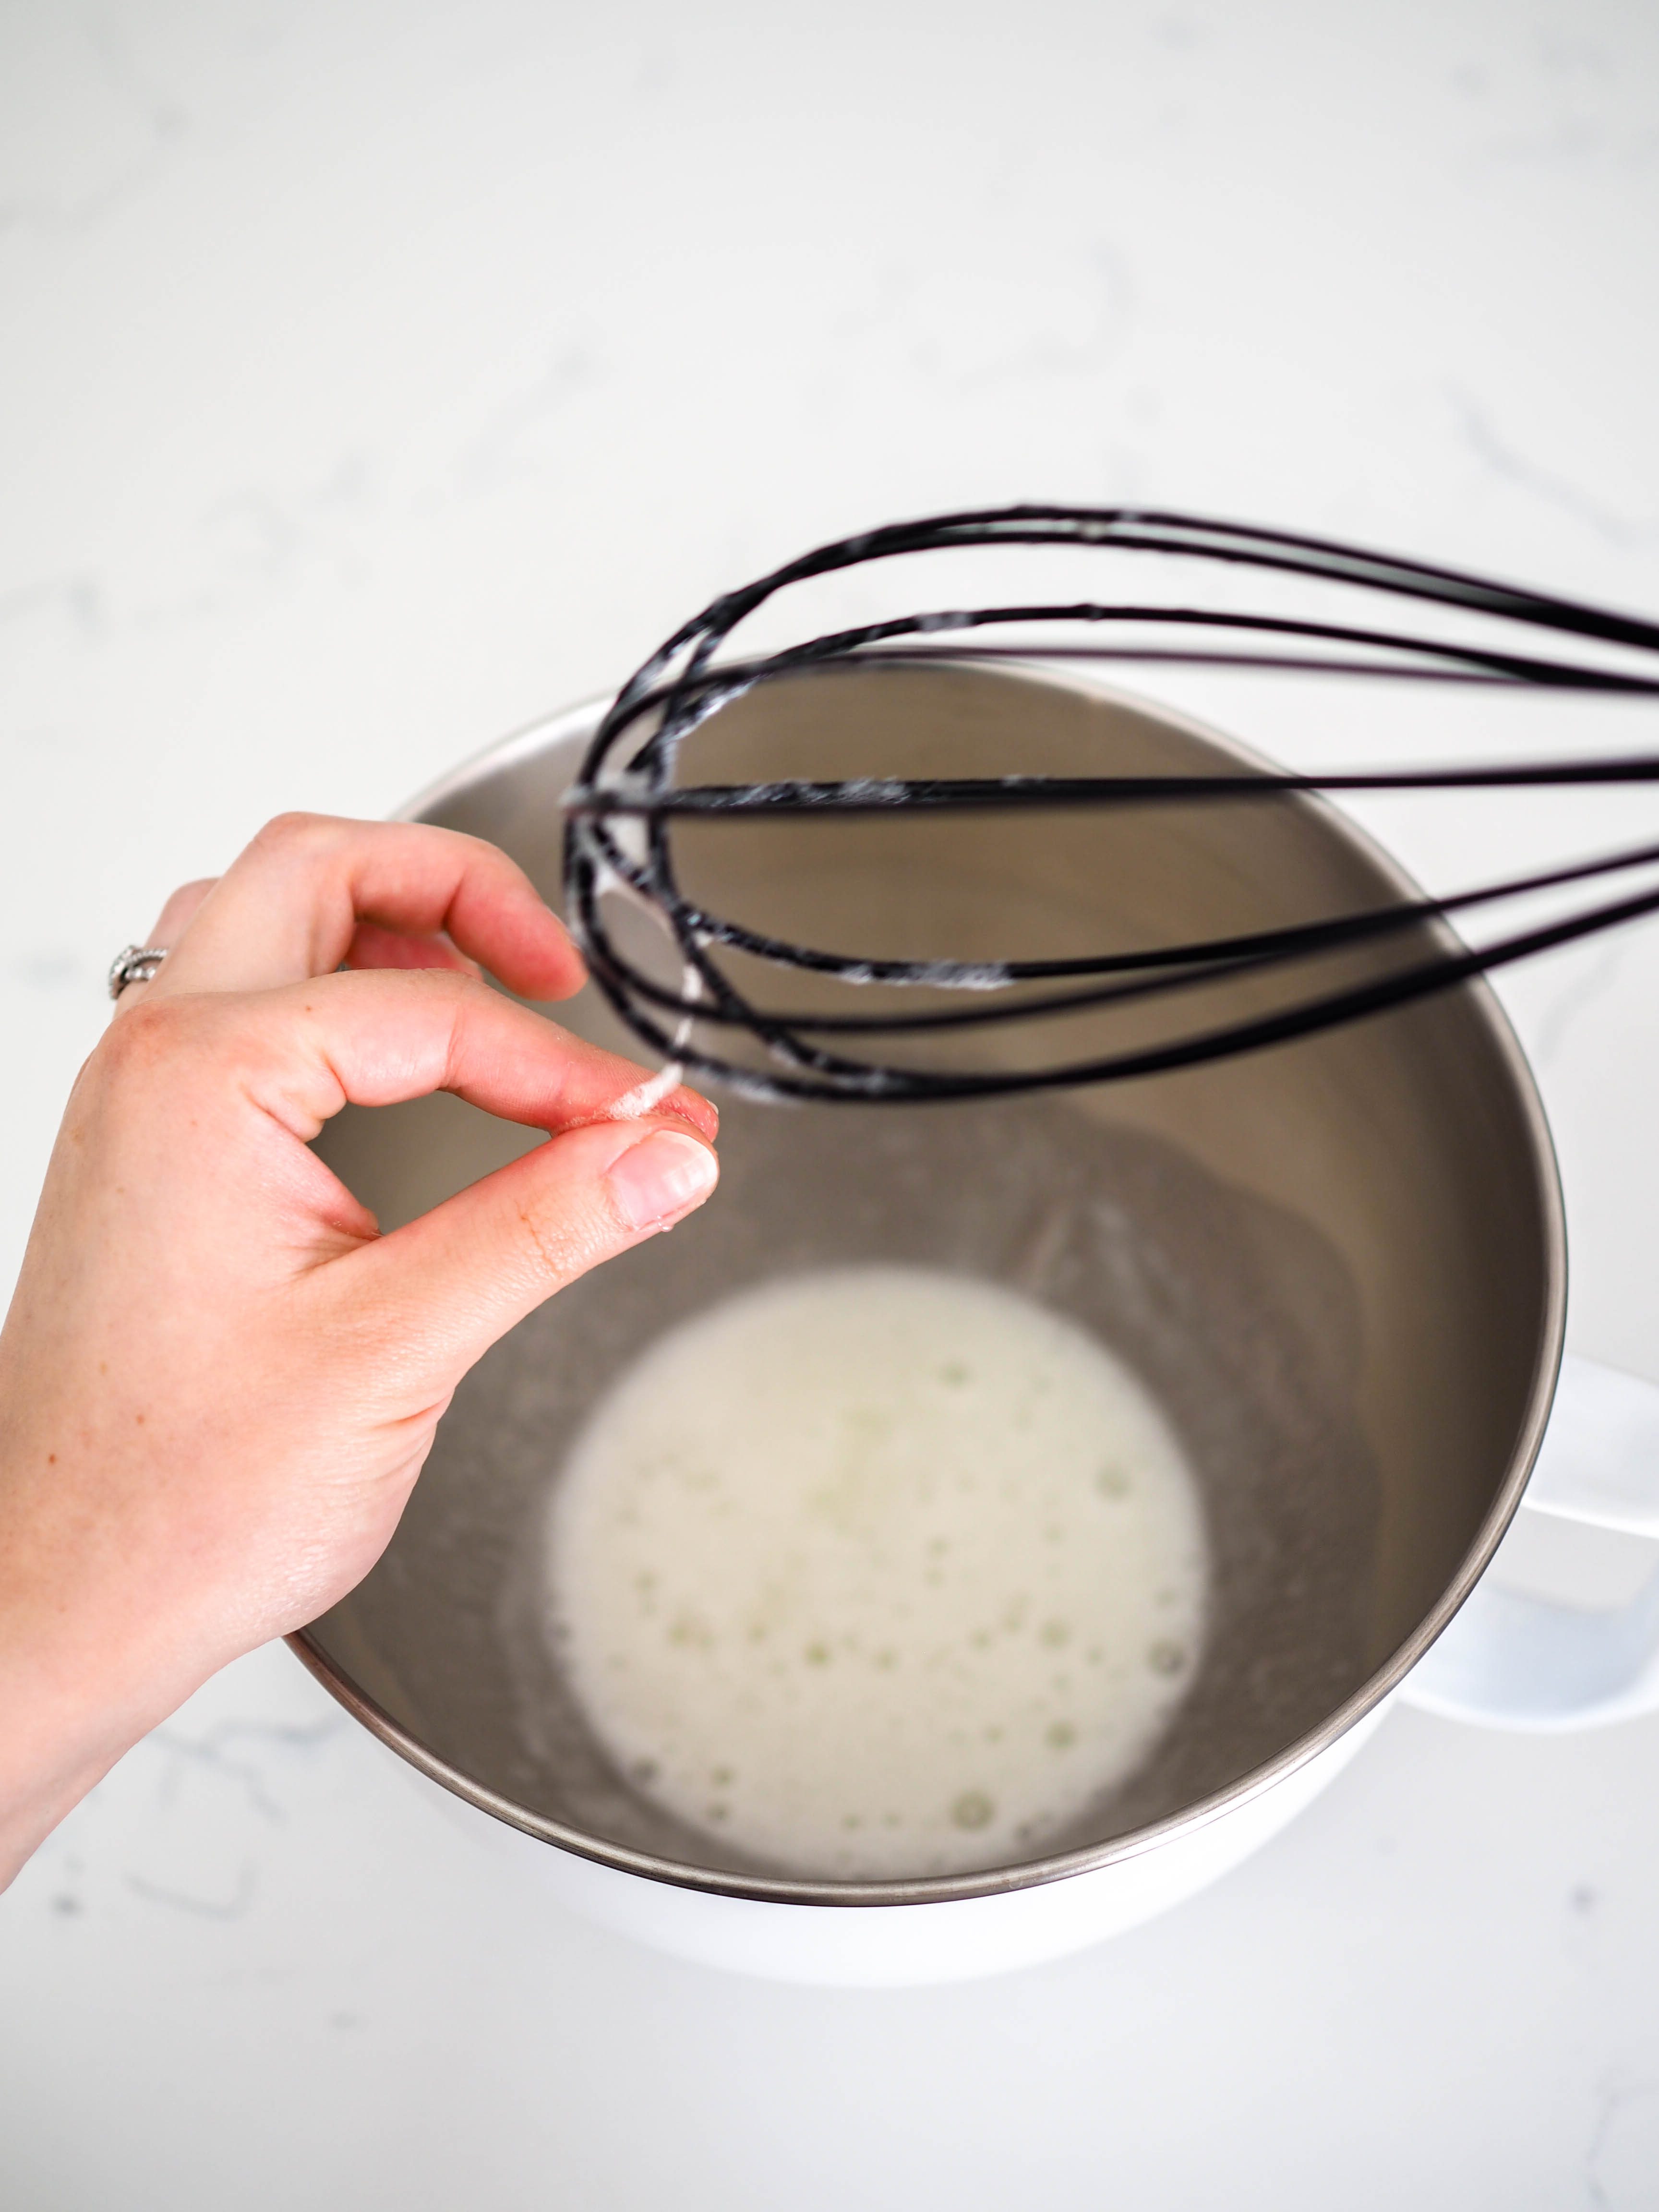
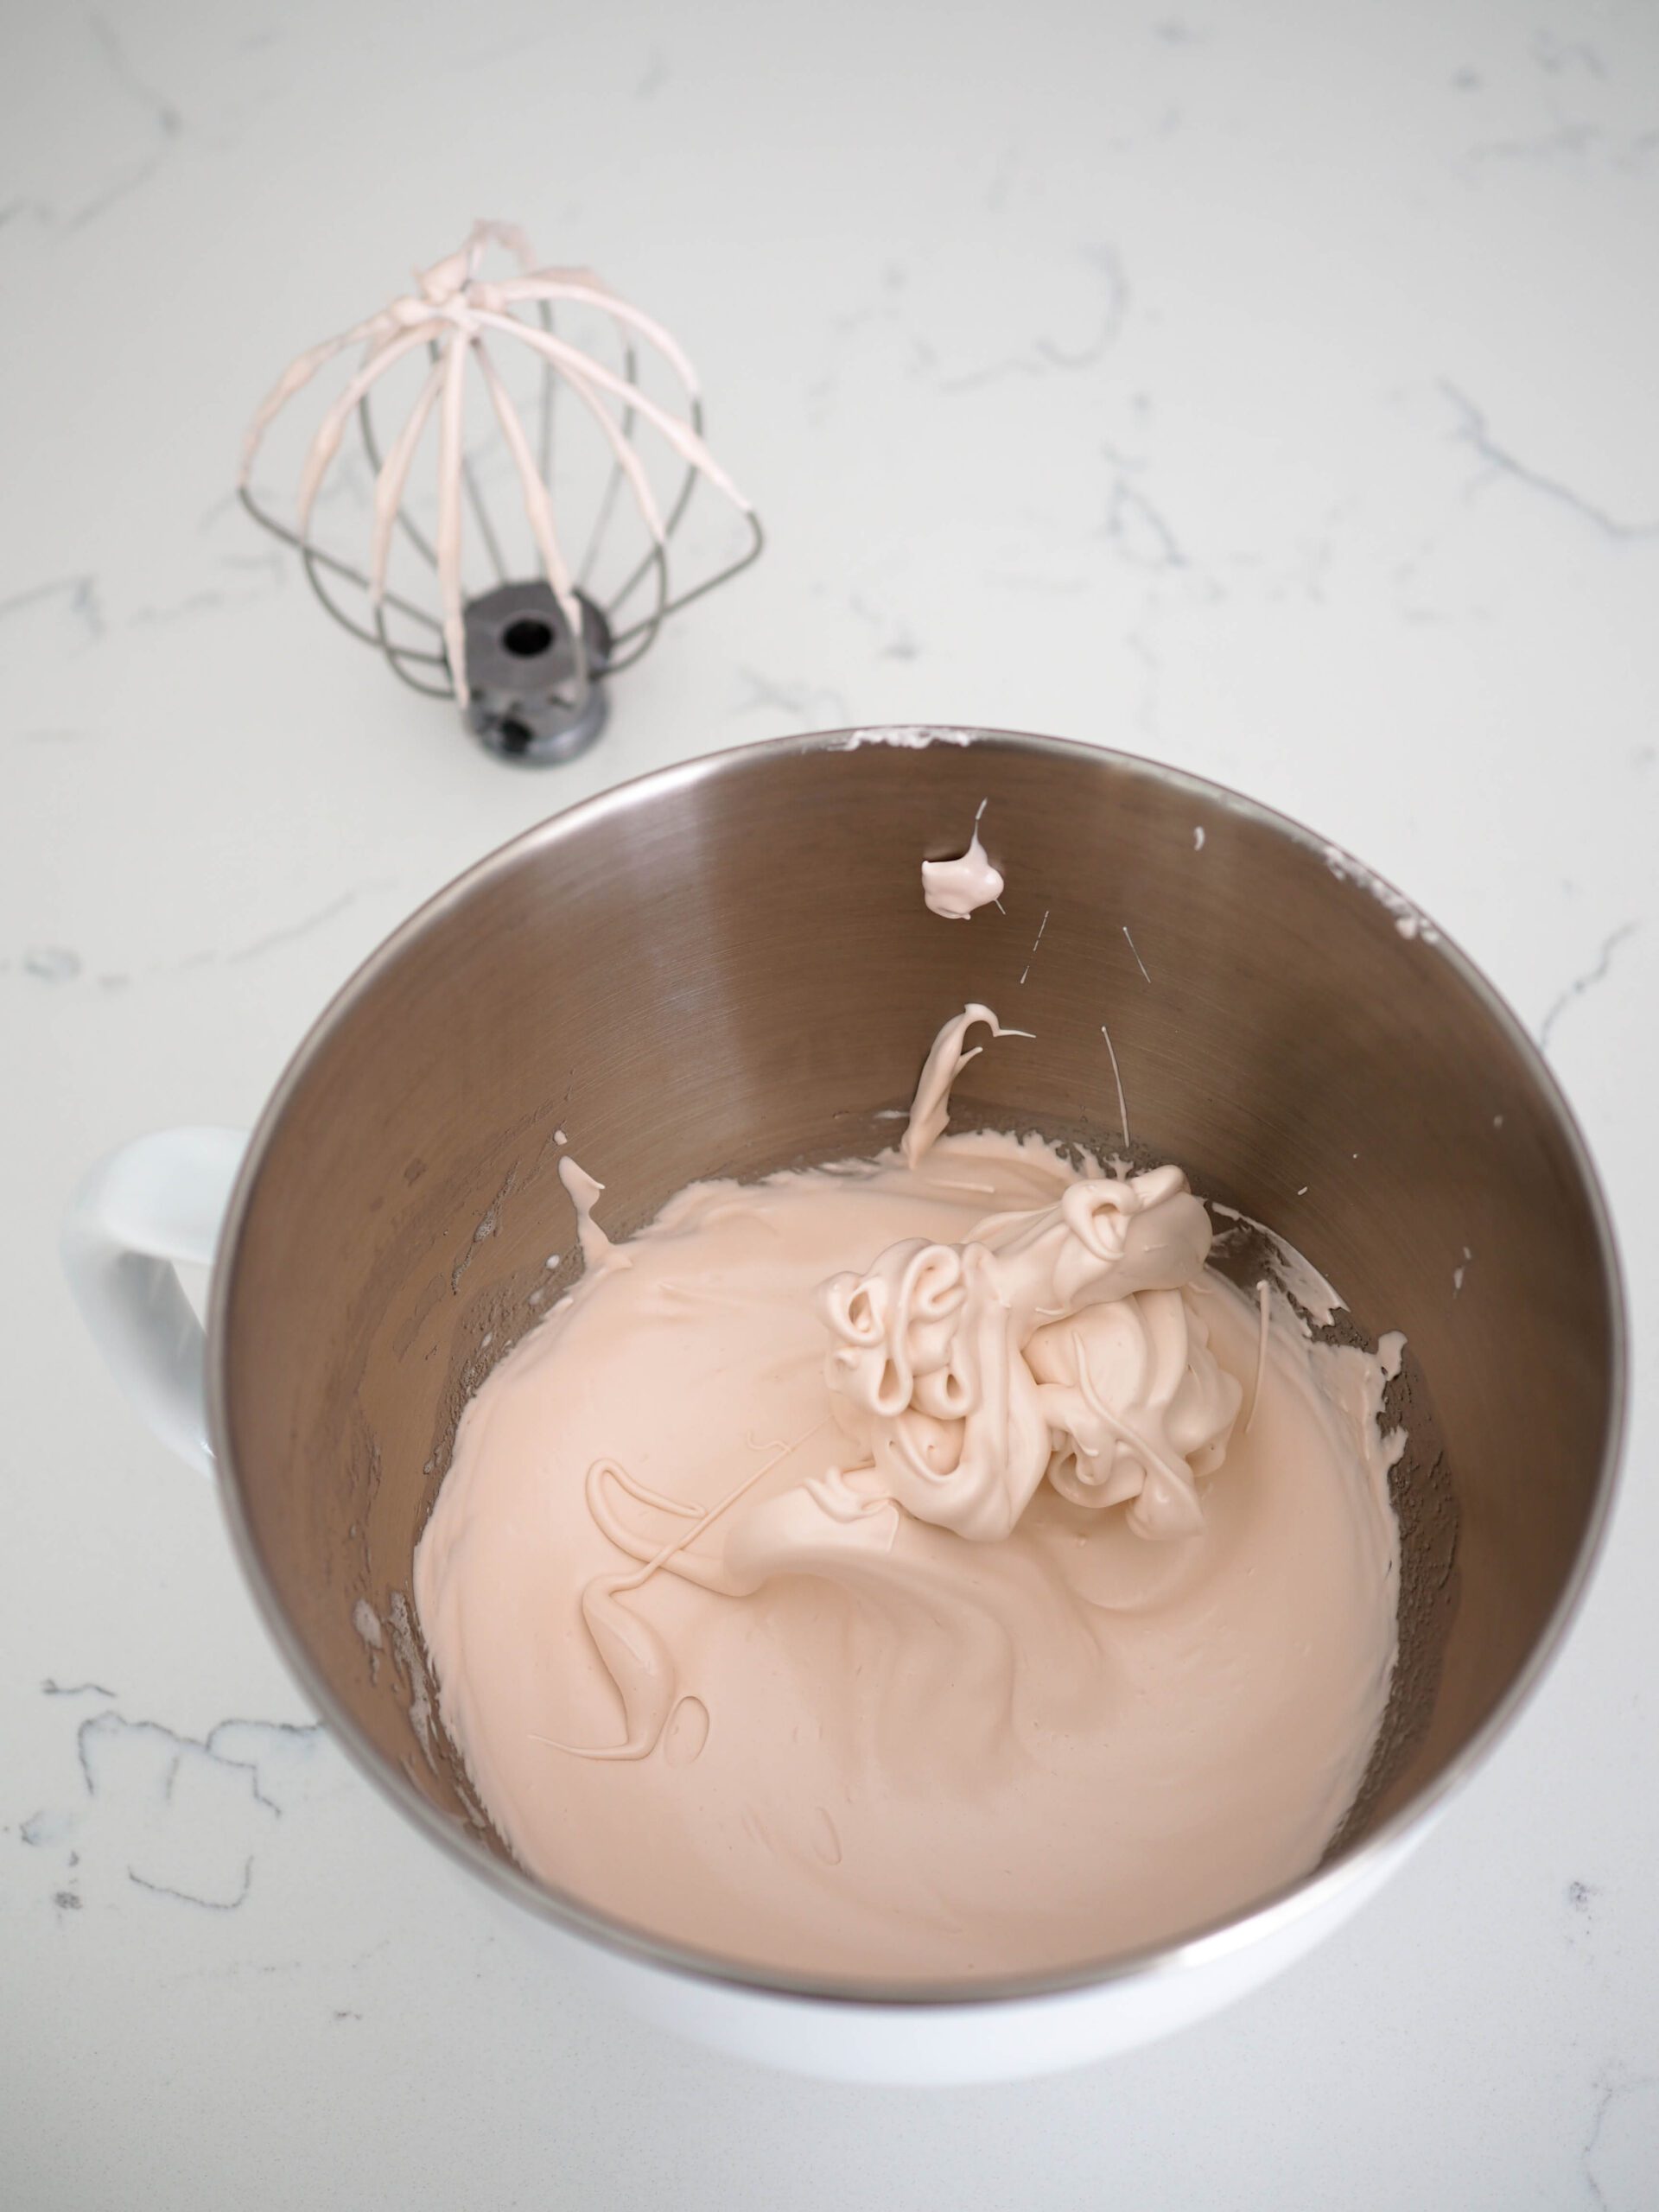
- Separate the eggs, placing the whites in the bowl of a stand mixer or other large bowl. Add the granulated sugar and whisk together. Set the bowl over the pot with steaming water and whisk until the mixture is no longer grainy, about 1 to 1 ½ minutes. To test if the sugar has fully dissolved, you can rub a small amount of the mixture between your thumb and forefinger.
- Remove the bowl from heat, wiping the bottom with a towel if necessary. Place the bowl in a stand mixer fitted with a whisk attachment. (You may also use a hand mixer.)
- Begin whisking the mixture on low (speed 2 on a KitchenAid). Over the course of 10-15 minutes, gradually increase the speed to medium and then medium high until the meringue forms stiff peaks (see blog post for a photo).
- Note: Do not whisk your meringue at anything higher than 8. Whisking too much air into the batter too quickly may result in hollow macaron shells from a weak meringue. (Trust me: I used to speed up this process and frequently ended up with hollow macarons!)
Making the Macarons
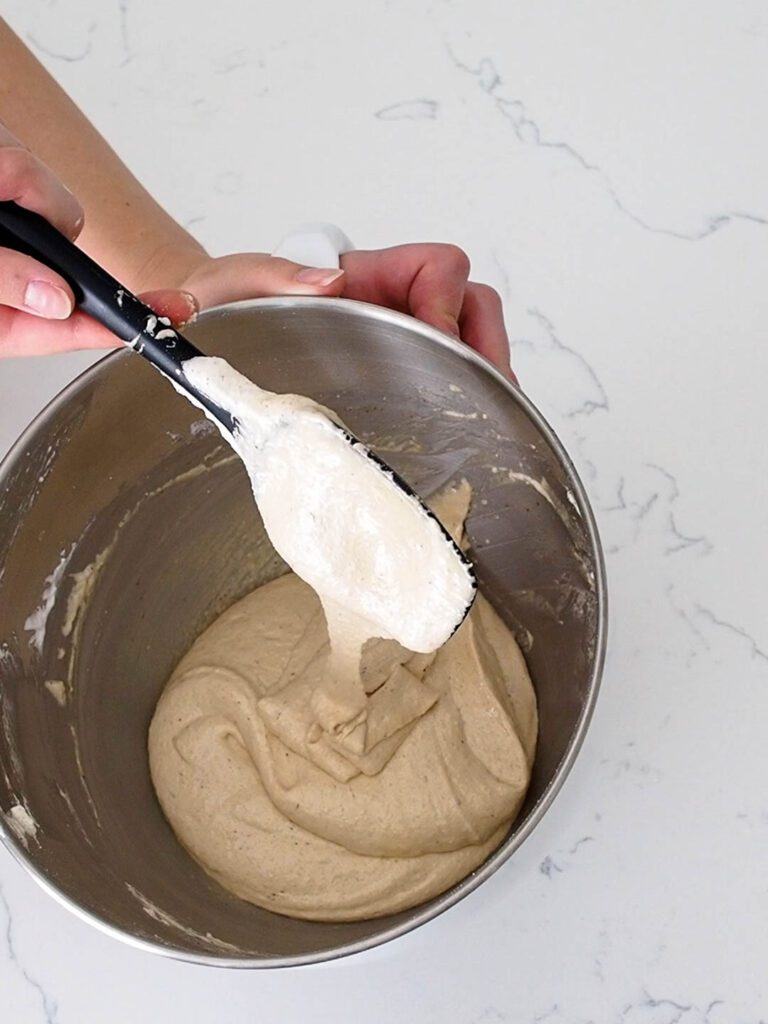
- Remove the bowl from the stand mixer and pour half of the almond flour mixture into the meringue. Fold together until fully incorporated, scraping the sides and bottom of the bowl. Add in the remaining almond flour mixture and fold together. The mixture will be thick, but as you continue folding, it will lose some air and thin out. Continue folding and pressing the batter into the sides of the bowl until the batter is the correct consistency (covered in the next step).
- To test the consistency, scoop the batter up, and let it flow back into the bowl. Continue folding until the mixture flows in one solid ribbon off the spatula. It should look a bit grainy as it flows off the spatula, then dissolve back into the batter in about 15 seconds and look glossy instead of grainy.
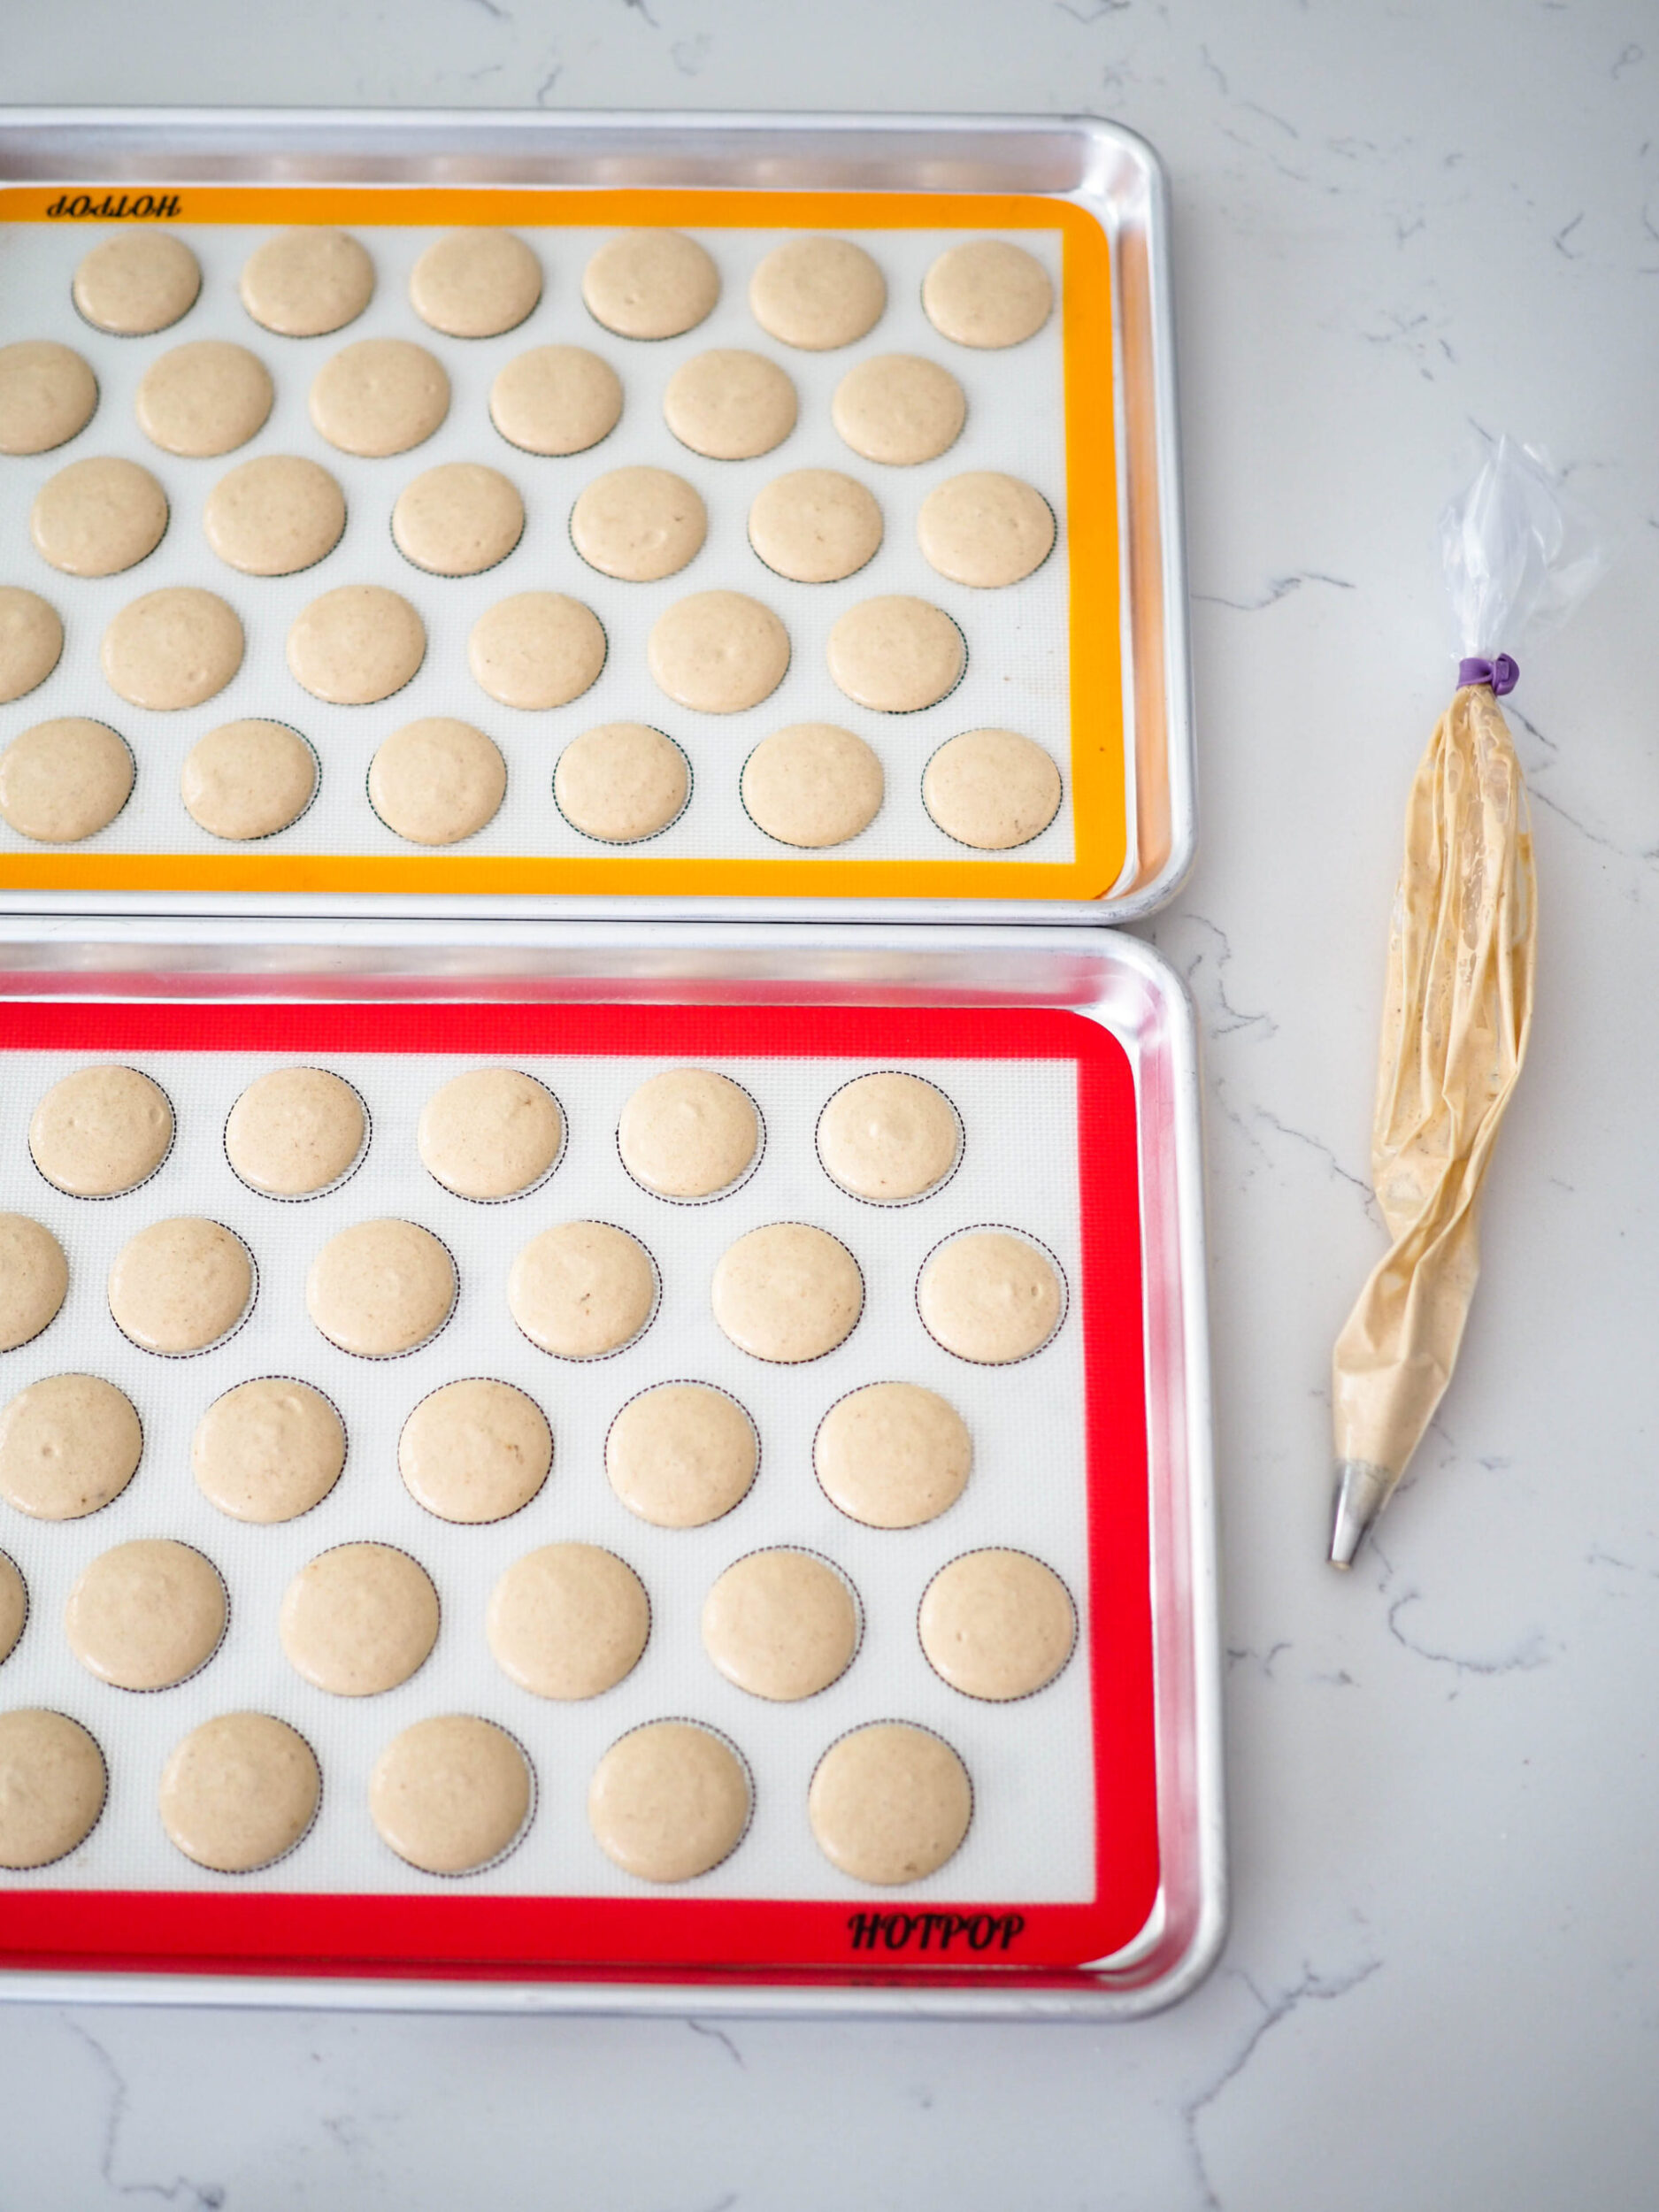
- Pour the batter into the prepared piping bag. Holding the bag at a 90° angle to the pan, gently squeeze out the macaron batter into little mounds about 1-1.5" in diameter. They will spread as they settle.
- To release any bubbles trapped inside the wet batter, bang the underside of the pan with the heel of your hand multiple times until you see tiny bubbles popping on the tops of the macaron shells. Use a toothpick or scribe to pop any remaining bubbles for a perfectly smooth top.
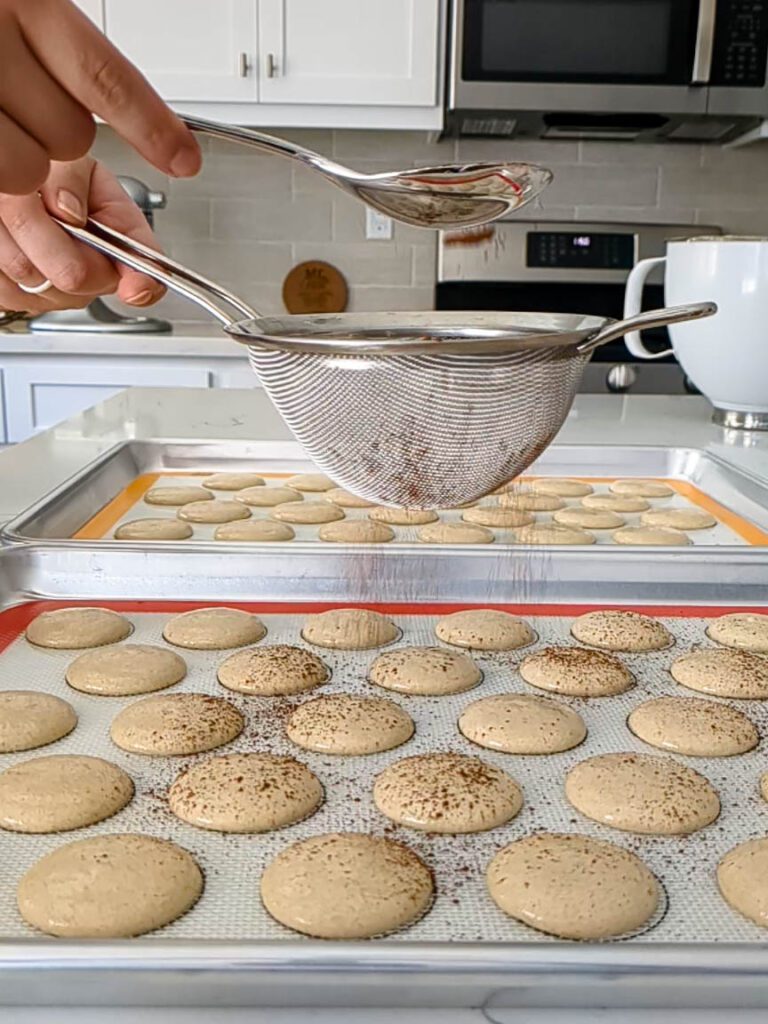
- If desired, dust half or all of the tops of the shells with a light coating of cocoa powder. I do this by tapping a bit of cocoa powder out of a fine mesh strainer. Dusting them with cocoa powder before baking helps reduce the amount of cocoa powder that comes off on your fingers later. (It doesn't eliminate it entirely, but it does reduce it!)
- Set the macarons aside in a well-ventilated area to dry for about 20-30 minutes. I like to point a low-speed fan at them to speed up the drying process. The faster the macarons dry, the lesser your chance of your meringue breaking down and ultimately causing hollows. On particularly humid days, this step may take about an hour.
- While the macarons are drying, preheat the oven to 320°F. The macarons are ready to go in the oven when you can lightly pet the top of a macaron without it leaving residue on your finger.
Baking the Macarons
- Once the macarons are dry, bake one tray at a time in the center rack for about 16-17 minutes or until the macaron is set. Depending on your oven and the color of your baking sheet, this can take anywhere from 15-20 minutes. Test to see if the macarons are set: Try to gently wiggle a macaron back and forth from the center of the pan with your thumb and forefinger. If the center moves at all, put the tray back in the oven for another minute or two until the center of the macaron is set and does not move when prompted.
- Let each tray cool completely before removing the macarons from the mats, about 10 minutes.
Making the Tiramisu Filling
- A word of warning: Mascarpone will curdle if it gets too warm or is beaten too much. Heavy cream whips much more quickly if it's straight from the fridge. Please make sure both your mascarpone and heavy cream are sufficiently cold before continuing.
- In the bowl of a stand mixer (or bowl you can use with a hand mixer), beat together the cold mascarpone, liqueur, and vanilla extract on low until just combined.
- Add in the powdered sugar and best on a low speed until it's mostly combined. A few small clumps of powdered sugar are okay—they'll come out when you add in the heavy cream. Scrape down the sides and bottom of the bowl.
- Increase the speed on the mixer to medium and slowly stream in cold heavy whipping cream for 1-3 minutes until fully combined and fluffy. It won't look like it will combine into anything thick enough to pipe at the beginning, but it will.
- This filling is very similar in consistency to tiramisu cream, so it's a bit more wet than your typical buttercream filling. If you like, you may add in an extra ½ cup of powdered sugar (55g) to make the filling thicker. That will prevent your macarons from becoming soggy if you live in a humid environment.
Assembling the Macarons
- I like to pair one cocoa powder-dusted shell and one plain shell, if possible. Pair similarly sized macarons together and line them up, one with the flat side up and one with the flat side down. The flat side is the bottom of a macaron shell.
- On the bottom of a macaron shell, pipe a dollop of buttercream in the center of the shell. Stop piping when the dollop is about ⅔ of the size of the shell. Place the other macaron shell on top and press lightly to form a nice seal. This will result in a dollop that stops right at the edges of the macaron. Repeat with the rest of the macarons.
- The macaron shells will soften and the flavors will develop after maturing in the fridge for one day, though you may eat them any time you'd prefer after assembly.
Notes
Because of the increased moisture content in these macarons, I would recommend eating them within three days for the best texture and flavor, though they will still be good if eaten within a week.
Nutrition Information:
Yield:
30Serving Size:
1 filled macaronAmount Per Serving: Calories: 92Total Fat: 5gSaturated Fat: 2gTrans Fat: 0gUnsaturated Fat: 3gCholesterol: 10mgSodium: 23mgCarbohydrates: 11gFiber: 0gSugar: 10gProtein: 1g
The nutrition facts are estimated and may vary based on specific ingredients used.
Thanks for trying out my tiramisu macaron recipe! I’d love to see how it turns out: Take a photo and tag me on Instagram @floralapronblog to share with me, or use the hashtag #floralapronbakes.
This post contains affiliate links. If you click through and make a purchase, I may receive a small commission at no cost to you. Thank you for helping to support The Floral Apron!
Other Recipes You May Enjoy
There are more macaron flavors available on the Macaron page here on my blog.
As I mentioned above, my ladyfingers recipe is a great place to start if you’ve never made macarons. The light, bite-sized sponge cakes are great to have on hand for trifles and no-bake desserts.
If tiramisu is one of your absolute favorite flavors, I have a recipe with a twist on the original: My tiramisu layer cake has all the flavor of the original with a little more cake!