
You can make crispy, chewy, thin crust pizza dough at home with just a handful of simple ingredients on a pizza stone. Whole wheat flour adds a delightfully chewy interior, while the quick bake on a hot pizza stone ensures a crisp exterior. Add a quick pizza sauce or creamy basil pesto as your sauce, then top with your favorite vegetables, meats, and cheeses. This recipe makes four 12″ pizzas, enough for eight servings, but is easily scaled up or down.
Bonus: Any leftover pizza dough can be refrigerated for up to three days or frozen for up to three months. I make one batch of this a month and freeze the rest so that my husband and I can have an easy pizza night each week! Serve with salads and garlic breadsticks, and you’ve got yourself a winning meal.
This post contains affiliate links. If you click through and make a purchase, I may receive a small commission at no cost to you. Thank you for helping to support The Floral Apron!
Ingredients for Thin Crust Pizza Dough
Traditional pizza doughs are made from just four ingredients: flour, yeast, salt, and water. With the addition of a few more simple ingredients, the flavor, chewiness, and crispiness changes slightly. This rendition is my husband’s and my favorite pizza crust that I make time and again.
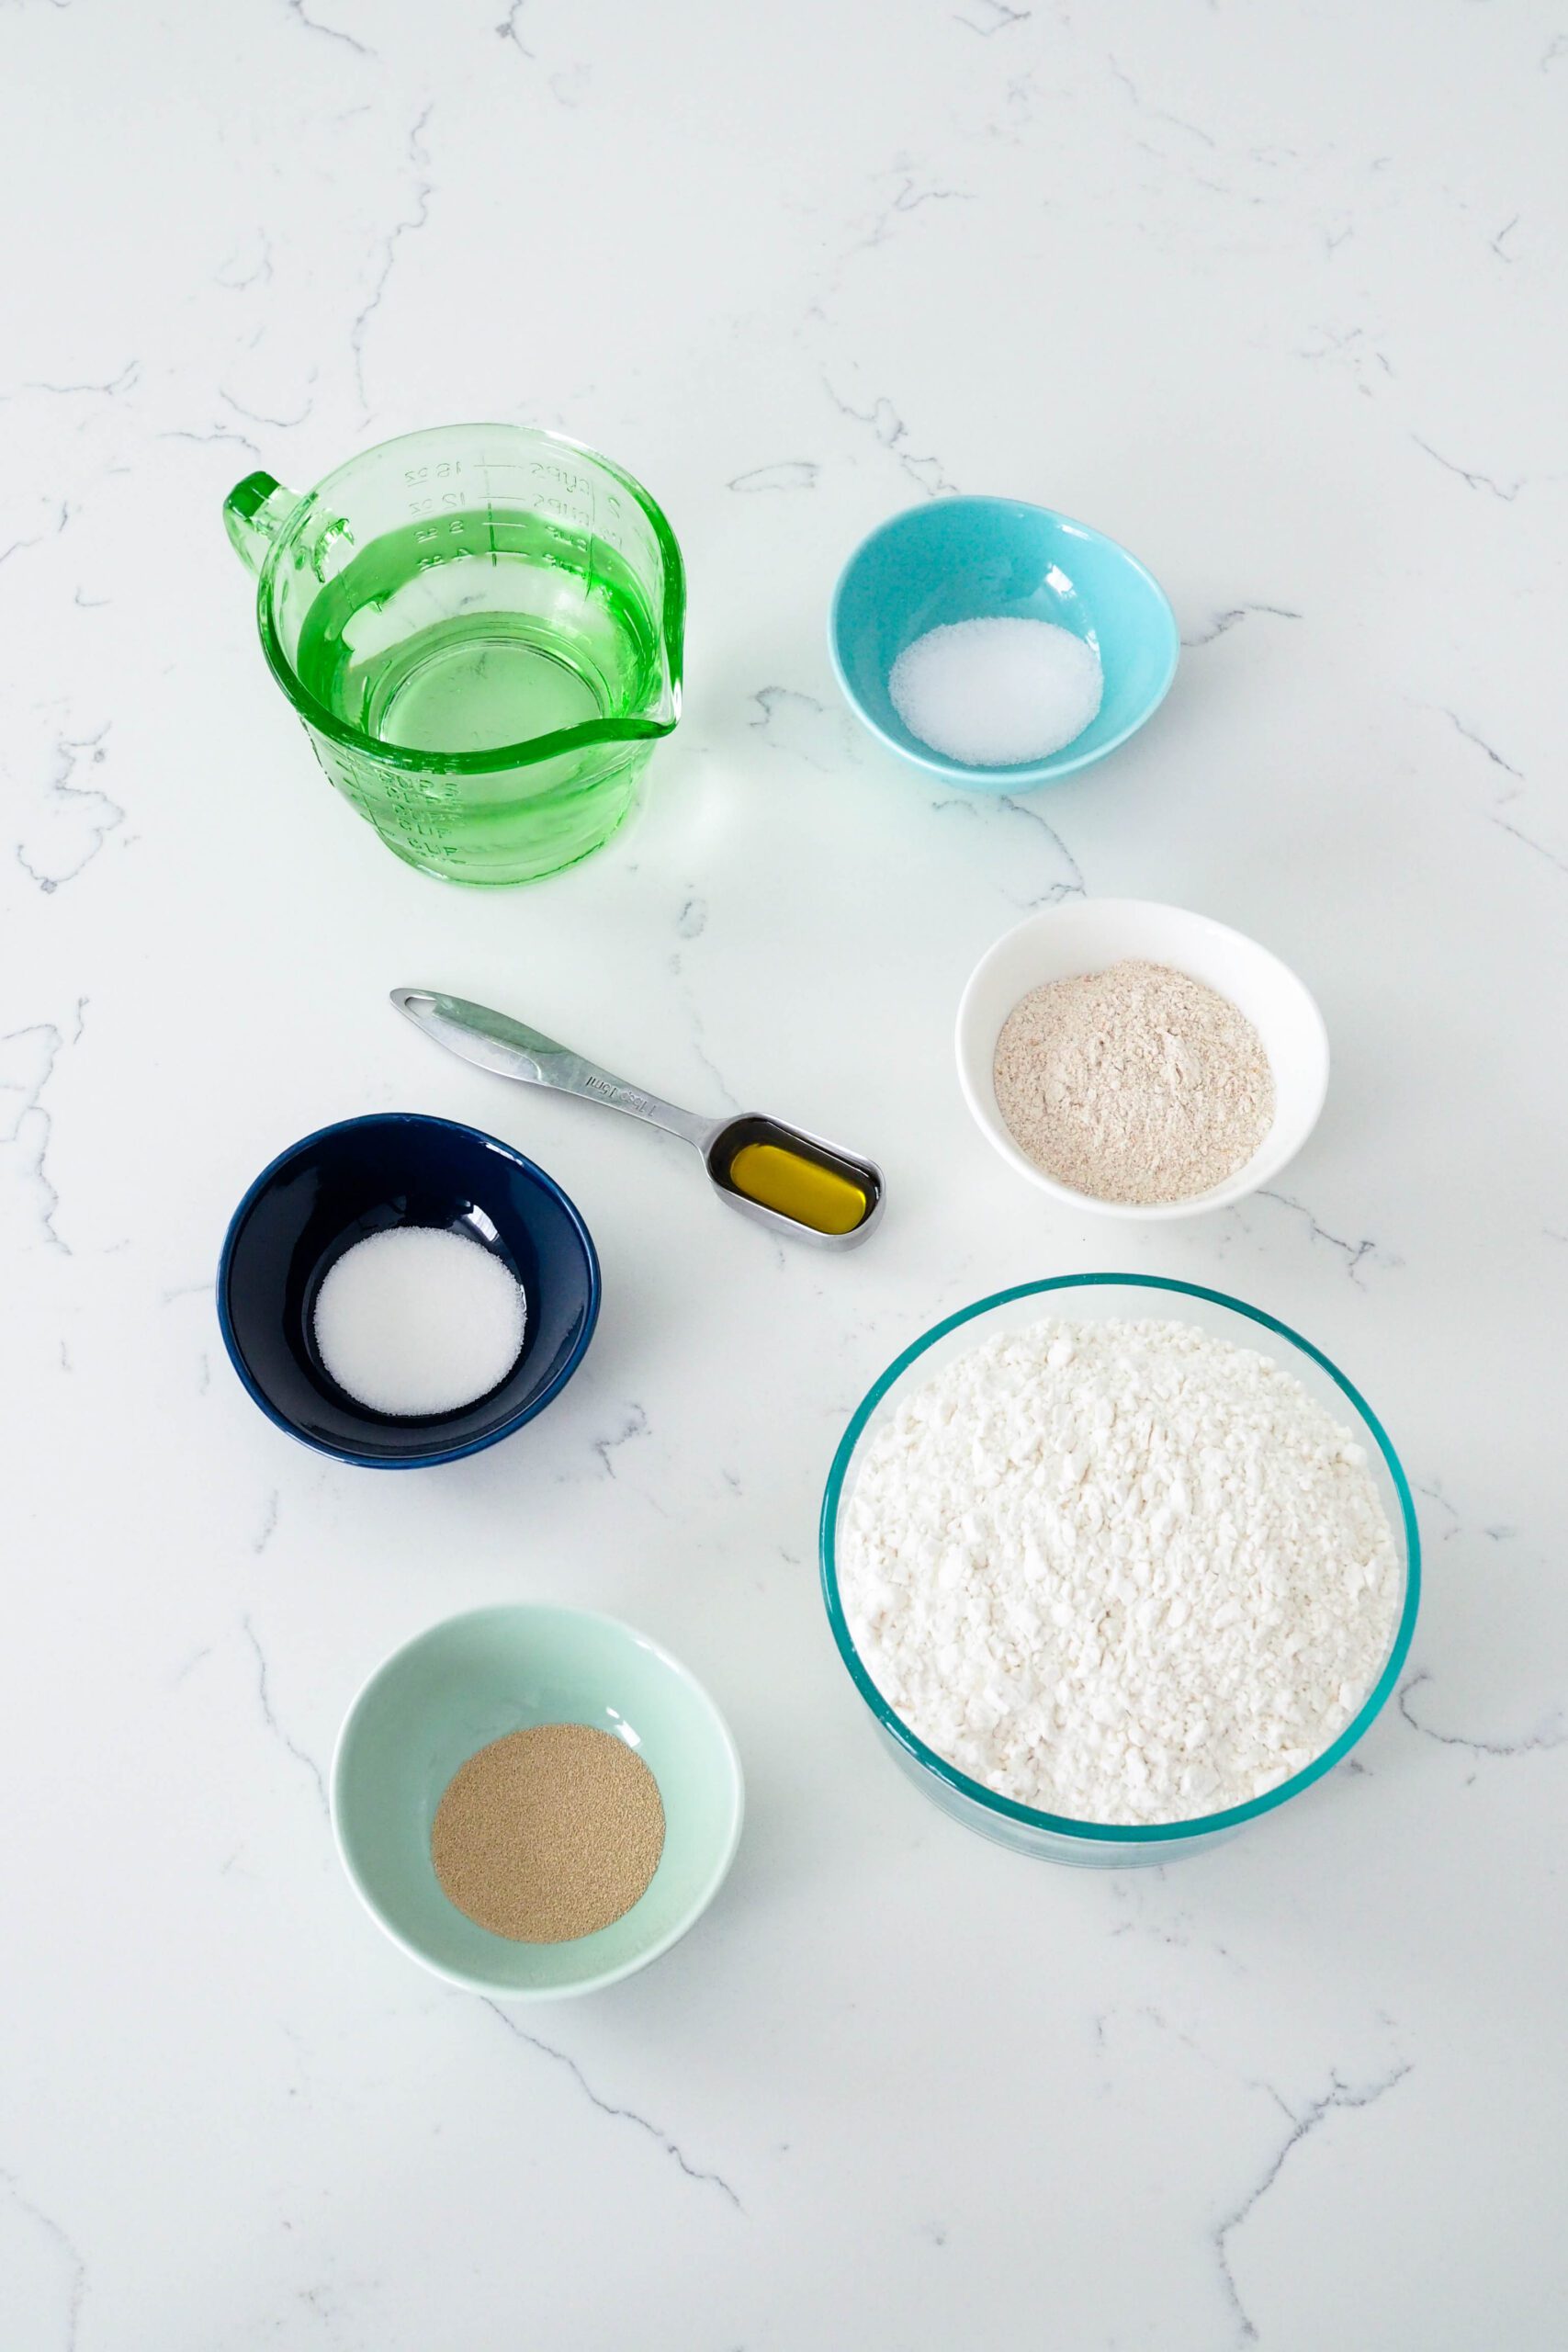
- Active dry yeast. I use active dry yeast, but you can also use instant yeast for this pizza dough recipe. Use the same amount of instant yeast and skip the 5-minute soak in step one.
- Granulated sugar. Two teaspoons of sugar adds a hint of sweetness at the end of each bite that pairs nicely with all pizza toppings, especially if you’re using a tomato-based sauce.
- Warm water. Yeast proofs best in warm water that’s about 110°F (43°C).
- Whole wheat flour. Just a bit of whole wheat flour gives the pizza crust a light chewiness that is second to none. It’s not traditional, but it’s worth trying if you haven’t before.
- All-purpose flour. Plain flour makes up the base of the dough for easy gluten development.
- Salt. In addition to giving the dough flavor, salt also controls yeast fermentation and strengthens the gluten in the thin crust pizza dough.
- Olive oil. A little bit of fat improves the texture and makes this dough more moist. I like the flavor and color of olive oil for pizza dough, but you can substitute any oil that’s liquid at room temperature.
If you’re new to making yeasted bread, most, if not all, of these ingredients can be found in the baking aisle.
How to Make Thin Crust Pizza Dough
To watch this pizza dough recipe come together, watch the video below. For a full tutorial on how to make thin crust pizza, including how to safely remove the pizza off the peel before baking, watch my really good thin crust pizza YouTube video here.
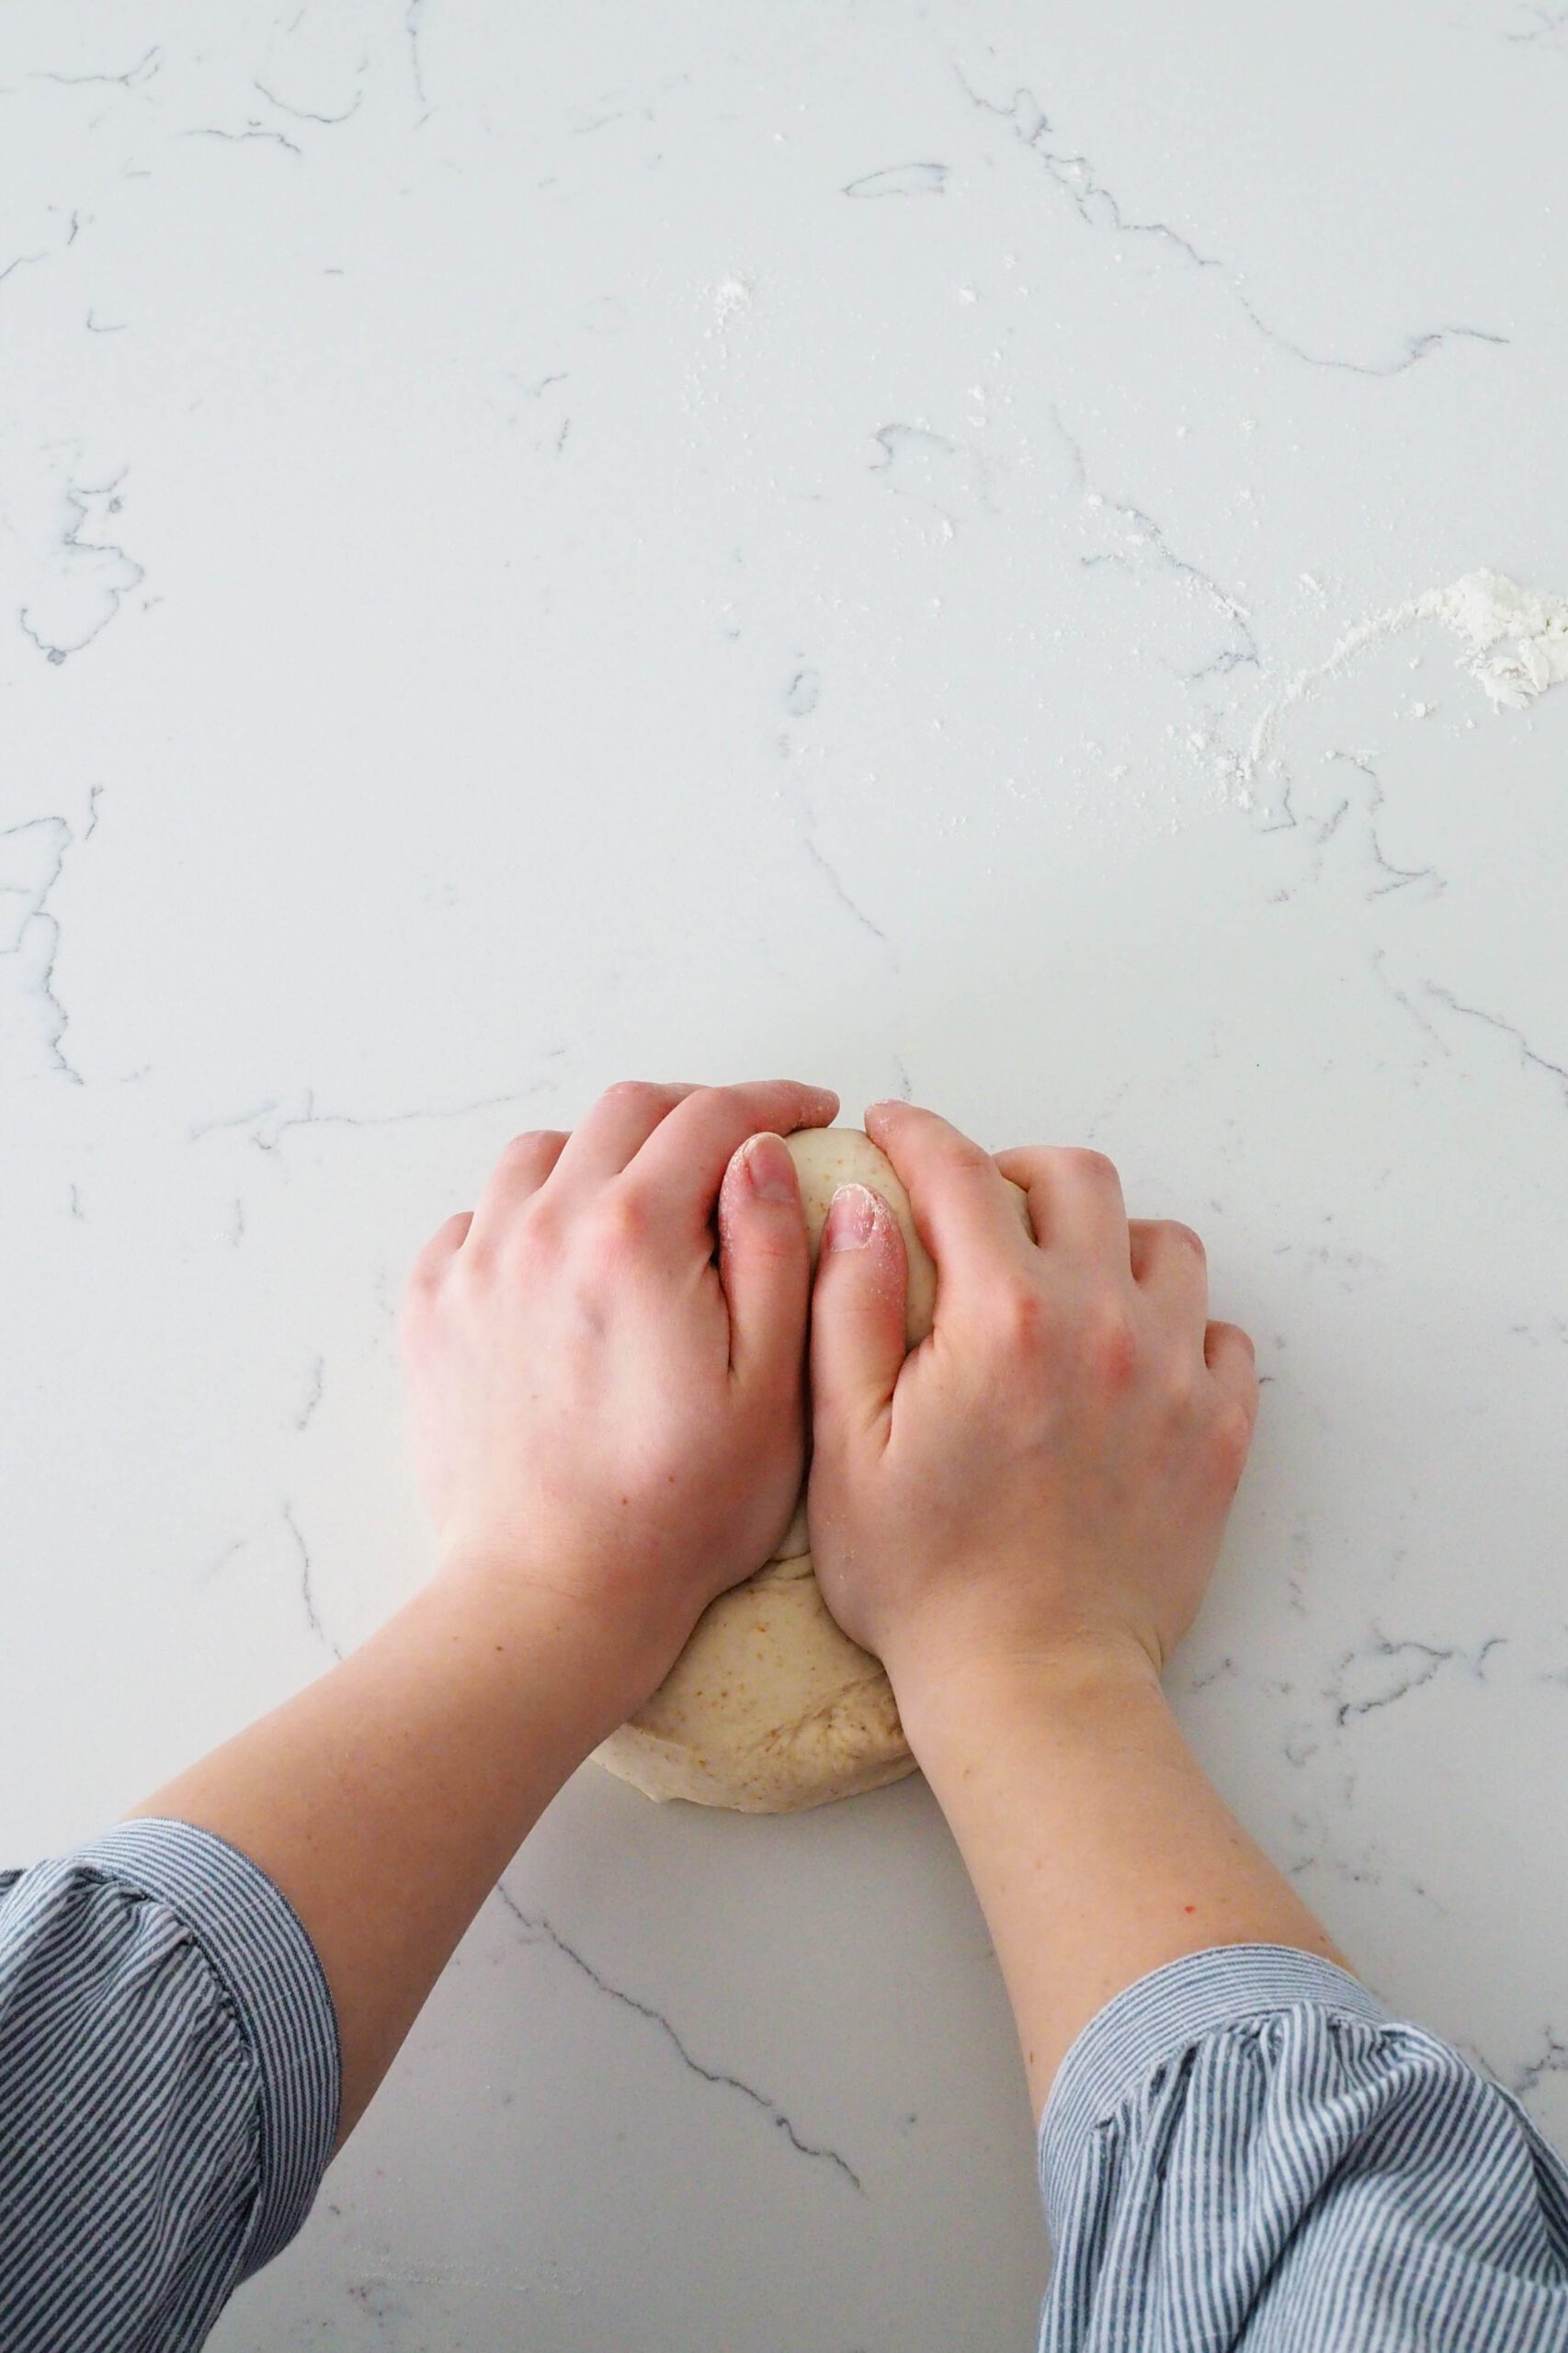
This pizza dough recipe can be made with a stand mixer or kneaded by hand. Kneading by hand takes about twice the time but is still entirely doable.
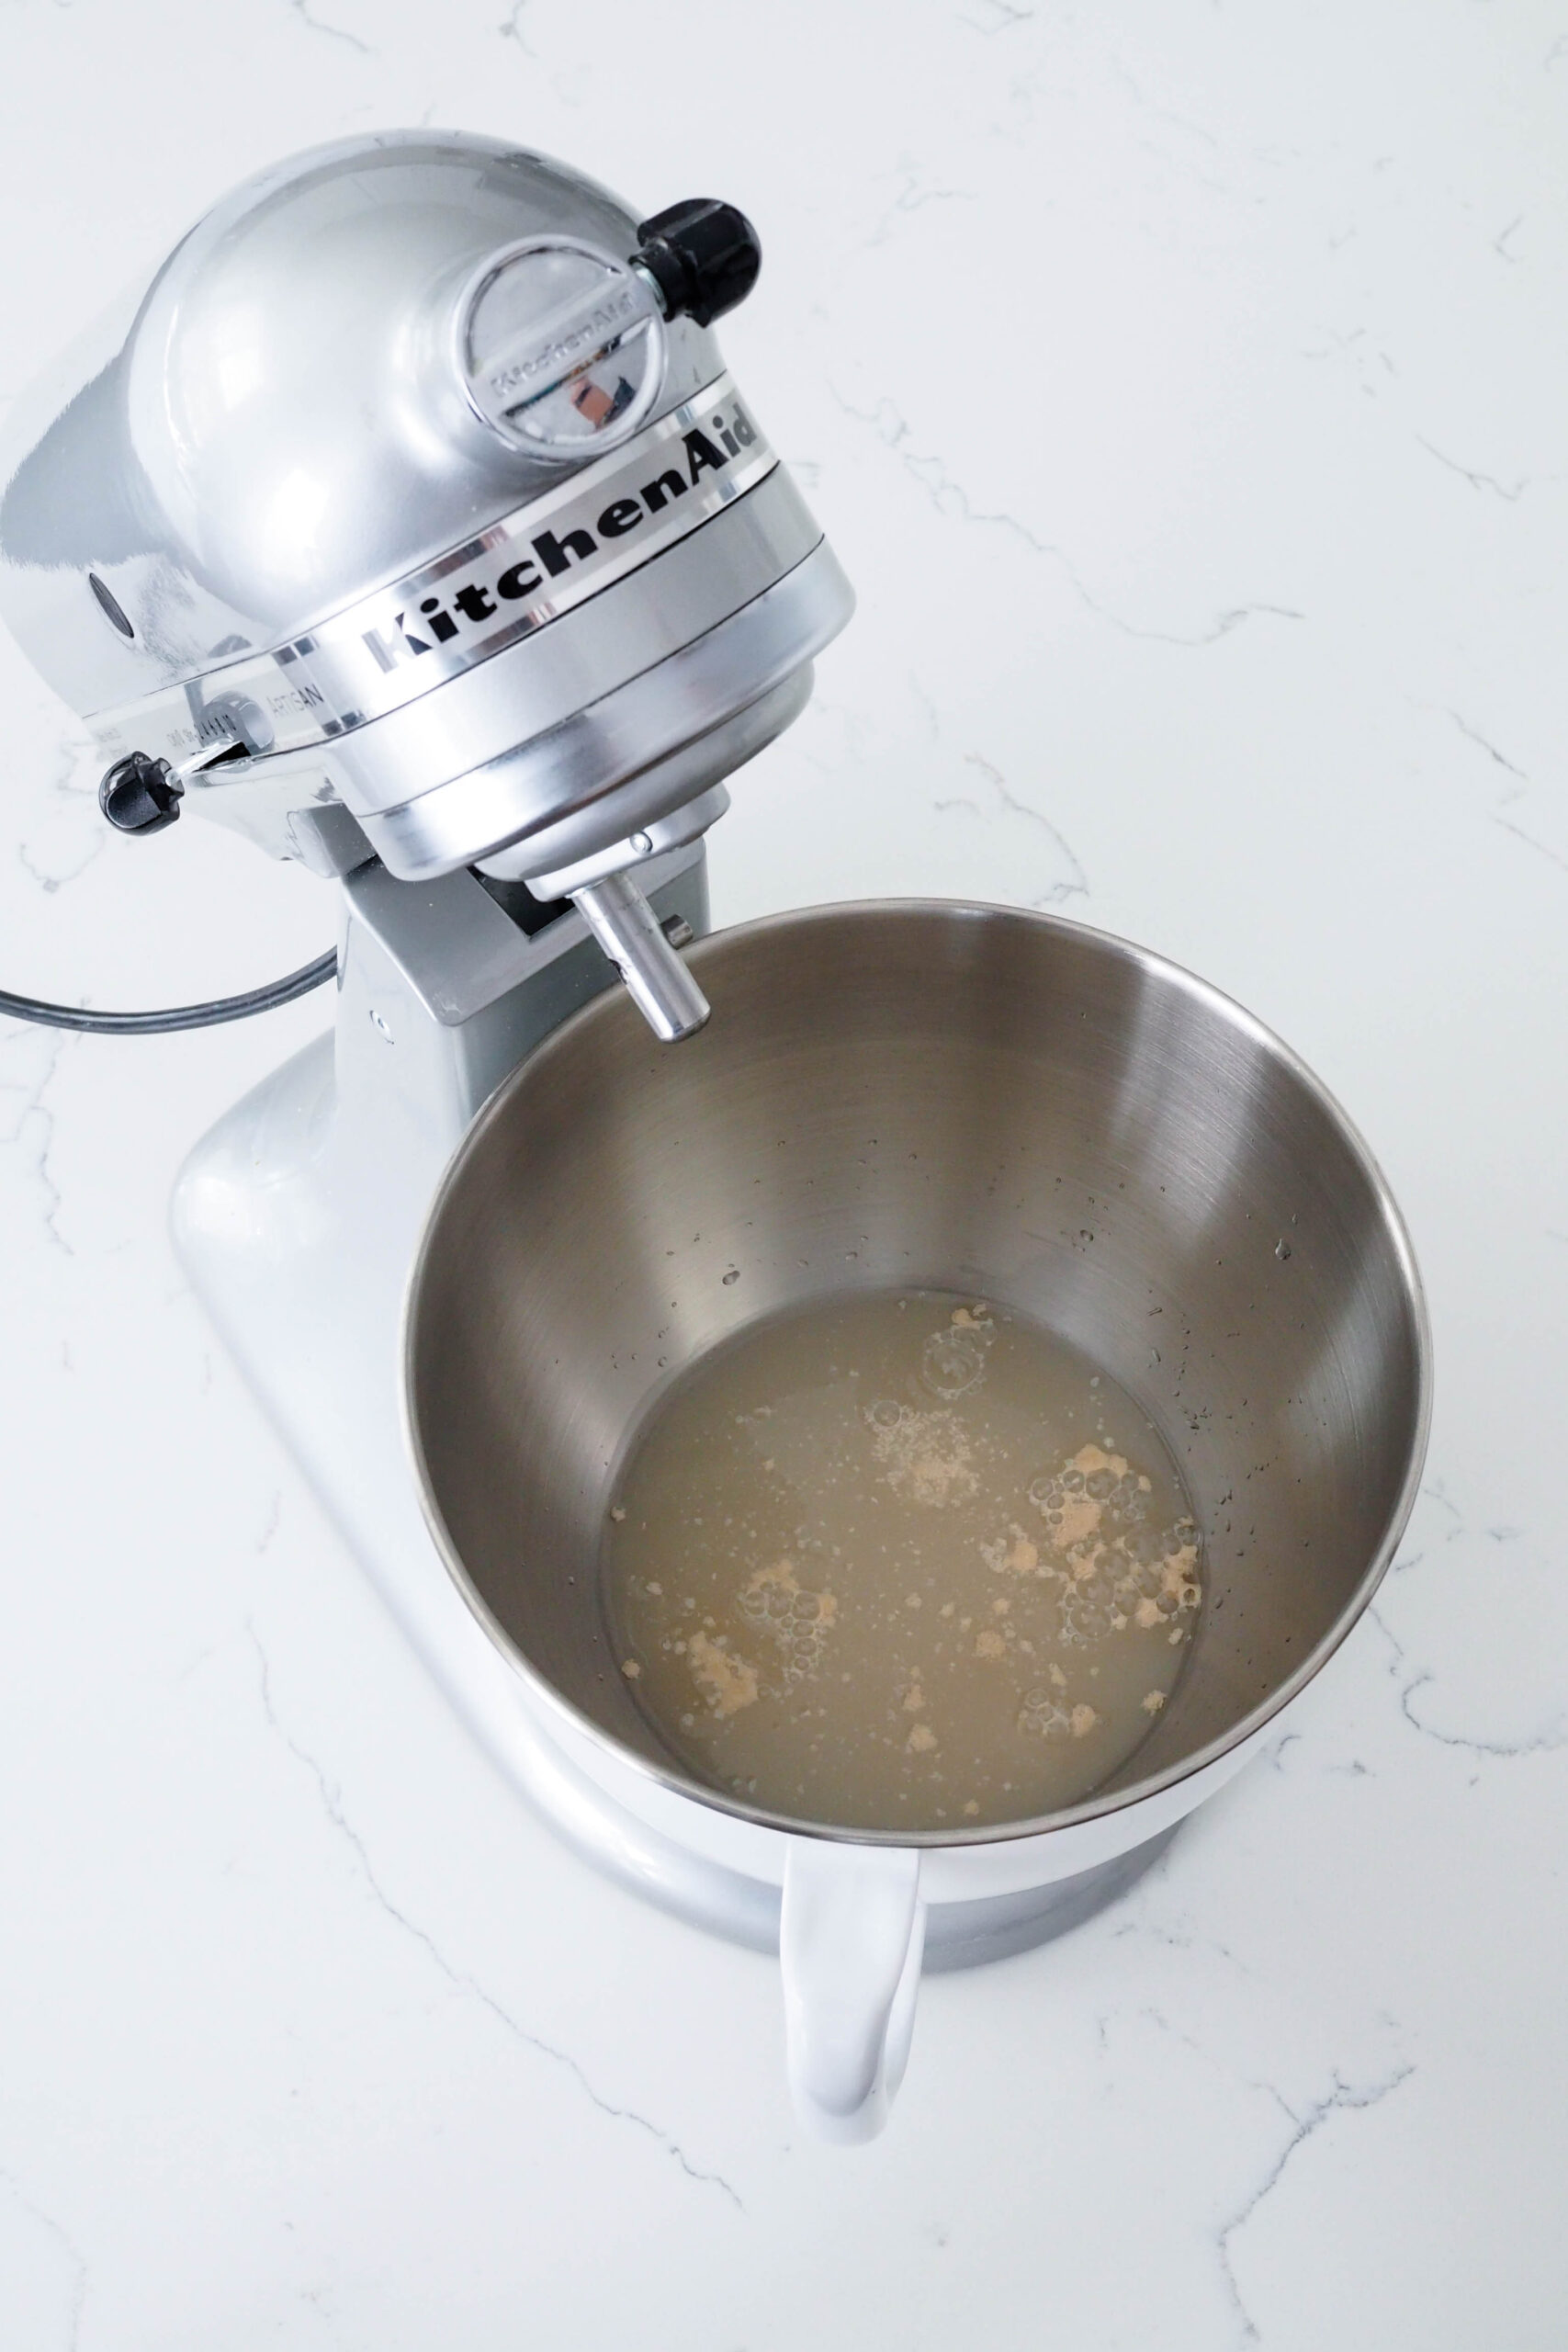
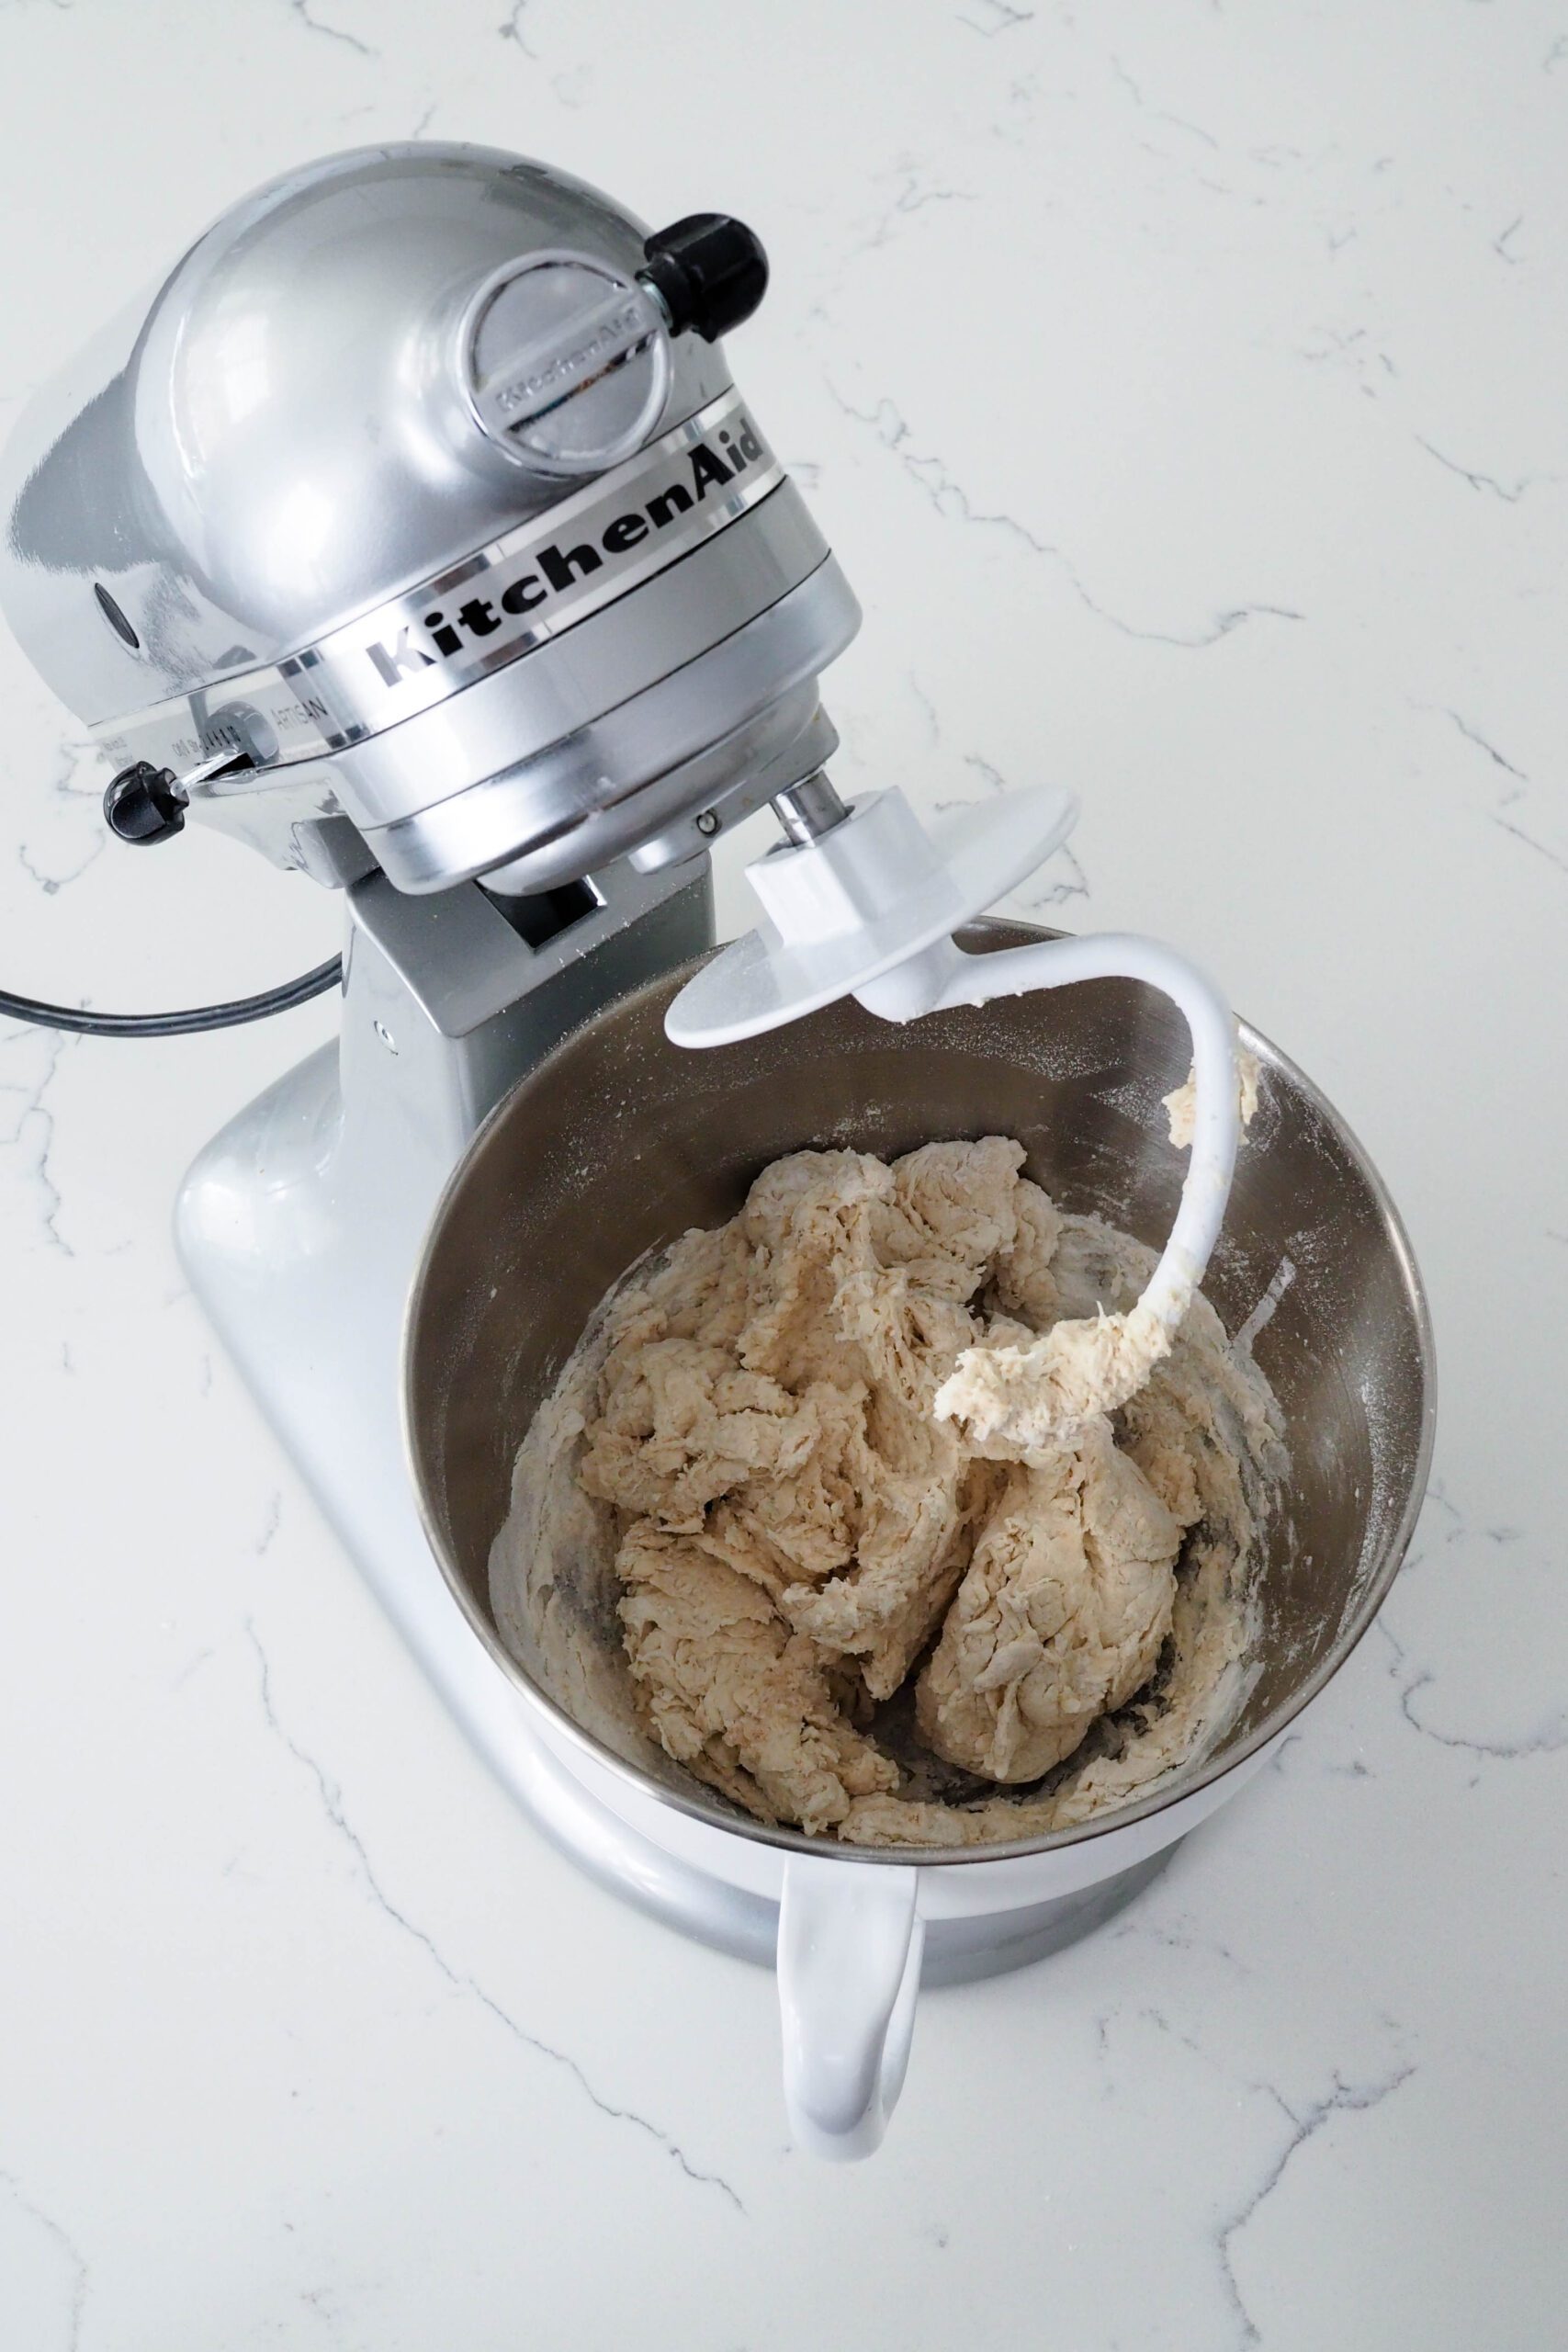
I have the easiest time incorporating all the ingredients if I go in stages. First, start with the yeast, sugar, and water. Once the yeast has activated, add half of the flour and mix it together to combine. It’s only once all the dough is added that the mixture requires kneading. If kneading by hand, a flexible bench scraper comes in handy for this part. You can also use a dough whisk.
Then, add the remaining flour, salt, and olive oil, and stir/knead until it becomes a shaggy dough.
Kneading Thin Crust Pizza Dough
This pizza dough will take 10-20 minutes to develop enough gluten. A stand mixer will cut the time down to 10-15 minutes. Kneading by hand takes longer, at 15-20 minutes.
Once the dough is stretchy and only tacky (not sticky), begin testing the pizza dough to see if it has enough gluten.
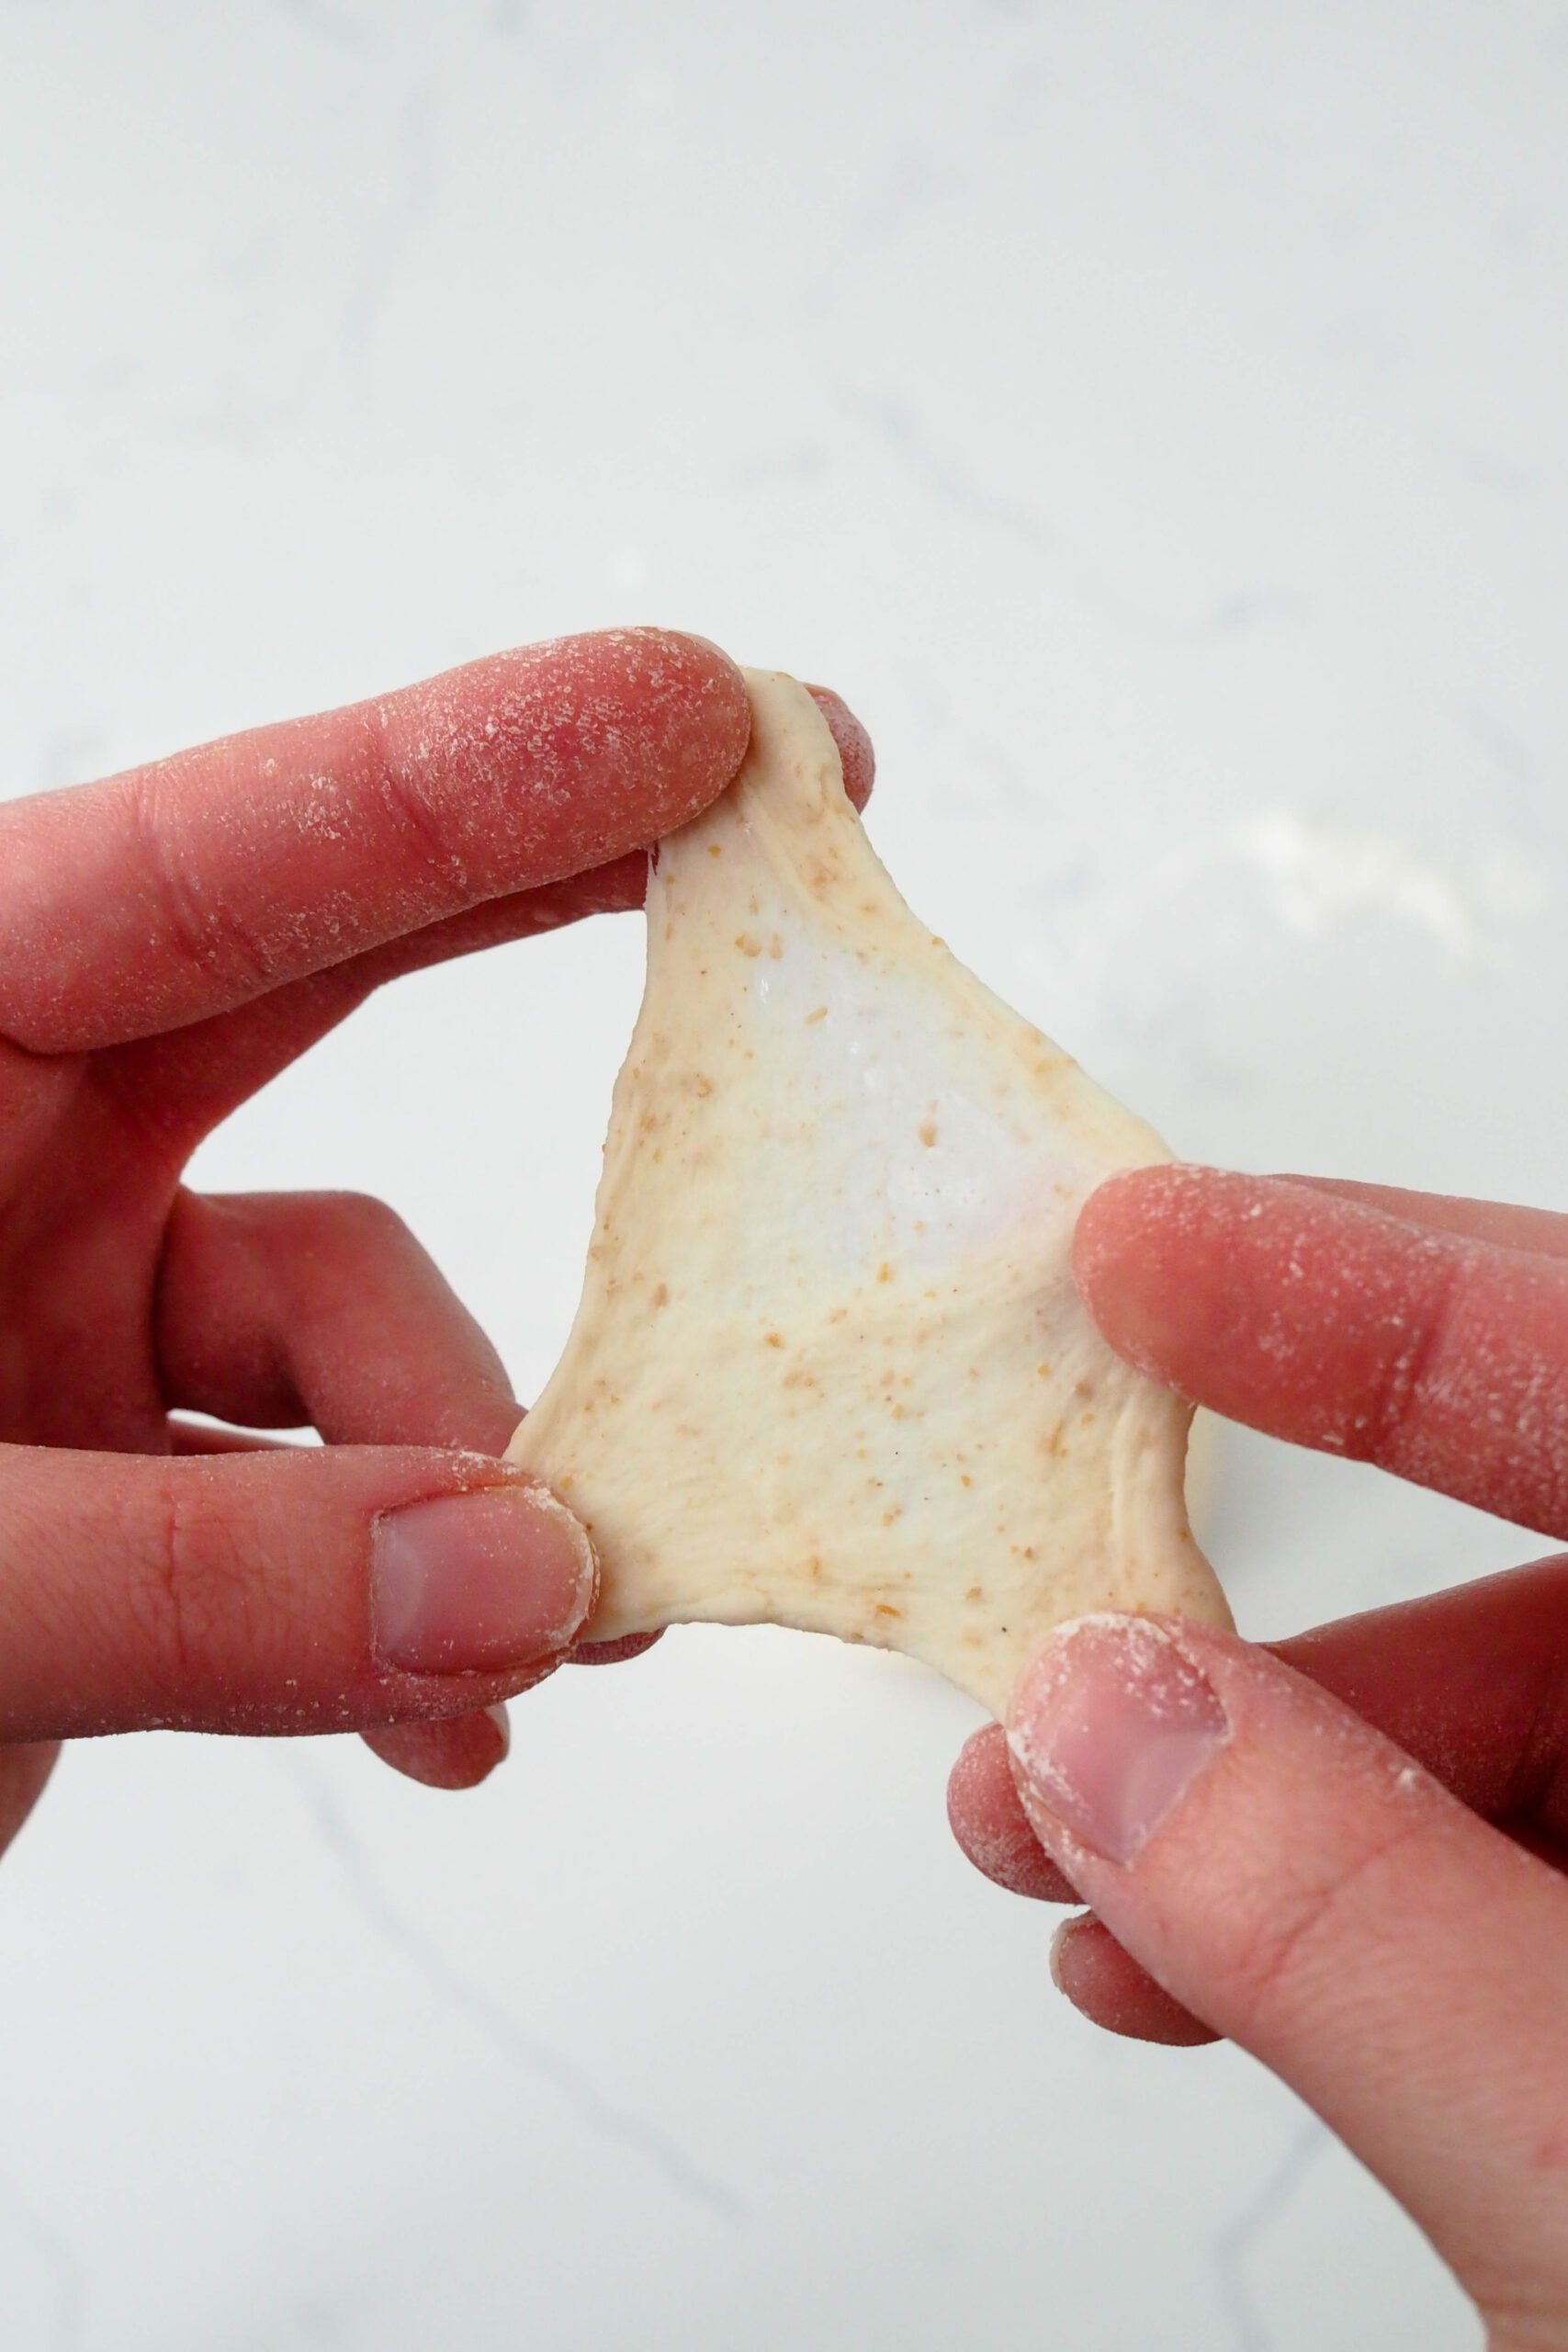
How to Tell When Thin Crust Pizza Dough Has Enough Gluten
Use the windowpane test! Pinch off a piece of dough about the size of a quarter and slowly pull it apart in your fingers.
Hold it up to a window or another light source. If it stretches thin enough to see light through it, you have developed enough gluten! If it breaks and doesn’t stretch much, knead for another minute and retest.
Proofing Thin Crust Pizza Dough
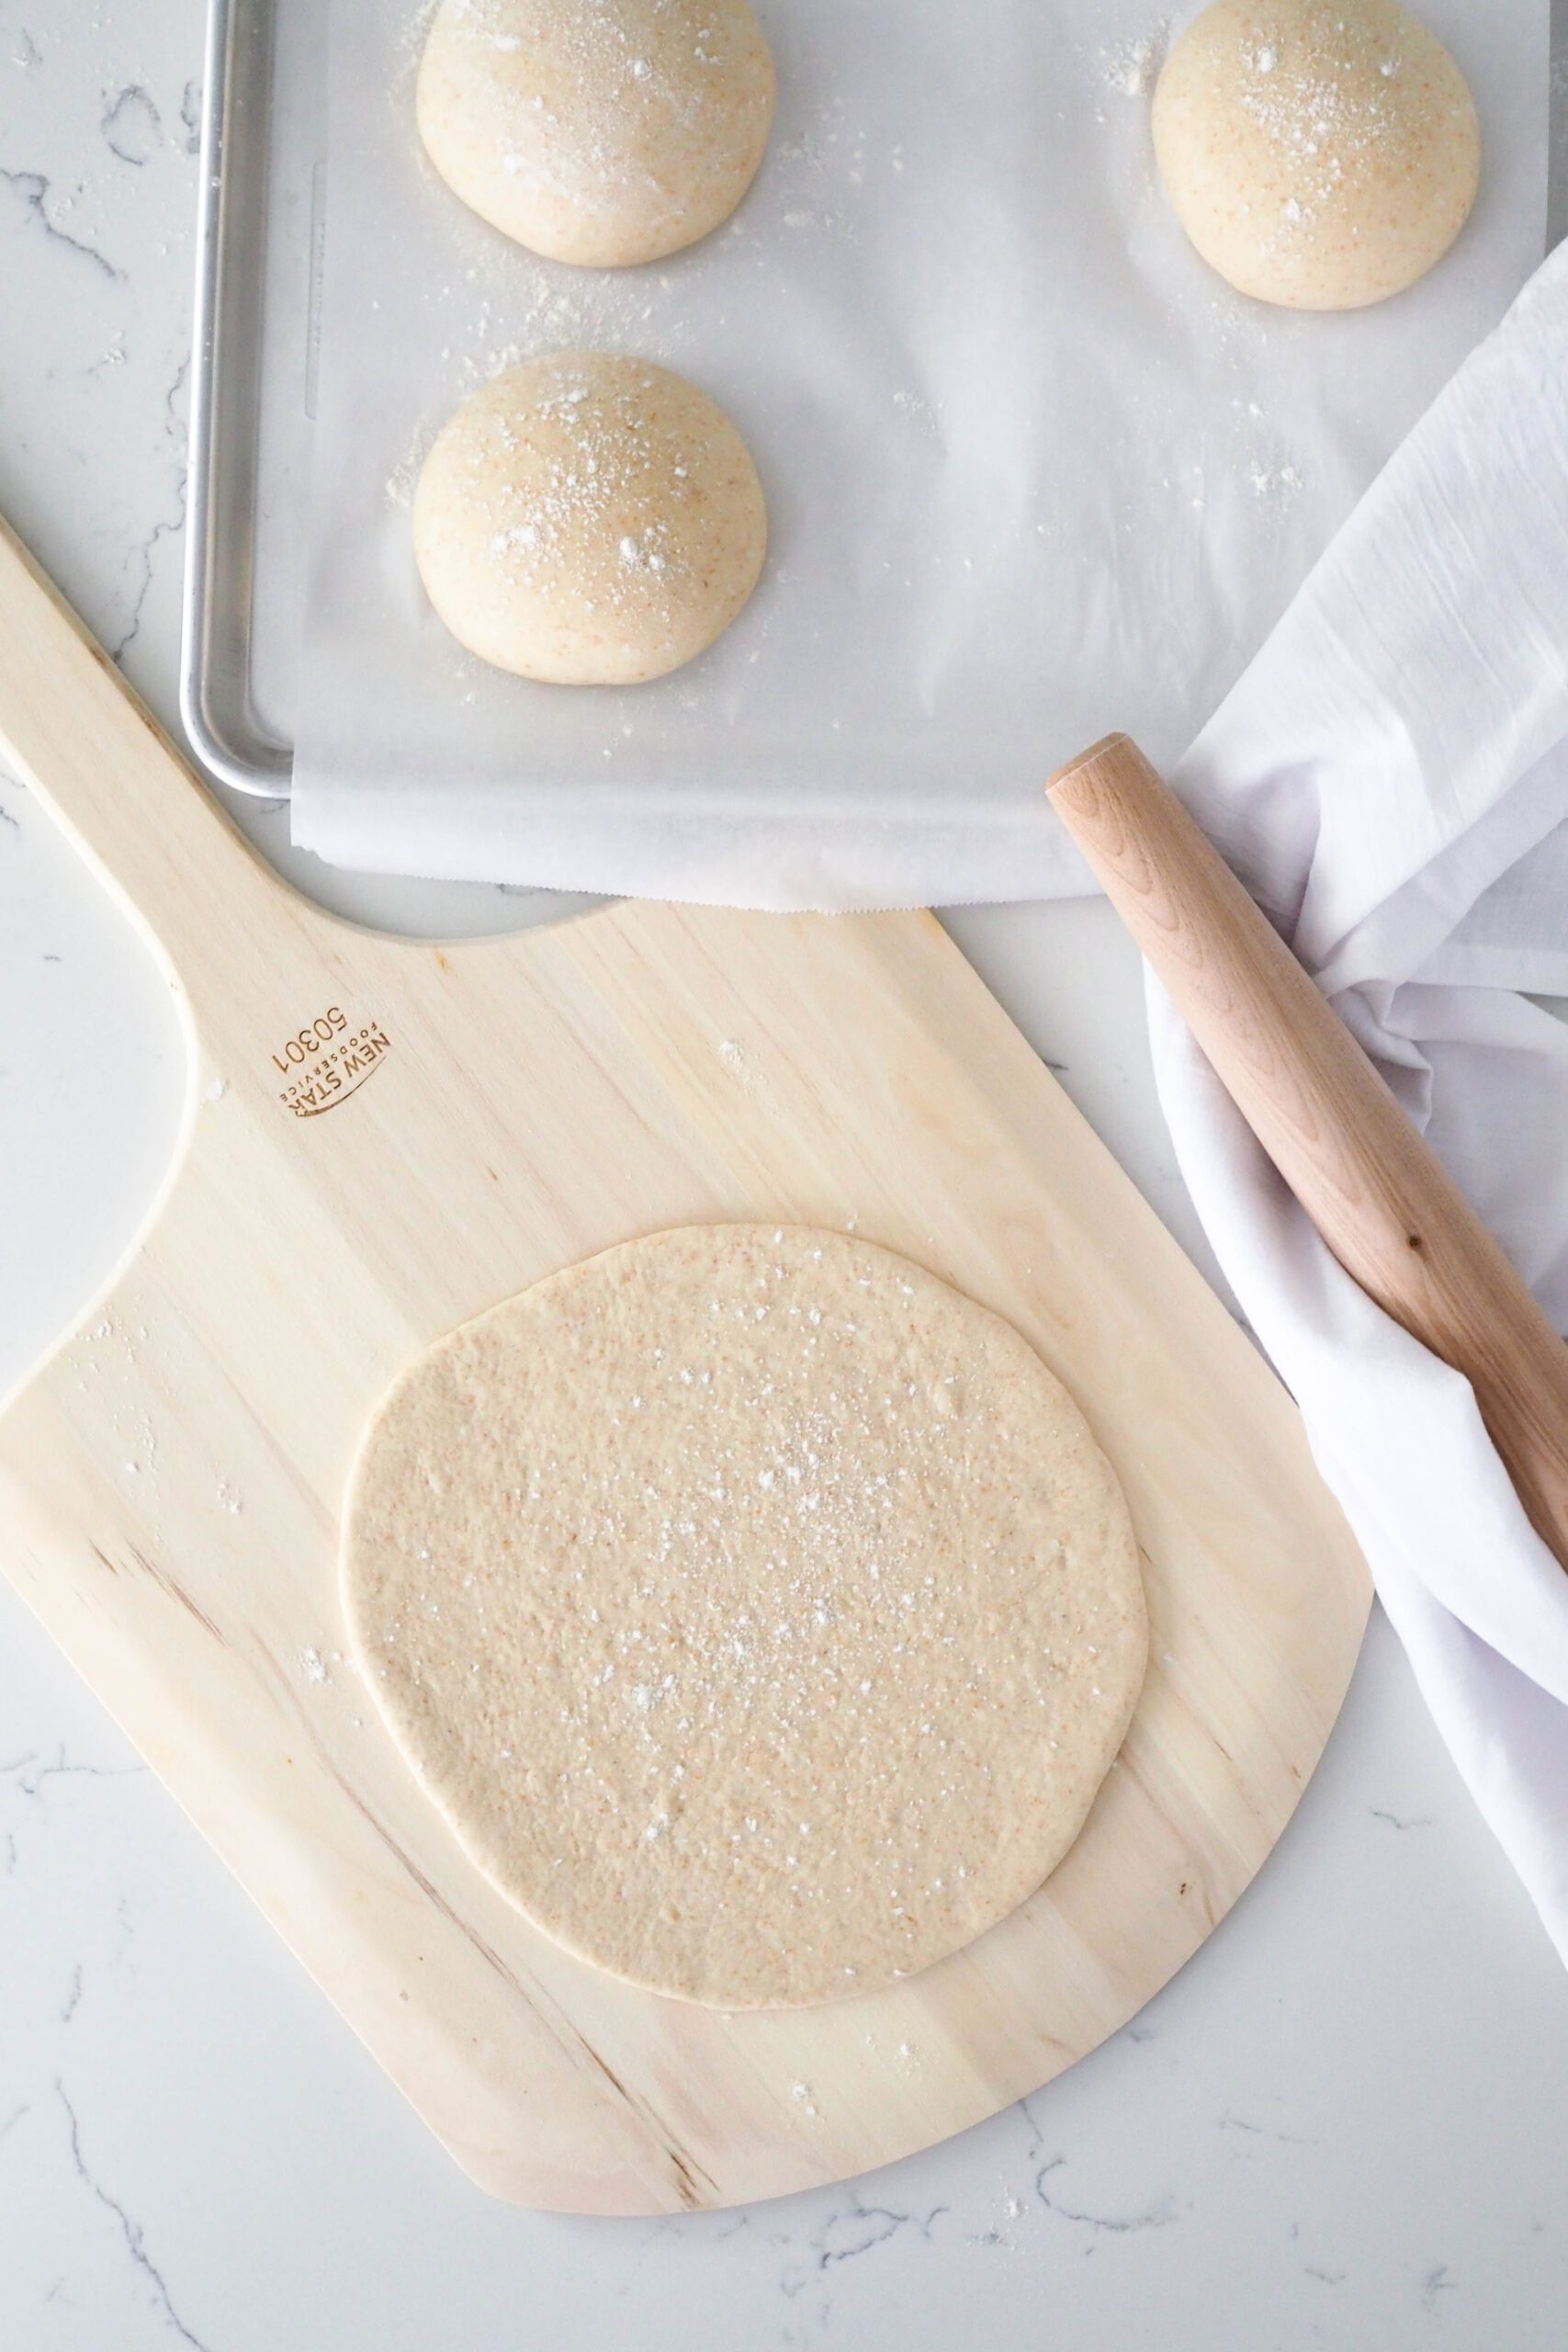
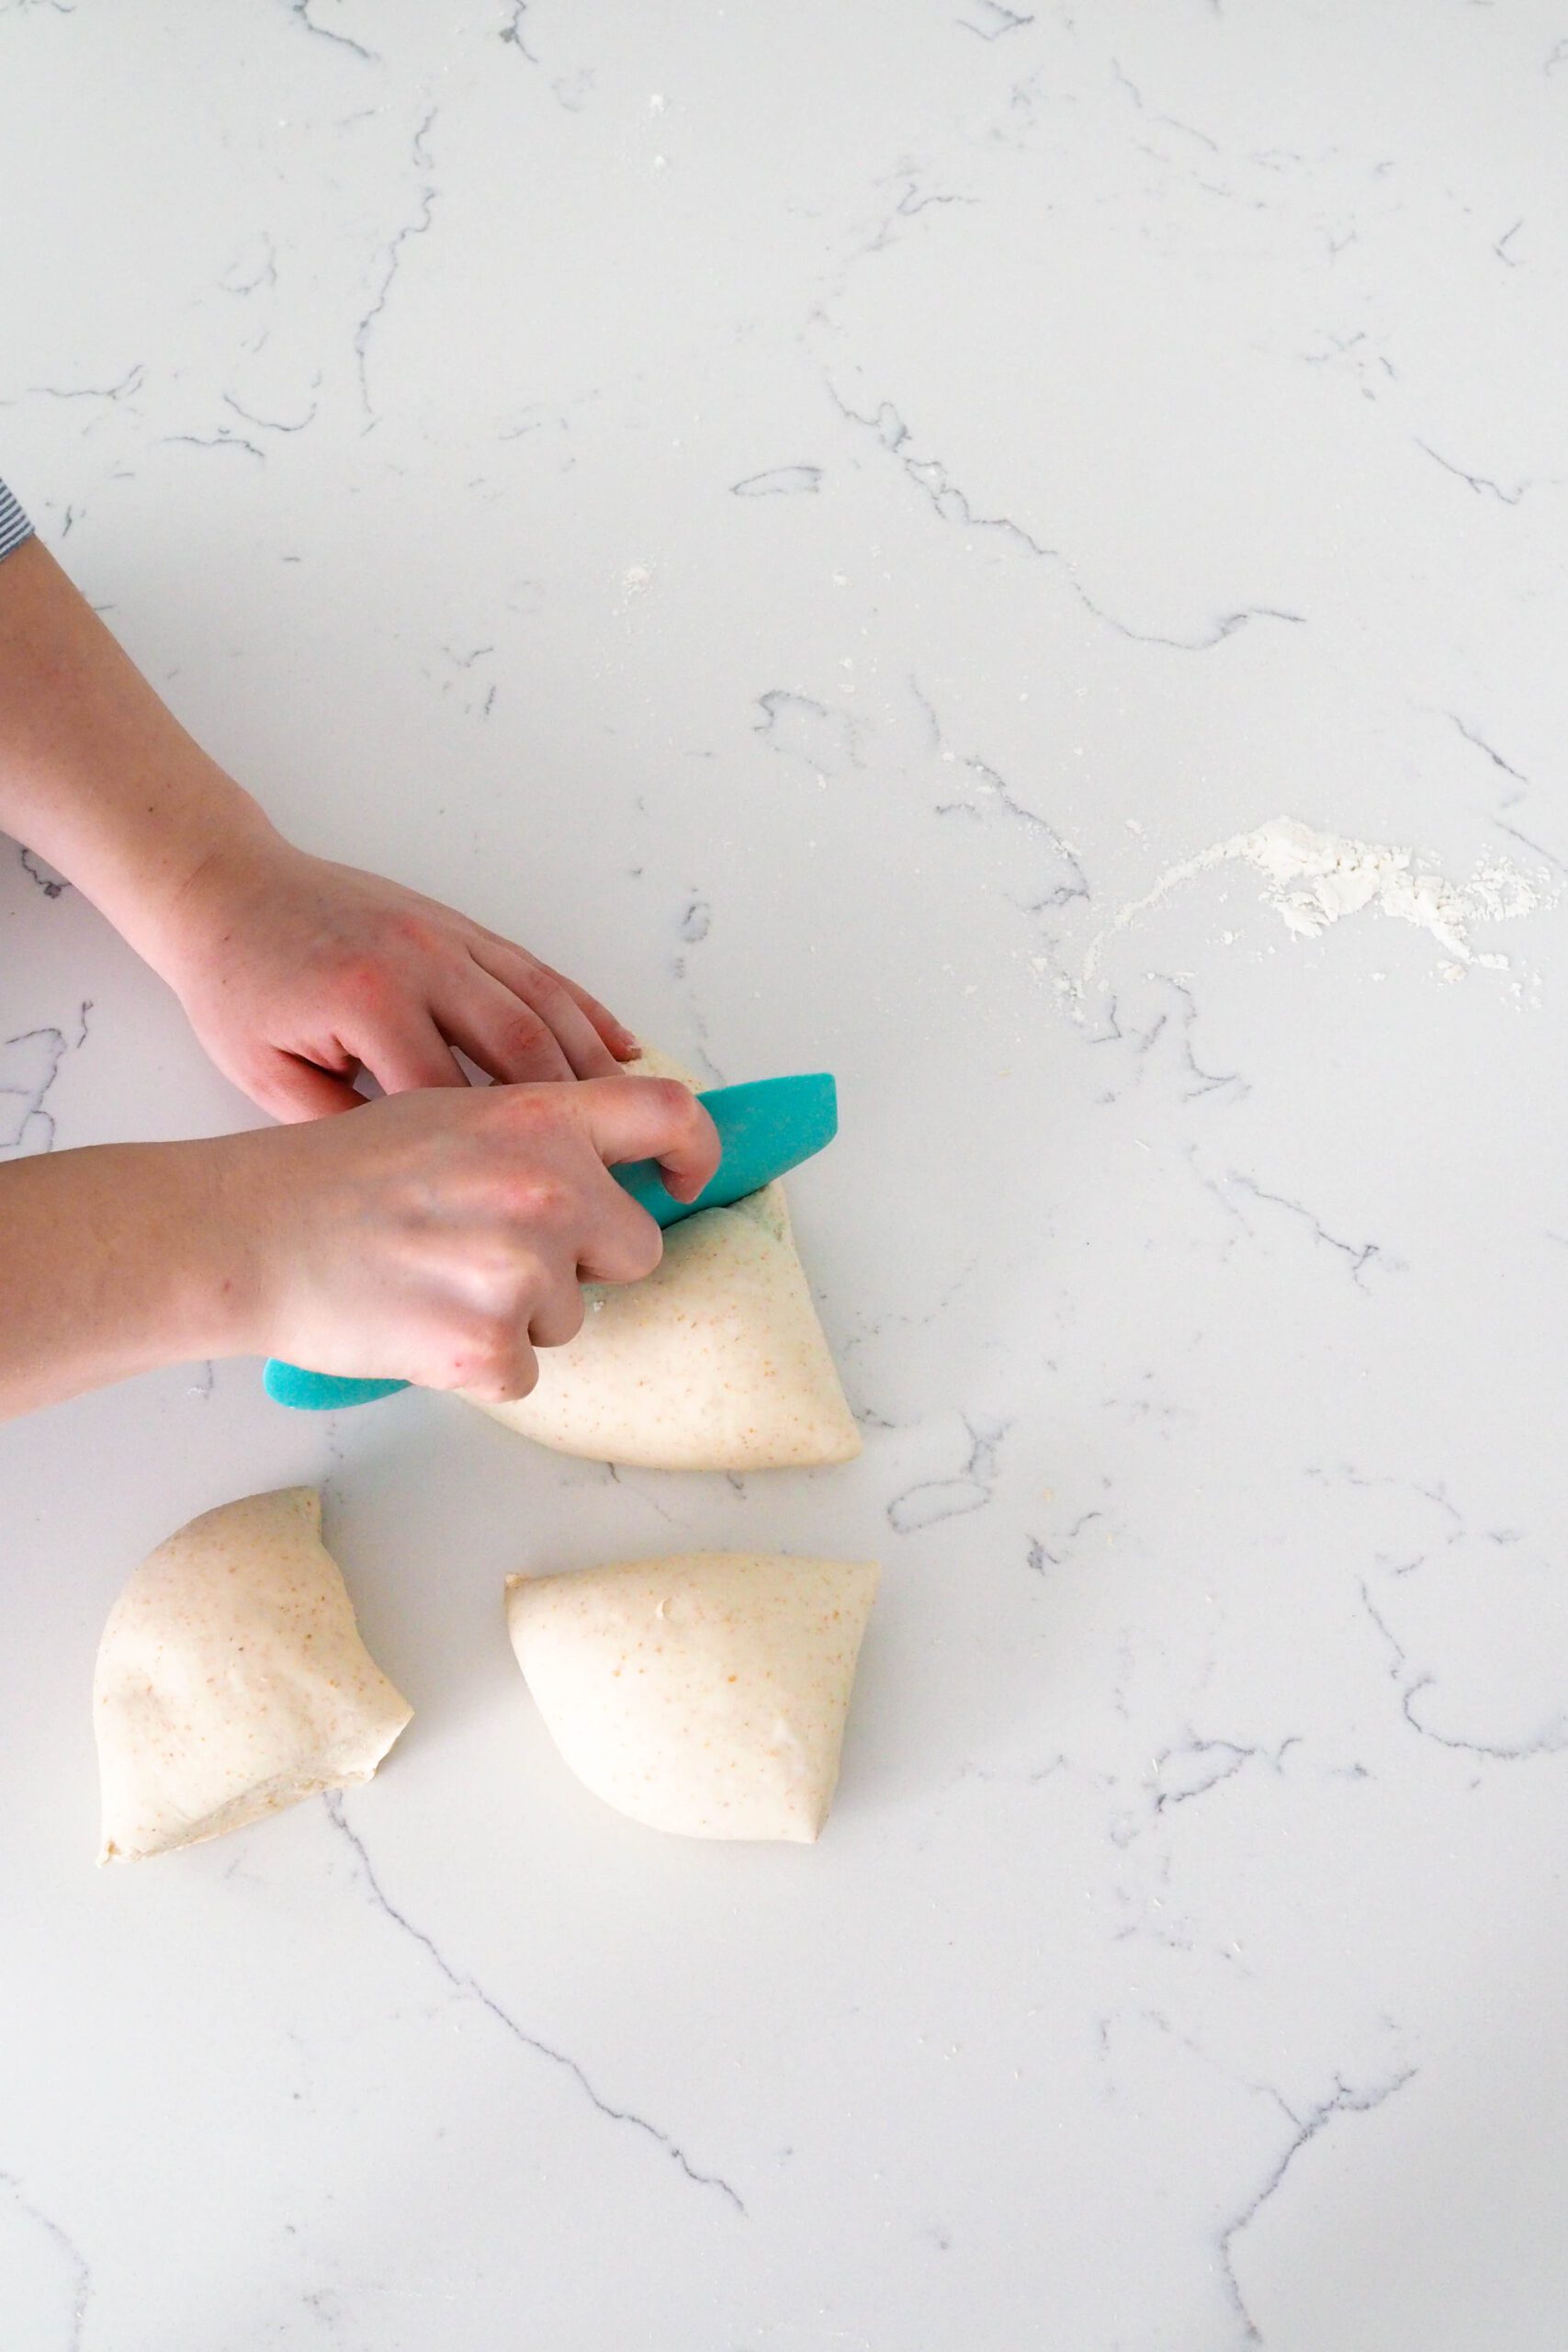
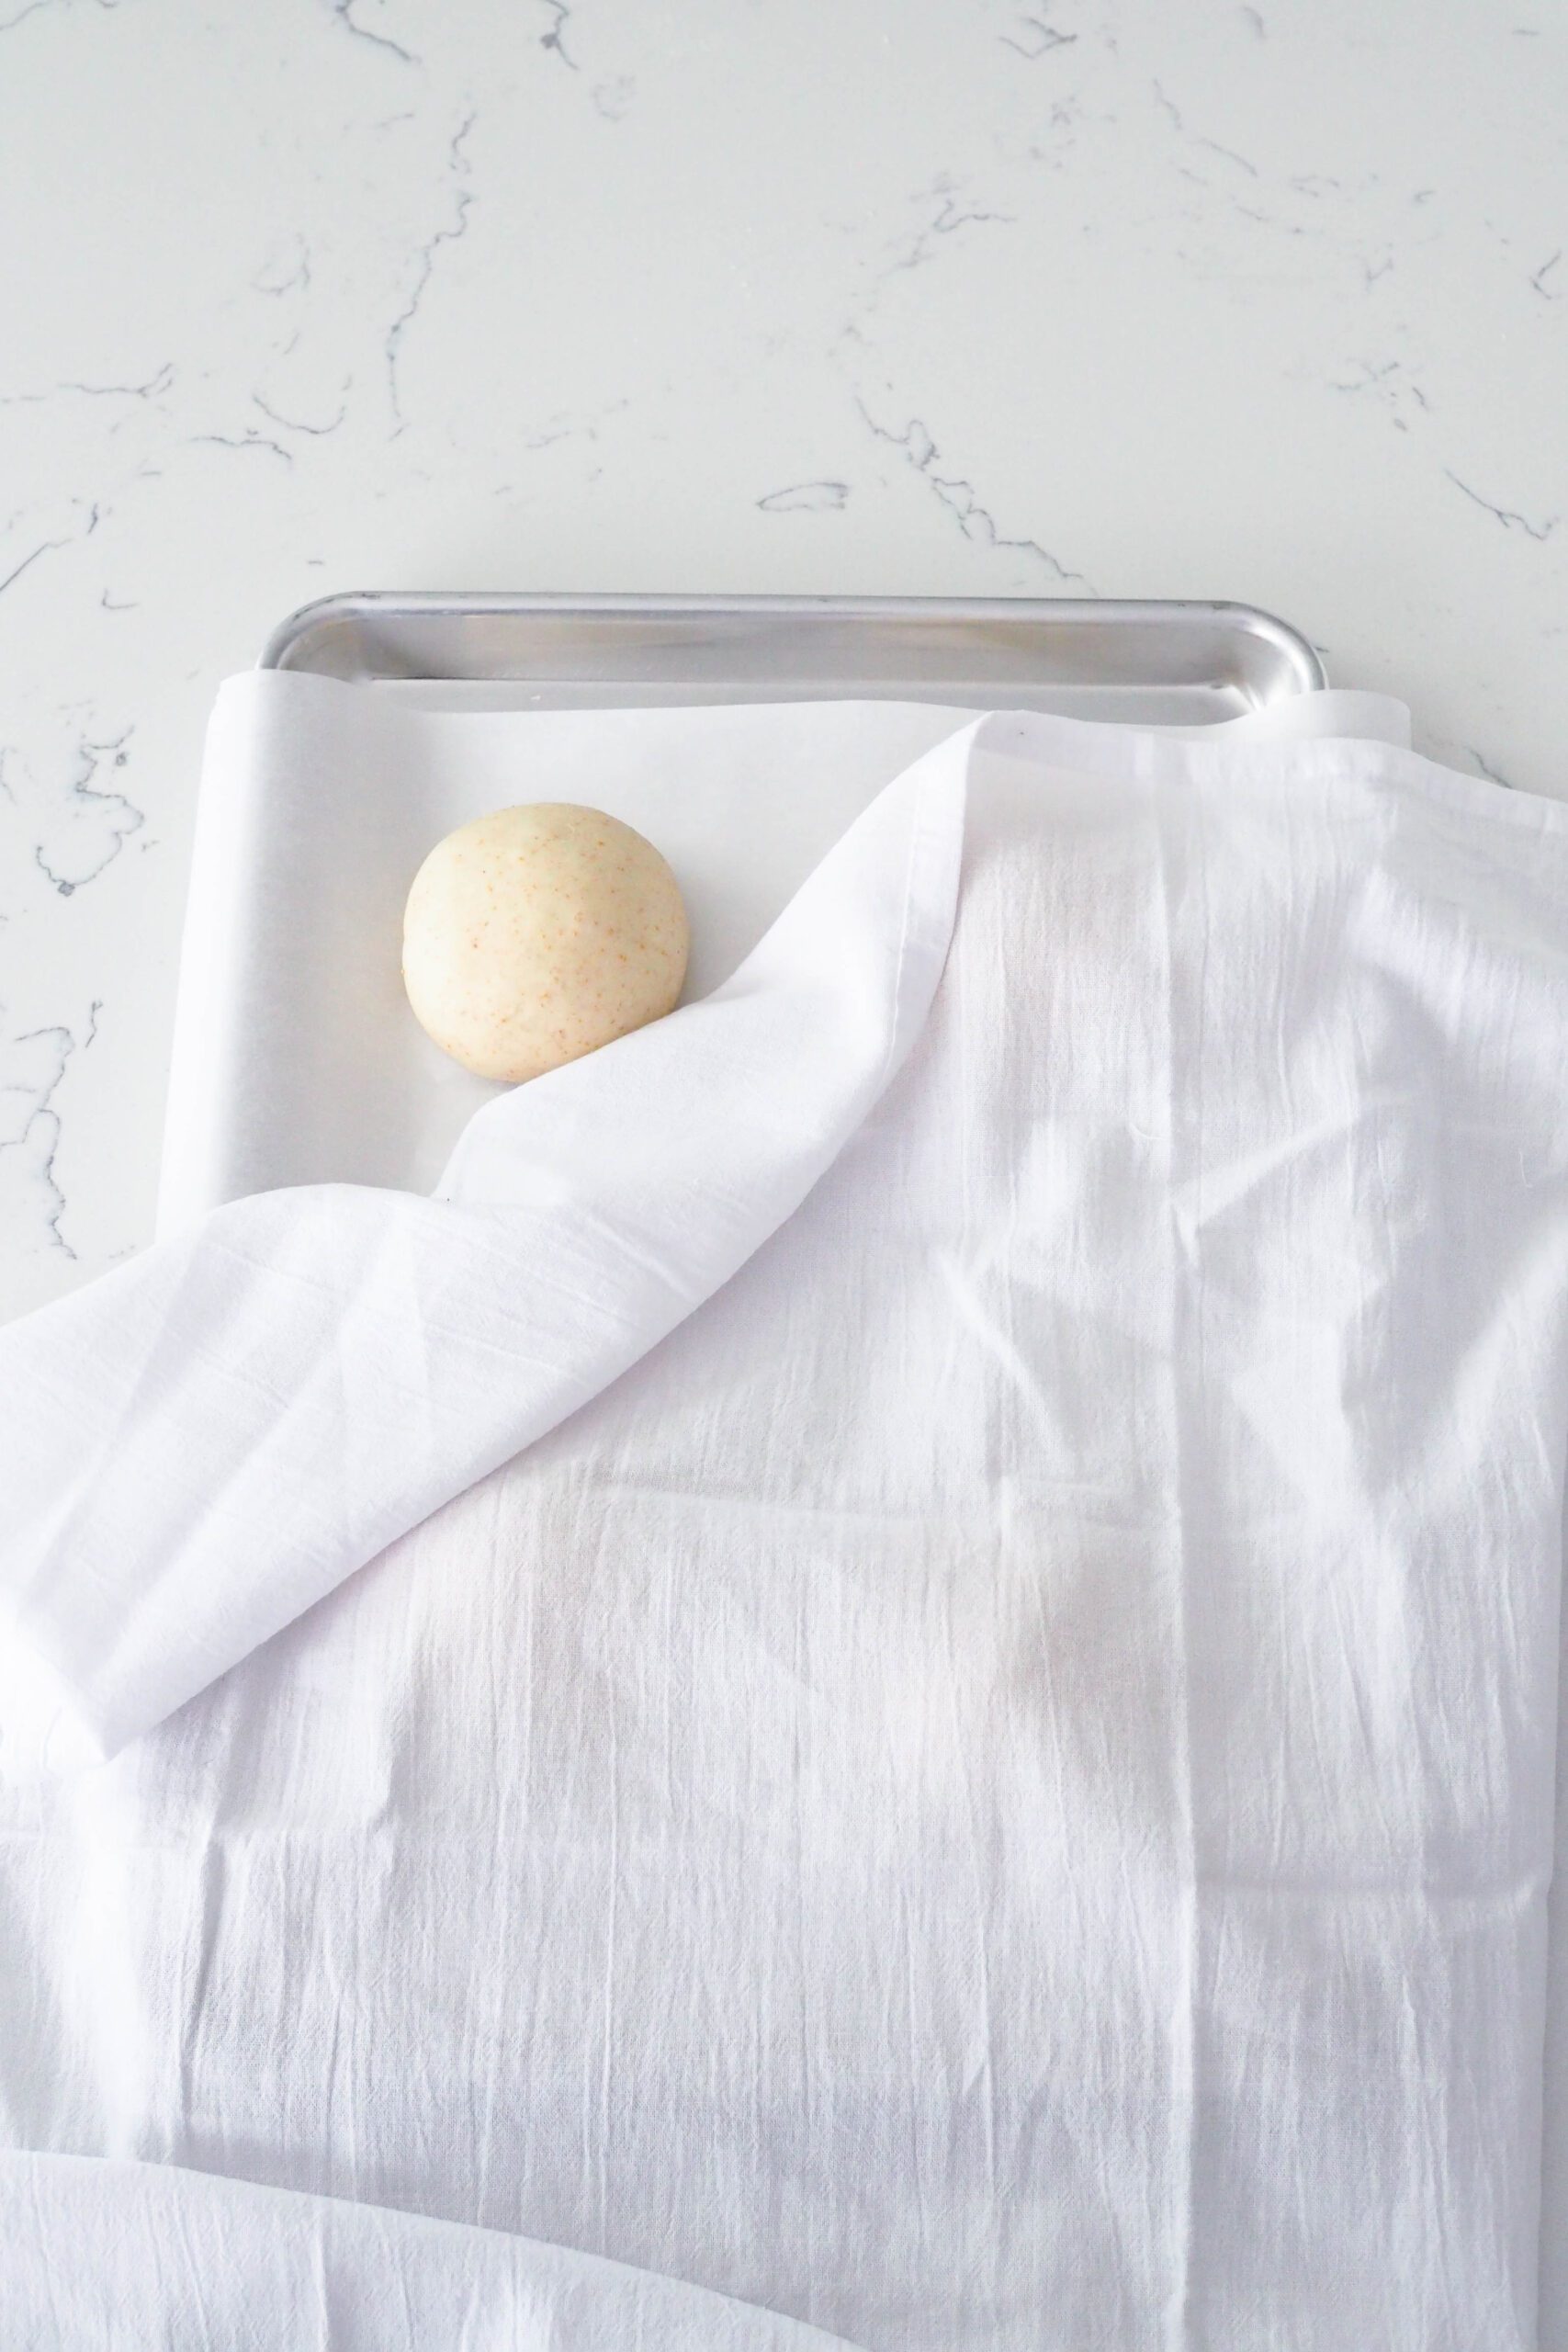
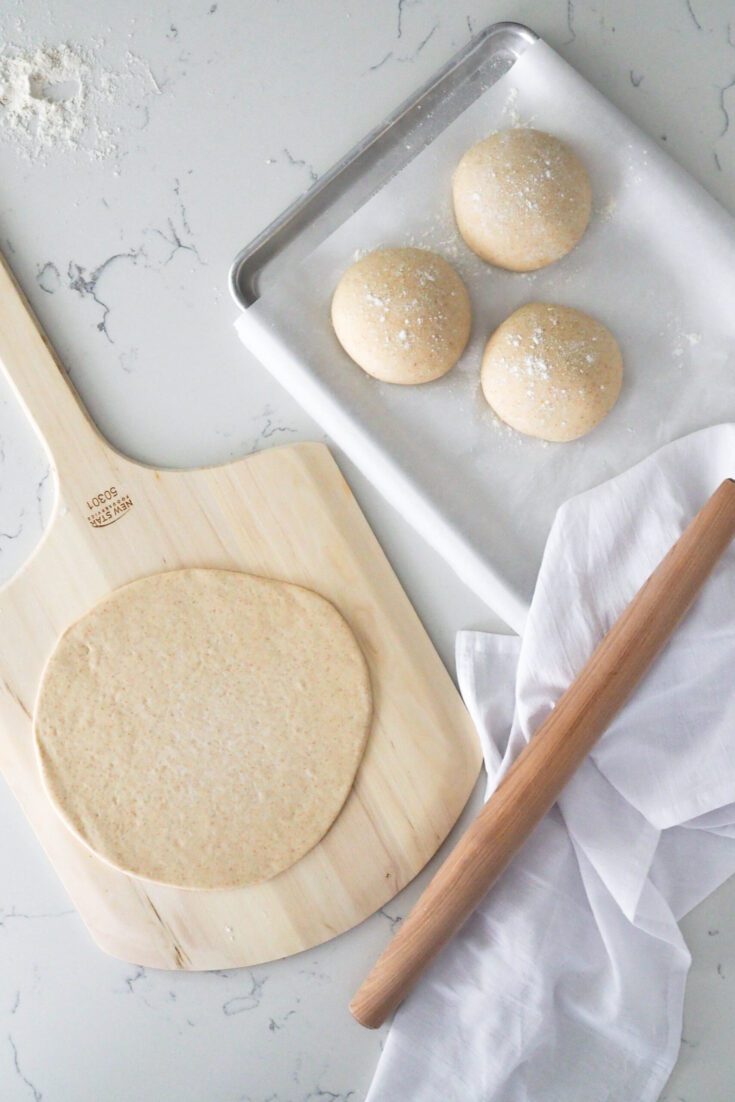
This dough can be proofed as one large ball of dough or divided up and proofed as four smaller balls of dough. Both turn out the exact same pizza. Use whatever method is most convenient for you.
I like using my Breville toaster oven’s proofing setting to proof bread. My stand mixer bowl is too tall to fit in the countertop oven, however, so I divide the dough into four before the first proof and place the dough balls on a baking sheet lined with parchment paper.
Either way, be sure to cover the dough with a towel or plastic wrap to prevent it from drying out until it doubles in size.
How to Roll Out Thin Crust Pizza Dough
There are a few tricks to successfully making and rolling out thin crust pizza dough at home. The number one thing to keep in mind while making pizza is time.
Before you start rolling out your pizza dough, make sure your pizza stone is in the oven and preheated. Have all your toppings ready and waiting.
Raw pizza dough is always in motion. Whether you see it or not, the yeast is fermenting, and the flour is absorbing water. Any excess flour sprinkled to prevent sticking will eventually get absorbed, and your pizza dough will stick to whatever surface it is on.
To lessen the stick, dust your workspace lightly with flour. Too much will dry out your dough, so be conservative with just a couple of Tablespoons max.
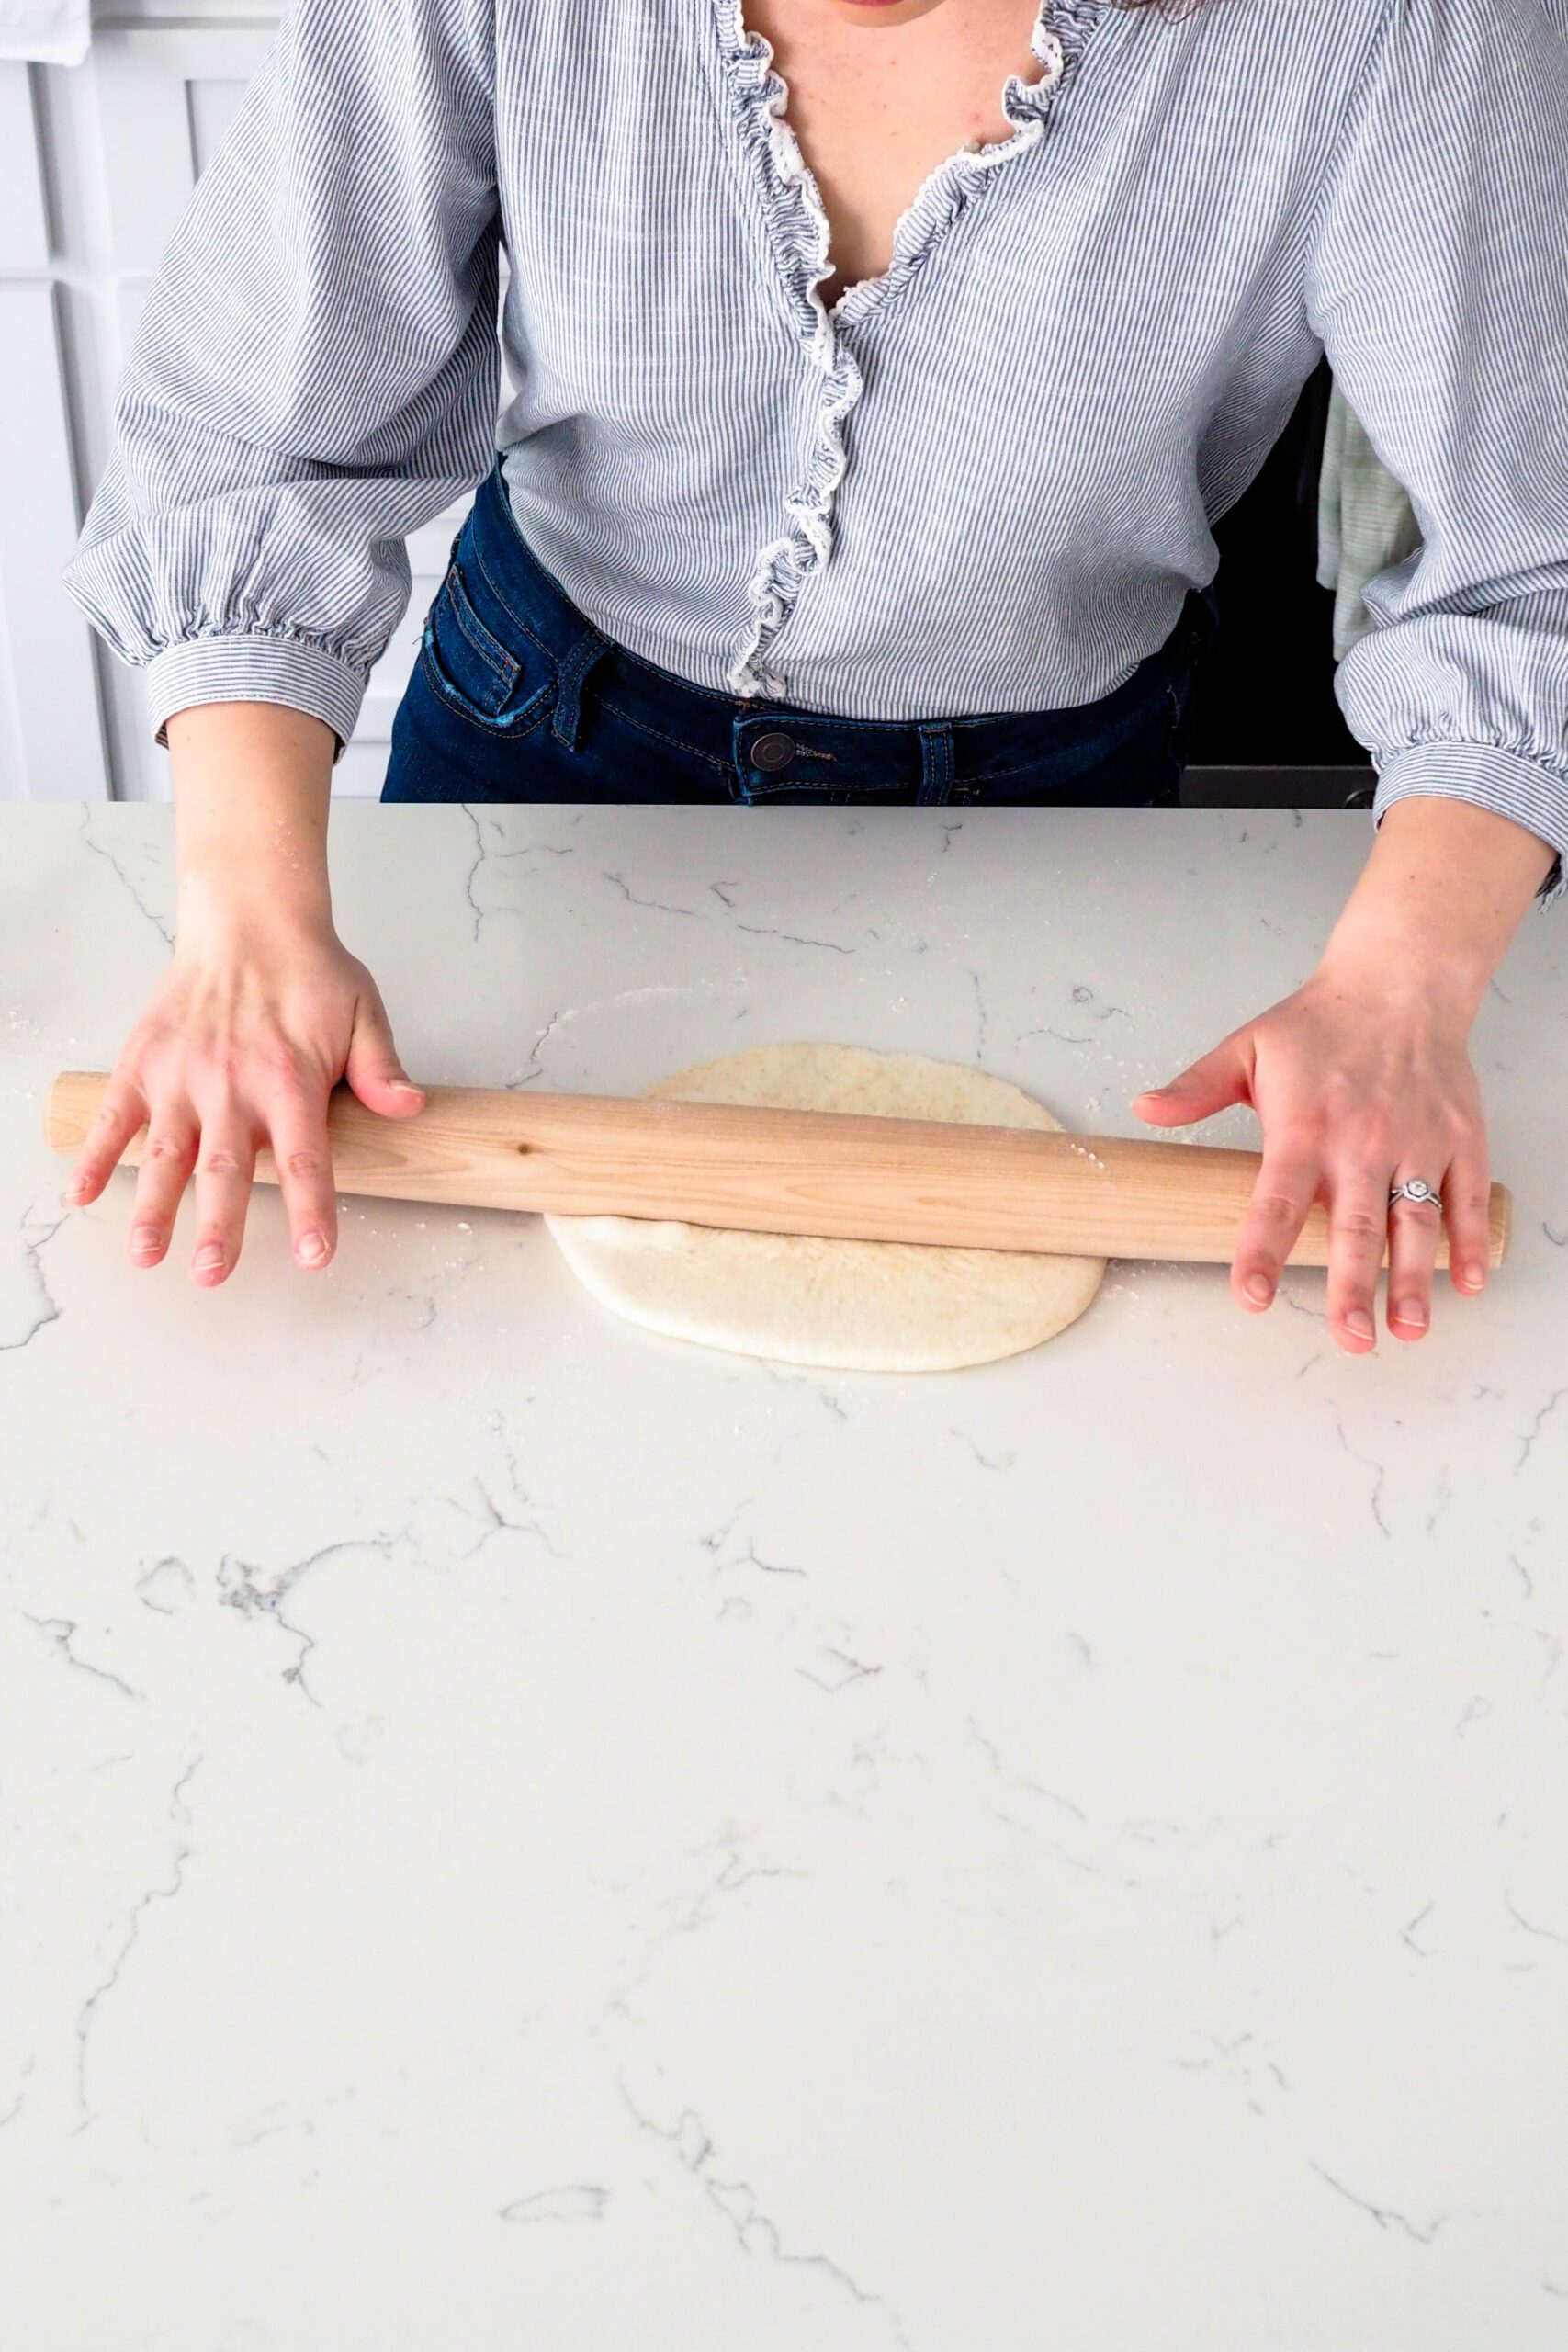
Then, roll out the pizza dough, one ball at a time: Place your rolling pin in the center of the dough ball on your workspace. Roll the pin away from you. Rotate the dough round one quarter turn, and then roll the dough out again. Repeat. The constant movement will prevent the dough from sticking to any one place on your countertop. Continue rolling out the dough until the round is about 12″ or 30 cm in diameter.
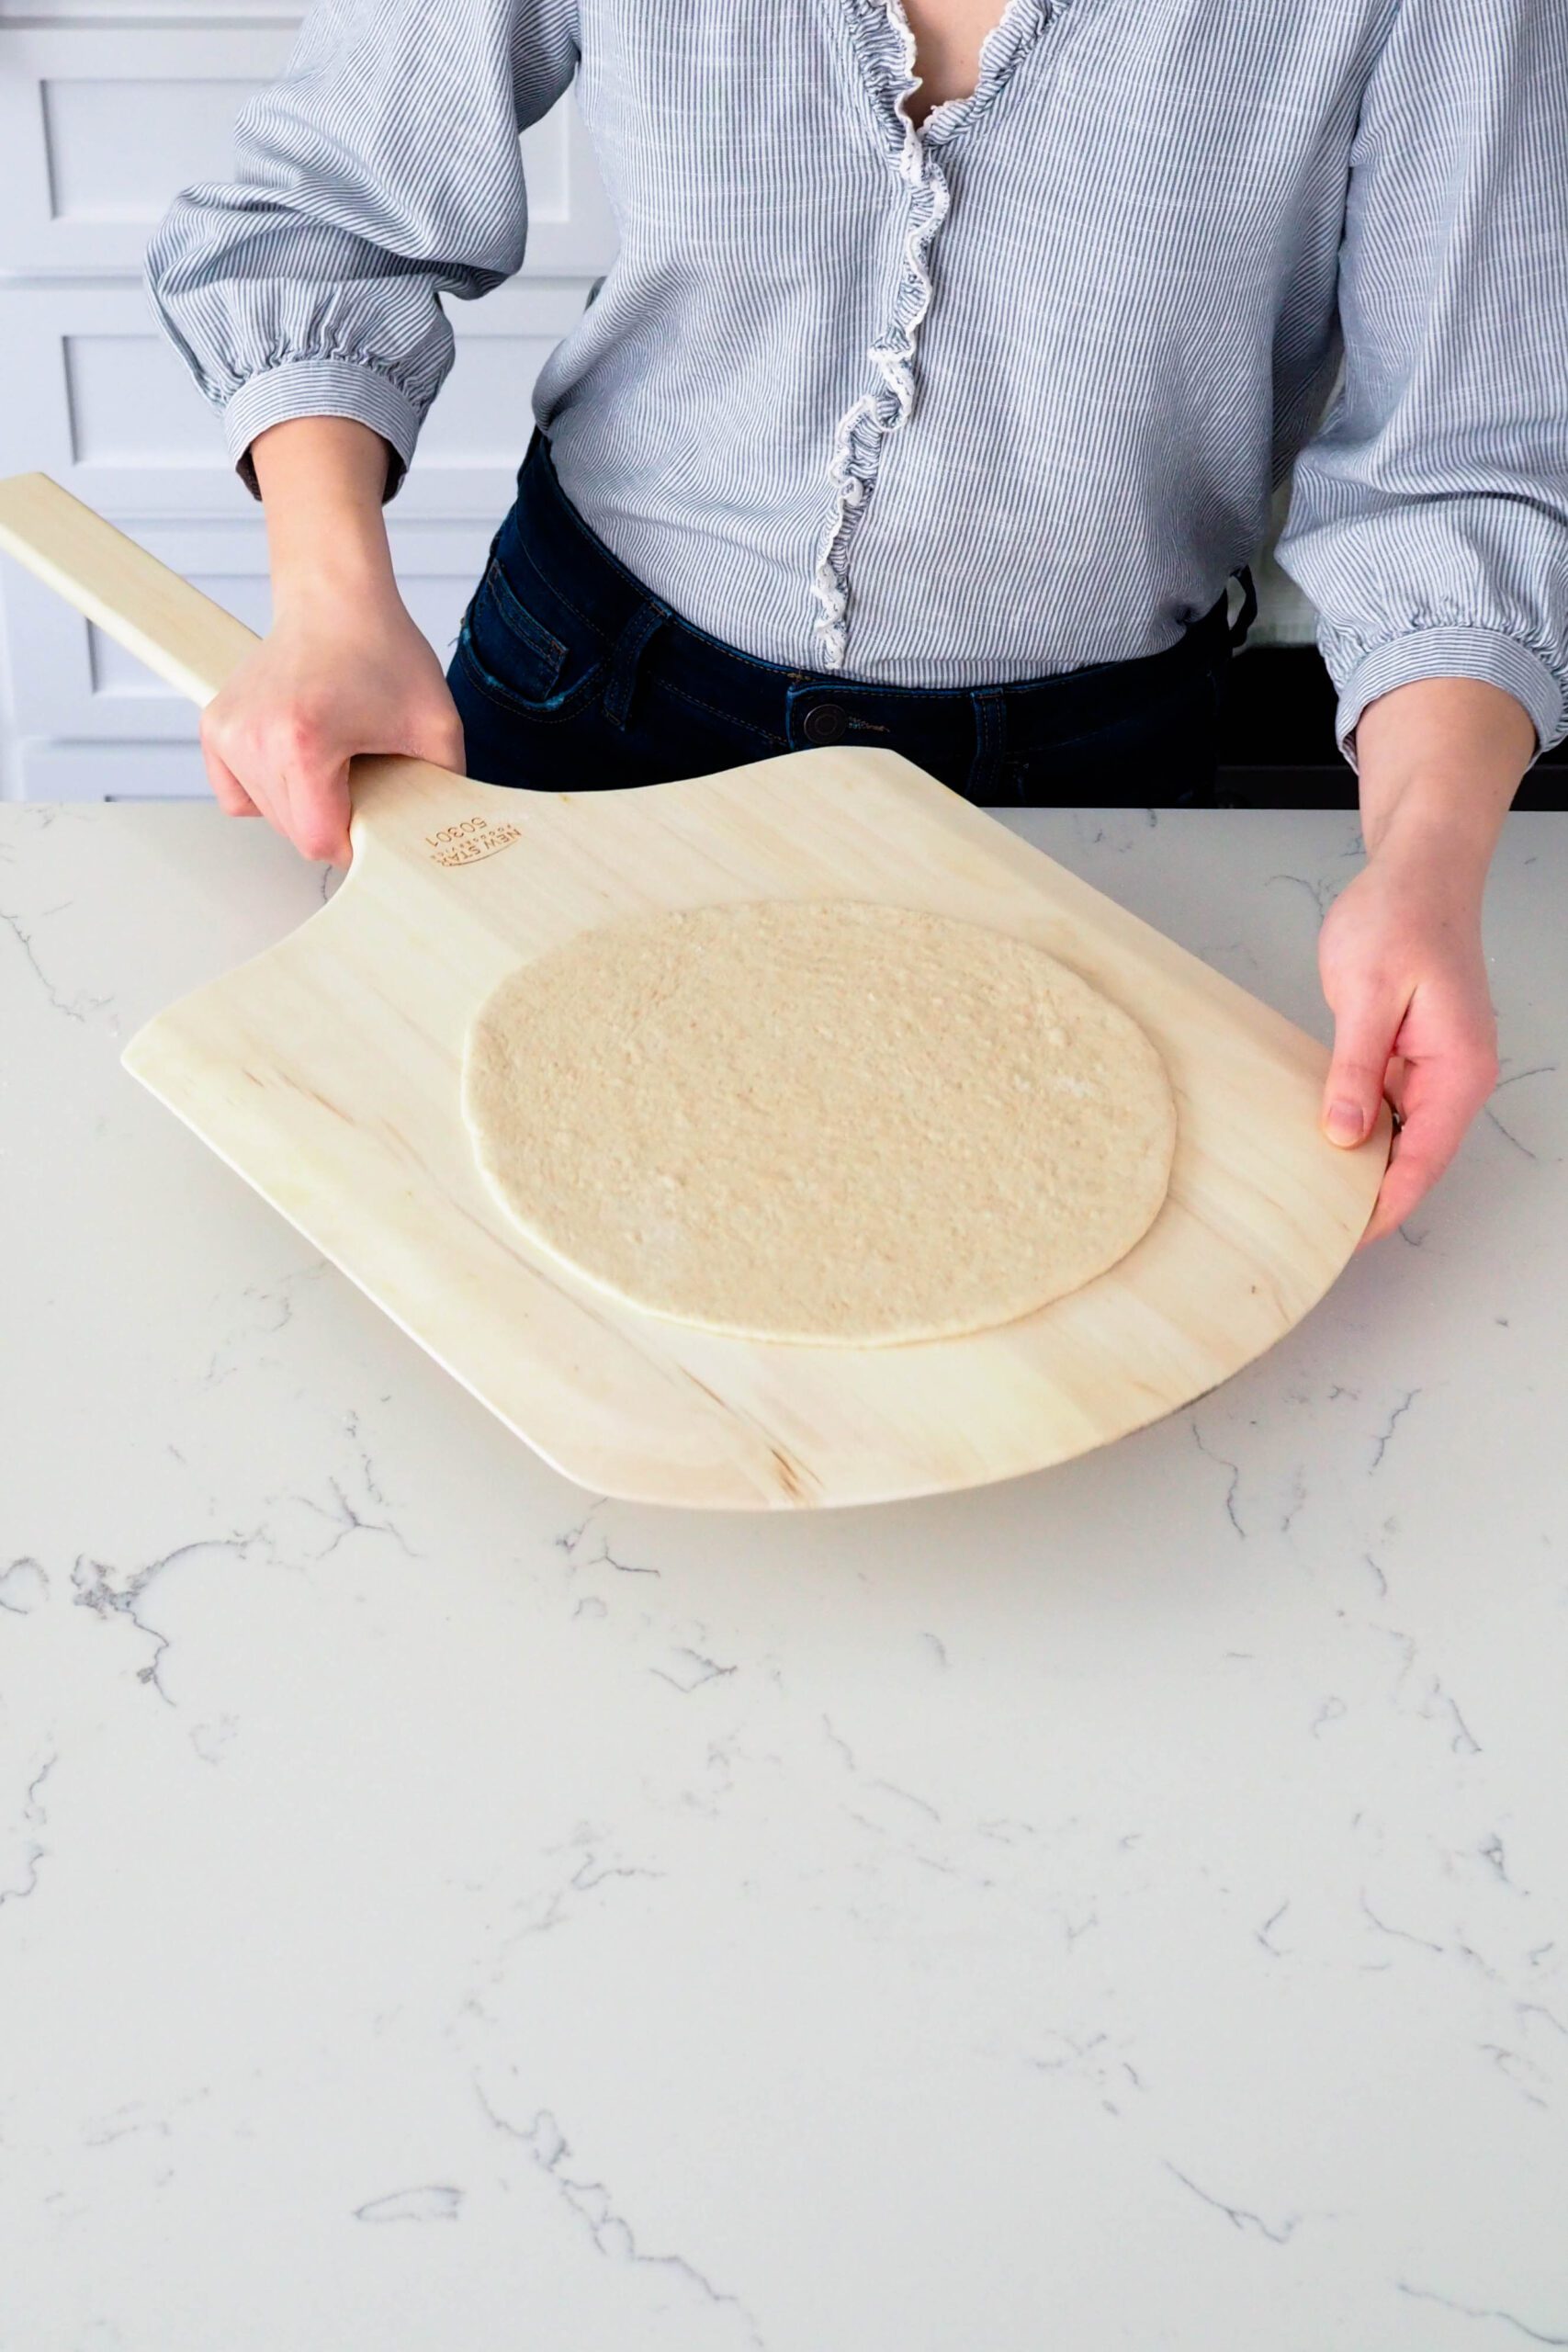
Dust a pizza peel or heat-safe cutting board (not plastic!) with flour. Transfer the dough round onto the peel, then add your desired toppings speedily.
Quick Tips for Baking Thin Crust Pizza
Place a cold pizza stone on the lowest rack in the oven and preheat it to 475°F/250°C, or 450°F/232°C if that’s the hottest your oven can go. For best results, allow the stone to heat up for 30 minutes before baking a pizza on it.
When using a pizza stone, always place a cold pizza stone in a cold oven. This will allow the stone to heat up with the oven, prevent the stone from cracking, and significantly reduce the chance of burning yourself.
Slide the pizza onto the pizza stone and bake for 8-10 minutes, until the edges are lightly golden brown. Remove from the oven using a pizza peel or tongs and place on a cutting board.
This rocking cutter is easily my favorite pizza cutter I’ve ever used. It’s easy to clean and safe to use with kids.
What Can I Use Instead of a Pizza Peel if I Don’t Have One?
We didn’t either, for a long time! You can make great pizza without a pizza peel. Simply use a thin wooden cutting board (1-2″ or 5 cm thick) dusted with flour. You might have to hold it with two hands, but it works—trust me!
Help, My Pizza Is Stuck to the Peel!
Don’t worry; as long as your pizza dough isn’t too wet, you can easily save your pizza! This trick works with all pizza dough recipes—not just mine.
Lightly shake the pizza peel back and forth with slowly increasing intensity. Start with quick and shallow shakes and transition to longer, deeper ones as the pizza starts to unstick. If your toppings start to fall off, you’re shaking too fast.
Once the dough unsticks, immediately slide onto the pizza stone in the oven.
I like to rest the edge of the pizza peel on the back third of the pizza stone, then do the same shaking until the pizza comes loose before removing the peel quickly in one motion. It takes a bit of practice to perfect, but you’ll get the hang of it!
Storing Thin Crust Pizza Dough Long-term
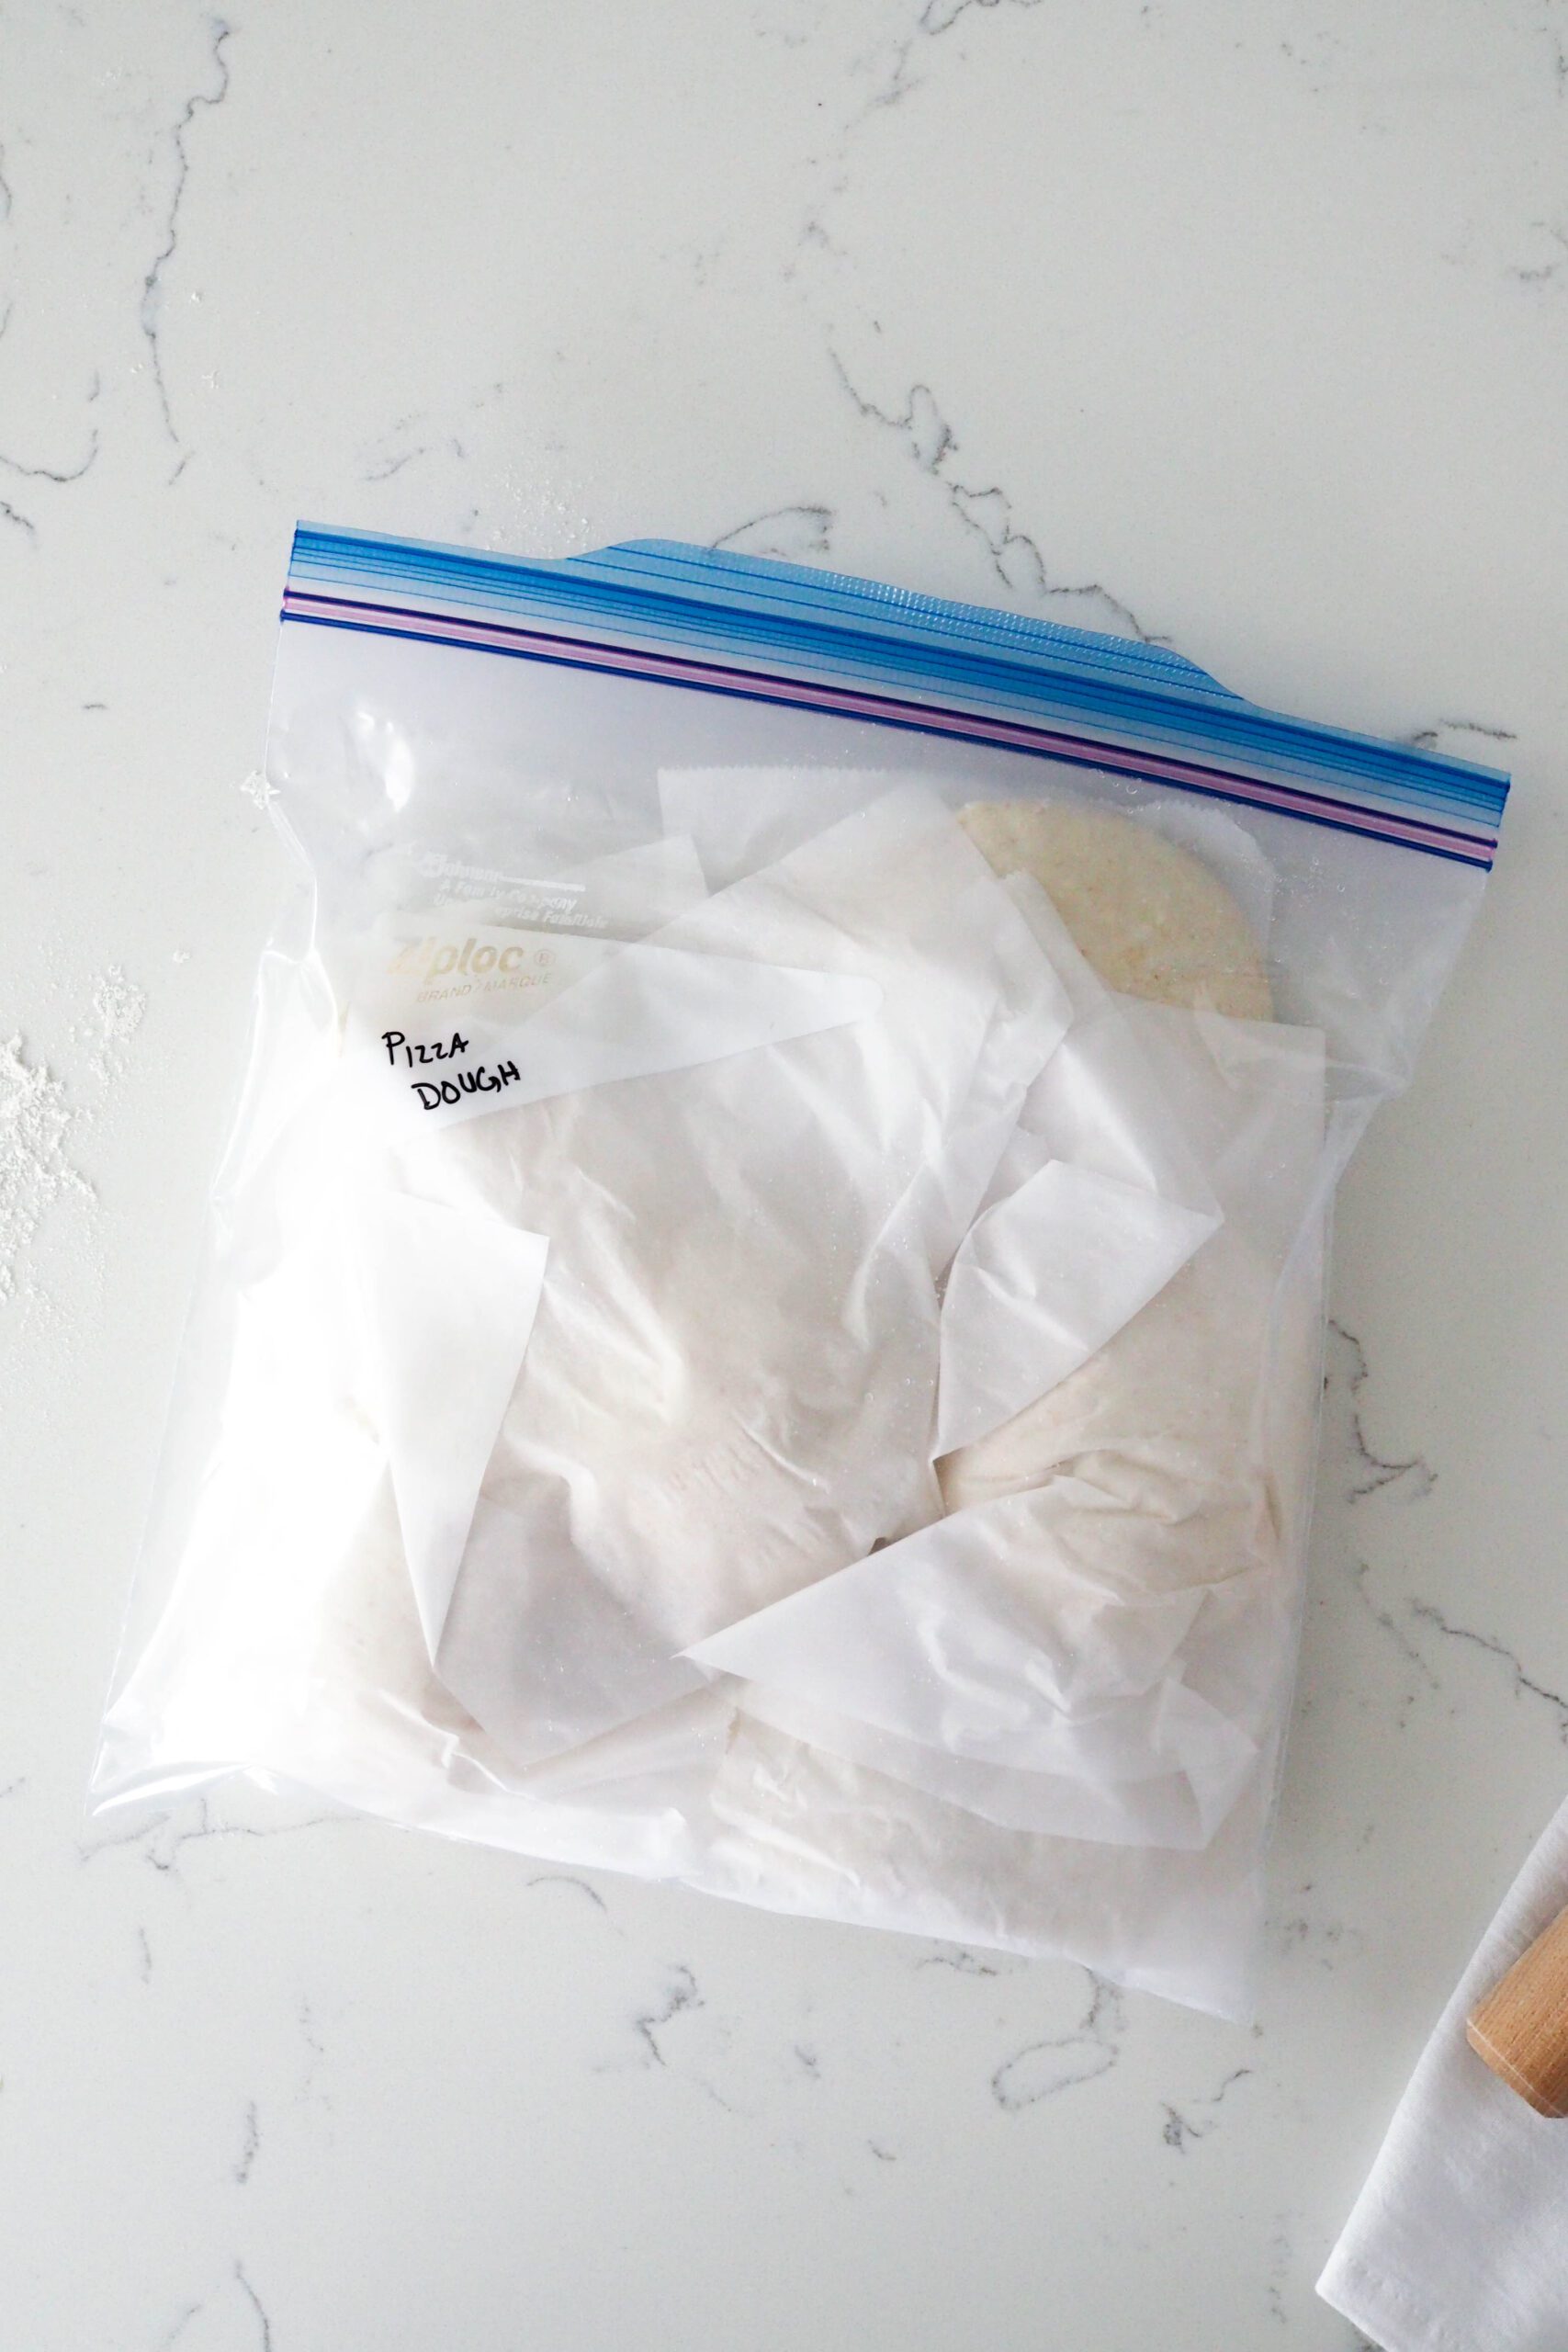
Pizza dough can be stored in the fridge for up to three days before use. I love the flavor of pizza dough on the third day, as it’s much stronger after all that fermenting.
Tip: Wrap your dough palls in parchment paper first, then place in zip-top freezer bags. Pizza dough sticks to plastic, and it is difficult to get the dough out without ruining the bag.
You can also freeze pizza dough for up to three months using this same method. In the photo below, I added three balls of fresh dough to my frozen pizza dough bag.
Other Recipes You May Enjoy
I’m experimenting with new pizza recipes all the time, so check back next month to see my favorite combination pizzas! Until then, here are a few of my other favorite dinners:
- One-pot chicken & brown rice
- Creamy Cajun spinach pasta for two
- Hoisin turkey and brown rice bowls
- Easy gochujang chicken ramen
Dish Cleanup: Piece of Cake
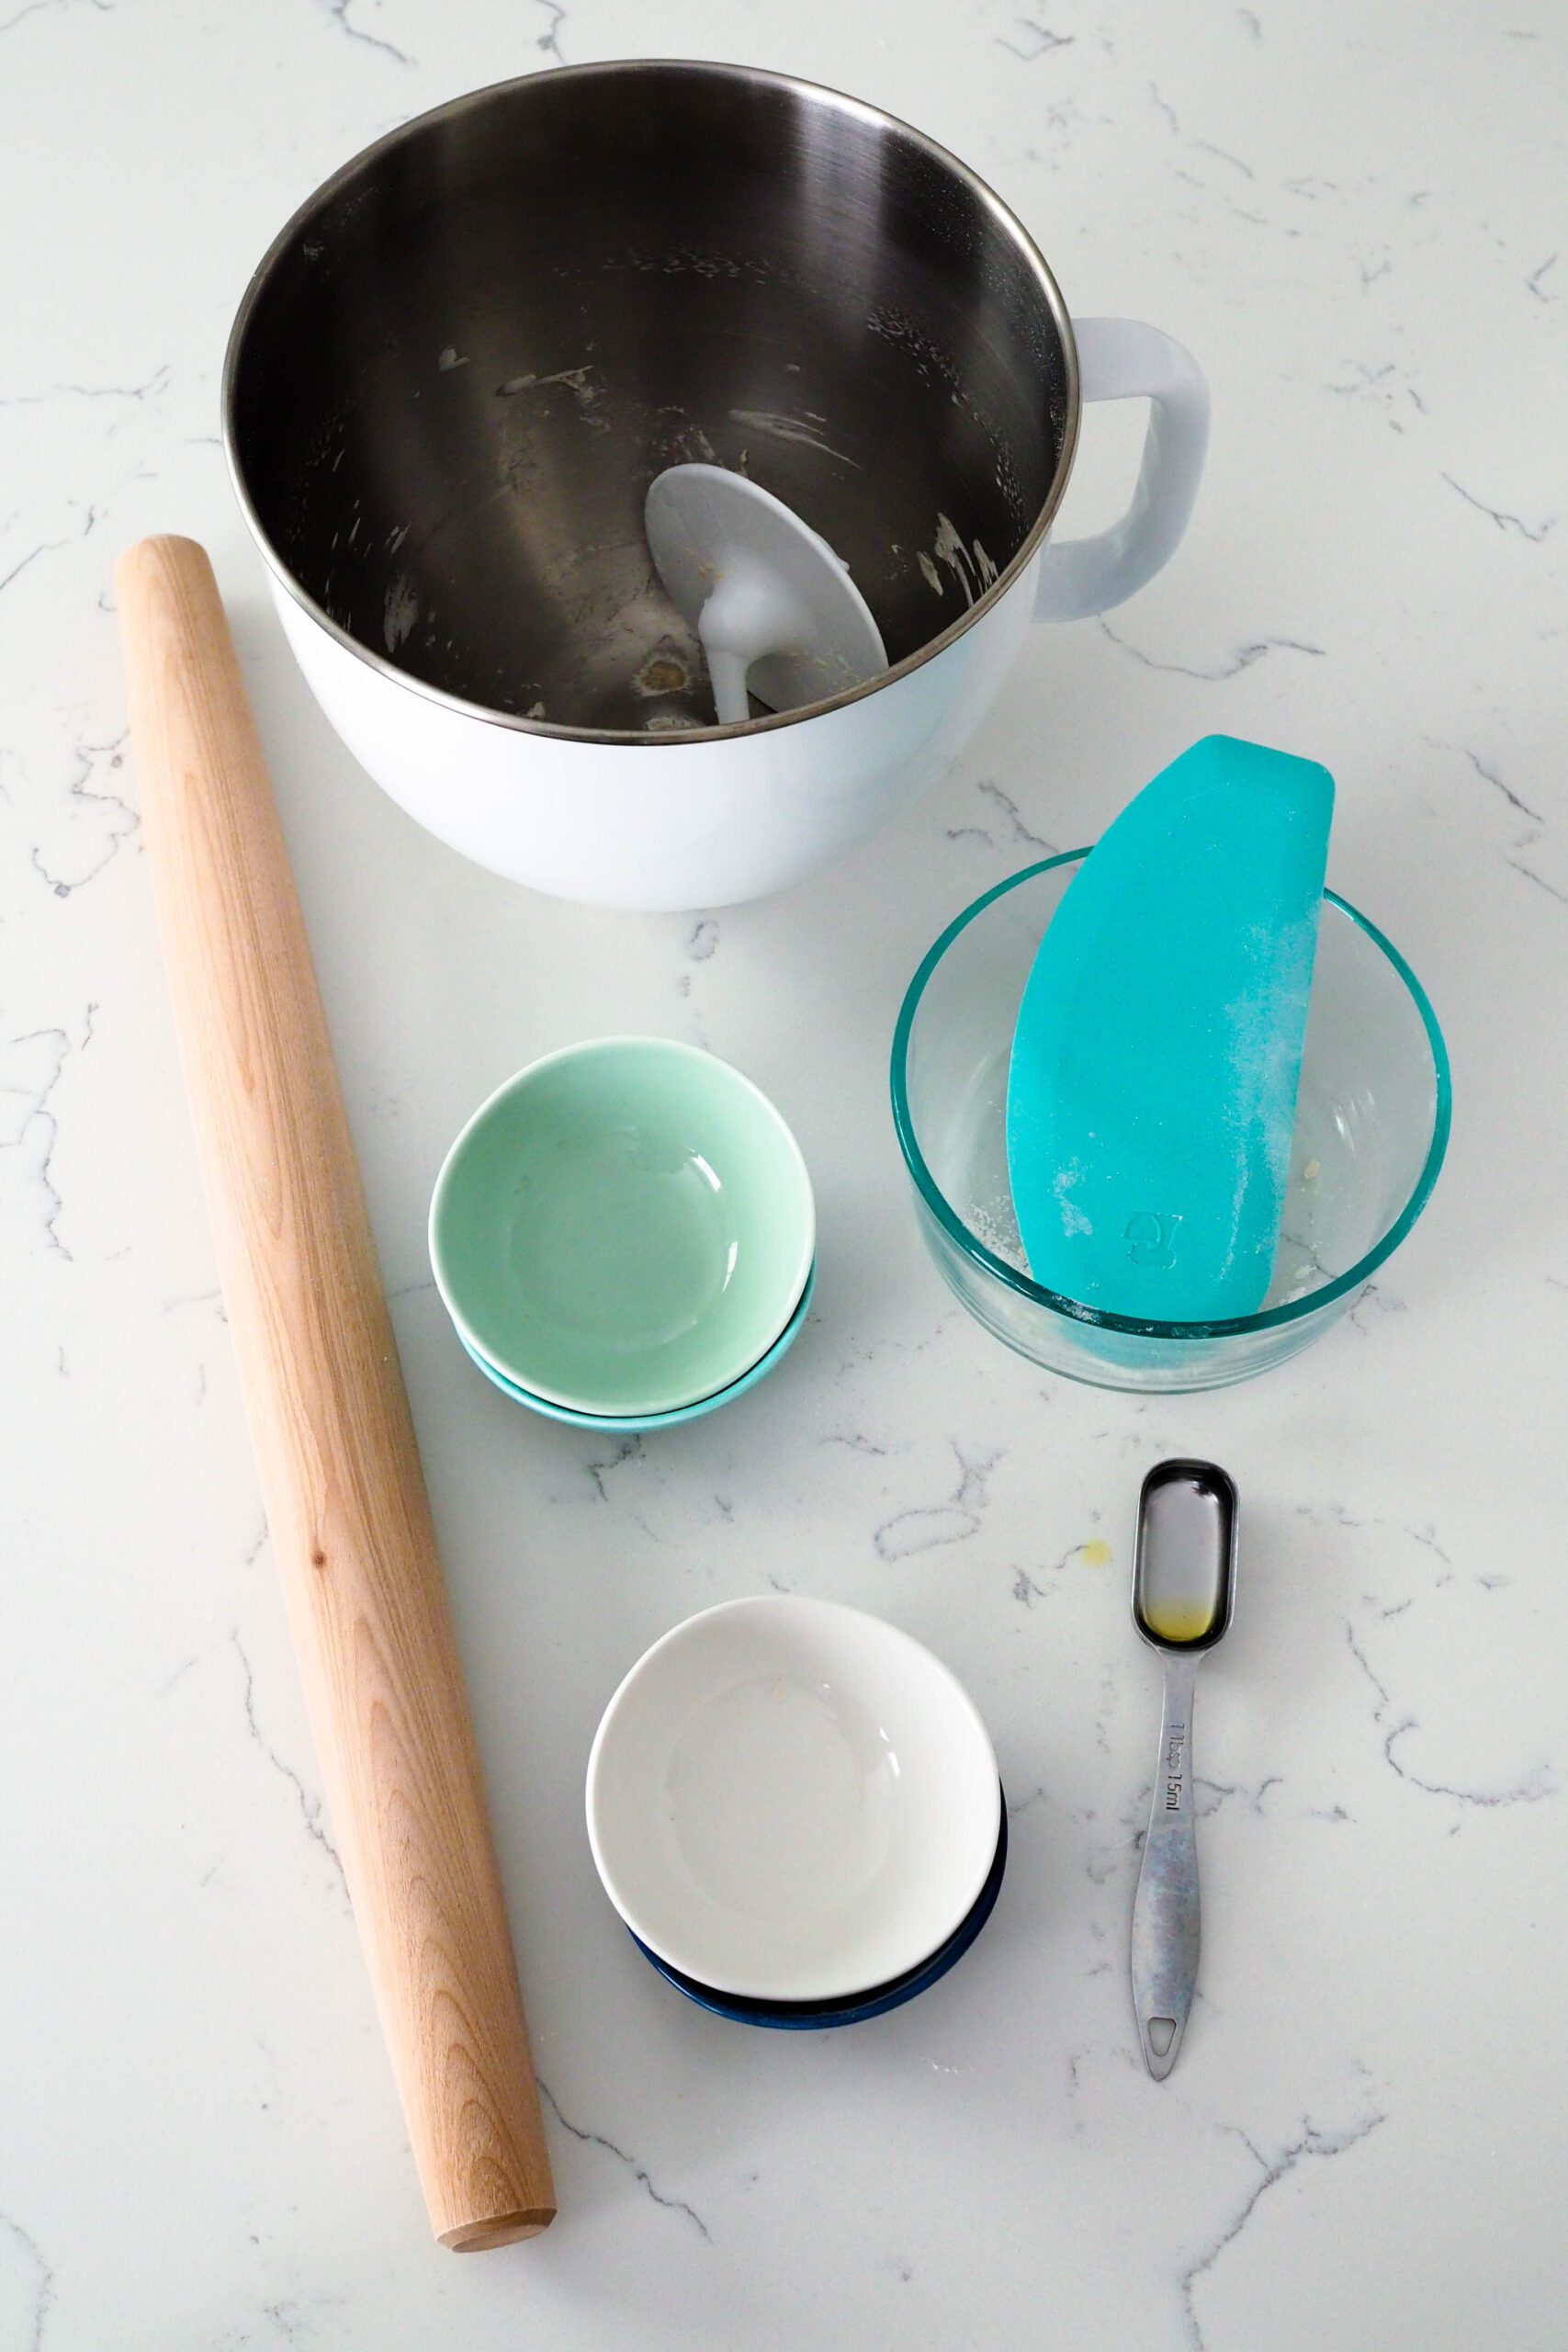
I rate my recipe cleanups on a scale of 1 to 5. 1 is only a handful of dishes, and 5 is everything including the kitchen sink.
My thin crust pizza dough recipe has a cleanup rating of a 1. There are just a handful of small bowls, one big mixing bowl, and a rolling pin that you’ll need to clean. Pizza dough is one of my favorite recipes to prepare in bulk, as it saves me time and cleaning efforts!
Note: My pizza peel and pizza stone rarely need cleaning, so I don’t include them in this photo or in the cleanup rating. Every three months (or sooner if you have a spill), it’s helpful to scrape any burned remains off the stone and gently wash the peel with warm, soapy water.
Thin Crust Pizza Dough Recipe
Thin Crust Pizza Dough
You can make crispy, chewy, thin crust pizzas at home with just a handful of simple ingredients on a pizza stone. This recipe makes four 12" pizzas, enough for eight servings.
Ingredients
- 2 teaspoons active dry yeast, or one packet (7 g)
- 2 teaspoons granulated sugar (8 g)
- 1½ cups warm water (350 ml)
- ¼ cup whole wheat flour (40 g)*
- 3½ cups all-purpose flour, plus extra for dusting (500 g)
- 2 teaspoons salt (10 g)
- 2 teaspoons olive oil (28 g)
Instructions
Making the Dough
- Add yeast and sugar to the bowl of a stand mixer or a large bowl. Pour the warm water slowly over the top of the yeast, and let the mixture sit for five minutes to allow the yeast to activate.
- Add the whole wheat flour and about half of the all-purpose flour, then stir together until combined. If making the dough by hand, I like using a flexible bench scraper here, as it makes for easy cleaning later.
- Add the remaining flour, salt, and olive oil, and stir until it becomes a shaggy dough.
- Kneading with a stand mixer: Knead the dough on speed 2 for 10-15 minutes until the dough is stretchy. As the gluten develops, the dough should begin to form a clump around the dough hook and will no longer stick to the sides of the bowl. If the dough still sticks to the edges of the bowl after five minutes, add more flour about a Tablespoon at a time and a minute apart until the dough no longer sticks to the sides of the bowl.
Kneading by hand: Knead the dough for 15-20 minutes on a clean workspace until the dough is stretchy. As the gluten develops, the dough will go from sticky to tacky. If the dough still seems sticky after 10 minutes of kneading and leaves a lot of residue on your hands, knead in more flour one Tablespoon at a time until the dough is only tacky. - Pinch off a piece of dough about the size of a quarter and slowly pull it apart in your fingers. If it stretches thin enough to see light through it, you have developed enough gluten! If it breaks and doesn't stretch much, knead for another minute and retest.
- Divide the dough into four, shape into balls, and place on parchment paper. Cover with a towel or plastic wrap to prevent the dough from drying out. Let the dough rise until doubled in size, about an hour.**
Preheating the Oven
- Place a pizza stone on the lowest rack in the oven and preheat the oven to 475°F/250°C. Always place a pizza stone in a cold oven to allow it to heat up with the oven and reduce the chance of burning yourself. If you place a cold pizza stone in a hot oven, you may crack the stone.
- Make sure the pizza stone has been in the preheated oven for at least 30 minutes to allow it to get up to temperature.
Prepping the Pizza
- Lightly dust your workspace with flour, then roll out the pizza dough, one at a time: Place your rolling pin in the center of the dough ball and roll the pin away from you. Rotate the dough round one quarter turn, and then roll the dough out again. Continue rolling out the dough until the round is about 12" or 30 cm in diameter.
- Dust a pizza peel or heat-safe cutting board (not plastic!) with flour. Transfer the pizza round onto the peel, then add your desired toppings. Work quickly, as the dough starts to stick.
- Lightly shake the pizza peel or cutting board with slowly increasing intensity to prevent toppings from falling off until the dough unsticks. Immediately slide onto the pizza stone in the oven. For a smooth transition, I like to rest the edge of the pizza peel on the back third of the pizza stone, then shake lightly until the pizza comes loose before removing the peel quickly in one motion. It takes a bit of practice to perfect, but you'll get the hang of it!
Baking the Pizza
- Slide the pizza onto the pizza stone and bake for 8-10 minutes, until the edges are lightly golden brown. Remove from the oven using a pizza peel or tongs and place on a cutting board. Let the pizza rest for two minutes before slicing and serving.
Notes
*This thin crust pizza dough can be made without the whole wheat flour if you don't have it on hand or simply don't want to use it. Substitute ⅓ cup all-purpose flour in its stead (whole wheat flour absorbs more moisture than regular all-purpose flour).
**Pizza dough can be made in advance. Make the dough through Step 6, then store in an air-tight container in the refrigerator for up to three days or in the freezer for up to three months. Take the pizza dough out of the fridge 2 hours in advance to allow it to come to room temperature before you roll it out.
Recommended Products
As an Amazon Associate and member of other affiliate programs, I earn from qualifying purchases.
-
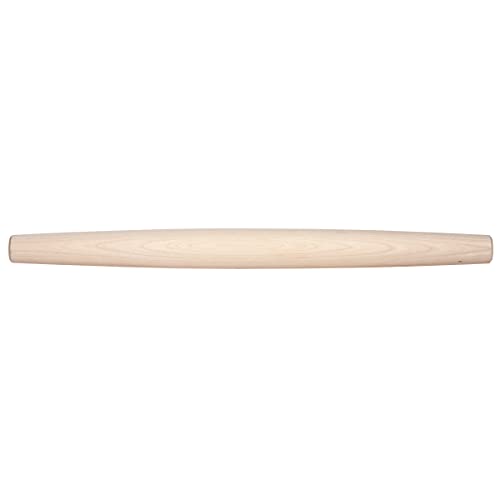
 J.K. Adams Maple Wood Baking and Pastry French Rolling Pin for Pizza, Pie, Cookie Dough Roller, and More, 20.5" long x 1.75" diameter (COOP-FP1)
 -
Honey-Can-Do Oven Round Pizza Stone
-
New Star Foodservice 50356 Restaurant-Grade Wooden Pizza Peel, 18" L x 18" W Plate, with 24" L Wooden Handle, 42" Overall Length
-
Epicurean Pizza Cutter Series - Natural/Slate
-
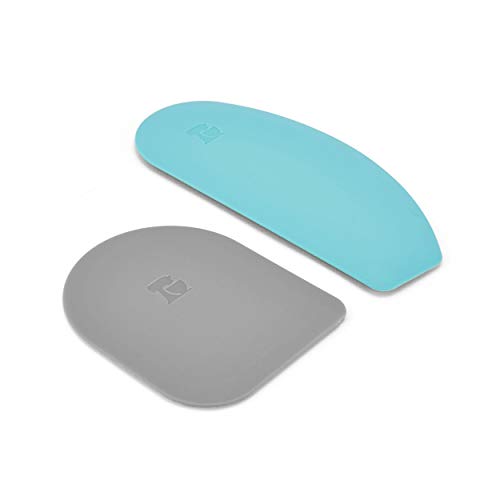
KitchenAid Gourmet Bowl Scraper, Set of 2, Aqua Sky/Storm Grey


Nutrition Information:
Yield:
8Serving Size:
1/2 pizzaAmount Per Serving: Calories: 234Total Fat: 2gSaturated Fat: 0gTrans Fat: 0gUnsaturated Fat: 2gCholesterol: 0mgSodium: 532mgCarbohydrates: 46gFiber: 2gSugar: 1gProtein: 7g
Thanks for trying out my thin crust pizza dough recipe!
If you liked it, please consider rating this recipe five stars so others find it, too.
I’d love to see how your recipe turns out: Take a photo and tag me on Instagram @floralapronblog to share with me, or use the hashtag #floralapronbakes.
Will be trying the pizza dough soon.
I have broken several pizza stones, probably my fault, then switched to a cast iron pizza baking steel…very heavy, cast iron, but awsome crust!!! Will never go back.
I’ve never used a cast iron baking steel, but I’m sure it makes great pizza! I’ll have to look into it if my pizza stone ever breaks.
I hope you enjoy the pizza dough! Thanks for leaving a comment 🙂
I don’t make the dough I buy it from Whole Foods or Trader Joe’s but let it proof until ready to prepare and roll out I have no problem with any of it except the pizza often puffs up a lot in my pizza oven can’t get it to stay thin as it cooks I’m wondering if oven is too hot it’s a professional pizza oven and heats to 700 degrees but we only cook pizza for 2-3 min any ideas thanks joan
Hi Joan,
I’m not sure, since I don’t buy pre-made dough. My guess is that store-bought dough has more fermentation from the yeast, so it puffs up more.
Your best chance would be using a recipe for thin crust pizza (like this one) or modifying how you bake the pizza. Perhaps par-baking the crust with no toppings for a minute or two would help? Or even poking it with a fork all over (called docking) before adding your toppings and baking?
Hope one of those ideas helps!
Hi! I am planning on using this recipe. I don’t have a pizza stone. Would it be ok to use a pizza pan instead??
Hosting pizza night in two days and would love a response as soon as time permits! Thank you 🙂
Hi Tashi,
A pizza pan will work! It won’t give you quite as crispy of a crust as on a pizza stone, but I’ve used one with this recipe and have had good results.
One thing to note: Your pizzas might need an extra 2-3 minutes or so to fully cook and start crisping up on the bottom, since the pan won’t be super hot to start. Just keep an eye on the first one 🙂
Hope your pizza night is a hit!